Opening up e60 headlights?
 06-15-2014, 03:24 AM
#31
Senior Members
Join Date: Jan 2011
Location: UpState SC
Posts: 2,348
Likes: 0
Received 3 Likes
on
3 Posts
My Ride: 2008 535i LCI with sports/premium package, Sports trans with paddle shifters, CF emblems, JB4 Software, Dinan Exhaust, Navigation, M5Tech body kit, Carbon wrap interrior trim and CIC Controller.
When I did my brows I have used this:
Buy Silicone Sealants Silcoset 158 Black Silicone Sealant 75ml Acc Silicones 158 online from RS for next day delivery.
It should be similar to the windshield adhesive if I remember correctly.
If I'll find enough time I will give a try
Buy Silicone Sealants Silcoset 158 Black Silicone Sealant 75ml Acc Silicones 158 online from RS for next day delivery.
It should be similar to the windshield adhesive if I remember correctly.
If I'll find enough time I will give a try

 06-15-2014, 06:29 PM
#32
Contributors
Join Date: Jun 2009
Location: CA
Posts: 5,781
Likes: 0
Received 2 Likes
on
2 Posts
My Ride: BMW E60
Model Year: 2016
Ok, c'mon, who's gonna be the first one to do this? I need to add Orions because my AE's are damaged and do not complete the light path. I PM'd Simon for cost and timing but I never got a response. I'm a bit nervous to attempt this myself but if I do, I know 100% sure I will not be using any silicone. Perhaps a slow drying epoxy is what I have in mind. Silicone can be deadly. After you apply it, and if for any reason you need to so back and do another repair or something, just about nothing will stick to any place this stuff was applied. Maybe silicone will stick again but I imagine that would be about it.
Sorry man, don't think I came across any pm from you.
Now, to comment on the video. I do not do the same method as the video shows. However, the way I open and seal now more or less look as oem as possible. I've posted pics on my FB to show this.
Additionally, for the heating method above, I am rather skeptical that the surrounding area where it's heated, the plastic isn't bubbling or damaged in some way. The reason is because I have seen lights that were attempted to be opened by heat gun, and it was just a mess.
For those that want to try this, I would advise you to use a practice set, because I can almost guarantee you that it's not as straight forward as the video is making it to be.
06-16-2014, 08:17 AM
#33
Members
Join Date: May 2010
Location: London
Posts: 213
Likes: 0
Received 0 Likes
on
0 Posts
My Ride: M3 ZCP EX:2005 BMW 535D Sport, Estate, Steptronic, Carbon Black, Black Dakota leather, Head up Display, Profi Satnav, Bluetooth - only MULF module, Bi-xenon adaptive headlights, Sportseats, Cruise control, Active steeringMods: 19
Model Year: 2011
Sorry man, don't think I came across any pm from you.
Now, to comment on the video. I do not do the same method as the video shows. However, the way I open and seal now more or less look as oem as possible. I've posted pics on my FB to show this.
Additionally, for the heating method above, I am rather skeptical that the surrounding area where it's heated, the plastic isn't bubbling or damaged in some way. The reason is because I have seen lights that were attempted to be opened by heat gun, and it was just a mess.
For those that want to try this, I would advise you to use a practice set, because I can almost guarantee you that it's not as straight forward as the video is making it to be.
06-16-2014, 01:54 PM
#34
Former Vendor

Sorry man, don't think I came across any pm from you.
Now, to comment on the video. I do not do the same method as the video shows. However, the way I open and seal now more or less look as oem as possible. I've posted pics on my FB to show this.
Additionally, for the heating method above, I am rather skeptical that the surrounding area where it's heated, the plastic isn't bubbling or damaged in some way. The reason is because I have seen lights that were attempted to be opened by heat gun, and it was just a mess.
For those that want to try this, I would advise you to use a practice set, because I can almost guarantee you that it's not as straight forward as the video is making it to be.
Now, to comment on the video. I do not do the same method as the video shows. However, the way I open and seal now more or less look as oem as possible. I've posted pics on my FB to show this.
Additionally, for the heating method above, I am rather skeptical that the surrounding area where it's heated, the plastic isn't bubbling or damaged in some way. The reason is because I have seen lights that were attempted to be opened by heat gun, and it was just a mess.
For those that want to try this, I would advise you to use a practice set, because I can almost guarantee you that it's not as straight forward as the video is making it to be.
Several things jumped out in this video:
1) There is very little time spent using the heat gun, to get the sealant properly warm enough to even attempt to do this, you would need 2-3 minutes of just warming it up slowly and methodically, and instead should use a conventional oven to get all the sealant equally warm/hot.
2) He's using a 'chisel' and screw driver and neither the plastic nor the lens exhibits any sign of stress cracking or damage. Very difficult to accomplish, if not impossible with that little time warming it up (see #1).
3) There doesn't appear to be any sealant residue on the lens once it's removed. Could be wrong but even with this sealant, I'd expect some of the "black stuff" to remain on the lenses.
My suspicion is that the lenses were pried open prior to the video (as it can be done with LOTS of hours and time) and then the video makes it seem "super easy".
---
For the installation, you can spend 8-10 hours per light and slowly methodically open it using the oven technique. Most people don't have that kind of time.
Our last install where we attempted to do this technique was on the new X5 E71 headlights:

We used Koito sealant to close up the lights, then used a 3X adhesive, then finished it off with a silicon. If you want to see the middle photos as the process was progressing, we need to get them posted up. This headlight we actually cut open using a multi-max type tool with a metal/wood blade. The cut line is very narrow with very minimal loss of material.
Plus, once installed back on the car, it's impossible to tell where you cut except if you look carefully at the top of the headlight only when the hood is open.
here are some that have been done in the past by us:


 06-19-2014, 04:41 AM
#37
New Members
Thread Starter

Join Date: Mar 2013
Location: London
Posts: 44
Likes: 0
Received 0 Likes
on
0 Posts
My Ride: BMW E60 3.0d
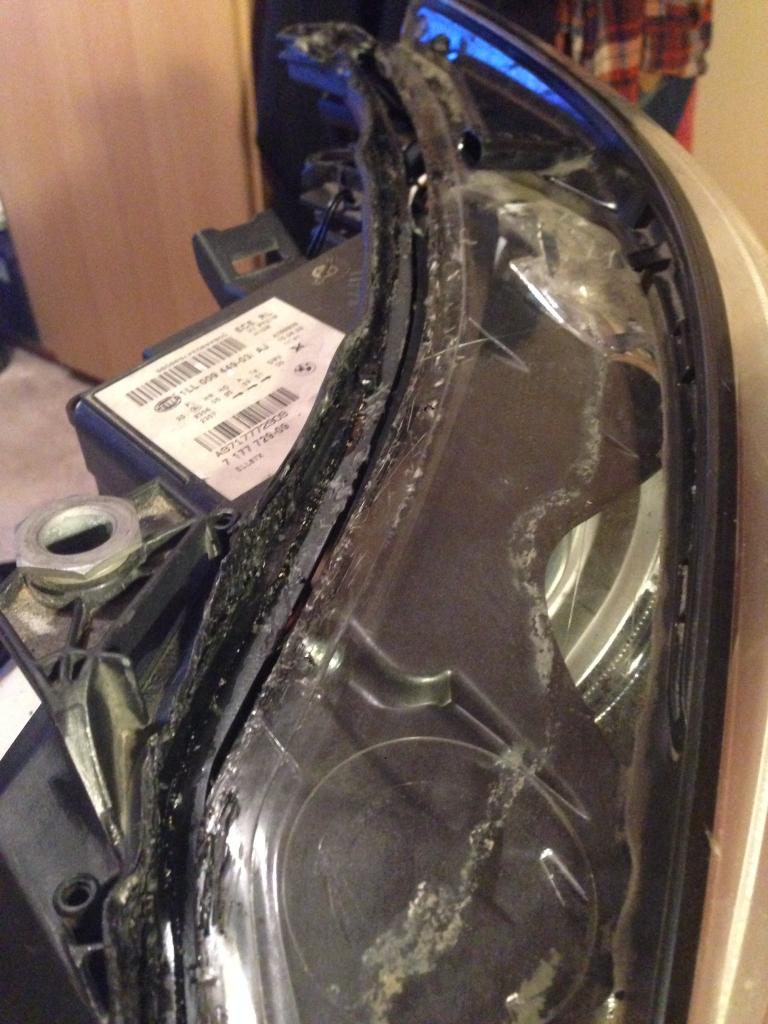
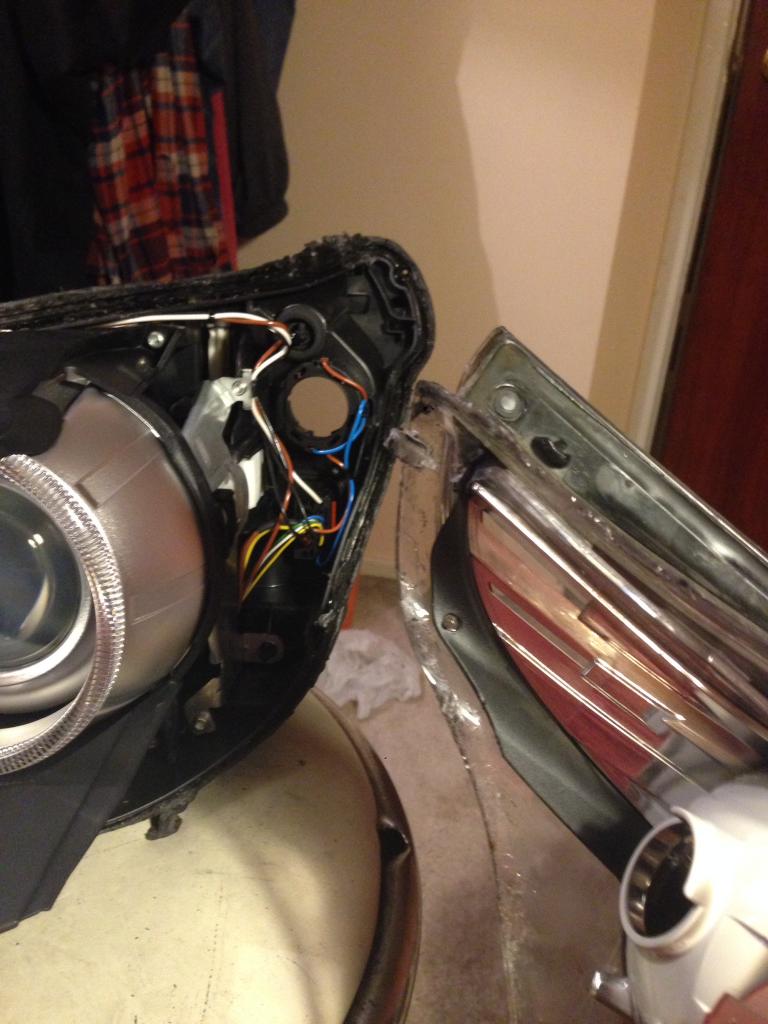
I am happy to report that after 12 hours or painful work i have finally done it! i have opened both of my headlights. I didn't follow the video posted as there was no way they were going to be as easy as it was shown on the video. So i had to come up with an alternative:
First i didn't want to cut the lens, this was a no go for me. What i did instead is cut the plastic that's on top of the glue, as the plastic that's holding the glue is shaped like a U shape and the lens sits in the middle, i cut the top bit to make it like an L shape if you know what i mean. I used a combination of dremel tool, Heat gun and shape blade to to cut the remove the plastic and the glue. First headlight took me 8 hours to figure it out, second took only 2.

First i didn't want to cut the lens, this was a no go for me. What i did instead is cut the plastic that's on top of the glue, as the plastic that's holding the glue is shaped like a U shape and the lens sits in the middle, i cut the top bit to make it like an L shape if you know what i mean. I used a combination of dremel tool, Heat gun and shape blade to to cut the remove the plastic and the glue. First headlight took me 8 hours to figure it out, second took only 2.


Last edited by CALIC; 06-19-2014 at 04:43 AM.
06-19-2014, 07:10 AM
#38
Senior Members
Join Date: Jan 2011
Location: UpState SC
Posts: 2,348
Likes: 0
Received 3 Likes
on
3 Posts
My Ride: 2008 535i LCI with sports/premium package, Sports trans with paddle shifters, CF emblems, JB4 Software, Dinan Exhaust, Navigation, M5Tech body kit, Carbon wrap interrior trim and CIC Controller.
What are y our next steps and what are you planning to do to them now? I tell ya, you clearly are brave!
06-19-2014, 08:06 AM
#39
New Members
Thread Starter
Join Date: Mar 2013
Location: London
Posts: 44
Likes: 0
Received 0 Likes
on
0 Posts
My Ride: BMW E60 3.0d
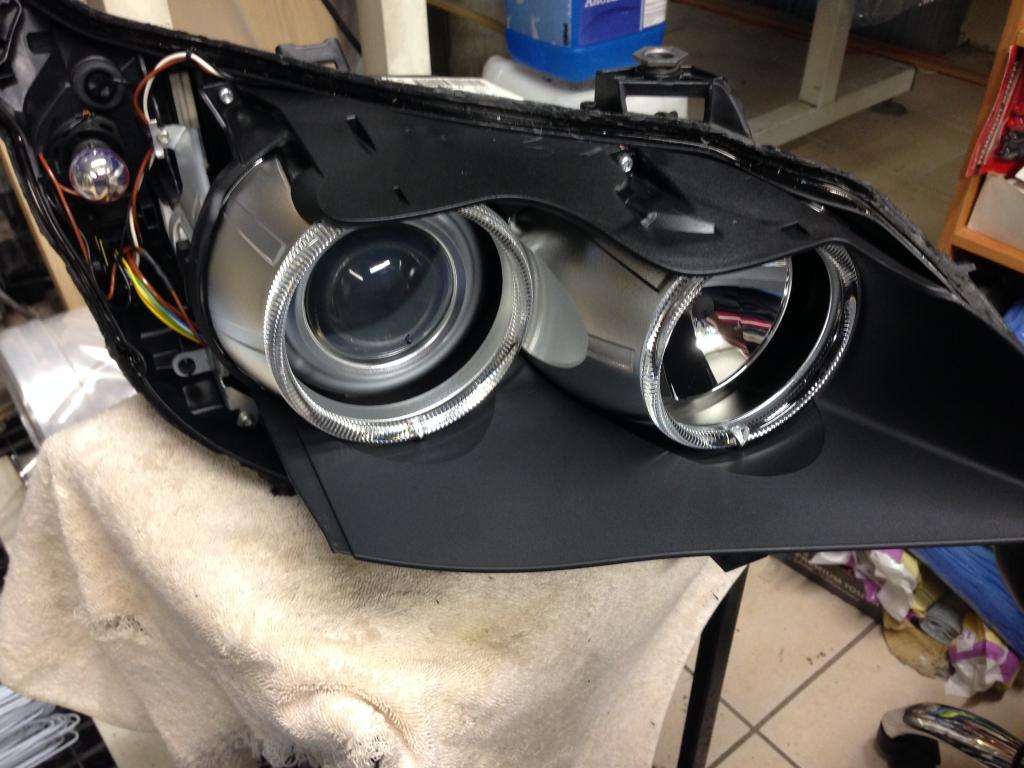
This is going to be a big project as am not only installing the orions, but installing them on an Lci halogens and will need to retrofit the headlights to my fit my pre lci..
Another pain in the a$$ is that I initially bought the the orions for my pre lci halogen lights, now the high beam rings are slightly taller than the oem... I hafto find a way to stick them on

Am really looking forward for the end result
 06-20-2014, 04:03 AM
#40
Members
Join Date: May 2010
Location: London
Posts: 213
Likes: 0
Received 0 Likes
on
0 Posts
My Ride: M3 ZCP EX:2005 BMW 535D Sport, Estate, Steptronic, Carbon Black, Black Dakota leather, Head up Display, Profi Satnav, Bluetooth - only MULF module, Bi-xenon adaptive headlights, Sportseats, Cruise control, Active steeringMods: 19
Model Year: 2011
I am happy to report that after 12 hours or painful work i have finally done it! i have opened both of my headlights. I didn't follow the video posted as there was no way they were going to be as easy as it was shown on the video. So i had to come up with an alternative:
First i didn't want to cut the lens, this was a no go for me. What i did instead is cut the plastic that's on top of the glue, as the plastic that's holding the glue is shaped like a U shape and the lens sits in the middle, i cut the top bit to make it like an L shape if you know what i mean. I used a combination of dremel tool, Heat gun and shape blade to to cut the remove the plastic and the glue. First headlight took me 8 hours to figure it out, second took only 2.
First i didn't want to cut the lens, this was a no go for me. What i did instead is cut the plastic that's on top of the glue, as the plastic that's holding the glue is shaped like a U shape and the lens sits in the middle, i cut the top bit to make it like an L shape if you know what i mean. I used a combination of dremel tool, Heat gun and shape blade to to cut the remove the plastic and the glue. First headlight took me 8 hours to figure it out, second took only 2.
Now after you open them, what do you thing about the video?
Do you think it would be possible to open them without cutting the top bit?
When you use the heat gun, what temperature did you use to avoid any head sign damages?