
DIY: Brakes Replacement & Painting the Calipers


Thread Starter
Members
Joined: May 2009
Posts: 178
Likes: 0
From: Minneapolis, MN
My Ride: 545i/6spd
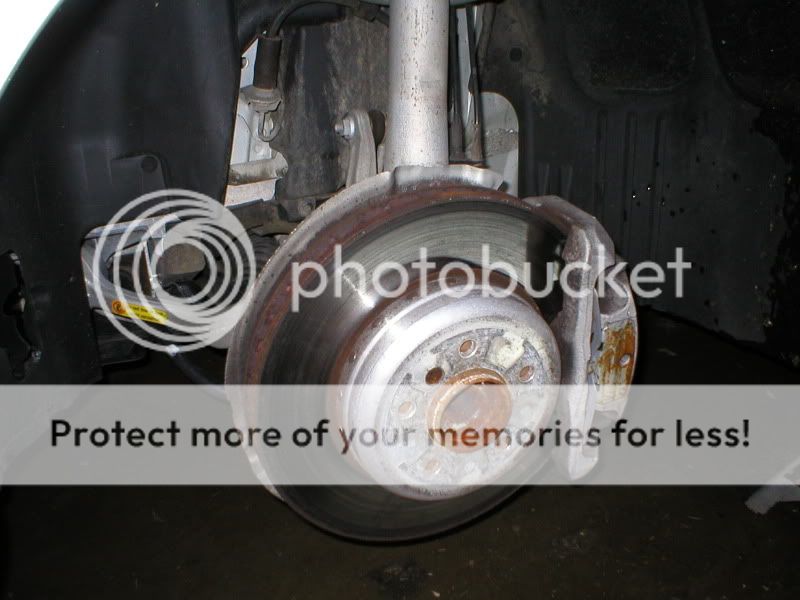
I bought my car with 22k just recently (04 545i/6 spd) and unfortunately the rotors, though fairly thick, were warped pretty bad. The pads are very thick however, so I didn't change those - but reading this will get you there anyhow if that's your objective.
Your rotors may still have life but are warped. Evidence of this is shaking under braking. The best way to spot it is actually looking at your rotor you'll see little dark spots or lines perpendicular to the rotors path of travel.
Some general tips:
Take your time - if your in a rush or gotta be somewhere your bound to break or screw something up and get frustrated.
Always use the right tool for the job. If you don't you will break or screw something up. If you need a 6mm and only have a standard 3/16, go to the store and get the right tool.
I add these as from my experience over the years these two tips have saved me many hours (see link in my sig about building a car).
The tools required:
6mm allen socket
17mm 6 point socket
Extention and Ratchet
18mm 6 point socket
Jack and stands
Rubber mallet and hammer
Highly recommend - Impact Gun/air compressor
Foam Brush
Swear Jar
What you might need:
1/2 COBALT Drill Bit
Drill
2 rotor bolts - $1.50 each at your local dealer
Parts and Supplies:
Brake Rotors and/or Pads as needed.
Pad sensors - one in front and one in the rear depending what your doing here
Brake cleaner - comes in a spray can
WD40 or JB80
Rustoleum Paint
Latex Gloves keep paint and grease off your hands - shave 5 minutes off your clean-up time and no greasy finger nails haha.
Begin:
Break loose the wheel bolts:
17mm or 11/16 should work (it seems 17 was correct). Do this initially before lifting up the car so you don't pull it off the stands (kidding of course) and the wheels aren't trying to move on you.
Jack the car up:
There's a little arrow on your sideskirt showing the jackpoint. You should have a rubber puck under there - like many BMW's mine did not (someone must have lost them at one point for reasons beyond me, maybe they're worth serious cash?). If this is the case get a little piece of 2x4 or just remove the round piece on your jack - if its like mine it will then have a slim chunk of rectangular metal to now fit this area where the puck is missing.
Place on jack stands - I used a spot much more to the middle of the car that felt and looked very solid.
Remove the wheels:
Once the bolts are out it's likely if you live in a climate like me that a little corrosion wants to keep your wheels from coming off the hub. Tap the tires from front and rear with your rubber mallet. Or at the exact same time push one side of the tire with one arm and pull with the opposite on the opposite side of the tire.
Remove the Caliper
You'll need a standard length 18mm socket for these two bolts at the rear. Use a 6 point so you don't strip anything. You need some serious leverage if your using your arms like me. I tapped the socket driver with a rubber mallet to get things loose - but careful doing this - if you hit it sideways you could strip something (though this is pretty hard to do on this bolt I think). A 2nd person applying extra pressure may also work if you don't want to use the mallet.
Bolts:
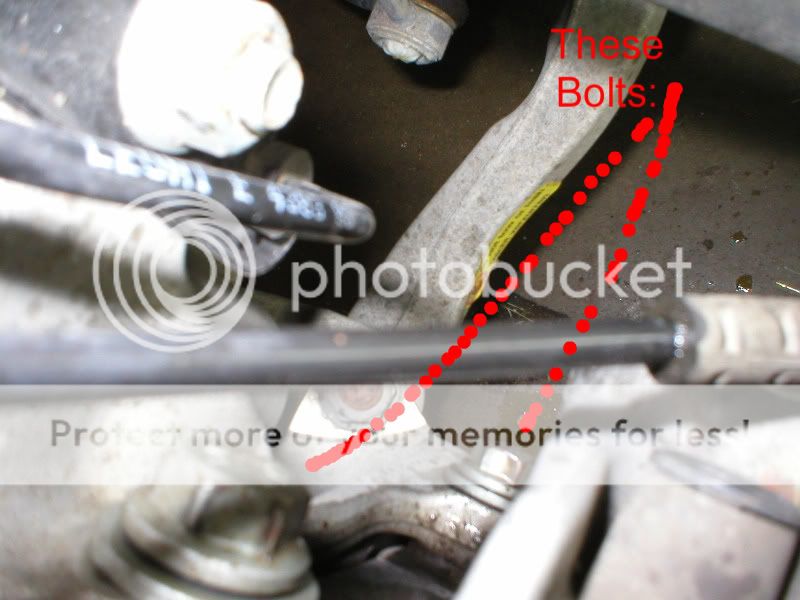
Now tap the caliper off with your rubber mallet. Have a spare jack stand or something to rest your caliper on - you don't want to leave it dangling from the brake lines now do you.
Remove the rotor - ATTENTION READ THIS STEP AT LEAST BEFORE YOU ATTEMPT THIS JOB
The rotor is held on with 1 little bolt that looks like this - very innocent:

Spray your JB80 or WD40 around it to try and loosen it up.
This is the hard part of the repair. You'll either need a impact gun and air compressor - or you'll have to do what I did which I do not warrant or suggest (though this is my car and I am comfortable doing this).
Take your 6mm allen socket. I felt with both standards and metric and this was clearly the correct size. Put it on and twist, that was easy (maybe for you if your lucky)!!
Not really to be honest. The problem here if you don't have an impact gun is your putting an akward side pressure on the socket/bolt - meaning you'd have to be very lucky not to strip this. Maybe you could heat the bolt up??? I don't know, but I stripped the bolt and now the fun began. Since mine hasn't been removed after 5 years that could be why it was so difficult as well.
I tried hammering a slightly larger allen on once it was already stripped but just couldn't turn the thing.
Now I went to the auto parts store and got an easy - out or bolt extractor as its also called. I also went to my dealer and got 2 rotor bolts knowing this was likely to happen on the other side. I drilled a small hole and put the extractor in. I started turning counterclockwise to loosen - and found this particular extractor was of the lowest quality - it broke. That and I think this bolt is super hard to get off.
The real solution - if you use an impact gun your not putting side pressure on the bolt and stripping it (most likely). Instead, your gun is only twisting the bolt and with a great sudden force. This is what your dealer would do obviously and the correct method.
My solution - went the hardware store and picked up a 1/2 inch COBALT drill bit. Cobalt is harder than titanium - its the best bit you can buy and you'll need it - because your bolt is hardened steel. Drill into the face at a very slow speed and keep spraying your WD40/JB80 on it to act as lubricant. Go too fast and you'll harden the bolt and possibly your bit. Basically you end up removing enough that just that thin part of the top of the bolt comes off - enabling the rotor to be removed.
At this point you have a stud still in there and two options; option 1 is to grab it with a pliers of some sort and pray it comes loose. Option 2 that I went with I don't really suggest - but off the record I think is perfectly safe. Most cars do not have a bolt like this holding the rotor in place. I think its there to keep the rotor in place for easy install of the caliper and wheels. You realize once your wheels are tightened down they'll keep the rotor snuggly in place. Furthermore, the little stud and wheel bolts keep it from doing any sort of rotation. Again, I don't fully recommend doing this, but I think it's ok.
The correct way to complete this is to use a impact gun or take it somewhere.
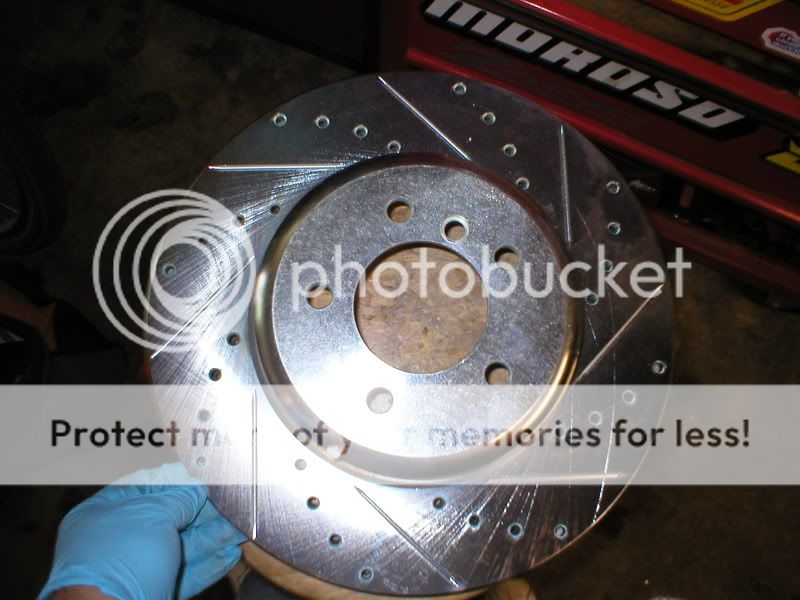
Now that we're past that it's time for the new rotors. I got these rotors - the brand is R1Concepts and from what I've read on the board they're, at least in part, manufactured by StopTech - and they know brakes! They're Zinc plated and look the shit. A few guys on the board do offer these and they're priced very reasonably.
Rotors:
Put them in place and put your rotor bolt on. Or in my case screw some wheel bolts on to make caliper installation easier.
If you have new pads this of course is the time to put them on. Pretty straight forward from other BMW's I've worked on so no worries. You'll likely need to push your new pads apart once in place to get the caliper over the rotor. Not sure exactly what it takes on this car. But generally, there's a couple tools at the auto parts store for the job. You might need to just loosen the bleed screw to push out. If you do, make sure you bleed your brakes when everything's done.
Install Caliper:
Nothing real tricky here. You can wiggle the caliper around once its close until the bolts catch the threads. Tighten up your bolts real well - I didn't have torque specs handy so maybe look those up. But either way they should go on real tight. Put your new pad sensors on if you replaced the pads - one on the front driver wheel, one on the rear passenger wheel.
Painting Calipers:
People do this different ways. Some disassemble the caliper completely and get some sort of brake paint thats often sprayed on. I do it differently and have for years with fine results.
First clean the caliper with a brake cleaner. Every auto parts store has this and you'll use just about the whole can for your car.
Brake cleaner:
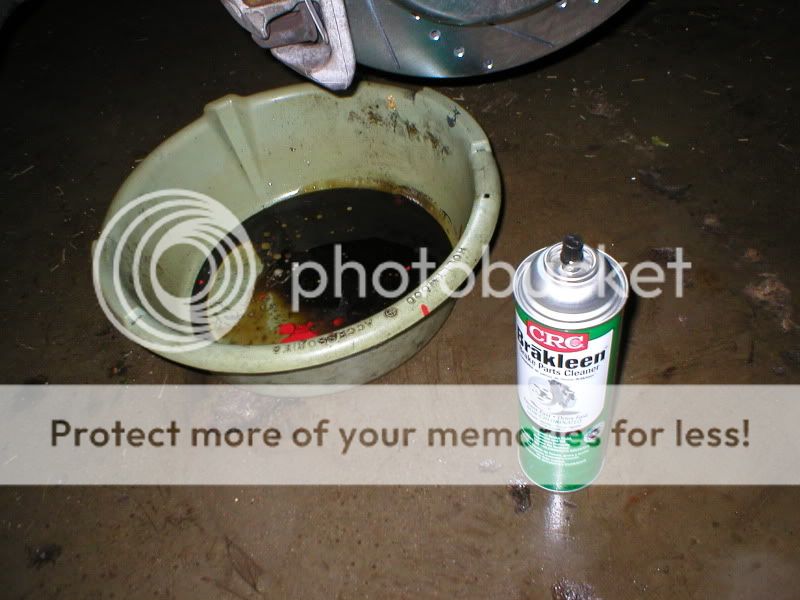
As you can see I like to put a drip pan under to catch everything. Just spray this stuff on - it's safe on hoses and everything so no worries there. It dries quickly - I like to rub some of the stuff off if - but generally speaking, this will get all the dust grease and grime off.
To paint, I use a foam brush and Rustoleum paint. I've always had good results - the color lasts if you prep properly and keep them fairly clean. Just paint it on and try to do at least 2 coats for solid color.

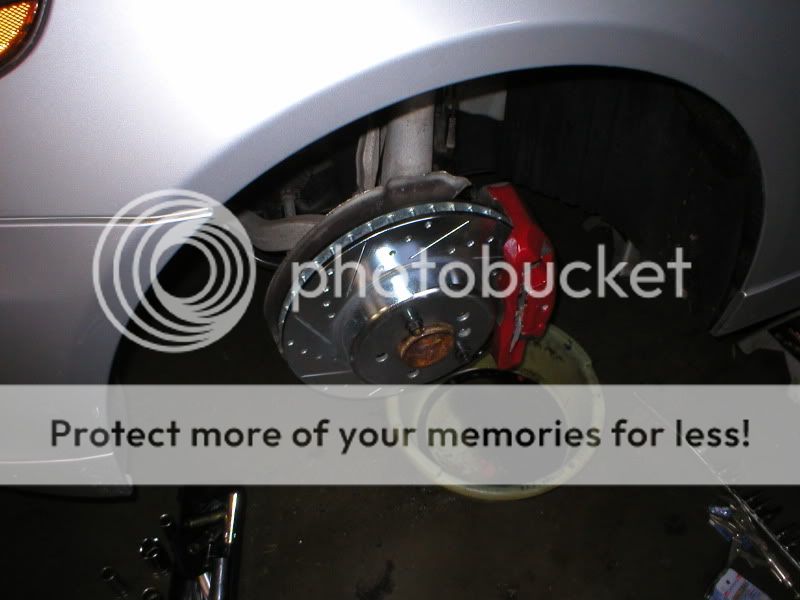
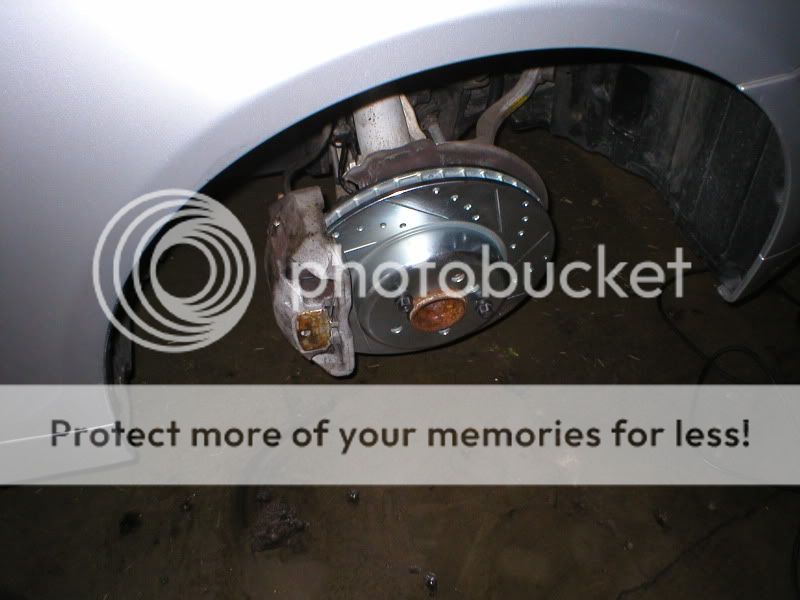
That's with one coat so the color was still going to get a little better. After the additional coat(s) your ready for the wheels. I let the stuff dry for an hour or so, then carefully put my wheels on. If you do what I did with the rotor bolt just carefully line everything up as you put the wheel on. I basically have the wheel in my lap, line it up, put it in place and put the bolts on. Put it back on the ground and re-tighten your wheel bolts in a star pattern first, then counterclockwise (or maybe clockwise who cares).
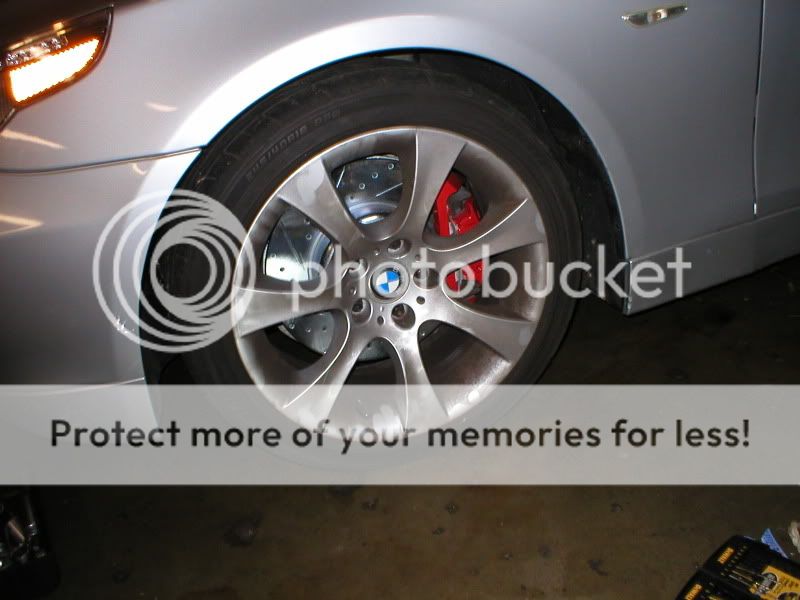
Now you can lift up the rear for the same.
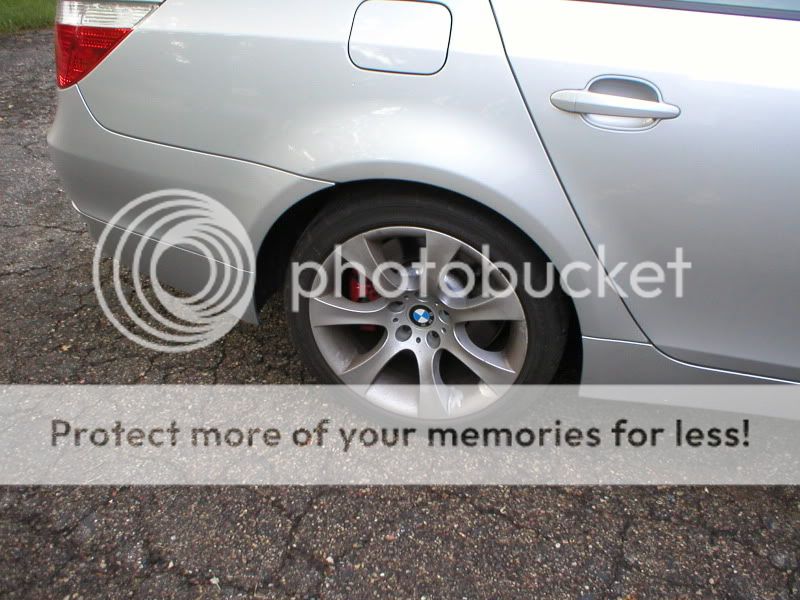
My wheels are dirty! And the camera I used sucks by the way, plus there was low lighting today. When I have a few more mods I'll take pics with the Nikon. They are very noticeable though and I like the look to match the tails and soon RPI red ram air duct.
Getting things ready for the road:
Bleed the brakes if necessary. Remember to use the correct sized wrench here as the caliper bleed screws will strip easily.
Start the car and make sure you don't get a brake warning -9000 miles. If you do you may have improperly installed the sensor(s). You can try the reset per this thread though (and should anyway):
https://5series.net/forums/index.php?showtopic=17756
Roll down the driveway and press the brakes. The first time you do this the pedal may move a bit more than normal as it's establishing the position. Though if you bled your brakes this likely won't happen.
Seat your rotors:
Basically what you want to do here is seat your pads into the rotors. Go to some road with little traffic and get some good speed (40-60 mph etc.) within the limits. Brake hard to about 15 mph, speed back up, then repeat. Do this a few times to seat the pads. Never fully stop though. After you've done this a few times, drive at speed to make sure they cool down properly. Then you'll be ok to stop. This often eliminates squeaks and gives you good pedal pressure in the future.
Performance:
My impression of these rotors is they are awesome! They really bite hard and are a huge improvement over my warped rotors for sure. I'd advise anyone to pick these up.
Whew that was a lot.. Hope this helps someone in the future!
Your rotors may still have life but are warped. Evidence of this is shaking under braking. The best way to spot it is actually looking at your rotor you'll see little dark spots or lines perpendicular to the rotors path of travel.
Some general tips:
Take your time - if your in a rush or gotta be somewhere your bound to break or screw something up and get frustrated.
Always use the right tool for the job. If you don't you will break or screw something up. If you need a 6mm and only have a standard 3/16, go to the store and get the right tool.
I add these as from my experience over the years these two tips have saved me many hours (see link in my sig about building a car).
The tools required:
6mm allen socket
17mm 6 point socket
Extention and Ratchet
18mm 6 point socket
Jack and stands
Rubber mallet and hammer
Highly recommend - Impact Gun/air compressor
Foam Brush
Swear Jar
What you might need:
1/2 COBALT Drill Bit
Drill
2 rotor bolts - $1.50 each at your local dealer
Parts and Supplies:
Brake Rotors and/or Pads as needed.
Pad sensors - one in front and one in the rear depending what your doing here
Brake cleaner - comes in a spray can
WD40 or JB80
Rustoleum Paint
Latex Gloves keep paint and grease off your hands - shave 5 minutes off your clean-up time and no greasy finger nails haha.
Begin:
Break loose the wheel bolts:
17mm or 11/16 should work (it seems 17 was correct). Do this initially before lifting up the car so you don't pull it off the stands (kidding of course) and the wheels aren't trying to move on you.
Jack the car up:
There's a little arrow on your sideskirt showing the jackpoint. You should have a rubber puck under there - like many BMW's mine did not (someone must have lost them at one point for reasons beyond me, maybe they're worth serious cash?). If this is the case get a little piece of 2x4 or just remove the round piece on your jack - if its like mine it will then have a slim chunk of rectangular metal to now fit this area where the puck is missing.
Place on jack stands - I used a spot much more to the middle of the car that felt and looked very solid.
Remove the wheels:
Once the bolts are out it's likely if you live in a climate like me that a little corrosion wants to keep your wheels from coming off the hub. Tap the tires from front and rear with your rubber mallet. Or at the exact same time push one side of the tire with one arm and pull with the opposite on the opposite side of the tire.
Remove the Caliper
You'll need a standard length 18mm socket for these two bolts at the rear. Use a 6 point so you don't strip anything. You need some serious leverage if your using your arms like me. I tapped the socket driver with a rubber mallet to get things loose - but careful doing this - if you hit it sideways you could strip something (though this is pretty hard to do on this bolt I think). A 2nd person applying extra pressure may also work if you don't want to use the mallet.
Bolts:
Now tap the caliper off with your rubber mallet. Have a spare jack stand or something to rest your caliper on - you don't want to leave it dangling from the brake lines now do you.
Remove the rotor - ATTENTION READ THIS STEP AT LEAST BEFORE YOU ATTEMPT THIS JOB
The rotor is held on with 1 little bolt that looks like this - very innocent:
Spray your JB80 or WD40 around it to try and loosen it up.
This is the hard part of the repair. You'll either need a impact gun and air compressor - or you'll have to do what I did which I do not warrant or suggest (though this is my car and I am comfortable doing this).
Take your 6mm allen socket. I felt with both standards and metric and this was clearly the correct size. Put it on and twist, that was easy (maybe for you if your lucky)!!
Not really to be honest. The problem here if you don't have an impact gun is your putting an akward side pressure on the socket/bolt - meaning you'd have to be very lucky not to strip this. Maybe you could heat the bolt up??? I don't know, but I stripped the bolt and now the fun began. Since mine hasn't been removed after 5 years that could be why it was so difficult as well.
I tried hammering a slightly larger allen on once it was already stripped but just couldn't turn the thing.
Now I went to the auto parts store and got an easy - out or bolt extractor as its also called. I also went to my dealer and got 2 rotor bolts knowing this was likely to happen on the other side. I drilled a small hole and put the extractor in. I started turning counterclockwise to loosen - and found this particular extractor was of the lowest quality - it broke. That and I think this bolt is super hard to get off.
The real solution - if you use an impact gun your not putting side pressure on the bolt and stripping it (most likely). Instead, your gun is only twisting the bolt and with a great sudden force. This is what your dealer would do obviously and the correct method.
My solution - went the hardware store and picked up a 1/2 inch COBALT drill bit. Cobalt is harder than titanium - its the best bit you can buy and you'll need it - because your bolt is hardened steel. Drill into the face at a very slow speed and keep spraying your WD40/JB80 on it to act as lubricant. Go too fast and you'll harden the bolt and possibly your bit. Basically you end up removing enough that just that thin part of the top of the bolt comes off - enabling the rotor to be removed.
At this point you have a stud still in there and two options; option 1 is to grab it with a pliers of some sort and pray it comes loose. Option 2 that I went with I don't really suggest - but off the record I think is perfectly safe. Most cars do not have a bolt like this holding the rotor in place. I think its there to keep the rotor in place for easy install of the caliper and wheels. You realize once your wheels are tightened down they'll keep the rotor snuggly in place. Furthermore, the little stud and wheel bolts keep it from doing any sort of rotation. Again, I don't fully recommend doing this, but I think it's ok.
The correct way to complete this is to use a impact gun or take it somewhere.
Now that we're past that it's time for the new rotors. I got these rotors - the brand is R1Concepts and from what I've read on the board they're, at least in part, manufactured by StopTech - and they know brakes! They're Zinc plated and look the shit. A few guys on the board do offer these and they're priced very reasonably.
Rotors:
Put them in place and put your rotor bolt on. Or in my case screw some wheel bolts on to make caliper installation easier.
If you have new pads this of course is the time to put them on. Pretty straight forward from other BMW's I've worked on so no worries. You'll likely need to push your new pads apart once in place to get the caliper over the rotor. Not sure exactly what it takes on this car. But generally, there's a couple tools at the auto parts store for the job. You might need to just loosen the bleed screw to push out. If you do, make sure you bleed your brakes when everything's done.
Install Caliper:
Nothing real tricky here. You can wiggle the caliper around once its close until the bolts catch the threads. Tighten up your bolts real well - I didn't have torque specs handy so maybe look those up. But either way they should go on real tight. Put your new pad sensors on if you replaced the pads - one on the front driver wheel, one on the rear passenger wheel.
Painting Calipers:
People do this different ways. Some disassemble the caliper completely and get some sort of brake paint thats often sprayed on. I do it differently and have for years with fine results.
First clean the caliper with a brake cleaner. Every auto parts store has this and you'll use just about the whole can for your car.
Brake cleaner:
As you can see I like to put a drip pan under to catch everything. Just spray this stuff on - it's safe on hoses and everything so no worries there. It dries quickly - I like to rub some of the stuff off if - but generally speaking, this will get all the dust grease and grime off.
To paint, I use a foam brush and Rustoleum paint. I've always had good results - the color lasts if you prep properly and keep them fairly clean. Just paint it on and try to do at least 2 coats for solid color.
That's with one coat so the color was still going to get a little better. After the additional coat(s) your ready for the wheels. I let the stuff dry for an hour or so, then carefully put my wheels on. If you do what I did with the rotor bolt just carefully line everything up as you put the wheel on. I basically have the wheel in my lap, line it up, put it in place and put the bolts on. Put it back on the ground and re-tighten your wheel bolts in a star pattern first, then counterclockwise (or maybe clockwise who cares).
Now you can lift up the rear for the same.
My wheels are dirty! And the camera I used sucks by the way, plus there was low lighting today. When I have a few more mods I'll take pics with the Nikon. They are very noticeable though and I like the look to match the tails and soon RPI red ram air duct.
Getting things ready for the road:
Bleed the brakes if necessary. Remember to use the correct sized wrench here as the caliper bleed screws will strip easily.
Start the car and make sure you don't get a brake warning -9000 miles. If you do you may have improperly installed the sensor(s). You can try the reset per this thread though (and should anyway):
https://5series.net/forums/index.php?showtopic=17756
Roll down the driveway and press the brakes. The first time you do this the pedal may move a bit more than normal as it's establishing the position. Though if you bled your brakes this likely won't happen.
Seat your rotors:
Basically what you want to do here is seat your pads into the rotors. Go to some road with little traffic and get some good speed (40-60 mph etc.) within the limits. Brake hard to about 15 mph, speed back up, then repeat. Do this a few times to seat the pads. Never fully stop though. After you've done this a few times, drive at speed to make sure they cool down properly. Then you'll be ok to stop. This often eliminates squeaks and gives you good pedal pressure in the future.
Performance:
My impression of these rotors is they are awesome! They really bite hard and are a huge improvement over my warped rotors for sure. I'd advise anyone to pick these up.
Whew that was a lot.. Hope this helps someone in the future!
Contributors
Joined: Dec 2007
Posts: 8,998
Likes: 1
From: St. Louis Burbs, USA
My Ride: 2007 530i. Purchased 6/28/07. Titanium Silver Metallic, Black Dakota Leather, Dark Poplar Trim, Steptronic, Premium Package, Cold Weather Package, Bluetooth, Adaptive Control Xenons. 10/30/07 Added OEM 124s with 245/40/18 & 275/35/18 Michelin Pilot Sport A/S tires. Installed red Cal Covers� from BavAuto. 11/21/07 Added OEM all-weather floor mats (for winter, carpet in summer) and coat rack. 6/26/08 installed M5-style rear spoiler. 6/30/08 put on red reflectors. 8/22/08 Euro turn signal stickers applied. 3/20/09 Installed Shadowline Trim. 3/27/09 Added Matte Black Kidney Grilles from Trinity. 4/03/09 Installed Bimmian Shadow Matte Black 530i Badges. 4/04/09 Installed LED license plate lights from Trinity. 5/01/09 Installed Brabus Interior LED Kit and White Angel Eyes. 5/02/09 Put in Brabus 6K Fogs. 5/14/09 Removed charcoal filter. 5/15/09 Installed light smoke LED side marker lamps from Trinity. 5/21/09 Sprint Booster. 6/12/09 Painted exhaust tips flat black. 6/13/09 Pulled red Cal Covers and painted calipers low gloss black. 6/27/09 RPI Ram Air Scoop from Trinity. 8/15/09 Installed Brabus's silver invisibulbs front and rear. 9/24/09 Installed R-Dash license plate LEDs from Brabaus (John).
Excellent and thorough DIY! Thanks for the resource! 
Thread Starter
Members
Joined: May 2009
Posts: 178
Likes: 0
From: Minneapolis, MN
My Ride: 545i/6spd
Originally Posted by DRANGED' post='969784' date='Aug 8 2009, 08:04 PM
Nice DIY Mike. You'll have to get together with me and the boys soon so we can check out your caliper paint job and rotors. 
You'll have to get together with me and the boys soon so we can check out your caliper paint job and rotors. For sure, let me know when you guys plan on something next!
Contributors
Joined: May 2004
Posts: 2,863
Likes: 1
From: SoCal San Diego
My Ride: 545i Sport
Model Year: 2004
Engine: N62
Nice DIY . I recommend using caliper paint such as Dupli-color that has Ceramic Resins for maximum heat dissipation.
Dupli-Color Caliper Paint is designed to withstand high temperatures.
. I recommend using caliper paint such as Dupli-color that has Ceramic Resins for maximum heat dissipation. Dupli-Color Caliper Paint is designed to withstand high temperatures.
Contributors
Joined: Mar 2009
Posts: 606
Likes: 1
From: OK
My Ride: 540i
Model Year: 2017
Great DIY! I agree that the single bolt holding the rotor to the hub just locates the rotor while the wheel is off. No need for it when the lug bolts are in place. Drilling it's head off is much easier than fighting it!
Do your new rotors have slanted vanes?
Do your new rotors have slanted vanes?


Thread Starter
Members
Joined: May 2009
Posts: 178
Likes: 0
From: Minneapolis, MN
My Ride: 545i/6spd
Originally Posted by 530inOK' post='970019' date='Aug 9 2009, 01:21 AM
Great DIY! I agree that the single bolt holding the rotor to the hub just locates the rotor while the wheel is off. No need for it when the lug bolts are in place. Drilling it's head off is much easier than fighting it!
Do your new rotors have slanted vanes?
Do your new rotors have slanted vanes?
Contributors
Joined: May 2008
Posts: 456
Likes: 0
From: Dallas, TX
My Ride: I have an 05 545i. It's a manual with a few options. This is my first BMW but I don't know how I'll ever be able to switch to something else.
very nice DIY. Thanks for the write-up, this will come in handy when I change out my brake pads. 
