
My E61-525d-RH 19", dropped, M-tech
 02-10-2011, 07:08 AM
#51
New Members

Join Date: Feb 2011
Location: Germany
Posts: 2
Likes: 0
Received 0 Likes
on
0 Posts
Hello Bimmerstyle,
i tried to find these wheels, but the dealer in Netherlands doesn't sell these wheels anymore, maybe you could tell me your little Shop in Belgium.
sorry, but i can't use the PM-System... maybe you could write me an e-mail?
nighty@temporaryemail.net
i tried to find these wheels, but the dealer in Netherlands doesn't sell these wheels anymore, maybe you could tell me your little Shop in Belgium.
sorry, but i can't use the PM-System... maybe you could write me an e-mail?
nighty@temporaryemail.net

 02-20-2011, 01:10 PM
#53
New Members
Thread Starter
Join Date: May 2009
Location: Belgium
Posts: 69
Likes: 0
Received 1 Like
on
1 Post
My Ride: '04 E61 525d
TITANGRAU II METALLIC (A36)
LEDER DAKOTA/BEIGE 3 (LCBA)
SIDE AIRBAG FOR REAR PASSENGERS
ALARM SYSTEM
ROOF RAIL
SUNBLINDS FOR REAR SIDE WINDOWS, MECH
FLOOR MATS, VELOUR
INT/EXT RR VW MIRROR W AUT ANTI-DAZZLE
INTERIOR RR VW MIRROR W AUT ANTI-DAZZLE
WOOD TRIM
CUPHOLDER
SEAT HEATING F DRIVER/FRONT PASSENGER
HEADLIGHT WASHER SYSTEM
PARK DISTANCE CONTROL (PDC)
XENON LIGHT
ADAPTIVE HEADLIGHTS
AUTOMATIC AIR CONDITIONING
CRUISE CONTROL
NAVIGATION SYSTEM PROFESSIONAL
CAR TELEPHONE PROFESSIONAL
CD CHANGER BMW FOR 6 CDS
Long time no news here. Mainly because there wasn't much news to report. Recently however I've started on planning to put a quad exhaust on the car. Most E61 owners will know this is not an easy task because of the air suspension compressor underneath the car. I've searched the web about moving this compressor but didn't find a lot of info. The only one I found was here, Tiago. He managed to put the compressor behind the rear bumper. I've asked him some questions in PM and his answers made me more confident in doing the mod. Thanks again Tiago. 
Now for my project I've ordered the Remus muffler with extension to the right. Altough the guys from Remus tell me it will fit a E61 without modifications one look at a picture of the exhaust tells me this isn't the case. The compressor has to be moved to fit the right exhaust pipe. I've expected the compressor to arrive Friday at the dealer where I ordered it but it wasn't there. I've kinda planned to do the conversion this weekend so I was quite bummed about it. Since I had no other plans an my friend made room in his garage for me I went ahead and did the compressor relocation. The exhaust should arrive this week so next weekend I will install this.
For now some explaining on how the compressor was moved.
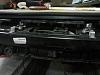
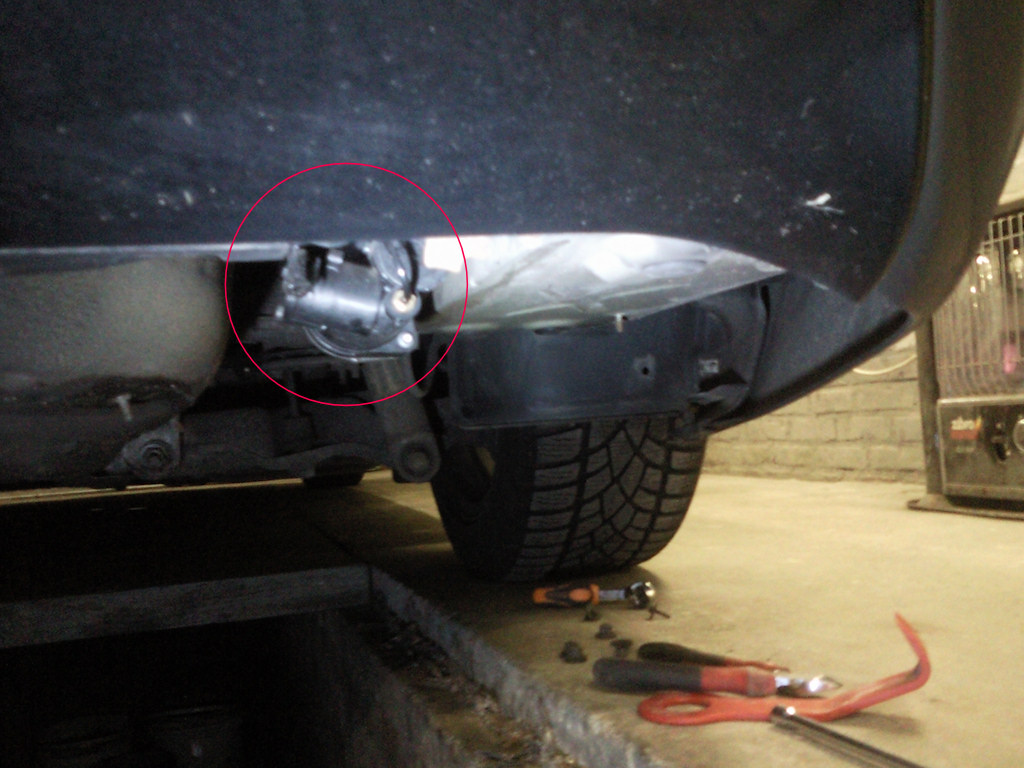
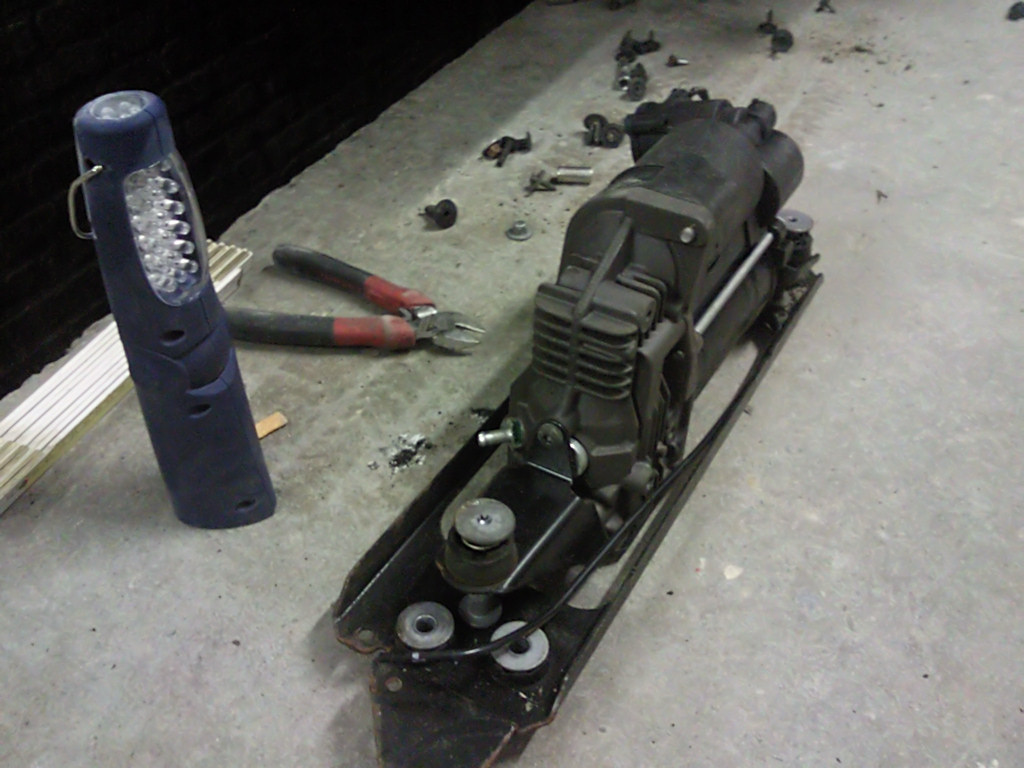
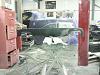
First of all this is what to be relocated. The air compressor. Not really a small thing...
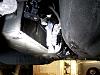
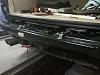
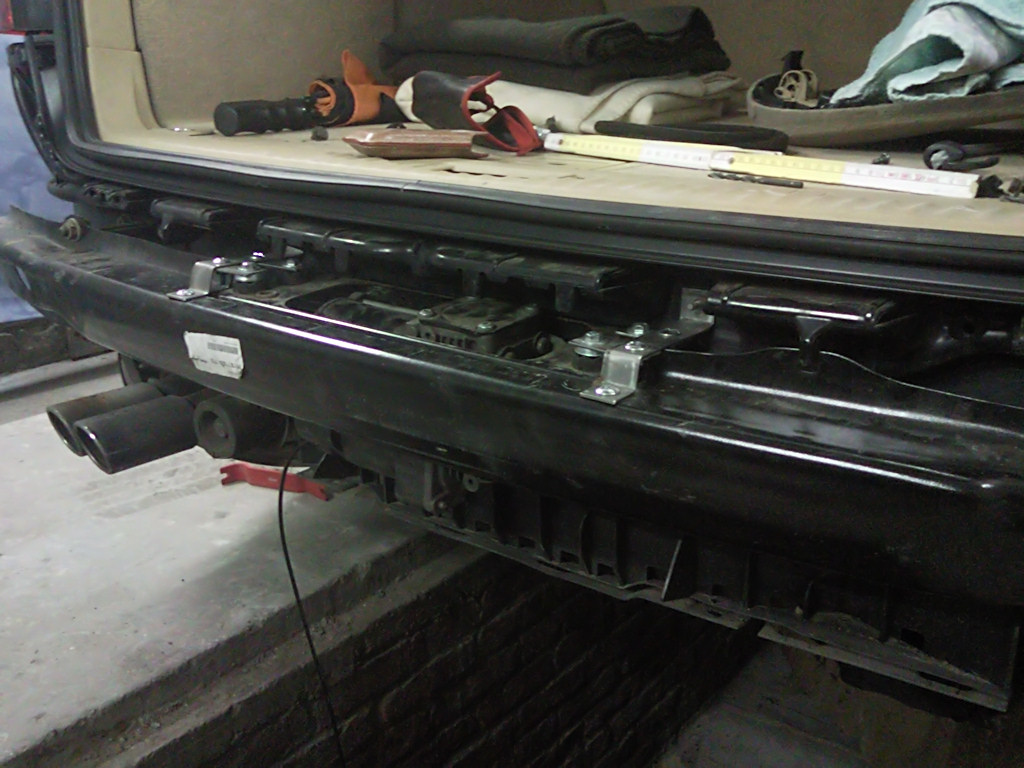
And here is where it should come. A quick fix with some cable ties tells me modification on the bumper carrier is necessary to make it fit without touching the bumper.
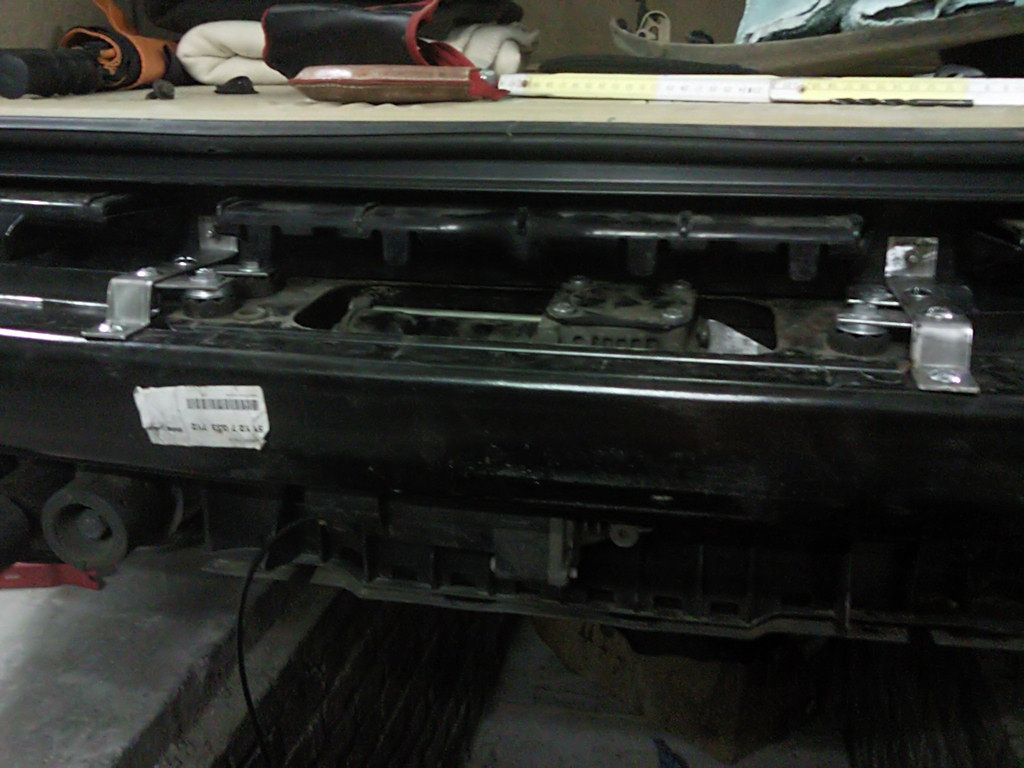
So i've did lots of measuring, made some brackets out of 2mm steel, cut out a piece of the bumper carrier and made it fit. The brackets are bolted to the car using the excisting bolts that hold the plastic carrier. The other ends are bolted to the bumper carrier itself. This way no holes had to be drilled in the bodywork of the car, something I always try to avoid. It really was a thight fit because I didn't want any metal parts to touch eachother. The compressor hangs in a mounting base with springs to absorb shocks and this base originaly is bolted to the car on rubber blocks to avoid vibration when the compressor is running. Any metal to metal contact will ruin these features so it was important to avoid this. In the end it's all good.
Next was extending the electrical wires and pressure lines. The electrical was pretty simple. I've simply cutted the factory wires and soldered some extra wiring on them. There was a rubber tube on the compressor to suck in air. For this I've bought some extra tubing and lengthened the original tube with a connection. Tiago adviced me to keep the pressure-valve in place. This way air stays in the system and only one pressure line has to be replaced. I followed his advice and used this method. So from the valve one new pressure tube goes to the compressor. I've ordered a connection to attach the tube to the compressor and on the valve the tube is connected with a quick release.
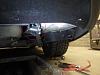
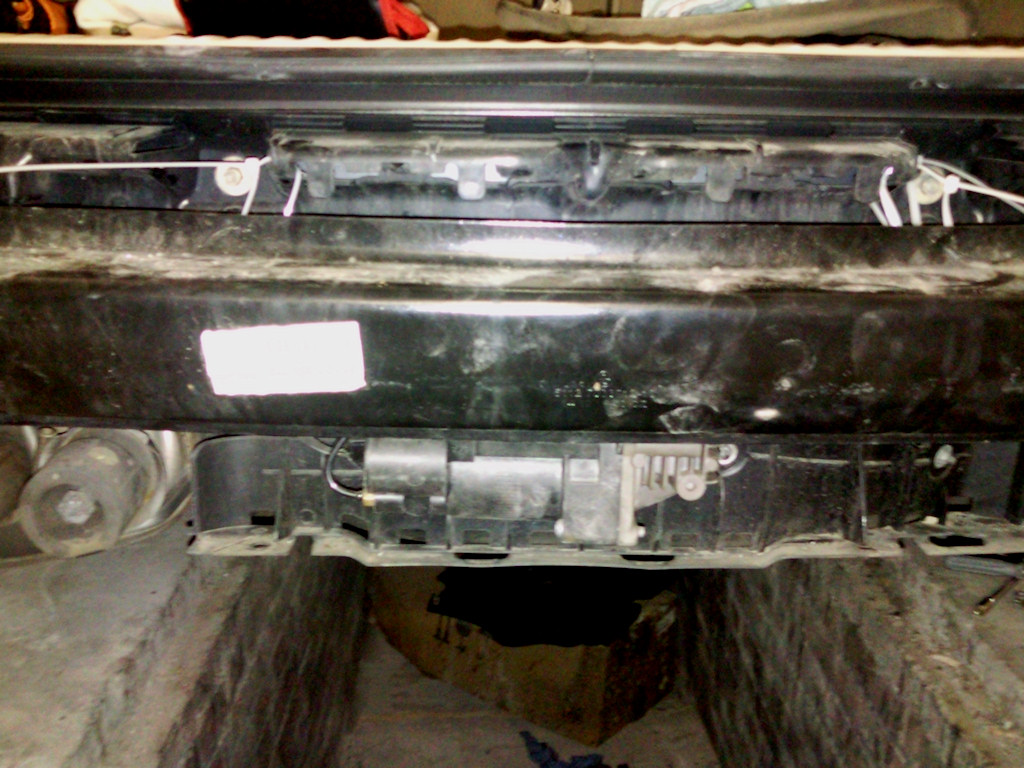
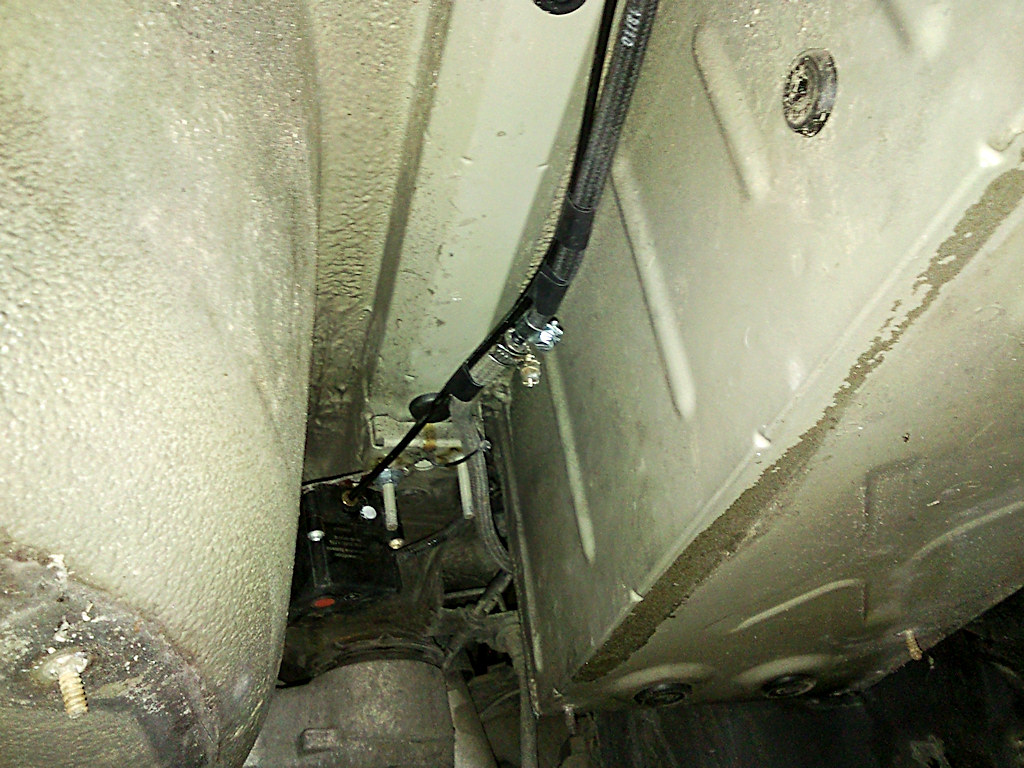
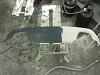
After the wiring and plumbing was done things looked a little bit like this:
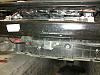
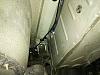
As you can see in the pics the electrical wires an pressure tube run into the plastic carrier. This way the stay in place and they don't get jammed anywhere. The last pic is the underside of the car. You can see the valve in its original location with the new pressure tube and the extended suction tube. Also you can see the free space that is available now to run the right exhaust pipe. Probably I will mount some heatshield over the valve and tubing when I install the exhaust. I also concider to put on some covers on the space that isn't used by the exhaust to optimise airflow underneath the car since now there is a huge gap that really messes up the airflow. I'll probably make those out of fiberglass and use the OEM fittings to hold it in place.
But that's all for later on. First installing the exhaust. Probably (hopefully) next weekend... I'll keep you guys updated.
Now for my project I've ordered the Remus muffler with extension to the right. Altough the guys from Remus tell me it will fit a E61 without modifications one look at a picture of the exhaust tells me this isn't the case. The compressor has to be moved to fit the right exhaust pipe. I've expected the compressor to arrive Friday at the dealer where I ordered it but it wasn't there. I've kinda planned to do the conversion this weekend so I was quite bummed about it. Since I had no other plans an my friend made room in his garage for me I went ahead and did the compressor relocation. The exhaust should arrive this week so next weekend I will install this.
For now some explaining on how the compressor was moved.
First of all this is what to be relocated. The air compressor. Not really a small thing...

And here is where it should come. A quick fix with some cable ties tells me modification on the bumper carrier is necessary to make it fit without touching the bumper.
So i've did lots of measuring, made some brackets out of 2mm steel, cut out a piece of the bumper carrier and made it fit. The brackets are bolted to the car using the excisting bolts that hold the plastic carrier. The other ends are bolted to the bumper carrier itself. This way no holes had to be drilled in the bodywork of the car, something I always try to avoid. It really was a thight fit because I didn't want any metal parts to touch eachother. The compressor hangs in a mounting base with springs to absorb shocks and this base originaly is bolted to the car on rubber blocks to avoid vibration when the compressor is running. Any metal to metal contact will ruin these features so it was important to avoid this. In the end it's all good.
Next was extending the electrical wires and pressure lines. The electrical was pretty simple. I've simply cutted the factory wires and soldered some extra wiring on them. There was a rubber tube on the compressor to suck in air. For this I've bought some extra tubing and lengthened the original tube with a connection. Tiago adviced me to keep the pressure-valve in place. This way air stays in the system and only one pressure line has to be replaced. I followed his advice and used this method. So from the valve one new pressure tube goes to the compressor. I've ordered a connection to attach the tube to the compressor and on the valve the tube is connected with a quick release.
After the wiring and plumbing was done things looked a little bit like this:

As you can see in the pics the electrical wires an pressure tube run into the plastic carrier. This way the stay in place and they don't get jammed anywhere. The last pic is the underside of the car. You can see the valve in its original location with the new pressure tube and the extended suction tube. Also you can see the free space that is available now to run the right exhaust pipe. Probably I will mount some heatshield over the valve and tubing when I install the exhaust. I also concider to put on some covers on the space that isn't used by the exhaust to optimise airflow underneath the car since now there is a huge gap that really messes up the airflow. I'll probably make those out of fiberglass and use the OEM fittings to hold it in place.
But that's all for later on. First installing the exhaust. Probably (hopefully) next weekend... I'll keep you guys updated.
02-24-2011, 10:24 AM
#54
New Members
Thread Starter
Join Date: May 2009
Location: Belgium
Posts: 69
Likes: 0
Received 1 Like
on
1 Post
My Ride: '04 E61 525d
TITANGRAU II METALLIC (A36)
LEDER DAKOTA/BEIGE 3 (LCBA)
SIDE AIRBAG FOR REAR PASSENGERS
ALARM SYSTEM
ROOF RAIL
SUNBLINDS FOR REAR SIDE WINDOWS, MECH
FLOOR MATS, VELOUR
INT/EXT RR VW MIRROR W AUT ANTI-DAZZLE
INTERIOR RR VW MIRROR W AUT ANTI-DAZZLE
WOOD TRIM
CUPHOLDER
SEAT HEATING F DRIVER/FRONT PASSENGER
HEADLIGHT WASHER SYSTEM
PARK DISTANCE CONTROL (PDC)
XENON LIGHT
ADAPTIVE HEADLIGHTS
AUTOMATIC AIR CONDITIONING
CRUISE CONTROL
NAVIGATION SYSTEM PROFESSIONAL
CAR TELEPHONE PROFESSIONAL
CD CHANGER BMW FOR 6 CDS
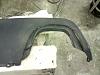
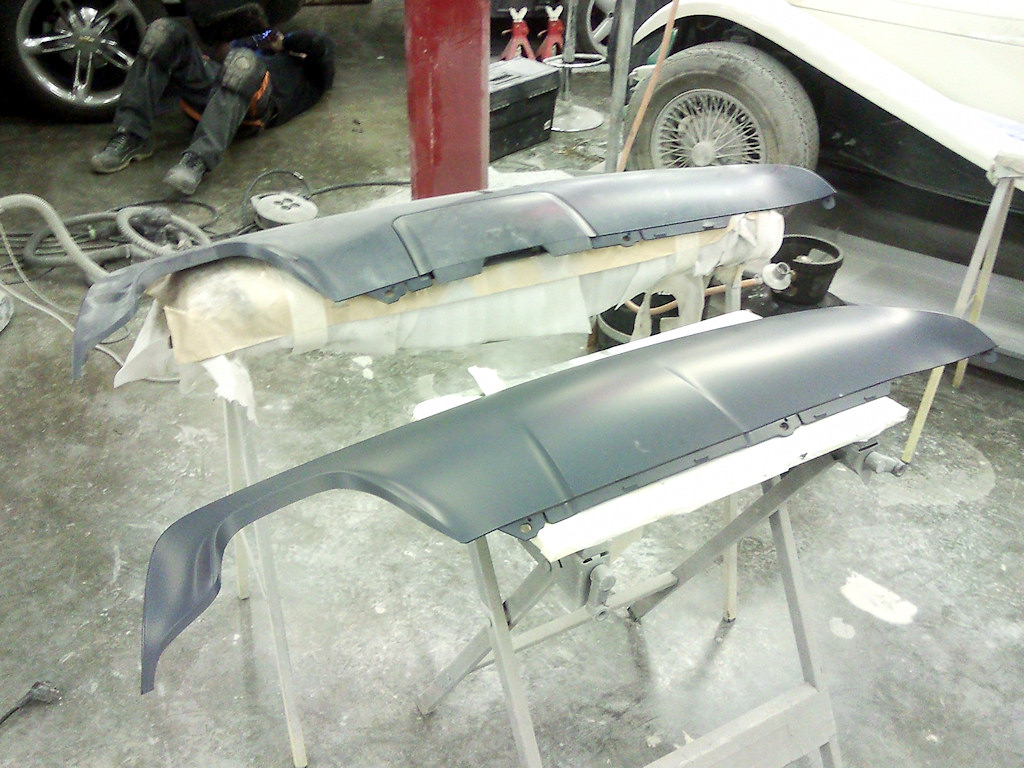
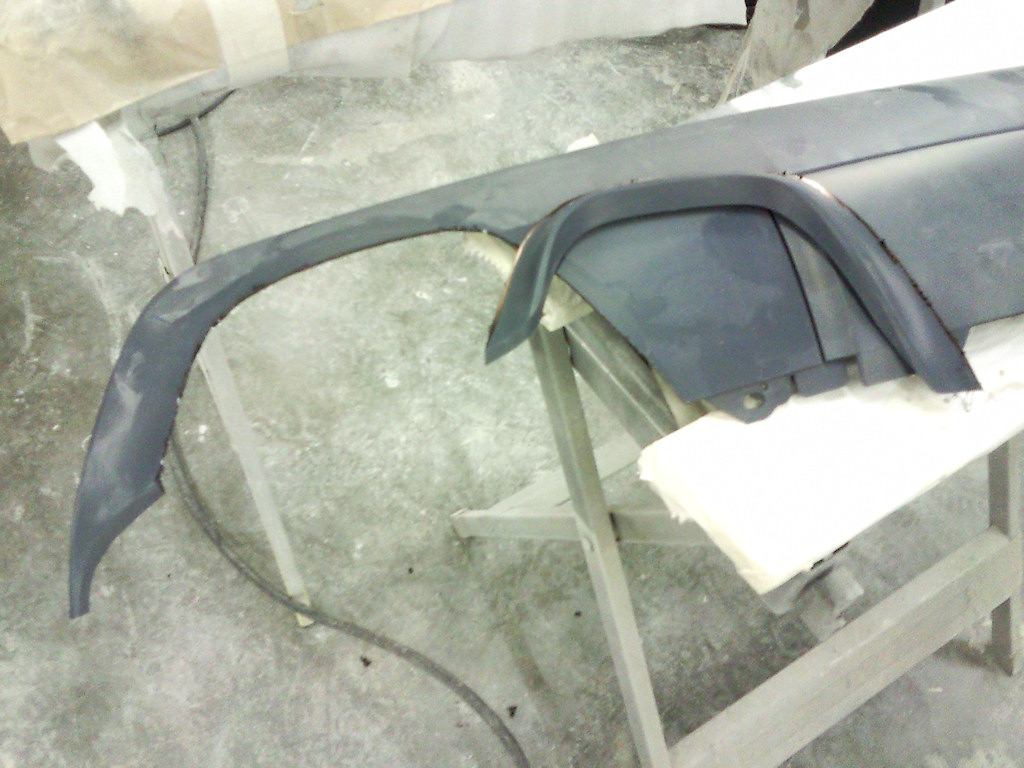
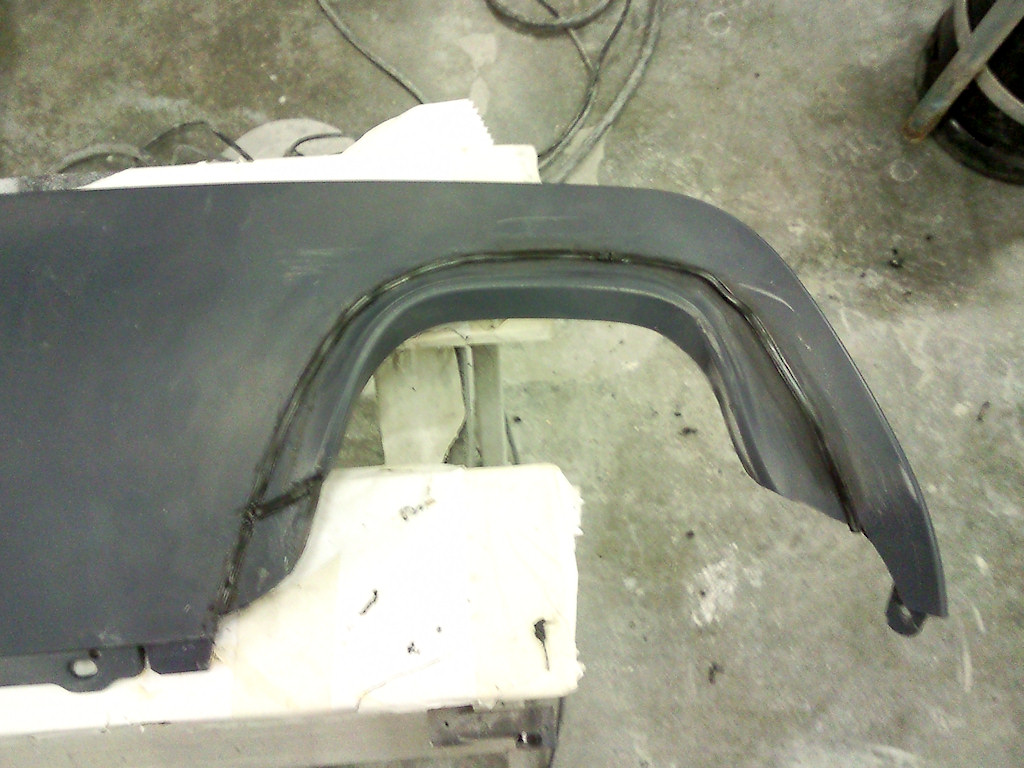
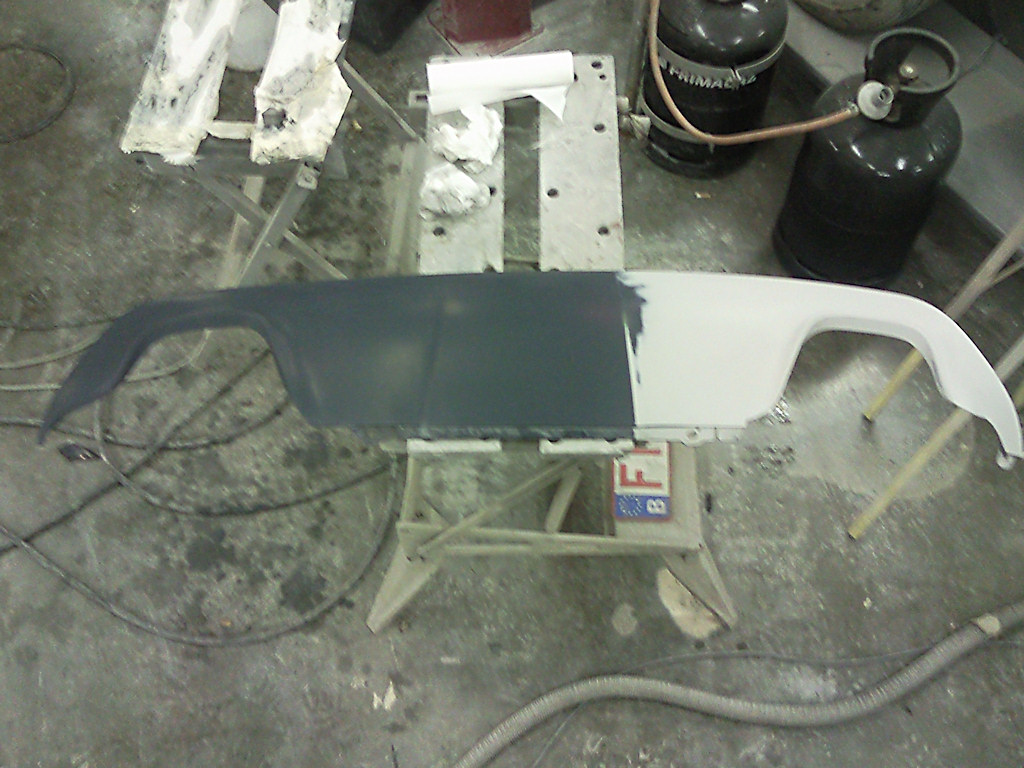
To make the exhaust fit I also needed an other diffuser in the rear bumper. Dual exhaust diffusers can be purchased online but I chose to make mine myself. I started with the extra diff. that came with the M-bodykit for cars with a towing hook an purchased a second one for cars without a towing hook.
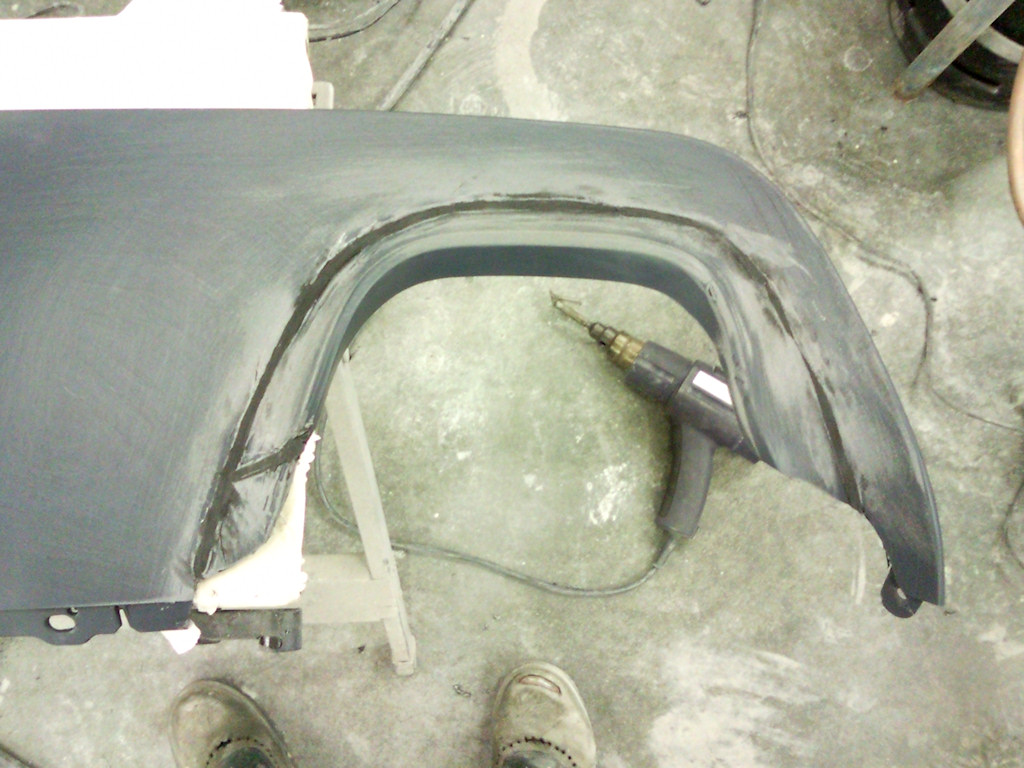
The one ment for cars with a towing hook was used to cut out the part surrounding the exhaust.
The other one was cut on the right side so the part I've cut out the first one would fit in this gap.

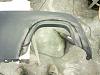
Next the parts were plastic welded together on the inside. Since the part on the left side isn't exactlty identical to the right heat was applied to shape it in to the same form.


The outside was also welded and a piece of plastic was welded on the spot not covered by the first piece.
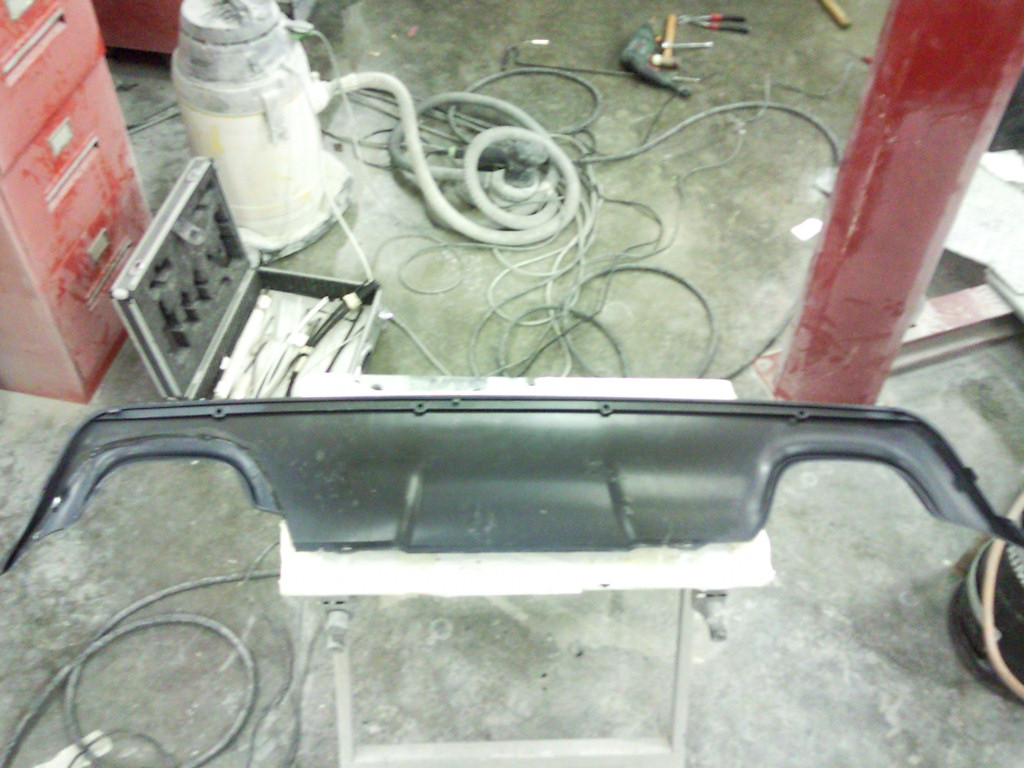
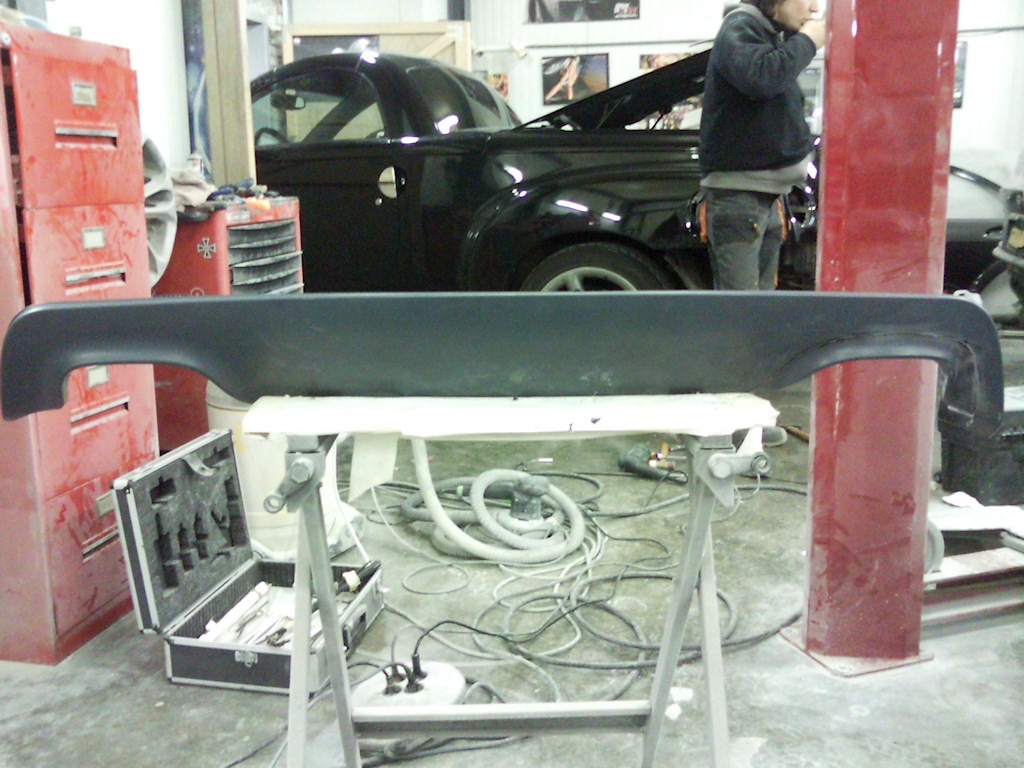
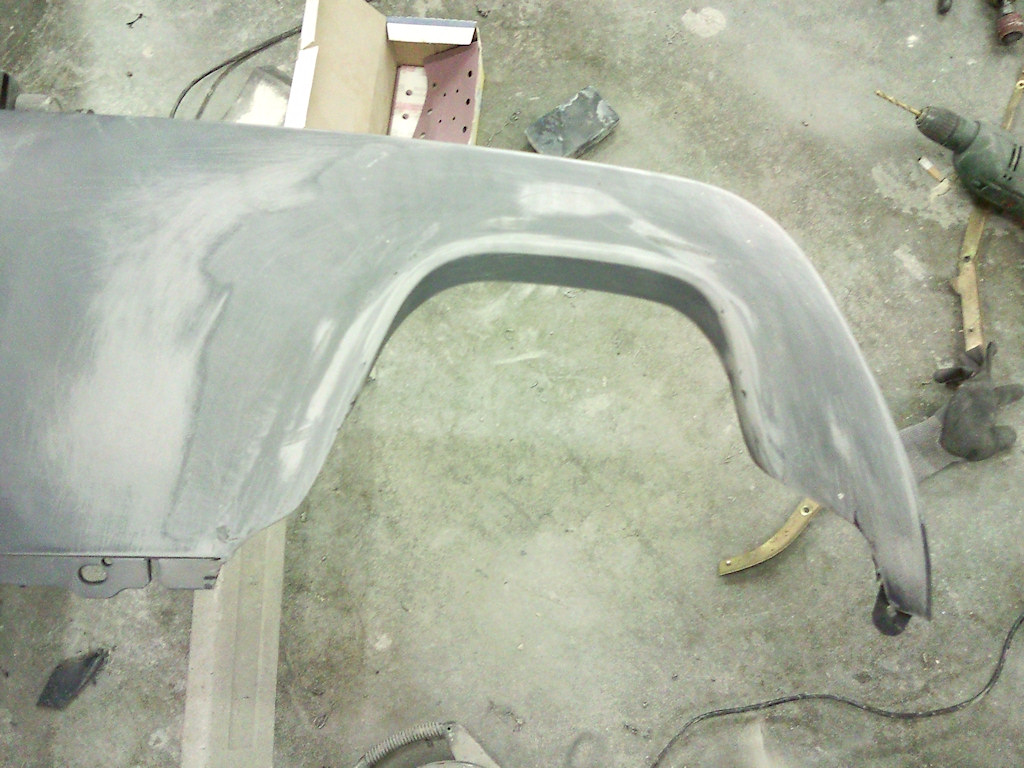
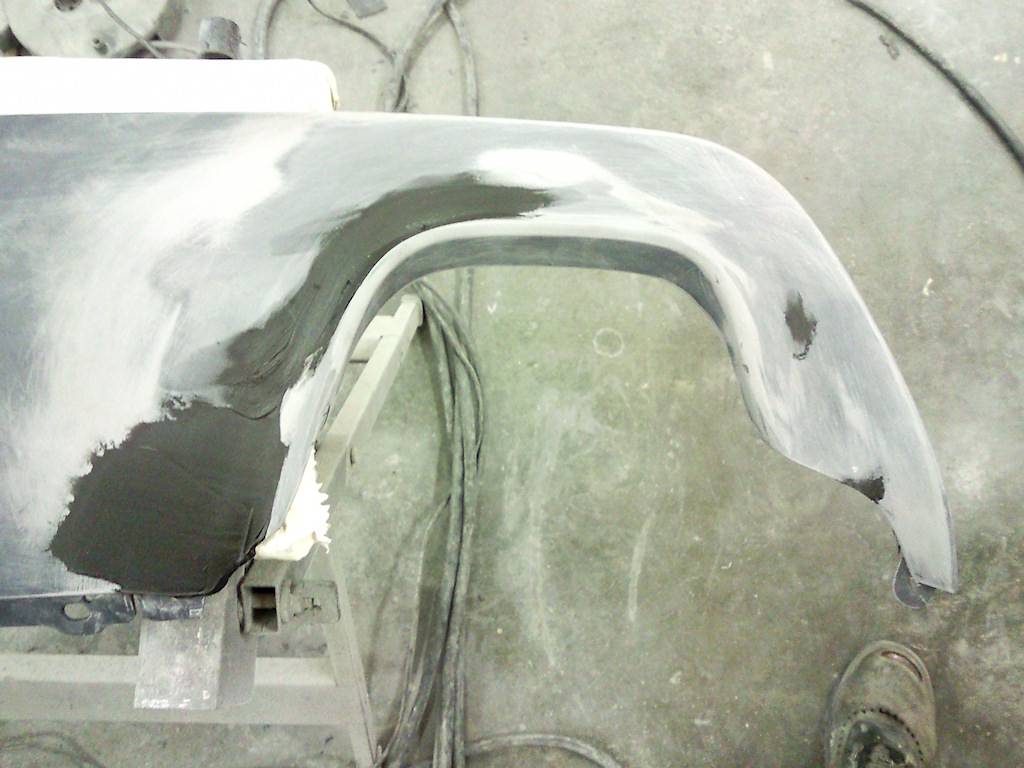
Everything was sanded down and some flexible body filler was applied. Then this was smoothed out until the surface was nice and smooth.

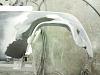
Next some spray filler was applied and this was sanded down.
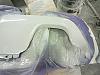
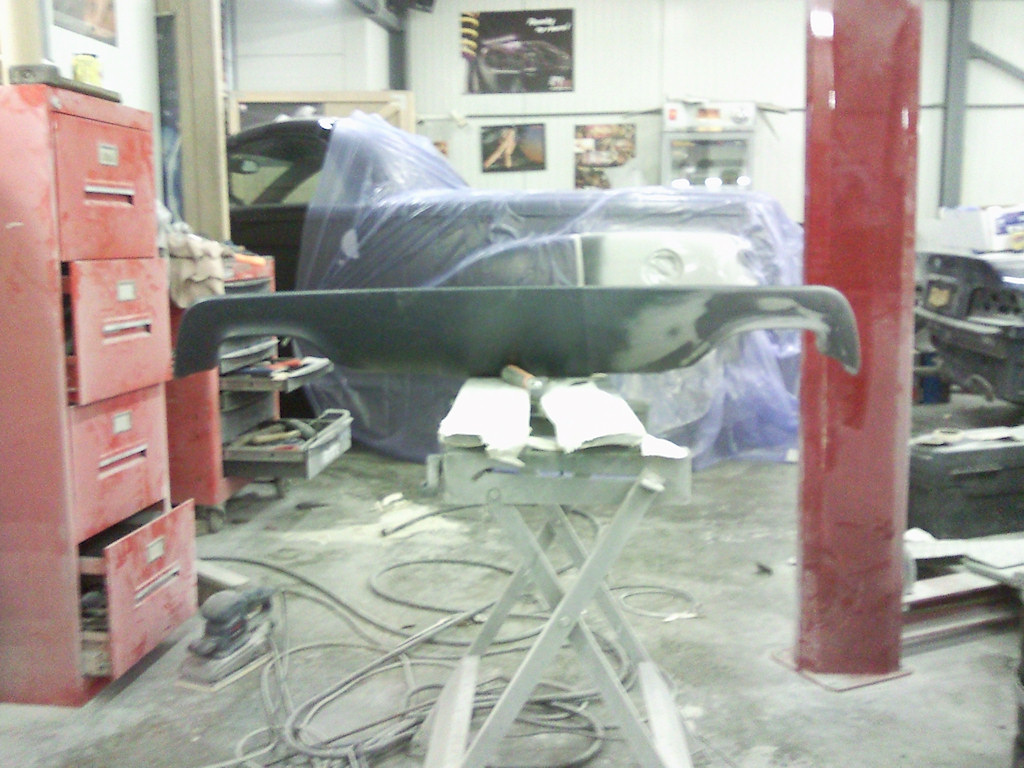
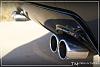
In the final step the diffuser was taken to the spray boot to spray the final coats of paint and clear. After this was done here is the final result.
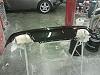
Tomorrow I will fit the exhaust on the car. Pictures of the finalized project will be posted here.
The one ment for cars with a towing hook was used to cut out the part surrounding the exhaust.
The other one was cut on the right side so the part I've cut out the first one would fit in this gap.

Next the parts were plastic welded together on the inside. Since the part on the left side isn't exactlty identical to the right heat was applied to shape it in to the same form.
The outside was also welded and a piece of plastic was welded on the spot not covered by the first piece.
Everything was sanded down and some flexible body filler was applied. Then this was smoothed out until the surface was nice and smooth.
Next some spray filler was applied and this was sanded down.
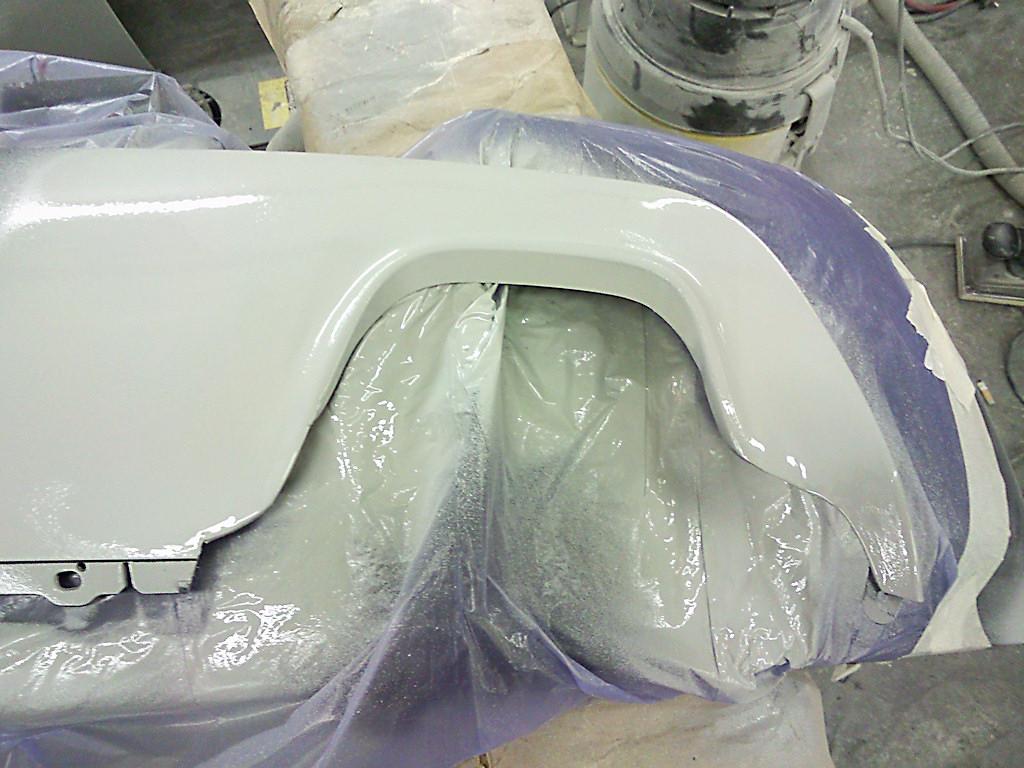
In the final step the diffuser was taken to the spray boot to spray the final coats of paint and clear. After this was done here is the final result.
Tomorrow I will fit the exhaust on the car. Pictures of the finalized project will be posted here.
02-24-2011, 10:46 AM
#55
Senior Members

Join Date: Jul 2009
Location: Amsterdam
Posts: 425
Likes: 0
Received 0 Likes
on
0 Posts
I followed your cars progress on the Belgium forum, full respect for attempting to build it all. Thats a lot of work on the diffuser! I bet it will look great when finished!
 02-25-2011, 12:30 AM
#57
Contributors
Join Date: Feb 2006
Location: UK
Posts: 4,186
Likes: 0
Received 2 Likes
on
2 Posts
My Ride: Jan 2006 E63 650i Sport
.
Options:
Sport version (includes: sport-seats, sport-suspension, M-Sport steering wheel, Anthracite headliner, Shaddow Line), Saphire Black, Black Dakota Leather, Anthracite Maple Wood trim, Steptronic Auto, Xenons, NAV-Professional with Voice Control, TV, CD-Changer, Bluetooth, Logic7, Head-up Display, Comfort Access, Seat Heating front, Auto Dimming & Folding Mirrors, Extended Auto Air Conditioning, PDC.
.
Mods:
Spacers 5mm front & 15mm rear
.
Wheels:
20" Alpina Softline (Classic) with Dunlop Sport Maxx non-RFT (255/35/20 & 285/30/20)
Looks good so far, good work! Best of luck with the exhaust 
Looking forward to seeing pictures of the final set-up...
Looking forward to seeing pictures of the final set-up...
02-25-2011, 01:28 AM
#58
Members
Join Date: Apr 2008
Location: UK
Posts: 100
Likes: 0
Received 0 Likes
on
0 Posts
My Ride: 2005 E61 525d M-Sport, Titanium Silver, Black Dakota Leather, Media Pack, Sun Protection Glass, M6 Staggered Alloys, ACS Rear Diffuser, EBC Green Stuff Brake Pads, I-Pod Interface. Rear Aux Power DIY, LCI Rear Lights, Extended interior lights - doors and footwells, LED licence plate lights.
 Looks fantastic, excellent work on the compressor relocation and diffuser modification.
 07-12-2011, 10:09 PM
#60
New Members
Thread Starter
Join Date: May 2009
Location: Belgium
Posts: 69
Likes: 0
Received 1 Like
on
1 Post
My Ride: '04 E61 525d
TITANGRAU II METALLIC (A36)
LEDER DAKOTA/BEIGE 3 (LCBA)
SIDE AIRBAG FOR REAR PASSENGERS
ALARM SYSTEM
ROOF RAIL
SUNBLINDS FOR REAR SIDE WINDOWS, MECH
FLOOR MATS, VELOUR
INT/EXT RR VW MIRROR W AUT ANTI-DAZZLE
INTERIOR RR VW MIRROR W AUT ANTI-DAZZLE
WOOD TRIM
CUPHOLDER
SEAT HEATING F DRIVER/FRONT PASSENGER
HEADLIGHT WASHER SYSTEM
PARK DISTANCE CONTROL (PDC)
XENON LIGHT
ADAPTIVE HEADLIGHTS
AUTOMATIC AIR CONDITIONING
CRUISE CONTROL
NAVIGATION SYSTEM PROFESSIONAL
CAR TELEPHONE PROFESSIONAL
CD CHANGER BMW FOR 6 CDS
It's been a wile since I've been here (again) but here is a little update.
The air-compressor is relocated again... to it's factory position...
It seemed that the Remus exhaust for Diesel engines is designed in a totaly different way as the petrol version. The compressor didn't needed to be replaced for mounting the exhaust. I came to this conclusion when I opened the box send by Remus.
The exhaust pipe that runs from left to right runs inside the rear bumper. Remus also states that it wouldn't fit an M-bumper but it does actually. Some modification on some plastic carriers was necessary but now it fits great. It's only a shame that I wasted all that time relocating the compressor when it wasn't needed. But hey, now I can say I did it.
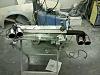
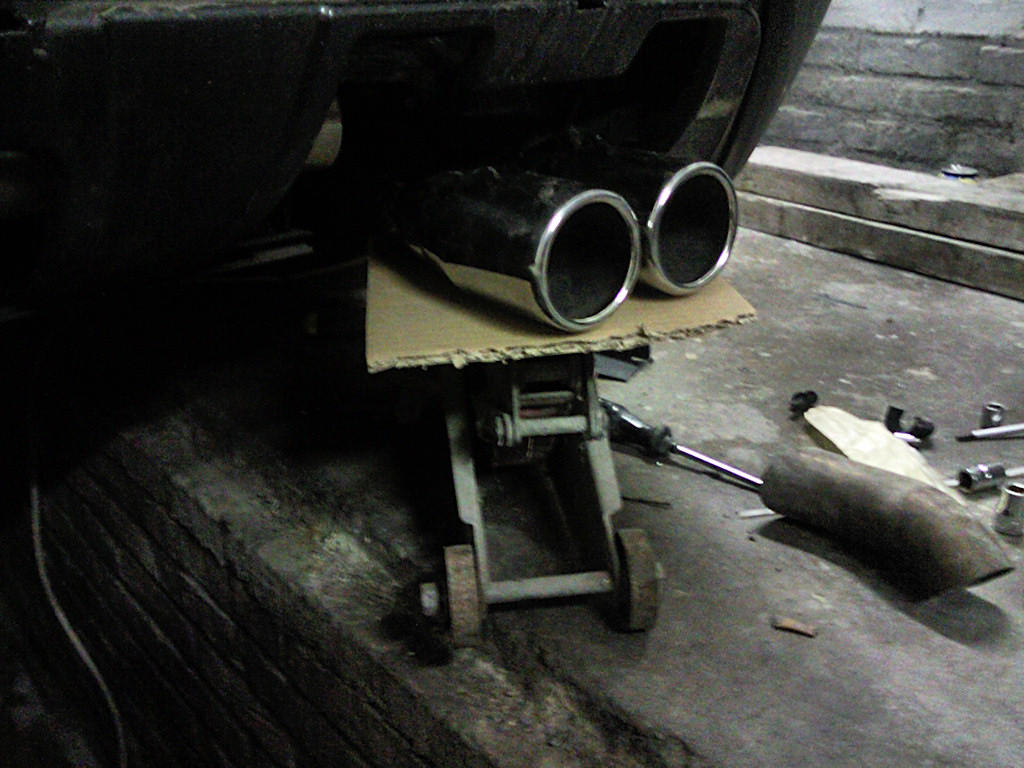
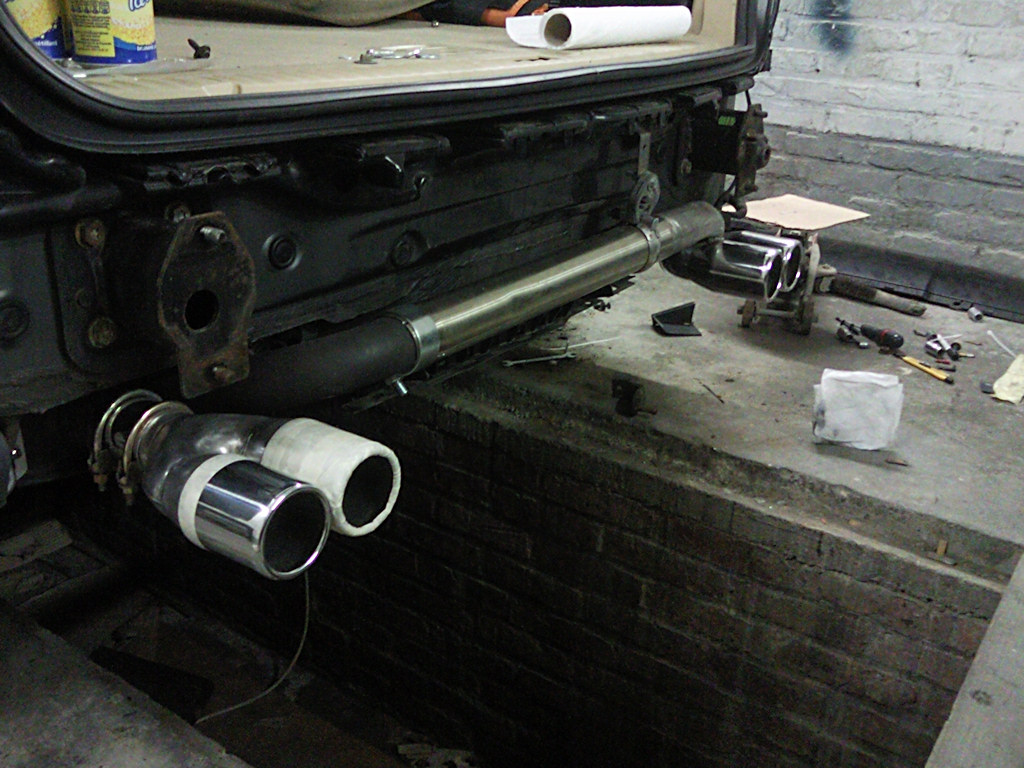
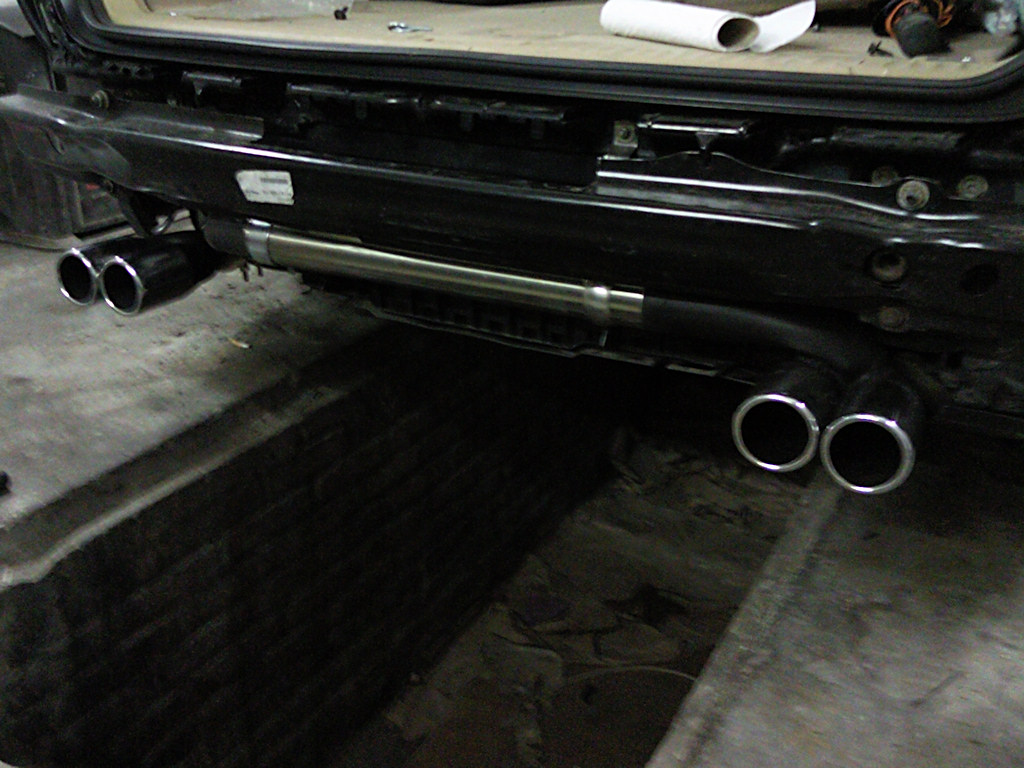
Mounting this type of exhaust was a hassle. Since the design of the muffler is completely different I would have needed the Remus pipe to the right. I didn't order it however. Instead I ordered some universal tips. On the petrol muffler these would have fitted perfectly but on this one however they didn't. To solve this problem I welded a pipe to the right tip that runs behind the bumper to the muffler. It looks pretty easy but lots of measuring and test fitting was required to get a flawless result. In the end everything worked out great.
Here are some pictures from work in progress and the final result:
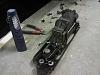
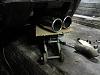
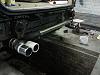
The muffler:

Test fitting the right pipes:
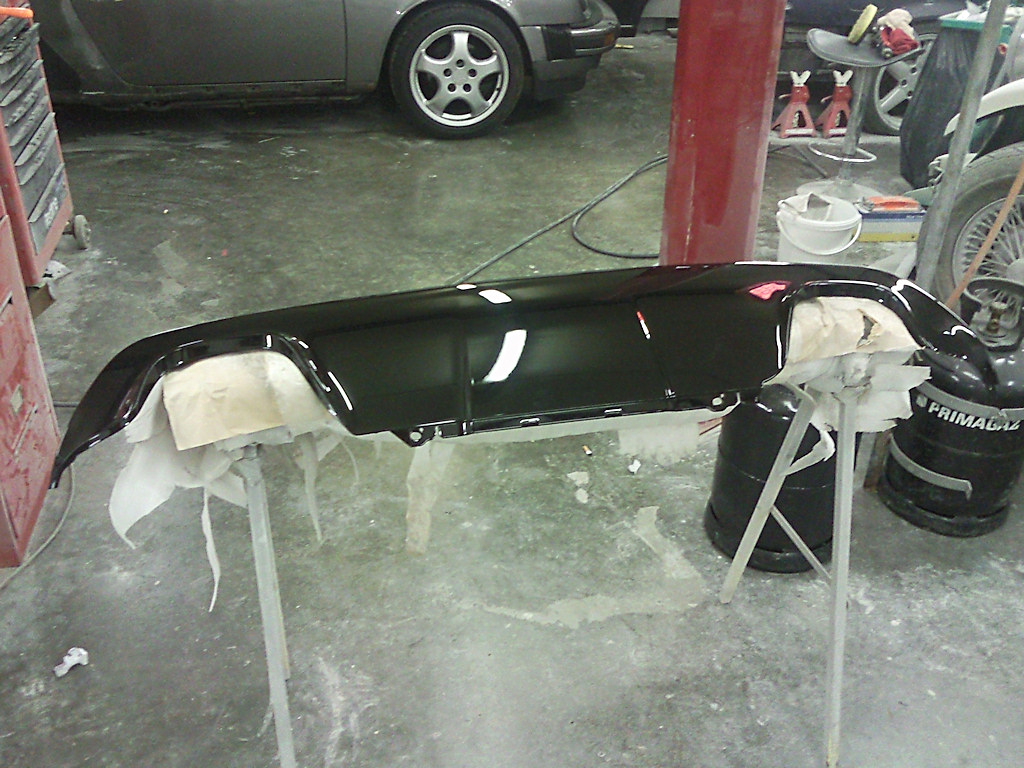
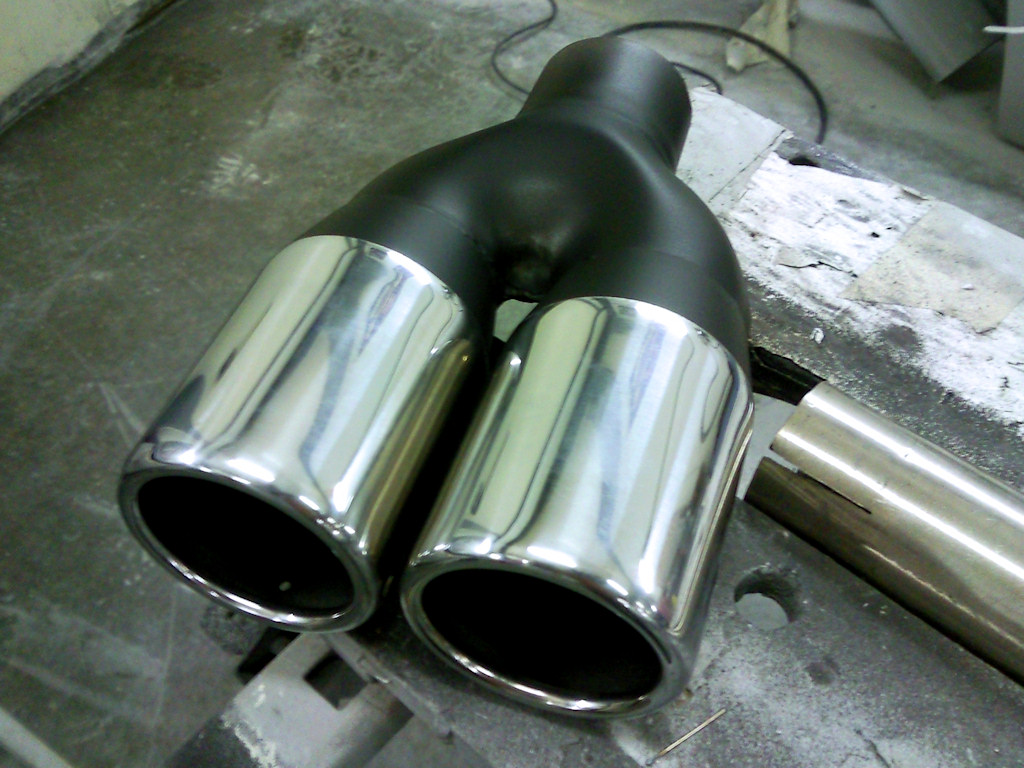
Painted the tips with black heat resistant paint.
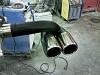
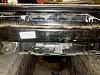
Exhaust completed without the bumper mounted:
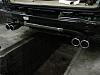
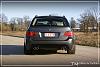
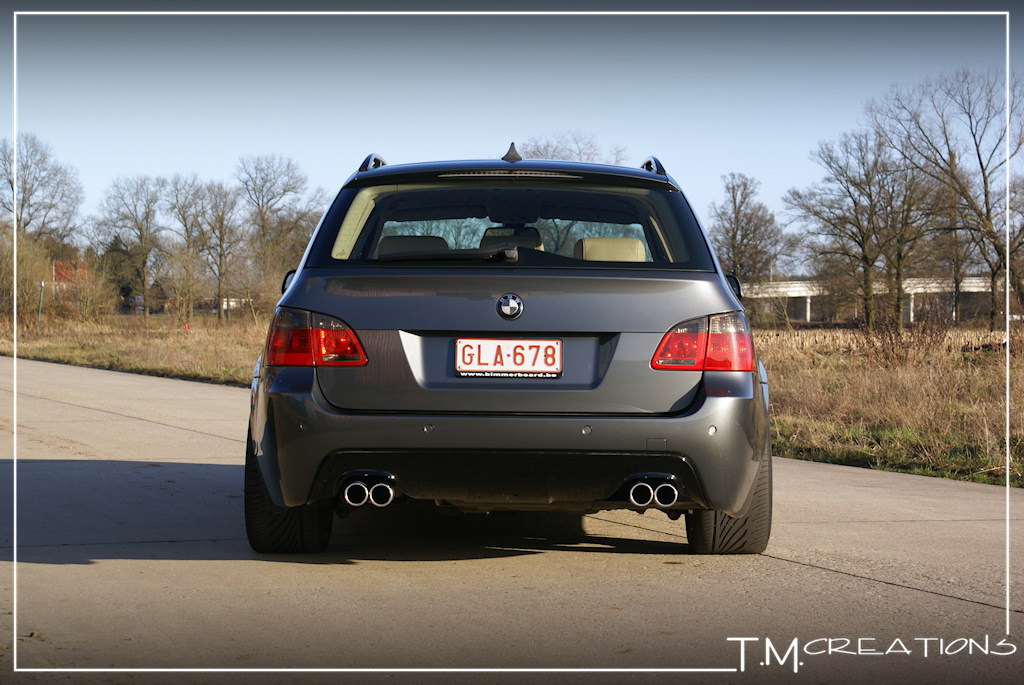
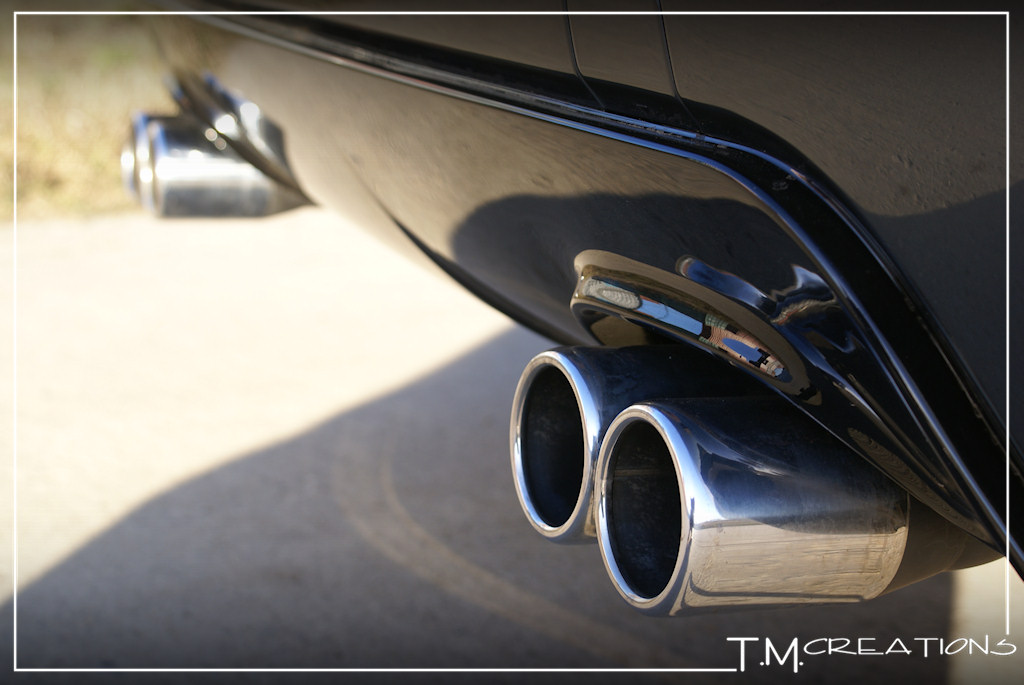
Final result pics:
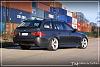
And a soundclip. It isn't very loud but it's a little louder than OEM. It's still a diesel so it doesn't need to be that loud. I'm happy with the way it looks and sounds.
http://www.youtube.com/watch?v=6PJ8YKtAmF0
The air-compressor is relocated again... to it's factory position...
It seemed that the Remus exhaust for Diesel engines is designed in a totaly different way as the petrol version. The compressor didn't needed to be replaced for mounting the exhaust. I came to this conclusion when I opened the box send by Remus.
The exhaust pipe that runs from left to right runs inside the rear bumper. Remus also states that it wouldn't fit an M-bumper but it does actually. Some modification on some plastic carriers was necessary but now it fits great. It's only a shame that I wasted all that time relocating the compressor when it wasn't needed. But hey, now I can say I did it.
Mounting this type of exhaust was a hassle. Since the design of the muffler is completely different I would have needed the Remus pipe to the right. I didn't order it however. Instead I ordered some universal tips. On the petrol muffler these would have fitted perfectly but on this one however they didn't. To solve this problem I welded a pipe to the right tip that runs behind the bumper to the muffler. It looks pretty easy but lots of measuring and test fitting was required to get a flawless result. In the end everything worked out great.
Here are some pictures from work in progress and the final result:
The muffler:

Test fitting the right pipes:
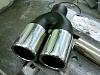
Painted the tips with black heat resistant paint.
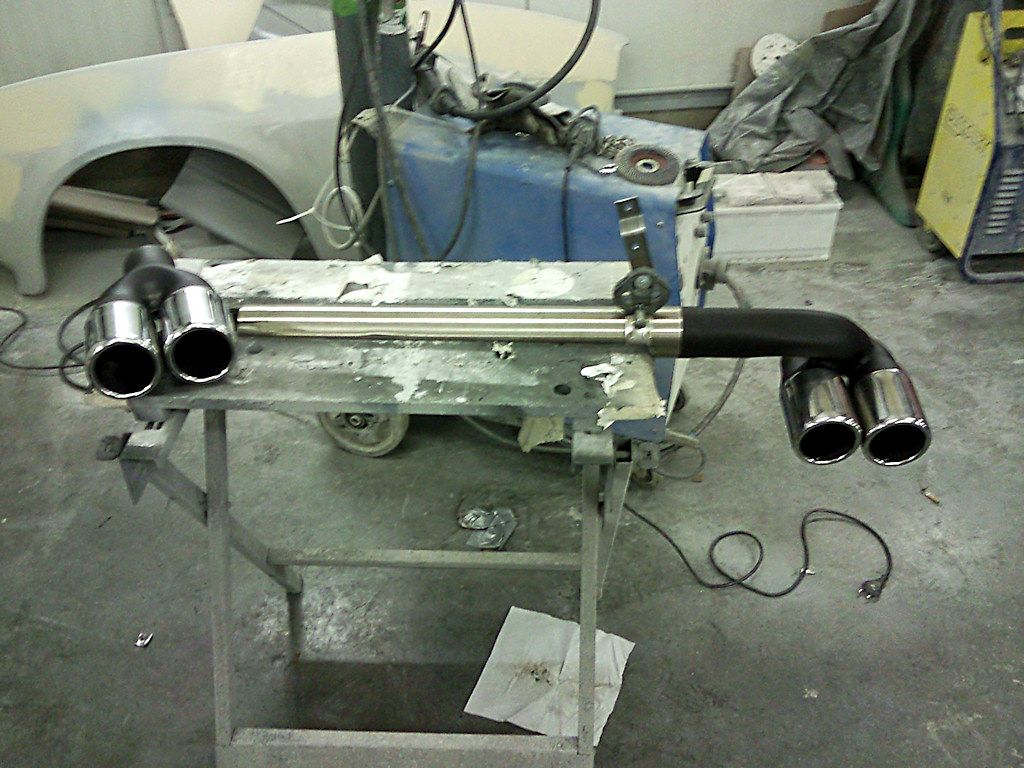

Exhaust completed without the bumper mounted:
Final result pics:

And a soundclip. It isn't very loud but it's a little louder than OEM. It's still a diesel so it doesn't need to be that loud. I'm happy with the way it looks and sounds.
http://www.youtube.com/watch?v=6PJ8YKtAmF0