
'04 545i VAREX X-FORCE Muffler Installation
 09-28-2013 | 04:17 AM
#12

Thread Starter
New Members
Joined: Aug 2013
Posts: 75
Likes: 0
From: South Australia
My Ride: E60 01/04 545i - 19" Alloys
 there is a mid setting that you can choose to get a milder sound, by the looks of it, the motor is just controlled by timing from the control box as there aren't any sensors or switches on the muffler to determine the position of the butterfly mechanism.
I'm going to start the wiring soon, will keep the thread updated with my progress
 10-19-2013 | 08:56 AM
#13
Thread Starter
New Members
Joined: Aug 2013
Posts: 75
Likes: 0
From: South Australia
My Ride: E60 01/04 545i - 19" Alloys
Update on the System:
I had the exhaust installed but the fitter had to weld the bracket a bit lower down as the electronics on top of the muffler got in the way!!! the only way around this would have been to modify the cars muffler mount and I didnt really want that to be done!
I'll post a video of the sound when I'm home next, as well as sound under load and just cruising too I have to admit it sounds better than i thought, with the exhaust valve fully open, and under normal acceleration it sounds like a nice tuned V8 with no resonance or droning, under heavy acceleration it sounds bitey and crisp, again, with no drone
with the exhaust valve fully closed, under normal acceleration it sounds stock, under heavy acceleration it is quiet still, but sounds like there is a slight whine or whistling noise, its hard to tell with all the engine noise.
All in all I'm very happy with the install and being able to control the exhaust volume is a big + in my opinion!
what i didn't do that i wish i had of now, was get a dyno done
maybe if somebody follows in my footsteps they could get a before and after
I'd love to hear all of your opinions on the Varex, after i post the video of course
All the best,
Matt
I had the exhaust installed but the fitter had to weld the bracket a bit lower down as the electronics on top of the muffler got in the way!!! the only way around this would have been to modify the cars muffler mount and I didnt really want that to be done!
I'll post a video of the sound when I'm home next, as well as sound under load and just cruising too
I have to admit it sounds better than i thought, with the exhaust valve fully open, and under normal acceleration it sounds like a nice tuned V8 with no resonance or droning, under heavy acceleration it sounds bitey and crisp, again, with no drone with the exhaust valve fully closed, under normal acceleration it sounds stock, under heavy acceleration it is quiet still, but sounds like there is a slight whine or whistling noise, its hard to tell with all the engine noise.
All in all I'm very happy with the install and being able to control the exhaust volume is a big + in my opinion!
what i didn't do that i wish i had of now, was get a dyno done
maybe if somebody follows in my footsteps they could get a before and after
I'd love to hear all of your opinions on the Varex, after i post the video of course
All the best,
Matt
 10-27-2013 | 11:26 PM
#15

Senior Members
Joined: Apr 2009
Posts: 1,122
Likes: 3
From: Seattle
Update on the System:
I had the exhaust installed but the fitter had to weld the bracket a bit lower down as the electronics on top of the muffler got in the way!!! the only way around this would have been to modify the cars muffler mount and I didnt really want that to be done!
I'll post a video of the sound when I'm home next, as well as sound under load and just cruising too I have to admit it sounds better than i thought, with the exhaust valve fully open, and under normal acceleration it sounds like a nice tuned V8 with no resonance or droning, under heavy acceleration it sounds bitey and crisp, again, with no drone
with the exhaust valve fully closed, under normal acceleration it sounds stock, under heavy acceleration it is quiet still, but sounds like there is a slight whine or whistling noise, its hard to tell with all the engine noise.
All in all I'm very happy with the install and being able to control the exhaust volume is a big + in my opinion!
what i didn't do that i wish i had of now, was get a dyno done
maybe if somebody follows in my footsteps they could get a before and after
I'd love to hear all of your opinions on the Varex, after i post the video of course
All the best,
Matt
I had the exhaust installed but the fitter had to weld the bracket a bit lower down as the electronics on top of the muffler got in the way!!! the only way around this would have been to modify the cars muffler mount and I didnt really want that to be done!
I'll post a video of the sound when I'm home next, as well as sound under load and just cruising too
I have to admit it sounds better than i thought, with the exhaust valve fully open, and under normal acceleration it sounds like a nice tuned V8 with no resonance or droning, under heavy acceleration it sounds bitey and crisp, again, with no drone with the exhaust valve fully closed, under normal acceleration it sounds stock, under heavy acceleration it is quiet still, but sounds like there is a slight whine or whistling noise, its hard to tell with all the engine noise.
All in all I'm very happy with the install and being able to control the exhaust volume is a big + in my opinion!
what i didn't do that i wish i had of now, was get a dyno done
maybe if somebody follows in my footsteps they could get a before and after
I'd love to hear all of your opinions on the Varex, after i post the video of course
All the best,
Matt
Do a search for 'the truth on quad exhaust' or something like that on the forum. All the parts and install photos can be found there. Many members on the forum are using the same system. It's basically a mix of three mufflers. One X pipe muffler and two magnapacks. All magnaflow parts.
10-28-2013 | 08:32 PM
#16

Contributors
Joined: Jan 2009
Posts: 948
Likes: 1
From: Sin City
My Ride: Jet Black '05 545i, Sport/Premium Pkg, Steptronic, Adaptive Xenon, Nav, L7, Blue2th, PDC,
Excellent work. Congratulations on the new system. Look forward to checking out the video.
Do a search for 'the truth on quad exhaust' or something like that on the forum. All the parts and install photos can be found there. Many members on the forum are using the same system. It's basically a mix of three mufflers. One X pipe muffler and two magnapacks. All magnaflow parts.
Do a search for 'the truth on quad exhaust' or something like that on the forum. All the parts and install photos can be found there. Many members on the forum are using the same system. It's basically a mix of three mufflers. One X pipe muffler and two magnapacks. All magnaflow parts.
https://5series.net/forums/e60-parts...fiction-98557/
It inspired me to overhaul my exhaust system, and been very pleased ever since.
 05-18-2015 | 06:57 PM
#17
Thread Starter
New Members
Joined: Aug 2013
Posts: 75
Likes: 0
From: South Australia
My Ride: E60 01/04 545i - 19" Alloys
Sorry for the very very VERY delayed update on this thread:
After having it installed I wired it in and took photos as I went I'm still yet to take a video of the exhaust, I wasn't happy with the sound quality of the videos I did take and none of them gave the muffler justice.
Here is the step by step of the wiring:
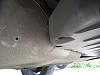
1. Drill a Small hole large enough to fit a small grommet or gland and the cable through into the spare wheel tub. I used a tight fitting 6mm grommet to seal the cable and the spare wheel tub so no water can get in. When drilling make sure to remove the tyre and drill from the inside of the Tub, to avoid drilling through the tyre and any cabling!
2. Use a small flat head screwdriver to release the pins in the two pin connector that connects into the RF module and connects to the exhaust. Take note of the polarity of the cable in the connector. Doing this will allow you to push just the pins and cable through the grommet and much smaller hole than if you left the cable in the connector.
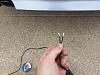
3. push the cables through the hole from the outside, push the cables through the grommet and then use a small flat head screwdriver or knife to bend the pin clips back out so they lock into the connector again, then connect the connector.

4. In the foam insert under the spare tyre, there should be space to put the RF receiver and tuck the cabling in there, next to the PDC. Use cable ties to tidy up the cabling to keep the cable off the exhaust especially, I used one of the unused exhaust mounting brackets to cable tie mine to..
5. Run the power cable around the foam and under the carpeting to the battery compartment, then connect directly to the battery using a 10A fuse. I didn't take any photos of this as it was getting a bit dark after the install. I tested the Idle current of the receiver and it was under 14mA, which wound drain your battery unless you don't drive the car for a long time.
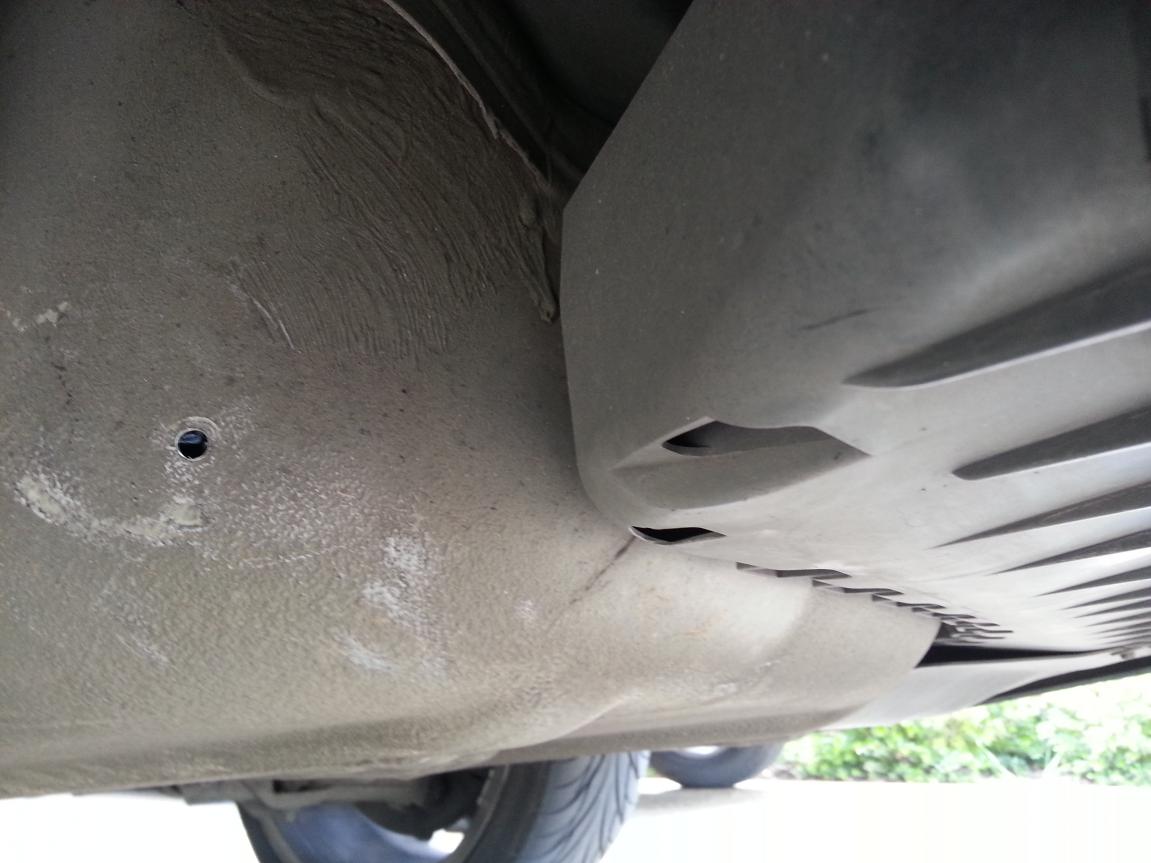
6. make sure to plug the tube that was connected to the old muffler with a golf tee or something similar. It is the tube used to open the second muffler section at higher speeds and is controlled by vacuum, the car surges and shows an error if this isn't plugged.
6. test it works!
7. enjoy the controllable exhaust I know I sure do! I've had it installed for a while now, a year and a half approx. and it is still working a treat!
After having it installed I wired it in and took photos as I went
I'm still yet to take a video of the exhaust, I wasn't happy with the sound quality of the videos I did take and none of them gave the muffler justice.Here is the step by step of the wiring:
1. Drill a Small hole large enough to fit a small grommet or gland and the cable through into the spare wheel tub. I used a tight fitting 6mm grommet to seal the cable and the spare wheel tub so no water can get in. When drilling make sure to remove the tyre and drill from the inside of the Tub, to avoid drilling through the tyre and any cabling!
2. Use a small flat head screwdriver to release the pins in the two pin connector that connects into the RF module and connects to the exhaust. Take note of the polarity of the cable in the connector. Doing this will allow you to push just the pins and cable through the grommet and much smaller hole than if you left the cable in the connector.

3. push the cables through the hole from the outside, push the cables through the grommet and then use a small flat head screwdriver or knife to bend the pin clips back out so they lock into the connector again, then connect the connector.

4. In the foam insert under the spare tyre, there should be space to put the RF receiver and tuck the cabling in there, next to the PDC. Use cable ties to tidy up the cabling to keep the cable off the exhaust especially, I used one of the unused exhaust mounting brackets to cable tie mine to..
5. Run the power cable around the foam and under the carpeting to the battery compartment, then connect directly to the battery using a 10A fuse. I didn't take any photos of this as it was getting a bit dark after the install. I tested the Idle current of the receiver and it was under 14mA, which wound drain your battery unless you don't drive the car for a long time.
6. make sure to plug the tube that was connected to the old muffler with a golf tee or something similar. It is the tube used to open the second muffler section at higher speeds and is controlled by vacuum, the car surges and shows an error if this isn't plugged.
6. test it works!
7. enjoy the controllable exhaust
I know I sure do! I've had it installed for a while now, a year and a half approx. and it is still working a treat!

Thread
Thread Starter
Forum
Replies
Last Post
UltimatePeter
DIY: Do It Yourself
5
09-28-2015 09:12 AM