rear foglight activation
 11-29-2011, 08:09 PM
#11
Members
Thread Starter

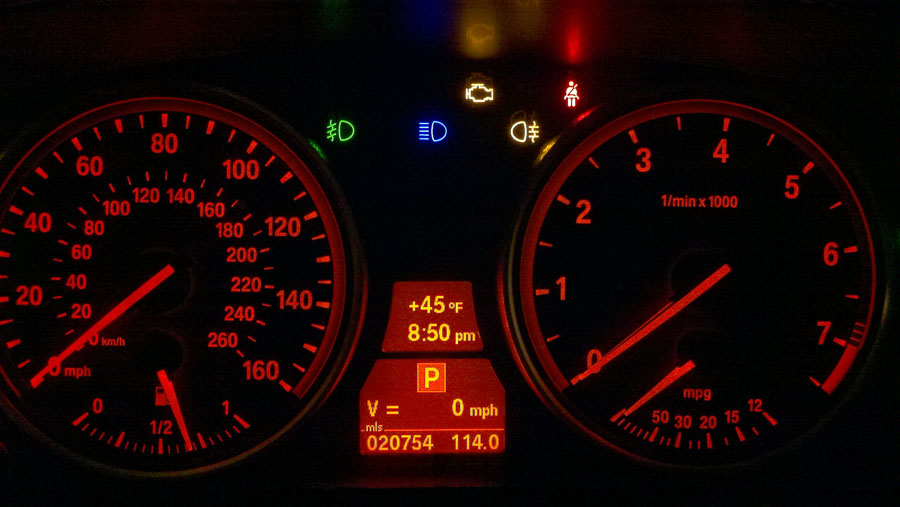
Got the rear fogs activated. No coding required. All you have to do is run a wire from position 9 on the headlight switch wiring harness to position 33 on the LCM. [url="http://wds.spaghetticoder.org/en/svg/sp/SP0000025822.svg?m=e60"]
Need Euro headlight switch (Has a button for the rear fog light), some wire, and 2 pin connectors. BMW part # 61130006663. [url="http://realoem.com/bmw/showphoto.do?id=61130006663"]
Step 1: I soldered the pin connectors to some 18g wire I had laying around the house. Total length about 36 inches.
Step 2: Remove the pedal trim panel in the driver's foot well. The trim panel has a light and speaker that need to be disconnected to free up the panel. [url="http://tis.spaghetticoder.org/s/view.pl?1/08/63/52"]
There are 5 screws holding this panel in place. 4 screws are obvious; the 5th one is hidden behind a carpeted trim piece along the driver's side of the center console. Wedge a flat screwdriver between the plastic and carpeted trim piece and rotate the screwdriver to push the carpeted strip backwards to expose the screw.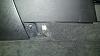
Step 3: Remove the original headlight switch by gently prying out and disconnect the wiring harness. This harness has to be disassembled by inserting a small flat screwdriver into this slot to expose the pin connectors.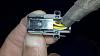
Step 4: Identify position 9 on the headlight switch wiring harness and insert one end of your spliced wire connector. It is a perfect fit.
Step 5: Carefully route the other end of your spliced wire connector through dashboard to the LCM in the footwell.
Step 6: Remove the LCM. [url="http://tis.spaghetticoder.org/s/view.pl?1/08/63/66"]
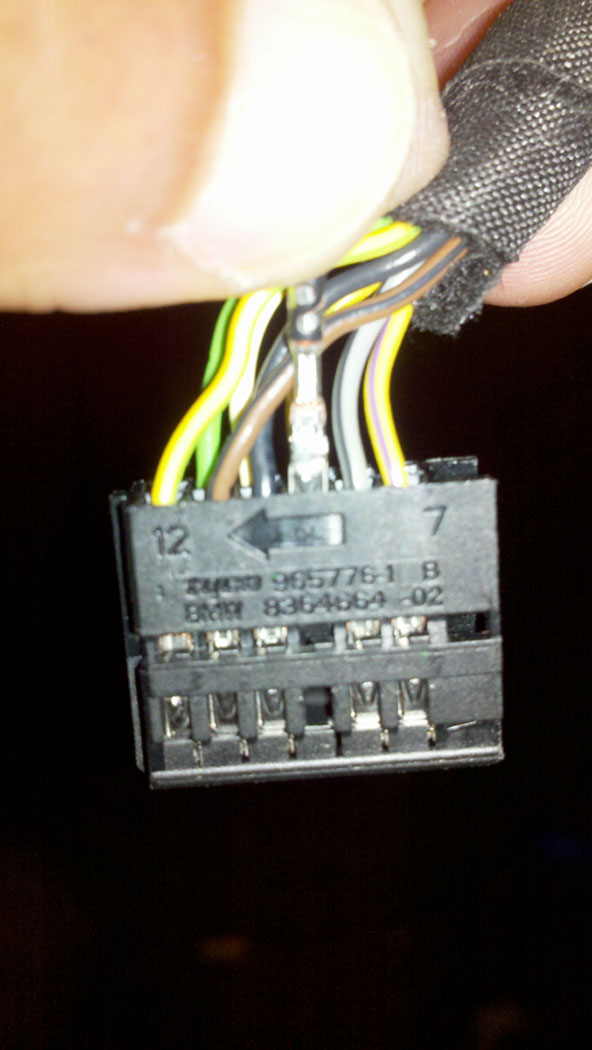
Step 7: Disassemble the LCM wiring harness. There is a blue and brown subassembly. Identify position 33 on the blue subassembly and insert the other end of your spliced wire connector.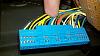 The connector I bought is not quite right; it has a little flange that you will have to fold over with a pair of pliers. It locks in securely despite this modification. Finally reassemble the LCM wiring harness and reinstall the LCM.
Step 8: Secure the wire to avoid rattles and reassemble the trim panel and install the Euro headlight switch after reassembling the wiring harness.
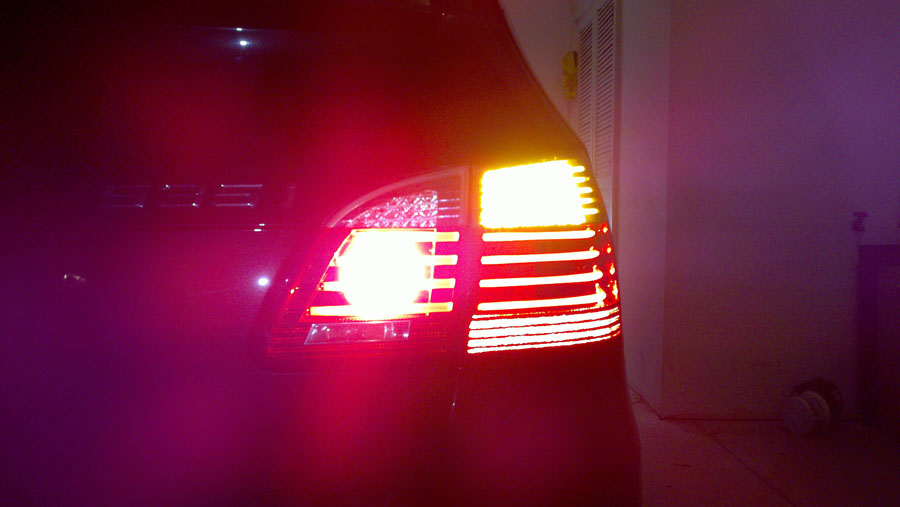
Step 9: Enjoy your results!!!


Need Euro headlight switch (Has a button for the rear fog light), some wire, and 2 pin connectors. BMW part # 61130006663. [url="http://realoem.com/bmw/showphoto.do?id=61130006663"]
Step 1: I soldered the pin connectors to some 18g wire I had laying around the house. Total length about 36 inches.

Step 2: Remove the pedal trim panel in the driver's foot well. The trim panel has a light and speaker that need to be disconnected to free up the panel. [url="http://tis.spaghetticoder.org/s/view.pl?1/08/63/52"]
There are 5 screws holding this panel in place. 4 screws are obvious; the 5th one is hidden behind a carpeted trim piece along the driver's side of the center console. Wedge a flat screwdriver between the plastic and carpeted trim piece and rotate the screwdriver to push the carpeted strip backwards to expose the screw.

Step 3: Remove the original headlight switch by gently prying out and disconnect the wiring harness. This harness has to be disassembled by inserting a small flat screwdriver into this slot to expose the pin connectors.

Step 4: Identify position 9 on the headlight switch wiring harness and insert one end of your spliced wire connector. It is a perfect fit.
Step 5: Carefully route the other end of your spliced wire connector through dashboard to the LCM in the footwell.
Step 6: Remove the LCM. [url="http://tis.spaghetticoder.org/s/view.pl?1/08/63/66"]
Step 7: Disassemble the LCM wiring harness. There is a blue and brown subassembly. Identify position 33 on the blue subassembly and insert the other end of your spliced wire connector.
 The connector I bought is not quite right; it has a little flange that you will have to fold over with a pair of pliers. It locks in securely despite this modification. Finally reassemble the LCM wiring harness and reinstall the LCM.
Step 8: Secure the wire to avoid rattles and reassemble the trim panel and install the Euro headlight switch after reassembling the wiring harness.
Step 9: Enjoy your results!!!

The following users liked this post:
pavjayt (08-03-2022)
11-30-2011, 06:25 AM
#12
Members

Join Date: Dec 2008
Location: St. Louis Mo
Posts: 105
Likes: 0
Received 0 Likes
on
0 Posts
My Ride: '04 530. Black on Black
Black Grills
Tint
Ipod Retrofit June '10
Now that is what I am talking bout!!!
This is now back on top of my list of things to do this winter to the car. Can ya grab some shots of the whole rear end of the car with the fogs on please.
Off to ebay to find the switch as cheap as I can.
This is now back on top of my list of things to do this winter to the car. Can ya grab some shots of the whole rear end of the car with the fogs on please.
Off to ebay to find the switch as cheap as I can.
11-30-2011, 11:38 AM
#13
Senior Members
Join Date: Mar 2007
Location: Los Angeles
Posts: 479
Likes: 0
Received 0 Likes
on
0 Posts
My Ride: 2008 550I,Space Grey,Hud,Cold Weather,M - Sport, matched GP Thunder headlights and Fogs,,Smoked Badges, Night Vision, Heated Seats,Rear Sunshades, Aux Audio, SAT, NAV, Black Grills, Sprint Booster, Dinan Cold Air, Stage 2 Dinan Software.....More to come soon
Let us now if you had any luck finding the switch!!!!
11-30-2011, 05:08 PM
#14
Members
Senior Members
Join Date: Sep 2006
Location: Omaha, NE - USA
Posts: 3,238
Likes: 0
Received 1 Like
on
1 Post
My Ride: MY07 525xi Silver Gray
Model Year: 2007
Well done OP!  ... there's nothin' beat the OEM retrofit like the OP did.
Can you also post up the pic of the replacement Euro headlight switch too ... tkx!
Alternatively ... due to the Euro headlight switch availability and/or cost you can do:
1) Hard wired pin #33 (rear fog) w/ pin #34 (front fog) together on the LCM plug so when you turn on the fog both front & rear lit up together. I've been using it this way for a long time as I only turn my fogs on during inclement weather.
2) Add you own switch to the alternative #1 above so you have more control for the rear fog in case you like to use the front fog independently.
... of course if you feel adventurous ... GL!
GL!
... there's nothin' beat the OEM retrofit like the OP did.Can you also post up the pic of the replacement Euro headlight switch too ... tkx!
Alternatively ... due to the Euro headlight switch availability and/or cost you can do:
1) Hard wired pin #33 (rear fog) w/ pin #34 (front fog) together on the LCM plug so when you turn on the fog both front & rear lit up together. I've been using it this way for a long time as I only turn my fogs on during inclement weather.
2) Add you own switch to the alternative #1 above so you have more control for the rear fog in case you like to use the front fog independently.
... of course if you feel adventurous ...
GL!
11-30-2011, 06:15 PM
#15
Members
Join Date: Dec 2008
Location: St. Louis Mo
Posts: 105
Likes: 0
Received 0 Likes
on
0 Posts
My Ride: '04 530. Black on Black
Black Grills
Tint
Ipod Retrofit June '10
Well done OP! ... there's nothin' beat the OEM retrofit like the OP did.
Can you also post up the pic of the replacement Euro headlight switch too ... tkx!
Alternatively ... due to the Euro headlight switch availability and/or cost you can do:
1) Hard wired pin #33 (rear fog) w/ pin #34 (front fog) together on the LCM plug so when you turn on the fog both front & rear lit up together. I've been using it this way for a long time as I only turn my fogs on during inclement weather.
2) Add you own switch to the alternative #1 above so you have more control for the rear fog in case you like to use the front fog independently.
... of course if you feel adventurous ... GL!
... there's nothin' beat the OEM retrofit like the OP did.Can you also post up the pic of the replacement Euro headlight switch too ... tkx!
Alternatively ... due to the Euro headlight switch availability and/or cost you can do:
1) Hard wired pin #33 (rear fog) w/ pin #34 (front fog) together on the LCM plug so when you turn on the fog both front & rear lit up together. I've been using it this way for a long time as I only turn my fogs on during inclement weather.
2) Add you own switch to the alternative #1 above so you have more control for the rear fog in case you like to use the front fog independently.
... of course if you feel adventurous ...
GL!
12-01-2011, 05:23 AM
#16
Contributors
Join Date: Jul 2007
Location: Saint Louis, Missouri, USA
Posts: 1,100
Likes: 0
Received 1 Like
on
1 Post
My Ride: 2010 535i M Sport 6MT
Model Year: 2010

From: BMW TIS - 61 35 285 Removing and installing (replacing) light module
12-01-2011, 05:26 AM
#17
Members
Thread Starter
Here's a link to a picture of the euro switch. They want $160.
http://euroactiveparts.com/bmw-oem-e...ontrol-switch/
I got mine from a scrap yard for 80euros when on vacation in Europe last summer. Could try ebay.de for a similar deal.
http://euroactiveparts.com/bmw-oem-e...ontrol-switch/
I got mine from a scrap yard for 80euros when on vacation in Europe last summer. Could try ebay.de for a similar deal.
12-01-2011, 07:35 AM
#18
Members
Senior Members
Join Date: Sep 2006
Location: Omaha, NE - USA
Posts: 3,238
Likes: 0
Received 1 Like
on
1 Post
My Ride: MY07 525xi Silver Gray
Model Year: 2007
Hey Victor,
Yes that's the LCM module (upper left driver footrest) ... what you need is find a compatible wired plug to insert into slot #33 of the LCM blue plug (like on pic #7) then use some sort of wire tap-in to splice into wire that goes to pin #34 ... just make sure you do the tapping outside the white wire loom cover 'cuz not enough room inside it. When the time come you can either undo the wire tap to pin #34 and just extend the wire from pin #33 to the headlight switch or replace the tap w/ you own switch.
GL!
I like (1). Same for the E60 LCI and pre-LCI? Is this the LCM plug you are referring to (item 1)? Can you offer details on the actual method of connecting a jumper wire to pins 33 and 34?
From: BMW TIS - 61 35 285 Removing and installing (replacing) light module
From: BMW TIS - 61 35 285 Removing and installing (replacing) light module
12-01-2011, 07:44 AM
#19
Members
Join Date: Dec 2008
Location: St. Louis Mo
Posts: 105
Likes: 0
Received 0 Likes
on
0 Posts
My Ride: '04 530. Black on Black
Black Grills
Tint
Ipod Retrofit June '10
OffT~VKhong another StLer are you by chance going to the STLBMWCCA cars and coffee the 17th?
OnT That was going to be my next question, is it best to tap inside or outside the big white loom. Looks like the car is having some minor surgery this weekend. I have all the parts I need.
As to the switch. I have contacted some junkyards in Sweden about some of their online sales. They want about 70 US to get a switch to me. I am going to see what I can do about getting more this way.
12-01-2011, 07:52 AM
#20
Members
Join Date: Dec 2008
Location: St. Louis Mo
Posts: 105
Likes: 0
Received 0 Likes
on
0 Posts
My Ride: '04 530. Black on Black
Black Grills
Tint
Ipod Retrofit June '10
Here's a link to a picture of the euro switch. They want $160.
http://euroactiveparts.com/bmw-oem-e...ontrol-switch/
I got mine from a scrap yard for 80euros when on vacation in Europe last summer. Could try ebay.de for a similar deal.
http://euroactiveparts.com/bmw-oem-e...ontrol-switch/
I got mine from a scrap yard for 80euros when on vacation in Europe last summer. Could try ebay.de for a similar deal.