
DIY: Shocks install

Contributors
Joined: Apr 2008
Posts: 2,596
Likes: 0
From: New Jersey
My Ride: '05 545 Titanium Silver, Black Leather - Nav, Logic 7, Cold weather.
Mods:
Carbon filter removed.
M5 iDrive knob.
Umnitza license plate LEDs.
MP3
40% 3M tint
ACS Anti-Roll(sway) bars
RPI Scoop
G-tech Pro RR
CF Roundels
CF Wheel caps
I only did the rear driver side shock install. The passenger side will be harder according to Allen (e60_lab_rat) because of the fuel lines.
I guess I'll find out tomorrow.
I guess I'll find out tomorrow.
Thread Starter
Contributors
Joined: May 2004
Posts: 2,863
Likes: 1
From: SoCal San Diego
My Ride: 545i Sport
Model Year: 2004
Engine: N62
Rear Shock (Right side) Install
Allen was right! There is this plastic piping(Vent Pipe) from the gas filler.

1. Chock the front wheel and raise the rear wheel off the ground. Remove the wheels. I placed another 2Ton jack under the differential housing forward of the cooling fins for added safety.

2. Remove the lower shock mounting bolt(18mm).
3. Access the upper shock mount by removing the side trunk trim panels. Remove the 3 (13mm) upper shock mount nuts.
4. Remove Wheel well liner plastic nut and a few screws. The secret is being able to pull the liner out of the way for the shock to come out.
Screw the wheel bolts so you can step on them and push down with all your body weight (I'm not kidding)
5. Continue with instruction 5 from Post #30.
There it is folks. The ride is much more enjoyable, the way the ultimate driving machine should be

 .
.
Allen was right! There is this plastic piping(Vent Pipe) from the gas filler.
1. Chock the front wheel and raise the rear wheel off the ground. Remove the wheels. I placed another 2Ton jack under the differential housing forward of the cooling fins for added safety.
2. Remove the lower shock mounting bolt(18mm).
3. Access the upper shock mount by removing the side trunk trim panels. Remove the 3 (13mm) upper shock mount nuts.
4. Remove Wheel well liner plastic nut and a few screws. The secret is being able to pull the liner out of the way for the shock to come out.
Screw the wheel bolts so you can step on them and push down with all your body weight (I'm not kidding)
5. Continue with instruction 5 from Post #30.
There it is folks. The ride is much more enjoyable, the way the ultimate driving machine should be
.
Contributors
Joined: Apr 2008
Posts: 2,596
Likes: 0
From: New Jersey
My Ride: '05 545 Titanium Silver, Black Leather - Nav, Logic 7, Cold weather.
Mods:
Carbon filter removed.
M5 iDrive knob.
Umnitza license plate LEDs.
MP3
40% 3M tint
ACS Anti-Roll(sway) bars
RPI Scoop
G-tech Pro RR
CF Roundels
CF Wheel caps
Great DIY! Any more detailed feedback on how the ride compares on the m-sport over sport setup?

Contributors
Joined: Jan 2009
Posts: 948
Likes: 1
From: Sin City
My Ride: Jet Black '05 545i, Sport/Premium Pkg, Steptronic, Adaptive Xenon, Nav, L7, Blue2th, PDC,
Great job on this DIY and the R&R on the M sport shocks and springs (love your sig - now the diff?  ) . Don't it feel great accomplishing this? Well, maybe mentally but physically it'll take a couple of days to recoup right?! haha
Now sit back, (floor it!) and enjoy your ride brotha.
Congrats Joe!
) . Don't it feel great accomplishing this? Well, maybe mentally but physically it'll take a couple of days to recoup right?! haha Now sit back, (floor it!) and enjoy your ride brotha.
Congrats Joe!

Members
Joined: Nov 2008
Posts: 80
Likes: 0
My Ride: 2009 535xi, short shifter, no CDV
I am glad that our e60 can remove top rear shock mount from trunk. I recall hours I spend to figure out how to remove the rear seat and back dash cover, then speaker to get it in my previous e39.
2 to 3 years later after mine hit 50K miles, I might do the job as well in my xi. I hope by that time, we will have more selection for xi folks.
2 to 3 years later after mine hit 50K miles, I might do the job as well in my xi. I hope by that time, we will have more selection for xi folks.
Originally Posted by Rizbel' post='1010835' date='Sep 18 2009, 12:10 AM
Rear Shocks Install
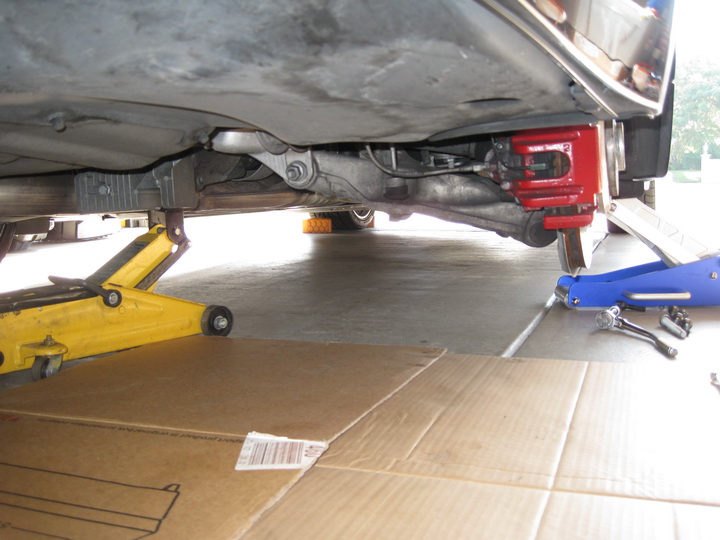
1. Chock the front wheel and raise the rear wheel off the ground. Remove the wheels. I placed another 2Ton jack under the differential housing forward of the cooling fins for added safety.
Attachment 90421
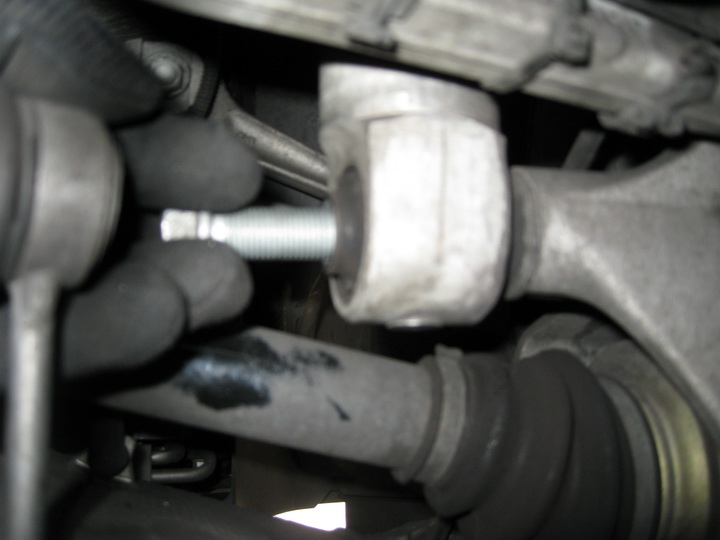
2. Remove the lower shock mounting bolt(18mm).
3. Access the upper shock mount by removing the side trunk trim panels. Remove the 3 (13mm) upper shock mount nuts.
Attachment 90422
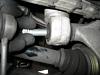
4. Remove liner plastic nut.
Attachment 90423
Pull the strut out of the liner and out of the wheel well.
Attachment 90425
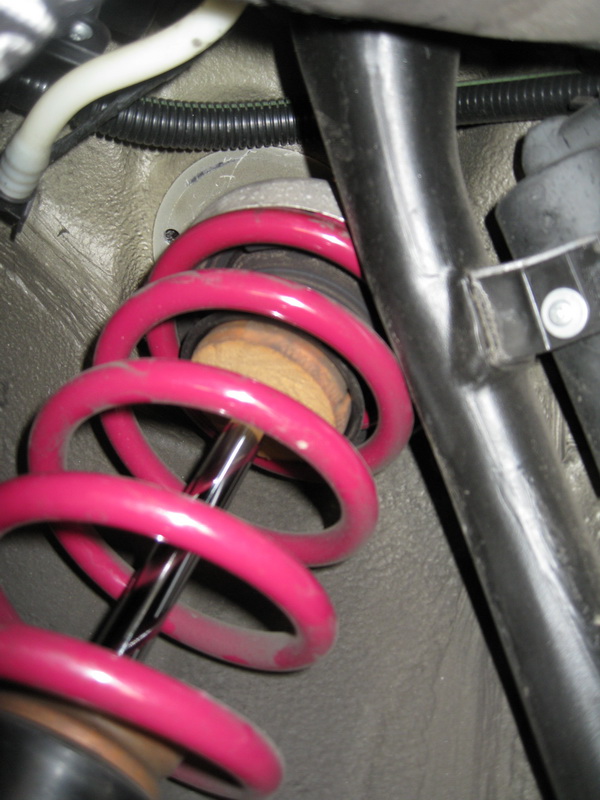
5. Using a spring compressor, compress the spring and remove the upper shock-to-mount nut (10) and disassemble the Spring pads(upper 6 and lower 3), upper mount plate (9), mount(7), lower mount washer(5), compression absorber and dust tube(4) from the shock.
Attachment 90424
6. Assemble all of the parts from step 5 onto the new shock.
7. Install the shock assembly in the reverse procedure from removal. Install the trunk trim panels.
Install the wheels and lower the vehicle.
Note:
I only did the rear driver side shock install. The passenger side will be harder according to Allen (e60_lab_rat) because of the fuel lines.
I guess I'll find out tomorrow.
1. Chock the front wheel and raise the rear wheel off the ground. Remove the wheels. I placed another 2Ton jack under the differential housing forward of the cooling fins for added safety.
Attachment 90421
2. Remove the lower shock mounting bolt(18mm).
3. Access the upper shock mount by removing the side trunk trim panels. Remove the 3 (13mm) upper shock mount nuts.
Attachment 90422
4. Remove liner plastic nut.
Attachment 90423
Pull the strut out of the liner and out of the wheel well.
Attachment 90425
5. Using a spring compressor, compress the spring and remove the upper shock-to-mount nut (10) and disassemble the Spring pads(upper 6 and lower 3), upper mount plate (9), mount(7), lower mount washer(5), compression absorber and dust tube(4) from the shock.
Attachment 90424
6. Assemble all of the parts from step 5 onto the new shock.
7. Install the shock assembly in the reverse procedure from removal. Install the trunk trim panels.
Install the wheels and lower the vehicle.
Note:
I only did the rear driver side shock install. The passenger side will be harder according to Allen (e60_lab_rat) because of the fuel lines.
I guess I'll find out tomorrow.

Thread Starter
Contributors
Joined: May 2004
Posts: 2,863
Likes: 1
From: SoCal San Diego
My Ride: 545i Sport
Model Year: 2004
Engine: N62
Originally Posted by suthurnbimmur' post='1016785' date='Sep 25 2009, 08:35 AM
GREAT write up and thanks again!! Do you have to torque the bolts when putting back on? thanks.
Front upper strut mount nuts 34 Nm (25 Lb-Ft)
Front 16 mm bolt 59 Nm (44 Lb-Ft)
Front 18 mm nut 65 Nm (48 Lb-Ft)
Rear Shock to Wheel carrier mounting bolt 165 Nm (122 Lb-Ft)
Rear upper shock mount nuts 28 Nm (21 Lb-Ft)
Rear shock nut to piston rod 27 Nm (20 Lb-Ft)
I'll re-torque again after few hundred miles.
Contributors
Joined: Jan 2008
Posts: 1,212
Likes: 0
From: Miami
My Ride: 05 545/6
Originally Posted by Rizbel' post='1017178' date='Sep 25 2009, 07:26 PM
Front shock nut to piston rod 64 Nm (47 Lb-Ft)
Front upper strut mount nuts 34 Nm (25 Lb-Ft)
Front 16 mm bolt 59 Nm (44 Lb-Ft)
Front 18 mm nut 65 Nm (48 Lb-Ft)
Rear Shock to Wheel carrier mounting bolt 165 Nm (122 Lb-Ft)
Rear upper shock mount nuts 28 Nm (21 Lb-Ft)
Rear shock nut to piston rod 27 Nm (20 Lb-Ft)
I'll re-torque again after few hundred miles.
Thread Starter
Contributors
Joined: May 2004
Posts: 2,863
Likes: 1
From: SoCal San Diego
My Ride: 545i Sport
Model Year: 2004
Engine: N62
Originally Posted by 545felix' post='1038356' date='Oct 22 2009, 11:58 AM
any difference in ride height?