
DIY: shadowline with plasti-dip on E60

Thread Starter
Members
Senior Members
Joined: Sep 2011
Posts: 476
Likes: 1
From: so cal
My Ride: coilvers retrofits
Model Year: 2001 and 2011
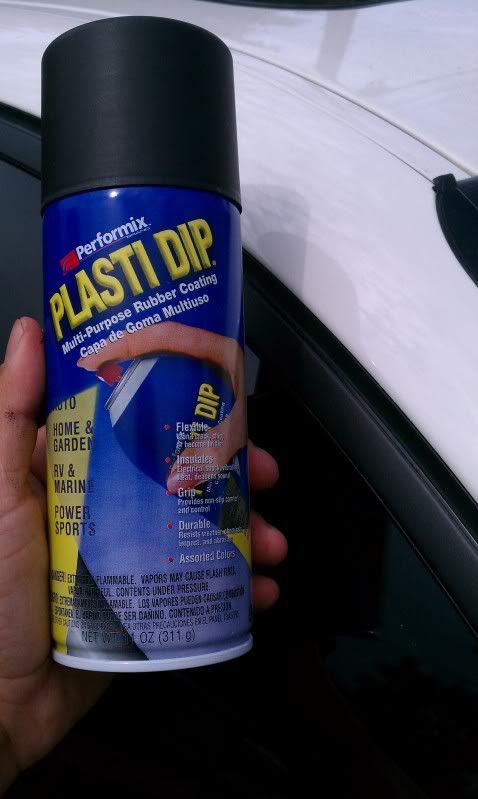
alright so ive been wanting to get rid of my chrome trim since i got my car. now i was searching online for different things i could try. i had options of either taking it off and painting them which i didnt want to do in risk of bending the trim and having gaps between the seals. i could buy painted ones from the dealer, but that would cost some money that could go towards other mods. then i thought about vinyl wraping them, but the thought of cutting slits and trying to get them even and dealing with a razor and heat gun squeegee all the same time seemed kind of hard. then i saw post about someone using plasti-dip its this spray that sprays on like rubber, from going to different forums of people using this stuff on wheels and grilled, it actually last a very long time, and is car wash safe. best part, it is 100% reversible. it actually peals off when you want it to. i figured it couldn't hurt to try this stuff. so i woke up early this morning and headed to lowes to buy a can of this stuff and some tape. after about an hour, im happy with the results and it wasnt even that hard.
things you will need:
can of plasti-dip (5.49)
roll of painters tape (4.99)
new sharp razor blade (had one already)
magazine or newspaper or any paper to use to mask off.
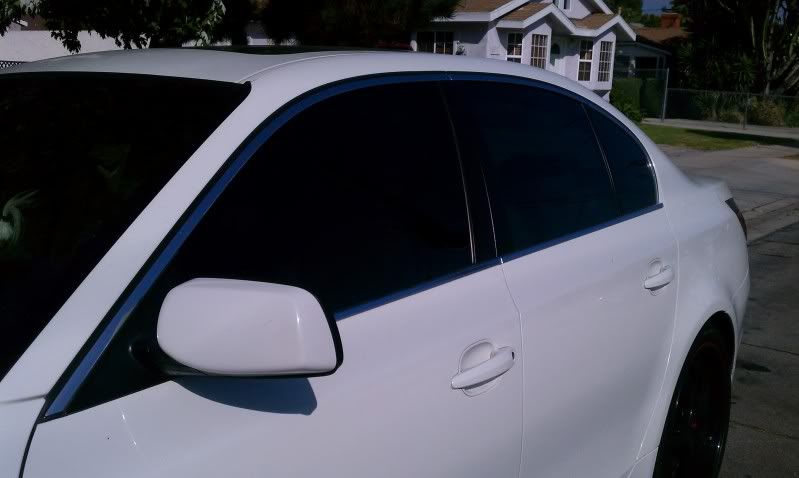
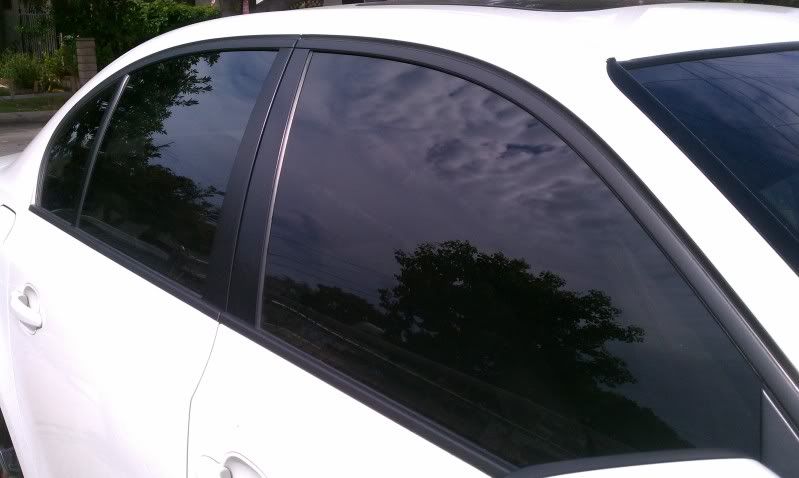
BEFORE:
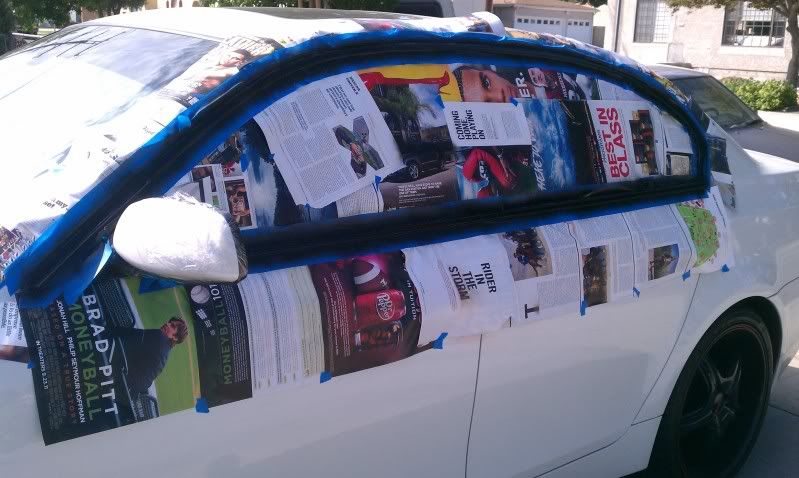
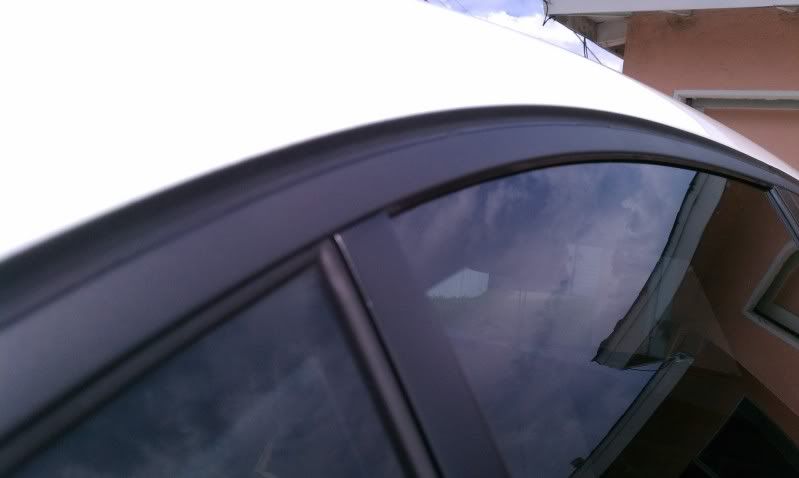
first of all take your time masking everything off. although this stuff is reversible and can be peeled off, why bother going thru all that trouble of taking off over spray when doing it right the first time is better. i thought i took a picture of it masked off before i started to spray but i guess i didnt. but here is a pic of the first layer and how i masked it.
now this is how i did the first side the first time. i sprayed the plasti-dips first layer. than i waited about a minute, and did the second. then waited another couple minutes and then sprayed the 3rd. then waited 15 minutes before i tried to take off the tape. now this is where i realized i could have gone another route. the problem with waiting for it to dry, is that even the paint on the tape bonds with the paint on the trim. now because it is rubber, when i went to take off the tape, it wanted to peel it off the trim as well. this is where a razor came in handy for that.
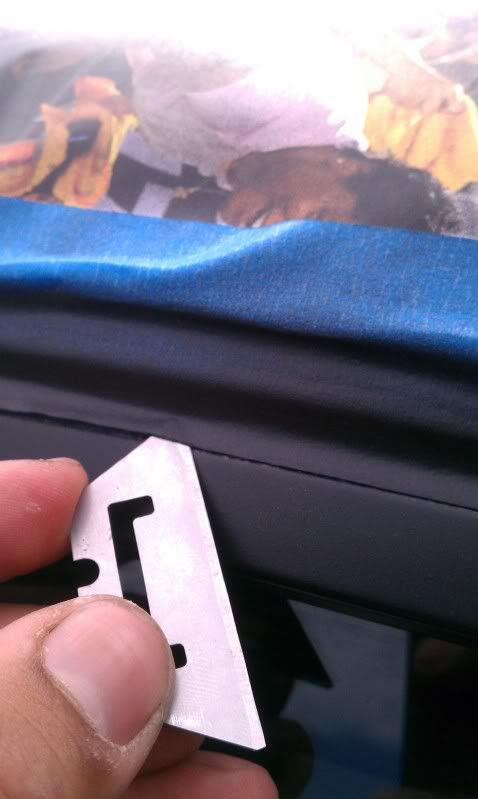
this actually made the making removal long, because i had to be very very careful not to peel it off too quick and it peels off the trim paint too. so i carefully ran the razor along when i removed the tape.
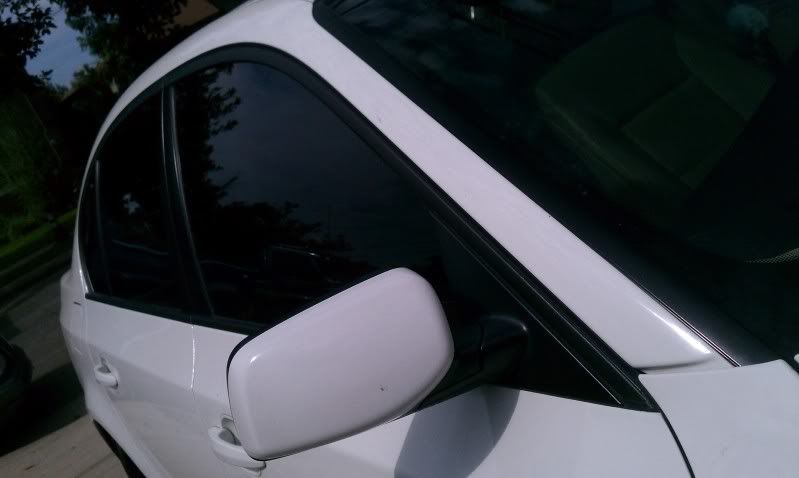
eventually after everything was off, i saw i had a few blemishes and one a few tiny spots chrome was visible (don't worry can easily be touched up)
now time to do the other side. this is where i thought my next move and how to prevent the take from bonding with the trim. this time when i masked this side, i just cut the pieces of magazine in half, when i was spraying i realized the spray zone wasnt that wide so i didnt need to get crazy on making so much. this made masking take only 15 minutes, where as the other side was about 25. im confident with my control of the spray can so i knew i couldn't control the spray with smaller masking.
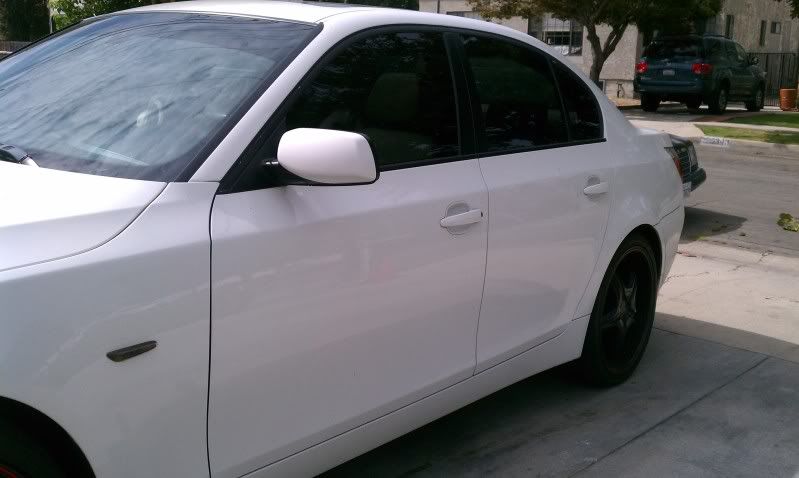
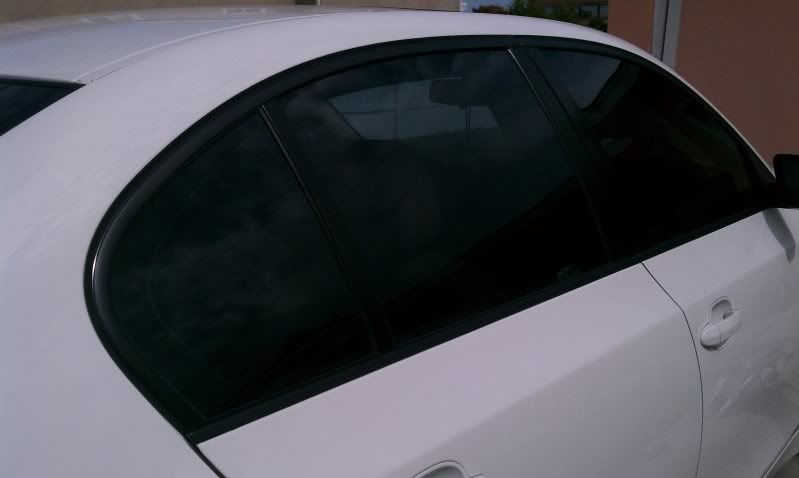
i was reading online that some people sprayed it and then after a minute, removed the masking with the plasti-dip still wet. i figured it couldn't hurt to try this method on the other side. so what i did was i sprayed 1 coast, and then immediately sprayed another, a lot heavier than the first. i repeated with about 4 coast one after the other with maybe only 10 seconds between them. then i waited less than a minute and then i took off the take. i could already see the plasti-dip looking dry (it was a little warm outside) but it wasnt pealing the plasti-dip at all. i had all the masking removed in less than a 15 seconds. and wow, much better! absolutely no blemishes and no pealing occurred! im very happy with the results and i will check back every once and a while and report how the durability is.
things you will need:
can of plasti-dip (5.49)
roll of painters tape (4.99)
new sharp razor blade (had one already)
magazine or newspaper or any paper to use to mask off.
BEFORE:
first of all take your time masking everything off. although this stuff is reversible and can be peeled off, why bother going thru all that trouble of taking off over spray when doing it right the first time is better. i thought i took a picture of it masked off before i started to spray but i guess i didnt. but here is a pic of the first layer and how i masked it.
now this is how i did the first side the first time. i sprayed the plasti-dips first layer. than i waited about a minute, and did the second. then waited another couple minutes and then sprayed the 3rd. then waited 15 minutes before i tried to take off the tape. now this is where i realized i could have gone another route. the problem with waiting for it to dry, is that even the paint on the tape bonds with the paint on the trim. now because it is rubber, when i went to take off the tape, it wanted to peel it off the trim as well. this is where a razor came in handy for that.
this actually made the making removal long, because i had to be very very careful not to peel it off too quick and it peels off the trim paint too. so i carefully ran the razor along when i removed the tape.
eventually after everything was off, i saw i had a few blemishes and one a few tiny spots chrome was visible (don't worry can easily be touched up)
now time to do the other side. this is where i thought my next move and how to prevent the take from bonding with the trim. this time when i masked this side, i just cut the pieces of magazine in half, when i was spraying i realized the spray zone wasnt that wide so i didnt need to get crazy on making so much. this made masking take only 15 minutes, where as the other side was about 25. im confident with my control of the spray can so i knew i couldn't control the spray with smaller masking.
i was reading online that some people sprayed it and then after a minute, removed the masking with the plasti-dip still wet. i figured it couldn't hurt to try this method on the other side. so what i did was i sprayed 1 coast, and then immediately sprayed another, a lot heavier than the first. i repeated with about 4 coast one after the other with maybe only 10 seconds between them. then i waited less than a minute and then i took off the take. i could already see the plasti-dip looking dry (it was a little warm outside) but it wasnt pealing the plasti-dip at all. i had all the masking removed in less than a 15 seconds. and wow, much better! absolutely no blemishes and no pealing occurred! im very happy with the results and i will check back every once and a while and report how the durability is.


Senior Members
Joined: Mar 2011
Posts: 434
Likes: 0
From: Northern California
My Ride: 2008 535i
Awesome job! I was planning on doing this myself. Now i know which brand/type of plastic dip to buy. I will probably end up removing my trim so i dont have to deal with tape and razors. Its really easy to remove the trim so why not.
Thread Starter
Members
Senior Members
Joined: Sep 2011
Posts: 476
Likes: 1
From: so cal
My Ride: coilvers retrofits
Model Year: 2001 and 2011
how easy is it to remove the trim? happen to know of any step by step instructions for removal? i just always feel a little iffy about removing window trims. would hate to bend them even slightly out of place. but if you could remove the trim, it would make the job a hell of a lot easier. even doing it my 2nd method by removing the tape soon after the last coat made it lot easier, no razor needed.
Contributors
Joined: Jun 2009
Posts: 5,781
Likes: 2
From: CA
My Ride: BMW E60
Model Year: 2016
Removing the trim is pretty easy, however, the concern for bending is real and definite as well. I would say with PlastiDip, I would mask off and spray instead of taking it apart.

Senior Members
Joined: Mar 2011
Posts: 434
Likes: 0
From: Northern California
My Ride: 2008 535i
how easy is it to remove the trim? happen to know of any step by step instructions for removal? i just always feel a little iffy about removing window trims. would hate to bend them even slightly out of place. but if you could remove the trim, it would make the job a hell of a lot easier. even doing it my 2nd method by removing the tape soon after the last coat made it lot easier, no razor needed.
