
How to fix windscreen washer jets blocked or losing pressure


Thread Starter
Members
Joined: Jul 2009
Posts: 9
Likes: 1
From: Belfast
Here's how I fixed my windscreen washer jet which graually lost pressure until they ended up dribbling down the bonnet.
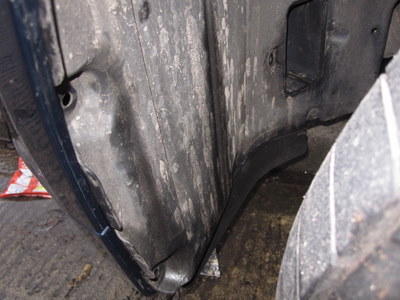
First park car with the wheels locked to left.
This is to get at the screws of the passenger side front wheelarch liner in order to access the washer tank.
Remove at least 2 screws.
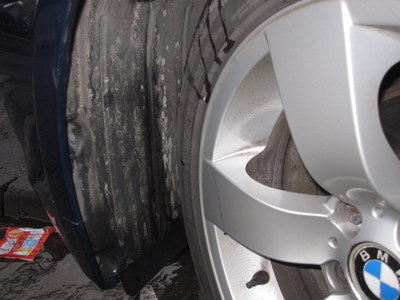
Lock wheels to the right

Remove the bottom 2 outermost screws from the wheel arch liner.
I only needed to remove 4 screws in total
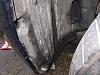
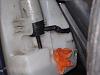
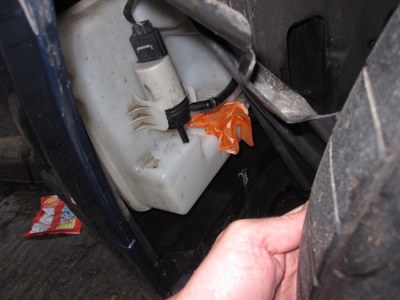
Carefully pull the wheelarch liner out, you should see this.
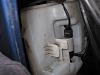
Slide the pump out. If the tank is full water will gush out when you do this.
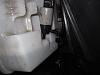
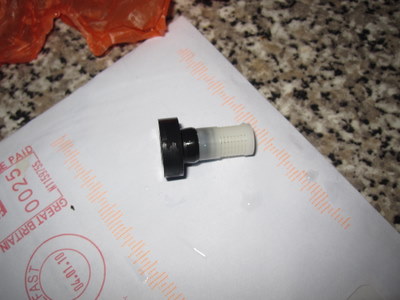
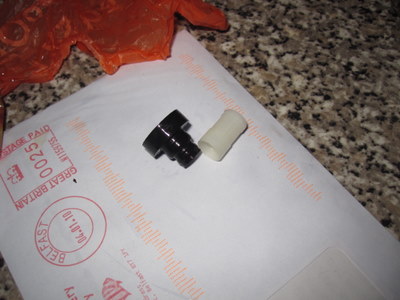
A rubber grommet with a plastic sieve attached sits directly beneath where you removed the pump.
Remove this very carefully to avoid the sieve falling into the tank.
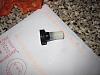

This gromet was covered with slimy algae. Clean it with a tooth brush and bleach.
This is the second time I have had to fix the washer jets, 1st time round I simply reassembled, the fix lasted only 6 month before the algae blocked the sieve again.
This time I blocked the tank using the grommet and a piece of plastic.


I then filled the blocked tank with bleach solution, left it for an hour removed the gromet and drained the tank.
I rinsed the tank to get rid of the algae and any residual bleach, by repeating this proceedure 5 times with tap water.
BEWARE OF GETTING BLEACH ON YOUR CAR PAINTWORK - RINSE THE TANK THOROUGHLY BEFORE REATTACHING THE PUMP.
First park car with the wheels locked to left.
This is to get at the screws of the passenger side front wheelarch liner in order to access the washer tank.
Remove at least 2 screws.
Lock wheels to the right
Remove the bottom 2 outermost screws from the wheel arch liner.
I only needed to remove 4 screws in total
Carefully pull the wheelarch liner out, you should see this.

Slide the pump out. If the tank is full water will gush out when you do this.

A rubber grommet with a plastic sieve attached sits directly beneath where you removed the pump.
Remove this very carefully to avoid the sieve falling into the tank.
This gromet was covered with slimy algae. Clean it with a tooth brush and bleach.
This is the second time I have had to fix the washer jets, 1st time round I simply reassembled, the fix lasted only 6 month before the algae blocked the sieve again.
This time I blocked the tank using the grommet and a piece of plastic.


I then filled the blocked tank with bleach solution, left it for an hour removed the gromet and drained the tank.
I rinsed the tank to get rid of the algae and any residual bleach, by repeating this proceedure 5 times with tap water.
BEWARE OF GETTING BLEACH ON YOUR CAR PAINTWORK - RINSE THE TANK THOROUGHLY BEFORE REATTACHING THE PUMP.
Members
Joined: Jan 2010
Posts: 238
Likes: 0
From: Barnsley, UK
My Ride: 2010(60) BMW 520d SE, Manual, In Sophisto Grey with Cream/Black Interior and Piano Black trim
Bookmarking this page! got it done under warranty this time, but it'll be out of warranty next time it clogs up. Cheers!


Members
Joined: Feb 2010
Posts: 7
Likes: 0
From: Scotland
My Ride: E60 525d
Thread Starter
Members
Joined: Jul 2009
Posts: 9
Likes: 1
From: Belfast


Members
Joined: Jun 2010
Posts: 1
Likes: 0
From: London
I must add that I followed this proceudre last night and it worked a treat. The only difference I had was that instead of screws, I had to undo nuts to remove the cover over the bottle. The white plastic thing was covered in gunk - cleaned it, replaced, washers are like new.

Members
Joined: Jun 2010
Posts: 1
Likes: 0
From: Birmingham
Just worked a treat for me today - my 5 series is still under warranty, and Rybrook Warwick wanted to charge me �157 plus VAT quoting 1.5 hrs labour, as it wasn't down to a faulty part- I did it in 25 minutes, following your instructions, and I'm no mechanic.
I was quite angry at having to do it myself, particularly as they said that they "come across it quite a lot" - surely that indicates a design fault.
To the guy who dropped his grommet in the tank, how about sucking it out with a wet and dry vacuum? - just a thought...
I was quite angry at having to do it myself, particularly as they said that they "come across it quite a lot" - surely that indicates a design fault.
To the guy who dropped his grommet in the tank, how about sucking it out with a wet and dry vacuum? - just a thought...