Evan's E61 Build: Pics, Updates, and Wagon Love for All
#152
Thread Starter
Members
Senior Members
Joined: Feb 2008
Posts: 899
Likes: 13
From: San Diego
My Ride: E61 with all the mods
Model Year: 2008
Engine: N54
Deleted the rear wiper
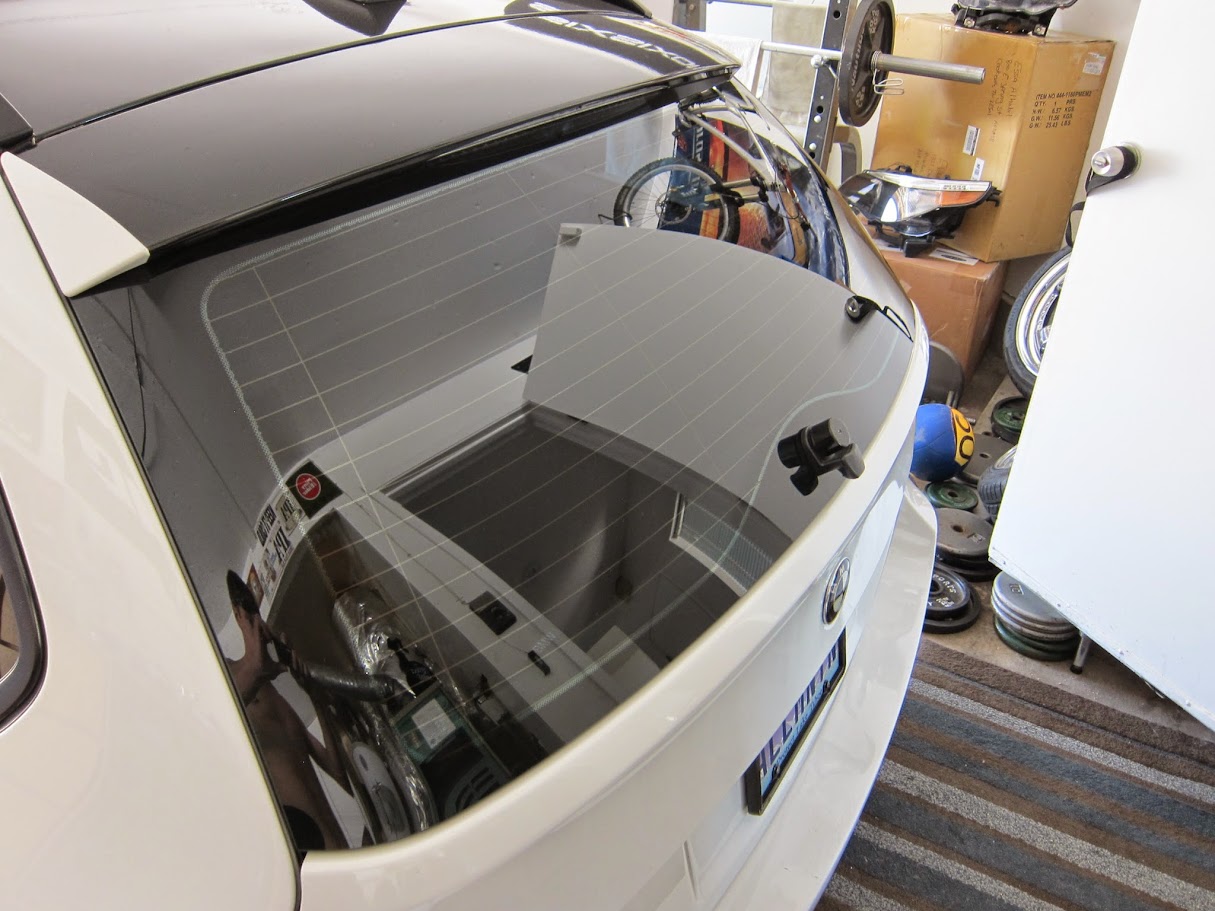
Built a custom turbo inlet system, also working on a custom air scoop.

I am a tester for Fuel It and their new throttle body injection system.

Built a custom turbo inlet system, also working on a custom air scoop.
I am a tester for Fuel It and their new throttle body injection system.
#153
Thread Starter
Members
Senior Members
Joined: Feb 2008
Posts: 899
Likes: 13
From: San Diego
My Ride: E61 with all the mods
Model Year: 2008
Engine: N54
Snagged some oem black carpet from an M5 for $100 shipped. Install was a pain but totally worth it, while the interior was gutted I upgraded the subs and ran wiring for aftermarket amplifiers.
Evan
Before
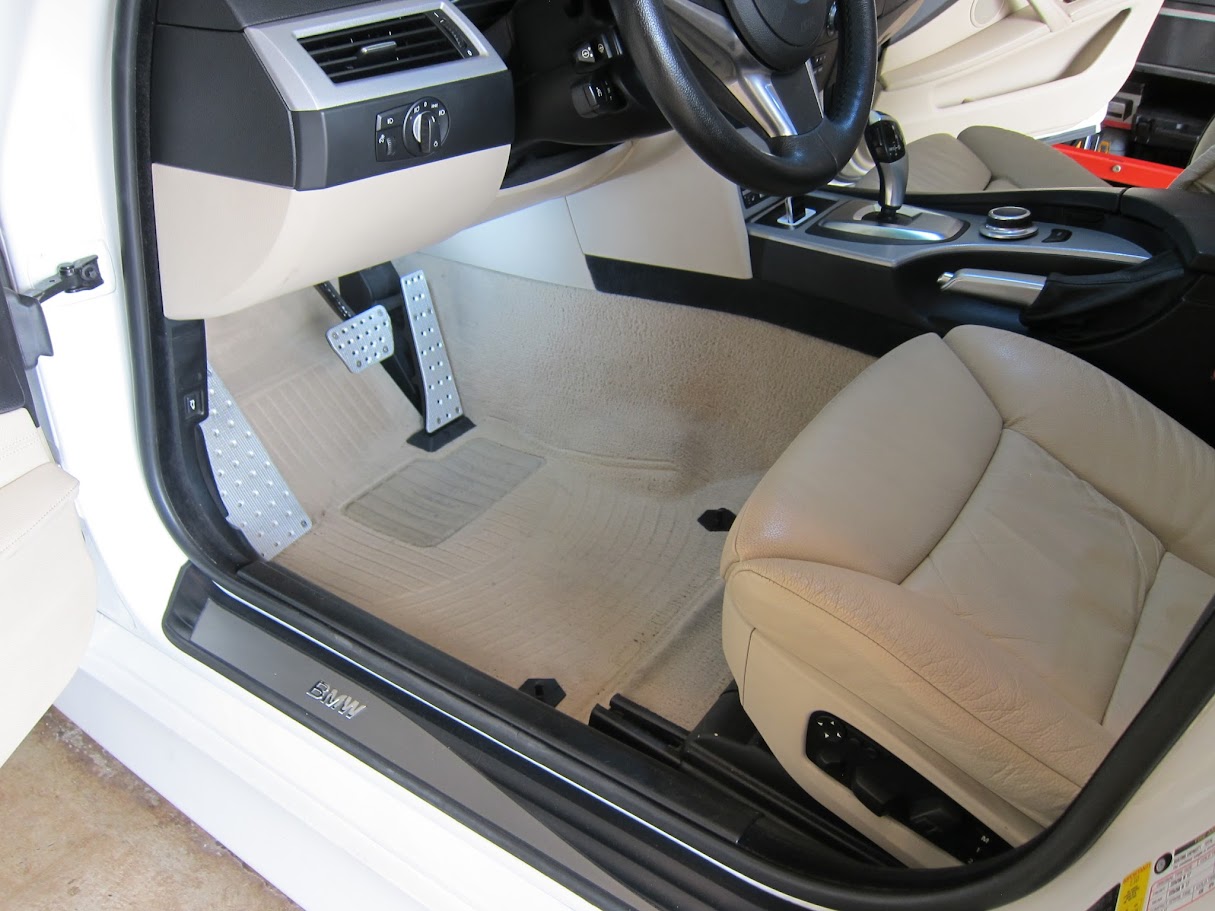
After

During

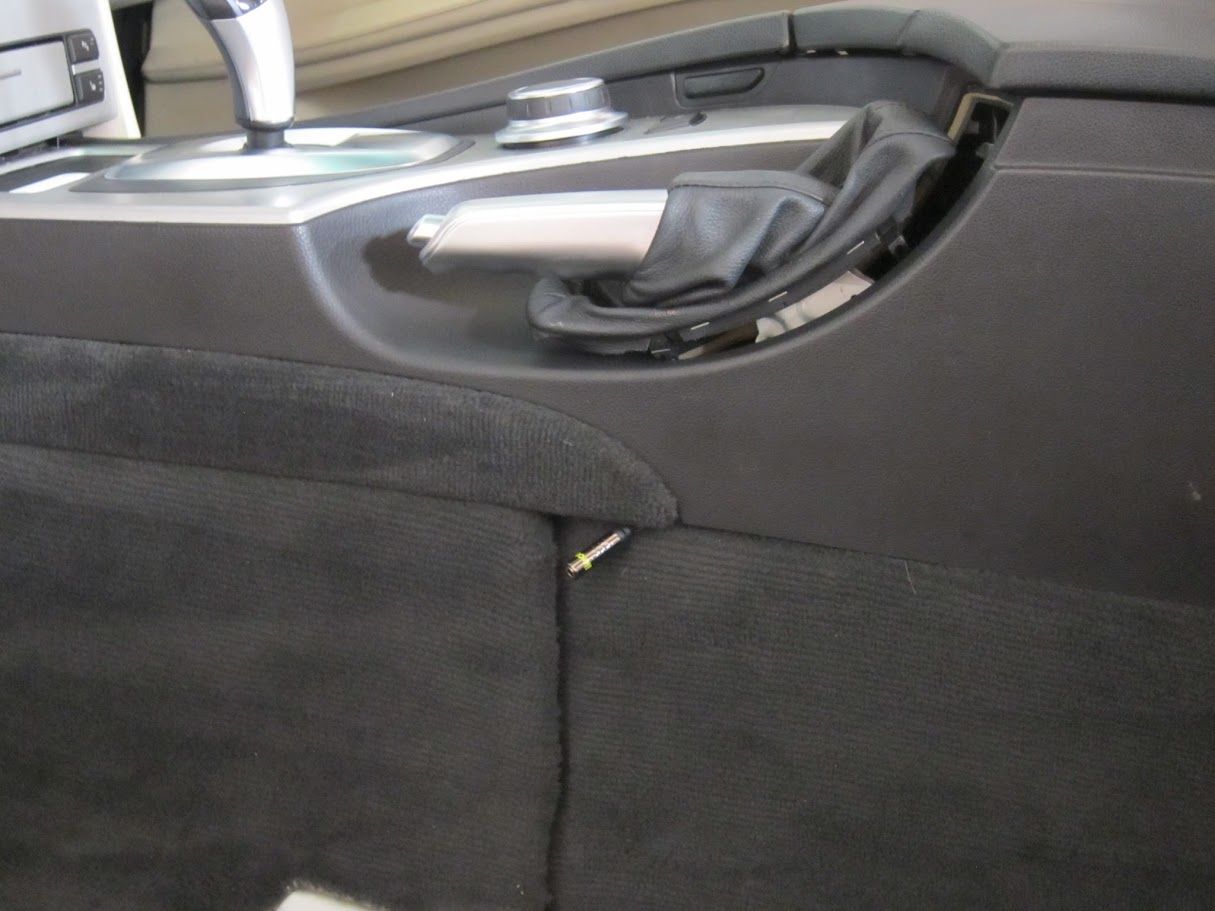
Carpet in
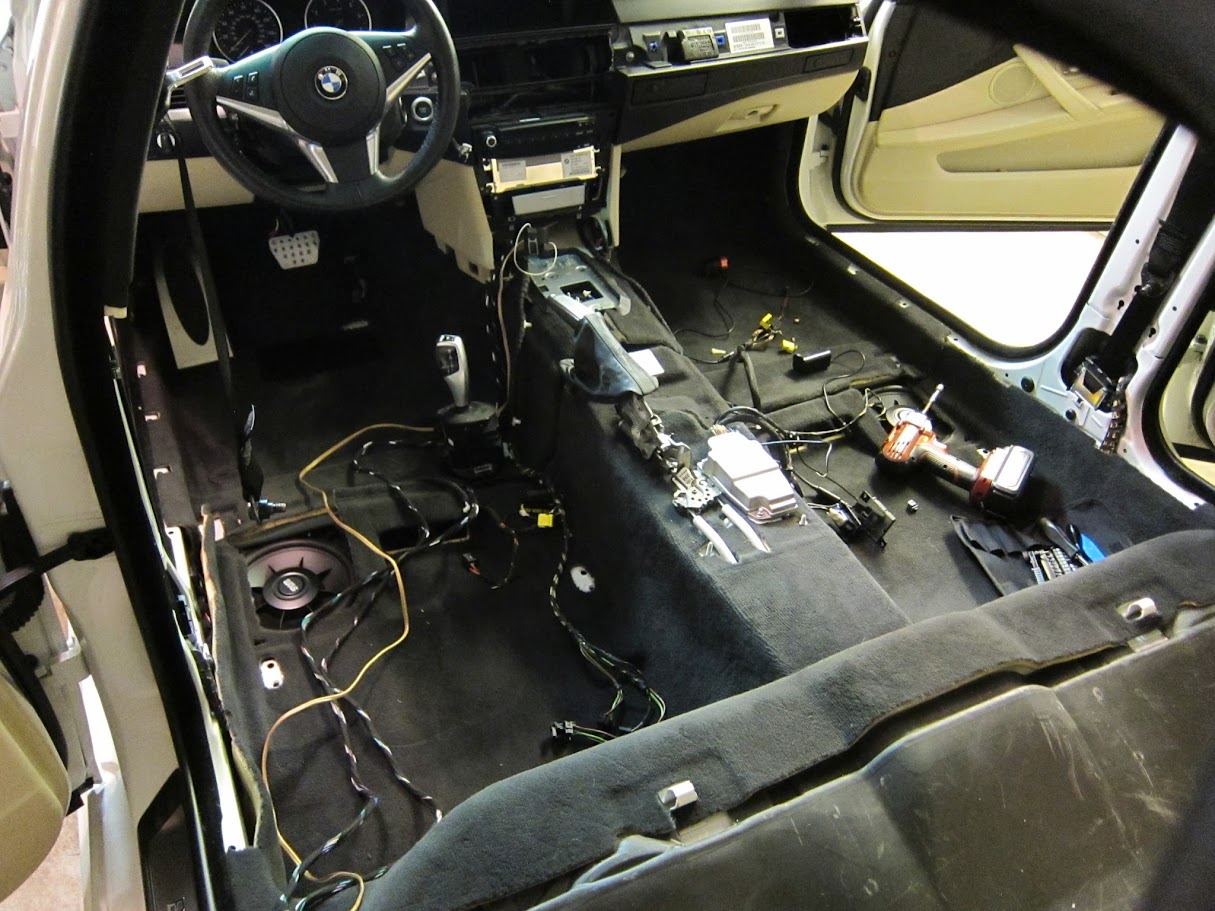
Since the carpet is from an M5 it comes with an aluminum deal pedal.

I also split the aux connection to add a 3.5mm jack to my Specdock.
Evan
Before
After
During
Carpet in
Since the carpet is from an M5 it comes with an aluminum deal pedal.
I also split the aux connection to add a 3.5mm jack to my Specdock.
#155
Thread Starter
Members
Senior Members
Joined: Feb 2008
Posts: 899
Likes: 13
From: San Diego
My Ride: E61 with all the mods
Model Year: 2008
Engine: N54
Evan
#156
Thread Starter
Members
Senior Members
Joined: Feb 2008
Posts: 899
Likes: 13
From: San Diego
My Ride: E61 with all the mods
Model Year: 2008
Engine: N54
BACK TO MODIFICATIONS!
Here is a project I have been working on during the last couple weeks. A turbo inlet system! Stock intake pipes run from the filters on the driver side to the turbos on the passenger side and in doing so are pancaked between the engine and radiator (front) and firewall (rear) which limits air flow, especially when the N54 is pushing power well beyond stock numbers.
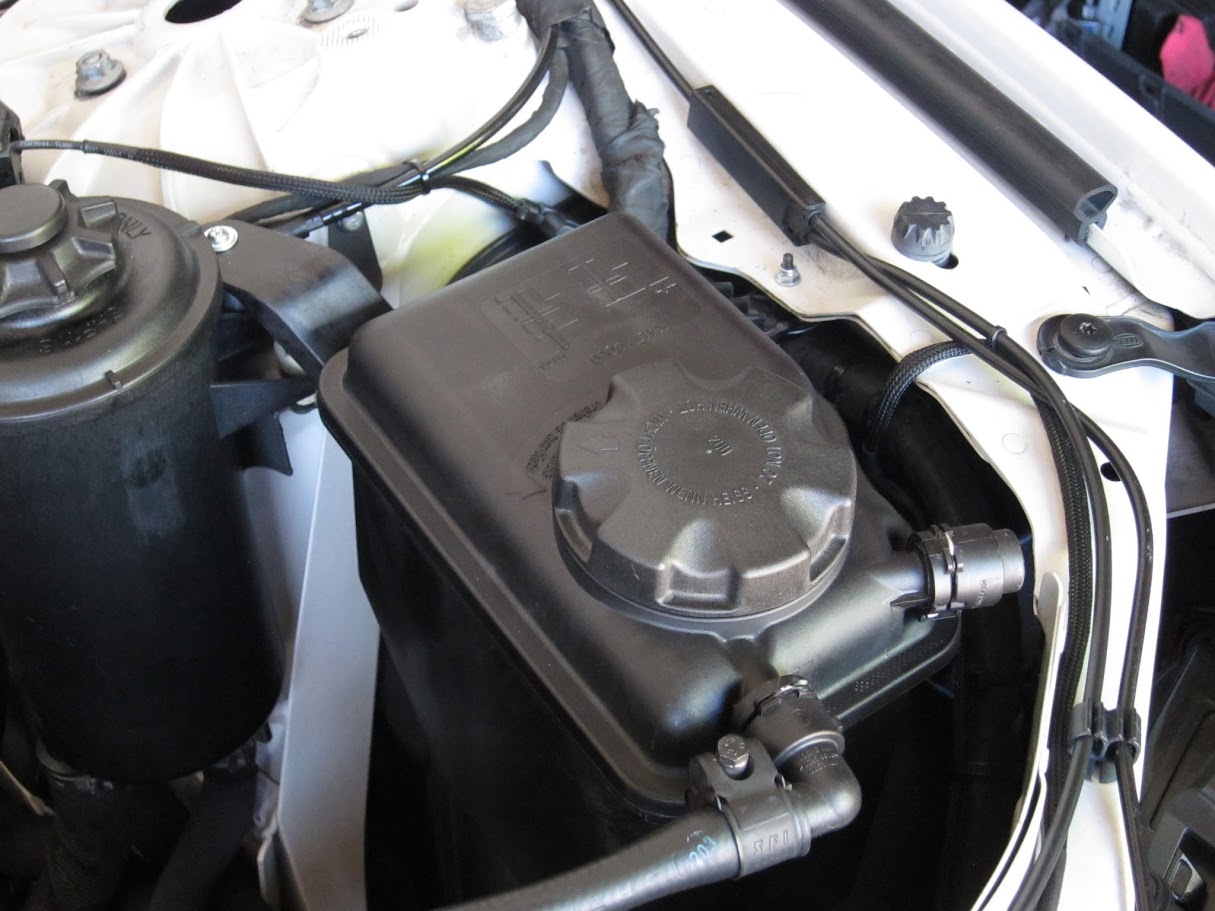
To fit this system I needed to reroute and relocate various items in the engine bay including: wastegate vacuum tanks, boost solenoids, radiator expansion tank, and an AC line. Once this space on the hot-side of the engine was opened up I was able to fit the Y-pipe design I was wanting to implement. The inlet retains the PCV function and connects to my oil catch can (unlike other inlet systems which utilize a vent-to-atmosphere setup).
I have been running the setup for about 2 weeks and turbo lag has decreased (wasn't much to begin with), hp and torque are up, especially above 4,500rpm, and of course there are a lot of cool noises coming from the engine bay since you are able to hear the turbos much better. I am yet to verify the performance increase on a dyno as I was plagued with a boost-leak the day I was supposed to dyno the wagon after inlets. With some other inlets systems people are noticing a 30-50whp/wtq jump, I would agree.
I am already working on some revisions to the system, the large silicone elbow that connects the filter and joiner to the Y-pipe will all be replaced with a velocity stack and aluminum 90 degree pipe which will all be welded; there will also be a velocity stack specific filter utilized. Experienced M5Board member (and new E61 owner) Timmay77 has been kind enough to assist with this inlet revision, thanks Tim!
If any of you are interested in the complete build thread, it can be found here: E60/E61 Turbo Inlets and Custom Intake Build Thread - N54Tech.com - Your Source for International Turbo BMW Racing Discussion
Evan
Before

After
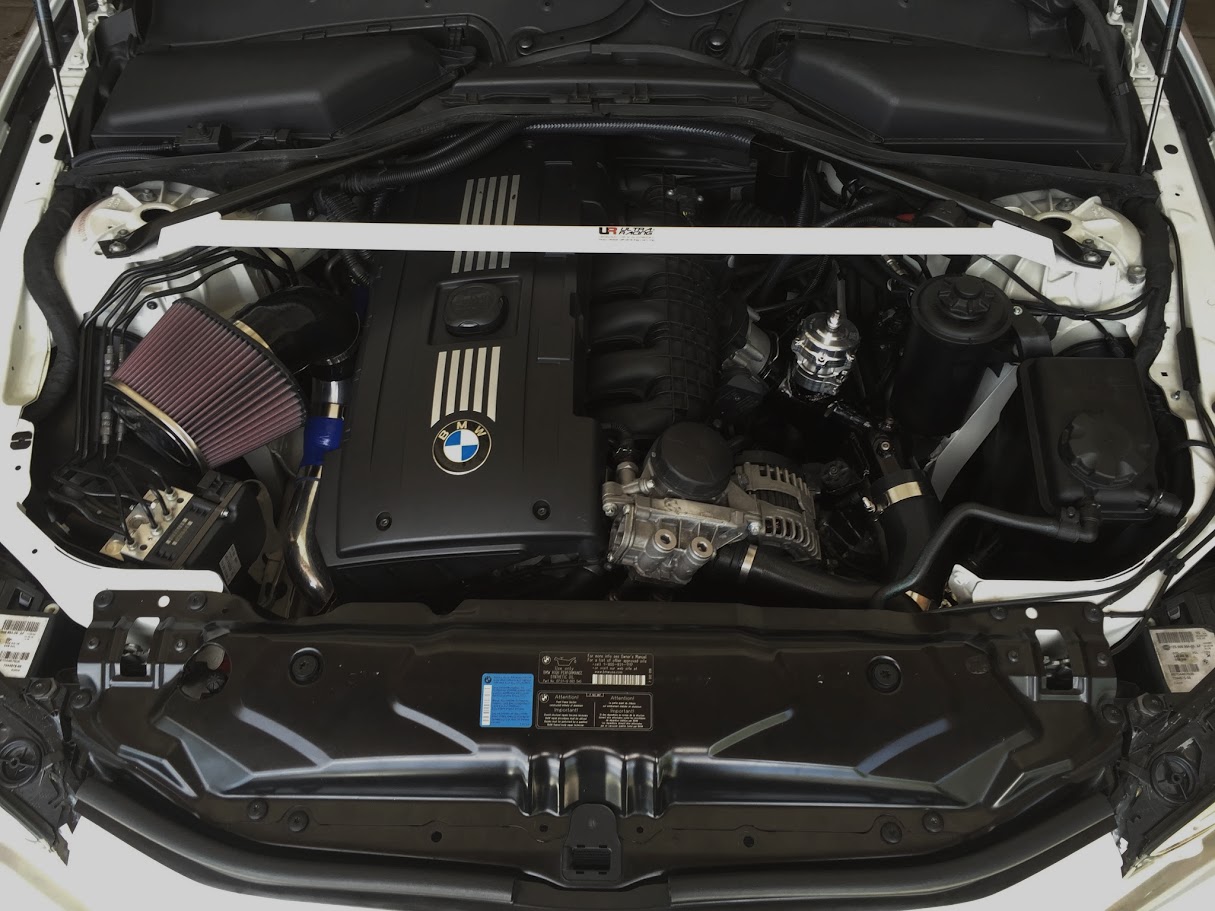
During

Oem vs. my design
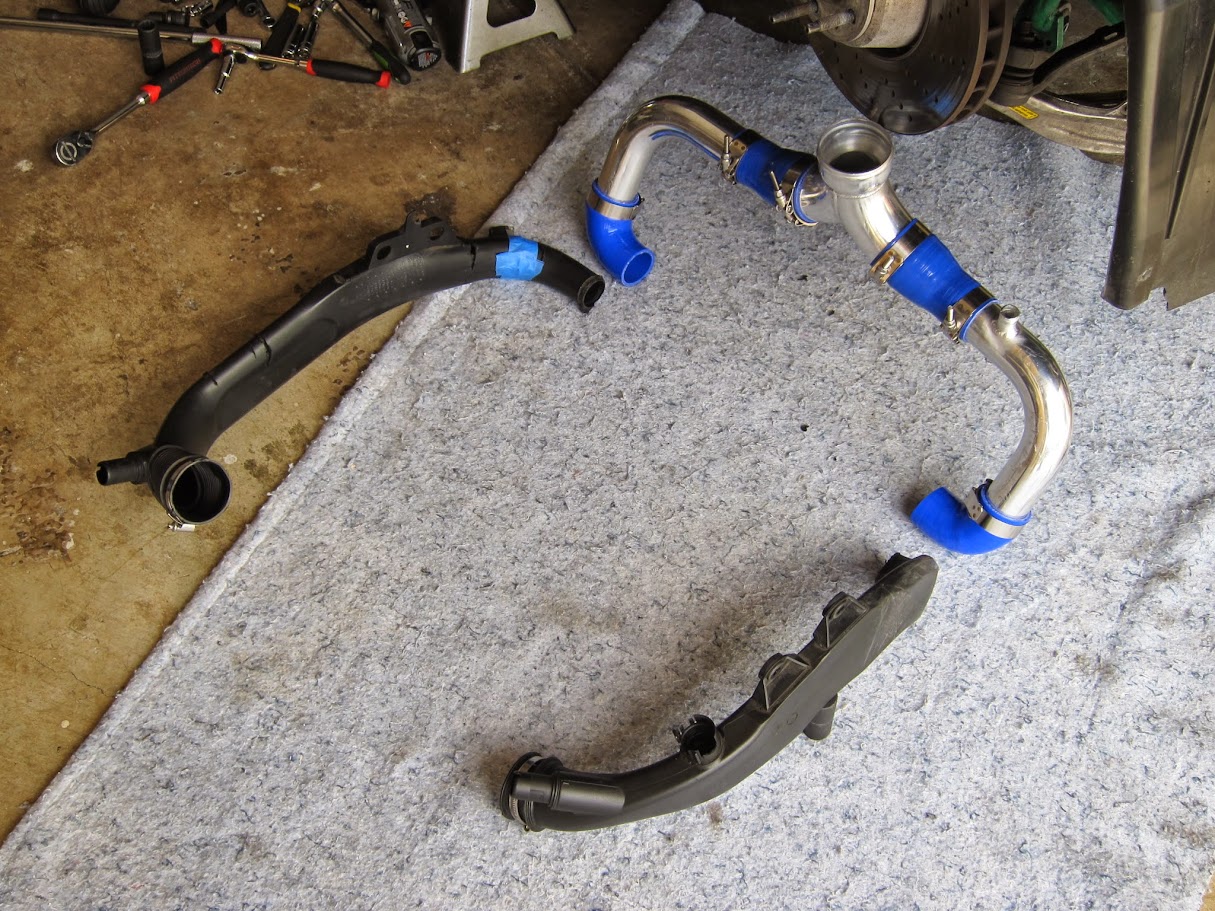
Clean and simple

Close up showing the PCV bung

Oem vac tank lines
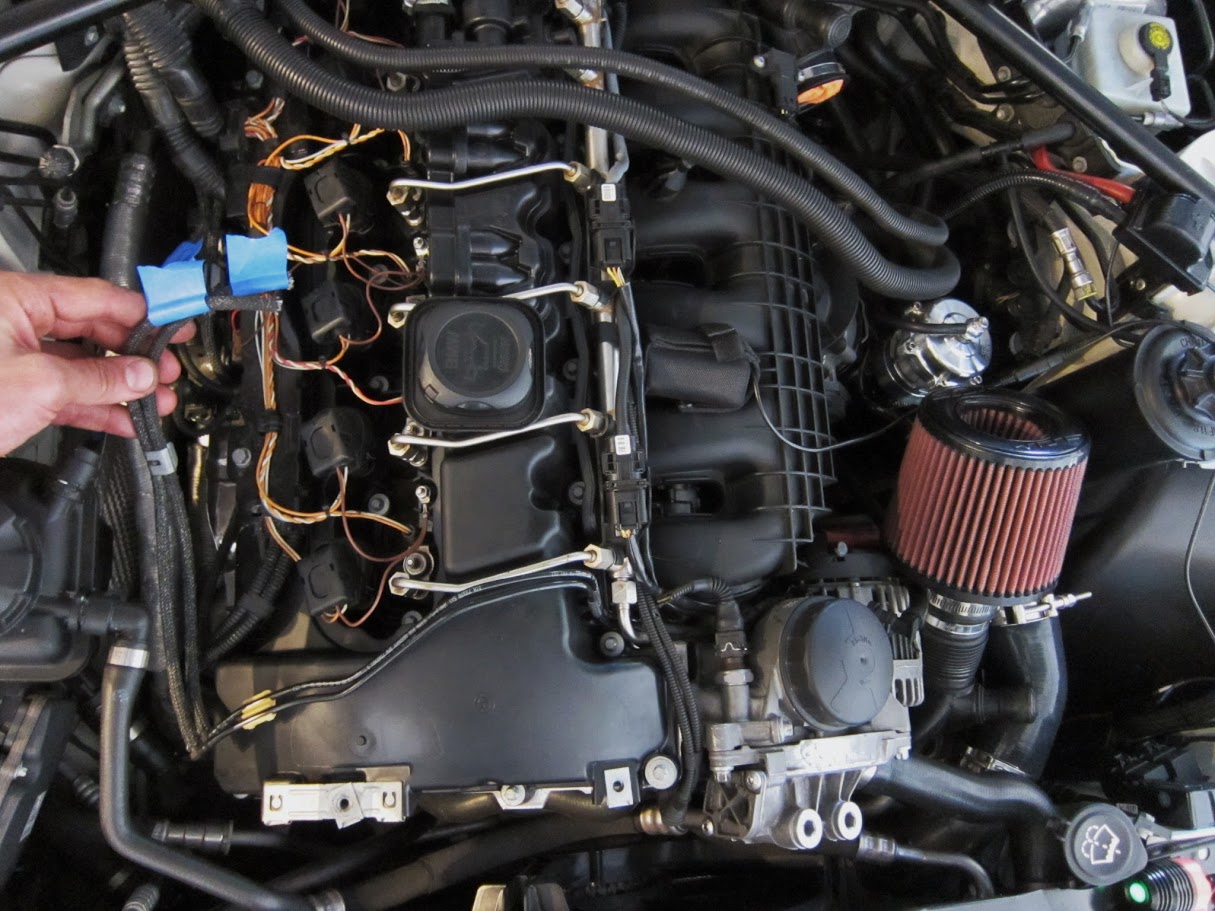
Vac tanks in their new location

Boost solenoids used to be here

...and are now here
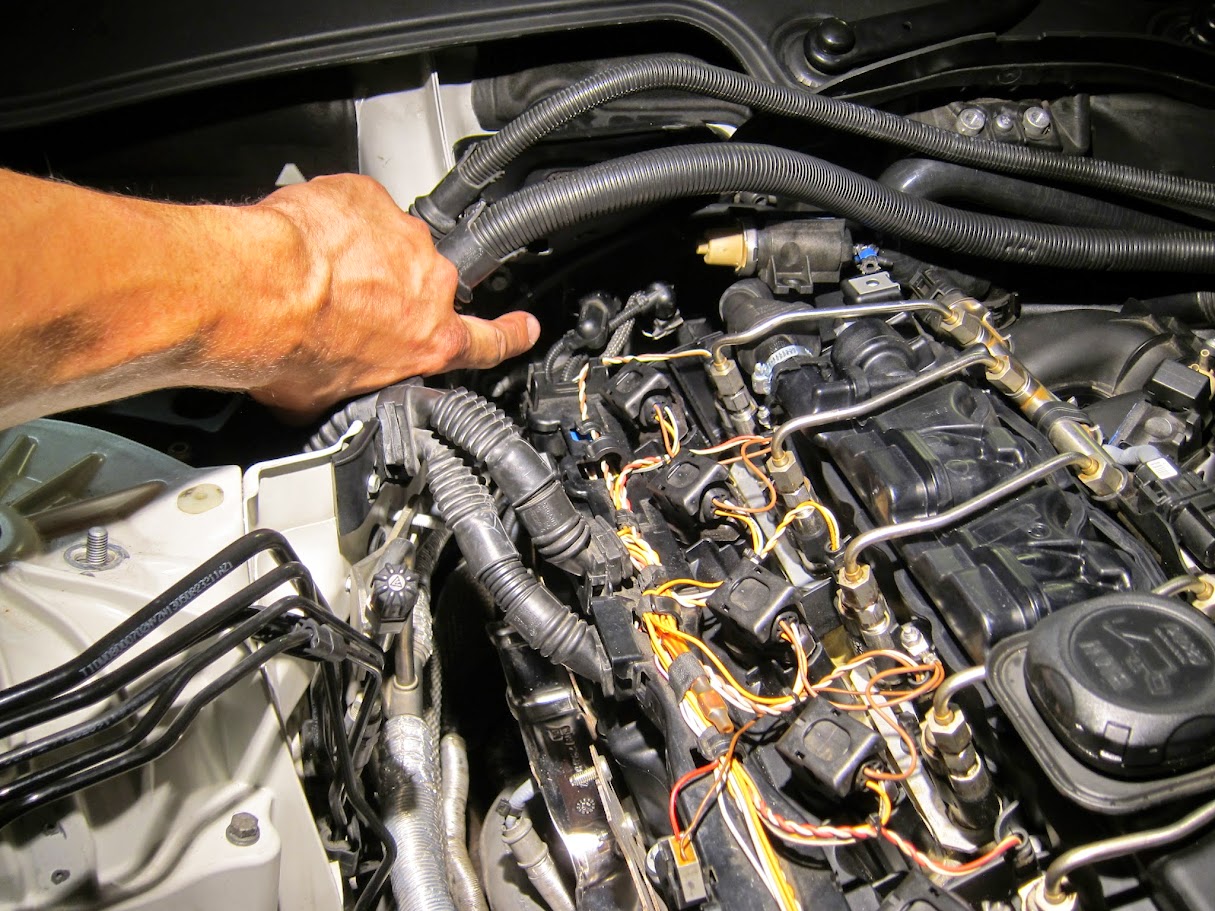
Draining coolant before system revision

New home for the expansion tank
As most of you are aware the oem M5 bumper has brake cooling ducts. My M5 brakes rarely see aggressive use so I decided to reroute that air up towards the intake filter. Considering how easy it was to build and install this scoop, it works very well, much better than I was expecting.
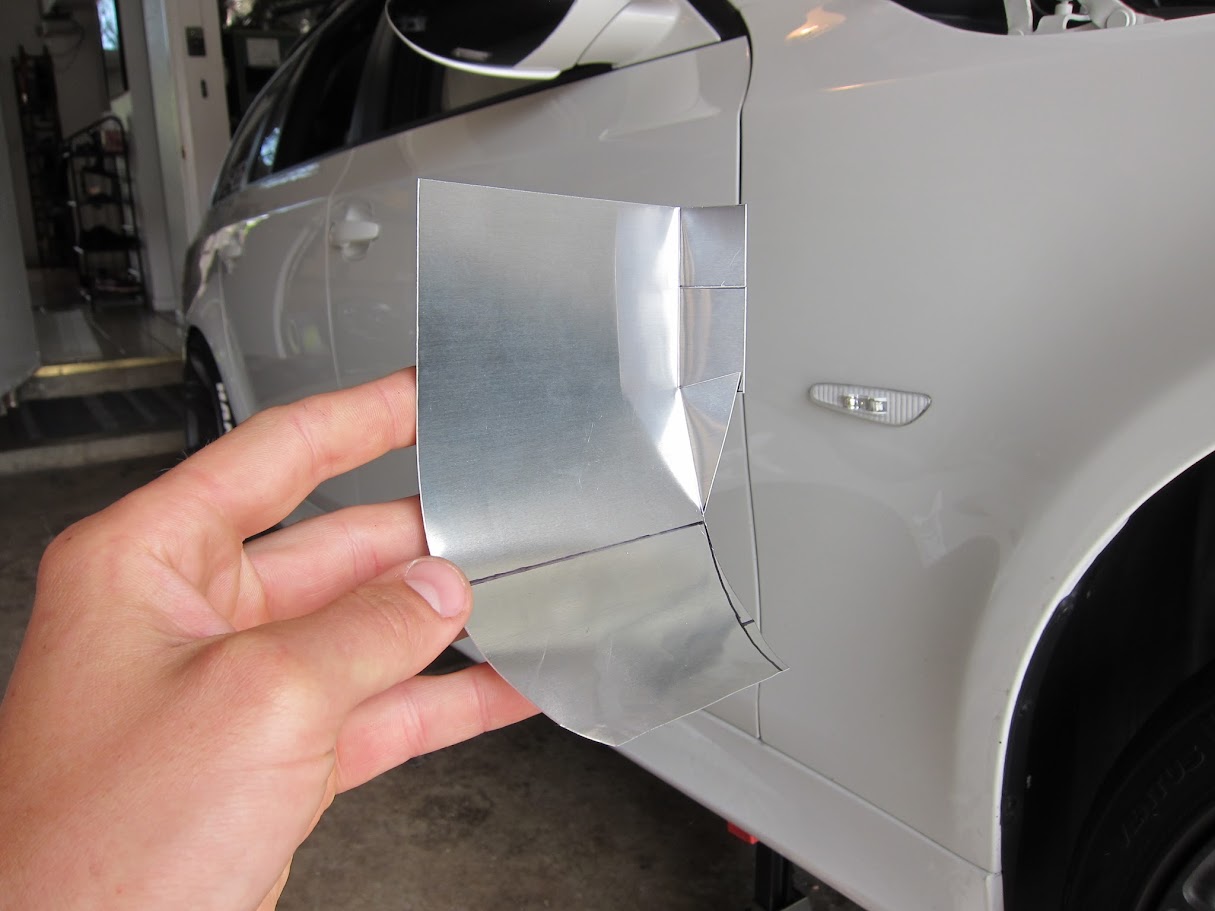
Here is the lower scoop installed, the top sits flush with the backside of the fender liner which helps direct the air towards the filter.

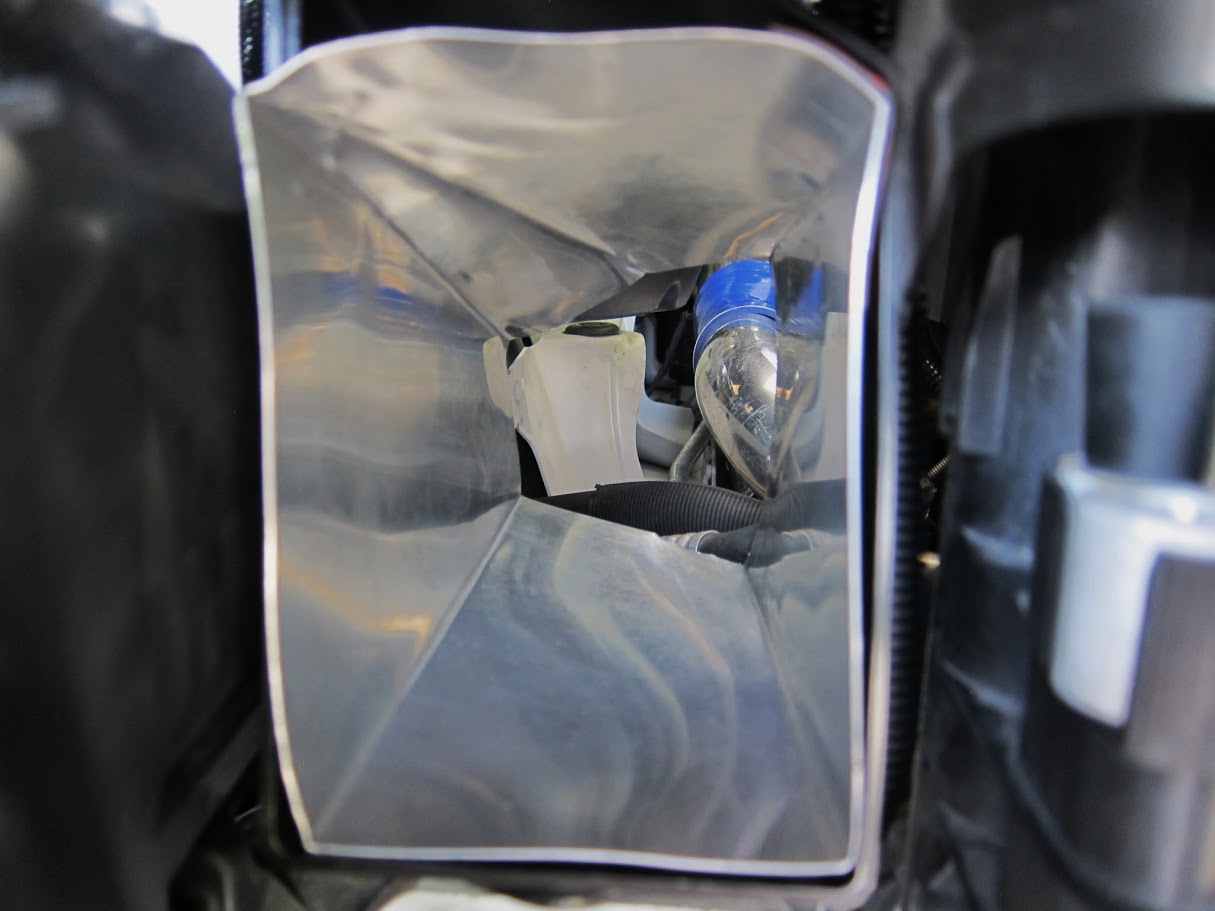
I also went ahead and built one for the kidney grill, it works in conjunction with another aluminum snorkel I built to throw the air towards the filter. There is the pesky hydraulic DSC control unit impeding some air flow but I am not about to relocate that!

Upper scoop installed

The scoop sits directly behind one of the kidney veins, it took a lot of effort to get this scoop to sit aligned and flush with the grill and I am happy with the results.

A look down the snorkel
My parts have arrived for my inlet V2

Here is a project I have been working on during the last couple weeks. A turbo inlet system! Stock intake pipes run from the filters on the driver side to the turbos on the passenger side and in doing so are pancaked between the engine and radiator (front) and firewall (rear) which limits air flow, especially when the N54 is pushing power well beyond stock numbers.
To fit this system I needed to reroute and relocate various items in the engine bay including: wastegate vacuum tanks, boost solenoids, radiator expansion tank, and an AC line. Once this space on the hot-side of the engine was opened up I was able to fit the Y-pipe design I was wanting to implement. The inlet retains the PCV function and connects to my oil catch can (unlike other inlet systems which utilize a vent-to-atmosphere setup).
I have been running the setup for about 2 weeks and turbo lag has decreased (wasn't much to begin with), hp and torque are up, especially above 4,500rpm, and of course there are a lot of cool noises coming from the engine bay since you are able to hear the turbos much better. I am yet to verify the performance increase on a dyno as I was plagued with a boost-leak the day I was supposed to dyno the wagon after inlets. With some other inlets systems people are noticing a 30-50whp/wtq jump, I would agree.
I am already working on some revisions to the system, the large silicone elbow that connects the filter and joiner to the Y-pipe will all be replaced with a velocity stack and aluminum 90 degree pipe which will all be welded; there will also be a velocity stack specific filter utilized. Experienced M5Board member (and new E61 owner) Timmay77 has been kind enough to assist with this inlet revision, thanks Tim!
If any of you are interested in the complete build thread, it can be found here: E60/E61 Turbo Inlets and Custom Intake Build Thread - N54Tech.com - Your Source for International Turbo BMW Racing Discussion
Evan
Before
After
During
Oem vs. my design
Clean and simple
Close up showing the PCV bung
Oem vac tank lines
Vac tanks in their new location
Boost solenoids used to be here
...and are now here
Draining coolant before system revision
New home for the expansion tank
As most of you are aware the oem M5 bumper has brake cooling ducts. My M5 brakes rarely see aggressive use so I decided to reroute that air up towards the intake filter. Considering how easy it was to build and install this scoop, it works very well, much better than I was expecting.
Here is the lower scoop installed, the top sits flush with the backside of the fender liner which helps direct the air towards the filter.
I also went ahead and built one for the kidney grill, it works in conjunction with another aluminum snorkel I built to throw the air towards the filter. There is the pesky hydraulic DSC control unit impeding some air flow but I am not about to relocate that!
Upper scoop installed
The scoop sits directly behind one of the kidney veins, it took a lot of effort to get this scoop to sit aligned and flush with the grill and I am happy with the results.
A look down the snorkel
My parts have arrived for my inlet V2
#159
Thread Starter
Members
Senior Members
Joined: Feb 2008
Posts: 899
Likes: 13
From: San Diego
My Ride: E61 with all the mods
Model Year: 2008
Engine: N54
The wagon is out of commission while a blown KW coilover is repaired so I took the opportunity to continue working on the stereo install. There are a couple projects that are currently in the works:
- KW repair
- Stereo Install
- M5 SMG paddle retrofit
- Throttle Body Injection Kit
- Vinyl Wrapped Interior Trim
- Turbo Inlet V2
I didn't want to upgrade the stereo but the stock HiFi system is pretty poor, the upgraded and much more powerful L7 may be standard on the M5s, not sure. My goal was to create a budget system with clean/easy/reversible integration and with no impact on the cargo area. Although I am a bass head at heart and had 2 12"s in my previous E39 M5, I wasn't about to add a subwoofer enclosure in the rear that would impede the wagon's functionality.
Stock HiFi system includes 4 mids, 4 tweeters, 2 8" subs under the front seats, and not much power.
Evan
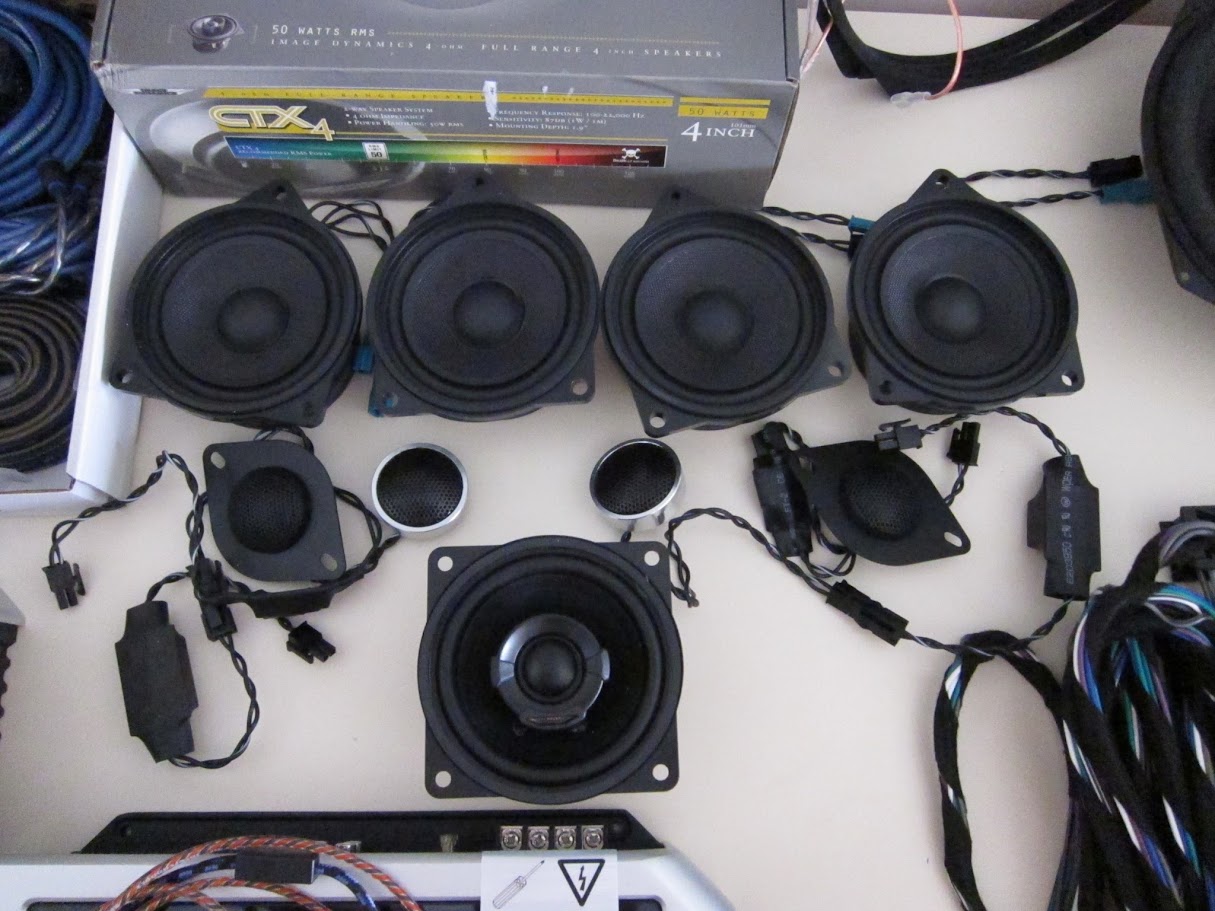
Here are the components

JBL MS8 Processor to power mids/highs and handle processing, JBL MS-A5001 to power the subs, and a wireless bass controller.

BSW Stage 1 speakers plus an Image Dynamics CTX-4 for the center channel.
In lemming-like fashion I went with the Earthquake SWS8xi subs, here pictured with the appropriate spacers and some poly fill.

Purchased the full Hi-Fi harness from Technic, money well spent.

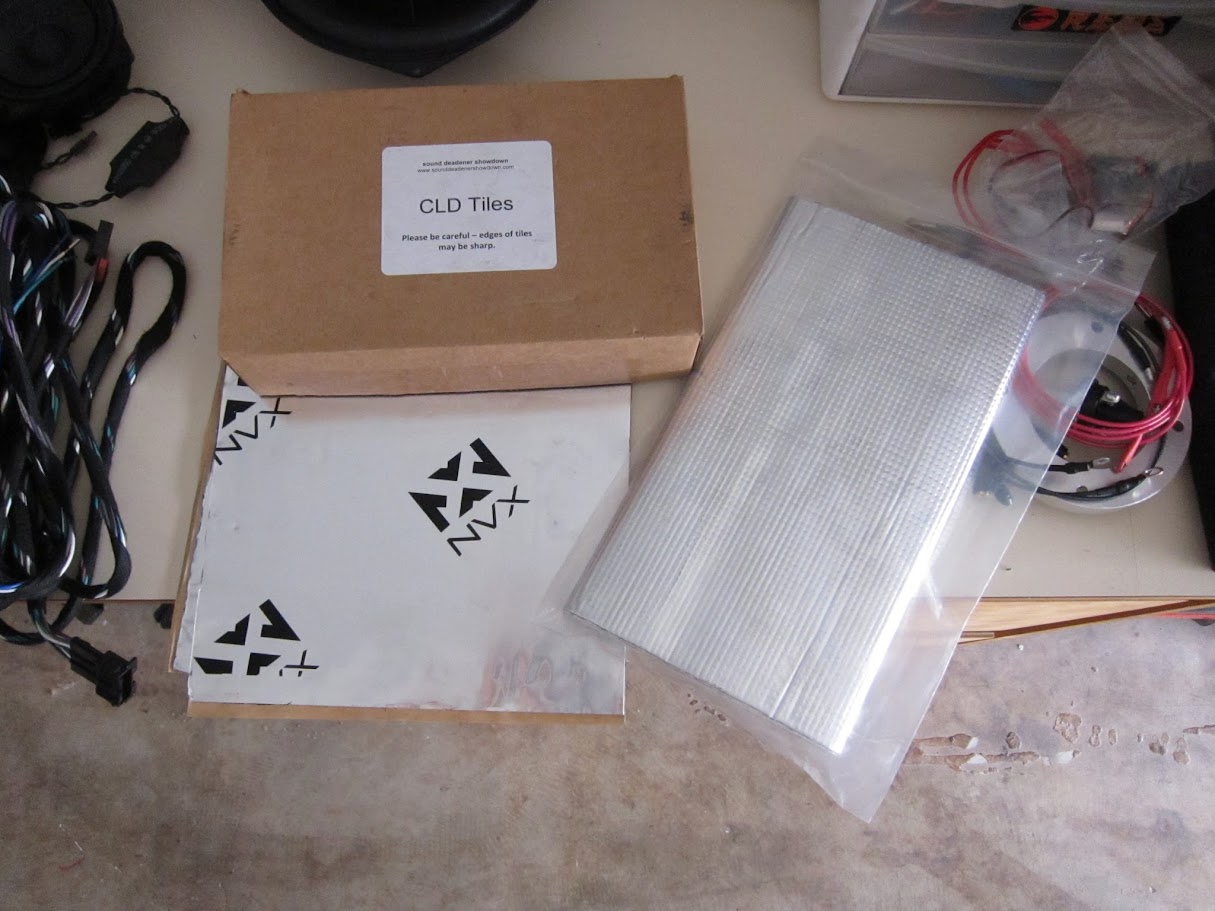
Sound deadening.
A previous project was to replace the interior carpet, while doing so I took the opportunity to install the subwoofers and run the wiring.

Zip-tied to the oem wiring loom

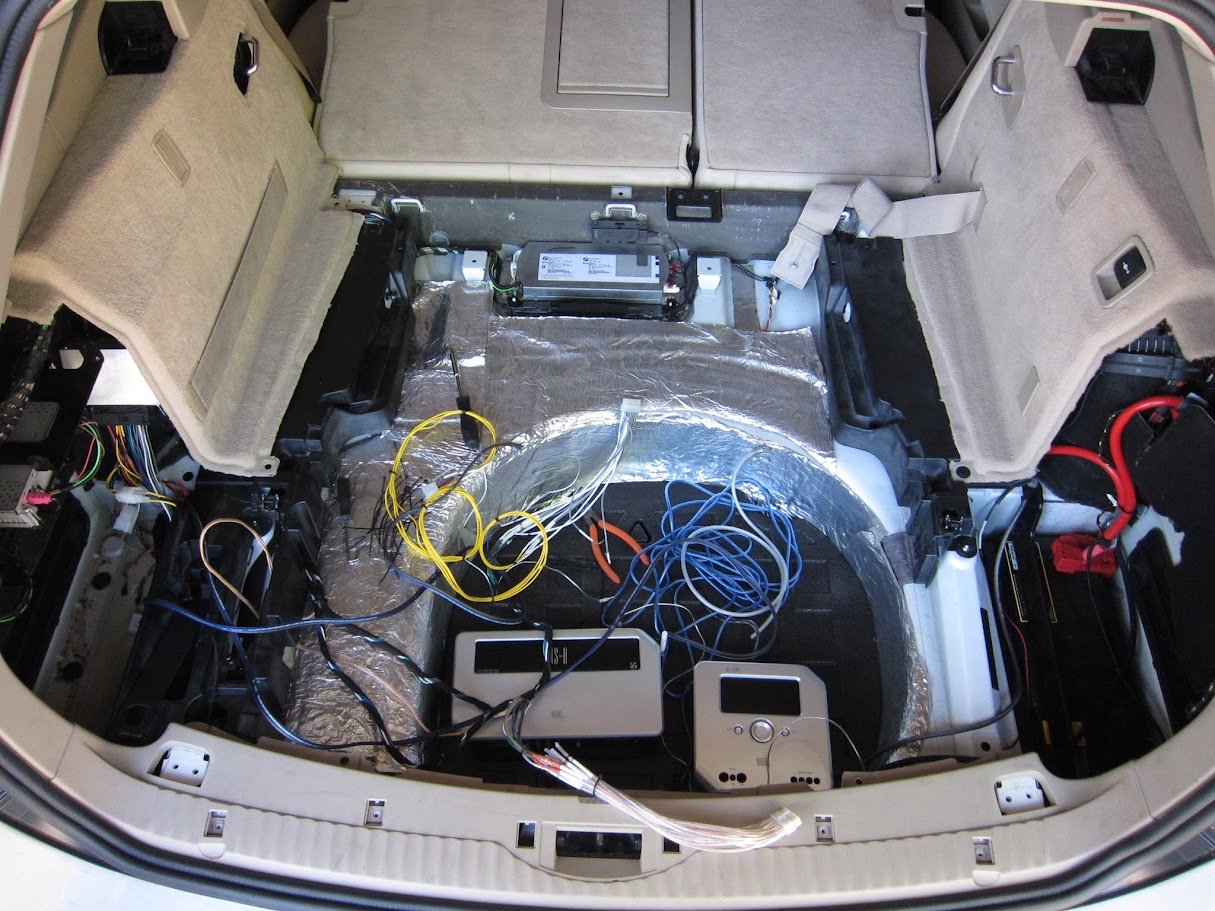
General layout of how things will be in the rear, I decided to ditch my spare.
Soldering

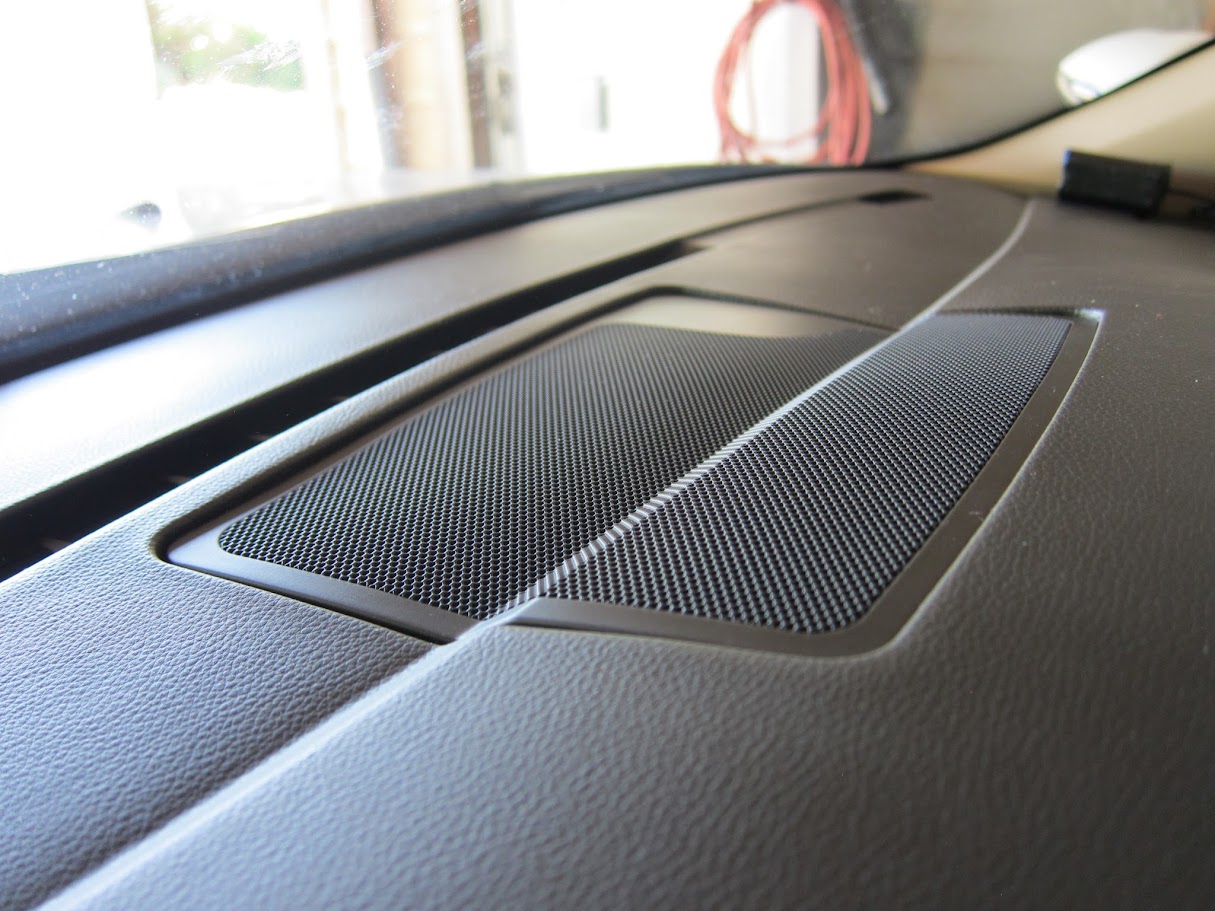
Even though HiFi systems do not use any center channel the dash is still spec'd to accommodate one, all you need to do is drop in a speaker and wire it up.

Before

During

After
- KW repair
- Stereo Install
- M5 SMG paddle retrofit
- Throttle Body Injection Kit
- Vinyl Wrapped Interior Trim
- Turbo Inlet V2
I didn't want to upgrade the stereo but the stock HiFi system is pretty poor, the upgraded and much more powerful L7 may be standard on the M5s, not sure. My goal was to create a budget system with clean/easy/reversible integration and with no impact on the cargo area. Although I am a bass head at heart and had 2 12"s in my previous E39 M5, I wasn't about to add a subwoofer enclosure in the rear that would impede the wagon's functionality.
Stock HiFi system includes 4 mids, 4 tweeters, 2 8" subs under the front seats, and not much power.
Evan
Here are the components
JBL MS8 Processor to power mids/highs and handle processing, JBL MS-A5001 to power the subs, and a wireless bass controller.
BSW Stage 1 speakers plus an Image Dynamics CTX-4 for the center channel.
In lemming-like fashion I went with the Earthquake SWS8xi subs, here pictured with the appropriate spacers and some poly fill.
Purchased the full Hi-Fi harness from Technic, money well spent.
Sound deadening.
A previous project was to replace the interior carpet, while doing so I took the opportunity to install the subwoofers and run the wiring.
Zip-tied to the oem wiring loom
General layout of how things will be in the rear, I decided to ditch my spare.
Soldering
Even though HiFi systems do not use any center channel the dash is still spec'd to accommodate one, all you need to do is drop in a speaker and wire it up.
Before
During
After


