
Ultimate Eyebrow Upgrade


Contributors
Joined: Mar 2007
Posts: 5,434
Likes: 0
From: NYC, Rego Park, Queens
My Ride: 2004 E60 530i, 2012 E70 X5 35i
Model Year: 2004
Southgate,
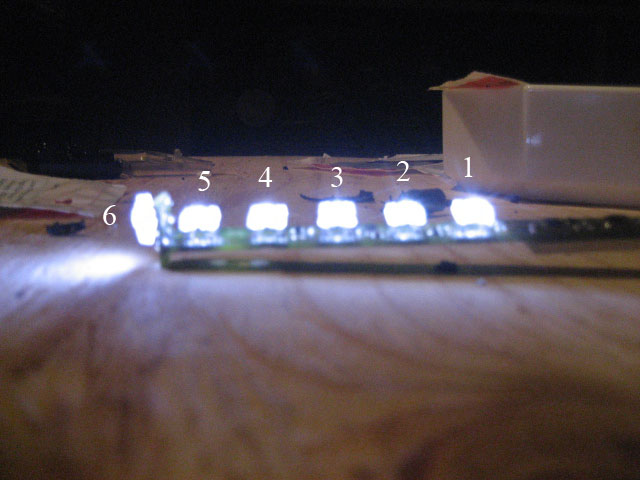
Here's a pic to help:
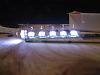
best way to do this is, start with #1 LED, then 2,3,4,5,6.
The easiest way to take out the LED's is to flip it upside down so you can see the contact points.
Then mount the board onto a little solid box so its hanging (The leds can fall down, you want that to get the old ones off. Just tape up the side that doesn't have LED's).
since its a little elevated. heat the contact points with a soldering iron, and use the desoldering kit to suck out the excess solder.
Once you do that for 4, then take a small screw driver and pry out the old led. The contact points are probably still stuck / not loose, so use the solder gun to just heat up each point and take it out slow. You don't want to scratch up the circuit board.
Once you are done with all of this, then slap on the new LED's, test if they all work right and if they are the right color.
Then start with LED #6 when soldering the new ones, then work your way down. Really simple once you get the hang of it.
Good luck man!
Here's a pic to help:
best way to do this is, start with #1 LED, then 2,3,4,5,6.
The easiest way to take out the LED's is to flip it upside down so you can see the contact points.
Then mount the board onto a little solid box so its hanging (The leds can fall down, you want that to get the old ones off. Just tape up the side that doesn't have LED's).
since its a little elevated. heat the contact points with a soldering iron, and use the desoldering kit to suck out the excess solder.
Once you do that for 4, then take a small screw driver and pry out the old led. The contact points are probably still stuck / not loose, so use the solder gun to just heat up each point and take it out slow. You don't want to scratch up the circuit board.
Once you are done with all of this, then slap on the new LED's, test if they all work right and if they are the right color.
Then start with LED #6 when soldering the new ones, then work your way down. Really simple once you get the hang of it.
Good luck man!
Contributors
Joined: Mar 2007
Posts: 5,434
Likes: 0
From: NYC, Rego Park, Queens
My Ride: 2004 E60 530i, 2012 E70 X5 35i
Model Year: 2004
Originally Posted by Eugene134' post='761193' date='Jan 6 2009, 11:57 PM
and then there were 4....


Banned
Joined: Jun 2008
Posts: 7,983
Likes: 1
From: Queens, NY
My Ride: A Car
Its really easy.
You have to solder it, no other way around it.
Definitely have a good desk / workstation. And make sure to have the piece mounted so it doesn't move on the desk. Like a type of clamp or something.
I taped the LED board onto something elevated a bit so that it wouldn't move and i can pull off the old LED's easily and without breaking it.
Get a desoldering kit. It sucks out the excess solder that's on the circuit once u heat it up (to take off the old LEDS). It'll help so much.
And to solder back the new LED's, that's like 20 seconds u can solder it all.
The only tricky one is the vertical LED. You must solder that first because if you put all the other 5 LED's on, it'll be hard to solder the 1 one i mentioned, which is vertical.
Good luck. if you have anymore questions. please let us know.
Stylezzza, lift up ur skirt, grab ur balls and start cutting away!


Thread Starter
Contributors
Joined: Dec 2006
Posts: 2,516
Likes: 1
From: New York CIty
My Ride: F10 535I
Model Year: 2016
Originally Posted by brabusw209amg' post='761270' date='Jan 7 2009, 12:08 AM
Stylezzza, lift up ur skirt, grab ur balls and start cutting away!
Contributors
Joined: Sep 2006
Posts: 21,274
Likes: 0
From: Hong Kong
My Ride: Mini Cooper
Originally Posted by nigxdoof' post='761199' date='Jan 7 2009, 12:05 PM
Southgate,
Here's a pic to help:
Attachment 68564
best way to do this is, start with #1 LED, then 2,3,4,5,6.
The easiest way to take out the LED's is to flip it upside down so you can see the contact points.
Then mount the board onto a little solid box so its hanging (The leds can fall down, you want that to get the old ones off. Just tape up the side that doesn't have LED's).
since its a little elevated. heat the contact points with a soldering iron, and use the desoldering kit to suck out the excess solder.
Once you do that for 4, then take a small screw driver and pry out the old led. The contact points are probably still stuck / not loose, so use the solder gun to just heat up each point and take it out slow. You don't want to scratch up the circuit board.
Once you are done with all of this, then slap on the new LED's, test if they all work right and if they are the right color.
Then start with LED #6 when soldering the new ones, then work your way down. Really simple once you get the hang of it.
Good luck man!

how about a topic on the DIY showing how to mods this step by step
Contributors
Joined: Mar 2007
Posts: 5,434
Likes: 0
From: NYC, Rego Park, Queens
My Ride: 2004 E60 530i, 2012 E70 X5 35i
Model Year: 2004
Originally Posted by pinguhk' post='761303' date='Jan 7 2009, 01:57 AM
that is cool
how about a topic on the DIY showing how to mods this step by step
how about a topic on the DIY showing how to mods this step by step
The toughest part was the damn taking out the plastic section. what a Bitch.


