
JUST RELEASED - NEW PART NUMBERS

Thread Starter
Contributors
Joined: Nov 2004
Posts: 572
Likes: 0
From: UK & Europe
My Ride: 2005 MY 545i Sport Saloon. 2006 MY Alpina B3S Convertible. 2006 MY Brabus Smart 42 Cabrio. 2006 MY AM DB9 Coupe.
Rudy
Thanks for the info. Sorry if I've double posted here then....
Do Americans REALLY have more vulnerable knee caps then????????????? Last I heard, we were all of the same species... :bashwall:
All the Best
Hobi
Thanks for the info. Sorry if I've double posted here then....
Do Americans REALLY have more vulnerable knee caps then????????????? Last I heard, we were all of the same species... :bashwall:
All the Best
Hobi
Super Moderator
Joined: Mar 2004
Posts: 17,310
Likes: 2
From: Pittsburgh, PA USA
My Ride: G30 M550i
Model Year: 2018
Originally Posted by Hobi' date='Apr 4 2005, 08:45 AM
Rudy
Thanks for the info.? Sorry if I've double posted here then....
Do Americans REALLY have more vulnerable knee caps then?????????????? Last I heard, we were all of the same species... :bashwall:
All the Best
Hobi
Thanks for the info.? Sorry if I've double posted here then....
Do Americans REALLY have more vulnerable knee caps then?????????????? Last I heard, we were all of the same species... :bashwall:
All the Best
Hobi
[snapback]110871[/snapback]
As you probably know, I think the reason behind the lack of cubby here has to do with crash test scores. It's our crash test dummies that have the more vulnerable knee caps!!


Thread Starter
Contributors
Joined: Nov 2004
Posts: 572
Likes: 0
From: UK & Europe
My Ride: 2005 MY 545i Sport Saloon. 2006 MY Alpina B3S Convertible. 2006 MY Brabus Smart 42 Cabrio. 2006 MY AM DB9 Coupe.
Hi All
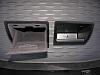
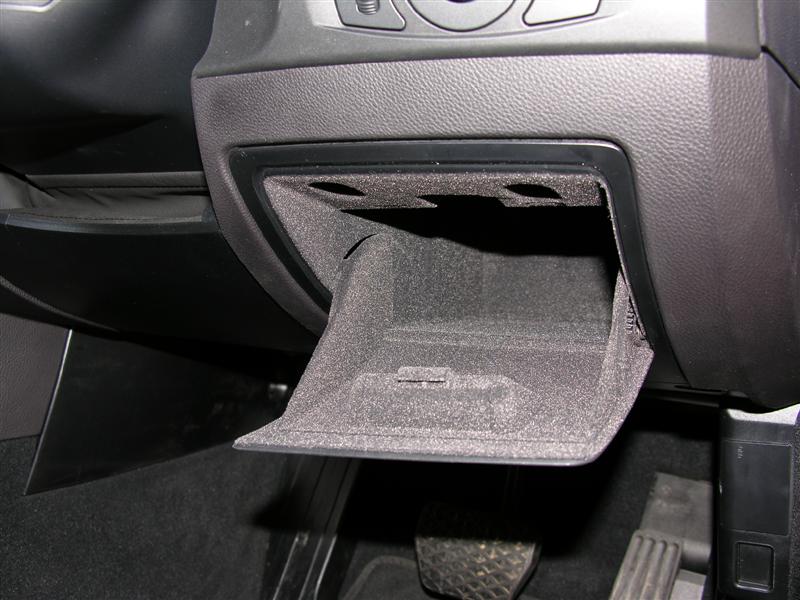
I finally got round to installing the cubby hole retrofit (driver's side glove box for non USA cars) and here are pics. The whole install took less than 5 minutes because I found that it was NOT necessary to undo the undertrim panel.
Image shows original open cubby hole
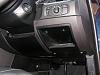
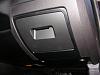
Image shows mounting screws for cubby hole
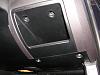
Image shows original cubby hole part and new "glove box" part
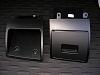
Image showing difference in sizes of parts
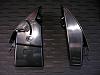
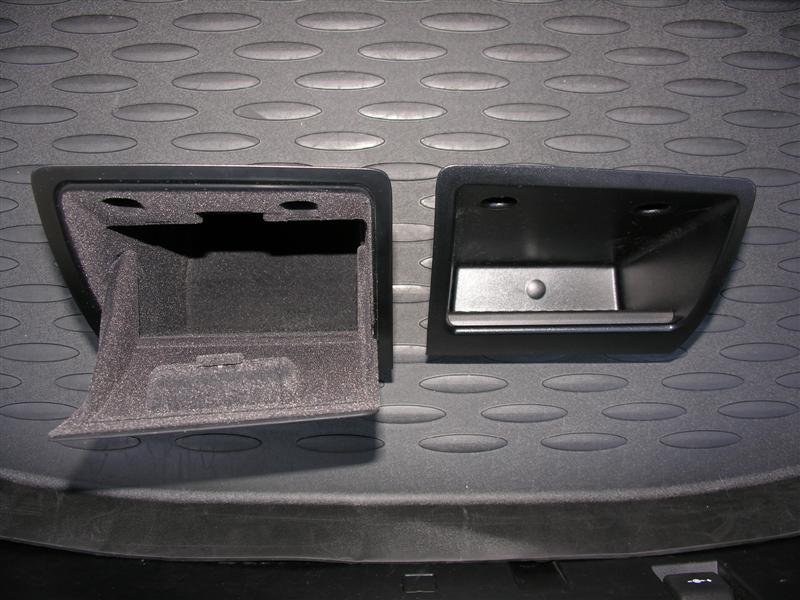
Image showing interior of parts
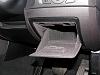
Images showing new glove box in place
FYI: In the UK, this part costs 42.12 Pounds plus VAT and is available in all the different colour trims for the dashboards. Price will be the same or thereabouts for all versions.
For my car (black dashboard) the part number was: 51.45.7.156.964
All the Best
Hobi
I finally got round to installing the cubby hole retrofit (driver's side glove box for non USA cars) and here are pics. The whole install took less than 5 minutes because I found that it was NOT necessary to undo the undertrim panel.
Image shows original open cubby hole
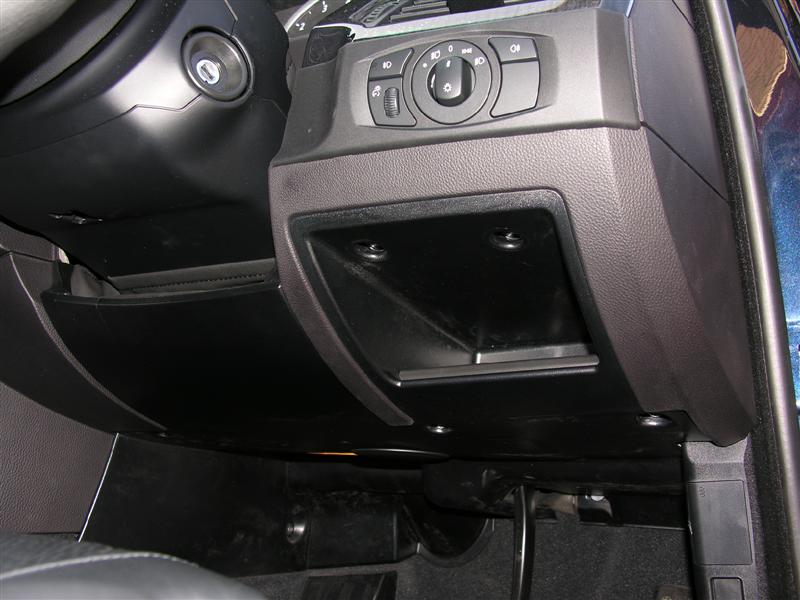
Image shows mounting screws for cubby hole

Image shows original cubby hole part and new "glove box" part
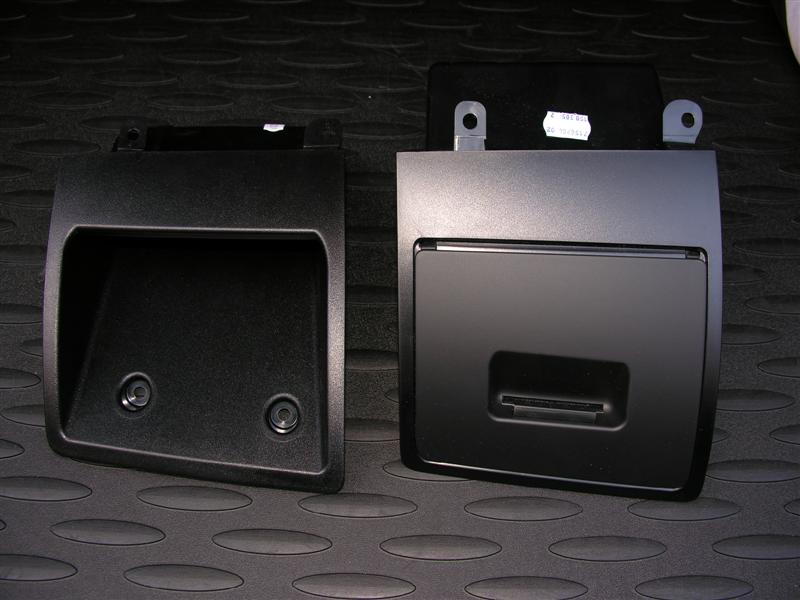
Image showing difference in sizes of parts
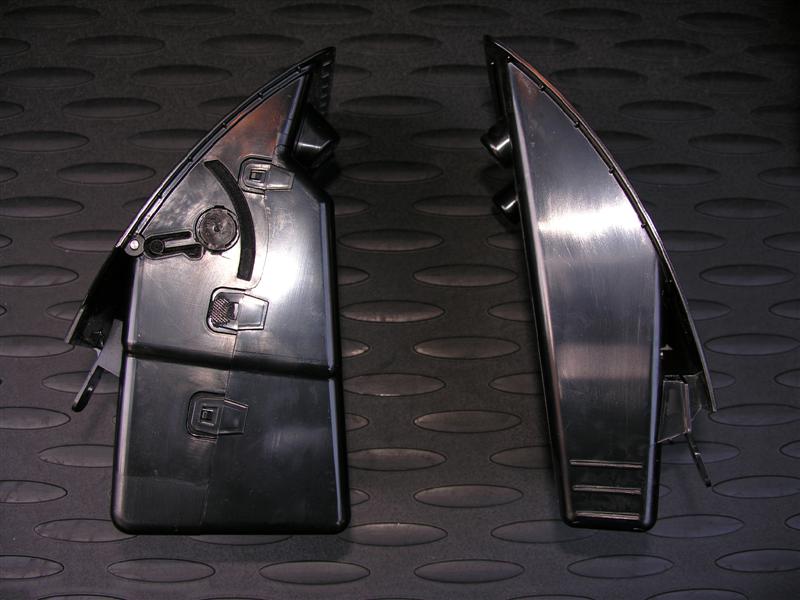
Image showing interior of parts
Images showing new glove box in place

FYI: In the UK, this part costs 42.12 Pounds plus VAT and is available in all the different colour trims for the dashboards. Price will be the same or thereabouts for all versions.
For my car (black dashboard) the part number was: 51.45.7.156.964
All the Best
Hobi

Senior Members
Joined: Jun 2004
Posts: 9,135
Likes: 0
From: USA
Originally Posted by kigerka' date='Apr 27 2005, 02:24 AM
Looks good.? Sux we can't get it unless us USA guys take a chance.? Who's first?
[snapback]120720[/snapback]
 ? you mean have someone to make a cutout then order the part
  ?
?


Thread Starter
Contributors
Joined: Nov 2004
Posts: 572
Likes: 0
From: UK & Europe
My Ride: 2005 MY 545i Sport Saloon. 2006 MY Alpina B3S Convertible. 2006 MY Brabus Smart 42 Cabrio. 2006 MY AM DB9 Coupe.
Hi Harry
Bear in mind what I am describing here is for UK RH drive cars!!! Mirror image everything for LH drive.
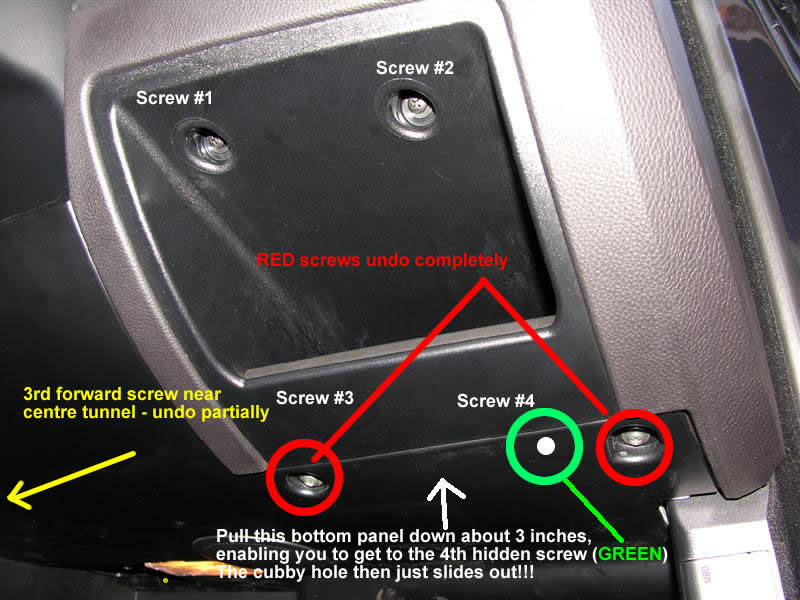
I basically removed the two forward screws that hold the bottom panel nearest the driver's door. I loosened the other forward screw that is next to the centre tunnel. The bottom panel then bends downwards enough to get a philips screwdriver into the hidden 4th screw that actually holds the cubby hole in place.
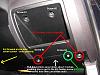
Note the 2 red circled screws hold the bottom panel up as well as the cubby hole part.
In order, I undid the screws: 1, 2, red ones, yellow one, panel pull down, hidden 4th screw, cubby hole completely loose and pull straight out. Install new glove box part and do exactly the reverse. 5 minutes in total using a standard crosspoint screwdriver.
The new glove box is approx twice the cubic volume as the old cubby hole BUT it still fits inside the dash opening.
Hope that explains it.
All the Best
Hobi
Bear in mind what I am describing here is for UK RH drive cars!!! Mirror image everything for LH drive.
I basically removed the two forward screws that hold the bottom panel nearest the driver's door. I loosened the other forward screw that is next to the centre tunnel. The bottom panel then bends downwards enough to get a philips screwdriver into the hidden 4th screw that actually holds the cubby hole in place.
Note the 2 red circled screws hold the bottom panel up as well as the cubby hole part.
In order, I undid the screws: 1, 2, red ones, yellow one, panel pull down, hidden 4th screw, cubby hole completely loose and pull straight out. Install new glove box part and do exactly the reverse. 5 minutes in total using a standard crosspoint screwdriver.
The new glove box is approx twice the cubic volume as the old cubby hole BUT it still fits inside the dash opening.
Hope that explains it.
All the Best
Hobi
Contributors
Joined: Mar 2005
Posts: 244
Likes: 0
From: Germany
My Ride: BMW E60 9/04
BMW E46 / 3
Perfect - you?re the best.
The missing part for me was the green circled thing. That holds that part and I was not able to pull out.
Edit: uuppsss..where the hell is this yellow screw... will find it anyhow.
I see...now then I can place my order!
Great.
In my mind there?s the wiring for the rear cig.lighters turning. I bet, I cannot get the original plugs male/female to build an Y-Connector.
Hmmm..