
DIY E60 Radiator Replacement

Thread Starter
Members
Joined: Nov 2010
Posts: 31
Likes: 0
From: DFW, Texas
My Ride: '06 530i and '99 E46 328i
I searched and could not find any E60 radiator removal so thought I'd share my experience. After replacing several coolant hoses, I was still having to refill my overflow coolant tank about once a week or every 500 miles. I determined it must be coming from the radiator and decided to bite the bullet and replace it. There are several different radiators depending on model, mine is an '06 530i Automatic. I would suggest Realoem.com to help you determine the correct one. Manual and Auto are different for the auto trans cooler fitting. This vehicle has 73,000 miles at time of radiator replacement.
Materials needed:
-Remove bottom cover and drain coolant.
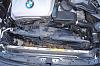
-Start by removing the top panel, there are 10 bolts (T-30). The hood latch is attached to this, there is no need to remove the latch cables just set this panel out of the way with the cable still attached.
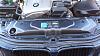
-Remove the plastic top panel, there are 5 bolts (T-25)
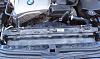
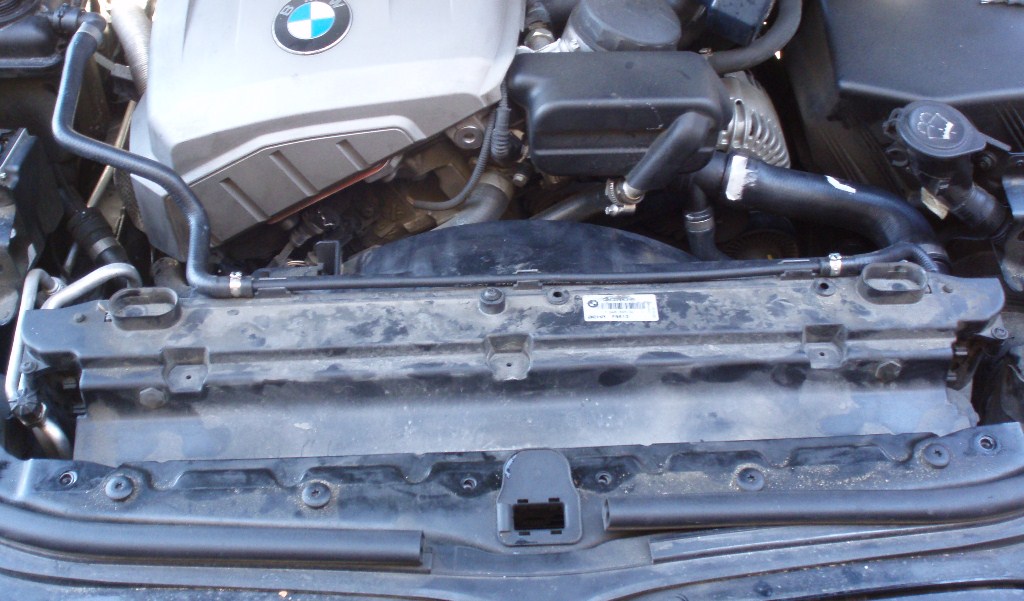
-Remove all quick release hoses, some will need to be removed from bottom. If automatic, remove the transmission cooler. There is just one pull tab that release the quick release and it will slide off. It will just hang there but disconnected from radiator.
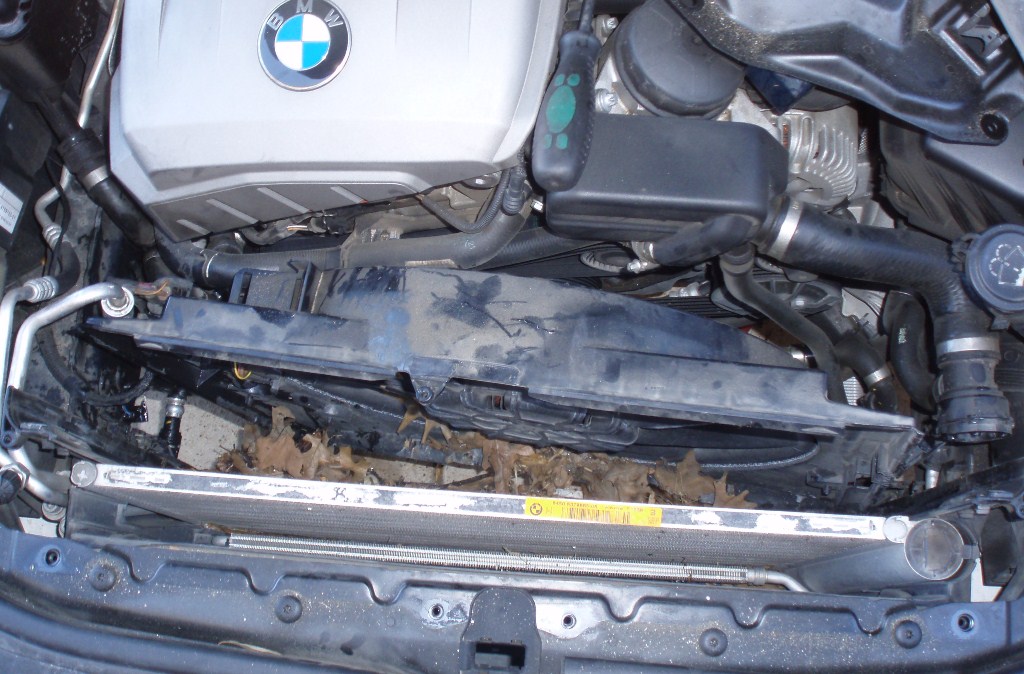
-Fan held in place by tabs slide it up and off radiator, but don't completely remove. Radiator will slide out without removing AC condenser or electric fan.
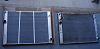
Old radiator will look something like this
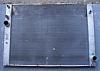
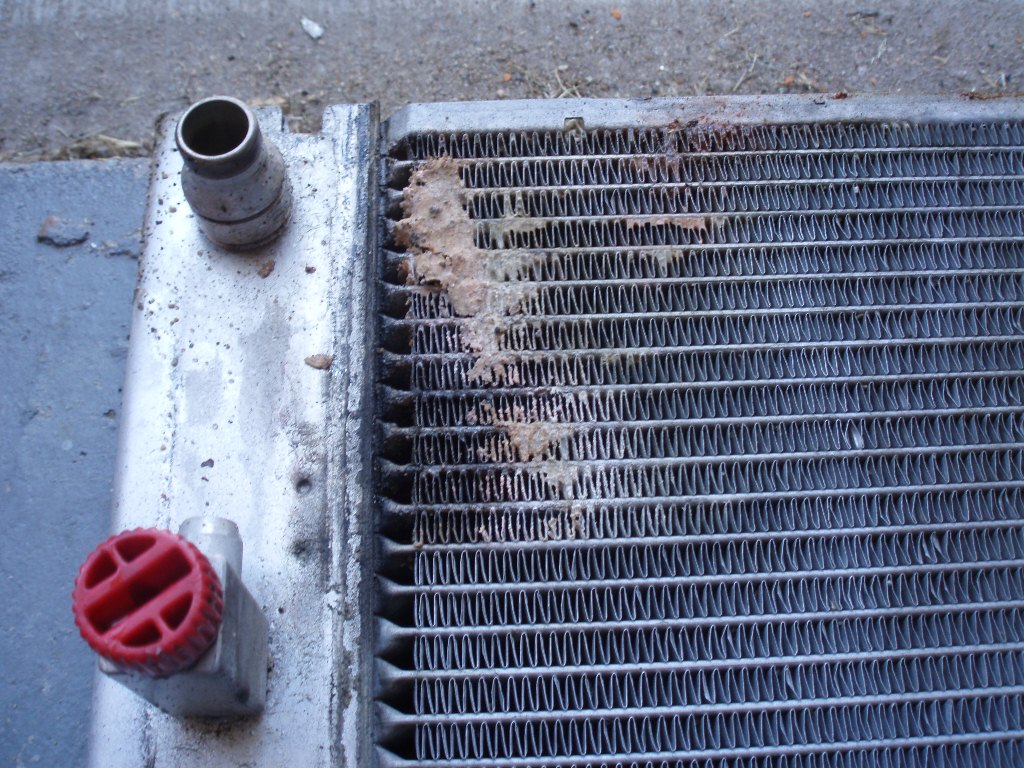
Once out of the car, filled with water and could see it leaking from bottom and side seams of the radiator confirming cause of leak.
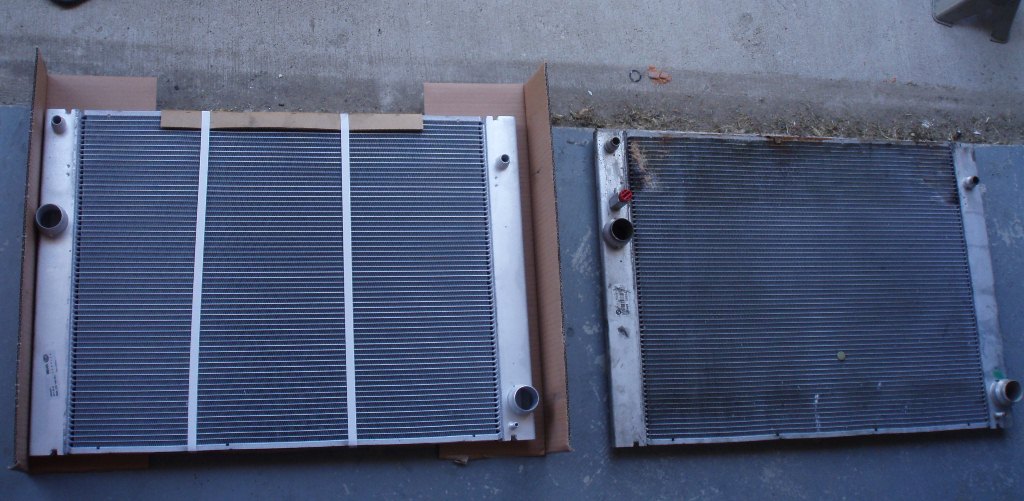
New radiator does not have drain but that's ok. One less spot to leak and it doesn't work well anyways as it drains on connection below it and splashes everywhere.
-Clean out the crud and leaves stuck in the radiator slot.
-Reverse of removal with new radiator, check all hose connections. TIP: Wet the coolant hose connection and the hose with clean water and it will slide on much easier. The plastic on metal causes a lot of friction and it was hard get them seated all the way before I thought to wet them.
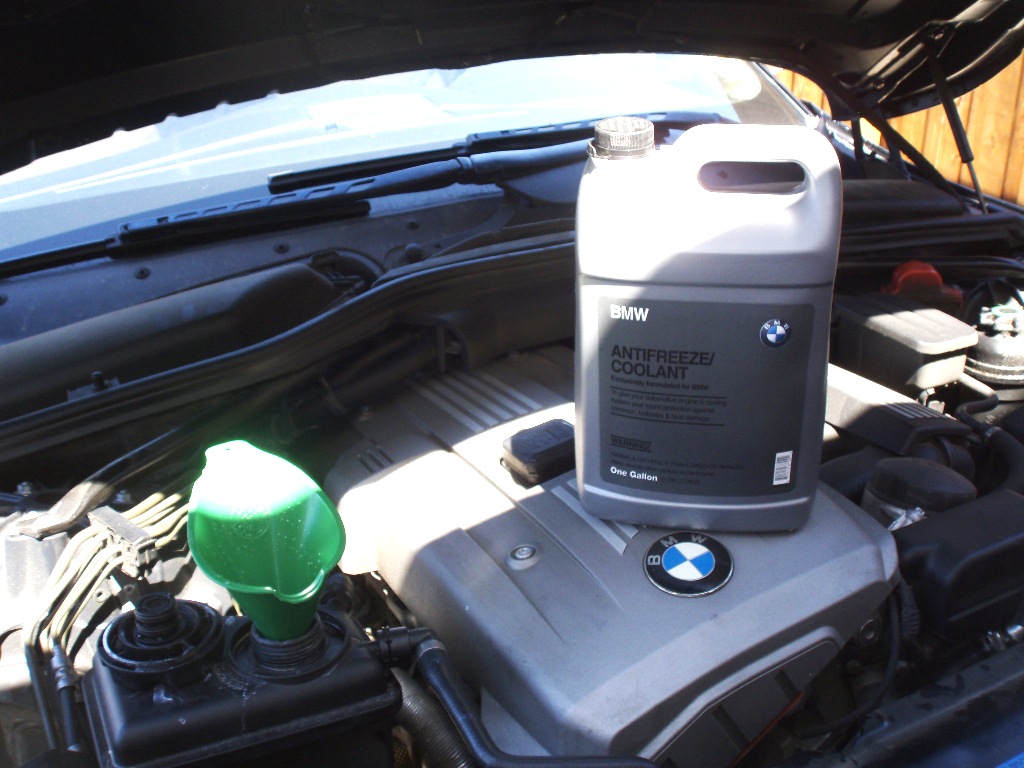
-Refill with coolant/distilled water mix. I used Genuine BMW coolant because I get wholesale pricing on it but I'm sure there are other brands that work just as well. One Gallon coolant plus water will do it
I used this venting procedure after refilling:
Materials needed:
- T-30 bit
- T-25 bit
- Something to pull the quick release hose clamps (I use a curved pick)
- New Coolant
- BEHR Radiator ($179 on sale from FCP Groton online) Part number 17117534914
- Check condition of coolant hoses. I replaced the upper radiator hose and coolant return hose at this time.
-Remove bottom cover and drain coolant.
-Start by removing the top panel, there are 10 bolts (T-30). The hood latch is attached to this, there is no need to remove the latch cables just set this panel out of the way with the cable still attached.

-Remove the plastic top panel, there are 5 bolts (T-25)
-Remove all quick release hoses, some will need to be removed from bottom. If automatic, remove the transmission cooler. There is just one pull tab that release the quick release and it will slide off. It will just hang there but disconnected from radiator.
-Fan held in place by tabs slide it up and off radiator, but don't completely remove. Radiator will slide out without removing AC condenser or electric fan.
Old radiator will look something like this
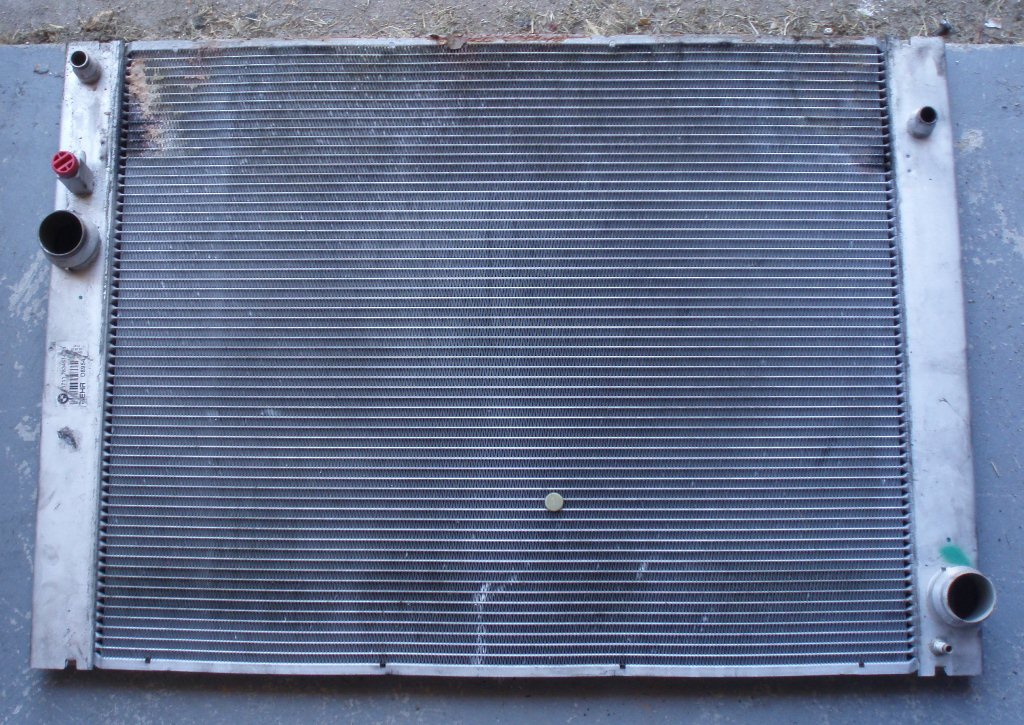
Once out of the car, filled with water and could see it leaking from bottom and side seams of the radiator confirming cause of leak.
New radiator does not have drain but that's ok. One less spot to leak and it doesn't work well anyways as it drains on connection below it and splashes everywhere.
-Clean out the crud and leaves stuck in the radiator slot.
-Reverse of removal with new radiator, check all hose connections. TIP: Wet the coolant hose connection and the hose with clean water and it will slide on much easier. The plastic on metal causes a lot of friction and it was hard get them seated all the way before I thought to wet them.
-Refill with coolant/distilled water mix. I used Genuine BMW coolant because I get wholesale pricing on it but I'm sure there are other brands that work just as well. One Gallon coolant plus water will do it
I used this venting procedure after refilling:
- Connect battery charger
- Switch on ignition, do not start.
- Set heater to max temperature, activate "Auto" button, then reduce fan to lowest setting.
- Press accelerator pedal for 10 seconds to floor. Engine must not be started.
- The venting procedure will start (you will hear noises from engine bay). Takes approximately 12 minutes (hence reason for battery charger)
- Check for the leaks.
- If venting procedure has to be carried out again, allow DME to drop completely (ignition key removed for 3 minutes)
Senior Members
Joined: Oct 2009
Posts: 1,380
Likes: 4
From: Indiana, USA
My Ride: 2007 530xi: Sport, NAV, PDC, HUD, Cold Wthr, CA, Logic 7, HD Radio, SAT, Custom NCS coded options 2008 535xi: Sport, Night Vision, NAV, PDC, HUD, Cold Wthr, CA, Logic 7, SAT, Custom NCS coded options, Rear Seat Heat Retrofit, Passport 9500ci
Model Year: 2008
Engine: N54
Nice DIY contribution!

Senior Members
Joined: Mar 2011
Posts: 1,198
Likes: 3
From: Boston
My Ride: '06 530i, '07 C280 4matic, '98 ML320
good write-up. Thanks for posting.
I think removing the fan would've been better in terms of having more room for connecting and disconnecting hoses as well as cleanup. It only takes 2 minutes to remove the fan... just to wiggle it out of place after bending the tab.
I think removing the fan would've been better in terms of having more room for connecting and disconnecting hoses as well as cleanup. It only takes 2 minutes to remove the fan... just to wiggle it out of place after bending the tab.


Contributors
Joined: Jul 2007
Posts: 1,100
Likes: 1
From: Saint Louis, Missouri, USA
My Ride: 2010 535i M Sport 6MT
Model Year: 2010
Can you please identify the "the upper radiator hose and coolant return hose"?

What amperage did you run the battery charger at? I've found 2A to be insufficient when keeping the ignition on and running the climate control and blower (with engine off). I have found from personal experience that the MPM (micro power module) can be damaged by a battery charger putting out more than 2A.
Is the BEHR radiator made from aluminum?
Thank you for the write-up.
Thread Starter
Members
Joined: Nov 2010
Posts: 31
Likes: 0
From: DFW, Texas
My Ride: '06 530i and '99 E46 328i
1 is the upper radiator hose but that diagram is for a manual transmission because the automatic has another connection for the auto trans cooler fittings. The return hose is 4. The 1 hose is much easier to replace with the radiator removed and covers off. I replaced 2 and 3 at an earlier date http://forums.5serie..._1#entry1284398
I ran the battery charger at 4amp because at 2amp my car still had low battery flashing. I have had it twice on the charger with no adverse effects but it's a smart charger with over surge protection so YMMV.
BEHR radiator is all aluminum, so rust isn't the issue with the leaking, weak joints perhaps?
Can you please identify the "the upper radiator hose and coolant return hose"?
What amperage did you run the battery charger at? I've found 2A to be insufficient when keeping the ignition on and running the climate control and blower (with engine off). I have found from personal experience that the MPM (micro power module) can be damaged by a battery charger putting out more than 2A.
Is the BEHR radiator made from aluminum?
Thank you for the write-up.
Thread Starter
Members
Joined: Nov 2010
Posts: 31
Likes: 0
From: DFW, Texas
My Ride: '06 530i and '99 E46 328i
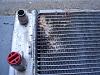
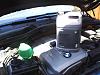
There is a drain screw (red cap is the picture) on the old radiator but on the new one I would have to disconnect the lower most hose to drain. In the picture the radiator is upside down but that's how it looks as you are standing over the car looking down. Also remove the overflow coolant tank cap to drain faster.