
Laser Jammer Install Locations

 03-21-2005, 12:37 PM
#42
Super Moderator
Join Date: Mar 2004
Location: Pittsburgh, PA USA
Posts: 17,310
Likes: 0
Received 2 Likes
on
2 Posts
My Ride: G30 M550i
Model Year: 2018
Originally Posted by Road Runner' date='Mar 21 2005, 04:20 PM
Don't get me wrong, I think that's an excellent suggestion.
[snapback]104714[/snapback]
I simply wasn't sure what you were trying to mount behind the dash -- is it something that needs to be visible from the interior of the car or is it some module that needs to be hidden behind the dash?
03-21-2005, 04:35 PM
#44
Contributors
Thread Starter

Join Date: Mar 2005
Location: U.S. of A.
Posts: 170
Likes: 0
Received 0 Likes
on
0 Posts
My Ride: 2005 545, Titanium Gray II, 6 Spd, CWP, Sat, LPP Laser Defense, V1 (hard-wired), iPod, 38% ceramic tint, CDV delete, H&R Street Performance Coil Overs, Forced Air Induction, DriveData Pro Camera System (4 cams), M5 Front Bumper
CRRobert,
You sure you want to mess with the panel next to the SMG???
I think that would be a great location in terms of appearance, but man I would hate to muck it up! Maybe you are more of an artisan than I... you already heard about my $150 mistake last weekend!
Speaking of which...
Before:

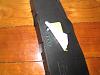
And After:
You sure you want to mess with the panel next to the SMG???
I think that would be a great location in terms of appearance, but man I would hate to muck it up! Maybe you are more of an artisan than I... you already heard about my $150 mistake last weekend!
Speaking of which...
Before:


And After:
 03-21-2005, 05:04 PM
#45
Super Moderator
Join Date: Mar 2004
Location: Pittsburgh, PA USA
Posts: 17,310
Likes: 0
Received 2 Likes
on
2 Posts
My Ride: G30 M550i
Model Year: 2018
Road Runner, are you saying you can't get the seat switch back together now? That looks like something that is doable to me.
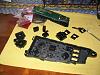
Also, how big is the jammer switch? From the picture you posted, it looks as if there's room for a switch right next to the seat memory buttons...
Also, how big is the jammer switch? From the picture you posted, it looks as if there's room for a switch right next to the seat memory buttons...
03-21-2005, 05:34 PM
#46
Contributors

Join Date: May 2004
Location: Colorado, USA
Posts: 822
Likes: 0
Received 0 Likes
on
0 Posts
Originally Posted by Road Runner' date='Mar 21 2005, 06:35 PM
CRRobert,
You sure you want to mess with the panel next to the SMG?????
I think that would be a great location in terms of appearance, but man I would hate to muck it up!? Maybe you are more of an artisan than I... you already heard about my $150 mistake last weekend!
Speaking of which...
You sure you want to mess with the panel next to the SMG?????
I think that would be a great location in terms of appearance, but man I would hate to muck it up!? Maybe you are more of an artisan than I... you already heard about my $150 mistake last weekend!
Speaking of which...
[snapback]104822[/snapback]

Holy Cow
I figured that I may get another panel to plan my destruction. Since I am out in SD at RV park, I don't have the tools or resources to get too wild.
Hope yours is all back together.
Just had a thought, you maybe install the switch somehow in the Ashtray compartment, so you could have the cover closed? Just a thought.
03-21-2005, 07:02 PM
#47
Contributors
Thread Starter
Join Date: Mar 2005
Location: U.S. of A.
Posts: 170
Likes: 0
Received 0 Likes
on
0 Posts
My Ride: 2005 545, Titanium Gray II, 6 Spd, CWP, Sat, LPP Laser Defense, V1 (hard-wired), iPod, 38% ceramic tint, CDV delete, H&R Street Performance Coil Overs, Forced Air Induction, DriveData Pro Camera System (4 cams), M5 Front Bumper
Rudy,
Well, first... yes, my intention was to place a switch next to the lumbar support. I don't believe the area next to the memory buttons would work because there are a couple of chips on the circuit board at that location (difficult to see from the pic above).
I have been able to put it back together again. The problem is that the buttons don't work quite as well as they used to. I've tried this a few times (taking apart... putting back together). The buttons either end up being too stiff or they are too loose. Usually the latter.
I think this was around the time my wife told me I better not quit my day job yet (seeing as how I'm becoming a regular customer at the BMW Parts Counter).
The main issue is that the circuit board needs to fit tightly on top of button assemblies, and it covers the entire interior area. The main "problem" switch after reassembling is the 4-way seat switch.
Now that I've gone through all of this, the thought occurred to me that the plastic cover around the seat memory buttons may have been a better idea. I'm going to examine this issue tomorrow or the next day, but basically it's just a thin piece of plastic.
03-21-2005, 07:04 PM
#48
Contributors
Thread Starter
Join Date: Mar 2005
Location: U.S. of A.
Posts: 170
Likes: 0
Received 0 Likes
on
0 Posts
My Ride: 2005 545, Titanium Gray II, 6 Spd, CWP, Sat, LPP Laser Defense, V1 (hard-wired), iPod, 38% ceramic tint, CDV delete, H&R Street Performance Coil Overs, Forced Air Induction, DriveData Pro Camera System (4 cams), M5 Front Bumper
Originally Posted by Rudy' date='Mar 21 2005, 10:04 PM
Also, how big is the jammer switch?? From the picture you posted, it looks as if there's room for a switch right next to the seat memory buttons...
[snapback]104830[/snapback]
Also, this is another issue with putting this thing back together - I now have a 3/4" hole in the front cover! :'(
03-21-2005, 07:11 PM
#49
Contributors
Thread Starter
Join Date: Mar 2005
Location: U.S. of A.
Posts: 170
Likes: 0
Received 0 Likes
on
0 Posts
My Ride: 2005 545, Titanium Gray II, 6 Spd, CWP, Sat, LPP Laser Defense, V1 (hard-wired), iPod, 38% ceramic tint, CDV delete, H&R Street Performance Coil Overs, Forced Air Induction, DriveData Pro Camera System (4 cams), M5 Front Bumper
Originally Posted by CRRobert' date='Mar 21 2005, 10:34 PM
[snapback]104822[/snapback]
Just had a thought, you maybe install the switch somehow in the Ashtray compartment, so you could have the cover closed?? Just a thought.[snapback]104837[/snapback]
I'm pretty sure it must be relatively easy to fish a wire from the ashtray over to the driver footwell area, provided you have the carpet strip removed on the driver side of the center console.
I'm also thinking there must be someone who has posted a DIY on installing a short shift kit. I would imagine that would entail removing all or most of the panels around the shifter. Perhaps there might be some useful info in such a post.
03-21-2005, 09:37 PM
#50
Super Moderator
Join Date: Mar 2004
Location: Pittsburgh, PA USA
Posts: 17,310
Likes: 0
Received 2 Likes
on
2 Posts
My Ride: G30 M550i
Model Year: 2018
Originally Posted by Road Runner' date='Mar 21 2005, 11:11 PM
I'm also thinking there must be someone who has posted a DIY on installing a short shift kit.? I would imagine that would entail removing all or most of the panels around the shifter.? Perhaps there might be some useful info in such a post.
[snapback]104869[/snapback]
http://forums.e60.net/index.php?showtopic=...indpost&p=93717