
KW Street Comfort Coilover Install
 04-09-2012, 01:12 PM
#1
Members
Thread Starter

Join Date: Mar 2012
Location: Fresno, California
Posts: 21
Likes: 0
Received 0 Likes
on
0 Posts
My Ride: 2005 BMW 545i
- Titanium Grey Metallic
- aFe Cold Air Intake
- KW Suspensions Street Comfort Coilovers
- Staggered 19" VMR Wheels with Falken Tires
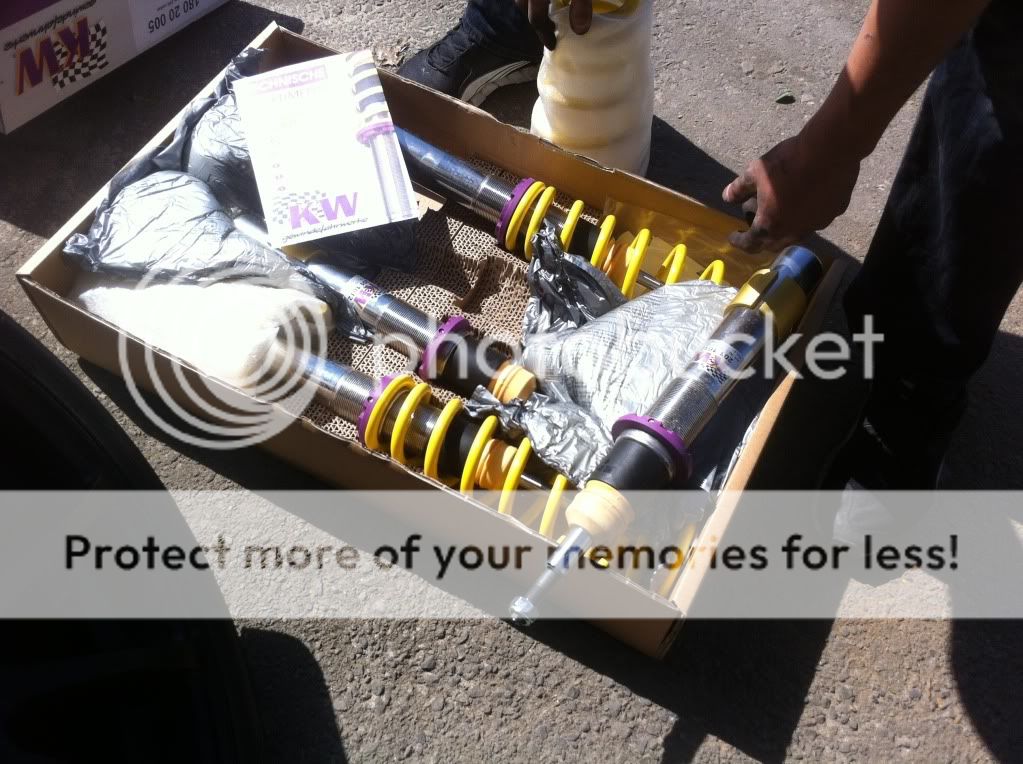
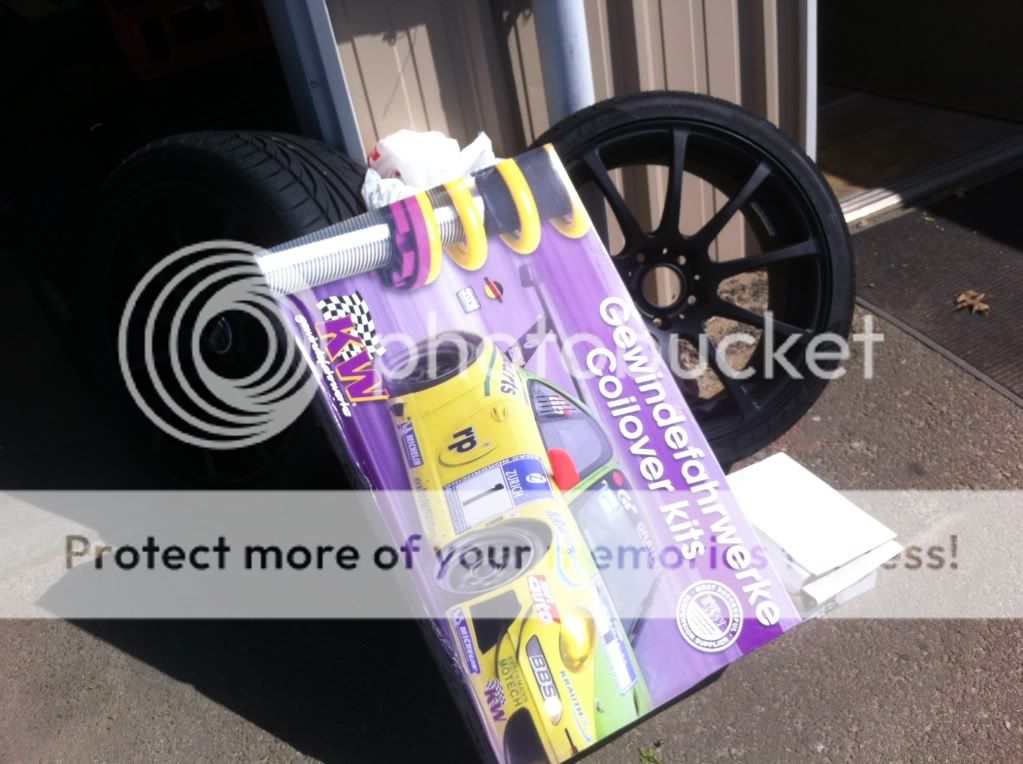
Wanted to share my coilover install with the forum. I recently purchased KW Suspensions Street Comfort Coilovers Part# 18020005 for my 2005 545i. I got a good deal from thesuspensionsource.com
First I want to mention that this is install is going to take more than 1 person. Me and a buddy were able to get these knocked out in about 5-6 hours. I have dynamic drive so it took a little more time. I would recommend using a lift if you can gain access.
The coilovers and wheels
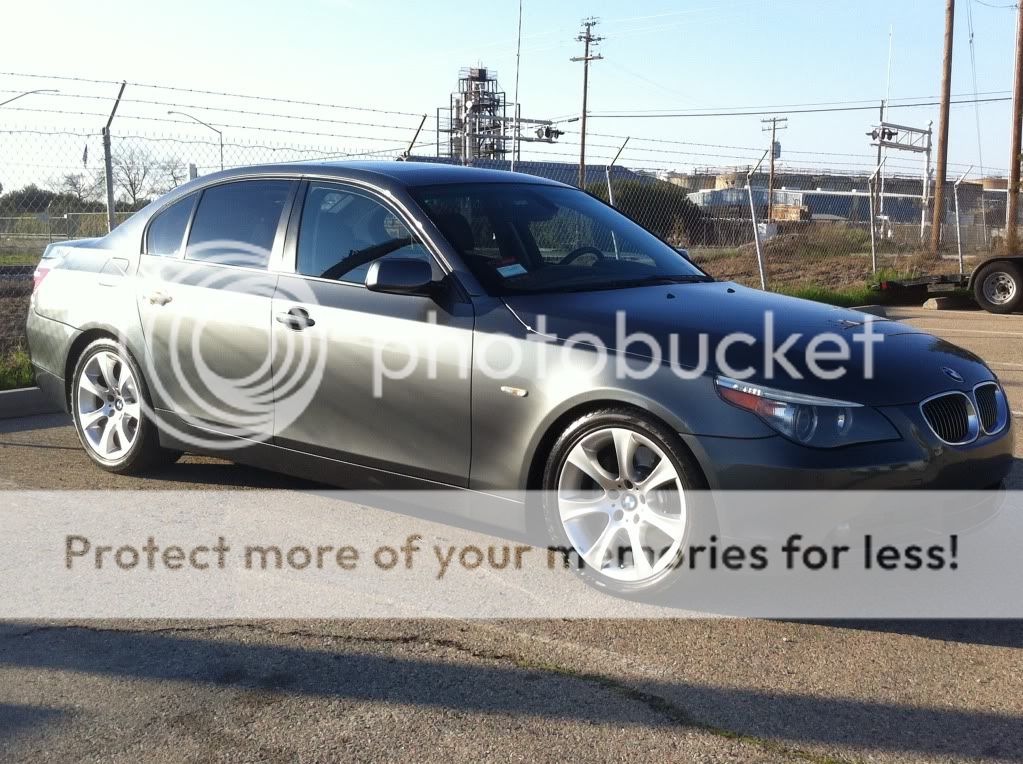
The Car Before
Taking Apart the Front Passenger Side
http://i1246.photobucket.com/albums/...n/IMG_3409.jpg
The had a lot of pretension forcing the lower control arms up. We used a spring compressor to compress the OEM spring. While my buddy removed the strut/coil assembly I pushed down as much as I could on the rotor to force the lower control arm down. After looking back we think the pretension was caused by the dynamic drive system. Be careful when using the spring compressor as you can easily damage your fender.
http://i1246.photobucket.com/albums/...n/IMG_3411.jpg
Getting the strut out of the spindle hub required some thinking. We shot it with WD-40 and let it sit for a few mins. We used a balljoint fork tool to spread open the hub. After a few tries it finally broke loose. My car had the original struts so it took some TLC for it to break loose.
http://www.alpha-sports.com/tools/06...lsE_img_93.jpg
http://i1246.photobucket.com/albums/...n/IMG_3412.jpg
The KWs next to the OEM
http://i1246.photobucket.com/albums/...n/IMG_3413.jpg
I reused my factory top hats since they were in good shape. Since we had em out we re-greased the ball bearings. To get the KW coilover unit back into its new home we again had to push down on the rotor and lower control arm. We also ended up using the spring compressor to help get the unit in. Be careful of the top hat bolts hitting your fender.
http://i1246.photobucket.com/albums/...n/IMG_3414.jpg
KWs installed. My "A" measurement for the front was 8". I am using a 19" x 8.5 wheel up front so I wanted just enough drop to close the fender well gap.
http://i1246.photobucket.com/albums/...n/IMG_3417.jpg
In the front I am running 19" x 8.5 VMR wheels with 235/35/19 FK452 Falken Tires with 18mm Macht Schnell Wheel Spacers.
http://i1246.photobucket.com/albums/...n/IMG_3421.jpg
http://i1246.photobucket.com/albums/...n/IMG_3438.jpg
The rear required to take apart the trunk panels to access the upper bolts. Be careful not to break the tie down hooks with removing. There will also be a cushion that covers access to the bolts. You will need to remove that as well. The rear required my buddy to stand on the rotor to allow me to get the assembly out. It is a very long spring/shock. Again we used a spring compressor to help get it out. Be careful not to damage your fender when removing your coil/shock assembly with the spring compressor attached.
http://i1246.photobucket.com/albums/.../IMG_34251.jpg
KWs next to rear OEM
http://i1246.photobucket.com/albums/...n/IMG_3426.jpg
The KWs in their new home. My "A" measurement for the rear was 10".
http://i1246.photobucket.com/albums/...n/IMG_3427.jpg
In the rear I am running 19" x 9.5 VMR wheels with 275/35/19 FK452 Falken Tires with 5mm Macht Schnell Wheel Spacers.
The car after
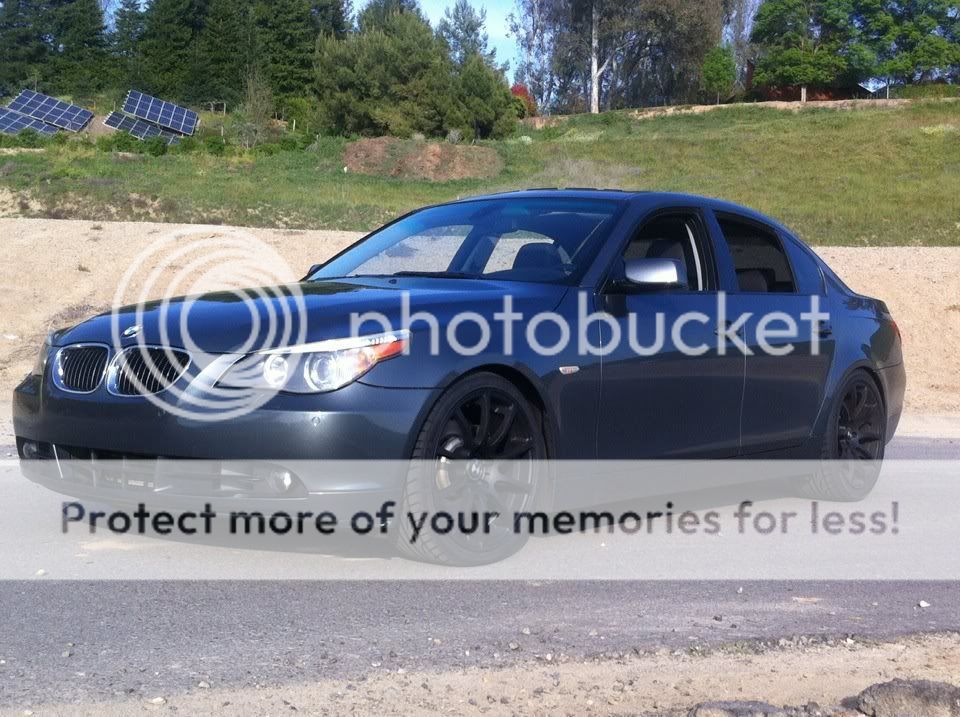
http://i1246.photobucket.com/albums/...n/IMG_3471.jpg
http://i1246.photobucket.com/albums/...n/IMG_3440.jpg
http://i1246.photobucket.com/albums/...n/IMG_3439.jpg
Since we were already playing with the car I also installed aFe Cold Air Intake Part# 51-11081. Took about 30mins to install. The instructions were clear and photos easy to see. Overall I think the quality is better than K&N intakes I have used in the past.
http://i1246.photobucket.com/albums/...n/IMG_3247.jpg
While I was doing the install my M Style Front Bumper from Trinity Autosport arrived. It gets painted this week! Just waiting on my matte black 545i emblem to arrive.
http://i1246.photobucket.com/albums/.../IMG_34181.jpg
First I want to mention that this is install is going to take more than 1 person. Me and a buddy were able to get these knocked out in about 5-6 hours. I have dynamic drive so it took a little more time. I would recommend using a lift if you can gain access.
The coilovers and wheels
The Car Before
Taking Apart the Front Passenger Side
http://i1246.photobucket.com/albums/...n/IMG_3409.jpg
The had a lot of pretension forcing the lower control arms up. We used a spring compressor to compress the OEM spring. While my buddy removed the strut/coil assembly I pushed down as much as I could on the rotor to force the lower control arm down. After looking back we think the pretension was caused by the dynamic drive system. Be careful when using the spring compressor as you can easily damage your fender.
http://i1246.photobucket.com/albums/...n/IMG_3411.jpg
Getting the strut out of the spindle hub required some thinking. We shot it with WD-40 and let it sit for a few mins. We used a balljoint fork tool to spread open the hub. After a few tries it finally broke loose. My car had the original struts so it took some TLC for it to break loose.
http://www.alpha-sports.com/tools/06...lsE_img_93.jpg
http://i1246.photobucket.com/albums/...n/IMG_3412.jpg
The KWs next to the OEM
http://i1246.photobucket.com/albums/...n/IMG_3413.jpg
I reused my factory top hats since they were in good shape. Since we had em out we re-greased the ball bearings. To get the KW coilover unit back into its new home we again had to push down on the rotor and lower control arm. We also ended up using the spring compressor to help get the unit in. Be careful of the top hat bolts hitting your fender.
http://i1246.photobucket.com/albums/...n/IMG_3414.jpg
KWs installed. My "A" measurement for the front was 8". I am using a 19" x 8.5 wheel up front so I wanted just enough drop to close the fender well gap.
http://i1246.photobucket.com/albums/...n/IMG_3417.jpg
In the front I am running 19" x 8.5 VMR wheels with 235/35/19 FK452 Falken Tires with 18mm Macht Schnell Wheel Spacers.
http://i1246.photobucket.com/albums/...n/IMG_3421.jpg
http://i1246.photobucket.com/albums/...n/IMG_3438.jpg
The rear required to take apart the trunk panels to access the upper bolts. Be careful not to break the tie down hooks with removing. There will also be a cushion that covers access to the bolts. You will need to remove that as well. The rear required my buddy to stand on the rotor to allow me to get the assembly out. It is a very long spring/shock. Again we used a spring compressor to help get it out. Be careful not to damage your fender when removing your coil/shock assembly with the spring compressor attached.
http://i1246.photobucket.com/albums/.../IMG_34251.jpg
KWs next to rear OEM
http://i1246.photobucket.com/albums/...n/IMG_3426.jpg
The KWs in their new home. My "A" measurement for the rear was 10".
http://i1246.photobucket.com/albums/...n/IMG_3427.jpg
In the rear I am running 19" x 9.5 VMR wheels with 275/35/19 FK452 Falken Tires with 5mm Macht Schnell Wheel Spacers.
The car after
http://i1246.photobucket.com/albums/...n/IMG_3471.jpg
http://i1246.photobucket.com/albums/...n/IMG_3440.jpg
http://i1246.photobucket.com/albums/...n/IMG_3439.jpg
Since we were already playing with the car I also installed aFe Cold Air Intake Part# 51-11081. Took about 30mins to install. The instructions were clear and photos easy to see. Overall I think the quality is better than K&N intakes I have used in the past.
http://i1246.photobucket.com/albums/...n/IMG_3247.jpg
While I was doing the install my M Style Front Bumper from Trinity Autosport arrived. It gets painted this week! Just waiting on my matte black 545i emblem to arrive.
http://i1246.photobucket.com/albums/.../IMG_34181.jpg
 04-10-2012, 01:22 PM
#3
Contributors
Join Date: Feb 2006
Location: NY
Posts: 14,646
Likes: 0
Received 0 Likes
on
0 Posts
My Ride: 2008 Silverstone II E60 M5 2012 E70 AW X5 50i Sport w/ LCI Aero Kit and Rocker Panels
Since we were already playing with the car I also installed aFe Cold Air Intake Part# 51-11081. Took about 30mins to install. The instructions were clear and photos easy to see. Overall I think the quality is better than K&N intakes I have used in the past.
http://i1246.photobucket.com/albums/...n/IMG_3247.jpg
http://i1246.photobucket.com/albums/...n/IMG_3247.jpg
 04-10-2012, 02:51 PM
#4
Members
Thread Starter
Join Date: Mar 2012
Location: Fresno, California
Posts: 21
Likes: 0
Received 0 Likes
on
0 Posts
My Ride: 2005 BMW 545i
- Titanium Grey Metallic
- aFe Cold Air Intake
- KW Suspensions Street Comfort Coilovers
- Staggered 19" VMR Wheels with Falken Tires
04-10-2012, 02:53 PM
#5
Members
Thread Starter
Join Date: Mar 2012
Location: Fresno, California
Posts: 21
Likes: 0
Received 0 Likes
on
0 Posts
My Ride: 2005 BMW 545i
- Titanium Grey Metallic
- aFe Cold Air Intake
- KW Suspensions Street Comfort Coilovers
- Staggered 19" VMR Wheels with Falken Tires
04-10-2012, 04:06 PM
#6
Contributors
Join Date: Apr 2008
Location: Miami Gardens, FL
Posts: 1,206
Likes: 0
Received 0 Likes
on
0 Posts
04-12-2012, 01:03 PM
#7
Contributors
Join Date: Feb 2006
Location: NY
Posts: 14,646
Likes: 0
Received 0 Likes
on
0 Posts
My Ride: 2008 Silverstone II E60 M5 2012 E70 AW X5 50i Sport w/ LCI Aero Kit and Rocker Panels
04-17-2012, 02:15 PM
#8
Members

Join Date: Feb 2011
Location: Eastern Connecticut
Posts: 80
Likes: 0
Received 0 Likes
on
0 Posts
Wanted to share my coilover install with the forum. I recently purchased KW Suspensions Street Comfort Coilovers Part# 18020005 for my 2005 545i. I got a good deal from thesuspensionsource.com
First I want to mention that this is install is going to take more than 1 person. Me and a buddy were able to get these knocked out in about 5-6 hours. I have dynamic drive so it took a little more time. I would recommend using a lift if you can gain access.
The coilovers and wheels
The Car Before
Taking Apart the Front Passenger Side
http://i1246.photobucket.com/albums/...n/IMG_3409.jpg
The had a lot of pretension forcing the lower control arms up. We used a spring compressor to compress the OEM spring. While my buddy removed the strut/coil assembly I pushed down as much as I could on the rotor to force the lower control arm down. After looking back we think the pretension was caused by the dynamic drive system. Be careful when using the spring compressor as you can easily damage your fender.
http://i1246.photobucket.com/albums/...n/IMG_3411.jpg
Getting the strut out of the spindle hub required some thinking. We shot it with WD-40 and let it sit for a few mins. We used a balljoint fork tool to spread open the hub. After a few tries it finally broke loose. My car had the original struts so it took some TLC for it to break loose.
http://www.alpha-sports.com/tools/06...lsE_img_93.jpg
http://i1246.photobucket.com/albums/...n/IMG_3412.jpg
The KWs next to the OEM
http://i1246.photobucket.com/albums/...n/IMG_3413.jpg
I reused my factory top hats since they were in good shape. Since we had em out we re-greased the ball bearings. To get the KW coilover unit back into its new home we again had to push down on the rotor and lower control arm. We also ended up using the spring compressor to help get the unit in. Be careful of the top hat bolts hitting your fender.
http://i1246.photobucket.com/albums/...n/IMG_3414.jpg
KWs installed. My "A" measurement for the front was 8". I am using a 19" x 8.5 wheel up front so I wanted just enough drop to close the fender well gap.
http://i1246.photobucket.com/albums/...n/IMG_3417.jpg
In the front I am running 19" x 8.5 VMR wheels with 235/35/19 FK452 Falken Tires with 18mm Macht Schnell Wheel Spacers.
http://i1246.photobucket.com/albums/...n/IMG_3421.jpg
http://i1246.photobucket.com/albums/...n/IMG_3438.jpg
The rear required to take apart the trunk panels to access the upper bolts. Be careful not to break the tie down hooks with removing. There will also be a cushion that covers access to the bolts. You will need to remove that as well. The rear required my buddy to stand on the rotor to allow me to get the assembly out. It is a very long spring/shock. Again we used a spring compressor to help get it out. Be careful not to damage your fender when removing your coil/shock assembly with the spring compressor attached.
http://i1246.photobucket.com/albums/.../IMG_34251.jpg
KWs next to rear OEM
http://i1246.photobucket.com/albums/...n/IMG_3426.jpg
The KWs in their new home. My "A" measurement for the rear was 10".
http://i1246.photobucket.com/albums/...n/IMG_3427.jpg
In the rear I am running 19" x 9.5 VMR wheels with 275/35/19 FK452 Falken Tires with 5mm Macht Schnell Wheel Spacers.
The car after
http://i1246.photobucket.com/albums/...n/IMG_3471.jpg
http://i1246.photobucket.com/albums/...n/IMG_3440.jpg
http://i1246.photobucket.com/albums/...n/IMG_3439.jpg
Since we were already playing with the car I also installed aFe Cold Air Intake Part# 51-11081. Took about 30mins to install. The instructions were clear and photos easy to see. Overall I think the quality is better than K&N intakes I have used in the past.
http://i1246.photobucket.com/albums/...n/IMG_3247.jpg
While I was doing the install my M Style Front Bumper from Trinity Autosport arrived. It gets painted this week! Just waiting on my matte black 545i emblem to arrive.
http://i1246.photobucket.com/albums/.../IMG_34181.jpg
04-17-2012, 05:00 PM
#9
Contributors

Join Date: Mar 2010
Location: Los Angeles, CA
Posts: 3,098
Likes: 0
Received 4 Likes
on
4 Posts
My Ride: BMW
Model Year: 2006
If you want the ride quality back, KWs are the best for it. Not to mention, you can adjust their dampening and rebound.
Stock :
F - 400 lbs/inch 7kg
R - Progressive
KW Street Comforts:
F - 286 lbs/inch E60 545 5kg
R - 314 lbs/inch E60 545 5.6kg
KW V2/V3
F - 400
R - Progressive
Unfortunately, I don't have H&R's spring rates, but they are definitely higher than stock.
Stock :
F - 400 lbs/inch 7kg
R - Progressive
KW Street Comforts:
F - 286 lbs/inch E60 545 5kg
R - 314 lbs/inch E60 545 5.6kg
KW V2/V3
F - 400
R - Progressive
Unfortunately, I don't have H&R's spring rates, but they are definitely higher than stock.
04-18-2012, 10:36 AM
#10
Senior Members
Join Date: Nov 2011
Location: Los Angeles, CA
Posts: 924
Likes: 0
Received 1 Like
on
1 Post
My Ride: 2008 AW N52 with sports package & premium package; natural brown interior
MODs:
Orion V2s
3000K H8 Yellow Fogs
Matte Black Kidney Grills
20" Miro 111
Hankook V12 Tires
H&R Sport Springs
Special coding via Simon (dbl flash hazards, digital velocity, etc.)
LED Side Markers from Trinity Autosports
LED License Plate Lights from Trinity Autosports
Carbon Delete
BMC Air Filter
RPI Scoop
RPI GT Exhaust
Future MODs:
Mtech Kit
KW Variant 2 Coilovers
CIC Retrofit
Upgrade Audio System
How is the ride compared to stock?