iPod Hardwire Install
 06-09-2005, 06:13 PM
#1
Banned
Thread Starter

Join Date: Jan 2005
Location: San Francisco Bay area
Posts: 2,882
Likes: 0
Received 0 Likes
on
0 Posts
My Ride: '05 545i, silver gray, black leather with anthracite maple wood, sport package, premium sound, navigation, cold weather package, electric rear sunshade, folding rear seat, satellite radio prep, PIAA 4150K fogs, red rear reflectors, hardwired Valentine One
I wanted to connect an iPod to my car and decided that waiting for the BMW iPod connector might take a while...or never happen, so I got the aux input installed ($64 part + $140 install). They also updated my s/w to 17.01.
I decided to have the iPod in the center arm rest (to be out of sight, and also have easy access).
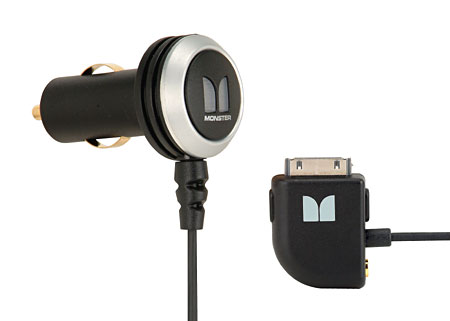
For a power source, I went with the Monster iCarCharger, since it has a direct line out (not through an amplifier like the Belkin adapter, so you have a clean output), which I hardwired to the switched power lines of one of the power outlets in the rear center console (below the A/C vents). You definitely don't want to use the headphone jack, since it is filtered and tailored toward headphone use and the quality & volume level of a headphone simply cannot compete with your car stereo. The headphone jack sound quality and bass levels are greatly reduced. The bottom dock connector (which transfers audio out of the iCarCharger's 3.5mm port) generates pure, unfiltered sound.
Here's a list of parts you'll need--on a difficulty scale of 1 - 5 with 1 being the easiest, I'd say this DIY is a 3--once I had all the parts, it took me half an afternoon to complete:
Monster iCarCharger--$40 from BestBuy:
http://www.monstercable.com/computer/produ...pple%20Products
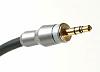
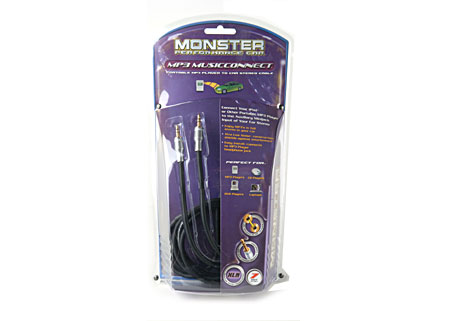
Monster MP3 MusicConnect shielded cable with mini-stereo connectors (1/8" mini jack on each end)--$20 from BestBuy:
http://www.monstercable.com/productPage.asp?pin=3258
Griffin AirClick remote control for iPod--$40 at Apple Store:
http://www.griffintechnology.com/pro...lick/index.php
Wire connectors--$4 at RadioShack:
http://www.radioshack.com/product.asp?cata...ct%5Fid=64-3131
http://www.radioshack.com/product.asp?cata...ct%5Fid=64-3133
18 gauge wire--you?ll need about a foot--I bought 4 feet to have extra ($0.12 per foot)
In-line fuse holder & fuses--$5
With this set up, when you have the audio input on aux input and the iPod playing & you turn off the car, the iPod pauses and shuts itself off after a few minutes. When you start the car, the iPod turns on and is still paused (at the point in the song when you turned off the car), and I use the Griffin AirClick to resume playing, by pressing the play/pause button (actually, pressing any button will work). I keep the AirClick remote in the drivers door storage area, so it's easy to press the play button. You don't have to open the center arm rest to access the iPod, except when you want to select a new playlist.
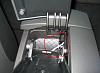
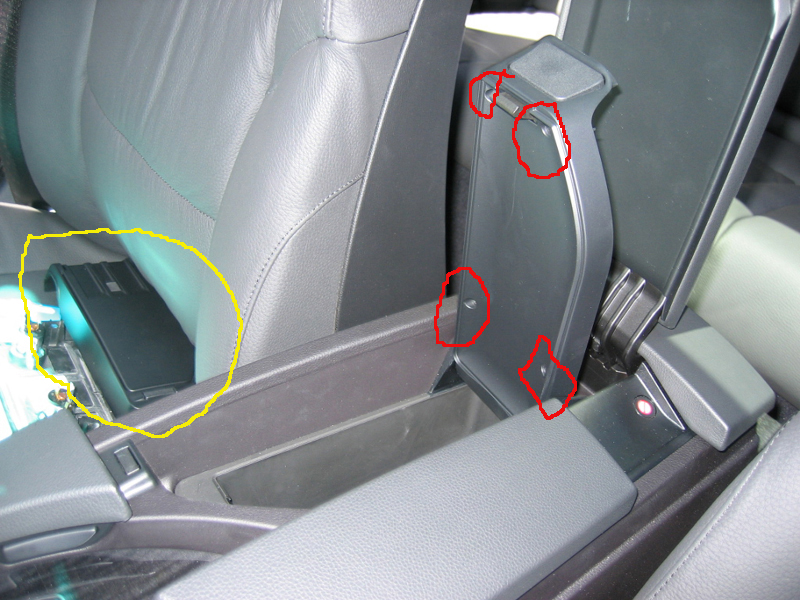
I first removed the coin holder in the center arm rest--there are 4 torx screws (red circles)--you can see the coin holder on the seat (yellow circle):
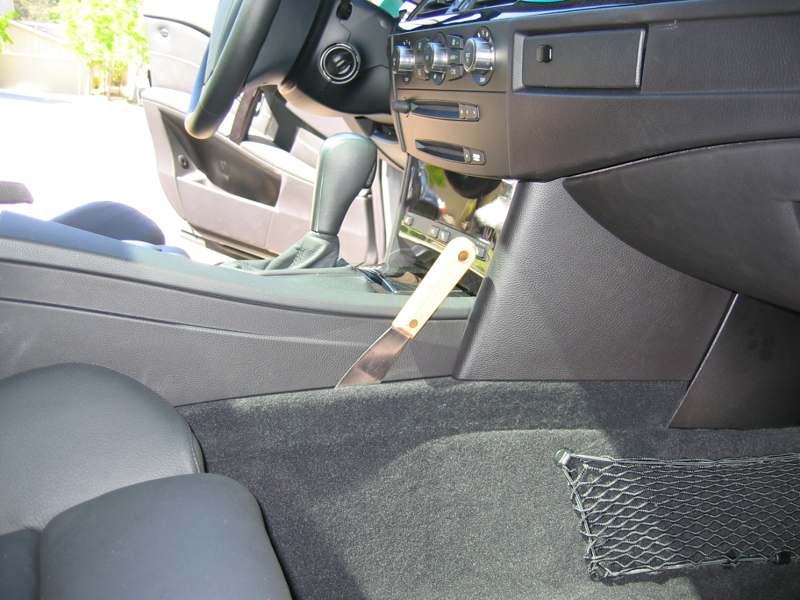
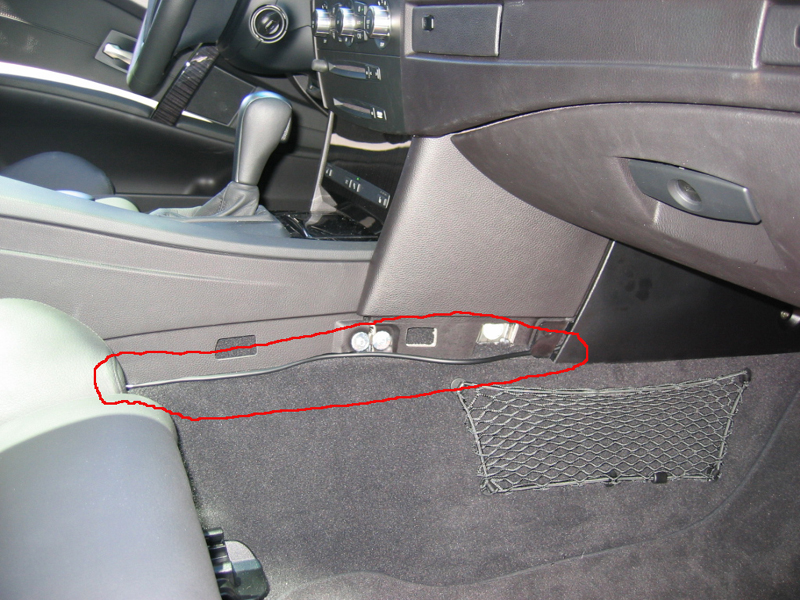
Next remove the panel that holds the 2 power outlets at the back of the rear center console--I used a metal spackle knife to wedged it out from the bottom sides--you need to use a bit of force, and it will eventually snap out on both bottom sides. Here's instructions (compliments of Rudy ):
):
rear_insert.pdf
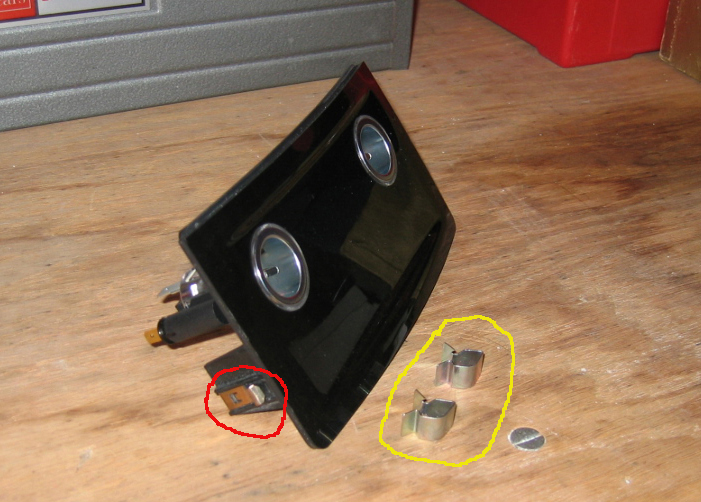
The 2 clips on the bottom sides (red circle) fell into the center console so you need to find them with a flash light and replace them for reassembly. The pic also show the 2 clips from the bottom edge of the A/C vent (yellow circle--see next instruction).
Next you remove the A/C vent--instructions:
fresh_air_grill.pdf
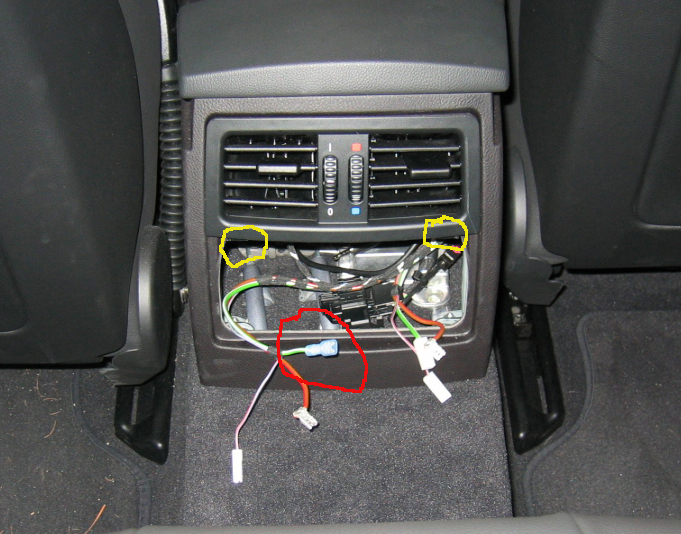
There are 2 clips (yellow circles) at the bottom corners, which you use needle nose pliers to pull down and out, then you pull the assembly toward you and down to remove. The red circle shows a blue female connector which I connected to the green wire in place of the stock connector, to fit the harness I made:
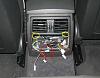
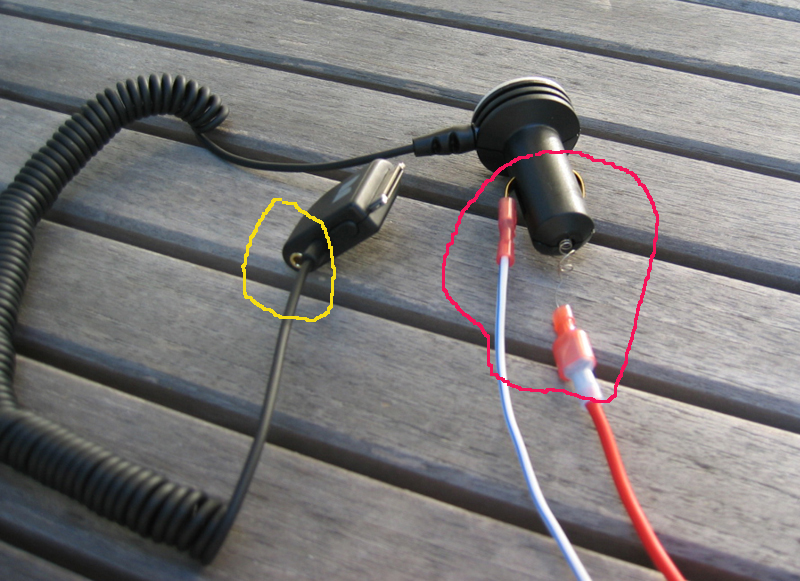
To hardwire the Monster iCarCharger, I used the metal spackle knife to wedge open the part of the adapter that would slide into the power outlet, to reveal the spring in the center, and one of the metal pieces on the side. I attached a female connector to each and crimped to secure (red circle). The pic also shows the line out connection (yellow circle):

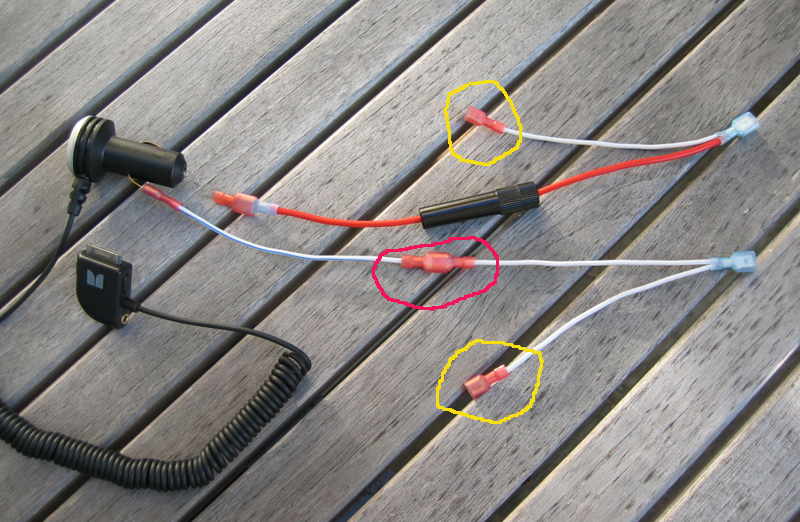
I assembled a harness to tap into the power and ground wires from one of the rear power outlets. The blue male connectors at the far right connect to the female connectors that originally connected to the power outlet (the red circled connection is unnecessary--you can use a straight wire here). The orange female connectors (yellow circles) connect to the power outlet:

Wrap all exposed connections with electrical tape, and reinstall A/C vents and power outlet panel.
Once you have the aux input installed in the glove box, you need to run the mini-stereo cable from the glove box to the rear center console. First remove the trim at the side of the rear center console, using a metal spackle knife and pushing towards the rear of the car--instructions here (again compliments of Rudy ):
under_dash_panel_removal.pdf

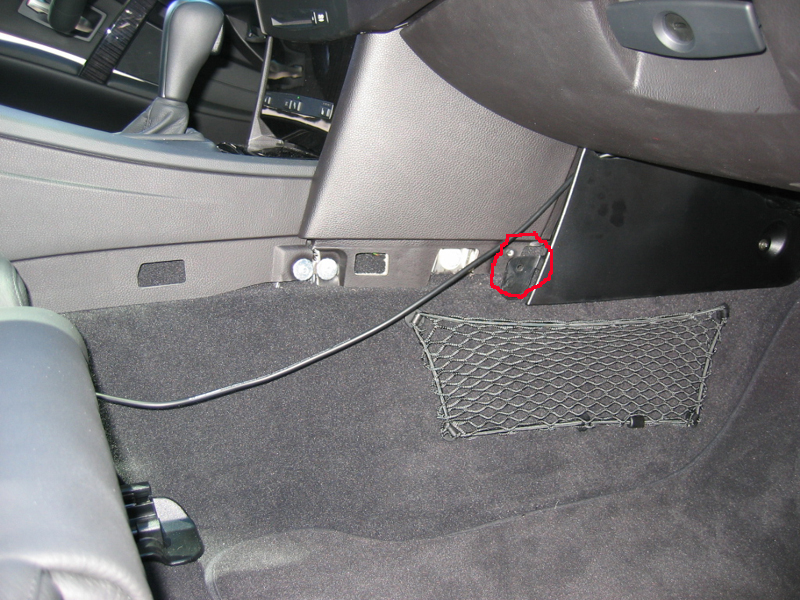
Remove screw (red circle) from side trim panel and pull panel toward you and down. After plugging cable into aux input and fishing through back of opened glove box door, run cable into top of panel and behind it
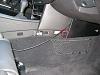
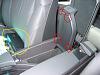
Run cable along side of rear center console, and into rear section:
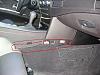
Run mini-stereo cable and coiled wire from Monster iCarCharger into center console compartment below the coin holder--this pic has a white wire for easy identification showing location. You'll need to enlarge the opening, using a Dremel or similar tool, so the iCarCharger plug will fit through:
Install coin holder.
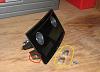
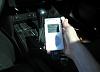
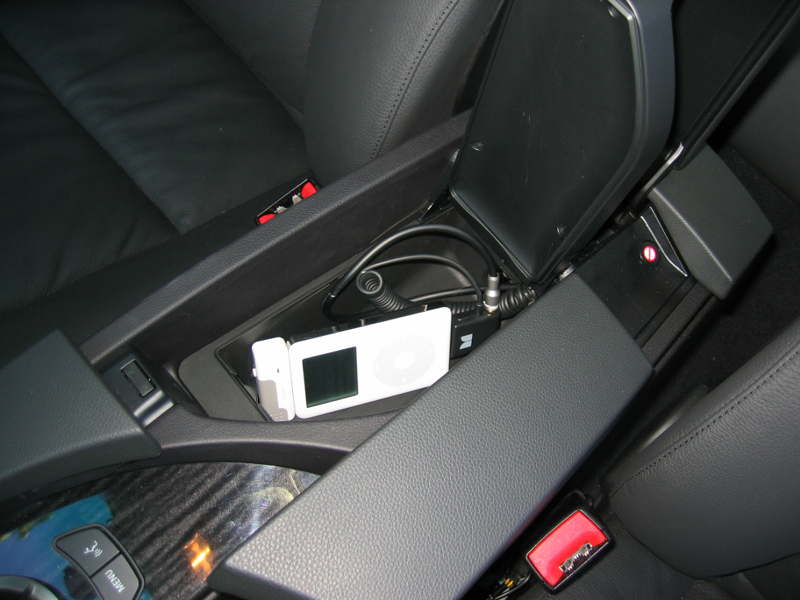
Here's the iPod in the armrest:
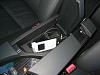
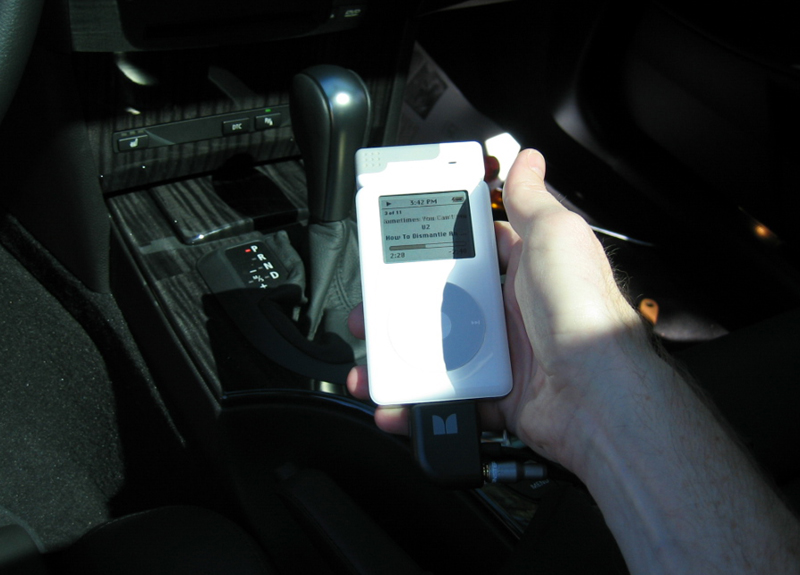
You can remove the iPod from the armrest to change playlists, etc.:
I ripped my CDs to iTunes as MP3 at 192 kbps, and the sound quality is excellent. Anybody want to buy a CD changer??!!
I decided to have the iPod in the center arm rest (to be out of sight, and also have easy access).
For a power source, I went with the Monster iCarCharger, since it has a direct line out (not through an amplifier like the Belkin adapter, so you have a clean output), which I hardwired to the switched power lines of one of the power outlets in the rear center console (below the A/C vents). You definitely don't want to use the headphone jack, since it is filtered and tailored toward headphone use and the quality & volume level of a headphone simply cannot compete with your car stereo. The headphone jack sound quality and bass levels are greatly reduced. The bottom dock connector (which transfers audio out of the iCarCharger's 3.5mm port) generates pure, unfiltered sound.
Here's a list of parts you'll need--on a difficulty scale of 1 - 5 with 1 being the easiest, I'd say this DIY is a 3--once I had all the parts, it took me half an afternoon to complete:
Monster iCarCharger--$40 from BestBuy:
http://www.monstercable.com/computer/produ...pple%20Products
Monster MP3 MusicConnect shielded cable with mini-stereo connectors (1/8" mini jack on each end)--$20 from BestBuy:

http://www.monstercable.com/productPage.asp?pin=3258
Griffin AirClick remote control for iPod--$40 at Apple Store:
http://www.griffintechnology.com/pro...lick/index.php
Wire connectors--$4 at RadioShack:
http://www.radioshack.com/product.asp?cata...ct%5Fid=64-3131
http://www.radioshack.com/product.asp?cata...ct%5Fid=64-3133
18 gauge wire--you?ll need about a foot--I bought 4 feet to have extra ($0.12 per foot)
In-line fuse holder & fuses--$5
With this set up, when you have the audio input on aux input and the iPod playing & you turn off the car, the iPod pauses and shuts itself off after a few minutes. When you start the car, the iPod turns on and is still paused (at the point in the song when you turned off the car), and I use the Griffin AirClick to resume playing, by pressing the play/pause button (actually, pressing any button will work). I keep the AirClick remote in the drivers door storage area, so it's easy to press the play button. You don't have to open the center arm rest to access the iPod, except when you want to select a new playlist.
I first removed the coin holder in the center arm rest--there are 4 torx screws (red circles)--you can see the coin holder on the seat (yellow circle):
Next remove the panel that holds the 2 power outlets at the back of the rear center console--I used a metal spackle knife to wedged it out from the bottom sides--you need to use a bit of force, and it will eventually snap out on both bottom sides. Here's instructions (compliments of Rudy
):rear_insert.pdf
The 2 clips on the bottom sides (red circle) fell into the center console so you need to find them with a flash light and replace them for reassembly. The pic also show the 2 clips from the bottom edge of the A/C vent (yellow circle--see next instruction).
Next you remove the A/C vent--instructions:
fresh_air_grill.pdf
There are 2 clips (yellow circles) at the bottom corners, which you use needle nose pliers to pull down and out, then you pull the assembly toward you and down to remove. The red circle shows a blue female connector which I connected to the green wire in place of the stock connector, to fit the harness I made:
To hardwire the Monster iCarCharger, I used the metal spackle knife to wedge open the part of the adapter that would slide into the power outlet, to reveal the spring in the center, and one of the metal pieces on the side. I attached a female connector to each and crimped to secure (red circle). The pic also shows the line out connection (yellow circle):
I assembled a harness to tap into the power and ground wires from one of the rear power outlets. The blue male connectors at the far right connect to the female connectors that originally connected to the power outlet (the red circled connection is unnecessary--you can use a straight wire here). The orange female connectors (yellow circles) connect to the power outlet:
Wrap all exposed connections with electrical tape, and reinstall A/C vents and power outlet panel.
Once you have the aux input installed in the glove box, you need to run the mini-stereo cable from the glove box to the rear center console. First remove the trim at the side of the rear center console, using a metal spackle knife and pushing towards the rear of the car--instructions here (again compliments of Rudy
):under_dash_panel_removal.pdf
Remove screw (red circle) from side trim panel and pull panel toward you and down. After plugging cable into aux input and fishing through back of opened glove box door, run cable into top of panel and behind it
Run cable along side of rear center console, and into rear section:
Run mini-stereo cable and coiled wire from Monster iCarCharger into center console compartment below the coin holder--this pic has a white wire for easy identification showing location. You'll need to enlarge the opening, using a Dremel or similar tool, so the iCarCharger plug will fit through:

Install coin holder.
Here's the iPod in the armrest:
You can remove the iPod from the armrest to change playlists, etc.:
I ripped my CDs to iTunes as MP3 at 192 kbps, and the sound quality is excellent. Anybody want to buy a CD changer??!!
 06-09-2005, 08:19 PM
#2
Members

Join Date: Feb 2005
Location: So. California
Posts: 237
Likes: 0
Received 0 Likes
on
0 Posts
My Ride: '05 545 Sport Week 9
Nice writeup thanks!
What's the coin tray, I don't have that in my car. Was that an accessory? Does it replace the other compartment in the center of the console that is meant for a phone?
What's the coin tray, I don't have that in my car. Was that an accessory? Does it replace the other compartment in the center of the console that is meant for a phone?
06-09-2005, 08:25 PM
#3
Banned
Thread Starter
Join Date: Jan 2005
Location: San Francisco Bay area
Posts: 2,882
Likes: 0
Received 0 Likes
on
0 Posts
My Ride: '05 545i, silver gray, black leather with anthracite maple wood, sport package, premium sound, navigation, cold weather package, electric rear sunshade, folding rear seat, satellite radio prep, PIAA 4150K fogs, red rear reflectors, hardwired Valentine One
Originally Posted by TitaniumGray5' date='Jun 9 2005, 09:19 PM
Nice writeup thanks!
What's the coin tray, I don't have that in my car.? Was that an accessory?? Does it replace the other compartment in the center of the console that is meant for a phone?
What's the coin tray, I don't have that in my car.? Was that an accessory?? Does it replace the other compartment in the center of the console that is meant for a phone?
[snapback]138136[/snapback]
06-09-2005, 08:57 PM
#4
Contributors

Join Date: Apr 2005
Location: Bay Area, CA
Posts: 599
Likes: 0
Received 0 Likes
on
0 Posts
My Ride: 545i Sport Auto (see sig)
Nice howto. I personally prefer the iPod in front me when I'm driving so I can pause/change music at a moment's notice. Only problem with this is the fonts on the iPod are too small for safe reading at driving speeds, and the wheel too sensitive. I'm going to troll some of the iPod boards and see if there is a way to adjust this.
06-12-2005, 09:54 AM
#5
Contributors
Join Date: Oct 2004
Location: Barrington (outside of Chicago), IL, USA
Posts: 247
Likes: 0
Received 0 Likes
on
0 Posts
My Ride: 2005 530i, Jet Black, Black Leather, Automatic, Cold Weather, Sirius Prep and Radio, Premium Package, Xenon Lights.
Doesn't this just seem cooler and way easier?
TuneBase for iPod mini
Part # F8V7098
The TuneBase for iPod mini mobile digital devices offers the most flexible way to use your iPod mini on the road. The holder features an innovative, flexible-steel neck that easily positions your iPod mini for your comfort, convenience, and safety while driving. TuneBase works through any cigarette lighter outlet within the car.
While mounted in the TuneBase, your iPod mini powers and charges simultaneously. The TuneBase also features a 3.5mm line-out for use with BMW Aux Input for high-quality audio through your car stereo.
The TuneBase makes sure your music goes wherever you do.
Advantages
? Custom-designed swivel-cradle provides a secure and stable connection for your iPod mini
? Features a flexible steel-neck construction that positions easily inside your car
? Features a 3.5mm line-out for use with your BMW Aux Input for high-quality audio through your car stereo.
? Features a dock connector base that locks securely to your iPod
? Comes with a Belkin 3-Year Warranty
06-12-2005, 10:14 AM
#6
Banned
Thread Starter
Join Date: Jan 2005
Location: San Francisco Bay area
Posts: 2,882
Likes: 0
Received 0 Likes
on
0 Posts
My Ride: '05 545i, silver gray, black leather with anthracite maple wood, sport package, premium sound, navigation, cold weather package, electric rear sunshade, folding rear seat, satellite radio prep, PIAA 4150K fogs, red rear reflectors, hardwired Valentine One
Originally Posted by tcumbo' date='Jun 12 2005, 10:54 AM
Doesn't this just seem cooler and way easier?
Attachment 8373
TuneBase for iPod mini
Part # F8V7098
The TuneBase for iPod mini mobile digital devices offers the most flexible way to use your iPod mini on the road. The holder features an innovative, flexible-steel neck that easily positions your iPod mini for your comfort, convenience, and safety while driving. TuneBase works through any cigarette lighter outlet within the car.
While mounted in the TuneBase, your iPod mini powers and charges simultaneously. The TuneBase also features a 3.5mm line-out for use with BMW Aux Input for high-quality audio through your car stereo.
The TuneBase makes sure your music goes wherever you do.
Advantages
? Custom-designed swivel-cradle provides a secure and stable connection for your iPod mini
? Features a flexible steel-neck construction that positions easily inside your car
? Features a 3.5mm line-out for use with your BMW Aux Input for high-quality audio through your car stereo.
? Features a dock connector base that locks securely to your iPod
? Comes with a Belkin 3-Year Warranty
[snapback]138797[/snapback]
06-20-2005, 05:15 PM
#7
Contributors
Join Date: Dec 2004
Location: Springfield, Virginia
Posts: 483
Likes: 0
Received 0 Likes
on
0 Posts
Stream,
I agree that out of sight / out of mind is better. I was holding out for the possibility that the Bluetooth Ipod would be out by summer. That seems unlikely. So before my next summer trip (tour of the Northern Rim of the Grand Canyons), I intend to print and follow your instructions. Great job! Next time your in Colorado Springs, beers on me!
I agree that out of sight / out of mind is better. I was holding out for the possibility that the Bluetooth Ipod would be out by summer. That seems unlikely. So before my next summer trip (tour of the Northern Rim of the Grand Canyons), I intend to print and follow your instructions. Great job! Next time your in Colorado Springs, beers on me!
07-29-2005, 04:26 PM
#8
Members

Join Date: Apr 2005
Location: Massachusetts, USA
Posts: 141
Likes: 0
Received 0 Likes
on
0 Posts
My Ride: X3 | 3.0 | 6-speed manual
As an aside, I never knew that the output from the dock connector provides higher quality sound than the headphone jack. Thanks for that little bit of info, too. It sure makes sense now that I think about it.
08-05-2005, 03:46 PM
#9
Senior Members
Join Date: Jun 2005
Location: Co / So. Cal
Posts: 276
Likes: 0
Received 0 Likes
on
0 Posts
After the install, did'nt you need to recode the i-drive to reconize the new hardware? I have a copy of the installation procedure from BMW of N. America and at the end of the steps it says that it needs to be recoded. Tell me if I'm right or wrong.
08-05-2005, 04:50 PM
#10
Banned
Thread Starter
Join Date: Jan 2005
Location: San Francisco Bay area
Posts: 2,882
Likes: 0
Received 0 Likes
on
0 Posts
My Ride: '05 545i, silver gray, black leather with anthracite maple wood, sport package, premium sound, navigation, cold weather package, electric rear sunshade, folding rear seat, satellite radio prep, PIAA 4150K fogs, red rear reflectors, hardwired Valentine One
Originally Posted by jta00r1' date='Aug 5 2005, 04:46 PM
After the install, did'nt you need to recode the i-drive to reconize the new hardware? I have a copy of the installation procedure from BMW of N. America and at the end of the steps it says that it needs to be recoded. Tell me if I'm right or wrong.
[snapback]156466[/snapback]