Internal Remote Boot Release
 01-21-2007, 06:30 AM
#1
Senior Members
Thread Starter

Join Date: Nov 2006
Location: Shropshire UK
Posts: 488
Likes: 0
Received 0 Likes
on
0 Posts
My Ride: Estoril Blue 440i GC
Model Year: 2017
This post is generally aimed at pre-2005 RHD car owners as I understand that most LHD cars and all E61's have the Remote Boot Release already fitted as standard, as it is on later cars. Hence there will be no apologies for the use of the word "Boot" rather than "Trunk" as our American cousins enjoy the switch as standard.
I have read elsewhere on the forum that there are some cars with the wiring for the switch already fitted. I am one of the unlucky ones that have nothing! Also elsewhere on the forum is a Contributor who may be able to supply a kit for this job, but I understand that he is a busy man, and may be difficult to get hold of.
The job took me about 45 minutes to complete, but it is really only a job for the competent, confident or foolhardy") .
.
The job is not a complete one as I have not bothered with the illumination for the switch - that's a job for another day.
Usual disclaimers apply, of course, please carry out his procedure at your own risk.
Firstly, you need some parts. Go to your friendly $tealer and buy the proper Boot Release switch that fits in the blank on the footwell trim below the OBD door. (cost less than a tenner). You will also need a couple of pieces of thin wire and connectors. You can buy connectors from Maplins or similar, as they are the same pitch as ones used in Computer motherboards. In the spirit of recycling, I used a connector from an old PC motherboard I had in my shed. I'm sure if you went to your local PC shop, they would give you a connector and wire for next to nothing. The switch has 3 connections, so a 3-way socket is needed, although if you are doing without the illumination, then a 2-way will do.
Get your tools together and remove the footwell trim, both the side panel and under the steering column. One screw on the side panel, plus the screw holding the bonnet release lever, and five screws for the rest, not forgetting the one under the carpet strip on the centre console (the strip just pushes out from the rear). When removing the side panel, the plastic threshold strip needs to be levered up too, so you can get it out completely.
Disconnect the battery - don't worry about this, you only lose the date, time and trip mileage.
Put the plastics somewhere safe, get on your back in the footwell and look upwards directly forward of the small cubby. You will see 2 electrickery boxes, one black and one grey. Its the grey one you want. Push the plug clip up and withdraw the plug.
On the edge of the plug, near the thick red wire, there are two small clips, spread these and the plug cover will slide off.
In the mass of wires so revealed, you will see at one end a grey/yellow wire, an empty slot and then a purple wire. Looking at the plug base, they are numbered 40, 39 and 38 respectively.
Get your piece of wire, along with its attached terminal and insert it into the empty slot. Slide the cover back on. Refit the plug.
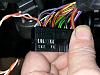
This is a picture of the plug without the cover. The Orange wire is the one I have fitted.
The mounting screw for the box makes a convenient earth for the other wire that goes to the switch, as below:
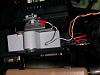
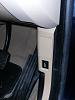
In this pic, you can see the forward part of the right hand cubby, to give you a better idea of the location.
Retrieve the plastics and fit the switch in the side panel. Plug in the PC type cable - the centre terminal is earth, the terminal next to the blank is the switched one. The remaining terminal, next to the locating peg when using the BMW plug, is for illumination.
Sorry for the poor picture on this one.
Now refit all the plastics and the battery connection, and Voila, one Remote Release fitted. They only come in black though!
Now you will be able to sit in the comfort of your car and open the boot without switching off the engine! Ideal for when picking up Wife and shopping or Kids and schoolbags.
If anyone has any questions/queries, I'll be glad to assist. Indeed if there is anyone wanting a little assistance or just moral support :'( in doing the job, let me know.
I have read elsewhere on the forum that there are some cars with the wiring for the switch already fitted. I am one of the unlucky ones that have nothing! Also elsewhere on the forum is a Contributor who may be able to supply a kit for this job, but I understand that he is a busy man, and may be difficult to get hold of.
The job took me about 45 minutes to complete, but it is really only a job for the competent, confident or foolhardy
.The job is not a complete one as I have not bothered with the illumination for the switch - that's a job for another day.
Usual disclaimers apply, of course, please carry out his procedure at your own risk.
Firstly, you need some parts. Go to your friendly $tealer and buy the proper Boot Release switch that fits in the blank on the footwell trim below the OBD door. (cost less than a tenner). You will also need a couple of pieces of thin wire and connectors. You can buy connectors from Maplins or similar, as they are the same pitch as ones used in Computer motherboards. In the spirit of recycling, I used a connector from an old PC motherboard I had in my shed. I'm sure if you went to your local PC shop, they would give you a connector and wire for next to nothing. The switch has 3 connections, so a 3-way socket is needed, although if you are doing without the illumination, then a 2-way will do.
Get your tools together and remove the footwell trim, both the side panel and under the steering column. One screw on the side panel, plus the screw holding the bonnet release lever, and five screws for the rest, not forgetting the one under the carpet strip on the centre console (the strip just pushes out from the rear). When removing the side panel, the plastic threshold strip needs to be levered up too, so you can get it out completely.
Disconnect the battery - don't worry about this, you only lose the date, time and trip mileage.
Put the plastics somewhere safe, get on your back in the footwell and look upwards directly forward of the small cubby. You will see 2 electrickery boxes, one black and one grey. Its the grey one you want. Push the plug clip up and withdraw the plug.
On the edge of the plug, near the thick red wire, there are two small clips, spread these and the plug cover will slide off.
In the mass of wires so revealed, you will see at one end a grey/yellow wire, an empty slot and then a purple wire. Looking at the plug base, they are numbered 40, 39 and 38 respectively.
Get your piece of wire, along with its attached terminal and insert it into the empty slot. Slide the cover back on. Refit the plug.

This is a picture of the plug without the cover. The Orange wire is the one I have fitted.
The mounting screw for the box makes a convenient earth for the other wire that goes to the switch, as below:

In this pic, you can see the forward part of the right hand cubby, to give you a better idea of the location.
Retrieve the plastics and fit the switch in the side panel. Plug in the PC type cable - the centre terminal is earth, the terminal next to the blank is the switched one. The remaining terminal, next to the locating peg when using the BMW plug, is for illumination.
Sorry for the poor picture on this one.

Now refit all the plastics and the battery connection, and Voila, one Remote Release fitted. They only come in black though!

Now you will be able to sit in the comfort of your car and open the boot without switching off the engine! Ideal for when picking up Wife and shopping or Kids and schoolbags.
If anyone has any questions/queries, I'll be glad to assist. Indeed if there is anyone wanting a little assistance or just moral support :'( in doing the job, let me know.
 01-21-2007, 07:14 AM
#2
Contributors
Join Date: Oct 2005
Location: Thailand
Posts: 2,052
Likes: 0
Received 0 Likes
on
0 Posts
I've been wanting this since the first day I got my car. Going to the airport and some mall is such a pain in the ass, when they have to check the trunk, and dono how to open it. I had to get out, and open it for them. I really want this. Can you give me the part number for the switch, and also when you figure out how to get it illuminated, please let me know. Thank you a bunch!! Have anyone else done this? I remember Hobi selling a kit for this, but I haven't seen him active for a LONG LONG LONG time!! 

01-21-2007, 08:43 AM
#3
Contributors

Join Date: Jul 2006
Location: Oxfordshire, UK
Posts: 1,180
Likes: 0
Received 0 Likes
on
0 Posts
My Ride: E61 535d Apr 05. UK spec + Media Pack, Luxury Pack & Visibility Pack


Excellent, AlwynMike. That's a job for next week (if I can find the time to get the switch).
Is this the type of connector that you mean when you say "PC motherboard"?
Is it the same type of (metal) connector at the other end (in the big black plug, I mean)?

Thanks a lot for your help!
01-21-2007, 09:00 AM
#4
Senior Members
Thread Starter
Join Date: Nov 2006
Location: Shropshire UK
Posts: 488
Likes: 0
Received 0 Likes
on
0 Posts
My Ride: Estoril Blue 440i GC
Model Year: 2017
525i,
Hope my explanation is OK for you.
The part number of the switch, according to RealOEM is 61316921846
As for the illumination, it will probably be later in the year when I get round to doing that, if at all :'( but if you find the "Light Module" which I think is the black box in front of the grey door/boot opening box (Car Access System). Pin 43 of that plug is the illumination feed, and it should have a Grey wire with Red tracer. This wire goes elsewhere in the car as well, so I was just going to use a "Scotchlock" or similar insulation displacement parallel connector to connecto to pin 1 of the opening switch - it uses a common earth return, so only one more wire is needed. Don't consider just hooking the light up to 12 volts as it is an LED, and will go bang!
Have fun
01-21-2007, 09:13 AM
#5
Senior Members
Thread Starter
Join Date: Nov 2006
Location: Shropshire UK
Posts: 488
Likes: 0
Received 0 Likes
on
0 Posts
My Ride: Estoril Blue 440i GC
Model Year: 2017
dlevi67,
Sorry, my description was a little vague on hindsight!
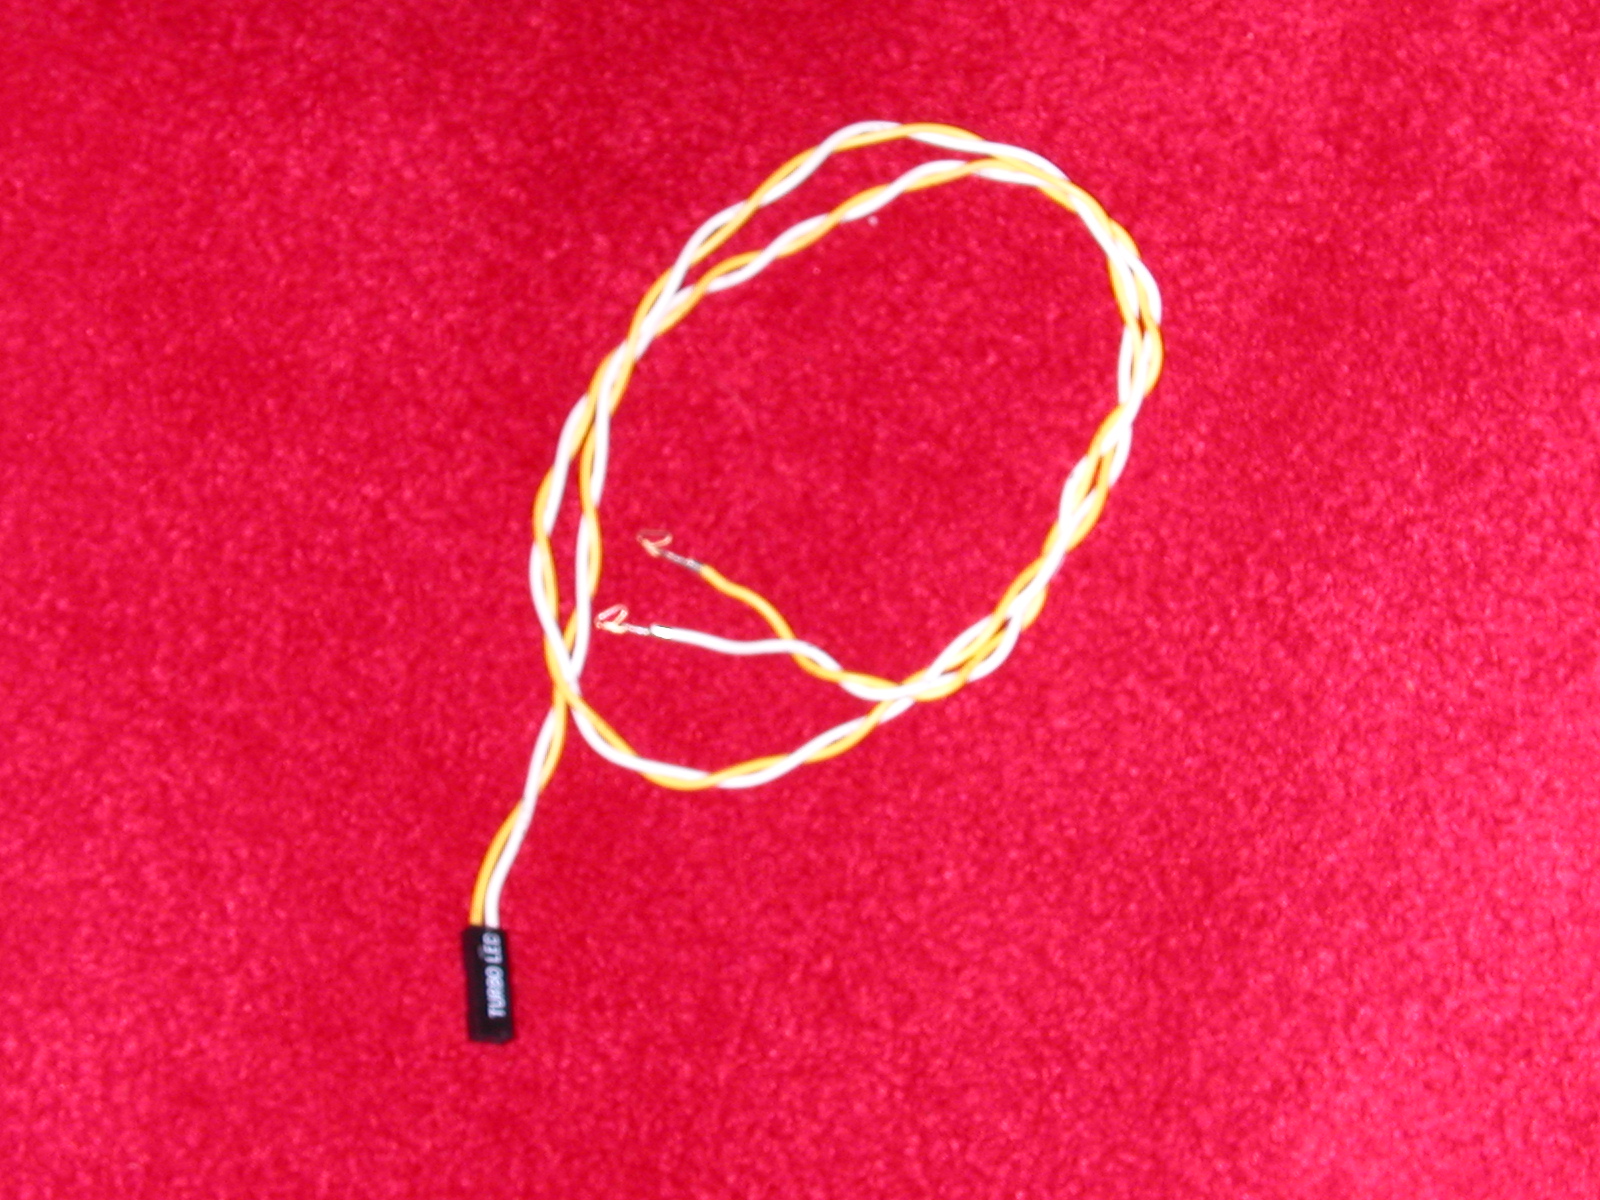
Your pics show motherboard power connectors, which aren't suitable. I used the plugs that connect the motherboard to case LED's or the PC internal speaker, or if it's a really old PC, the "Turbo" switch (You can tell which one I used .) If you have an old case, there will be four or five in there. Failing that, go to Maplins, they do individual parts to make up the plugs, just get a 2 or 3 way socket and some pins. The pins come in strips of 10, part no. YW25 at 71p. The sockets may come under the name "PCB Latch Housing" but ask the staff.
Sorry, my description was a little vague on hindsight!
Your pics show motherboard power connectors, which aren't suitable. I used the plugs that connect the motherboard to case LED's or the PC internal speaker, or if it's a really old PC, the "Turbo" switch (You can tell which one I used
.) If you have an old case, there will be four or five in there. Failing that, go to Maplins, they do individual parts to make up the plugs, just get a 2 or 3 way socket and some pins. The pins come in strips of 10, part no. YW25 at 71p. The sockets may come under the name "PCB Latch Housing" but ask the staff.
01-21-2007, 09:26 AM
#6
Senior Members
Thread Starter
Join Date: Nov 2006
Location: Shropshire UK
Posts: 488
Likes: 0
Received 0 Likes
on
0 Posts
My Ride: Estoril Blue 440i GC
Model Year: 2017
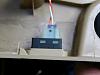
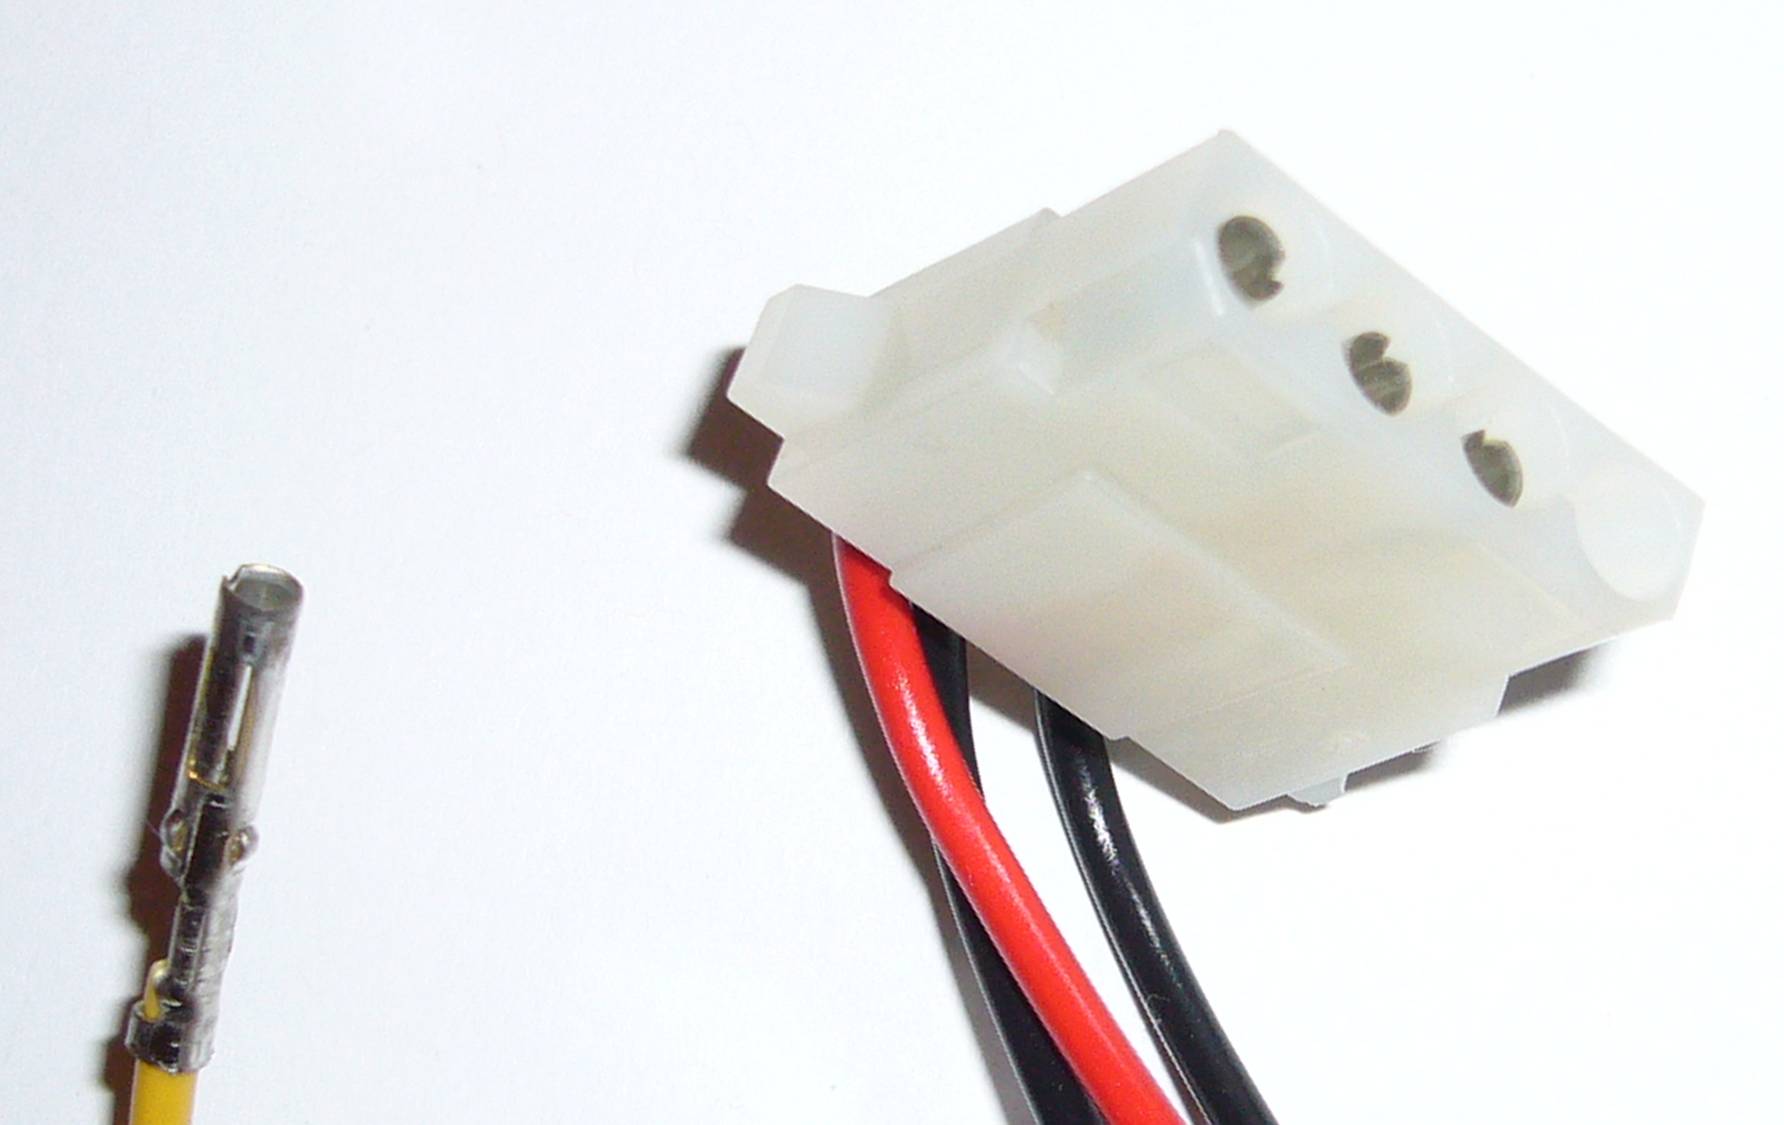
This is the type of connector:
The plug will fit straight on to the Opening switch (note this is a 2-way, so no illumination)
The metal connector will slide into the Car Access plug at point 39, and lock in.
Snip the other metal connector off and fit a tag for connection to earth.

Sorry for the lack of quality!!!
The plug will fit straight on to the Opening switch (note this is a 2-way, so no illumination)
The metal connector will slide into the Car Access plug at point 39, and lock in.
Snip the other metal connector off and fit a tag for connection to earth.
Sorry for the lack of quality!!!
01-22-2007, 05:13 AM
#7
Contributors
Join Date: Mar 2005
Location: Germany
Posts: 244
Likes: 0
Received 0 Likes
on
0 Posts
My Ride: BMW E60 9/04
BMW E46 / 3
This manual rulez! Thanks for sharing man! One question would be where to get the connectors that is clicked in the black bmw connector.
01-22-2007, 06:14 AM
#8
Senior Members
Thread Starter
Join Date: Nov 2006
Location: Shropshire UK
Posts: 488
Likes: 0
Received 0 Likes
on
0 Posts
My Ride: Estoril Blue 440i GC
Model Year: 2017
Harry,
The last picture is one of a lead from an old PC. The black plug will fit in the BMW switch. The metal clip you can see on the other end of the wire will clip straight into the BMW plug. It has a small tag that will stop it sliding back out. If you have no old PC, then try your local PC shop or the local equivalent of Maplins/Tandy/Radio Shack - see my previous post.
The wires in my picture have identical metal ends - just one end has its black housing to go in the switch.
01-22-2007, 01:45 PM
#9
Contributors
Join Date: Mar 2005
Location: Germany
Posts: 244
Likes: 0
Received 0 Likes
on
0 Posts
My Ride: BMW E60 9/04
BMW E46 / 3
Ah - now I see.
That was the part I didn?t get.
You?re a hero dude!
I advise the mods to get you the forum award for this. Some of us are waiting since august 05 for that solution. If youre a little inside, you understand
The pc-part idea is just GENIUS! I?ll see if I can find something here around.
Again thanks for sharing!
The metal clip you can see on the other end of the wire will clip straight into the BMW plug
You?re a hero dude!
I advise the mods to get you the forum award for this. Some of us are waiting since august 05 for that solution. If youre a little inside, you understand
The pc-part idea is just GENIUS! I?ll see if I can find something here around.
Again thanks for sharing!
01-27-2007, 08:16 AM
#10
Contributors
Join Date: Jul 2006
Location: Oxfordshire, UK
Posts: 1,180
Likes: 0
Received 0 Likes
on
0 Posts
My Ride: E61 535d Apr 05. UK spec + Media Pack, Luxury Pack & Visibility Pack
Originally Posted by AlwynMike' post='381274' date='Jan 21 2007, 06:00 PM
[snip]
As for the illumination, it will probably be later in the year when I get round to doing that, if at all :'( but if you find the "Light Module" which I think is the black box in front of the grey door/boot opening box (Car Access System). Pin 43 of that plug is the illumination feed, and it should have a Grey wire with Red tracer. [snip]
As for the illumination, it will probably be later in the year when I get round to doing that, if at all :'( but if you find the "Light Module" which I think is the black box in front of the grey door/boot opening box (Car Access System). Pin 43 of that plug is the illumination feed, and it should have a Grey wire with Red tracer. [snip]
I also found a "stump" (for lack of a better word) near where the CAS cable joins the main wiring loom that clearly contains spare wires - I believe there may well be a low-voltage lighting and a ground wire in there, allowing for maximum neatness and no scotchlocks, but finding the beginning of the tape in which they are wound up is very very difficult. I may end up cutting it and rewinding later. Does anyone know what's in there?
Will try again next week, once I can get the switch from the dealer (they did not have one in stock today).
AlwynMike - where did you get the schematics for the electricals from?