
DIY - Changing the S85 VANOS solenoids
 02-25-2013, 10:07 PM
#1
Contributors
Thread Starter
Join Date: Apr 2007
Location: Kajaani, Finland
Posts: 5,851
Likes: 0
Received 3 Likes
on
3 Posts
My Ride: Bmw 530d 2004
Changing the VANOS solenoids in the S85 engine.
Here's my report/DIY about changing the VANOS solenoids. Big thanks to members on M5Board (especially b767capt) who help me to do this by my own.
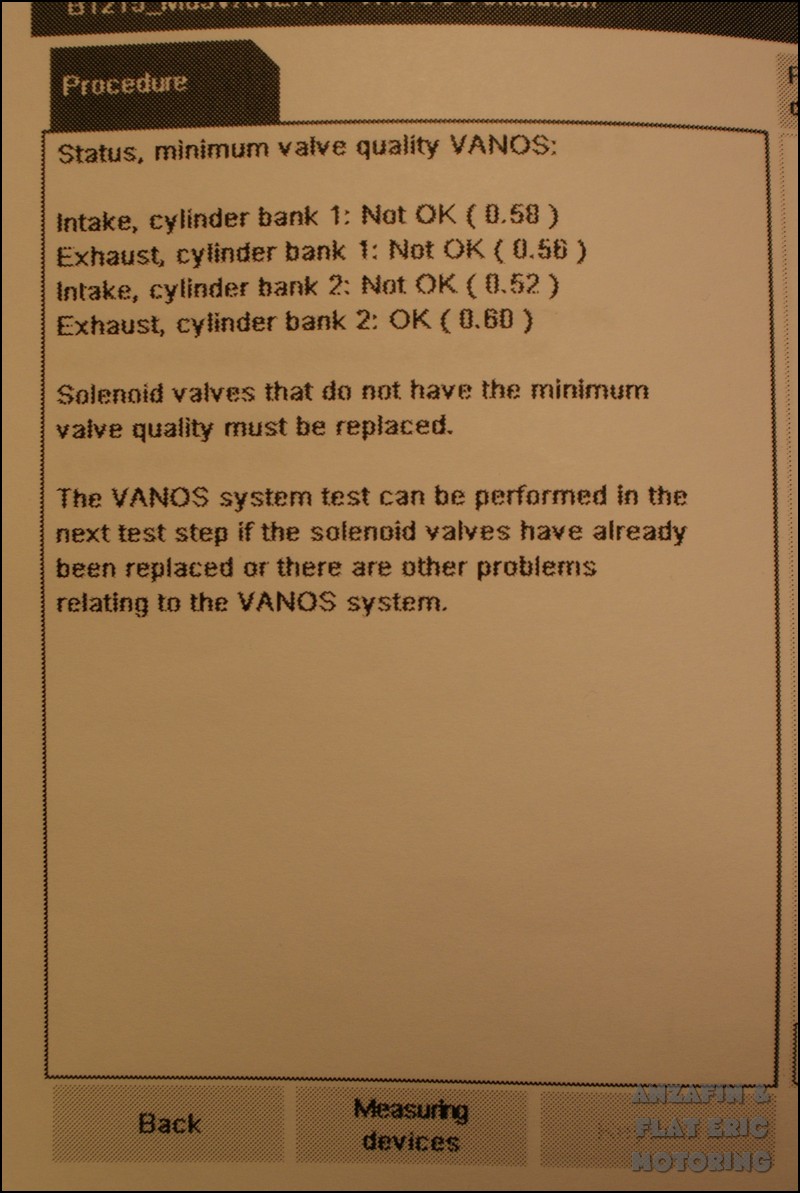
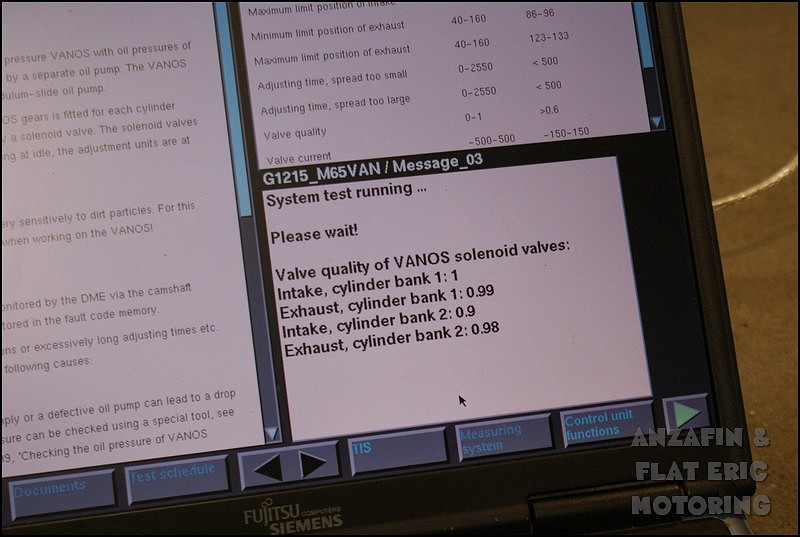
I ran a VANOS test few weeks ago and the report said that three out of four solenoids are NOT OK and they need to be changed. The test gives an index to every solenoid, and the best value is 1.0. As you can conclude, the limit between the "OK" and "NOT OK" is the 0.6.
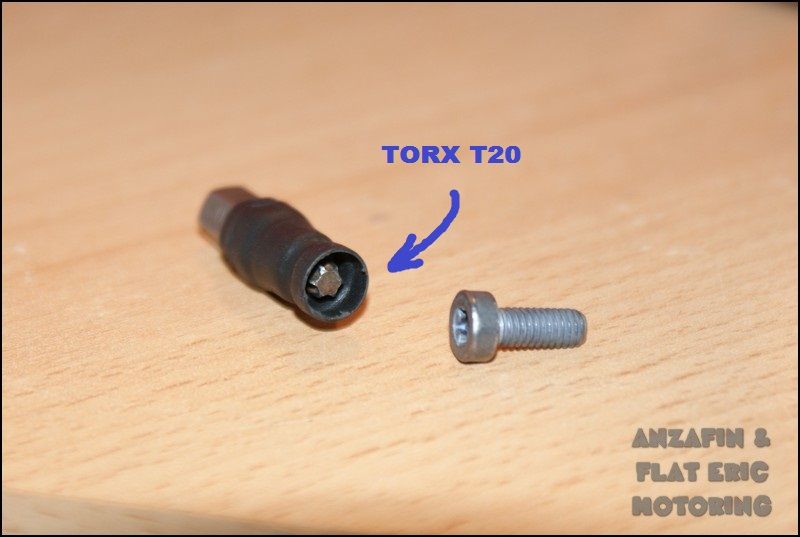
While I was preparing for the job, I modded this holder for a TORX T20 key which is needed to remove the solenoids. The advice for this came from the member b767capt .
.
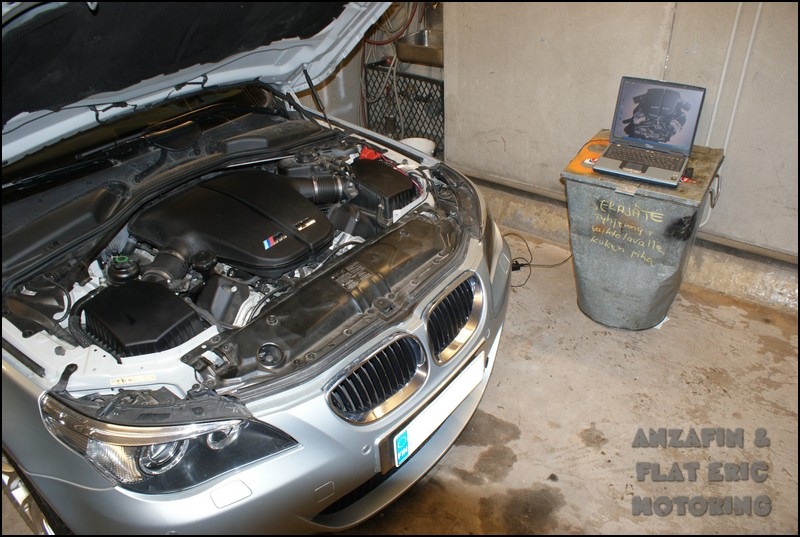
All systems are go!
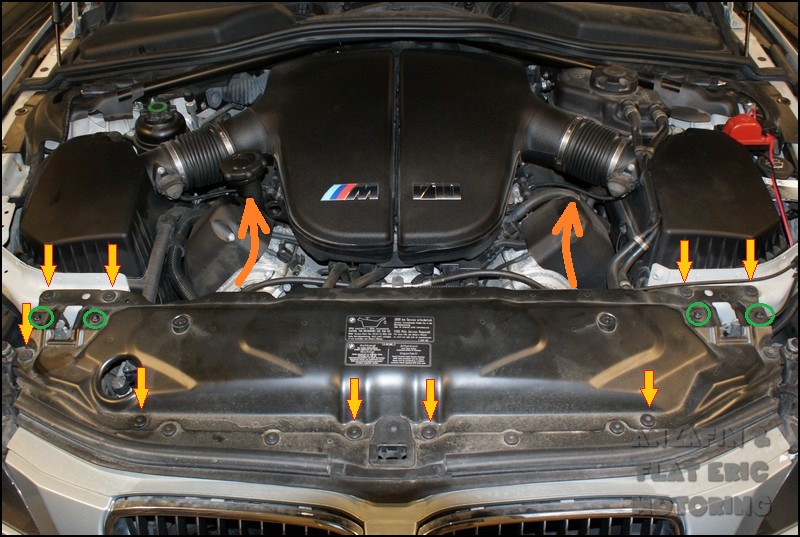
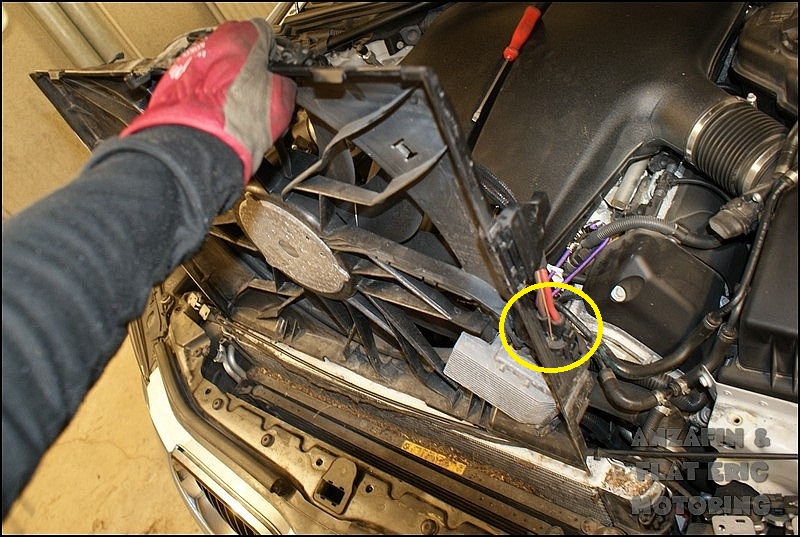
At first a covering plate must be removed. It is hold in place with nine TORX T30 bolts (red/orange arrows). I also removed the hood latches to get this plate a bit further than a feet away lol! The hood latches are also hold in place with TORX T30 bolts (green circles). When these have been removed, the covering plate can be removed towards the big orange arrows.
The hood latch cables and detector wiring goes under the plate and they must be released from the little hooks.
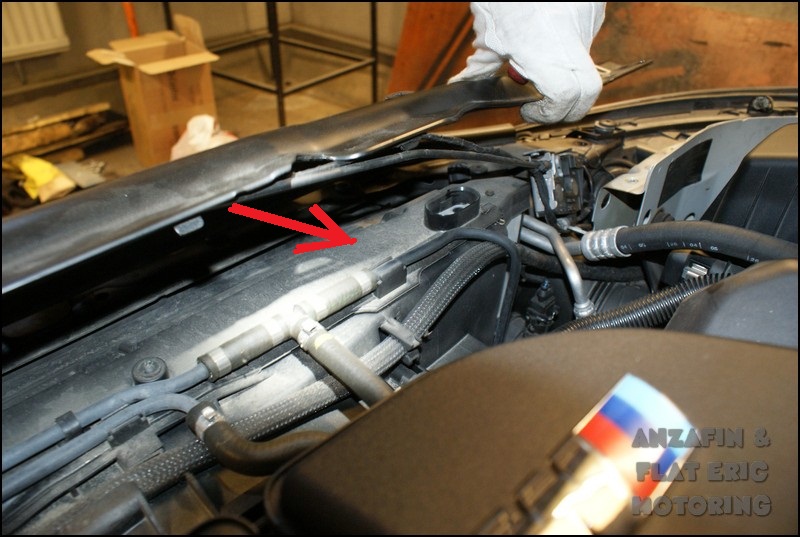
Then we have to remove another covering plate that sits on top of the radiator and the electric fan. Five TORX T25 screws.

There are two little water hoses that are attached to the cowl with different clips. Detach them.
Oh crap!
The fan can be removed by lifting it a bit, then the "wings" on left and right have to be turned away from the holders. Then lift the fan up. I broke the other wing to get the fan easier out next time .
.
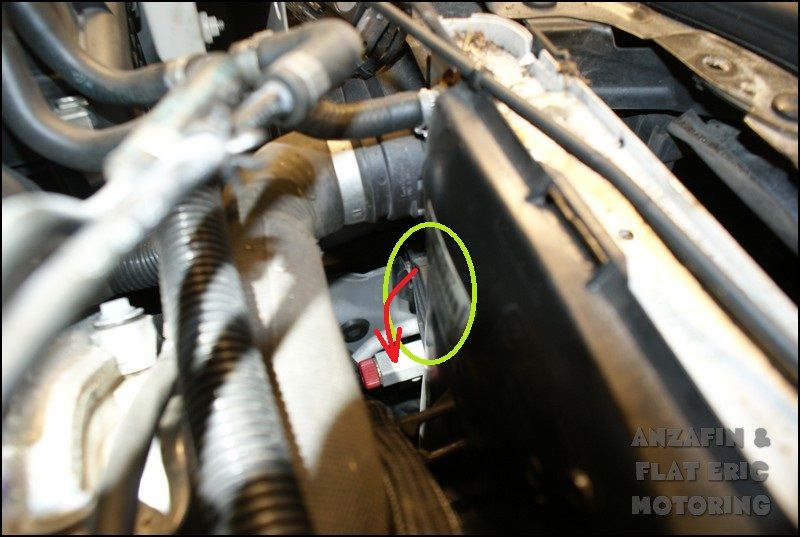
The power cord is easy to remove (yellow circle). Then put the fan aside. TIS says there can be two cords attached but I had only one.
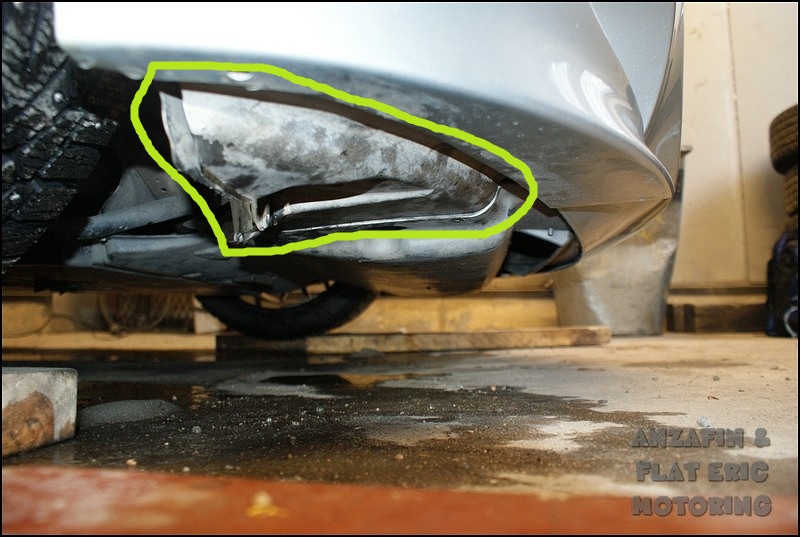
To drain the coolant I removed the little service flap on the bottom of the right front corner. It is fastened with typical undercarriage screws (M8).
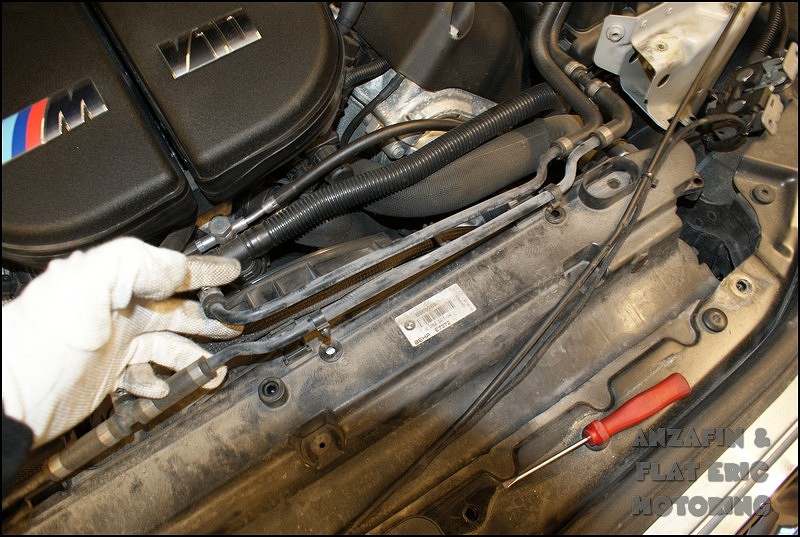
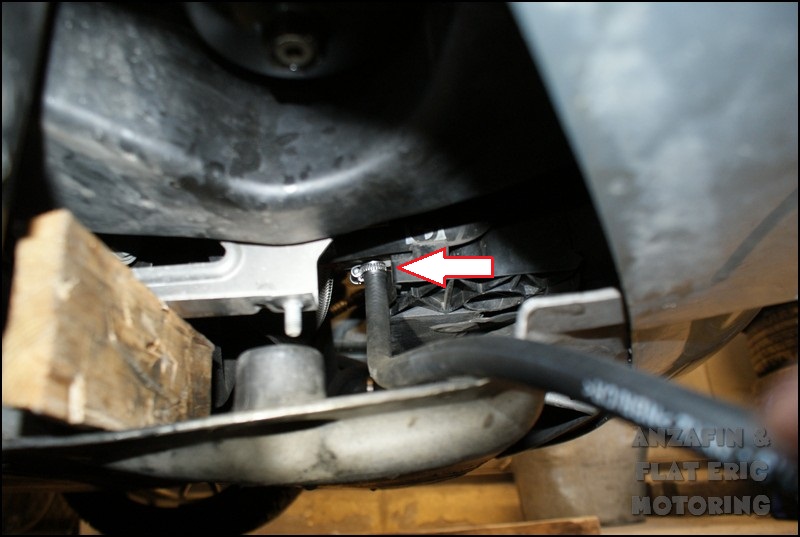
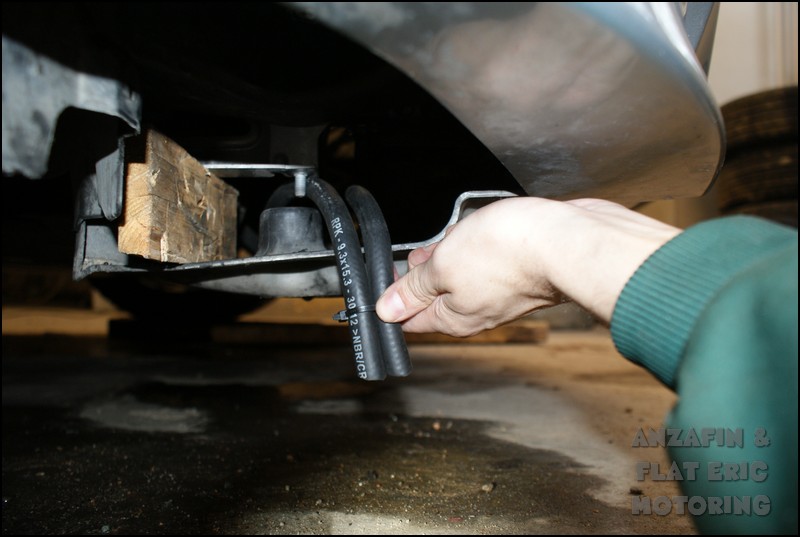
The S85 radiator is divided to two sections, one for both cylinder banks. Therefore there's two draining plugs in it. As b767capt adviced, I installed draining tubes on both of them. The inner diameter is 9.3mm. I used strong fuel line for this purpose so that I can leave them installed for the next time. The lower draining plug can be seen in this picture.
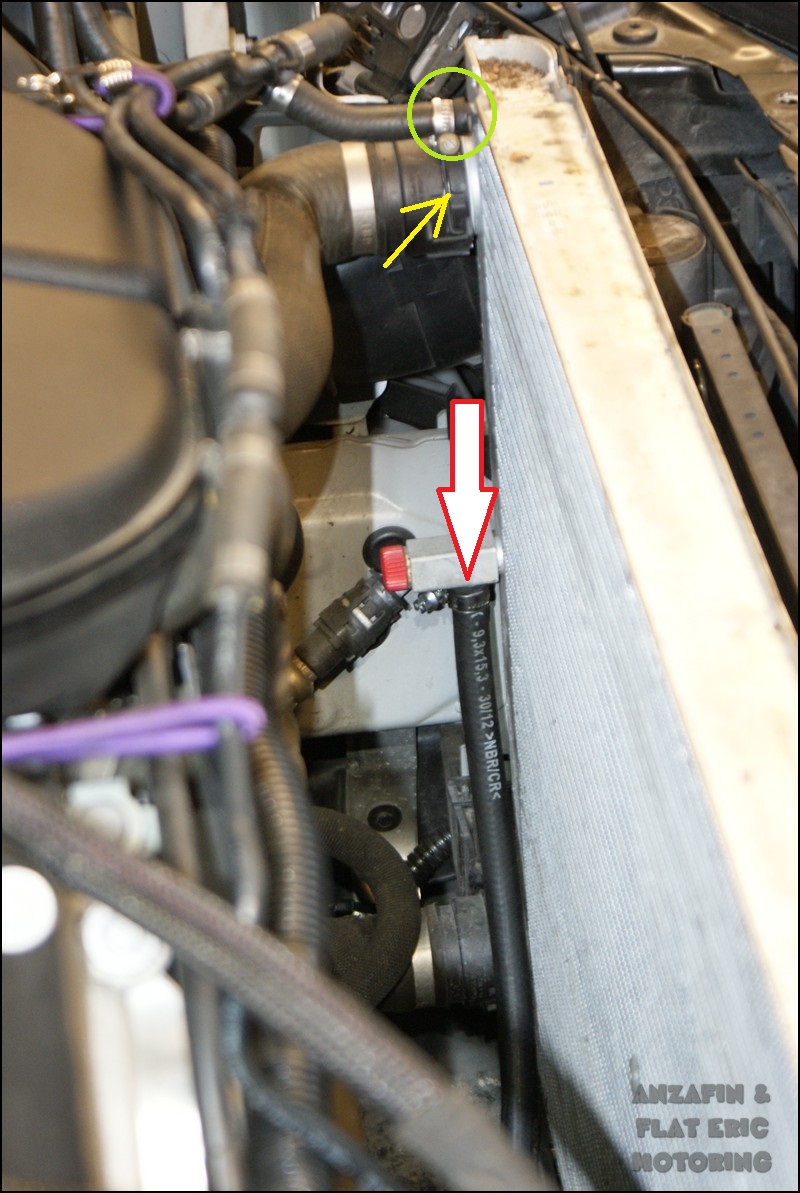
And here's the upper one with the tube attached. Here you can also see the wire clamp that holds the big water hose in place and the little water hose that is attached with the typical hose clamp. There are four big water hoses and two smaller and these have to be removed after draining the coolant.
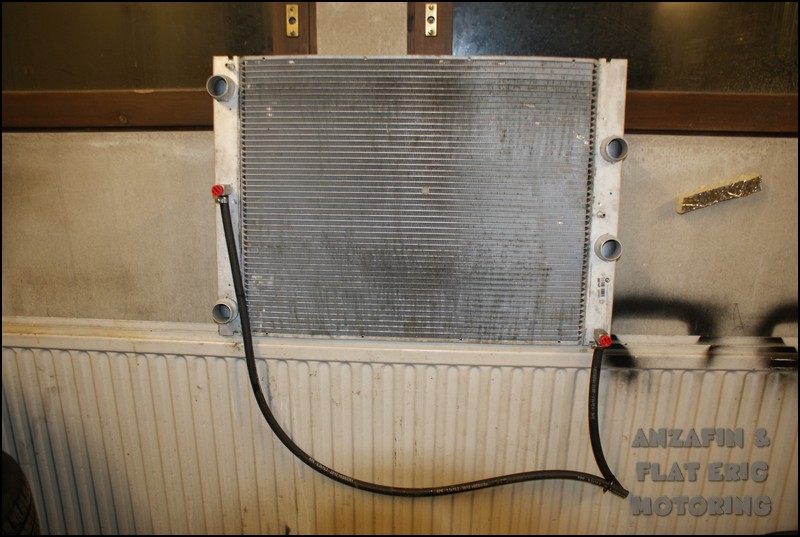
Here are the draining hoses. It is easy to drain the coolant through these without messing the whole engine bay.
Draining itself is easy. First open up the fill cap, then open the red finger screws.
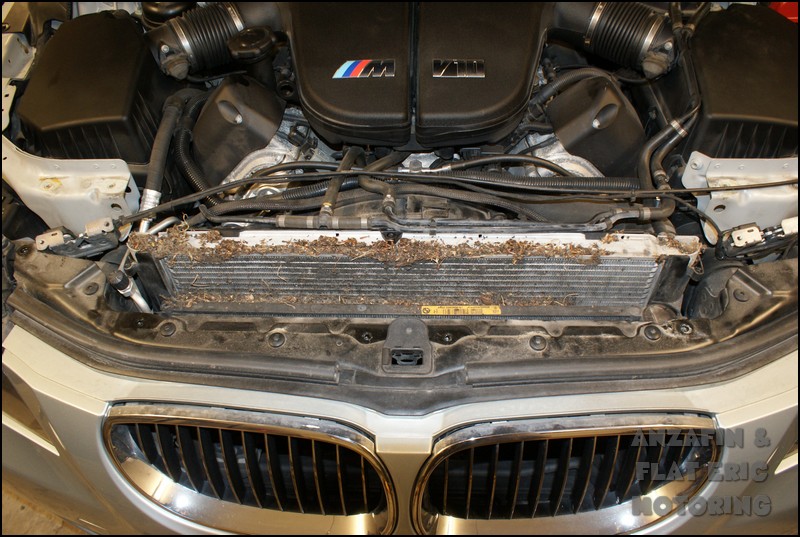
The radiator then comes up only by lifting it.
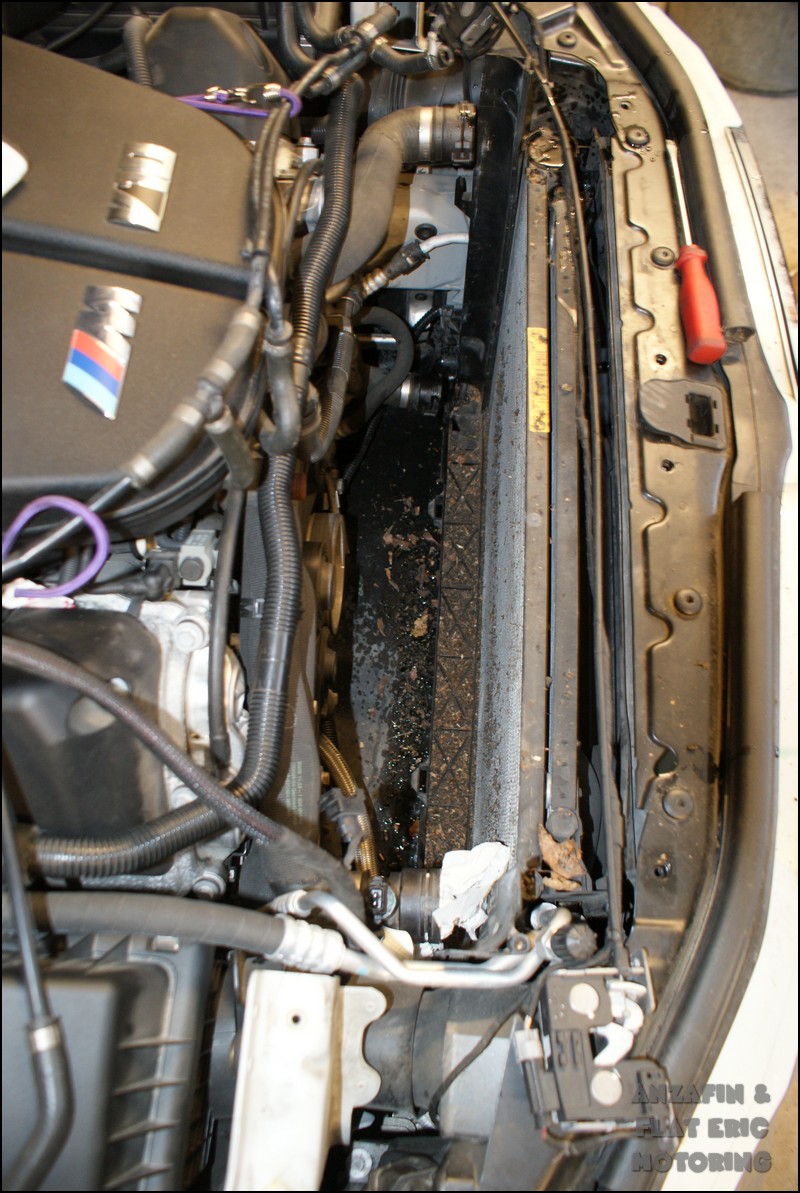
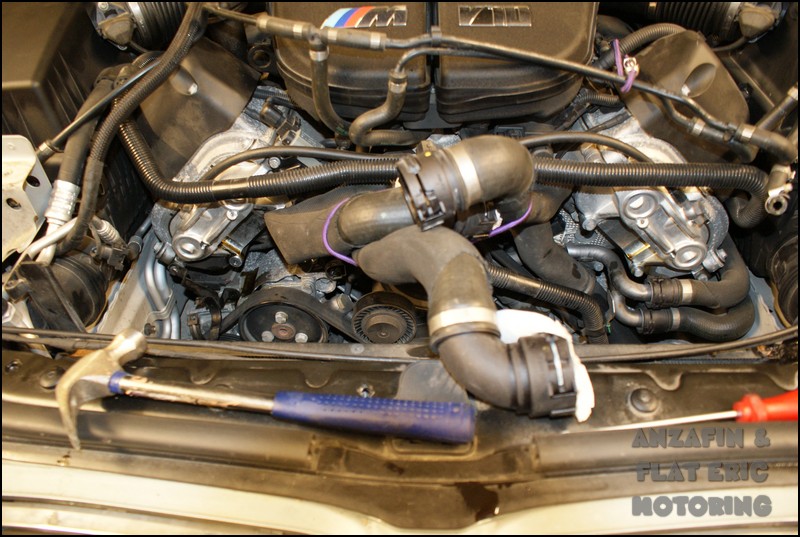
This is the room you will have for working with the solenoids.
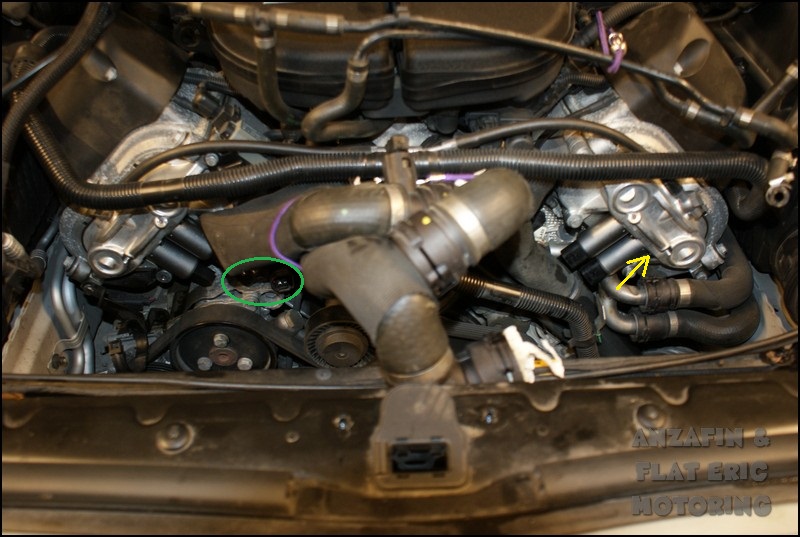
The most annoying job is to remove the solenoids. First the electric plugs need to be removed (In this pic they have been removed already.Green circle.). They're easy, but you may want to mark them so that you don't mix them when plugging them back in. The solenoids are held in place with two TORX T20 screws each, and the other screw is hiding (yellow arrow). I used a friend, mirror, flashlight and different T20 tools to open them. The solenoids can sit a bit tight in their place, so I needed to put a little screwdriver between the VANOS body and the solenoid and simply crank them out slowly. By the way, the new solenoids are already installed this picture. The old ones were plastic covered, the new ones are metallic.
Solenoids removed. There will be some oil coming out of VANOS, clean it.
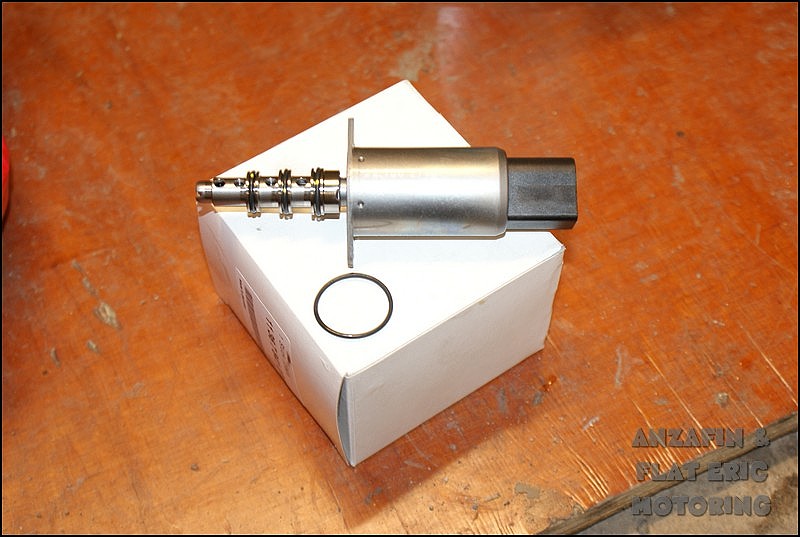
Here's the new one. First lubricate the O-rings with motor oil. Then install the bigger O-ring on the bottom of the VANOS body. There's a place for it. Then put the solenoid back. I didn't try to push it to bottom with force. I just used the screws to get it sit tight.
Then you need to put everything back in opposite order. The coolant system is pretty smart, you just need to fill the coolant in until the bobber sits 18mm over the fill cap edge. Then the system bleeds itself when the engine is run approx. 15mins on idle.
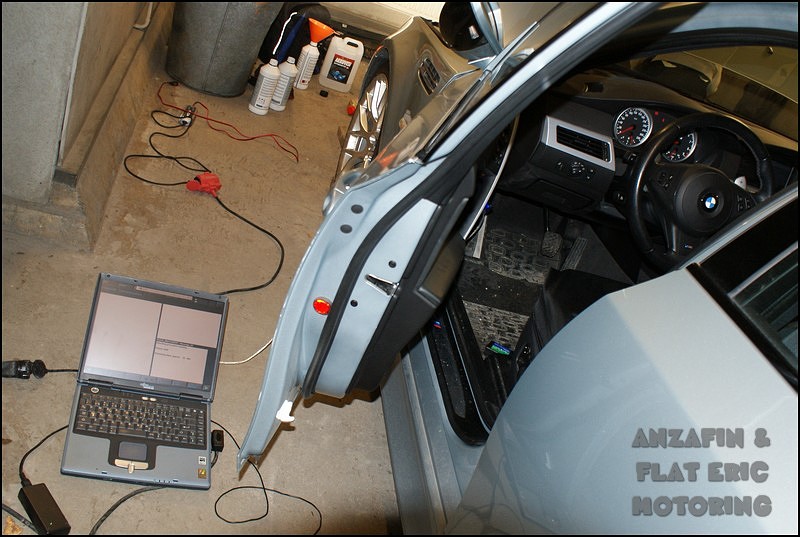
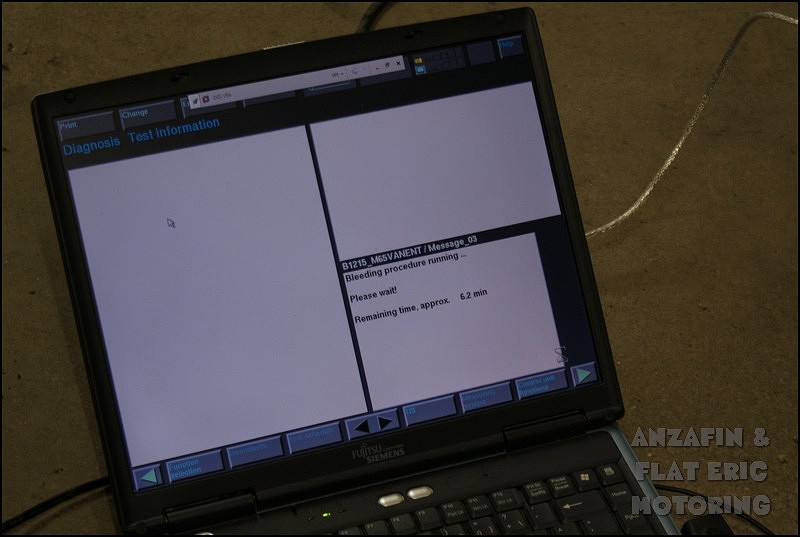
The VANOS oil system needs bleeding too. I did this with the DIS (Vanos ventilation/bleeding). The program runs the engine for 18mins and varies the rpms. Interesting sounds can be heard during the process .
.
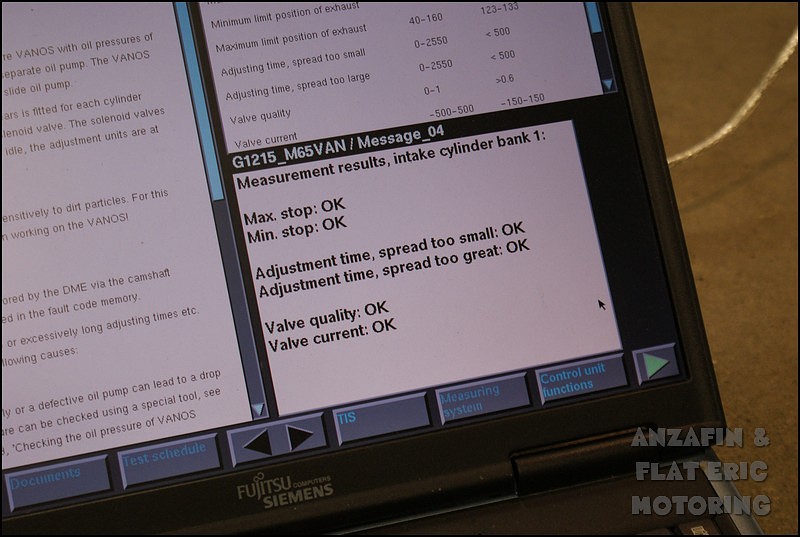
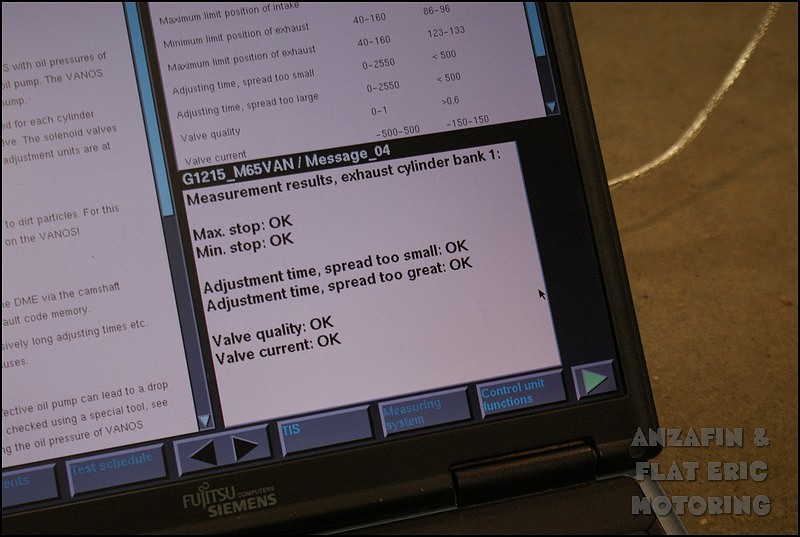
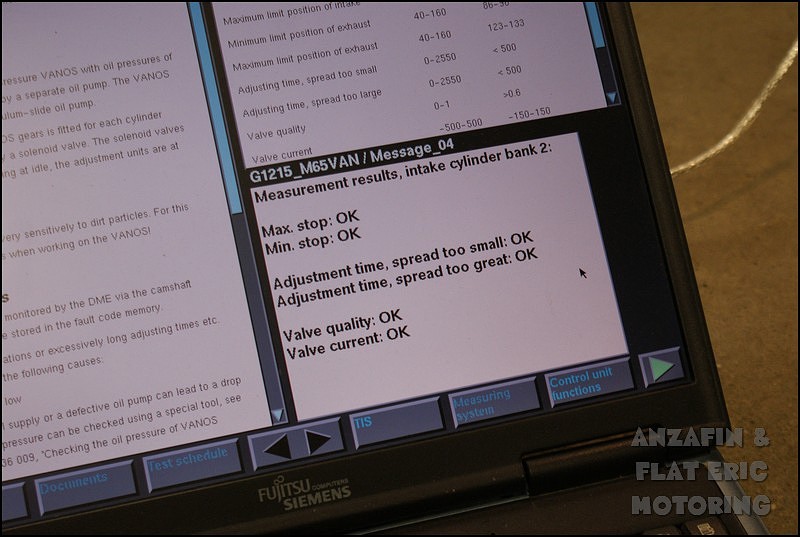
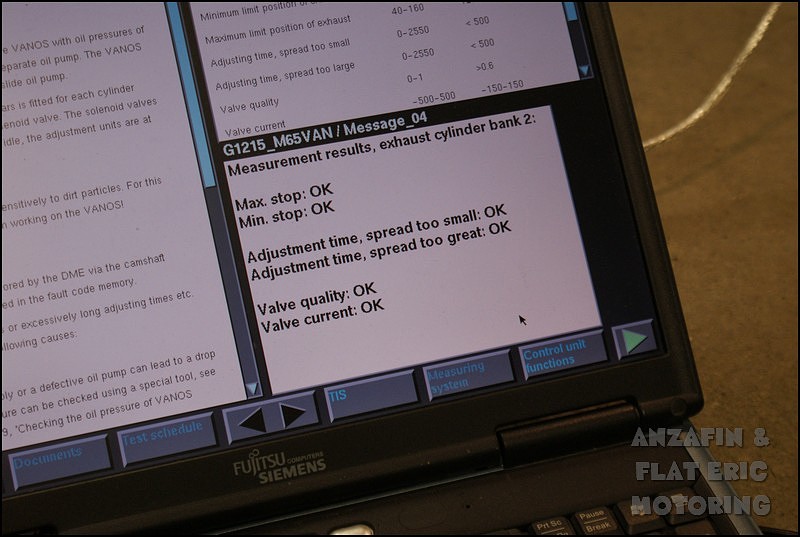
Everything went great and after the bleeding procedure I ran the VANOS test again. Here are the results.
- Antti -
Here's my report/DIY about changing the VANOS solenoids. Big thanks to members on M5Board (especially b767capt) who help me to do this by my own.
I ran a VANOS test few weeks ago and the report said that three out of four solenoids are NOT OK and they need to be changed. The test gives an index to every solenoid, and the best value is 1.0. As you can conclude, the limit between the "OK" and "NOT OK" is the 0.6.
While I was preparing for the job, I modded this holder for a TORX T20 key which is needed to remove the solenoids. The advice for this came from the member b767capt
.All systems are go!
At first a covering plate must be removed. It is hold in place with nine TORX T30 bolts (red/orange arrows). I also removed the hood latches to get this plate a bit further than a feet away lol! The hood latches are also hold in place with TORX T30 bolts (green circles). When these have been removed, the covering plate can be removed towards the big orange arrows.
The hood latch cables and detector wiring goes under the plate and they must be released from the little hooks.
Then we have to remove another covering plate that sits on top of the radiator and the electric fan. Five TORX T25 screws.
There are two little water hoses that are attached to the cowl with different clips. Detach them.
Oh crap!
The fan can be removed by lifting it a bit, then the "wings" on left and right have to be turned away from the holders. Then lift the fan up. I broke the other wing to get the fan easier out next time
.The power cord is easy to remove (yellow circle). Then put the fan aside. TIS says there can be two cords attached but I had only one.
To drain the coolant I removed the little service flap on the bottom of the right front corner. It is fastened with typical undercarriage screws (M8).
The S85 radiator is divided to two sections, one for both cylinder banks. Therefore there's two draining plugs in it. As b767capt adviced, I installed draining tubes on both of them. The inner diameter is 9.3mm. I used strong fuel line for this purpose so that I can leave them installed for the next time. The lower draining plug can be seen in this picture.
And here's the upper one with the tube attached. Here you can also see the wire clamp that holds the big water hose in place and the little water hose that is attached with the typical hose clamp. There are four big water hoses and two smaller and these have to be removed after draining the coolant.
Here are the draining hoses. It is easy to drain the coolant through these without messing the whole engine bay.
Draining itself is easy. First open up the fill cap, then open the red finger screws.
The radiator then comes up only by lifting it.
This is the room you will have for working with the solenoids.
The most annoying job is to remove the solenoids. First the electric plugs need to be removed (In this pic they have been removed already.Green circle.). They're easy, but you may want to mark them so that you don't mix them when plugging them back in. The solenoids are held in place with two TORX T20 screws each, and the other screw is hiding (yellow arrow). I used a friend, mirror, flashlight and different T20 tools to open them. The solenoids can sit a bit tight in their place, so I needed to put a little screwdriver between the VANOS body and the solenoid and simply crank them out slowly. By the way, the new solenoids are already installed this picture. The old ones were plastic covered, the new ones are metallic.
Solenoids removed. There will be some oil coming out of VANOS, clean it.
Here's the new one. First lubricate the O-rings with motor oil. Then install the bigger O-ring on the bottom of the VANOS body. There's a place for it. Then put the solenoid back. I didn't try to push it to bottom with force. I just used the screws to get it sit tight.
Then you need to put everything back in opposite order. The coolant system is pretty smart, you just need to fill the coolant in until the bobber sits 18mm over the fill cap edge. Then the system bleeds itself when the engine is run approx. 15mins on idle.
The VANOS oil system needs bleeding too. I did this with the DIS (Vanos ventilation/bleeding). The program runs the engine for 18mins and varies the rpms. Interesting sounds can be heard during the process
.Everything went great and after the bleeding procedure I ran the VANOS test again. Here are the results.
- Antti -


Thread
Thread Starter
Forum
Replies
Last Post
socale39
Complete Car Sales
9
09-05-2023 08:30 AM