
Dash Trim Change Guide

Thread Starter
Members
Joined: Jan 2010
Posts: 238
Likes: 0
From: Barnsley, UK
My Ride: 2010(60) BMW 520d SE, Manual, In Sophisto Grey with Cream/Black Interior and Piano Black trim
This Do-It-Yourself guide is based on myself actually doing the change over in my own, right-hand drive car. I changed my existing silver dash trim to the M5 Madeira trim.
Changing the trim above the light controls:
Firstly, you need to remove the lighting control unit. Note, if you have push button start, then avoid disconnecting this unit, as i would not like to guess what problems could arise from this.
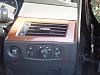
This control panel is merely slid into place. A small plastic wedge placed under the trim at the points shown in the pic above would pry it out easily, and the whole thing should gently slide out and hang free without the cables being removed.
To remove the trim peice, the two screws outlined in the pic above will need to be removed and the whole trim, along with its vent should slide out without a problem. All that you need to do is unclip each of the holds which is keeping the vent attached to the trim and you're done. re-attach your vent to your new trim and repeat this process in reverse and thats your trim changed...
Removing the upper long dash trim
I started this off by removing the upper, long trim of the dash, which is shown in the pics below, prior to removing this, you will need to pry out your hazard/lock button and disconnect its cable. This is dont by placing a small plastic wedge under the button and applying a small amount of pressure, this should help it pop right out.
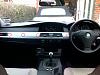
There are 4 pins and one plastic clip that hold this piece into place. The far left is a plastic clip, which does not take much pressure to release, but the other four are metal pins, which are fixed into metal lined clips, which will require some force to remove.
Start at the right hand side, insert a plastic wedge, as not to damage the dash and pry up the right side of the trim, enough to get your fingers under. Slowly apply pressure to remove this side from its clips, while slowly running a plastic wedge or your finger, along the trim to carefully release each pin from its fixings to release the trim. Be careful, as this trim can be easily damaged with too much pressure.
Once this trim is removed, simply unclip the left side vent from the clips that hold it in place. When removing the centre large vent from the trim piece, there are 2 bolts, one at either end of the trim, which hold this in place, and depending on which model you have, there may also be a torx screw in the centre of the vent, holding it to the trim.
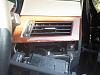
Removing the centre console/heater controls
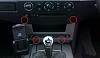
After removing the upper trim piece, the centre console surround can then be removed. Start off by removing the two upper screws shown in the image below:
After removing these screws, the centre trim is just held on with four or six clips, depending on model. These are shown in the pic below.
The upper two can be released by (according to BMW's guide) placing a long screwdriver down the back of the trim and gently prying forward the panel until the clips release. What this does not take into account is that you can very easily damage your control panel for the radio by doing this, so please be very careful, as these parts are very fragile.
At this point, i would advise you to remove the cables from the heater controls, to avoid damage. When the upper clips are removed, the lower clips are removed by gently easing the panel forward and carefully popping each side out in turn, again, be careful, these panels will only bend so far before causing damage.
With this centre trim removed, all other parts are merely clipped together which is pretty self-explanatory of what to do should you need to replace any of the trim parts or heater controls.
To replace these parts, you would need to repeat all of the above processes in reverse order, remembering to check all clips prior to installation, repair or replace any broken ones. Ensure all heater controls are plugged in as they were before and DO NOT forget to thread the hazard light wire through the trim prior to installing the upper dash trim, or you will need to take it all off again...
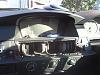
Removing the centre gearstick surround
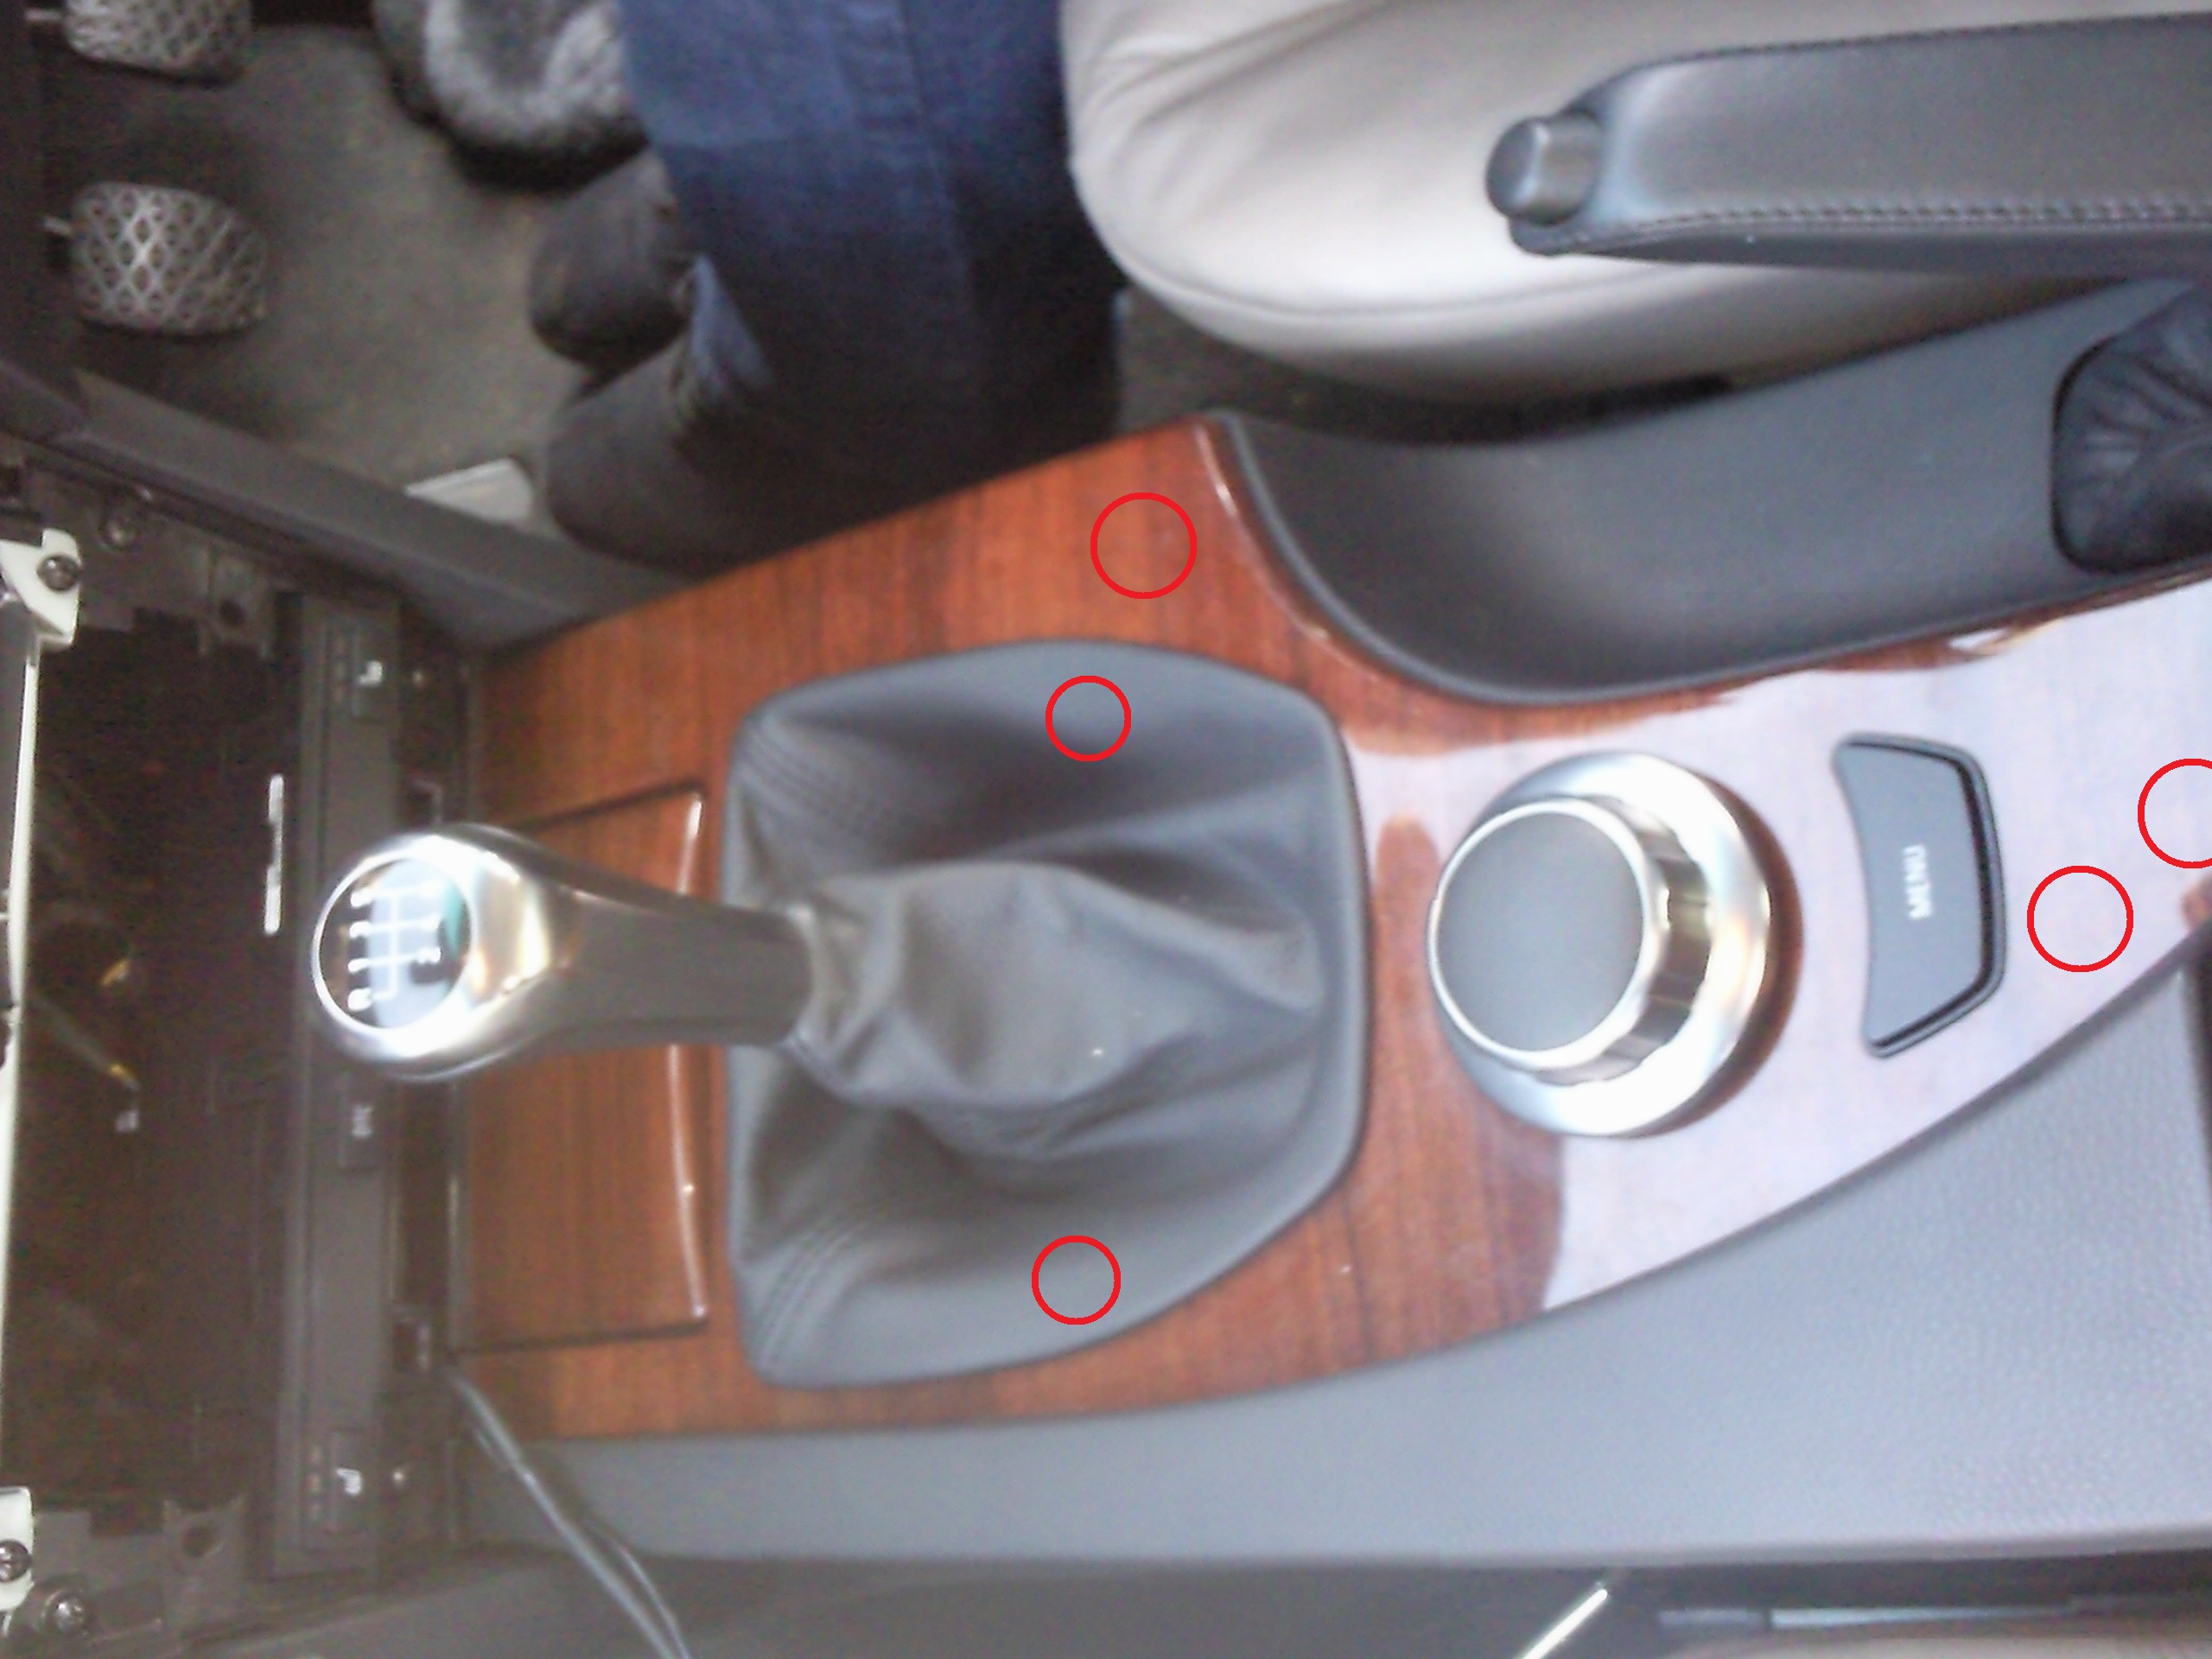
This process can be quite tricky, especially when removing the idrive without causing damage to its retaining clips. Take note of the image below:
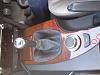
You need to initially release the gearstick gaitor from its surround, as there are two, torx screws located under this. Remove these two screws, and then give some attention to the idrive knob. You need to apply pressure to two quarters of the knob, ideally at 3 and 6 as if it were a clock and slowly lift it, with little pressure and this should pop off. At this point, i would just suggest removing the ash try lining, as this stops the trim sliding out.
With this off, you will need to begin to lift the centre surround, there are three clips which you will need to note, as shown in the pic above. Carefully pry the trim upwards until it is free of these clips, and release the menu button from the housing, so that the cable can be disconnected.
This console will now slide out of place, just make sure that the ash tray has been removed, and the 12V socket is not getting caught, and be careful not to catch your leather with the clips or tools used!!
To re-install this console, just repeat the above process in reverse, taking care not to damage any connections and make sure to line up clips when attaching the idrive knob. Remember to thread the menu cable back through the trim before installing it, or you'll have to remove the trim again. Be careful not to catch the 12V socket when replacing this trim, as with it being sprung, it is prone to getting in the way
**Please note that this process was done on a March 2007 pre-LCI BMW 520d SE saloon, with basic MASK system, and it was right-hand-drive. This process might not be the same for LCI and left-hand drive vehicles.**
I accept no responsiblity for any damage caused when attempting this process, so take care and any questions, please ask.
Changing the trim above the light controls:
Firstly, you need to remove the lighting control unit. Note, if you have push button start, then avoid disconnecting this unit, as i would not like to guess what problems could arise from this.

This control panel is merely slid into place. A small plastic wedge placed under the trim at the points shown in the pic above would pry it out easily, and the whole thing should gently slide out and hang free without the cables being removed.

To remove the trim peice, the two screws outlined in the pic above will need to be removed and the whole trim, along with its vent should slide out without a problem. All that you need to do is unclip each of the holds which is keeping the vent attached to the trim and you're done. re-attach your vent to your new trim and repeat this process in reverse and thats your trim changed...
Removing the upper long dash trim
I started this off by removing the upper, long trim of the dash, which is shown in the pics below, prior to removing this, you will need to pry out your hazard/lock button and disconnect its cable. This is dont by placing a small plastic wedge under the button and applying a small amount of pressure, this should help it pop right out.
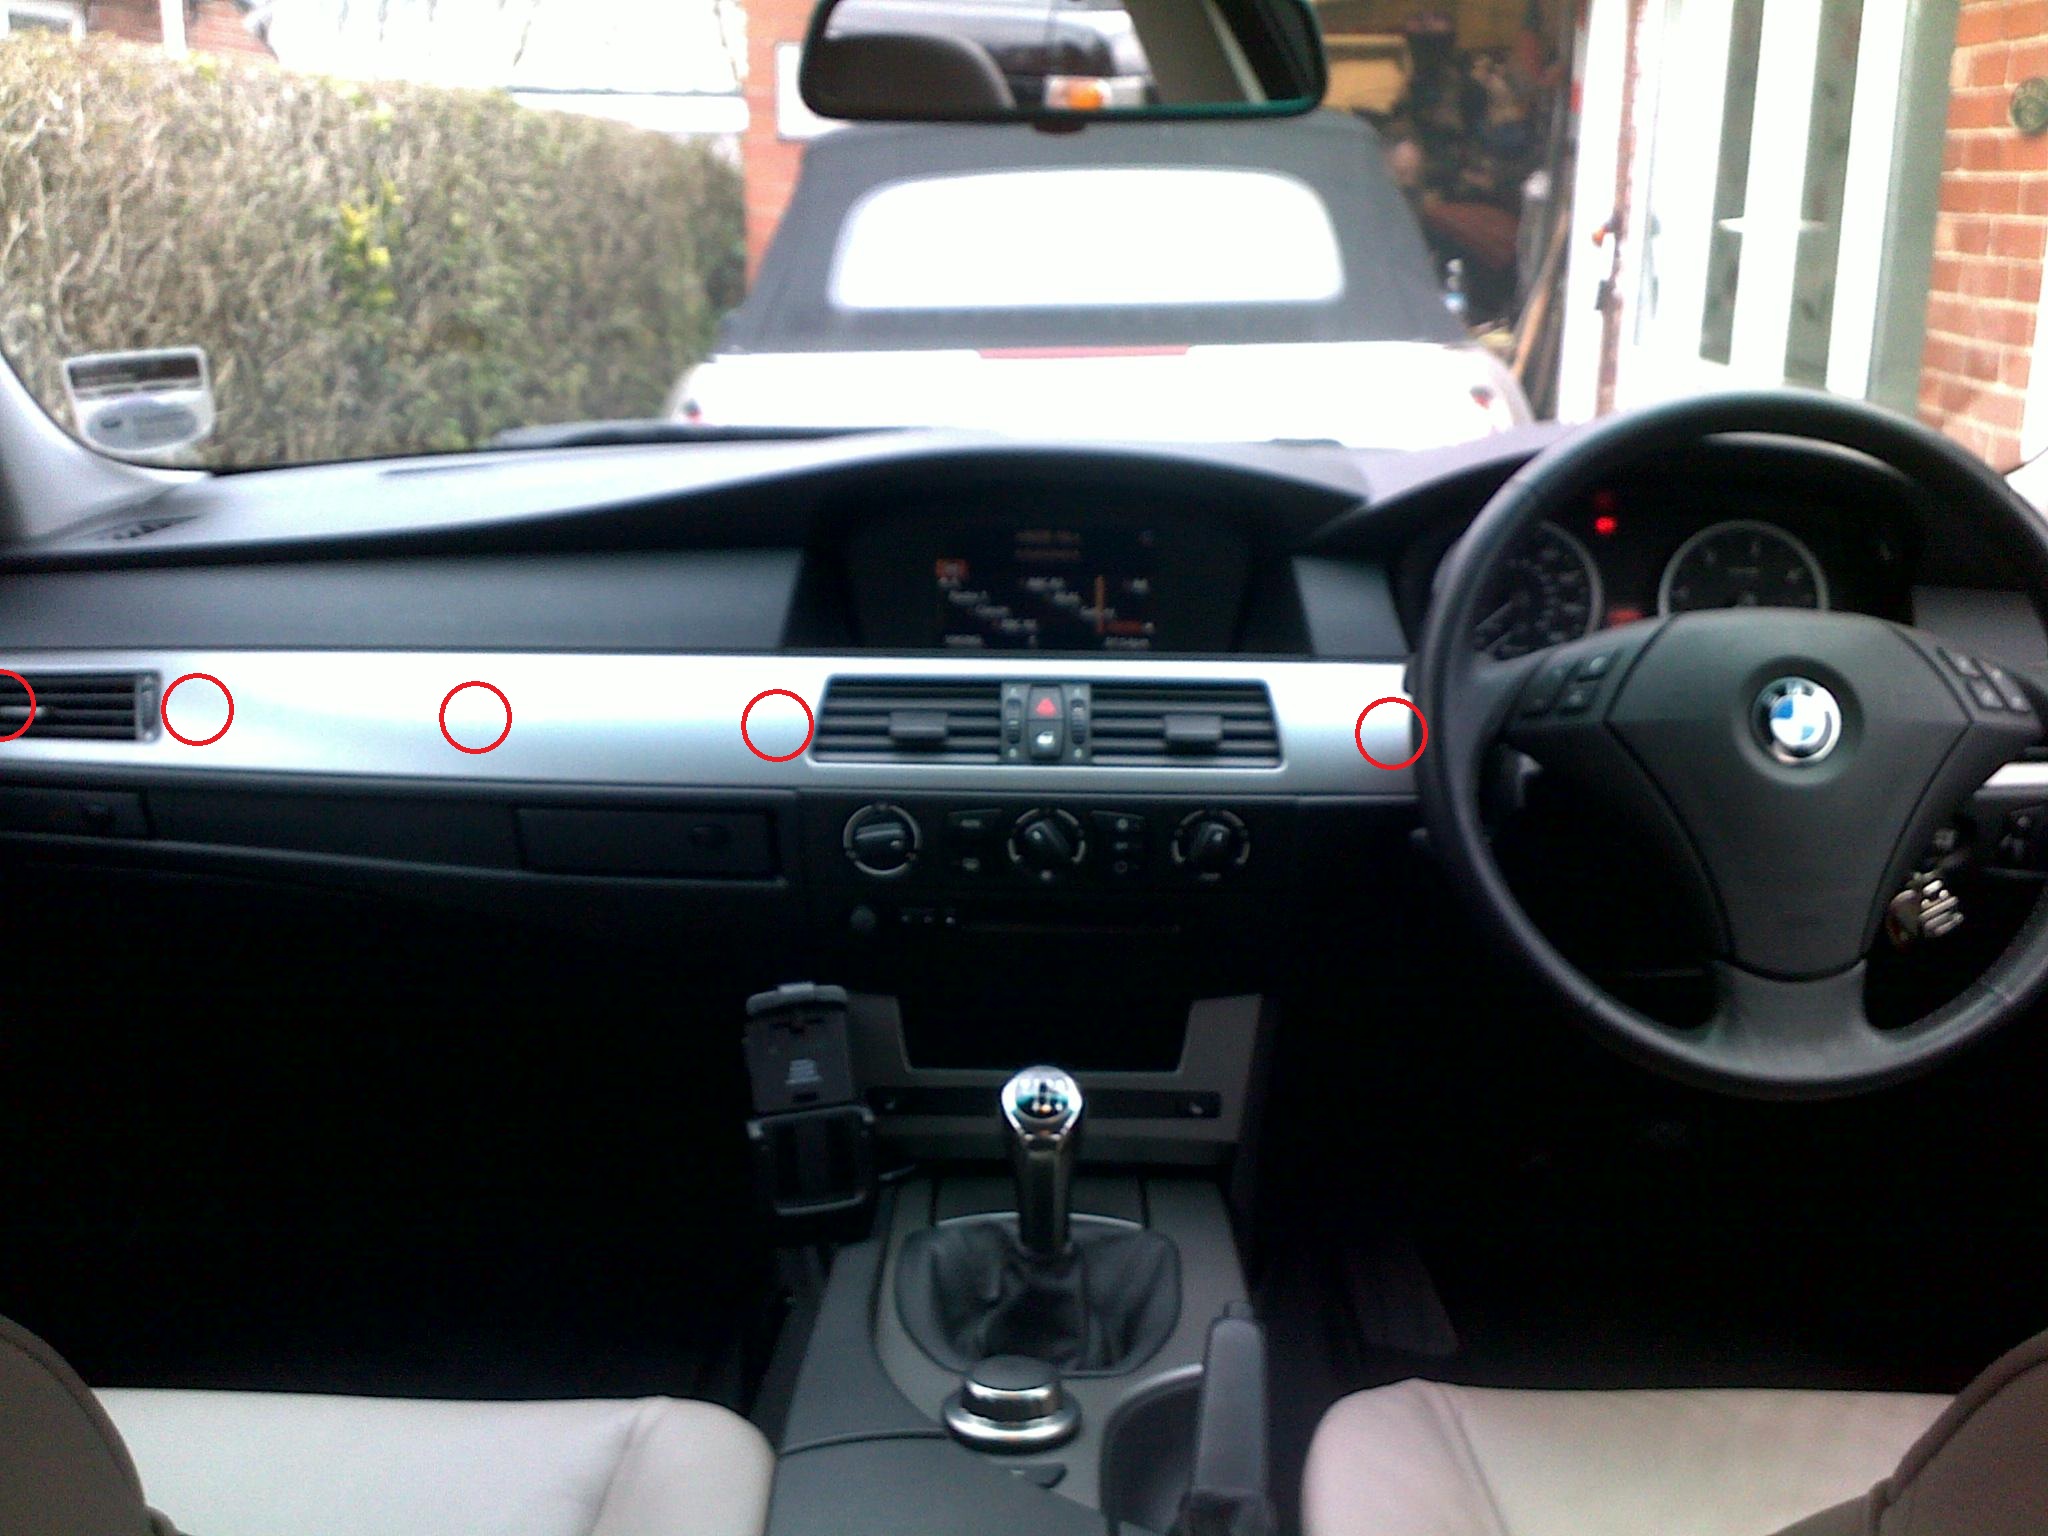
There are 4 pins and one plastic clip that hold this piece into place. The far left is a plastic clip, which does not take much pressure to release, but the other four are metal pins, which are fixed into metal lined clips, which will require some force to remove.
Start at the right hand side, insert a plastic wedge, as not to damage the dash and pry up the right side of the trim, enough to get your fingers under. Slowly apply pressure to remove this side from its clips, while slowly running a plastic wedge or your finger, along the trim to carefully release each pin from its fixings to release the trim. Be careful, as this trim can be easily damaged with too much pressure.
Once this trim is removed, simply unclip the left side vent from the clips that hold it in place. When removing the centre large vent from the trim piece, there are 2 bolts, one at either end of the trim, which hold this in place, and depending on which model you have, there may also be a torx screw in the centre of the vent, holding it to the trim.
Removing the centre console/heater controls
After removing the upper trim piece, the centre console surround can then be removed. Start off by removing the two upper screws shown in the image below:

After removing these screws, the centre trim is just held on with four or six clips, depending on model. These are shown in the pic below.
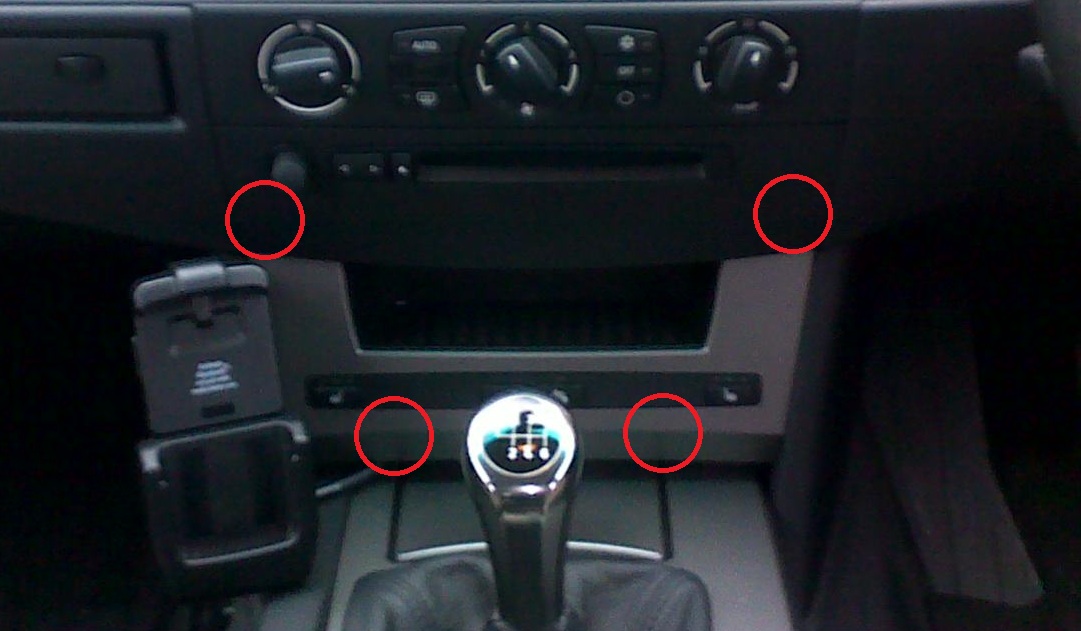
The upper two can be released by (according to BMW's guide) placing a long screwdriver down the back of the trim and gently prying forward the panel until the clips release. What this does not take into account is that you can very easily damage your control panel for the radio by doing this, so please be very careful, as these parts are very fragile.
At this point, i would advise you to remove the cables from the heater controls, to avoid damage. When the upper clips are removed, the lower clips are removed by gently easing the panel forward and carefully popping each side out in turn, again, be careful, these panels will only bend so far before causing damage.
With this centre trim removed, all other parts are merely clipped together which is pretty self-explanatory of what to do should you need to replace any of the trim parts or heater controls.
To replace these parts, you would need to repeat all of the above processes in reverse order, remembering to check all clips prior to installation, repair or replace any broken ones. Ensure all heater controls are plugged in as they were before and DO NOT forget to thread the hazard light wire through the trim prior to installing the upper dash trim, or you will need to take it all off again...
Removing the centre gearstick surround
This process can be quite tricky, especially when removing the idrive without causing damage to its retaining clips. Take note of the image below:
You need to initially release the gearstick gaitor from its surround, as there are two, torx screws located under this. Remove these two screws, and then give some attention to the idrive knob. You need to apply pressure to two quarters of the knob, ideally at 3 and 6 as if it were a clock and slowly lift it, with little pressure and this should pop off. At this point, i would just suggest removing the ash try lining, as this stops the trim sliding out.
With this off, you will need to begin to lift the centre surround, there are three clips which you will need to note, as shown in the pic above. Carefully pry the trim upwards until it is free of these clips, and release the menu button from the housing, so that the cable can be disconnected.
This console will now slide out of place, just make sure that the ash tray has been removed, and the 12V socket is not getting caught, and be careful not to catch your leather with the clips or tools used!!
To re-install this console, just repeat the above process in reverse, taking care not to damage any connections and make sure to line up clips when attaching the idrive knob. Remember to thread the menu cable back through the trim before installing it, or you'll have to remove the trim again. Be careful not to catch the 12V socket when replacing this trim, as with it being sprung, it is prone to getting in the way
**Please note that this process was done on a March 2007 pre-LCI BMW 520d SE saloon, with basic MASK system, and it was right-hand-drive. This process might not be the same for LCI and left-hand drive vehicles.**
I accept no responsiblity for any damage caused when attempting this process, so take care and any questions, please ask.


Thread Starter
Members
Joined: Jan 2010
Posts: 238
Likes: 0
From: Barnsley, UK
My Ride: 2010(60) BMW 520d SE, Manual, In Sophisto Grey with Cream/Black Interior and Piano Black trim

Thread Starter
Members
Joined: Jan 2010
Posts: 238
Likes: 0
From: Barnsley, UK
My Ride: 2010(60) BMW 520d SE, Manual, In Sophisto Grey with Cream/Black Interior and Piano Black trim


Senior Members
Joined: Nov 2006
Posts: 488
Likes: 0
From: Shropshire UK
My Ride: Estoril Blue 440i GC
Model Year: 2017
Good guide Robg520d.
Nice pictures
My experience is that the trim above the light switch will just (gently) prize off without removing anything else.
Also, you can remove the long trim without first removing the hazard switch - you can get a hand behind to disconnect the wires with the trim loose.
Richard313, do a search on "Dashboard / Door Trims" for a thread I made on Door Trims. It will be a start before Robg520d does a better one with pictures!
The door trims aren't too bad a job. If you've done the other trim pieces, then the doors will be pretty easy, given the knowledge of how the clips fix on to the door / panel.
Mike
Thread Starter
Members
Joined: Jan 2010
Posts: 238
Likes: 0
From: Barnsley, UK
My Ride: 2010(60) BMW 520d SE, Manual, In Sophisto Grey with Cream/Black Interior and Piano Black trim
Good guide Robg520d.
Nice pictures
My experience is that the trim above the light switch will just (gently) prize off without removing anything else.
Also, you can remove the long trim without first removing the hazard switch - you can get a hand behind to disconnect the wires with the trim loose.
Richard313, do a search on "Dashboard / Door Trims" for a thread I made on Door Trims. It will be a start before Robg520d does a better one with pictures!
The door trims aren't too bad a job. If you've done the other trim pieces, then the doors will be pretty easy, given the knowledge of how the clips fix on to the door / panel.
Mike
Nice pictures
My experience is that the trim above the light switch will just (gently) prize off without removing anything else.
Also, you can remove the long trim without first removing the hazard switch - you can get a hand behind to disconnect the wires with the trim loose.
Richard313, do a search on "Dashboard / Door Trims" for a thread I made on Door Trims. It will be a start before Robg520d does a better one with pictures!
The door trims aren't too bad a job. If you've done the other trim pieces, then the doors will be pretty easy, given the knowledge of how the clips fix on to the door / panel.
Mike
I have to agree, as you say, once you get going, theres the odd obstacle, but overall its a good job to get done. Had plenty of trouble on the first door panel figuring out how it clips on, but after that, it applies to all 4, so stright forward. I'll get some better pics, then attempt another door trim DIY section next weekend.

