Another crazy ass sub-woofer upgrade
 10-13-2010, 08:05 AM
#1
Members
Thread Starter
Join Date: Mar 2009
Location: Fredericksburg, VA
Posts: 176
Likes: 0
Received 0 Likes
on
0 Posts
So, if you've been paying attention...
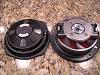
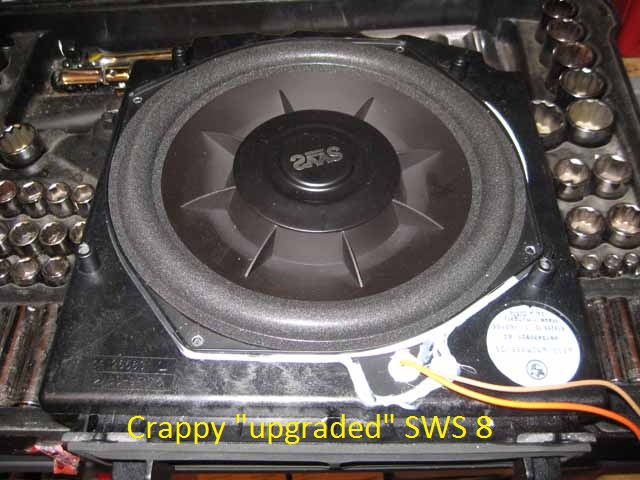
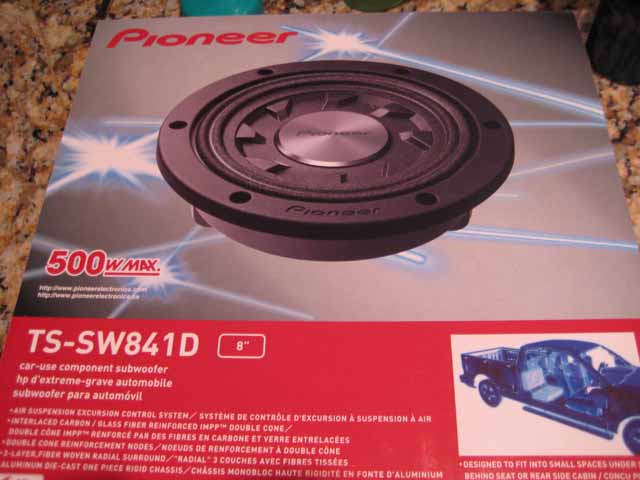
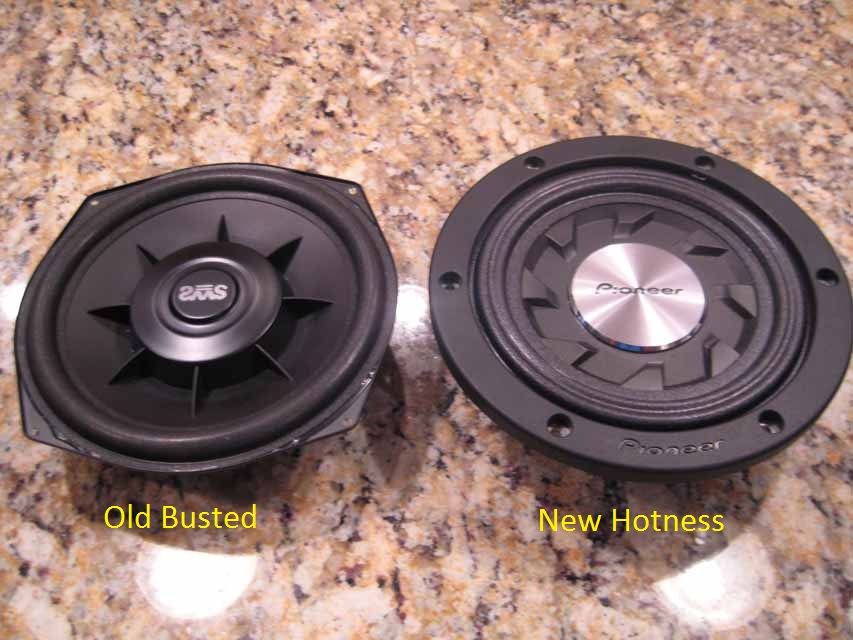
I upgraded my system in an effort to get more and better sounding bass (see original thread). The problem is the SWS8's for lack of a better word, suck. I wound up blowing FOUR of them (running @150w RMS) . IMO, their RMS claim of 150w is bogus. In fact, when I called Earthquake and spoke to them about my problem they told me, "If you read the fine print on the box and in the manual it states the RMS wattage the sub handles is based on the type of music played". Nice... I've never heard something like that before. Anyway, time to find a new solution. After doing some research, the only woofer I could find that was close to the right depth was the Pioneer TS-SW841Ds. I took a chance and ordered a pair with the idea of making them work (or die trying).
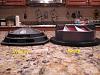
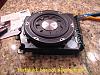
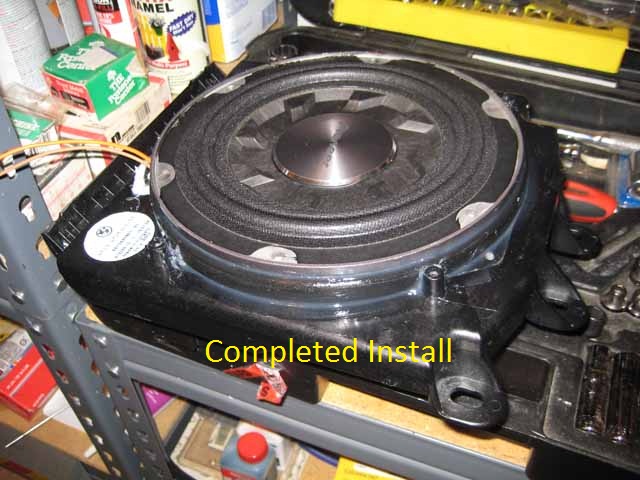
Actually, as far a stereo mods go, this one turned out to be relatively simple. In fact, if you have or know someone with wood cutting skills to make a trim piece for you (I don't so I improvised using the rubber trim that came with the woofer) I imagine it would be even easier. I have both woofers connected together (pos pos / neg neg) in trunk then going into my amp which is pushing 300w @ 2ohms rms (so they get 150w rms each). I gotta tell you they sound awesome. They are very tight and I can feel the bass hit through the seat.
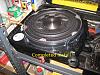
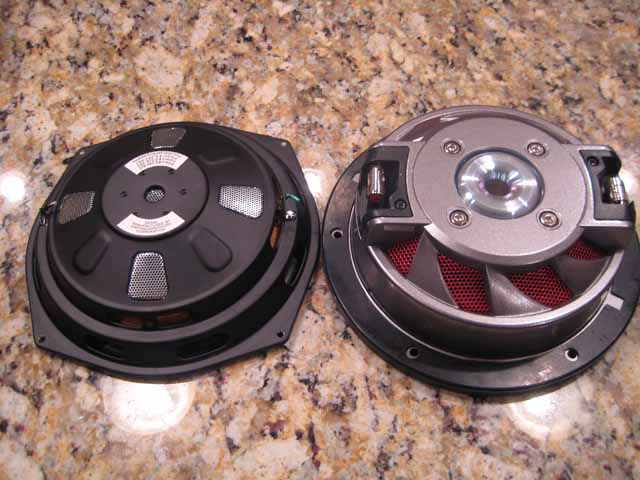
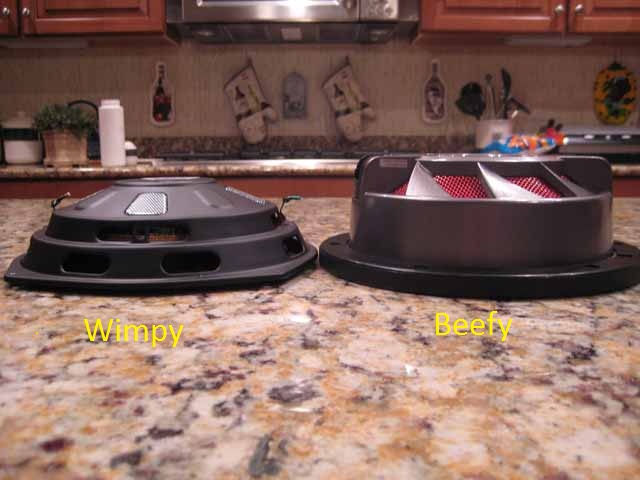
IMO, the only thing the Earthquakes have going for them is they fit. They sound ok compared to the stockers, but they are made really cheap. Personally, I would not recommend them to anyone. The Pioneers are beefier, hit much harder, sound cleaner, and are cheaper to boot.
Two minor issues that prevent me from calling the install "perfect":
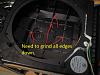
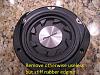
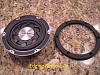
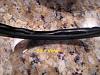
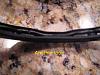
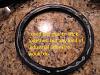
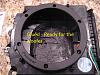
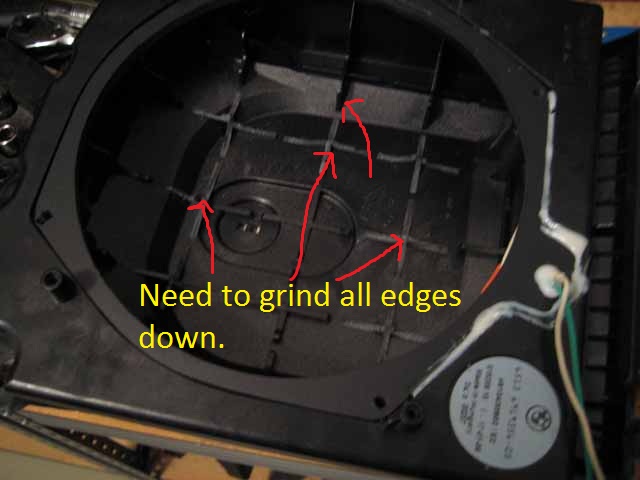
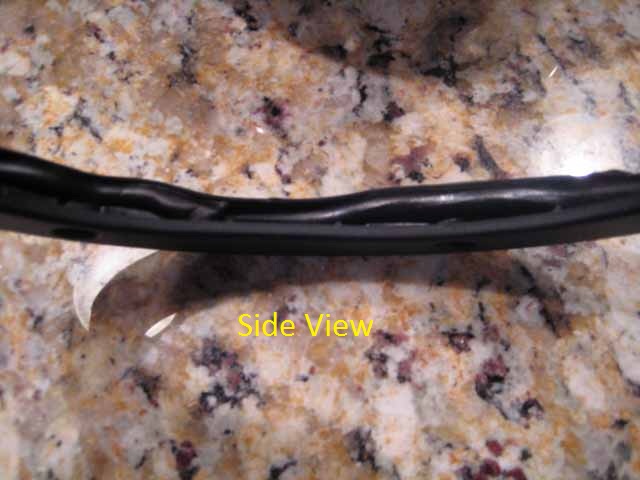
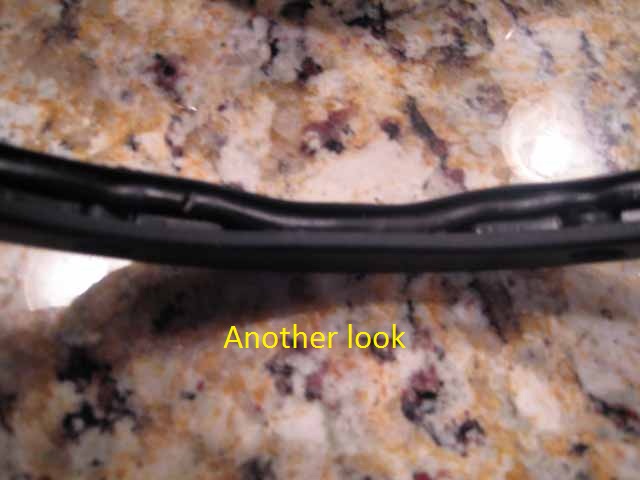
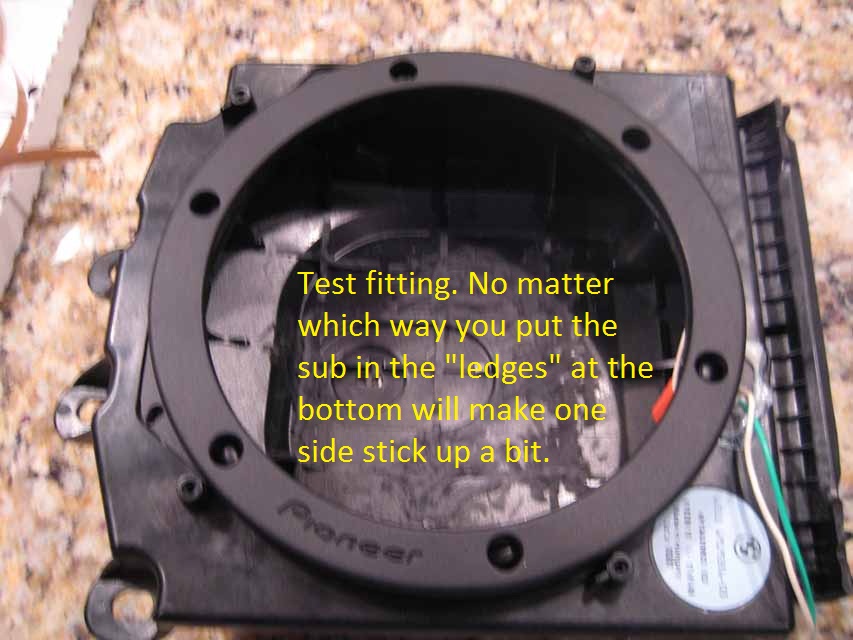
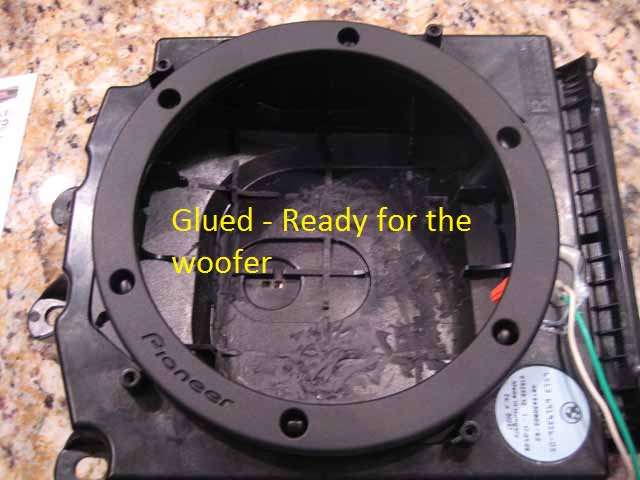
1. Due to the shape (circled in one of the pics) of the under seat enclosure the sub has about a 1/16" of an inch gap on one side when you drop it in. I used clear silicone to seal the woofer to the enclosure so all the gaps are now filled.
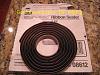
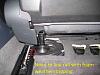
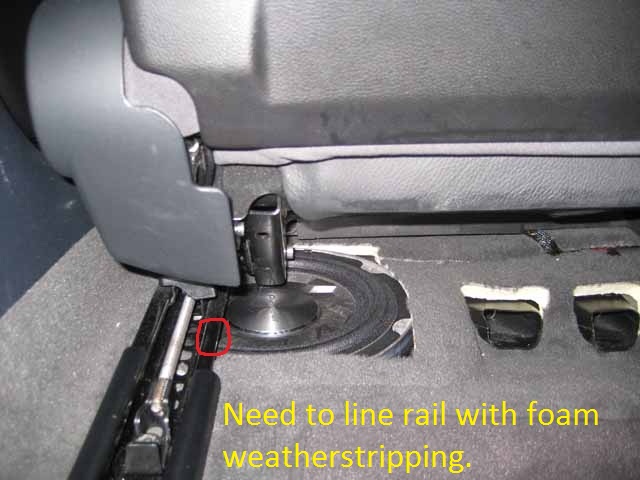
2. The clearance from the top of the woofer to the bottom of the seat rail is reduced so on loud deep bass notes the very bottom outside edge of the woofer (about a 1 inch section of the curve) MAY hit the seat rail. In my install I addressed this by lining the bottom of the seat rail in that area (it's about a 1-2" space on the rail) with foam weatherproofing tape, so the woofer hits the foam if it hits anything. I circled the spot in one of the pics.
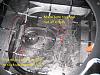
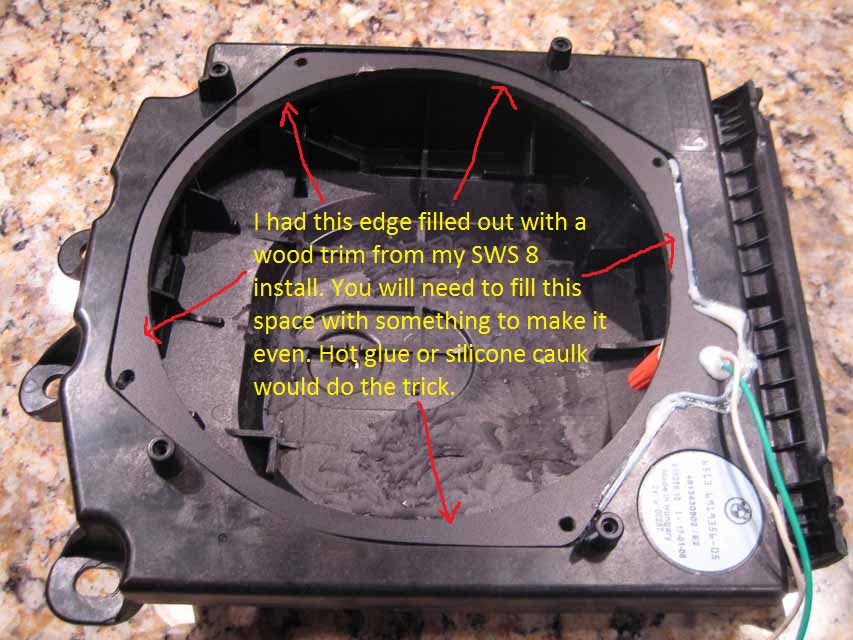
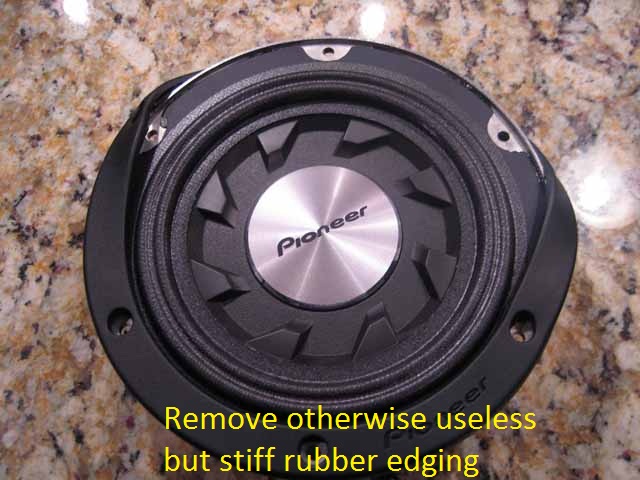
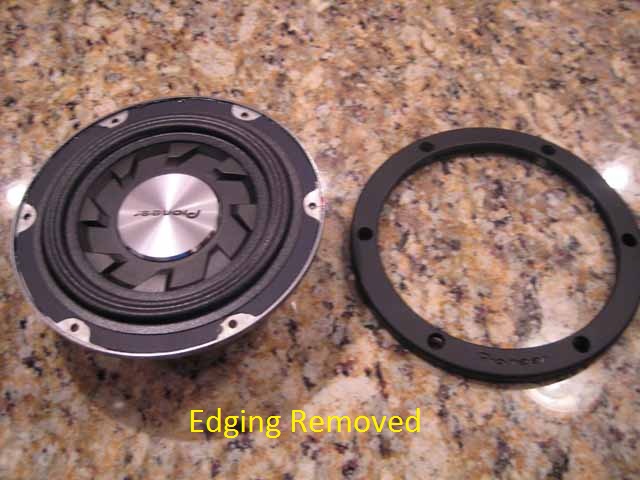
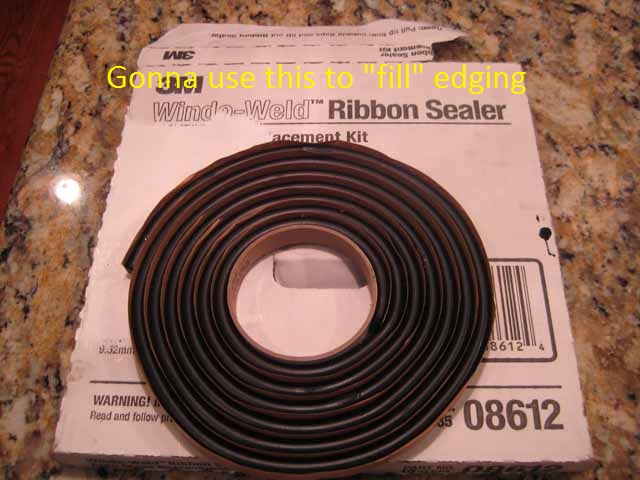
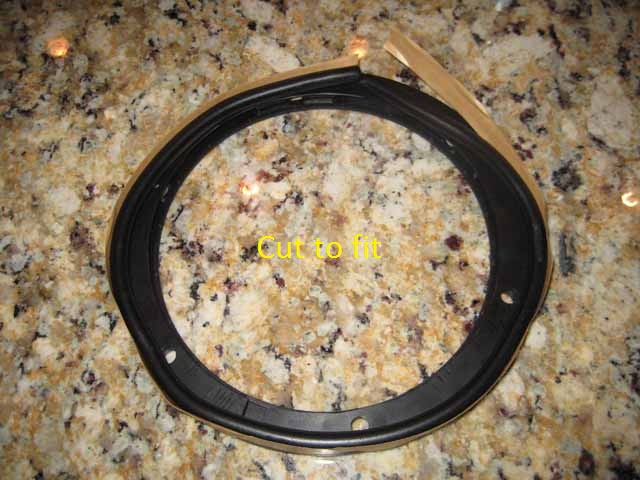
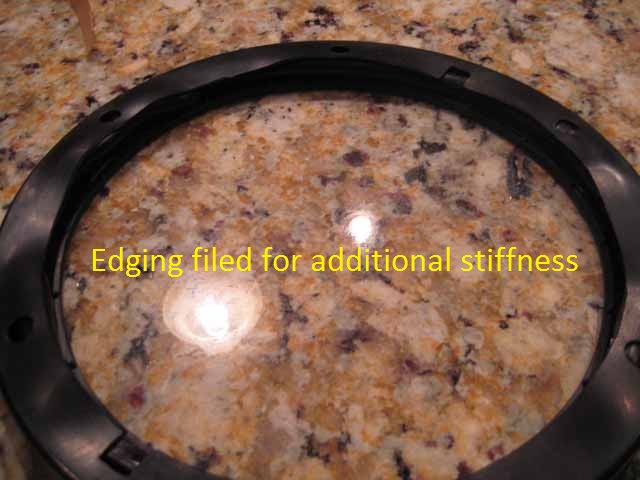
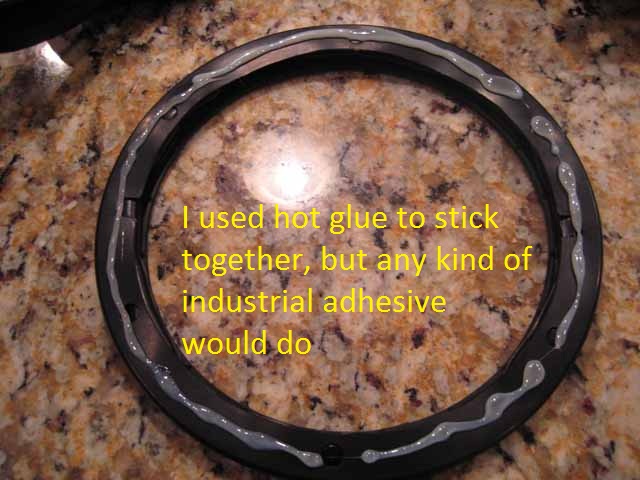
Other than that the install looks good and is well worth it. Oh, I also stuffed some polyfill into the hole the enclosure uses for additional space (the hole is under the door where the enclosure seals up) to give the woofer an appearance of a bigger box.Like I said in the beginning, if you know someone who can cut you a wood (or other material) 8 inch circle at the right thickness then you would not have to use the rubber edge cover as I did. I can imagine professionals have better ways to do what I did, but I wanted to go with materials I had at hand and my imagination. Hopefully this mod will give some of you more advanced guys an idea on what can be done.
All said, I think if you like bass this upgrade would work for you. Enough yappin' - time for the pics!
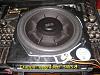


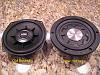


I upgraded my system in an effort to get more and better sounding bass (see original thread). The problem is the SWS8's for lack of a better word, suck. I wound up blowing FOUR of them (running @150w RMS) . IMO, their RMS claim of 150w is bogus. In fact, when I called Earthquake and spoke to them about my problem they told me, "If you read the fine print on the box and in the manual it states the RMS wattage the sub handles is based on the type of music played". Nice... I've never heard something like that before. Anyway, time to find a new solution. After doing some research, the only woofer I could find that was close to the right depth was the Pioneer TS-SW841Ds. I took a chance and ordered a pair with the idea of making them work (or die trying).
Actually, as far a stereo mods go, this one turned out to be relatively simple. In fact, if you have or know someone with wood cutting skills to make a trim piece for you (I don't so I improvised using the rubber trim that came with the woofer) I imagine it would be even easier. I have both woofers connected together (pos pos / neg neg) in trunk then going into my amp which is pushing 300w @ 2ohms rms (so they get 150w rms each). I gotta tell you they sound awesome. They are very tight and I can feel the bass hit through the seat.
IMO, the only thing the Earthquakes have going for them is they fit. They sound ok compared to the stockers, but they are made really cheap. Personally, I would not recommend them to anyone. The Pioneers are beefier, hit much harder, sound cleaner, and are cheaper to boot.
Two minor issues that prevent me from calling the install "perfect":
1. Due to the shape (circled in one of the pics) of the under seat enclosure the sub has about a 1/16" of an inch gap on one side when you drop it in. I used clear silicone to seal the woofer to the enclosure so all the gaps are now filled.
2. The clearance from the top of the woofer to the bottom of the seat rail is reduced so on loud deep bass notes the very bottom outside edge of the woofer (about a 1 inch section of the curve) MAY hit the seat rail. In my install I addressed this by lining the bottom of the seat rail in that area (it's about a 1-2" space on the rail) with foam weatherproofing tape, so the woofer hits the foam if it hits anything. I circled the spot in one of the pics.
Other than that the install looks good and is well worth it. Oh, I also stuffed some polyfill into the hole the enclosure uses for additional space (the hole is under the door where the enclosure seals up) to give the woofer an appearance of a bigger box.Like I said in the beginning, if you know someone who can cut you a wood (or other material) 8 inch circle at the right thickness then you would not have to use the rubber edge cover as I did. I can imagine professionals have better ways to do what I did, but I wanted to go with materials I had at hand and my imagination. Hopefully this mod will give some of you more advanced guys an idea on what can be done.
All said, I think if you like bass this upgrade would work for you. Enough yappin' - time for the pics!


 10-13-2010, 12:10 PM
#2
Members

Join Date: Sep 2010
Location: Isle of man
Posts: 79
Likes: 0
Received 0 Likes
on
0 Posts
Looks pretty good , i'm trying to get some spacers and will get some additional wood spacer rings made up
Quick Question , would you think a ring spacer made in a slant / angle to slighty drop it on the rail side up raised on the in side would be better and give more of a stereo bass
Quick Question , would you think a ring spacer made in a slant / angle to slighty drop it on the rail side up raised on the in side would be better and give more of a stereo bass
10-13-2010, 12:16 PM
#3
Contributors

Join Date: Mar 2007
Location: NYC, Rego Park, Queens
Posts: 5,434
Likes: 0
Received 0 Likes
on
0 Posts
My Ride: 2004 E60 530i, 2012 E70 X5 35i
Model Year: 2004
That looks great man! I think I finally might take the plunge and do that. Quick question, how much were the subs? and Also, the amp that you are using, are you only powering these two subs too? How did you do the wiring for the amp? I want to know if I need to run new wiring or can i just use the existing wires from the OEM Sub.
10-13-2010, 12:17 PM
#4
Senior Members

Join Date: Aug 2010
Posts: 616
Likes: 0
Received 0 Likes
on
0 Posts
so you didn't cover the woofer with the speaker grill? how did you line the seat rail? i'd like a better pic of that if possible. still, i think a sub hitting anything during use is bad for it. i can't see how that would last over time. thoughts?
10-13-2010, 12:57 PM
#5
Members
Thread Starter
Join Date: Mar 2009
Location: Fredericksburg, VA
Posts: 176
Likes: 0
Received 0 Likes
on
0 Posts
Looks pretty good , i'm trying to get some spacers and will get some additional wood spacer rings made up
Quick Question , would you think a ring spacer made in a slant / angle to slighty drop it on the rail side up raised on the in side would be better and give more of a stereo bass
Quick Question , would you think a ring spacer made in a slant / angle to slighty drop it on the rail side up raised on the in side would be better and give more of a stereo bass
10-13-2010, 01:04 PM
#6
Members
Thread Starter
Join Date: Mar 2009
Location: Fredericksburg, VA
Posts: 176
Likes: 0
Received 0 Likes
on
0 Posts
That looks great man! I think I finally might take the plunge and do that. Quick question, how much were the subs? and Also, the amp that you are using, are you only powering these two subs too? How did you do the wiring for the amp? I want to know if I need to run new wiring or can i just use the existing wires from the OEM Sub.
10-13-2010, 01:07 PM
#7
Members
Join Date: Sep 2010
Location: Isle of man
Posts: 79
Likes: 0
Received 0 Likes
on
0 Posts
I work as a IT Admin at a school which has a DnT department all kinds of tools to do all sorts including laser cutters etc , I should be-able to make a ring in a angle of 8" , do you know the exact dimensions for the inner and outer rings ?
10-13-2010, 01:16 PM
#8
Members
Thread Starter
Join Date: Mar 2009
Location: Fredericksburg, VA
Posts: 176
Likes: 0
Received 0 Likes
on
0 Posts
It was a risk I was willing to take 'cause damn it sounds good!
 10-13-2010, 01:20 PM
#9
Members
Join Date: Sep 2010
Location: Isle of man
Posts: 79
Likes: 0
Received 0 Likes
on
0 Posts
Its good that your enjoying the bass , is it enough not not have the extra in the boot.
how much space is there under the rear parcel shelve after the sub box is installed , i'm thinking of mounting the JBL MS-8 DSP there and 1 amp on the left side in the boot and the rest in the spare wheel compartment
how much space is there under the rear parcel shelve after the sub box is installed , i'm thinking of mounting the JBL MS-8 DSP there and 1 amp on the left side in the boot and the rest in the spare wheel compartment
10-13-2010, 01:32 PM
#10
Members
Thread Starter
Join Date: Mar 2009
Location: Fredericksburg, VA
Posts: 176
Likes: 0
Received 0 Likes
on
0 Posts
Its good that your enjoying the bass , is it enough not not have the extra in the boot.
how much space is there under the rear parcel shelve after the sub box is installed , i'm thinking of mounting the JBL MS-8 DSP there and 1 amp on the left side in the boot and the rest in the spare wheel compartment
how much space is there under the rear parcel shelve after the sub box is installed , i'm thinking of mounting the JBL MS-8 DSP there and 1 amp on the left side in the boot and the rest in the spare wheel compartment