New look for steering wheel trim
#1
Thread Starter
Senior Members
Joined: May 2011
Posts: 1,169
Likes: 0
From: Canada
My Ride: 2010 535 xi - M Sport Pkg & other goodies
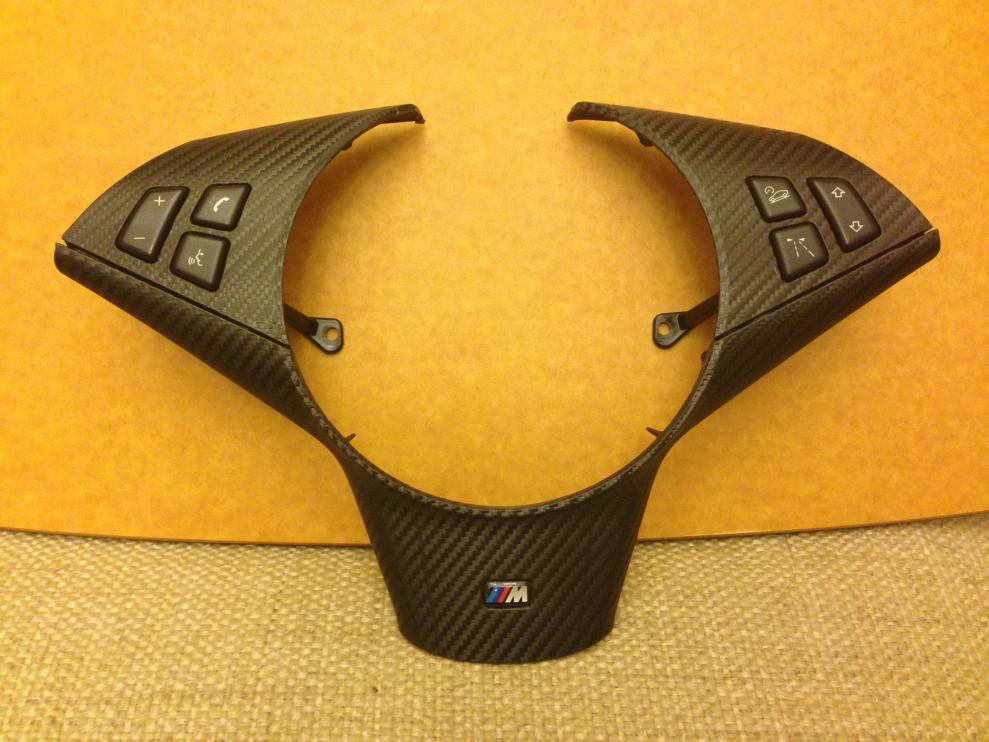
Got tired of looking at the trim that had started peeling, so I decided to wrap it with vinyl carbon fiber. So far I've managed to get the bottom piece done, which will be the tougher of the 3, considering all the complex curves to it.
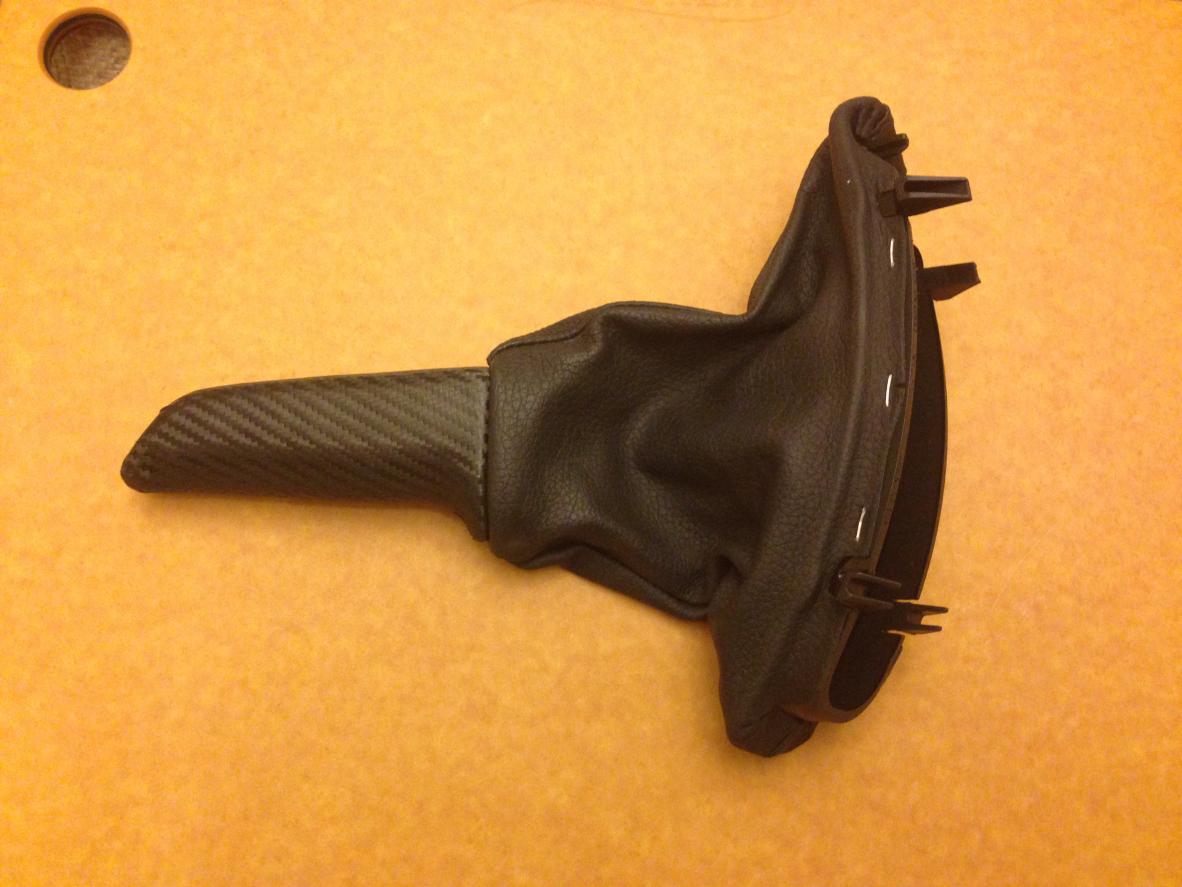
In the ideal world, I'd cover all the trim pieces in the car too, so it all matches, but for now, this is it (along with the emergency brake handle, which will be next, so at least there's something else in the car that's carbon fiber).
Here's the workstation, and then the finished product.
.
In the ideal world, I'd cover all the trim pieces in the car too, so it all matches, but for now, this is it (along with the emergency brake handle, which will be next, so at least there's something else in the car that's carbon fiber).
Here's the workstation, and then the finished product.

.
Last edited by Lotus99; 09-16-2014 at 11:07 PM.
#2
Good work!
I like the fastening of the heatgun/hairdryer
How difficult was it to take the actual piece of the steering wheel? I think I have seen a DIY guide here somewhere, but nice to know if it is tricky or not. I have a lot of respect for the airbag removal...
I like the fastening of the heatgun/hairdryer

How difficult was it to take the actual piece of the steering wheel? I think I have seen a DIY guide here somewhere, but nice to know if it is tricky or not. I have a lot of respect for the airbag removal...
#3
Thread Starter
Senior Members
Joined: May 2011
Posts: 1,169
Likes: 0
From: Canada
My Ride: 2010 535 xi - M Sport Pkg & other goodies
Thanks. 
I found a thread on it somewhere and saved it in this document.
It's like a lot of things... for me at least. At first, it looks scary, but then when I get into it, it's not that bad. I did disconnect the battery to be totally safe, as a few warned of the scary scenario of the airbag going off, but having done it, I don't think it's necessary, and I don't see how you could possibly short anything while trying to take it off.
To get the airbag off, at first I wasn't quite pushing on the right spot and pressed with a lot of pressure, but the spring wouldn't release. So I followed my rule of thumb that if I'm using too much force, I must be doing it wrong! I wiggled the tool a bit and kept pushing, and when I found the sweet spot, it popped open with little force. Once you figure it out (IIRC more towards you than the windshield), then it's easy to repeat. I've taken it on and off a few times since, because I had to put it back of course to keep driving, while the trims are out.
One last tip, it's easier to turn the steering wheel straight up or have the whole that's at the bottom towards 10 or 11 o'clock, so you can easily push your tool into it.
Good luck and ask away!
.
.

I found a thread on it somewhere and saved it in this document.
It's like a lot of things... for me at least. At first, it looks scary, but then when I get into it, it's not that bad. I did disconnect the battery to be totally safe, as a few warned of the scary scenario of the airbag going off, but having done it, I don't think it's necessary, and I don't see how you could possibly short anything while trying to take it off.
To get the airbag off, at first I wasn't quite pushing on the right spot and pressed with a lot of pressure, but the spring wouldn't release. So I followed my rule of thumb that if I'm using too much force, I must be doing it wrong!
 I wiggled the tool a bit and kept pushing, and when I found the sweet spot, it popped open with little force. Once you figure it out (IIRC more towards you than the windshield), then it's easy to repeat. I've taken it on and off a few times since, because I had to put it back of course to keep driving, while the trims are out.
One last tip, it's easier to turn the steering wheel straight up or have the whole that's at the bottom towards 10 or 11 o'clock, so you can easily push your tool into it.
Good luck and ask away!
.
.
#9
Thread Starter
Senior Members
Joined: May 2011
Posts: 1,169
Likes: 0
From: Canada
My Ride: 2010 535 xi - M Sport Pkg & other goodies
Only the large up / down buttons on each side I could get out easily. Those, from the inside, just use a small flat head screwdriver to pop out the little hinge point in the center of each button (two per button), after unscrewing the circuit board from behind. It'll be obvious once you look.
For the smaller buttons, I ended up with the circuit board out, cutting the vinyl with a few mm's overlapping the edge, then cutting a slit at each corner, so I could fold down a bit of vinyl over the edge. Seems to be sticking fine so far and hasn't peeled. Using a hair dryer's very important to keep the vinyl flexible.
Also, one thing I learned is don't cut the vinyl with the X-acto knife is 90 degrees to the vinyl. Cut it at almost horizontal to minimize cutting into the button below and scratching it.
Practice with some scrap vinyl first also to get that part figured out.
Good luck.
Thread
Thread Starter
Forum
Replies
Last Post
TexaZ3
Complete Car Sales
17
05-06-2015 10:54 AM


