Fittng Front and Rear M sport bumpers onto SE
 06-03-2012, 06:10 AM
#1
Members
Senior Members
Thread Starter
Join Date: Feb 2012
Location: Sheffield UK
Posts: 269
Likes: 0
Received 0 Likes
on
0 Posts
My Ride: 535D Tourer - Pre LCI
Right, managed to finally get around to this - bear in mind when sourcing the parts for this, the front grills alone are Ł250-Ł300, I paid slightly less as i managed to get quite lucky on ebay. I've probably missed some bits off here, it was a very hot day and i just wanted them fitted! took approx 5-6 hours in total for both front and rear.
The front first - i jacked up the front of the car placing it on axle stands, made it much easier to work on (removing the undertray first). Firstly you need to remove the screws securing the bumper on the inner arch, not forgetting the nut securing the bumper to the wing. Then lift the bonnet, underneath you will find several torx screws underneath the rubber strip, then finally several more torx bits above the bottom grills. The next bit is a pain as there are runners holding the top of the sides of the bumper, to the wing. The only way to get to the two screws is to prise the bumper corner out and get an 8mm wrench in to remove (self explanitory when you see it). Once the bumper is off you just need to disconnect the fogs and the sensors.
With the bumper off, carefully push the sensors out- DO NOT PULL THEM! I did this with one of the rear ones and it seperated, upon testing later on, i found it didnt work! glad i kept two spares from when i bought the bumpers
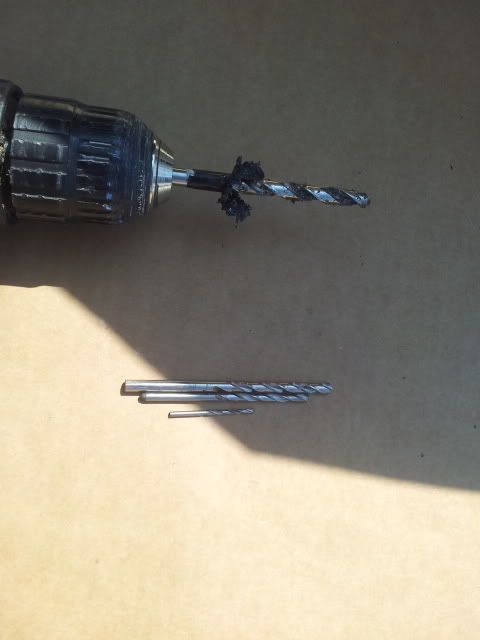
I fitted all the pieces to the new bumper, left the kidneys out until the M sport bumper was fitted properly. I utilised the springs on the headlight washer pieces as can be seen below. Basically fit the bottom centre grill leaving out the two additional bottom grill pieces (you'll need to get your hand in to fit the brake ducts) - fit the brake ducts, headlight washer pieces and fogs before offering up the bumper to the car. Before you do this however, I removed a bit of the polystyrene on the bumper support, otherwise this would have blocked the two outer sensors. Note: the only pieces you can use from the SE bumper are the HL washer springs and fogs - I bought some SE fogs off the bay, the pics below show where i had to drill to get them to fit, along with the drill bits i used in order to make the holes bigger (so the plastic didnt split) - they arent perfectly aligned, but near enough - also bear in mind, when fitting the SE fogs, the adjuster is on the opposite side, therefore you'll need to remove the headlights to get to it later on.
Fitting - offer the bumper upto the car, using the top torx screw to stop it falling off, you then push the brake ducts into the brake ducts fitted to the car - no modification was required here. You'll then be able to see how much of the arches need trimming with the Dremel - try to get this as flush as possible, get this right and the bumper goes on a treat.
On another pic below you'll see the outer undertrays, the left one is M sport, the right one is SE, notice the height difference - I also trimmed the rubber on the SE tray to match the MSport - although I'd advise you change both for the sake of Ł40 - mine were both broken.
Once you have the arch trimmed, the bumper should go on, assuming you have the ducts aligned up, secure the top torx bits, then when you are happy, clip the sides in to the runners, and secure the arch using the 8mm bolts - then fit the rest of the top torx screws, you wont need the lower torx screws as im sure the M sport has a different crash bar which comes out further than the SE, therefore you cant utilise the bottom fixings, regardless, the bumper is sturdy enough so I wasnt too worried. The last thing to do is to remove approx 2-3 inch of the undertray before refitting. Push in the lower 2 grills and the kidneys....JOB DONE!!
Before:
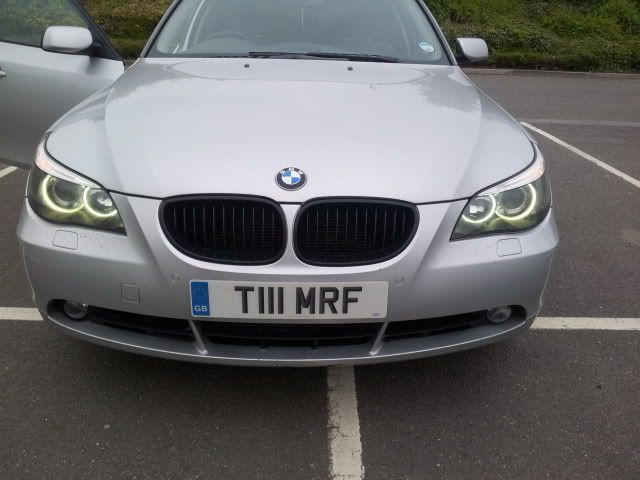
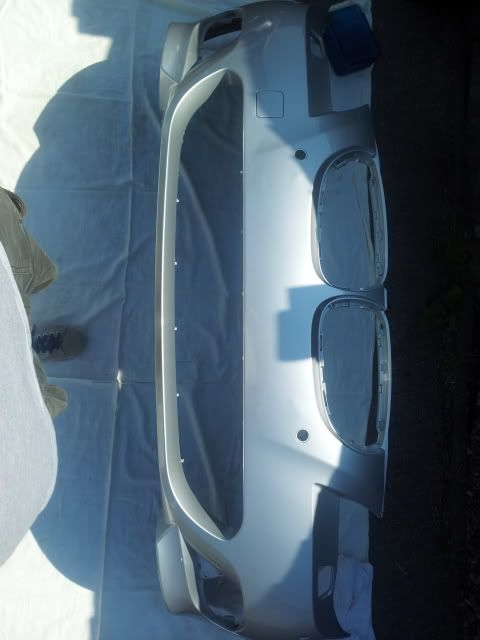
Bumper after painting
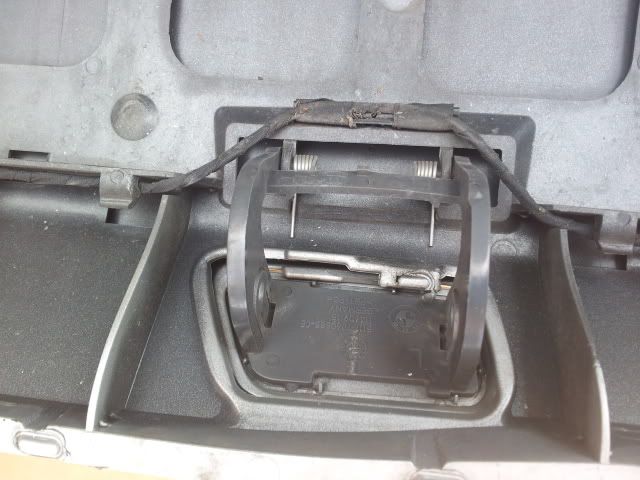
Fitting the spring to the HL washer from the old SE bumper
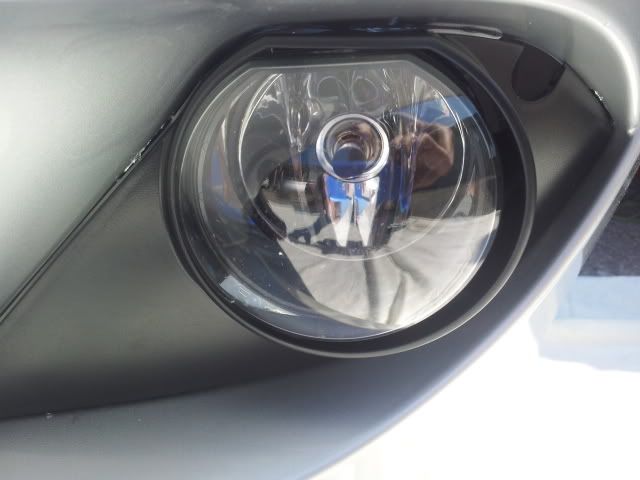
Fogs - take your time with these!!

The M sport and SE out under trays
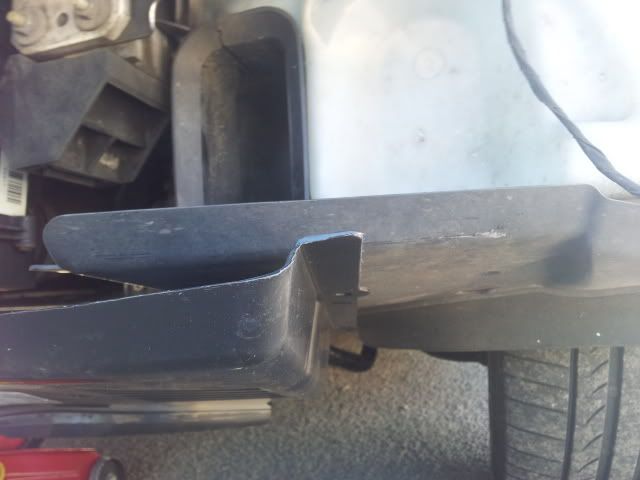
Notice the height difference of the undertrays once fitted
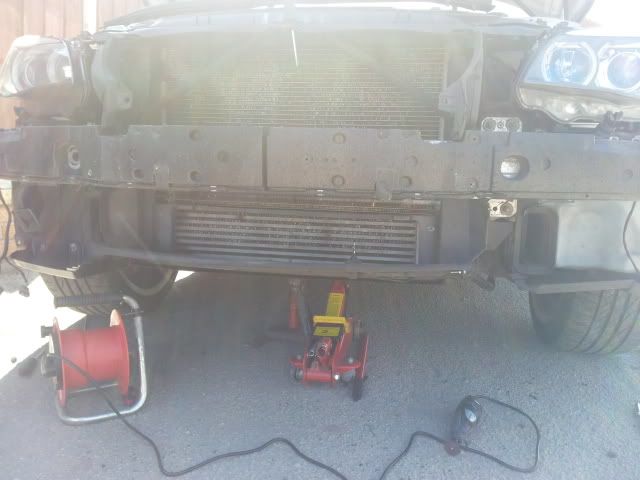
The last thing I'll say is to make it perfect, you could ideally do with trimming the plastic that sits at the bottom of the radiator, the bit that aids the lower air flow - although I managed to push mine in place, it wasn't ideal though...
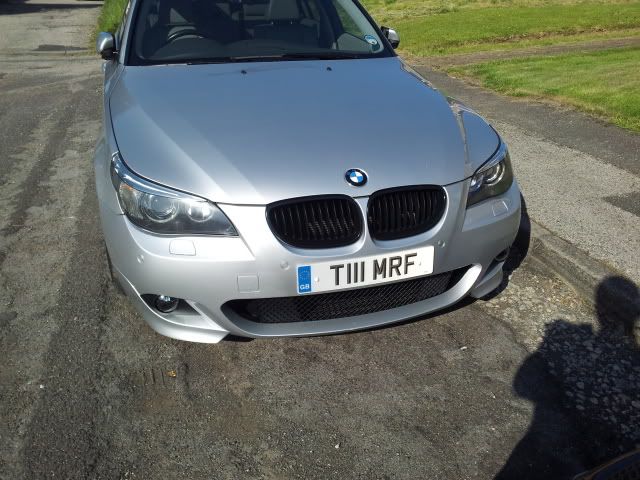
After
I wrote this guide in a bit of a rush to feel free to add anything i've missed
The front first - i jacked up the front of the car placing it on axle stands, made it much easier to work on (removing the undertray first). Firstly you need to remove the screws securing the bumper on the inner arch, not forgetting the nut securing the bumper to the wing. Then lift the bonnet, underneath you will find several torx screws underneath the rubber strip, then finally several more torx bits above the bottom grills. The next bit is a pain as there are runners holding the top of the sides of the bumper, to the wing. The only way to get to the two screws is to prise the bumper corner out and get an 8mm wrench in to remove (self explanitory when you see it). Once the bumper is off you just need to disconnect the fogs and the sensors.
With the bumper off, carefully push the sensors out- DO NOT PULL THEM! I did this with one of the rear ones and it seperated, upon testing later on, i found it didnt work! glad i kept two spares from when i bought the bumpers
I fitted all the pieces to the new bumper, left the kidneys out until the M sport bumper was fitted properly. I utilised the springs on the headlight washer pieces as can be seen below. Basically fit the bottom centre grill leaving out the two additional bottom grill pieces (you'll need to get your hand in to fit the brake ducts) - fit the brake ducts, headlight washer pieces and fogs before offering up the bumper to the car. Before you do this however, I removed a bit of the polystyrene on the bumper support, otherwise this would have blocked the two outer sensors. Note: the only pieces you can use from the SE bumper are the HL washer springs and fogs - I bought some SE fogs off the bay, the pics below show where i had to drill to get them to fit, along with the drill bits i used in order to make the holes bigger (so the plastic didnt split) - they arent perfectly aligned, but near enough - also bear in mind, when fitting the SE fogs, the adjuster is on the opposite side, therefore you'll need to remove the headlights to get to it later on.
Fitting - offer the bumper upto the car, using the top torx screw to stop it falling off, you then push the brake ducts into the brake ducts fitted to the car - no modification was required here. You'll then be able to see how much of the arches need trimming with the Dremel - try to get this as flush as possible, get this right and the bumper goes on a treat.
On another pic below you'll see the outer undertrays, the left one is M sport, the right one is SE, notice the height difference - I also trimmed the rubber on the SE tray to match the MSport - although I'd advise you change both for the sake of Ł40 - mine were both broken.
Once you have the arch trimmed, the bumper should go on, assuming you have the ducts aligned up, secure the top torx bits, then when you are happy, clip the sides in to the runners, and secure the arch using the 8mm bolts - then fit the rest of the top torx screws, you wont need the lower torx screws as im sure the M sport has a different crash bar which comes out further than the SE, therefore you cant utilise the bottom fixings, regardless, the bumper is sturdy enough so I wasnt too worried. The last thing to do is to remove approx 2-3 inch of the undertray before refitting. Push in the lower 2 grills and the kidneys....JOB DONE!!
Before:
Bumper after painting
Fitting the spring to the HL washer from the old SE bumper
Fogs - take your time with these!!
The M sport and SE out under trays
Notice the height difference of the undertrays once fitted
The last thing I'll say is to make it perfect, you could ideally do with trimming the plastic that sits at the bottom of the radiator, the bit that aids the lower air flow - although I managed to push mine in place, it wasn't ideal though...
After
I wrote this guide in a bit of a rush to feel free to add anything i've missed
 06-03-2012, 06:29 AM
#2
Members
Senior Members
Thread Starter
Join Date: Feb 2012
Location: Sheffield UK
Posts: 269
Likes: 0
Received 0 Likes
on
0 Posts
My Ride: 535D Tourer - Pre LCI
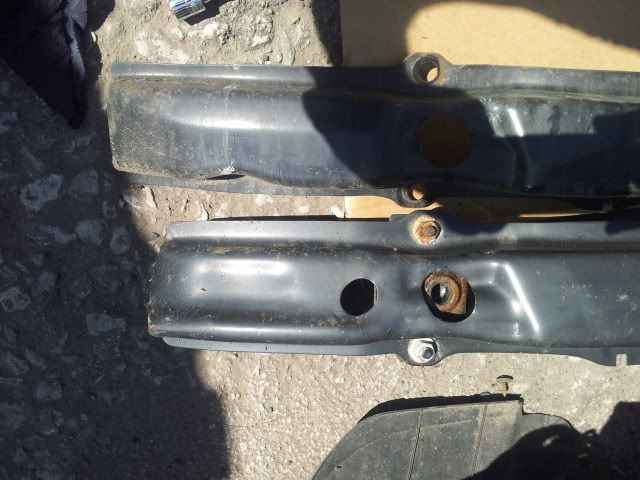
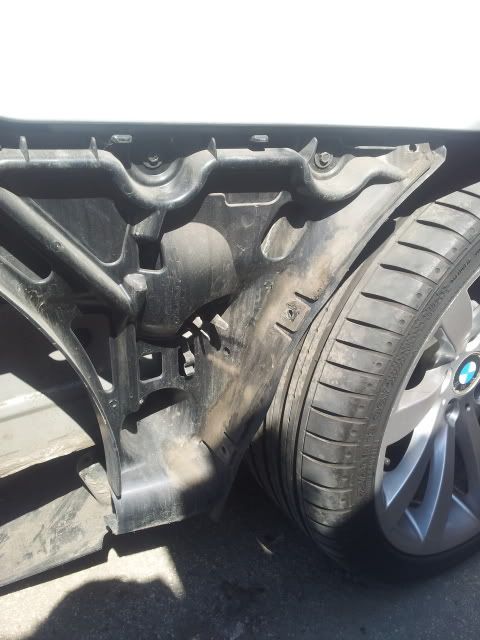
ok, now for the rear - FOr this i needed additional parts after fitting, so to make this easier for anyone considering, you'll need the bumper and diffuser, the diffuser is connected via a plastic base plate which is secured to the outer wheel well, you'll need a new one of these, you may also need to side plastics that secure the bumper to the car, the SE ones dont go down far enough and aren't necessarily ideal for the perfect fitment. My left hand side fitrted on the old support perfectly, where as the left was a crap fitting, therefore i purchased the left bracket only, along with the three plastic push fit screw thingys. I was also offered an M sport crash bar with my second hand bumper, luckily i took it as they are both different!! I have no idea if you can utilise the SE crash bar with the M S bumper, as you can see below, the MS is shorter....
Ok, to remove the bumper, there are two bolts on the inside of the back lights behind two black plastic covers, remove these and the 3 bolts in the arches - lastly there are four plastic lugs underneath, one on the outer edges of the bumper, two securing it to the centre bracket.... once you remove all these, pull out the bumper edges and carefully pull away from the car, disconnecting the sensors.
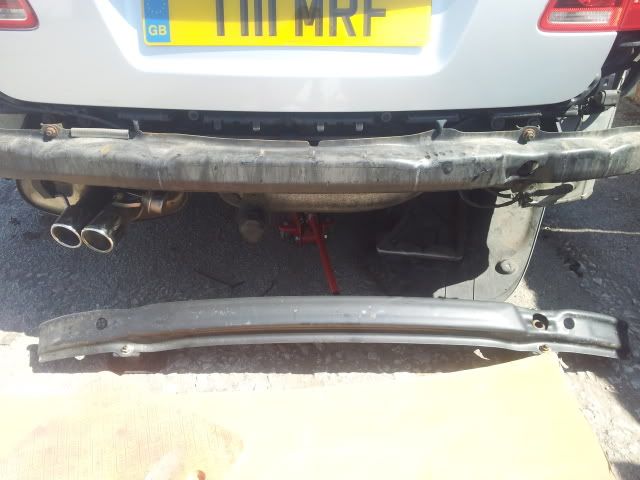
Again, push the sensors out DO NOT PULL THEM! - Fit the new lower centre bracket and change over the crash bar (change the bar, not the shock absorbing brackets, as these are the same for both models) then offer up the new bumper, once on secure with the two bolts near the lights, this allows you to play about without fear of it coming off and scratching that nice new paint! then push in the sides of the bumper, you'll then be able to see if the SE sides need replacing or not - ideally just buy new M sport ones if funds allow, much easier.
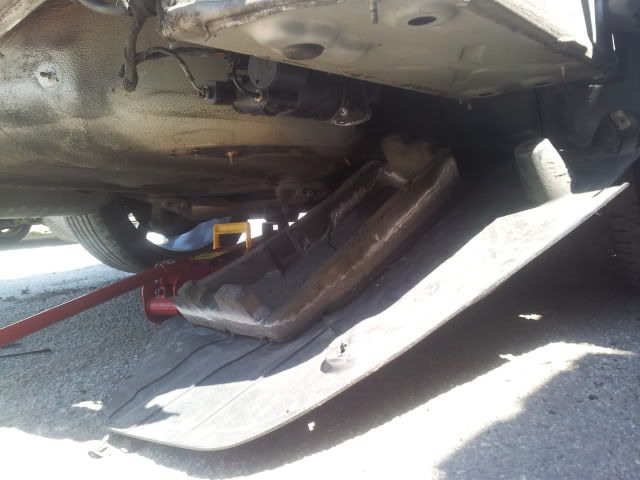
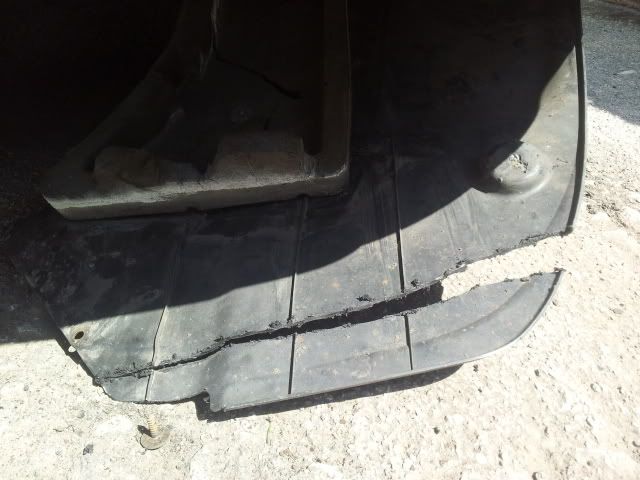
Something i've missed, drop the compressor cover under the car, once the bumper is fitted you'll need to Dremel the ends of this to make it a snug fit.
When your happy with the alignment, start to put all the fixings back, I was only able to utilise two of the three arch bolts as the threads werent long enough, it was still secured enough not to worry though.
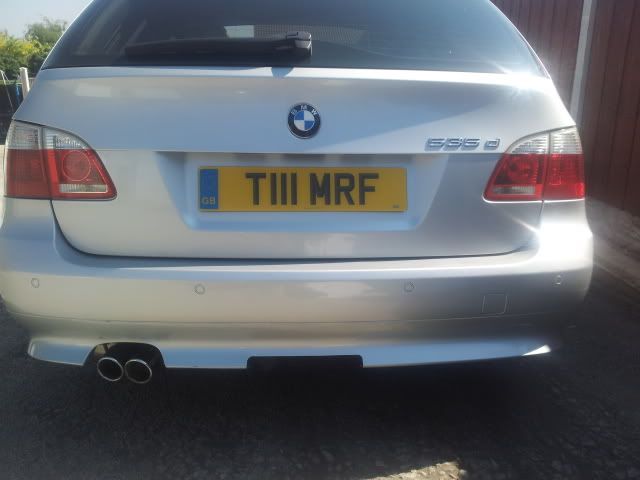
Before:
Notice the difference in the crash bars, shorter one is M sport
See the compressor cover dropped and a rough first cut
one of the lower plastic lugs connecting the SE bumper, if you dont change the side brackets, you wont be able to reuse this as the MS bumper is lower at the ends
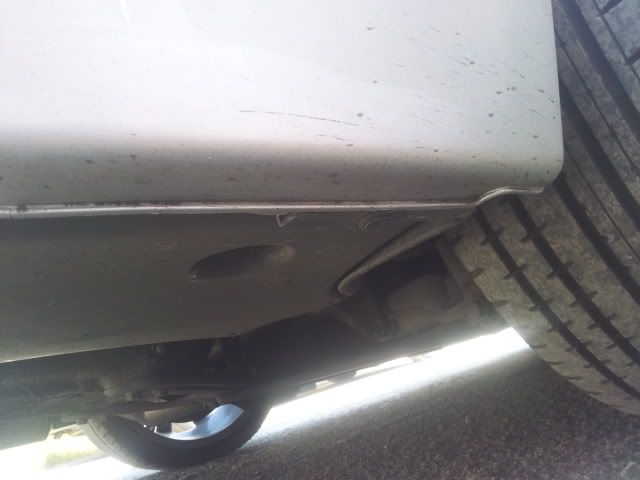
The SE side bracket, I changed one of these a few days later as the fitment on one side was crap, 2-3mm out and wouldnt push in near the light
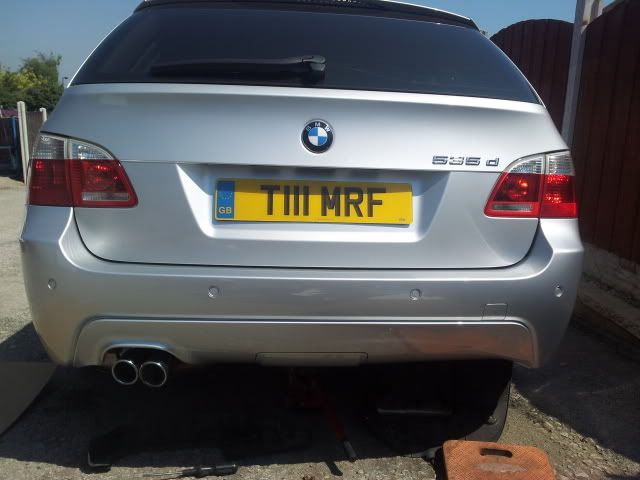
Finished
I hope someone finds these instructions useful, as before, written in a rush.... but seeing as i found little on this subject....it should be helpful to someone attempting the same job
Ok, to remove the bumper, there are two bolts on the inside of the back lights behind two black plastic covers, remove these and the 3 bolts in the arches - lastly there are four plastic lugs underneath, one on the outer edges of the bumper, two securing it to the centre bracket.... once you remove all these, pull out the bumper edges and carefully pull away from the car, disconnecting the sensors.
Again, push the sensors out DO NOT PULL THEM! - Fit the new lower centre bracket and change over the crash bar (change the bar, not the shock absorbing brackets, as these are the same for both models) then offer up the new bumper, once on secure with the two bolts near the lights, this allows you to play about without fear of it coming off and scratching that nice new paint! then push in the sides of the bumper, you'll then be able to see if the SE sides need replacing or not - ideally just buy new M sport ones if funds allow, much easier.
Something i've missed, drop the compressor cover under the car, once the bumper is fitted you'll need to Dremel the ends of this to make it a snug fit.
When your happy with the alignment, start to put all the fixings back, I was only able to utilise two of the three arch bolts as the threads werent long enough, it was still secured enough not to worry though.
Before:
Notice the difference in the crash bars, shorter one is M sport
See the compressor cover dropped and a rough first cut
one of the lower plastic lugs connecting the SE bumper, if you dont change the side brackets, you wont be able to reuse this as the MS bumper is lower at the ends
The SE side bracket, I changed one of these a few days later as the fitment on one side was crap, 2-3mm out and wouldnt push in near the light
Finished
I hope someone finds these instructions useful, as before, written in a rush.... but seeing as i found little on this subject....it should be helpful to someone attempting the same job
 01-31-2013, 04:20 AM
#4
Members
Senior Members
Thread Starter
Join Date: Feb 2012
Location: Sheffield UK
Posts: 269
Likes: 0
Received 0 Likes
on
0 Posts
My Ride: 535D Tourer - Pre LCI
Best of luck mate - tip, I used a sheet to rest my bumpers on whilst removing the old ones, resulted in some tiny chips in the new paint - in hindsight i'd use a duvet to protect them whilst your working on the new bumpers...prior to fitting


Thread
Thread Starter
Forum
Replies
Last Post
kane1111
Complete Car Sales
1
04-10-2015 04:40 PM