RWC LCI Insane Headlight Build | Project #PoisonIvy
 07-26-2013, 08:16 PM
#1
Senior Members
Thread Starter
Join Date: Oct 2010
Location: Los Angeles, CA
Posts: 2,163
Likes: 0
Received 2 Likes
on
2 Posts
My Ride: ///M5 BEAST
Model Year: 2006
What's up everyone? I wanted to create a separate thread for the crazy crap im going to do to my headlights. There are a ton of options and a ton of different guys doing stuff to their headlights....but this will serve as my attempt at a Coup de Gr�ce showing the heights to which you can take your LCI headlights since im building a semi-show car for this summer season...and showcase the cool stuff that I can do with just a simple set of headlights
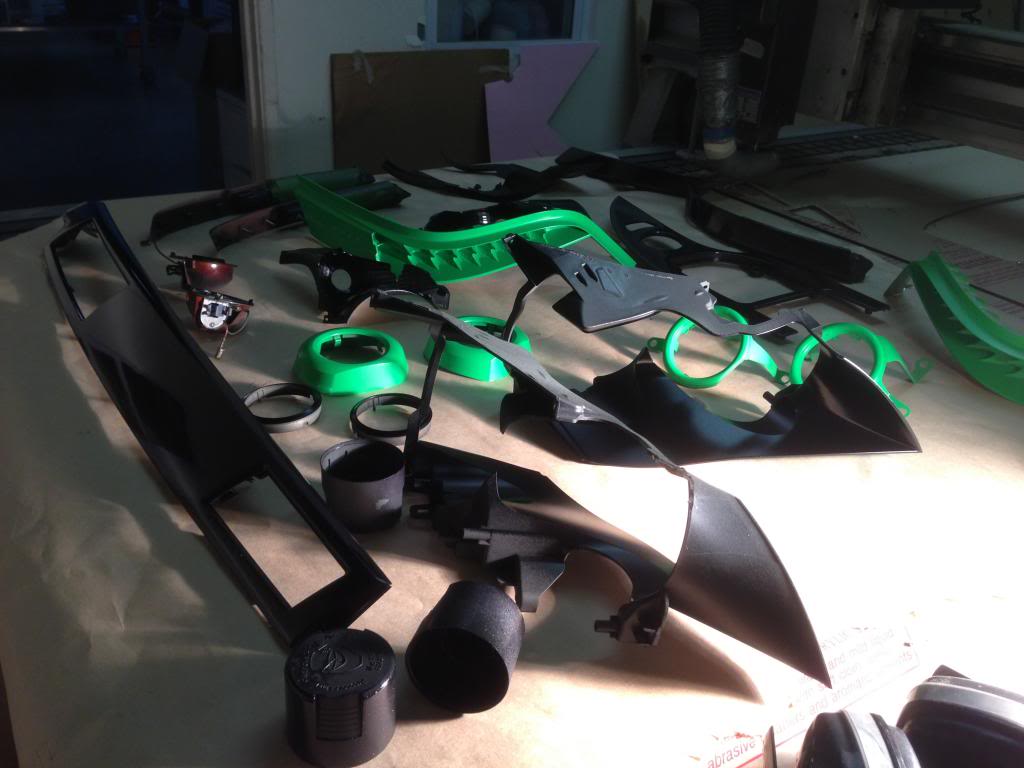
Here is the list of mods for this headlight build:
- LCI Headlight retrofit with LM2 module + OEM cables & coding (I have a 2006 ///M5)
- Umnitza Orion V4 super bright LED rings (brightest & best on the market right now)
- Quad clear lens (removing the ugly OEM cornering lens and replacing it with a new lens)
- Oakley USA Custom Cornering Lenses...this will be 1 of only 4 sets in the world to feature this
- Gloss black blackout of the entire LCI headlight housing
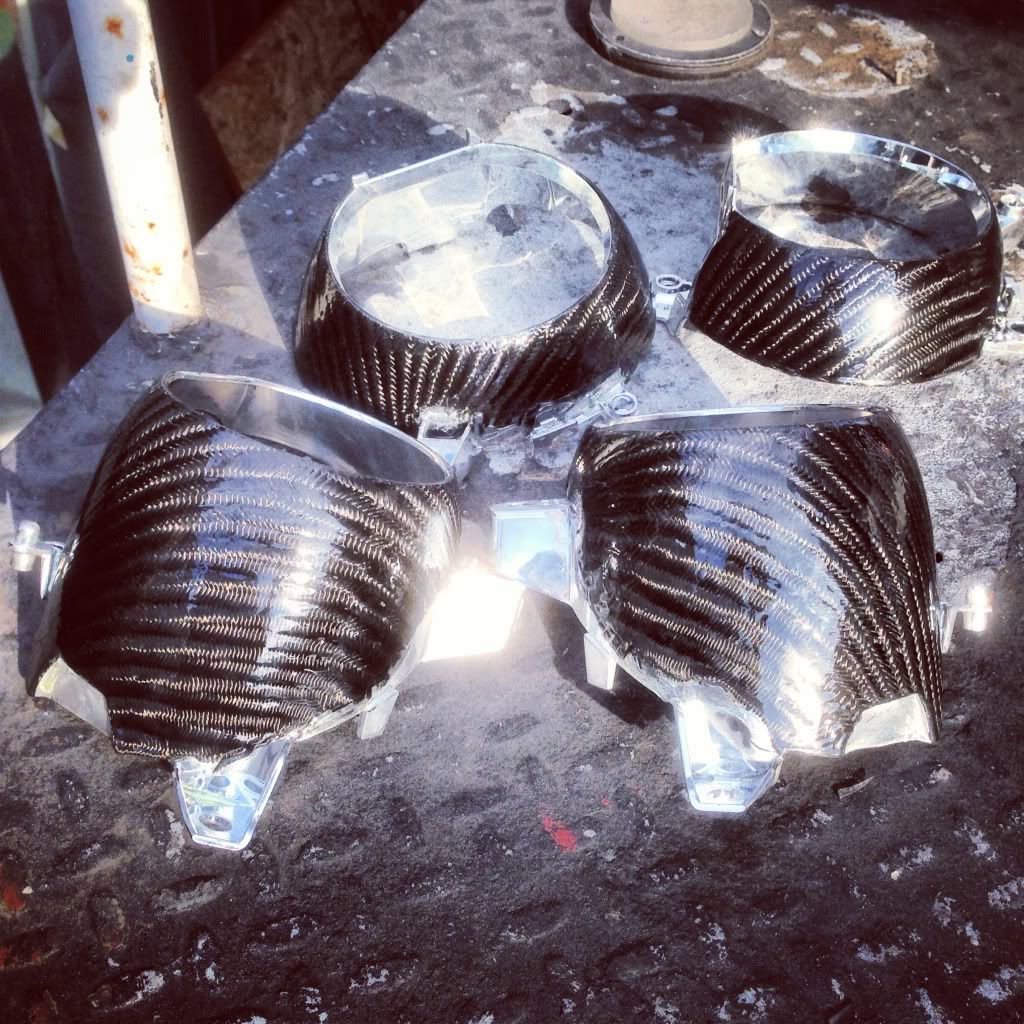
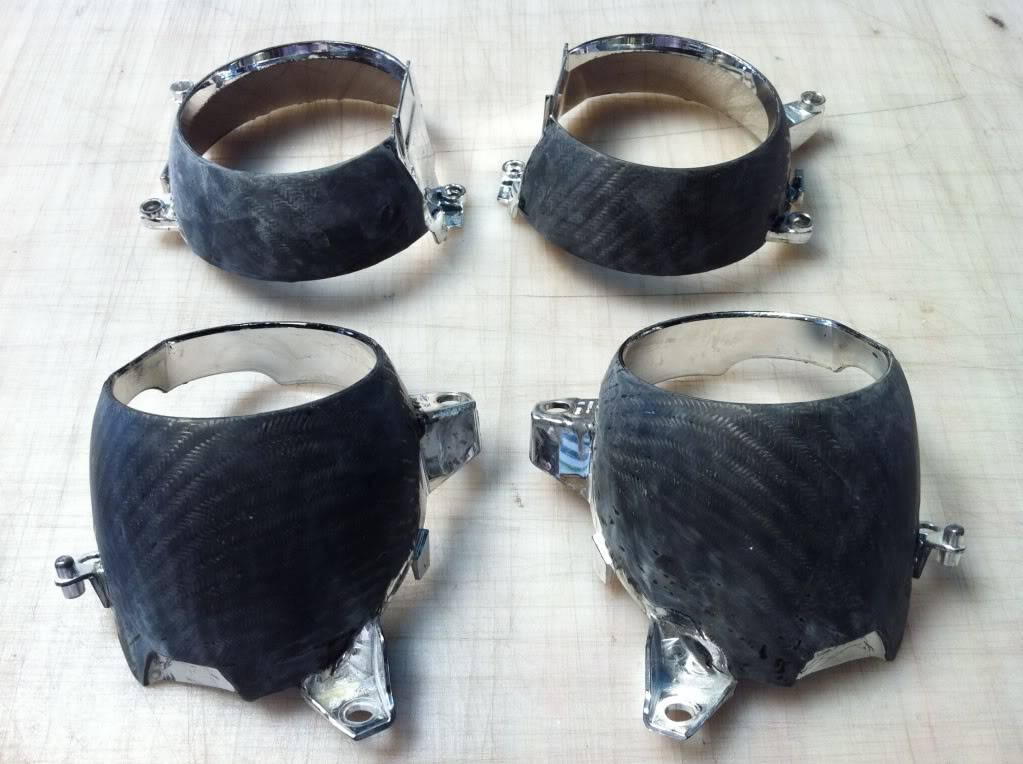
- 100% real 4x4 weave Carbon Fiber Low Beam and Corner Lens shrouds (second set in the world for the E60...i created the first one as well lol)
- White LED eyebrow mod (removing the orange LEDs and replacing with bright white...the same color temp as the Orion V4s)
- Satin Metallic Anthracite Eyebrow (custom paint instead of that chrome/silver OEM finish)
- Lighted LCI Fins (shout out to member nomis_chen for pioneering this mod)
- Custom Wiring Solution for Lighted Fins allowing them to blink/signal with the turn signals (oh yea!)
- T1000 low beam lens color matched to the bright green my car is wrapped with (dont worry it will look clean)
- Color matched interior low beam shroud - satin apple green
- Super bright white blacked out LED turn signals (finally found a new/better set)
- Super bright white blacked out LED cornering bulbs
I will be working on them nightly an hour or two per night. I will update this thread pretty often over the next two weeks or so until complete.
PM me with questions!
Here is the list of mods for this headlight build:
- LCI Headlight retrofit with LM2 module + OEM cables & coding (I have a 2006 ///M5)
- Umnitza Orion V4 super bright LED rings (brightest & best on the market right now)
- Quad clear lens (removing the ugly OEM cornering lens and replacing it with a new lens)
- Oakley USA Custom Cornering Lenses...this will be 1 of only 4 sets in the world to feature this
- Gloss black blackout of the entire LCI headlight housing
- 100% real 4x4 weave Carbon Fiber Low Beam and Corner Lens shrouds (second set in the world for the E60...i created the first one as well lol)
- White LED eyebrow mod (removing the orange LEDs and replacing with bright white...the same color temp as the Orion V4s)
- Satin Metallic Anthracite Eyebrow (custom paint instead of that chrome/silver OEM finish)
- Lighted LCI Fins (shout out to member nomis_chen for pioneering this mod)
- Custom Wiring Solution for Lighted Fins allowing them to blink/signal with the turn signals (oh yea!)
- T1000 low beam lens color matched to the bright green my car is wrapped with (dont worry it will look clean)
- Color matched interior low beam shroud - satin apple green
- Super bright white blacked out LED turn signals (finally found a new/better set)
- Super bright white blacked out LED cornering bulbs
I will be working on them nightly an hour or two per night. I will update this thread pretty often over the next two weeks or so until complete.
PM me with questions!

 07-27-2013, 08:04 PM
#3
Senior Members
Join Date: Nov 2011
Location: Los Angeles, CA
Posts: 924
Likes: 0
Received 1 Like
on
1 Post
My Ride: 2008 AW N52 with sports package & premium package; natural brown interior
MODs:
Orion V2s
3000K H8 Yellow Fogs
Matte Black Kidney Grills
20" Miro 111
Hankook V12 Tires
H&R Sport Springs
Special coding via Simon (dbl flash hazards, digital velocity, etc.)
LED Side Markers from Trinity Autosports
LED License Plate Lights from Trinity Autosports
Carbon Delete
BMC Air Filter
RPI Scoop
RPI GT Exhaust
Future MODs:
Mtech Kit
KW Variant 2 Coilovers
CIC Retrofit
Upgrade Audio System
Looks great so far. Can't wait to see the complete build. Thanks for sharing your awesome ideas.
08-07-2013, 10:57 PM
#4
Senior Members
Thread Starter
Join Date: Oct 2010
Location: Los Angeles, CA
Posts: 2,163
Likes: 0
Received 2 Likes
on
2 Posts
My Ride: ///M5 BEAST
Model Year: 2006
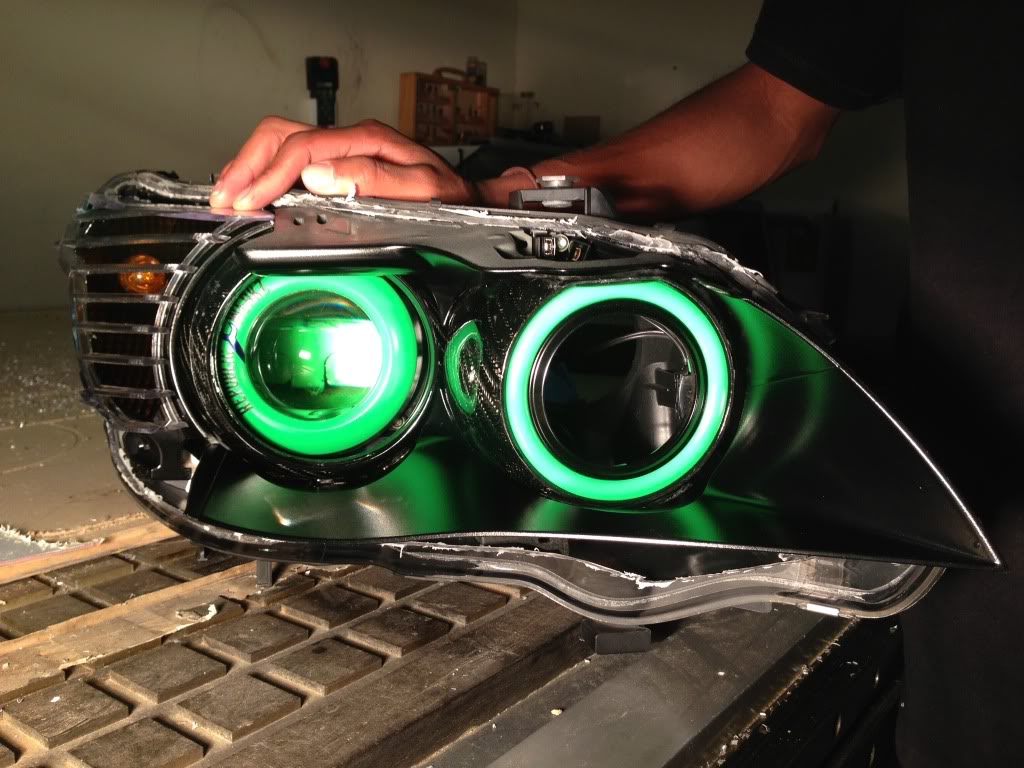
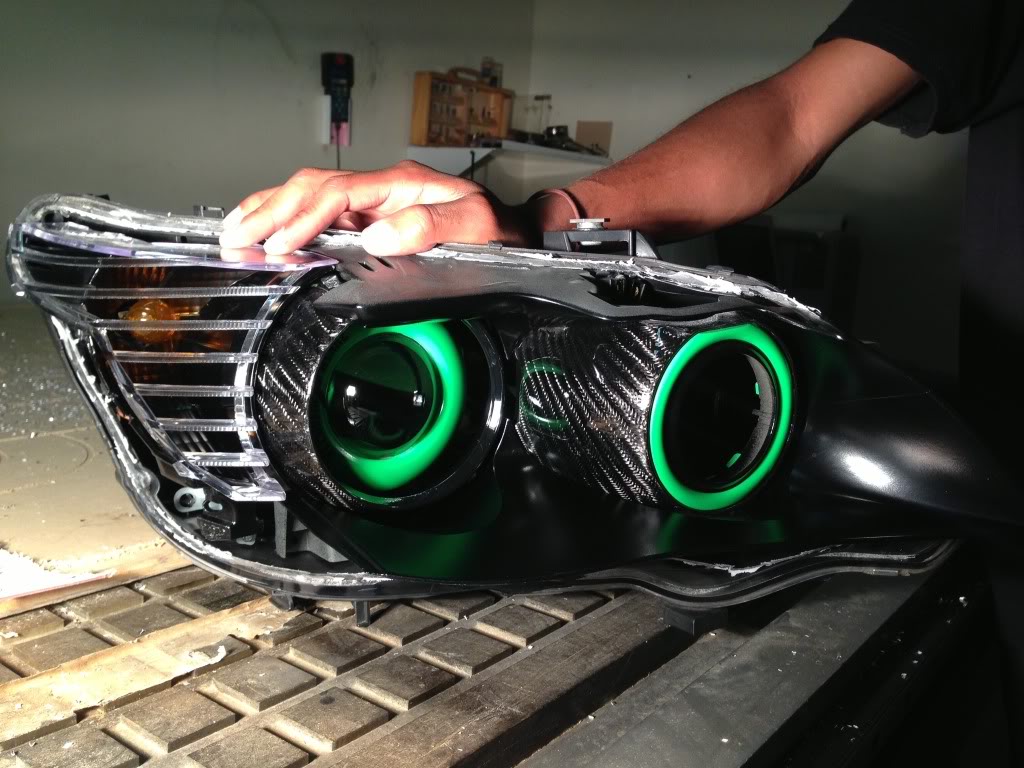
resurfaced the resin to even it out going with 220 to 400 to 600 to 1000 to 2000 grit sand paper then a three stage polish process after that....
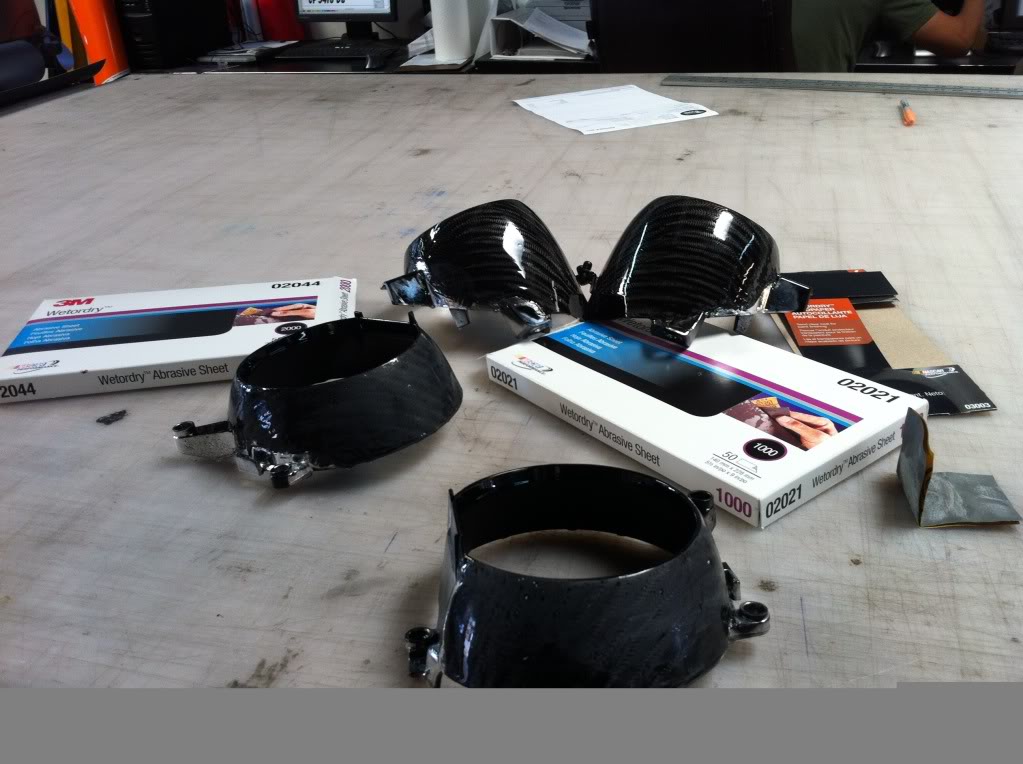
then two coats of clear with a quick 2000 grit then polish in between both coats....
up next will be painting the housing high gloss black, then beginning modding the eyebrows then the lighted fins...
then two coats of clear with a quick 2000 grit then polish in between both coats....
up next will be painting the housing high gloss black, then beginning modding the eyebrows then the lighted fins...
08-08-2013, 11:38 AM
#6
Members
Senior Members
Join Date: Nov 2008
Location: The hills next to Chino, Ca
Posts: 255
Likes: 0
Received 0 Likes
on
0 Posts
My Ride: /// 2006 | 530I | Silver Gray Metallic | Sport / Prem / Navi / IPod | LCI EURO SPEC Tail's | LED Licence plate bulbs | LED side turn indicators | Roof Spoiler MORE TO COME!!!!
Can't wait to see more!
08-12-2013, 11:30 AM
#7
Senior Members
Thread Starter
Join Date: Oct 2010
Location: Los Angeles, CA
Posts: 2,163
Likes: 0
Received 2 Likes
on
2 Posts
My Ride: ///M5 BEAST
Model Year: 2006
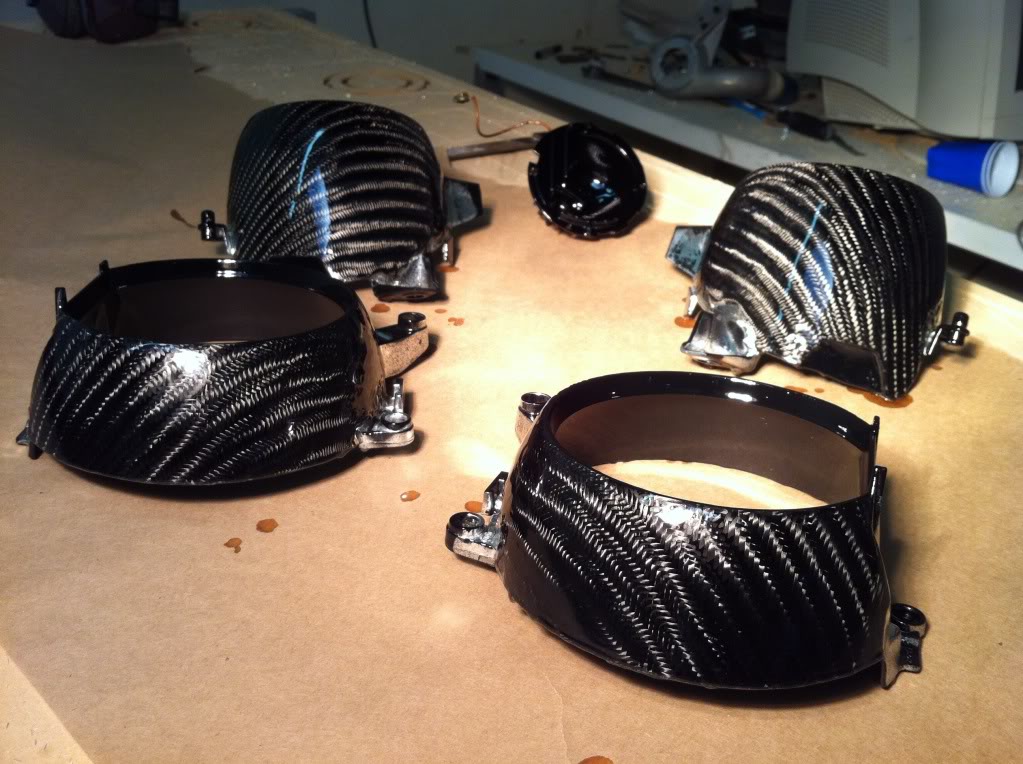
i did a quick test fit last night to check the clearances of the Carbon Fiber shrouds in regards to the OEM housing....came out perfect! i didnt even need to trim it. the level of quality with this 4x4 weave is beyond belief, i wish i could show you all in person. when the lights are complete ill be sure to get some better pics.
next up will be the lighted fin mod....

next up will be the lighted fin mod....
Last edited by umichchris; 08-12-2013 at 01:50 PM.
08-12-2013, 02:39 PM
#8
New Members
Join Date: Jan 2013
Location: UK
Posts: 11
Likes: 0
Received 0 Likes
on
0 Posts
My Ride: 2005 BMW 535d M-Sport Touring, Carbon black, Black comfort leather, Shadow line trim, Media pack, Visibility pack, 192 19" alloys, Black wood interior. DPF Removal and engine remap: 334bhp and 673lbs torque. BMC Ram air C/F badges, LED side repeate
This may be a stupid question but when you remove the original
light outer lens what do you do about replacing it. From the last pictures it shows a fairly rough edge where the plastic once was. I ask as my lenses are quite badly pitted and scratched and I'd love a replacement option if possible.
Sick looking lights by the way. Serious envy at my end.
light outer lens what do you do about replacing it. From the last pictures it shows a fairly rough edge where the plastic once was. I ask as my lenses are quite badly pitted and scratched and I'd love a replacement option if possible.
Sick looking lights by the way. Serious envy at my end.
08-12-2013, 03:19 PM
#9
Senior Members
Thread Starter
Join Date: Oct 2010
Location: Los Angeles, CA
Posts: 2,163
Likes: 0
Received 2 Likes
on
2 Posts
My Ride: ///M5 BEAST
Model Year: 2006
the original lens is going back on soon....once we complete the internal customization. when its time so seal the lights back up we will refinish the lens and get rid of any pitting or imperfections. stay tuned....the final pics will show it all.
This may be a stupid question but when you remove the original
light outer lens what do you do about replacing it. From the last pictures it shows a fairly rough edge where the plastic once was. I ask as my lenses are quite badly pitted and scratched and I'd love a replacement option if possible.
Sick looking lights by the way. Serious envy at my end.
light outer lens what do you do about replacing it. From the last pictures it shows a fairly rough edge where the plastic once was. I ask as my lenses are quite badly pitted and scratched and I'd love a replacement option if possible.
Sick looking lights by the way. Serious envy at my end.
08-12-2013, 06:23 PM
#10
Contributors
Join Date: Jun 2009
Location: CA
Posts: 5,781
Likes: 0
Received 2 Likes
on
2 Posts
My Ride: BMW E60
Model Year: 2016
This may be a stupid question but when you remove the original
light outer lens what do you do about replacing it. From the last pictures it shows a fairly rough edge where the plastic once was. I ask as my lenses are quite badly pitted and scratched and I'd love a replacement option if possible.
Sick looking lights by the way. Serious envy at my end.
light outer lens what do you do about replacing it. From the last pictures it shows a fairly rough edge where the plastic once was. I ask as my lenses are quite badly pitted and scratched and I'd love a replacement option if possible.
Sick looking lights by the way. Serious envy at my end.
To answer your question, it's the original that goes back on. There's nowhere to purchase replacement lenses. If your damages are external and not deep into the plastic, refinishing will do the job. Otherwise your only option is to buy new headlights.