
Predator ICE LED Modification
 01-12-2007, 05:58 AM
#11
Contributors
Join Date: Sep 2005
Location: SF Bay Area, California
Posts: 1,344
Likes: 0
Received 0 Likes
on
0 Posts
thanks for coming out of hibernation rootkit. great write up. i'm particularly interested in your last paragraph. how did you change the LED and the driver? and do you have any pics?

 01-12-2007, 04:35 PM
#13
Contributors
Thread Starter

Join Date: Nov 2006
Location: High Desert, So. CA USA
Posts: 295
Likes: 0
Received 0 Likes
on
0 Posts
Originally Posted by alpineweiss' post='374168' date='Jan 5 2007, 10:50 PM
Red eyes would look evil 

I think the blue looks best. But both blue and red are illegal here. Cyan has too much green distraction in it. White will be washed out in the sun and washed out when the headlights are turned on. Amber color match well with the "eyebrows" and give good contrast with the oem headlight. The orange/red LED is a bit too red for my taste. But again, it really comes down to everyone having their own preference.
I'll post some more pictures little bit later.
01-13-2007, 03:07 AM
#15
Contributors
Thread Starter
Join Date: Nov 2006
Location: High Desert, So. CA USA
Posts: 295
Likes: 0
Received 0 Likes
on
0 Posts
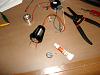
Everything besides the LED can be grabbed from your local hardware shop or radioshack.
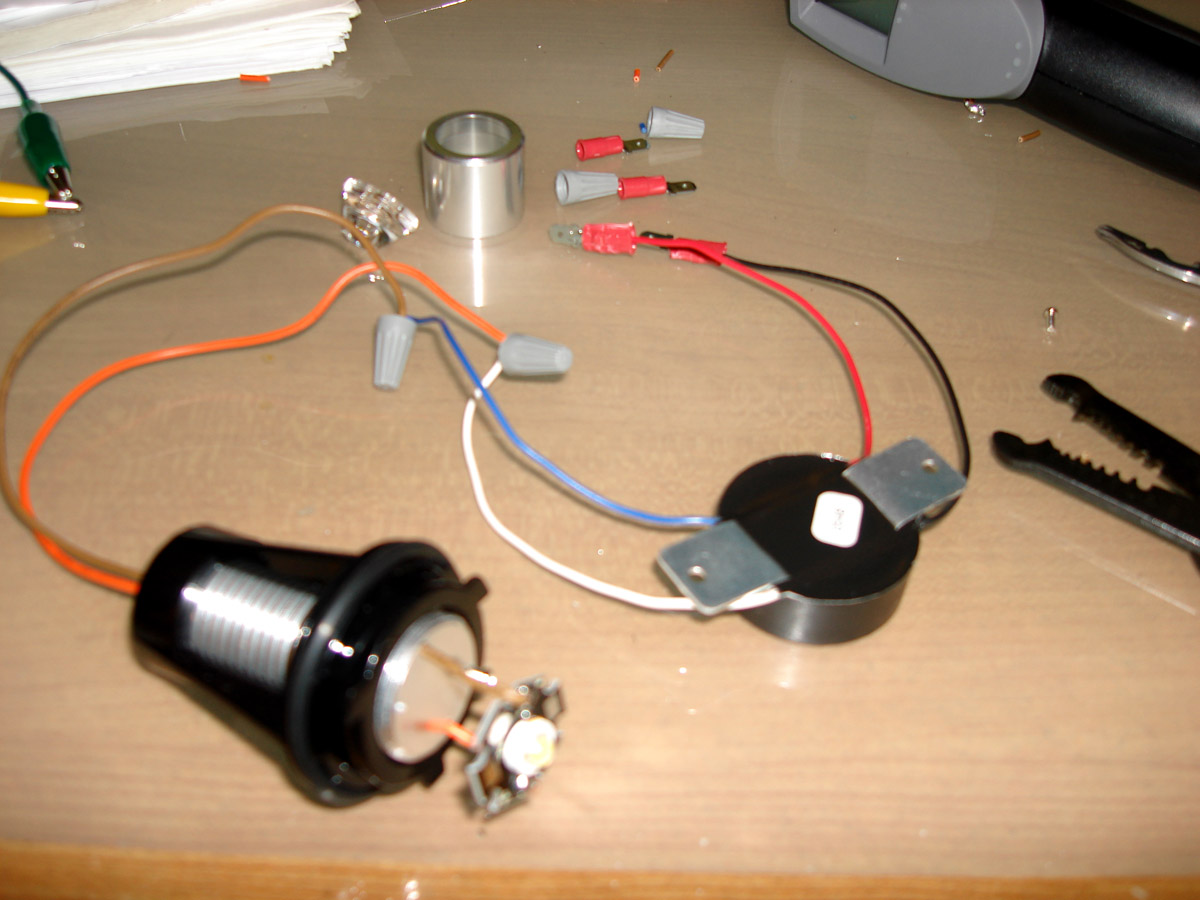
a. Cut the LED driver(long silver round bar) off the housing(holds the LED & heatsink).
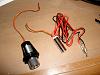
b. Swap another LED driver. You can use any kind as long it is rated for the LED specs. The one I used is the LuxDrive PowerPuck 5-32 VDC 1000mA LED Driver. The LED driver will output a constant 1000mA and can accept anywhere from 5 volts to 32 volts DC. This is fine since the car is 12 volts DC. Make sure to connect to the correct end of the terminals, it would help alot. I had some spare electrical connectors handy, so I ended up using it.
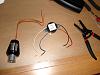
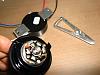
c. Unscrew the top metal cap. When opened will notice the collimator lens(to focus light) and the two tiny screws holding the LED in position. Remove the screws. Use a soldering iron to heat up the joints and pull out the wires freely. Or cut off the endings and restrip the wires for the new LED. Also the wires can be pulled out to make it easier to work with. But be careful. The two holes where the red & brown wires siphoned through top of heatsink...are somewhat sharp, can accidentally cut into the wires while pulling it out.
d. Put some heat transfer compound on the backside of LED. It helps get rid of the heat away from LED and onto the heatsink. It might not be necessary but better to err on the precautionary side.
e. After soldering and screwing the new LED in place. Soldering is fairy easy, google it if unsure of the technique and practice first. The soldering doesn't have to be perfect as long wire is jointed securely onto LED. Just in case, I clamp an aluminum clip to direct the heat away from the LED when soldering. Make sure the LED is tightly screwed onto the heatsink. If it is loose and not flushed against the heatsink, the ability to remove heat is diminished.
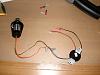
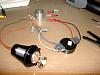
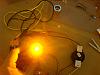
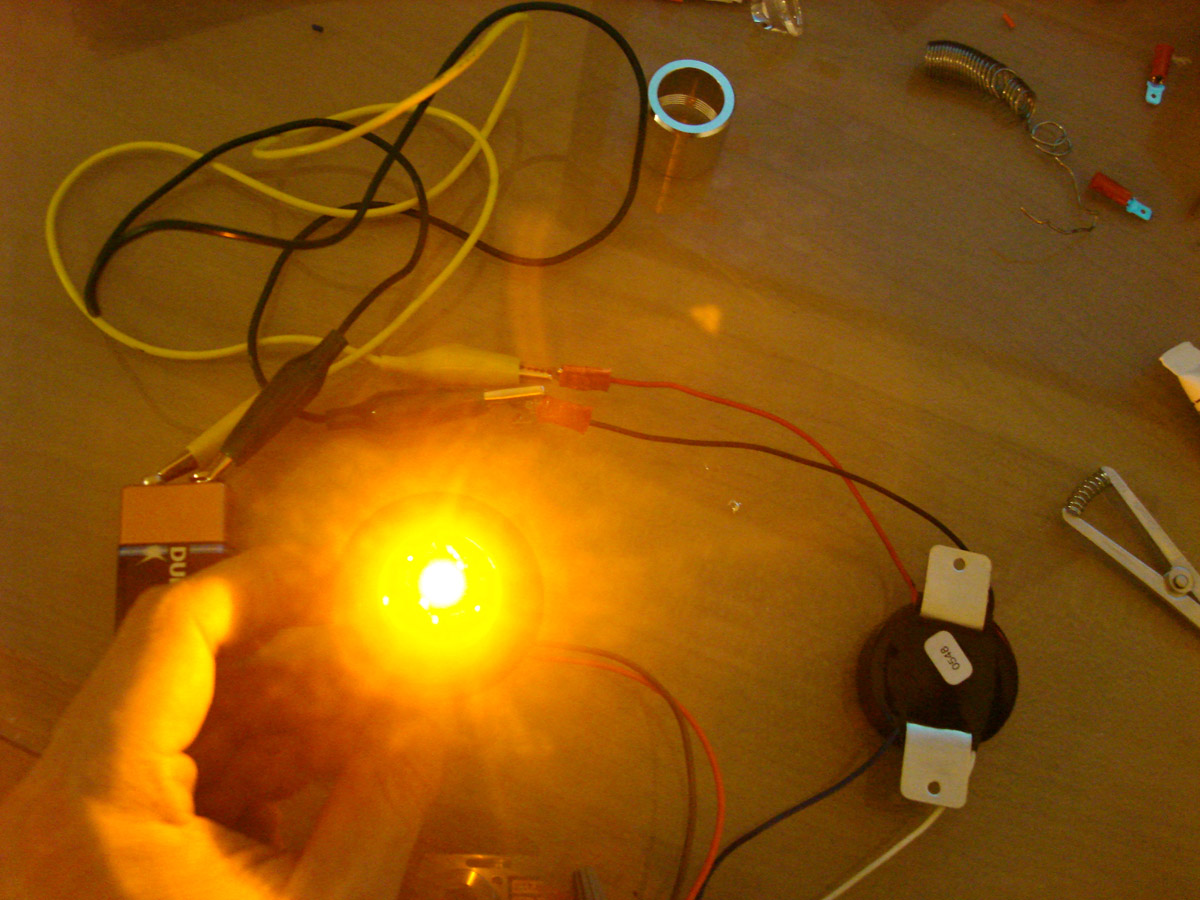
f. Test it out and make sure everything is OK. Wait a second here! can the large current kill you? Yes we are dealing with enough current to kill a person many times. However, the voltage is relatively small and would not be able to push the current through the body. From what I have heard, a person can recieve fatal shock as low as 40 volts DC. It's better to be paranoid anyways when working with electricity. For testing purpose, use some small batteries as long it is greater than the LED's forward voltage (Vf) to turn on the LED. I used alligator clips to connect the 9V battery to the LED Driver. Make sure the - and + terminals are correct. Shake and pull on wires a little bit, make sure notthing is loose. Do not look directly into the light(trust me on this one). The LED will drain the energy out of the battery in a few minutes if you have it on for too long!!

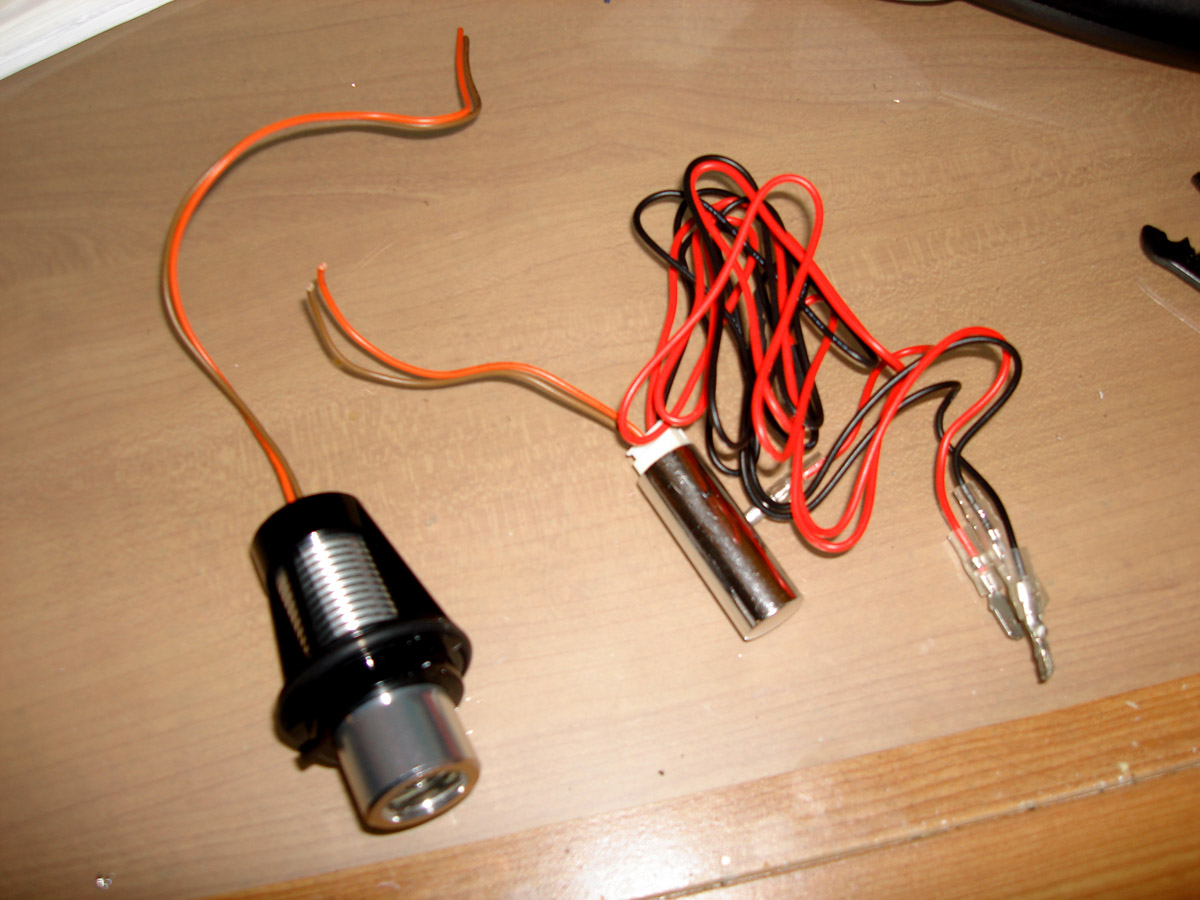
If you have keen eyes, might have wondered about the red connectors at the end of the wires. I clamp the wire endings to something called a male disconnect(.187 tab). I was hoping it would fit the bmw female adapter. It did not. It was still too large....I think a member here managed to have something like that but smaller and it fits perfectly with the oem adapter. I decided to cut the connectors off and spice it directly to the adapter wires. Whatever your choice is, do NOT use the gimmicky e60 tap connectors included with the Pedator ICE.
What about heat issue? I don't think there is a theoretical sure way of figuring out if heat will be a problem now or later or not. The LED use about 3 watts of power. The heatsink seems to dissipate the heat well. From applied experience, I have driven 3 hours straight with the headlights on and observed no problems from outside. I think the heatsink will still efficiently remove the heat when using a 5 watt LED. Can the same heatsink be used when LEDs are pushing more wattage in the future, let say 7W or 9W in the future? The only way to know is by experimenting with it.
Hopefully many can give it a try, have fun with different configurations and post some pictures!
a. Cut the LED driver(long silver round bar) off the housing(holds the LED & heatsink).
b. Swap another LED driver. You can use any kind as long it is rated for the LED specs. The one I used is the LuxDrive PowerPuck 5-32 VDC 1000mA LED Driver. The LED driver will output a constant 1000mA and can accept anywhere from 5 volts to 32 volts DC. This is fine since the car is 12 volts DC. Make sure to connect to the correct end of the terminals, it would help alot. I had some spare electrical connectors handy, so I ended up using it.


c. Unscrew the top metal cap. When opened will notice the collimator lens(to focus light) and the two tiny screws holding the LED in position. Remove the screws. Use a soldering iron to heat up the joints and pull out the wires freely. Or cut off the endings and restrip the wires for the new LED. Also the wires can be pulled out to make it easier to work with. But be careful. The two holes where the red & brown wires siphoned through top of heatsink...are somewhat sharp, can accidentally cut into the wires while pulling it out.
d. Put some heat transfer compound on the backside of LED. It helps get rid of the heat away from LED and onto the heatsink. It might not be necessary but better to err on the precautionary side.

e. After soldering and screwing the new LED in place. Soldering is fairy easy, google it if unsure of the technique and practice first. The soldering doesn't have to be perfect as long wire is jointed securely onto LED. Just in case, I clamp an aluminum clip to direct the heat away from the LED when soldering. Make sure the LED is tightly screwed onto the heatsink. If it is loose and not flushed against the heatsink, the ability to remove heat is diminished.

f. Test it out and make sure everything is OK. Wait a second here! can the large current kill you? Yes we are dealing with enough current to kill a person many times. However, the voltage is relatively small and would not be able to push the current through the body. From what I have heard, a person can recieve fatal shock as low as 40 volts DC. It's better to be paranoid anyways when working with electricity. For testing purpose, use some small batteries as long it is greater than the LED's forward voltage (Vf) to turn on the LED. I used alligator clips to connect the 9V battery to the LED Driver. Make sure the - and + terminals are correct. Shake and pull on wires a little bit, make sure notthing is loose. Do not look directly into the light(trust me on this one). The LED will drain the energy out of the battery in a few minutes if you have it on for too long!!

If you have keen eyes, might have wondered about the red connectors at the end of the wires. I clamp the wire endings to something called a male disconnect(.187 tab). I was hoping it would fit the bmw female adapter. It did not. It was still too large....I think a member here managed to have something like that but smaller and it fits perfectly with the oem adapter. I decided to cut the connectors off and spice it directly to the adapter wires. Whatever your choice is, do NOT use the gimmicky e60 tap connectors included with the Pedator ICE.
What about heat issue? I don't think there is a theoretical sure way of figuring out if heat will be a problem now or later or not. The LED use about 3 watts of power. The heatsink seems to dissipate the heat well. From applied experience, I have driven 3 hours straight with the headlights on and observed no problems from outside. I think the heatsink will still efficiently remove the heat when using a 5 watt LED. Can the same heatsink be used when LEDs are pushing more wattage in the future, let say 7W or 9W in the future? The only way to know is by experimenting with it.
Hopefully many can give it a try, have fun with different configurations and post some pictures!
 This is what I'm waiting for - amber for angel eyes
01-31-2007, 07:43 PM
This is what I'm waiting for - amber for angel eyes
01-31-2007, 07:43 PM
#17
Members

Join Date: Jan 2007
Location: Dubai - UAE
Posts: 22
Likes: 0
Received 0 Likes
on
0 Posts
My Ride: 2006 E60 M5
The information is amazing .. thanks a lot for the great job .. I'll just order those stuff now and work on it ...
I'll post you some pictures hopefully once everyting is done ..
I'll post you some pictures hopefully once everyting is done ..
01-31-2007, 08:01 PM
#18
Members

Join Date: Jan 2007
Posts: 1
Likes: 0
Received 0 Likes
on
0 Posts
Rootkit - So what led did you end up buying?
Originally Posted by RootKit' post='377611' date='Jan 13 2007, 04:07 AM
Everything besides the LED can be grabbed from your local hardware shop or radioshack.
a. Cut the LED driver(long silver round bar) off the housing(holds the LED & heatsink).
Attachment 27567
b. Swap another LED driver. You can use any kind as long it is rated for the LED specs. The one I used is the LuxDrive PowerPuck 5-32 VDC 1000mA LED Driver. The LED driver will output a constant 1000mA and can accept anywhere from 5 volts to 32 volts DC. This is fine since the car is 12 volts DC. Make sure to connect to the correct end of the terminals, it would help alot. I had some spare electrical connectors handy, so I ended up using it.
Attachment 27568
Attachment 27569
c. Unscrew the top metal cap. When opened will notice the collimator lens(to focus light) and the two tiny screws holding the LED in position. Remove the screws. Use a soldering iron to heat up the joints and pull out the wires freely. Or cut off the endings and restrip the wires for the new LED. Also the wires can be pulled out to make it easier to work with. But be careful. The two holes where the red & brown wires siphoned through top of heatsink...are somewhat sharp, can accidentally cut into the wires while pulling it out.
Attachment 27570
d. Put some heat transfer compound on the backside of LED. It helps get rid of the heat away from LED and onto the heatsink. It might not be necessary but better to err on the precautionary side.
Attachment 27571
e. After soldering and screwing the new LED in place. Soldering is fairy easy, google it if unsure of the technique and practice first. The soldering doesn't have to be perfect as long wire is jointed securely onto LED. Just in case, I clamp an aluminum clip to direct the heat away from the LED when soldering. Make sure the LED is tightly screwed onto the heatsink. If it is loose and not flushed against the heatsink, the ability to remove heat is diminished.
Attachment 27572
f. Test it out and make sure everything is OK. Wait a second here! can the large current kill you? Yes we are dealing with enough current to kill a person many times. However, the voltage is relatively small and would not be able to push the current through the body. From what I have heard, a person can recieve fatal shock as low as 40 volts DC. It's better to be paranoid anyways when working with electricity. For testing purpose, use some small batteries as long it is greater than the LED's forward voltage (Vf) to turn on the LED. I used alligator clips to connect the 9V battery to the LED Driver. Make sure the - and + terminals are correct. Shake and pull on wires a little bit, make sure notthing is loose. Do not look directly into the light(trust me on this one). The LED will drain the energy out of the battery in a few minutes if you have it on for too long!!
Attachment 27573
Attachment 27574
If you have keen eyes, might have wondered about the red connectors at the end of the wires. I clamp the wire endings to something called a male disconnect(.187 tab). I was hoping it would fit the bmw female adapter. It did not. It was still too large....I think a member here managed to have something like that but smaller and it fits perfectly with the oem adapter. I decided to cut the connectors off and spice it directly to the adapter wires. Whatever your choice is, do NOT use the gimmicky e60 tap connectors included with the Pedator ICE.
What about heat issue? I don't think there is a theoretical sure way of figuring out if heat will be a problem now or later or not. The LED use about 3 watts of power. The heatsink seems to dissipate the heat well. From applied experience, I have driven 3 hours straight with the headlights on and observed no problems from outside. I think the heatsink will still efficiently remove the heat when using a 5 watt LED. Can the same heatsink be used when LEDs are pushing more wattage in the future, let say 7W or 9W in the future? The only way to know is by experimenting with it.
Hopefully many can give it a try, have fun with different configurations and post some pictures!
02-01-2007, 07:48 AM
#19
Contributors
Join Date: Sep 2005
Location: SF Bay Area, California
Posts: 1,344
Likes: 0
Received 0 Likes
on
0 Posts
Originally Posted by bmw530i_408' post='386162' date='Jan 31 2007, 09:01 PM
Rootkit - So what led did you end up buying?
"used the ambered Luxeon III LED. The LED allows current up to 1400mA (1.4A). I replaced the Predator ICE LED driver with the LuxDrive PowerPuck 1000mA LED Driver. "
02-01-2007, 08:07 AM
#20
Contributors
Join Date: Aug 2005
Location: Maryland
Posts: 559
Likes: 0
Received 0 Likes
on
0 Posts
My Ride: Mach5 05' 530i Black Sapphire Metallic w/Auburn Leather Seats, Heated Front/Rear Seats, Cold Weather Pkg, Premium Pkg, Sports Pkg, Xenon Headlights, NAV, Mud Flaps, 20" 166 Style Rims
Model Year: 2005
Engine: N54
Can someone translate this entire thread in poor man's english!!  :'(
:'( 


:'(