Painted my grill
 10-12-2010, 08:59 AM
#1
Members
Thread Starter

Join Date: Sep 2010
Location: Chattanooga, TN
Posts: 39
Likes: 0
Received 0 Likes
on
0 Posts
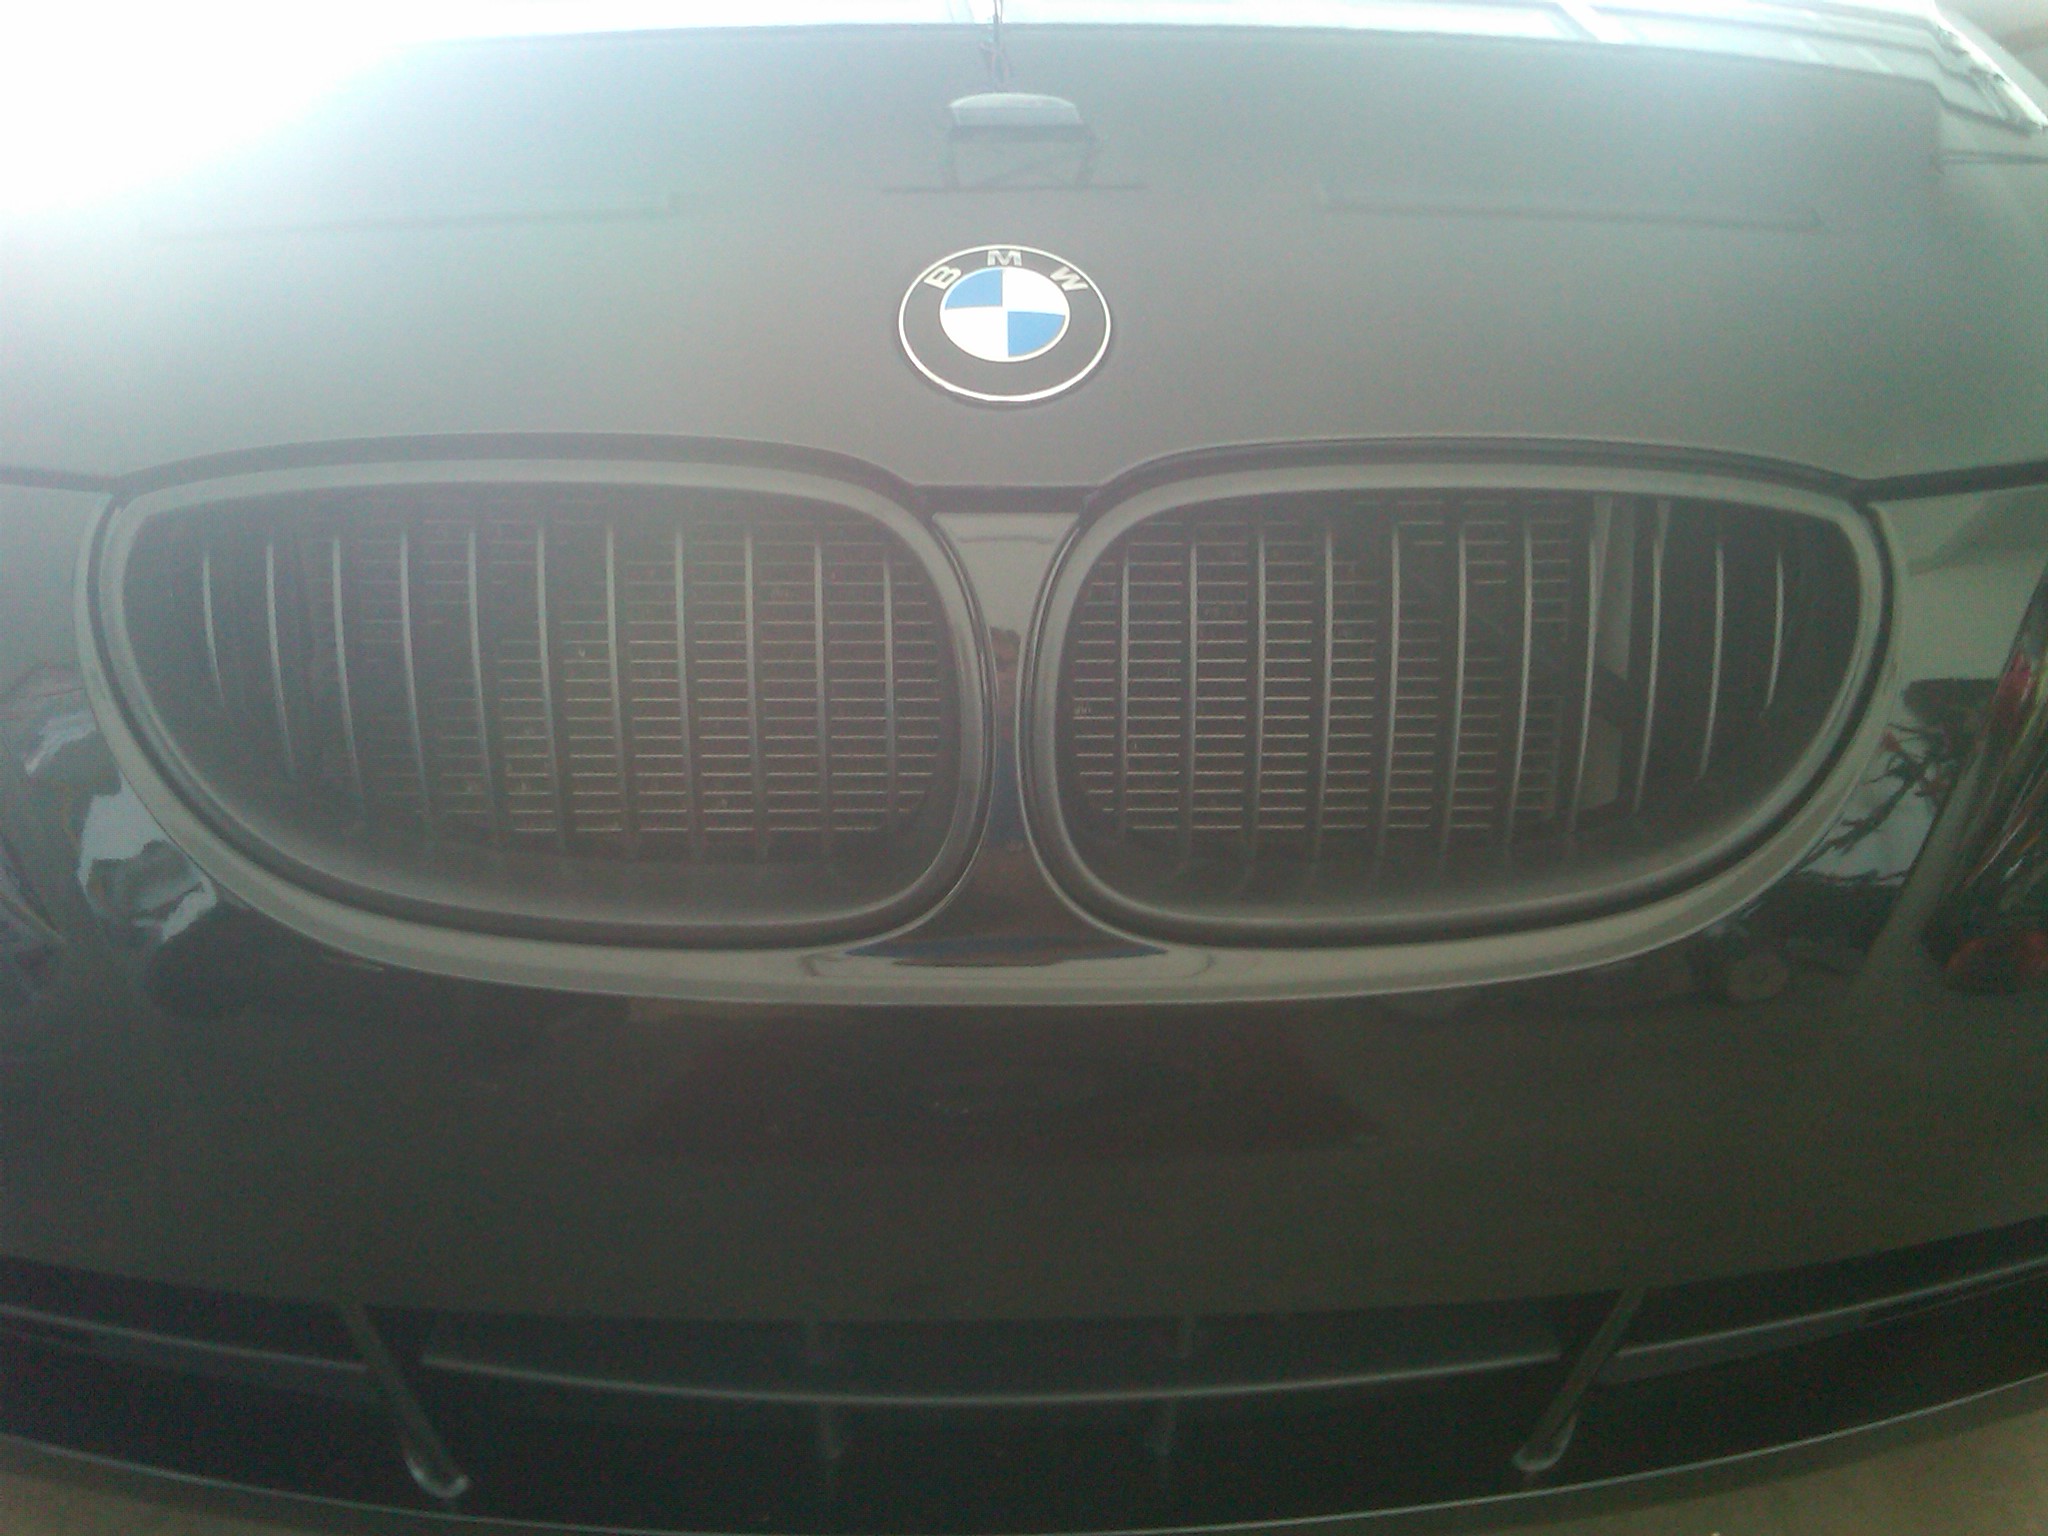
I painted my grill last night. I wanted to have something in between the flat black or the gloss black that I have seen for sale. I know the pic isn't that great, but it turned out really well.
I used a semi-gloss black (a lot of coats) after sanding everything down, and then put 4 layers of satin clear over it. It gave me the nice "in-between" look I was going for.
I have to admit, you guys had me scared about pulling the grill pieces out, but it was really pretty simple. Granted, I did use a torx to loosen the top of the front bumper, but I had them out in less than five minutes and didn't break any tabs. Anyway, I'm just glad it turned out the way I wanted it to and it cost me about $7 in paint.


 10-12-2010, 03:33 PM
#5
Members

Join Date: Aug 2010
Location: New York
Posts: 183
Likes: 0
Received 0 Likes
on
0 Posts
My Ride: 07 525i mystic blue / black
concept one staggered wheels
19x8.5
19x10.5
very nice
can you tell me the step by step
what kinda sand paper and paint you used i wanna do mine the same
can you tell me the step by step
what kinda sand paper and paint you used i wanna do mine the same
10-12-2010, 07:42 PM
#7
Members
Thread Starter
Join Date: Sep 2010
Location: Chattanooga, TN
Posts: 39
Likes: 0
Received 0 Likes
on
0 Posts
It's really pretty easy.
1. Pop the grills off the car. I used a torx to take off the bolts holding the top of the front bumper so I had more room. Pull out on the grill while you while you press the tabs down. Some guys used screwdrivers and stuff, put I used the tip of my finger. To get the bottom and side tabs, squeeze your arm behind the grill from where you opened it up by removing the torx.
2. After you get the grills off the car, you will see that you can separate the vertical slats from the surrounds as well. Now you will have 4 separate pieces.
3. I bought some 2000 grit paper, but it wouldn't even scratch the surface. I ended up using 150 grit to completely take the silver off of the slats and sanded in between the slats and everywhere. On the surround pieces, the chrome is VERY thick. You will not sand all the way through it. Just use the 150 to scuff all of the surface area. You can go back over it all again with 230 later, but I didn't bother.
4. Wash and dry all the pieces VERY thoroughly. I used my air compressor to blow any water out all the crevices as well. I still a little moisture on one surround and saw it bubble as soon as I applied the paint, so I had to wait for it to dry and sand all the paint off and start over.
5. Lay all the pieces on some newspaper and spray them with paint. I just bought some nice spray paint from Ace hardware. My personal preference was semi-gloss black. Apply in light, even coats so there is no running. I applied 6 or 7 coats (almost the whole can) in roughly 30 minute intervals (the paint I had said it was dry in 10 minutes). I don't care if it says it's dry, DON'T TOUCH OR MOVE THE PIECES AT ALL. You don't want fingerprints on you grill.
6. After the last coat of paint, I waited about an hour and started putting on the clear coat. All I used for this was a clear urethane spray paint. I chose Satin to give the whole combo a nice "in-between" of the flat or gloss black. I put 4 coats of this on with about a 30 minute gap in between coatings. I did notice some "dust" on the parts after each coat of the urethane. The urethane did dry very quickly and I was able to pick the pieces up (carefully and only touching unseen parts) to wipe them down with a lint free cloth before each re-coat.
I let them completely dry for about 12 hours after the last coat, then snapped the slats back into the surrounds and put them back in the car. I just got them back on, so I can't speak for durability yet, but hopefully with that many coats of paint and urethane on them, they should hold up well. Plus, if you do screw them up, you can buy a black set on Ebay for like $40. I just wanted a slightly different finish and like playing with things, so I did it myself.
If you have any other questions, just shoot me a message back.
Scott


