My Plasti Dip Log: Updates, Pictres, and Evaluation
 09-08-2014, 05:14 PM
#11
Members
Senior Members
Thread Starter
Lotus: I normally do 2 light base coats then 4-6 heavier coats a few of which are "wet" and then with 1 or 2 light coats to even everything out, so far it has been working fairly well for me. This of course depends on the color and style of Dip, both Gunmetal and Black have fairly good coverage.
What is going on top of the trim is a True Metalizer Dip in Aluinum which covers extremely well and typically requires 1-2 coats for uniform coverage, the rule of thumb with ALL Plasti Dip products is: the more coats the better protection and the easier removal will be, of course if you are using an enhancer like copper or a glossifier, the more you use the greater the impact will be. So in my case 2 coats of aluminum over a solid gunmetal foundation should work very well and save me a few dollars as gunmetal is an inexpensive color.
That interior looks like, I am jealous of your black carpet and trim everywhere! haha. Although my wood trim wasn't very offensive I really like introducing silver/aluminum colors for more contrast and a sportier look. If the color and texture comes out well it should tie in with the shifter bezel, HVAC controls, gauge rings, etc. This is the same approach I used when I wrapped my interior trim with a silver CF fabric on my E39 M5. ...man, I miss that car
Evan
 09-09-2014, 11:33 AM
#12
Senior Members
Join Date: May 2011
Location: Canada
Posts: 1,169
Likes: 0
Received 0 Likes
on
0 Posts
My Ride: 2010 535 xi - M Sport Pkg & other goodies
Wow, so 8 to 10 coats on interior trim too?
Yeah, I'm lucky that my 5 series wagon is the same colour combo as my 3 series. The tan leather on black carpet.
So as far as how to remove trim, is there a Bentley manual I have to get, or some DIY links you've found? The center trim by shifter and the trim around the radio/heating controls looks like a PITA to remove...
09-09-2014, 01:04 PM
#13
Members
Senior Members
Thread Starter
Wow, so 8 to 10 coats on interior trim too?
Yeah, I'm lucky that my 5 series wagon is the same colour combo as my 3 series. The tan leather on black carpet.
So as far as how to remove trim, is there a Bentley manual I have to get, or some DIY links you've found? The center trim by shifter and the trim around the radio/heating controls looks like a PITA to remove...
Yeah, I'm lucky that my 5 series wagon is the same colour combo as my 3 series. The tan leather on black carpet.
So as far as how to remove trim, is there a Bentley manual I have to get, or some DIY links you've found? The center trim by shifter and the trim around the radio/heating controls looks like a PITA to remove...
Sorry I forgot to address your previous question about trim removal. I do have a manual but have not used it regarding trim, most tutorials used are from searching forums and Youtube. The pieces you speak of are fairly easy to remove, the first time can be a little nerve-racking as you are traveling into the unknown.
Here are the basic steps/tips for interior trim (dash and console).
Main Dash Trim:
Start at the passenger side, open the passenger door and pry the far right edge of the trim up. There are 4-5 clips holding this piece in, once the first is popped you will be able to progressively release the clips from right to left with your hands. The hazard/Lock button will need to be popped out and disconnected and then trim is free.
Dash Trim Left of Steering Wheel:
Pry and release the two clips holding the HEADLIGHT control panel, once this is lifted out of the way remove the two screws holding the lower part of the trim piece, once screws are out trim can be popped out like main dash trim.
Lower Dash / Center Stack Trim:
Part 1: After the main dash trim is removed the HVAC panel must go. There are 2 screws at each top corner, remove these and then use a prying tool on the lower corners of the Navigation plate (on the black plastic just above the lower dash trim). After these are popped you must disconnect all the wiring before the HVAC face can be removed.
Part 2: The lower dash trim is held on my 4 STRONG clips, one in each corner. First remove the top ones and then the bottom ones. Pry from the bottom or as low as you can wedge it on the sides, be sure to stabilizer the trim and keep it from breaking if you are using a lot of force. Once the 4 clips are released unplug the DTC/seat heater connections. Ashtray can be removed by pulling forward on the top of it.
Center Console Trim:
Remove iDrive knob by pulling up firmly. Remove the shifter bezel by sticking your finger inside and pulling up (good ol' fish hook). There will be 2 screws exposed which are located in each rearward corner, after these are removed the trim piece will be loose but not free. There are 2 clips in the rear by the Menu button which must be popped, use your pry too in this area, once released disconnect the Menu button and trim can be removed.
For the door trim I think you must remove the doors, although I have not done this I plan to do so in the coming days so I will confirm then.
I was going to PM you this information but hopefully it will help others.
Let me know if you have any questions.
Evan
 09-09-2014, 03:57 PM
#15
Senior Members
Join Date: May 2011
Location: Canada
Posts: 1,169
Likes: 0
Received 0 Likes
on
0 Posts
My Ride: 2010 535 xi - M Sport Pkg & other goodies
Thanks a lot Evan. I'll take a read thru your points when I get around to doing this mod.
On the 3 series, we're lucky, as all the trim pops out using a flat blade screwdriver / trim removal tool, including the doors:
EAS Carbon Fiber Interior Trim Installation
On the 3 series, we're lucky, as all the trim pops out using a flat blade screwdriver / trim removal tool, including the doors:
EAS Carbon Fiber Interior Trim Installation
09-12-2014, 10:19 PM
#16
Members
Senior Members
Thread Starter
The basic instructions for the front door panels are as follows:
1. Pop open airbag emblem and remove torx screw. Remove small plastic screw-head cap located midway up the panel toward the hinge.
2. release all clips holding the perimeter of the panel, BMW says start at the bottom, I like to start on the high on the rearward side (just below the height of the trim).
3. Once all perimeter clips are popped, grab the panel and wiggle it upwards and inwards until the centrally located main clip pops.
4. Be mindful of all the wires, release them from door card OR release harness from door, you pick.
NOTE: For the rear doors, instead of the airbag emblem covering a screw, there is an additional screw located at the very bottom of the panel, so the rear doors have one screw at the left side of the panel (front of car) and bottom. Also the small pillar separating the glass windows must be removed before the panel will be free.
Here are some things to watch out for which are not very well documented:
1. This is the reason so many people break their trim while trying to remove it, it doesn't just pop out like most, there are 5 of these holding the front trim onto the panels and 7 on the rear trim. I accidentally broke one when trying to remove it (with the panel removed and knowing they existed and how the worked) I was unaware how fragile the plastic stud was. These things suck, I hate them.

2. Here is how I got them off. I had a small set of picks which came in extremely handy with trim related tasks. I would take this 90degree angle pick, first pull some individual tabs upward to loosen their death-grip then, from underneath the outter edge of the ring pry the tabs up in a clockwise motion until the ring was worked up and off the shaft. There might be some proprietary BMW tool which makes the removal of these a breeze but I am unaware of it. The pick came in very handy, it would have taken much longer it I only had screwdrivers and other basic tools at my disposal.

3. For reference, the little black plastic cube in the middle of the door is the "main" clip, it is the strongest and the last to pop when removing the panel. On the perimeter, almost every small black hole is related to a clip, as are the 6 silver clips across the top.

4. Close up of top clips.

5. NOTE This can save you a considerable amount of time. This is a close up of the "main" clip. As you can see the black plastic cube is attached to the door and this is how you will find it after removing the panel. Before reinstalling the panel, take some pliers, release the black cube and slide it into the metal subframe of the panel. This will make the install exponentially easier.

Additional Notes: Be mindful of threading the door lock "marker" through it's whole before aligning the clips and snapping the panel into place. If this doesn't make sense, it will after it's too late .
It was tedious and frustrating but it is done, unfortunately I ran out of "True Metallic Aluminum" before I could Dip the steering wheel trim so it is still Gunmetal.
More updates to come,
Evan

 09-14-2014, 08:37 PM
#17
Senior Members
Join Date: May 2011
Location: Canada
Posts: 1,169
Likes: 0
Received 0 Likes
on
0 Posts
My Ride: 2010 535 xi - M Sport Pkg & other goodies
Seriously? To paint the trim on the door, you need to take the whole panel off? The trim piece itself doesn't just come off, like on the 3 series, in the link I posted in #15 above?
I presume then masked off the rest of the panel then to spray the trim?
I presume then masked off the rest of the panel then to spray the trim?
09-16-2014, 10:05 PM
#18
Senior Members
Join Date: May 2011
Location: Canada
Posts: 1,169
Likes: 0
Received 0 Likes
on
0 Posts
My Ride: 2010 535 xi - M Sport Pkg & other goodies
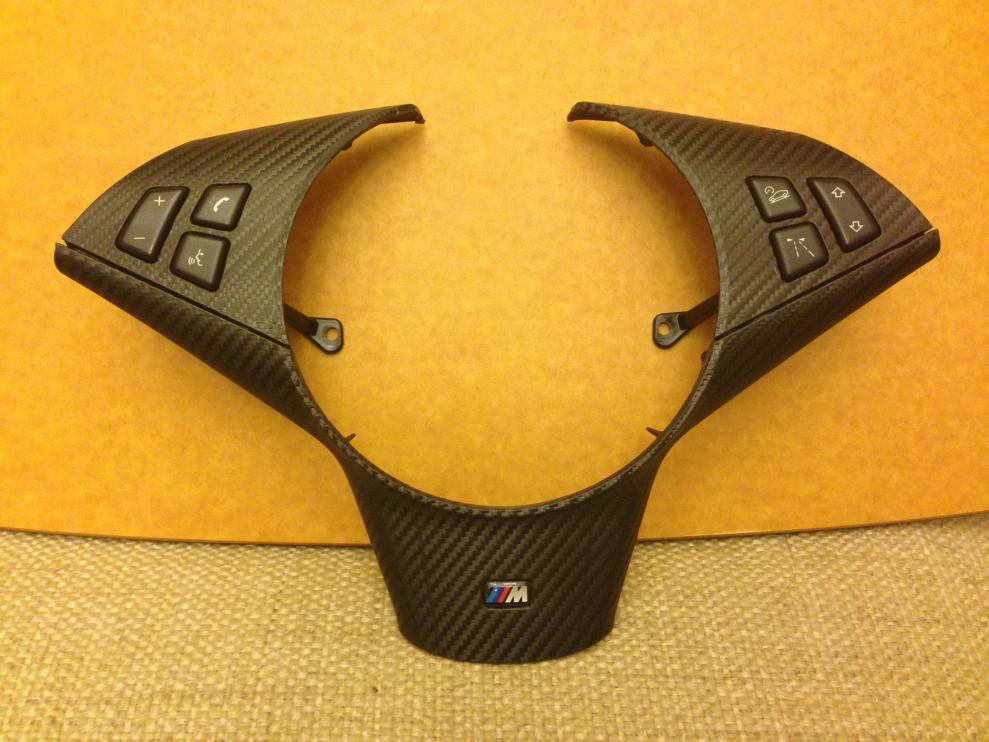
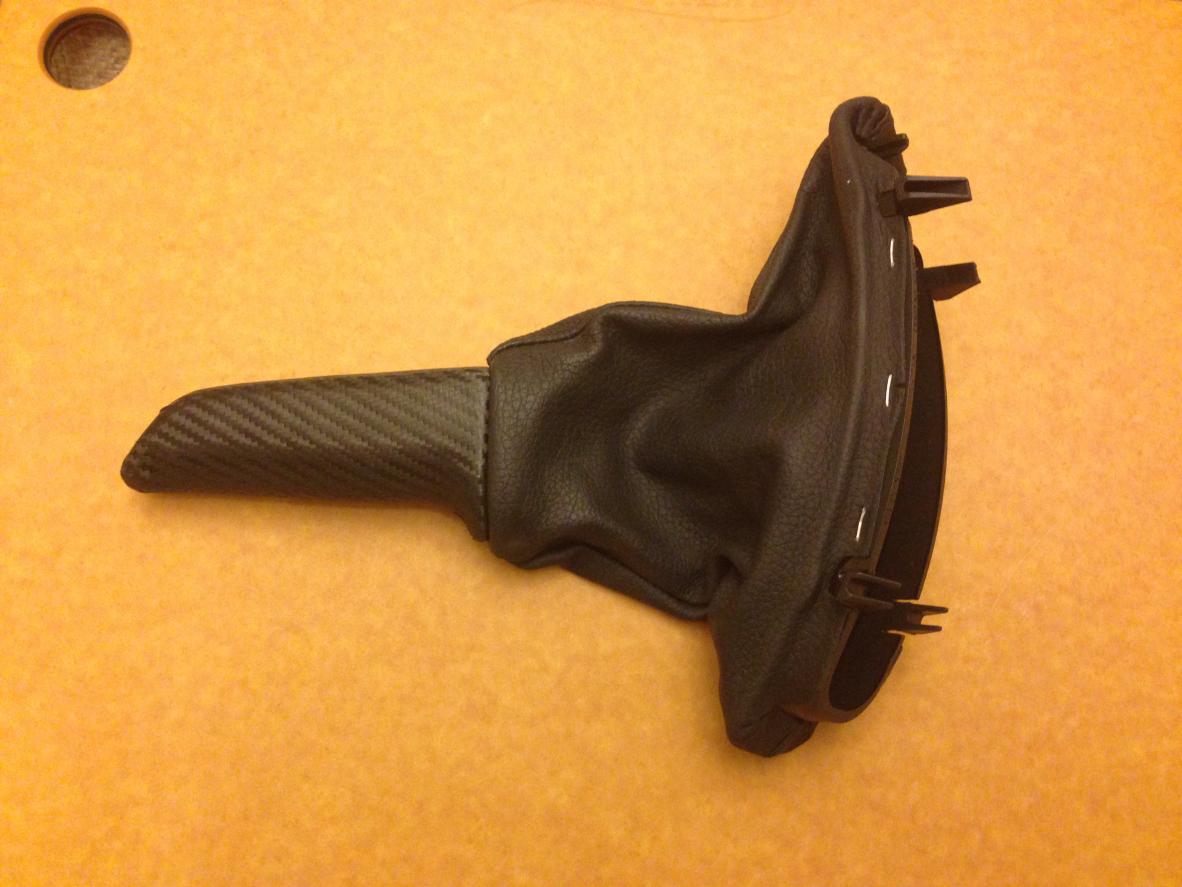
Here's the route I went with my steering wheel trim:
https://5series.net/forums/e61-touri...l-trim-139542/
.
.
Final results in big pics:
https://5series.net/forums/e61-touri...l-trim-139542/
.
.
Final results in big pics:
Last edited by Lotus99; 09-26-2014 at 04:21 PM.
09-17-2014, 08:18 AM
#19
Members
Senior Members
Thread Starter
I removed all the rivets on the trim to enable full removal and did not have to tape anything off. It was quiet a pain.
Here's the route I went with my steering wheel trim:
https://5series.net/forums/e61-touri...l-trim-139542/
.
https://5series.net/forums/e61-touri...l-trim-139542/
.
09-17-2014, 09:16 AM
#20
Senior Members
Join Date: May 2011
Location: Canada
Posts: 1,169
Likes: 0
Received 0 Likes
on
0 Posts
My Ride: 2010 535 xi - M Sport Pkg & other goodies
So I had a bit of practice before this round, but it took me about 1.5 hours to do that piece, and I had some breaks every half hour. The vinyl stretches quite a bit when you heat it, so you just pull it and it conforms to the curves. Had no issues around the corners. I cut slits in the vinyl around the corners before pulling them over the edges, so I wouldn't end up with creases.
The two pointy corners at the top were harder. I can't say I did a super job, but it won't be visible, so it's a non issue. I first put a slit in the vinyl, then snipped a little triangular piece out, so when I did fold them onto each other, I wouldn't end up with two layers. Hopefully it holds and doesn't bubble anywhere or peel off.
I'd have more faith in this than plasti dip, which I would worry would rub off just like the original rubber layer, so it'll be interesting to see how yours holds up.