Latest Mod | Gloss Black Vinyl Roof & SL Trim Wrap

 09-28-2011, 06:51 PM
#32
Members

Join Date: Sep 2011
Location: Minnesnowta
Posts: 38
Likes: 0
Received 0 Likes
on
0 Posts
I'm going to vinyl my roof in a few minutes here, in the garage right now. I'm putting together a little video DIY for it too. First...order 60x72, NOT 60x60 like was said. I bought it and it's about an inch short. hopefully it'll stretch out enough.
 09-28-2011, 07:35 PM
#34
Members

Join Date: Apr 2010
Location: Corona, CA
Posts: 90
Likes: 0
Received 0 Likes
on
0 Posts
My Ride: 2008 550i Sport Alpine White
Options: Nav, Cold Weather Pkg, Comfort Pkg, Black Dakota Leather, Folding Rear Seat
Mods: Dinan Free Flow Exhaust, Dinan Stage 2 Software, Dinan High Flow Intake System, Dinan High Flow Throttle Body, Carbon Fiber Front Strut Tower Brace, HID 8000k Fogs, LED Super White Side Markers
Coming Soon: HID 8000k Angel Eyes and Lowbeams
Wow. Really cool look. I bet the gloss black would look sweet on my alpine white. Another mod for the wish list!
09-28-2011, 10:37 PM
#36
Members
Join Date: Sep 2011
Location: Minnesnowta
Posts: 38
Likes: 0
Received 0 Likes
on
0 Posts
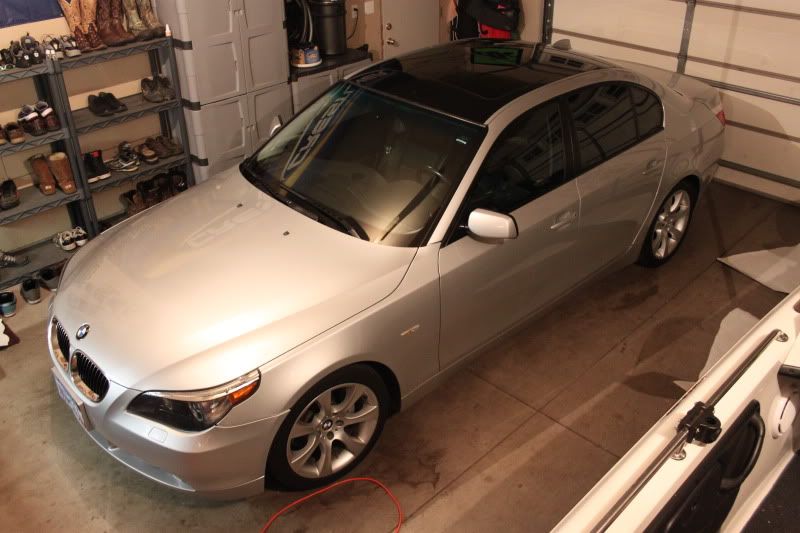
Here ya go! Video camera ended up not workin, but i'll write up a little DIY and post it here soon. There's definitely room for improvement, mainly in heat application and trimming it. didn't turn out half bad, can't see the imperfections from more than a few feet away
10-04-2011, 12:26 PM
#38
Members
Join Date: Sep 2011
Location: Minnesnowta
Posts: 38
Likes: 0
Received 0 Likes
on
0 Posts
I'm probably going to be re-doing it at some point, now that i've got the hang of applying vinyl wrap. There's a couple spots toward the back that wrinkled a bit, and the vinyl adhesive actually pulled off arm hair when I was holding it underneath to spread it out while squeegeeing, so you can see where the hair is under it ;D I also didn't take enough time trimming it, so there's some less than 100% edges. Aside from that, I love the look. But here's a bit of advice:
First, if you plan on doing it, at LEAST 60x72. 60 is wide enough, but not long enough for the roof. I got 60x60 per what was said on here, and it wasn't long enough. Had to patch the back a bit.
Applying it is pretty straight-forward.
1. Make sure the top surface is clean, I washed it with water and dish soap, then dried it with a lint free towel. I also then cleaned it by spraying it with Isopropyl Alcohol, and then dried it again.
2. Now you can throw the vinyl on there. Peel off the backing, and lay the adhesive on the roof. I recommend taking off only 1/2 the adhesive backing. Don't worry if it's not perfect, the adhesive is made so you can peel it and reapply it multiple times. I'd suggest using at least 2 people for this part, as it allows you to line it up much easier. Doing it myself was a bit of a PITA, as it would sometimes fold over, and adhesive-to-adhesive likes to stick together pretty well.
3. Once you've got the vinyl in roughly the right spot, start pressing it on with the squeegee. I didn't start using a heat gun with application until I was halfway done. I realized how much easier it was to get it wrinkle-free when i put a bit of heat on it.
4. Squeegee from the middle outward. Using the heat gun, heat up the vinyl just a bit, enough to where it feels warm. All i used was a hi-heat hair dryer, actually. and it worked just fine. as it's warm, apply just a BIT of pull and lay it down, while squeegeeing. When it's still warm, the wrinkles pretty much go away. Again, it'd help to have someone holding/putting tension on the vinyl while you squeegee.
5. Once you get that half applied, peel off the other 1/2 and continue with that the same way you did the first. Again, if you get wrinkles or bubbles, just lift the vinyl and re-apply it.
6. Once the vinyl is applied, all that's left is trimming. I left a good inch of over hang, and hit it with the heat gun, then squeegeed it down (I also removed the roof side trim...pops off easily with a light pry using a flathead from the rear of the roof. They're just on using clips.
7. After it's all trimmed and neat-looking, pop the trim back on and you're good to go!
I gotta get to class, so I typed this up fairly quickly. I'll probably come back and add details/possibly part of the video when I have time.
10-04-2011, 11:05 PM
#39
Members

I'm probably going to be re-doing it at some point, now that i've got the hang of applying vinyl wrap. There's a couple spots toward the back that wrinkled a bit, and the vinyl adhesive actually pulled off arm hair when I was holding it underneath to spread it out while squeegeeing, so you can see where the hair is under it ;D I also didn't take enough time trimming it, so there's some less than 100% edges. Aside from that, I love the look. But here's a bit of advice:
First, if you plan on doing it, at LEAST 60x72. 60 is wide enough, but not long enough for the roof. I got 60x60 per what was said on here, and it wasn't long enough. Had to patch the back a bit.
Applying it is pretty straight-forward.
1. Make sure the top surface is clean, I washed it with water and dish soap, then dried it with a lint free towel. I also then cleaned it by spraying it with Isopropyl Alcohol, and then dried it again.
2. Now you can throw the vinyl on there. Peel off the backing, and lay the adhesive on the roof. I recommend taking off only 1/2 the adhesive backing. Don't worry if it's not perfect, the adhesive is made so you can peel it and reapply it multiple times. I'd suggest using at least 2 people for this part, as it allows you to line it up much easier. Doing it myself was a bit of a PITA, as it would sometimes fold over, and adhesive-to-adhesive likes to stick together pretty well.
3. Once you've got the vinyl in roughly the right spot, start pressing it on with the squeegee. I didn't start using a heat gun with application until I was halfway done. I realized how much easier it was to get it wrinkle-free when i put a bit of heat on it.
4. Squeegee from the middle outward. Using the heat gun, heat up the vinyl just a bit, enough to where it feels warm. All i used was a hi-heat hair dryer, actually. and it worked just fine. as it's warm, apply just a BIT of pull and lay it down, while squeegeeing. When it's still warm, the wrinkles pretty much go away. Again, it'd help to have someone holding/putting tension on the vinyl while you squeegee.
5. Once you get that half applied, peel off the other 1/2 and continue with that the same way you did the first. Again, if you get wrinkles or bubbles, just lift the vinyl and re-apply it.
6. Once the vinyl is applied, all that's left is trimming. I left a good inch of over hang, and hit it with the heat gun, then squeegeed it down (I also removed the roof side trim...pops off easily with a light pry using a flathead from the rear of the roof. They're just on using clips.
7. After it's all trimmed and neat-looking, pop the trim back on and you're good to go!
I gotta get to class, so I typed this up fairly quickly. I'll probably come back and add details/possibly part of the video when I have time.
First, if you plan on doing it, at LEAST 60x72. 60 is wide enough, but not long enough for the roof. I got 60x60 per what was said on here, and it wasn't long enough. Had to patch the back a bit.
Applying it is pretty straight-forward.
1. Make sure the top surface is clean, I washed it with water and dish soap, then dried it with a lint free towel. I also then cleaned it by spraying it with Isopropyl Alcohol, and then dried it again.
2. Now you can throw the vinyl on there. Peel off the backing, and lay the adhesive on the roof. I recommend taking off only 1/2 the adhesive backing. Don't worry if it's not perfect, the adhesive is made so you can peel it and reapply it multiple times. I'd suggest using at least 2 people for this part, as it allows you to line it up much easier. Doing it myself was a bit of a PITA, as it would sometimes fold over, and adhesive-to-adhesive likes to stick together pretty well.
3. Once you've got the vinyl in roughly the right spot, start pressing it on with the squeegee. I didn't start using a heat gun with application until I was halfway done. I realized how much easier it was to get it wrinkle-free when i put a bit of heat on it.
4. Squeegee from the middle outward. Using the heat gun, heat up the vinyl just a bit, enough to where it feels warm. All i used was a hi-heat hair dryer, actually. and it worked just fine. as it's warm, apply just a BIT of pull and lay it down, while squeegeeing. When it's still warm, the wrinkles pretty much go away. Again, it'd help to have someone holding/putting tension on the vinyl while you squeegee.
5. Once you get that half applied, peel off the other 1/2 and continue with that the same way you did the first. Again, if you get wrinkles or bubbles, just lift the vinyl and re-apply it.
6. Once the vinyl is applied, all that's left is trimming. I left a good inch of over hang, and hit it with the heat gun, then squeegeed it down (I also removed the roof side trim...pops off easily with a light pry using a flathead from the rear of the roof. They're just on using clips.
7. After it's all trimmed and neat-looking, pop the trim back on and you're good to go!
I gotta get to class, so I typed this up fairly quickly. I'll probably come back and add details/possibly part of the video when I have time.
I have a car the same color.
What type of gloss vinil wrap do you used?
Thanks
10-05-2011, 07:18 AM
#40
Contributors

Join Date: Jul 2011
Location: Evansville, IN
Posts: 36
Likes: 0
Received 0 Likes
on
0 Posts
get a 60 x 60 wrap for the roof... check out metrorestyling.com thats where i got all my stuff. they are local here in Metro Detroit but they do a lot of mail orders.... hit the site and tell em that Chris sent you from the BMW forum and they should give you the best pricing out here.
its a lot of fun doing it yourself if you have the patience and enjoy being in the garage....its really not too hard if u want to give it a try. good luck either way and share pics!
its a lot of fun doing it yourself if you have the patience and enjoy being in the garage....its really not too hard if u want to give it a try. good luck either way and share pics!
These guys are great to deal with! I'll be giving mine a shot tonight, can't wait!
BTW what about wrapping the rails?