Custom Paint Job | Engine Cover
 09-02-2011, 08:23 AM
#1
Senior Members
Thread Starter
Join Date: Oct 2010
Location: Los Angeles, CA
Posts: 2,163
Likes: 0
Received 2 Likes
on
2 Posts
My Ride: ///M5 BEAST
Model Year: 2006
First i want to thank member jg525i for the inspiration here. he had his engine cover painted in prep for a recent car show. it was color matched blue to his car and very tastefully done.
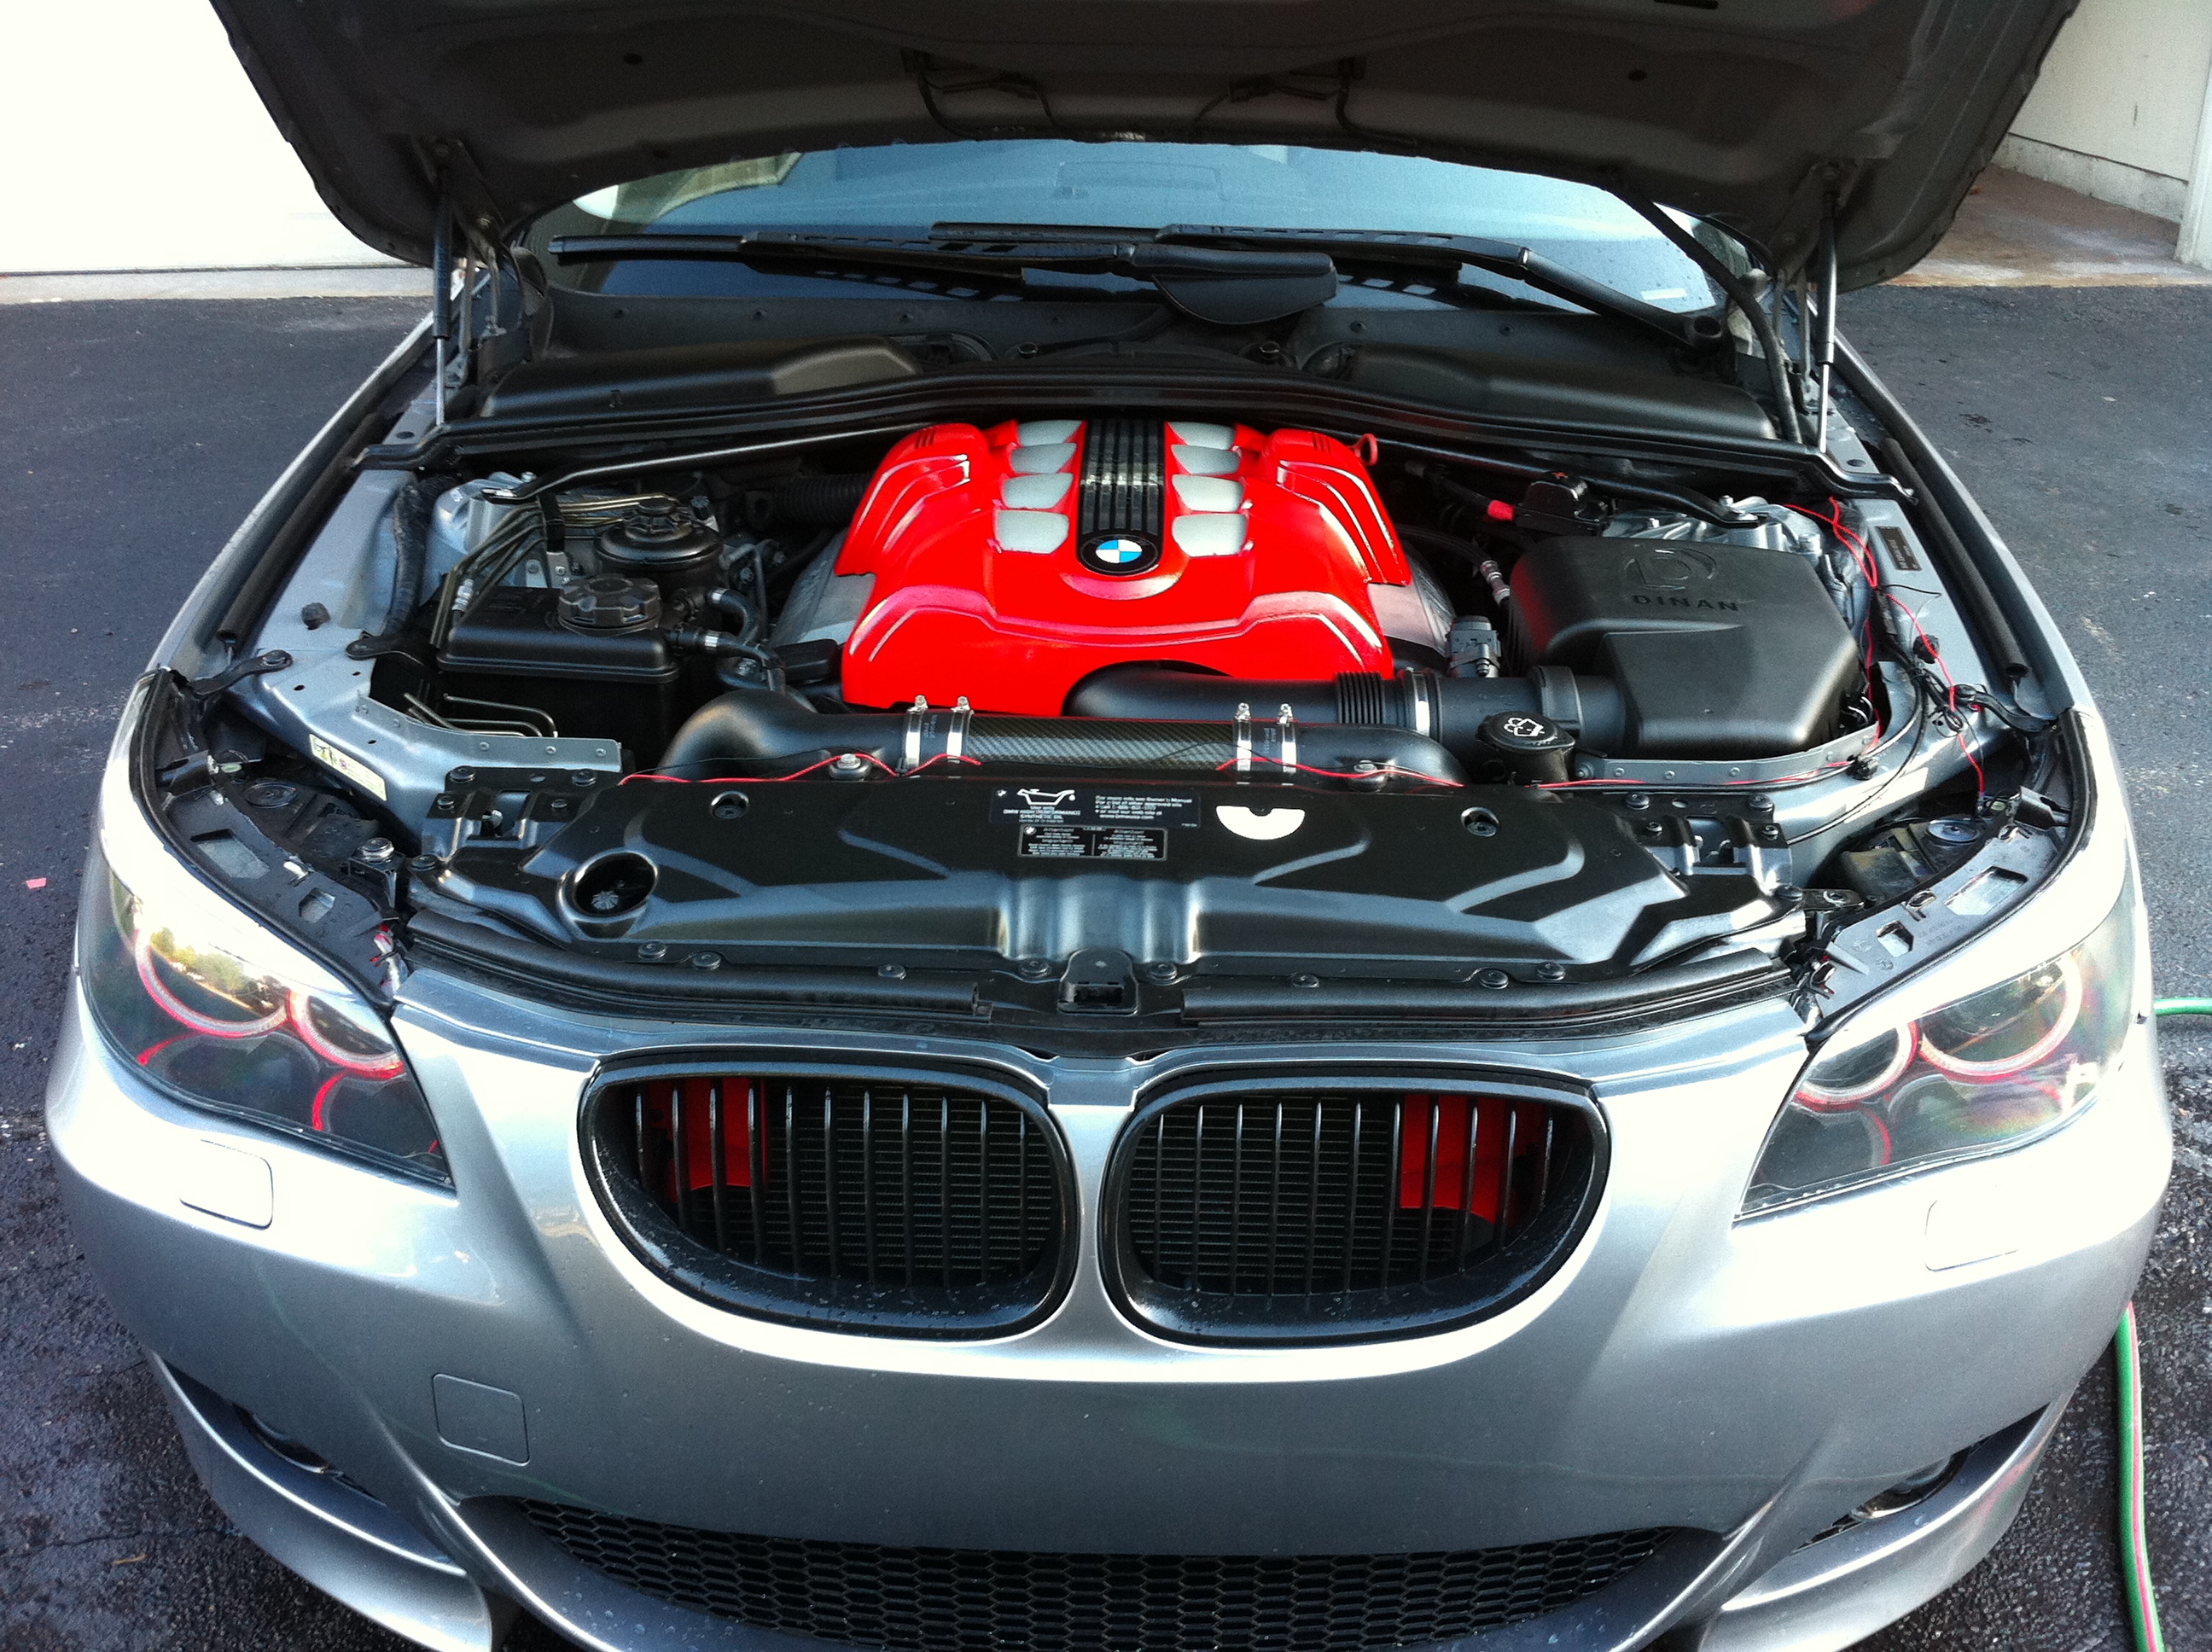
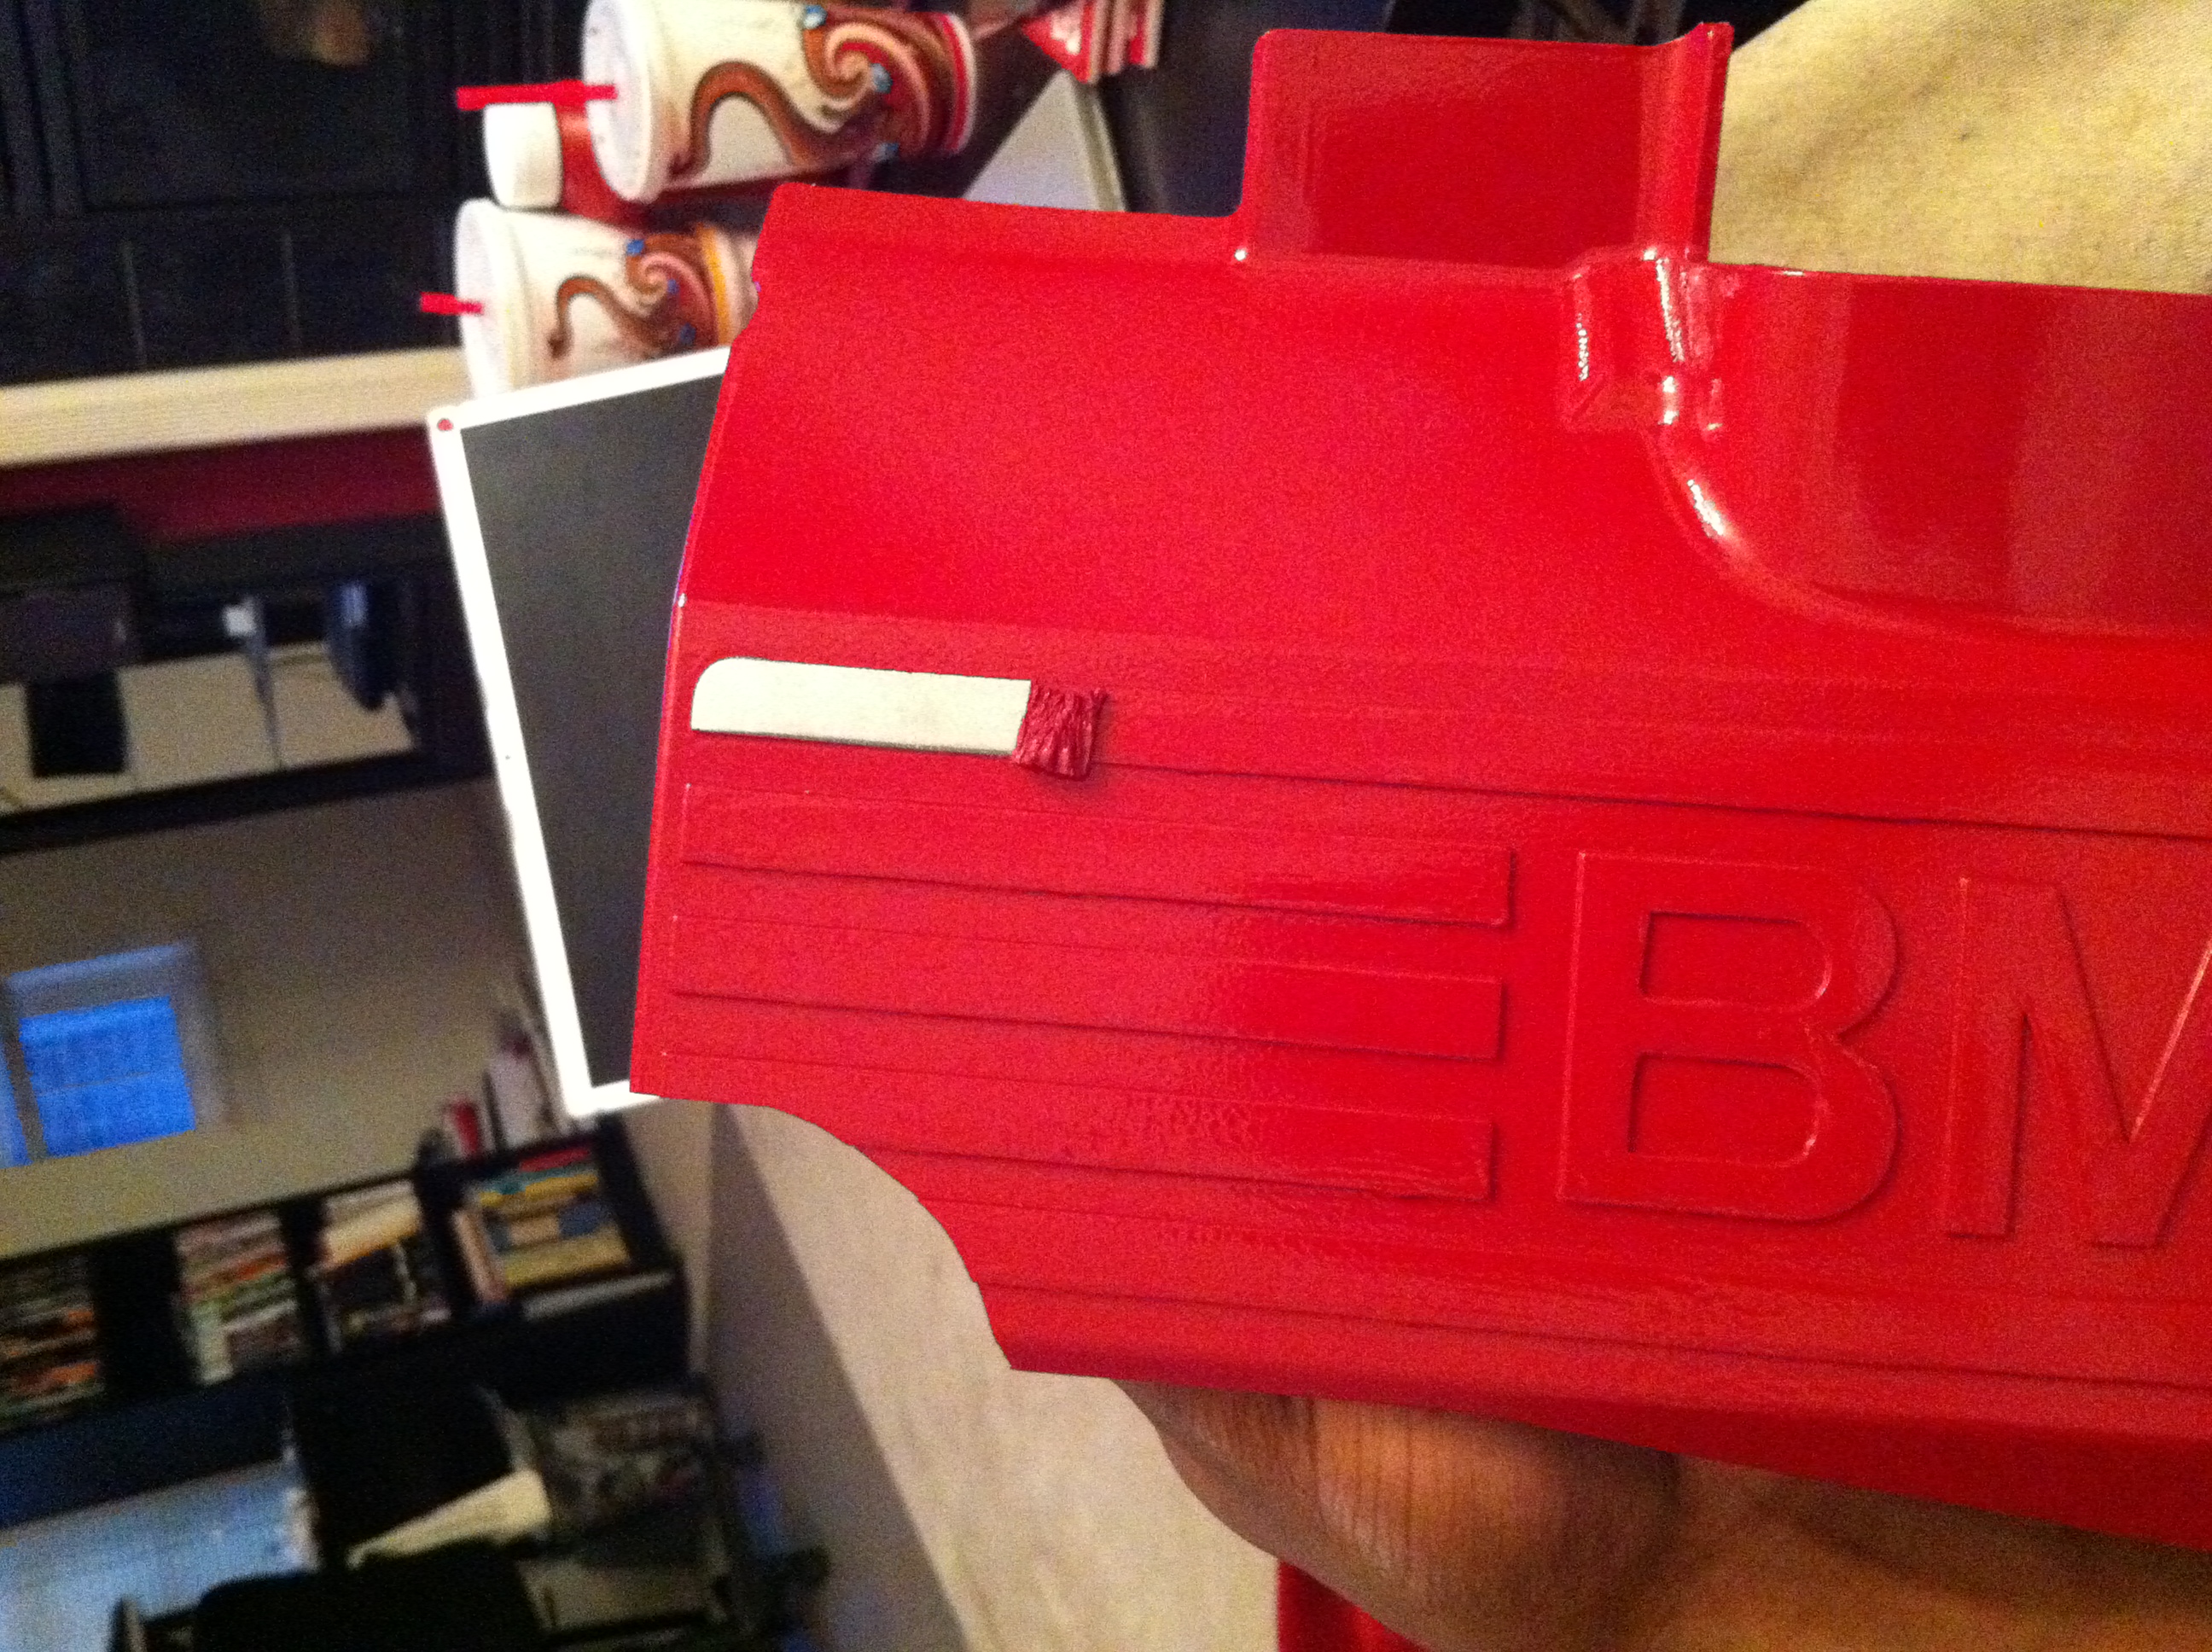
I tried to go with a bright red as it matches the Silver Grey, gloss black and bright red color scheme i have going with my 545i...HOWEVER as you can see from the attached pic....the results were kinda sketchy...it looked like a big lollipop or a cartoon engine. no thanks lol!
so....
i had to spend roughly two days taking the paint off. tons of paint thinner and a wire brush drill bit tip.
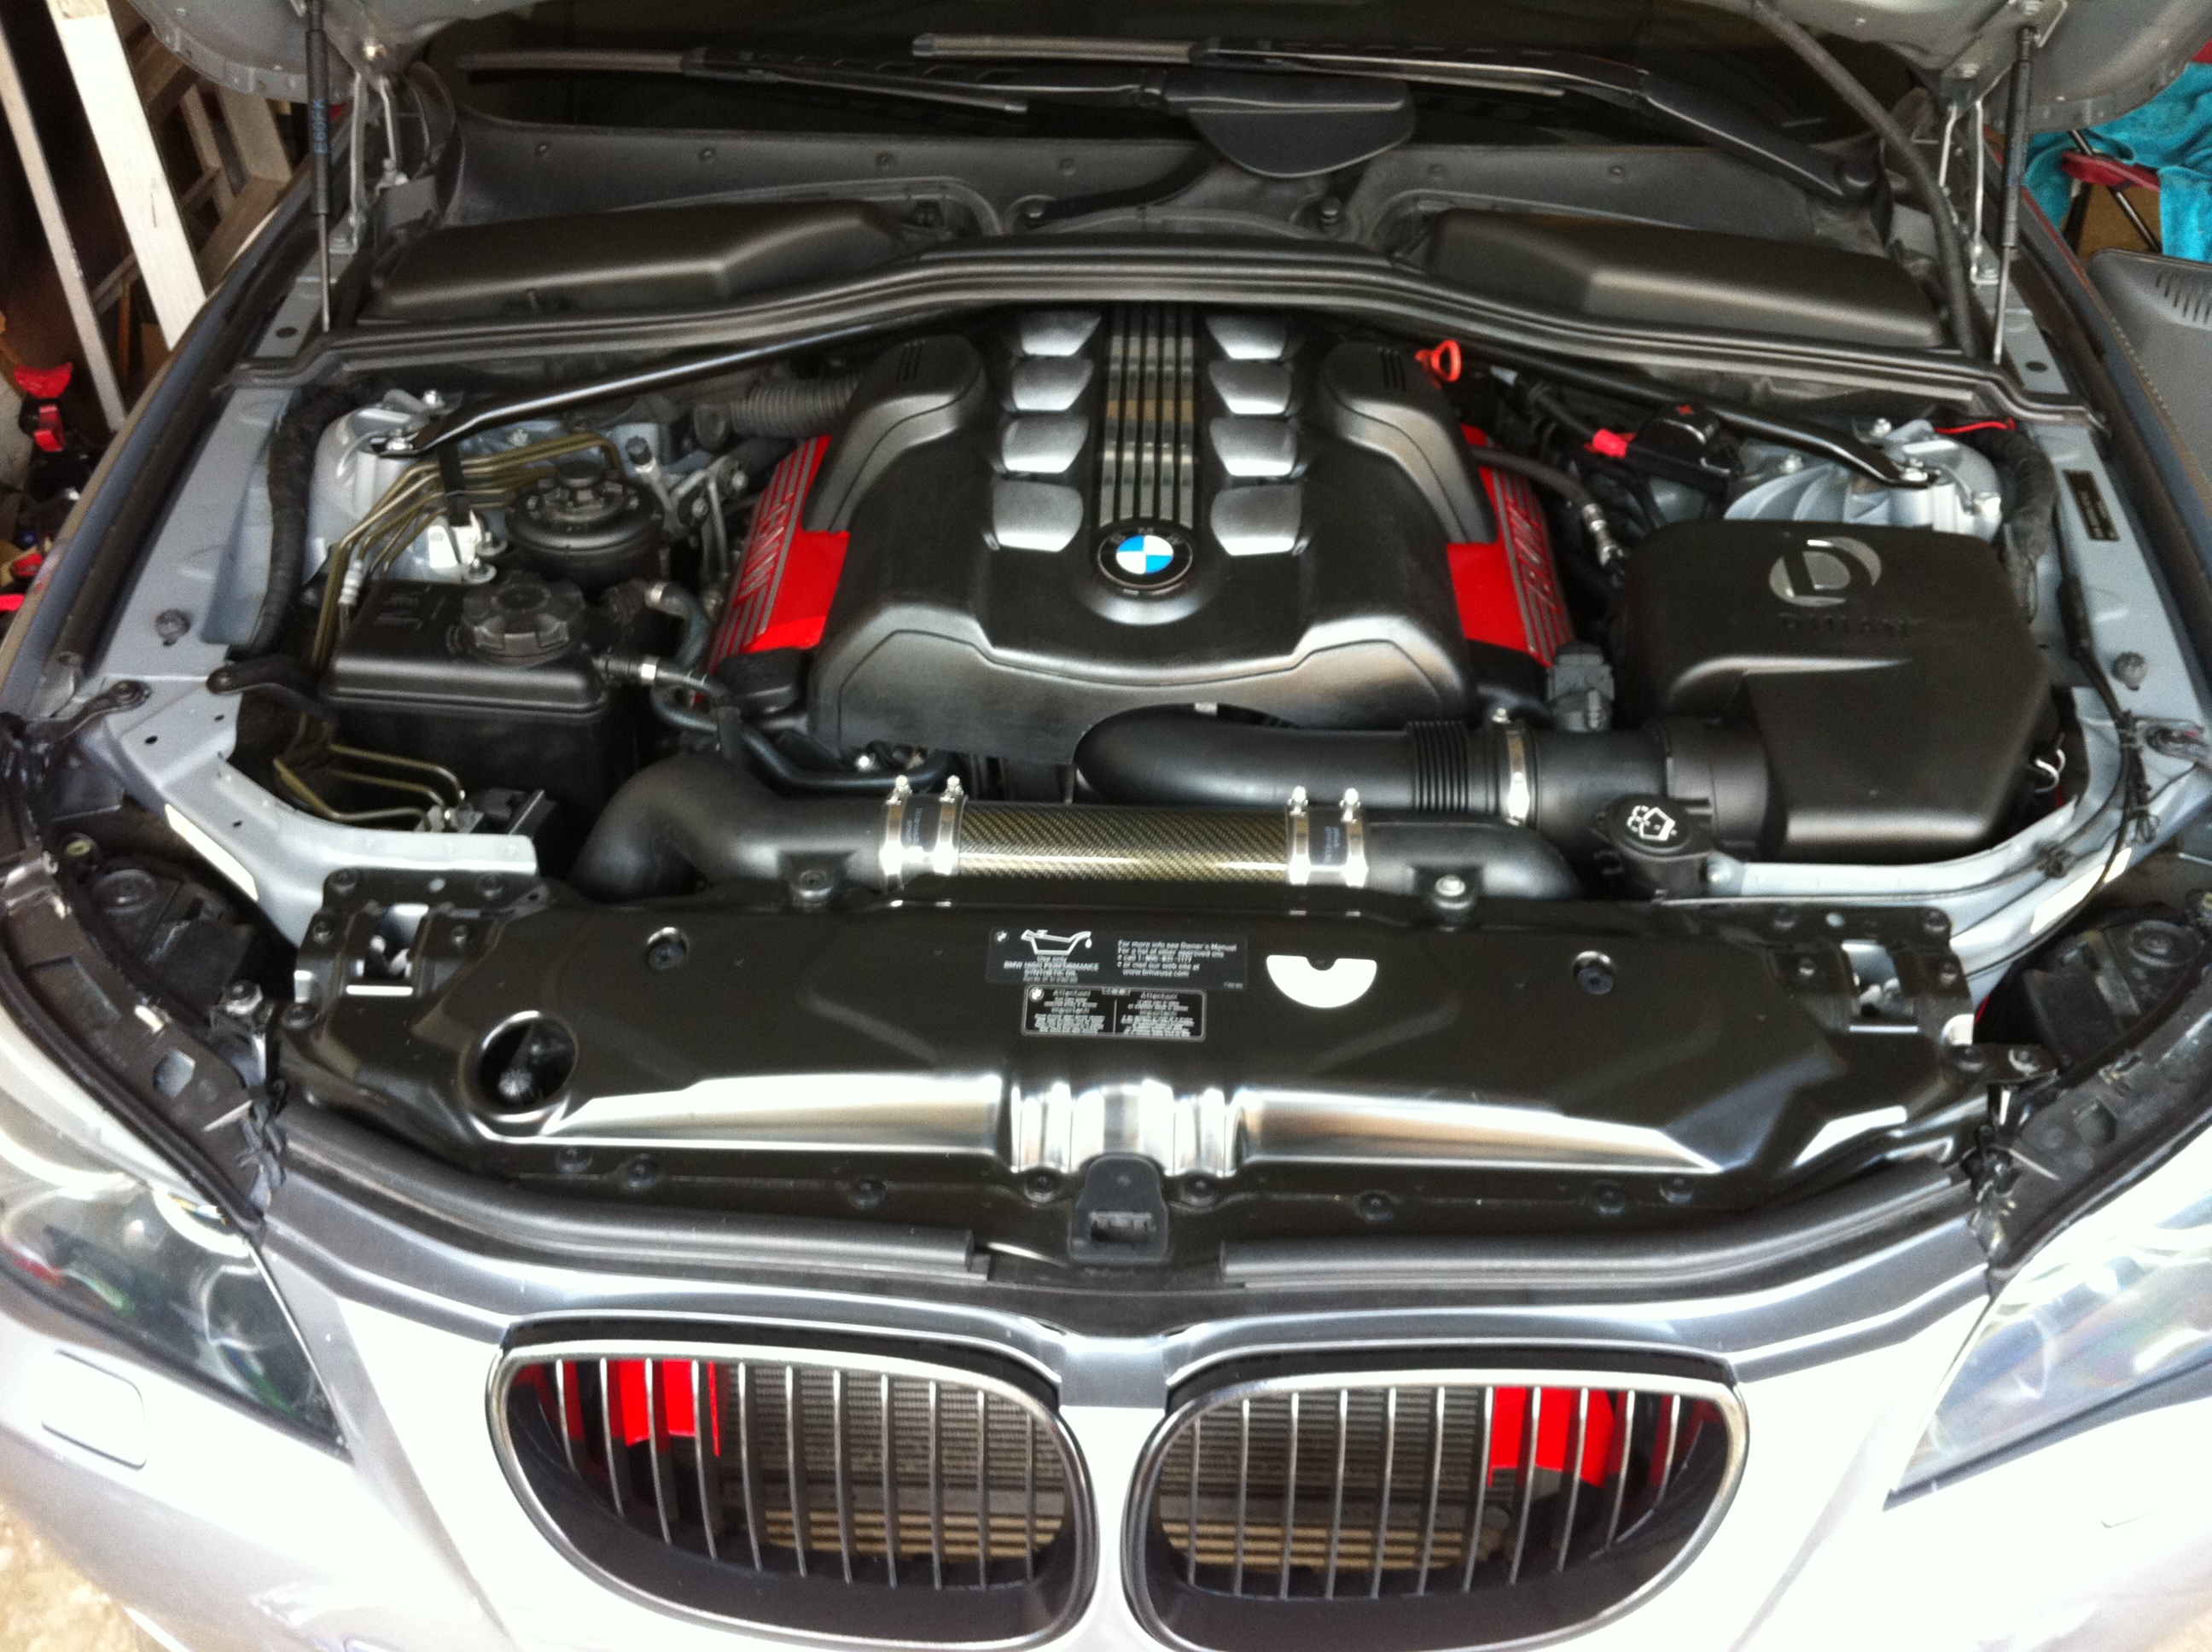
i went with a matte black paint finish instead. something a bit more subtle. for some flair i paid special attention to the side pieces and painted those a bright gloss red. i was able to keep the detail the original gray by putting a light layer of petroleum jelly on the raised/detailed portion then painting like normal. after everything dried, i used a plastic scraper to remove the paint layer which thanks to the petroleum jelly did not adhere to the cover.
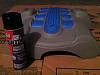

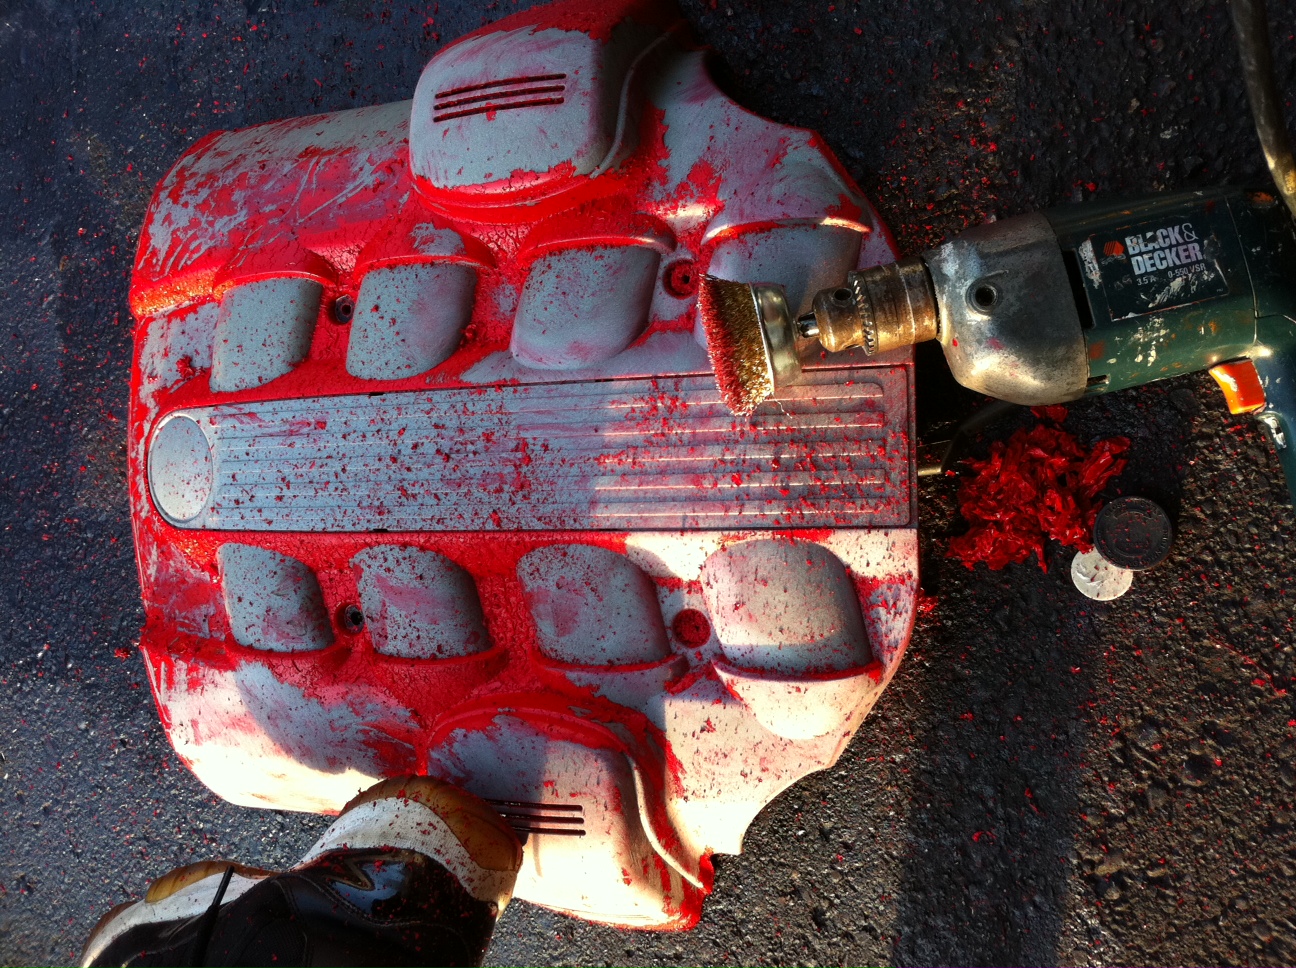
sidenote: be sure to use the right paint and an adhesion promoter like Bulldog otherwise the paint will come out looking like this and you will need to strip it and start all over (as i learned the hard way). and use a light grit sandpaper as well to promote adhesion (320 grit is what i used).
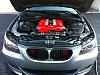
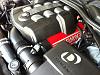
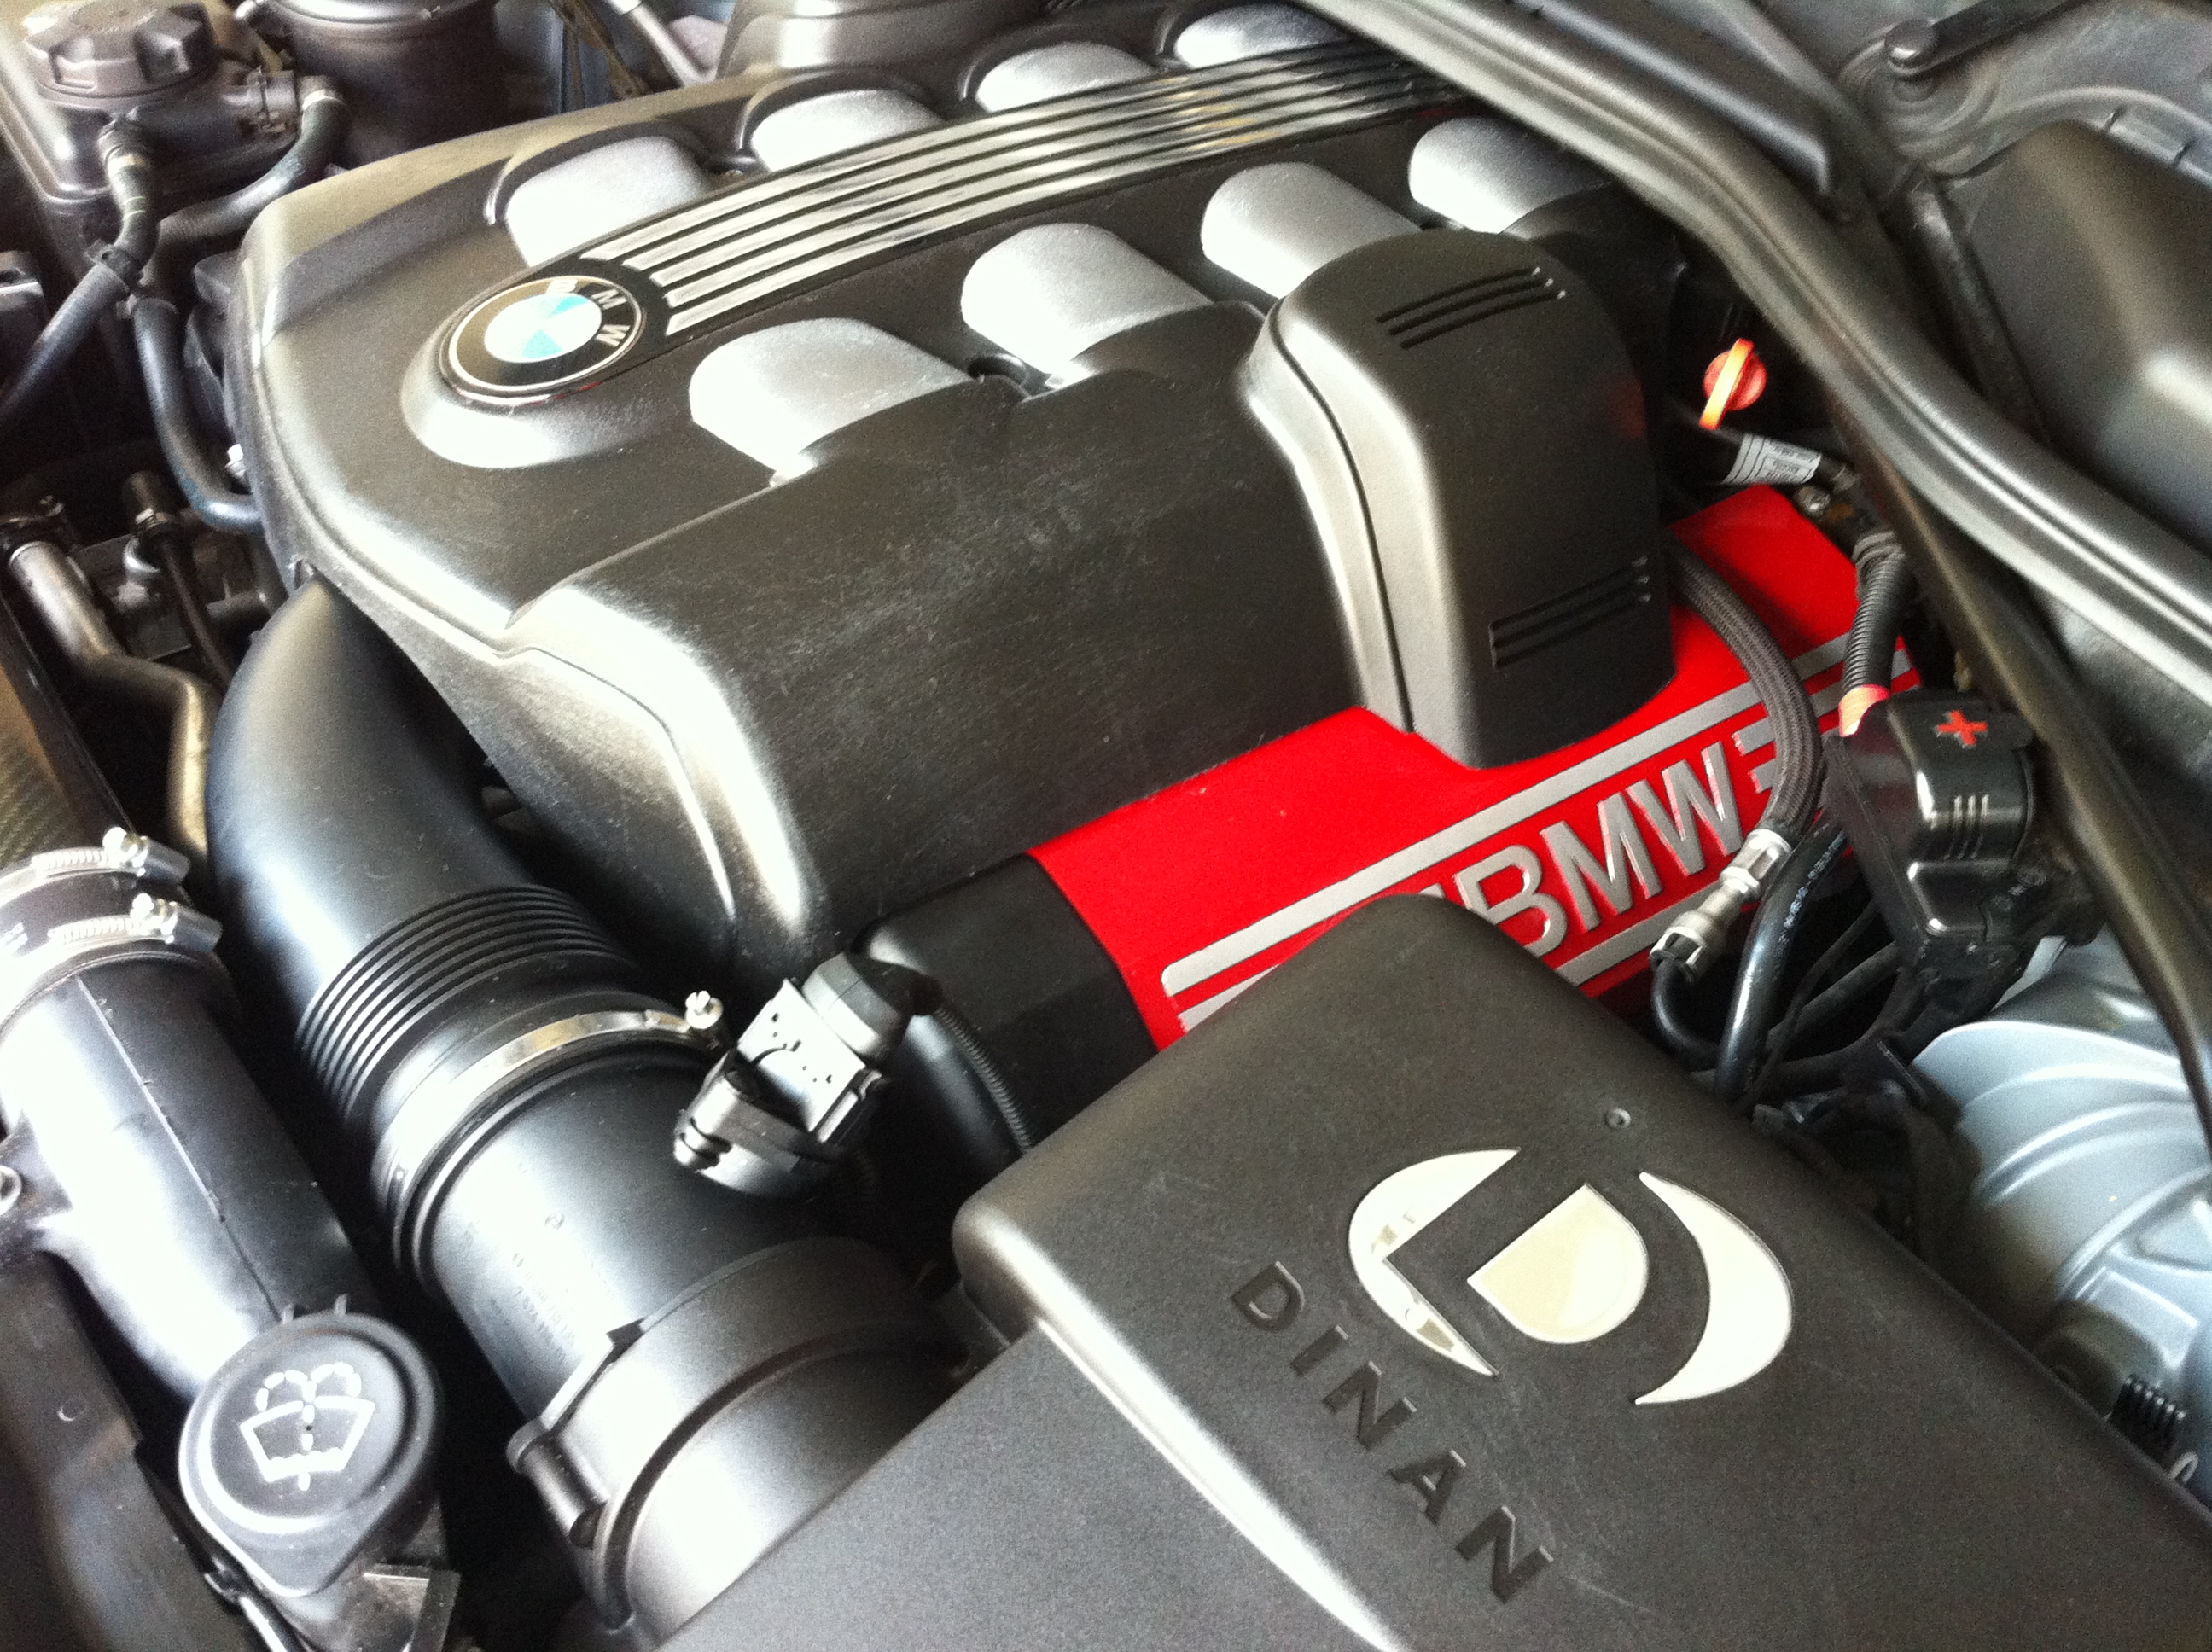
Here's the final product. matte black with bright red gloss accents. i think it fits very well w/ my color scheme. its subtle yet not all in your face lol. what are your thoughts?
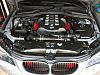
I tried to go with a bright red as it matches the Silver Grey, gloss black and bright red color scheme i have going with my 545i...HOWEVER as you can see from the attached pic....the results were kinda sketchy...it looked like a big lollipop or a cartoon engine. no thanks lol!
so....
i had to spend roughly two days taking the paint off. tons of paint thinner and a wire brush drill bit tip.
i went with a matte black paint finish instead. something a bit more subtle. for some flair i paid special attention to the side pieces and painted those a bright gloss red. i was able to keep the detail the original gray by putting a light layer of petroleum jelly on the raised/detailed portion then painting like normal. after everything dried, i used a plastic scraper to remove the paint layer which thanks to the petroleum jelly did not adhere to the cover.
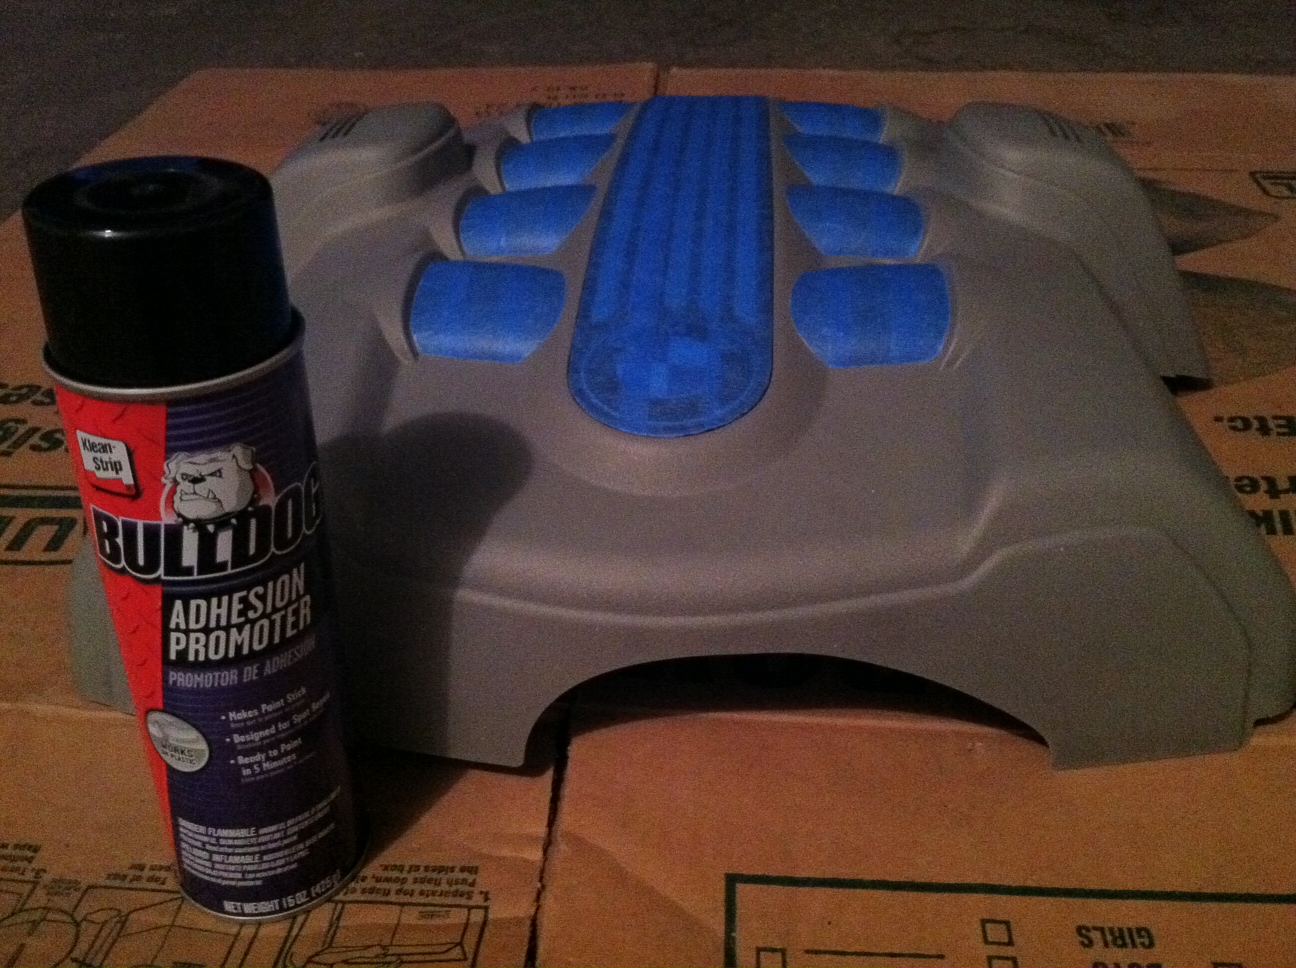
sidenote: be sure to use the right paint and an adhesion promoter like Bulldog otherwise the paint will come out looking like this and you will need to strip it and start all over (as i learned the hard way). and use a light grit sandpaper as well to promote adhesion (320 grit is what i used).
Here's the final product. matte black with bright red gloss accents. i think it fits very well w/ my color scheme. its subtle yet not all in your face lol. what are your thoughts?
 09-02-2011, 08:31 AM
#2
Members
Join Date: Mar 2011
Location: New York, NY
Posts: 132
Likes: 0
Received 0 Likes
on
0 Posts
My Ride: E60: 2004 545i - Sport steptronic
Rear & side sun shades
Heated seats & steering wheel
Sport & Winter packages
Adaptive headlights
Exterior:
OEM M5 Front Bumper
OEM M5 Fenders
20" 163 Replica M6 wheels
Debadged
Performance:
OEM E60 M5 Big Brake Kit
***Removed*** AFE CAI (HOT air intake lol.) (not to happy with upgrade)
Lighting:
MTEC V3.0 Angel Eyes
Motorcepts License Plate Lamps
Motorcepts Amber Signals (Front & Rear)
Motorcepts Amber Side Markers
Motorcepts D2S 6000K low beams (Awesome!)
Sound:
Stocker than a mutha eff'er!
A+ to the second paint job... I like a lot...


 09-02-2011, 04:50 PM
#8
Members

Join Date: Jan 2011
Location: Fort Worth, TX
Posts: 217
Likes: 0
Received 0 Likes
on
0 Posts
My Ride: 2004 525i Alpine White / Tan
looks alot better, I like the suttle red accents...and not to be a downer, but it looks like your wire brush / sanding is showing throw the matte black. I dont know if its just the pic or what but it doesnt look smooth and continous.