HID Fitting guide
 09-12-2010, 07:55 AM
#1
Members
Thread Starter
Join Date: Sep 2010
Location: UK, Beccles
Posts: 27
Likes: 0
Received 0 Likes
on
0 Posts
My Ride: 535D Touring E61
I love my 535D, but with all the amazing extras it was fitted with, it has really surprised me that it doesn't come with Xenons. Further more, the headlamps it does have on dipped beam, are woefully inadequate. I live in the middle of nowhere down a shady lane in Suffolk, and with the nights drawing in, I didn't want the drive home to be illuminated by the current candles.
So, I ordered a set of HID's off of E-Bay and have decided to fit them today. I'm sure that many of you have done this before, and it's not difficult, but just in case someone is out there and is a bit worried about how to do it, I've photographed the procedure and included it below.
For those of you in the know, my apologies for the boring blog entry.
=========
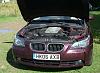
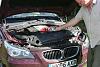
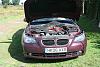
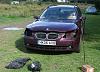
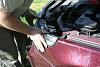
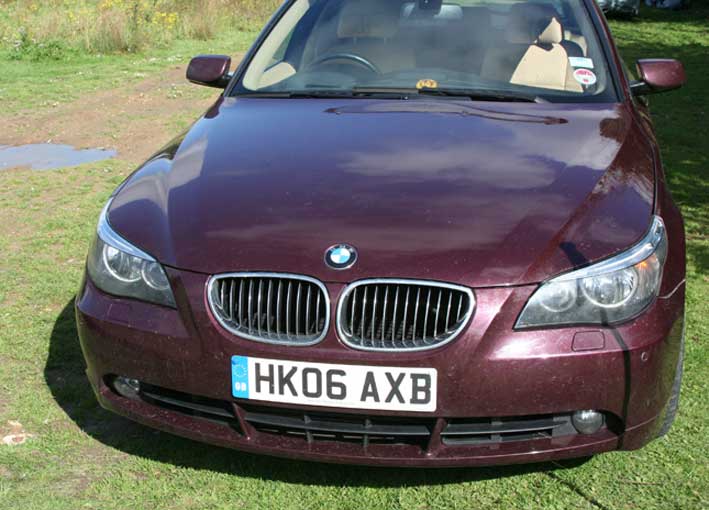
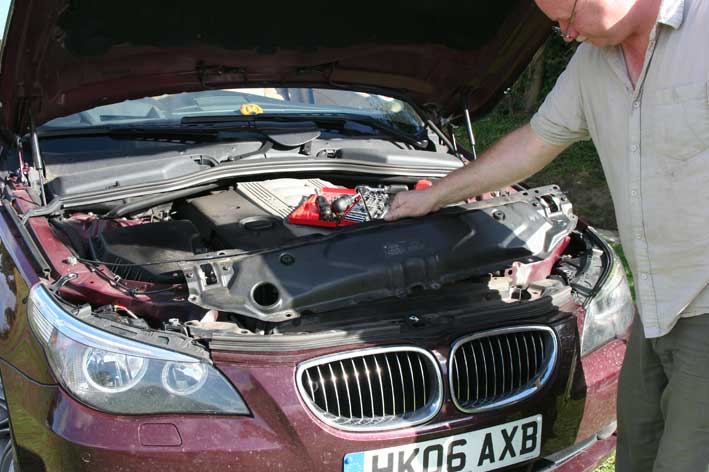
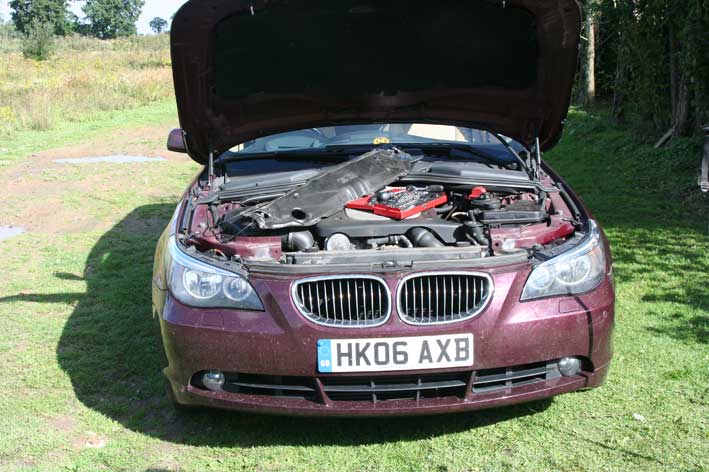
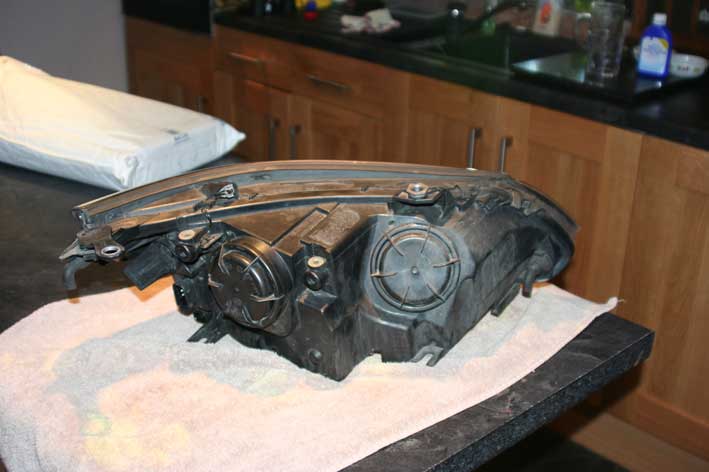
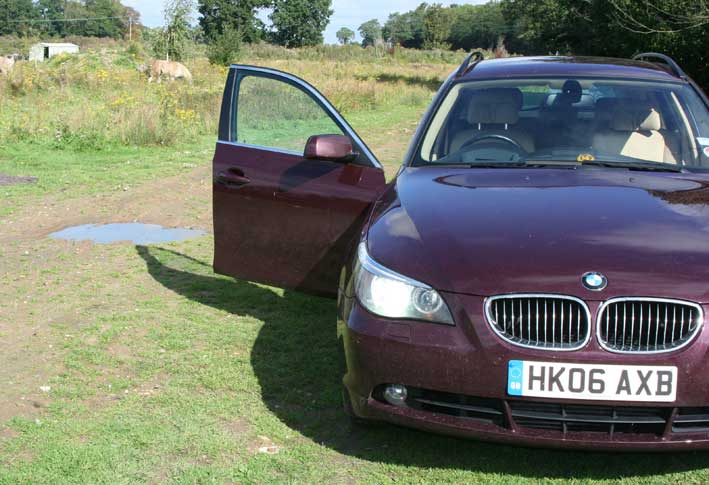
OK, so start with one slightly grubby 5 series E60/E61

NOTE* As a general rule I would advise removing the headlamp dipped beam moisture covers, removing the old lamps, and then plugging in the new ones while just resting them on the top, don't even bother to remove the new lamps from their protective plastic shroud, as they'll be safer that way. This way you can then start the car making sure that your kit does not bring on the lamp warning light failure. Kits all seem to say that they won't do this, however by checking first, you can save a whole lot of hassle by finding out their OK now, rather than when you've spent a couple of hours fitting them. You'll only need to try them for a minute as you don't want to get them hot.
You'll also need to following tools. A Torx T30 screwdriver bit and driver. Either a long screwdriver T30 or a 1/4" drive ratchet set with a long extension and an 8mm socket. A small flat blade screwdriver, a pair of pliers, a drill and a 25mm wood bit. Finally, a small container for the bolts and a cat to kick in case it all goes horribly wrong.
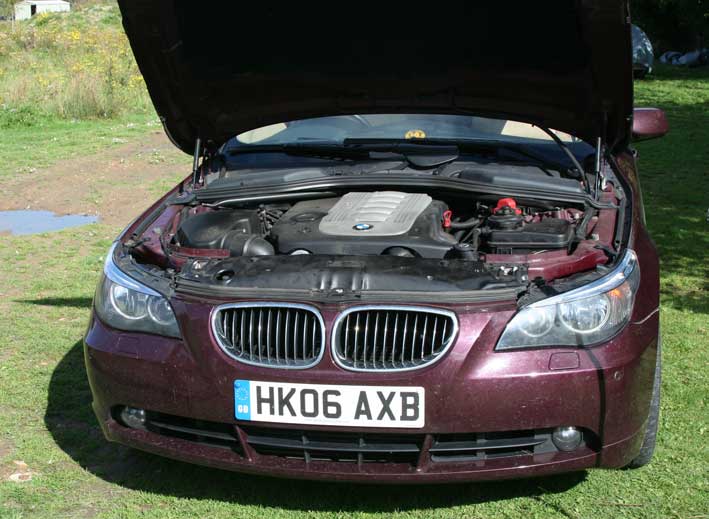
Get the bonnet up and let's see what we need to do.
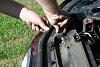
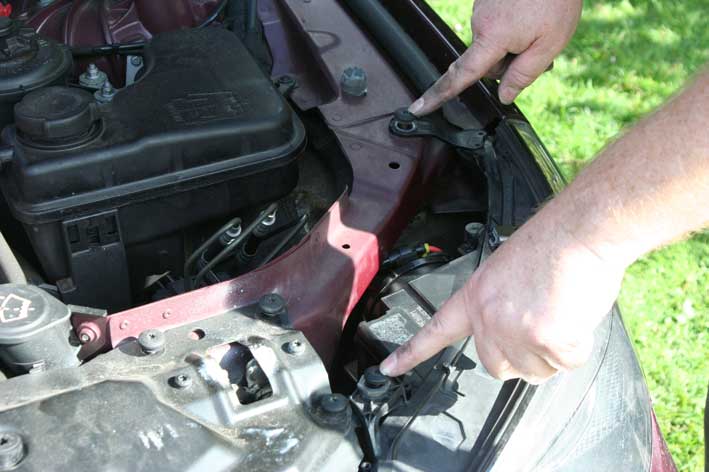
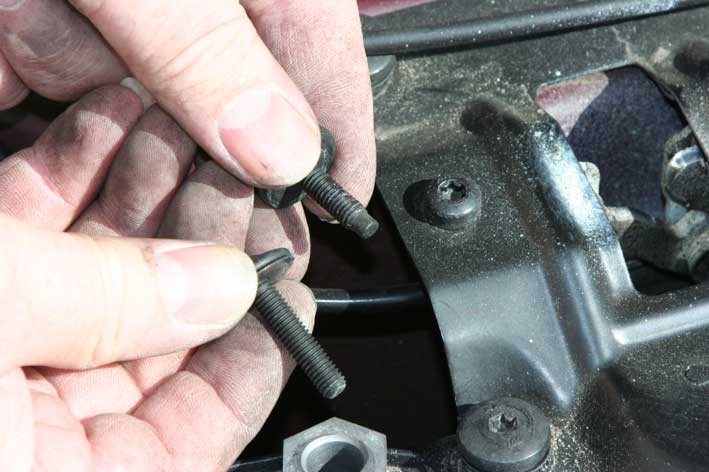
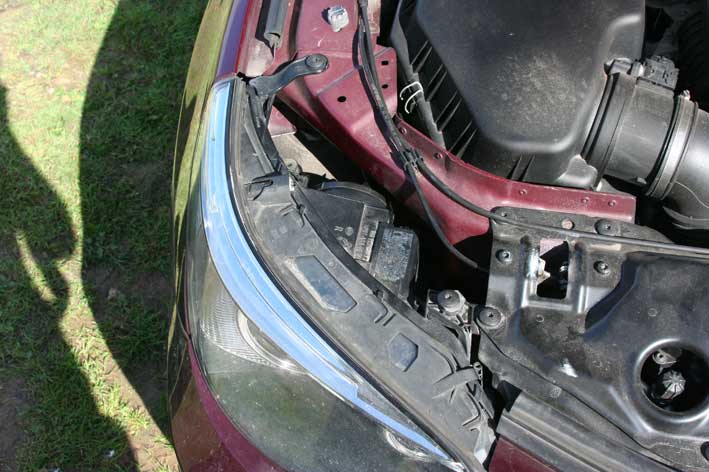
First, remove the top two Torx bolts that hold the headlamp top in place.
Note, one is longer than the other. All other bolts are the same size.
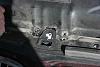
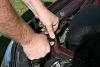
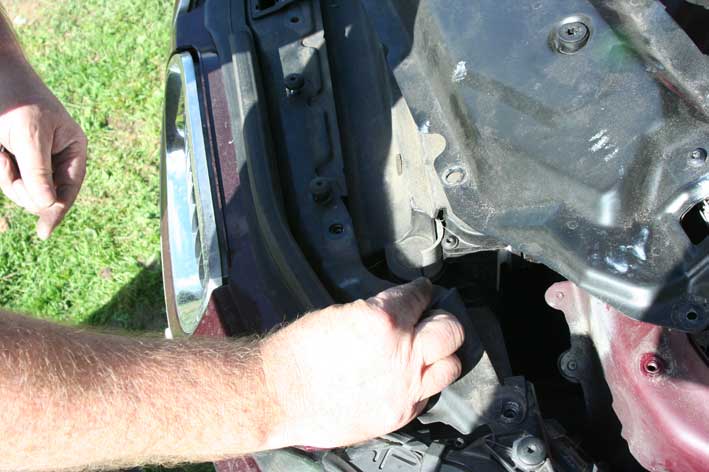
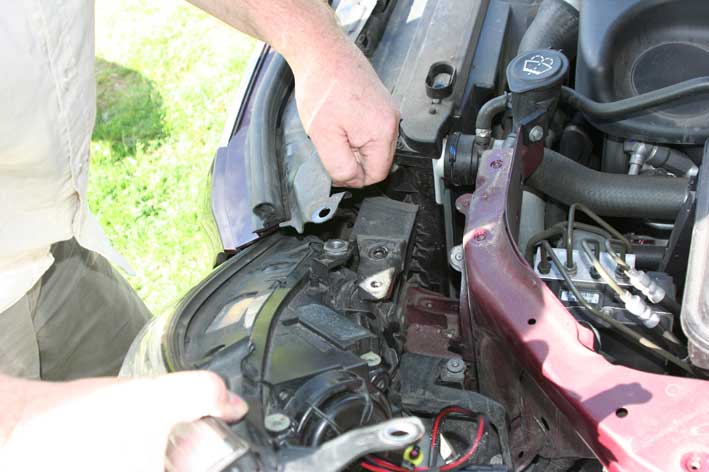
Then, if you look down behind the headlamp, you'll find two more torx screws, but these ones have an 8mm head on them. You don't need to remove these, just undo them a few turns to allow the headlamp to slide out later.


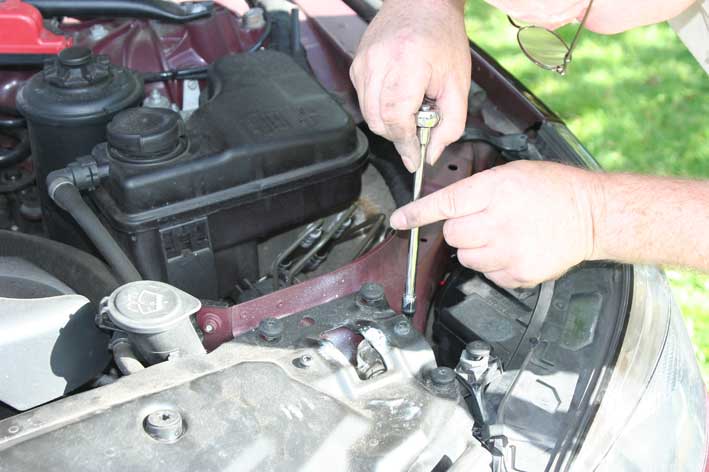
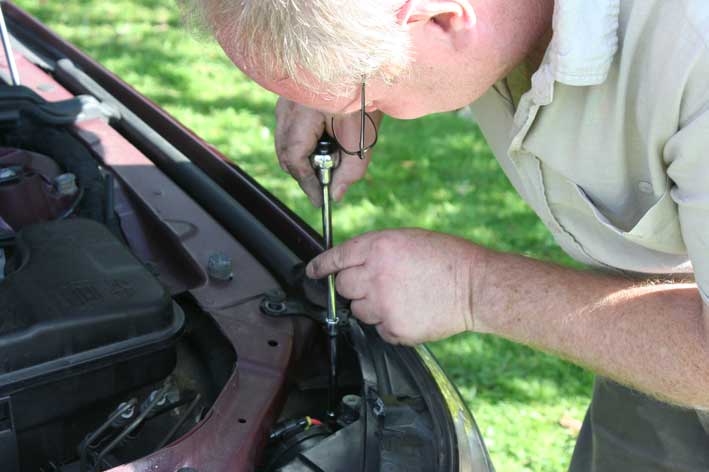
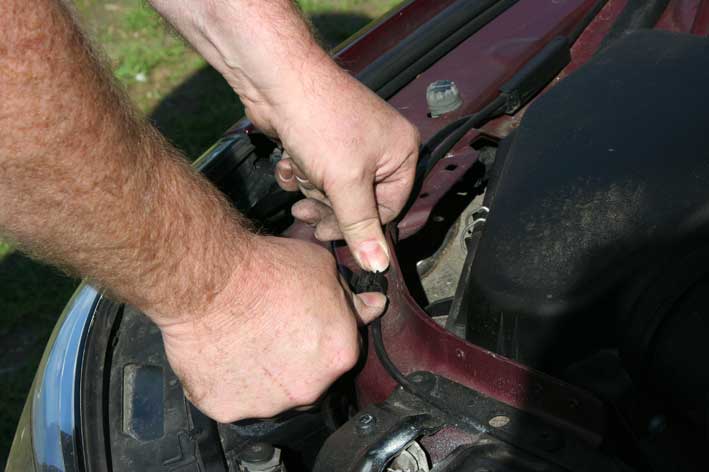
Now remove all of the torx screws that hold down the bonnet slam panel. There are about 14 of them.
Lift out the bonnet release cable from its retaining clip and then lift up the slam panel by sliding it back slightly and then lift.
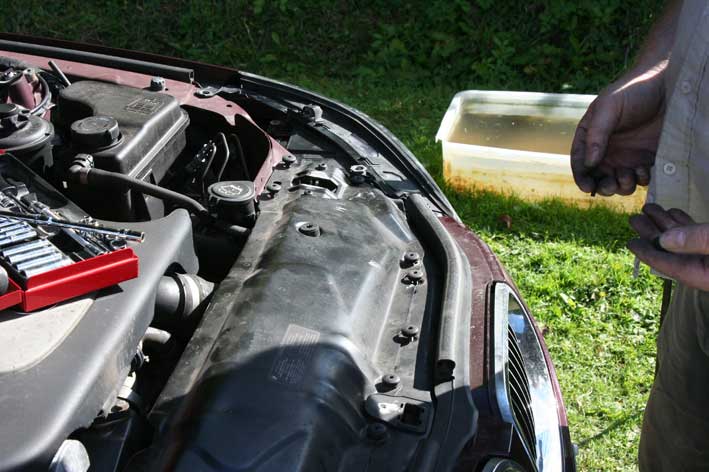
Put the slam panel onto the engine.
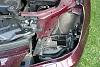
Underneath you will now see two more torx screws that are the final ones that hold the front grill assembly.
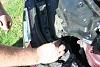
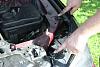
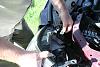
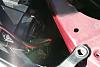
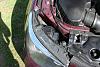
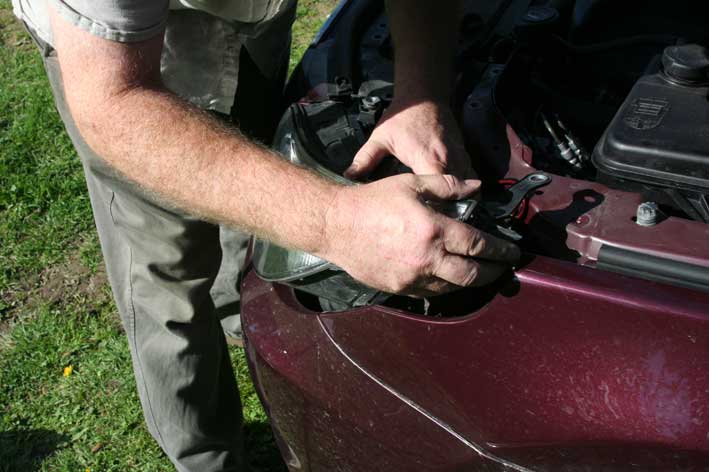
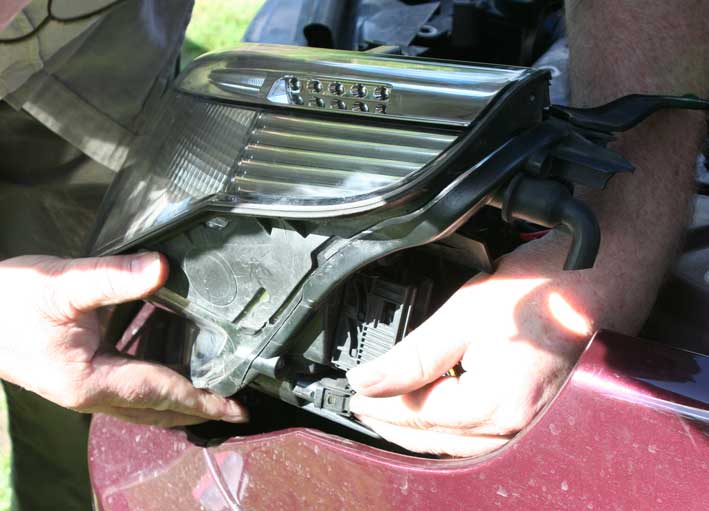
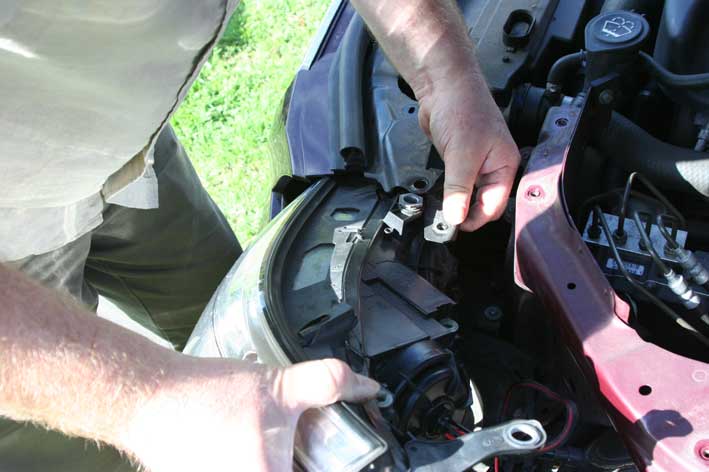
Slide the headlamp forward as far as it will go, then pull the outer side forward enought to get to the connectors at the side of the headlamp assembly.
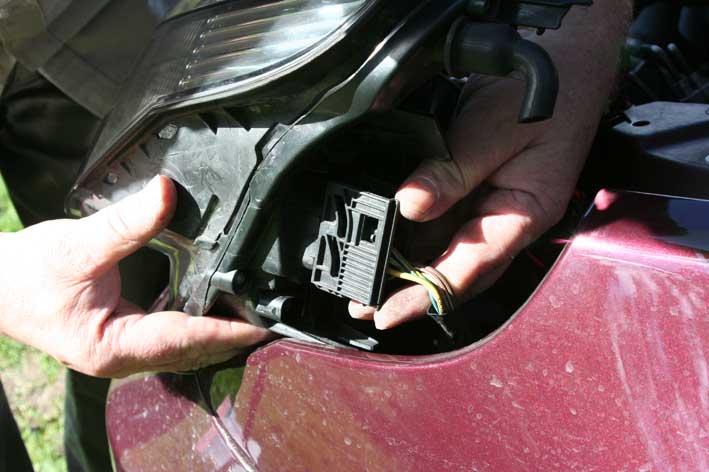
First remove the small lower connector by squeezing the edges together and pulling.
Then remove the much larger connector by sliding it away from the headlamp which will release it from its latch.
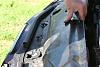
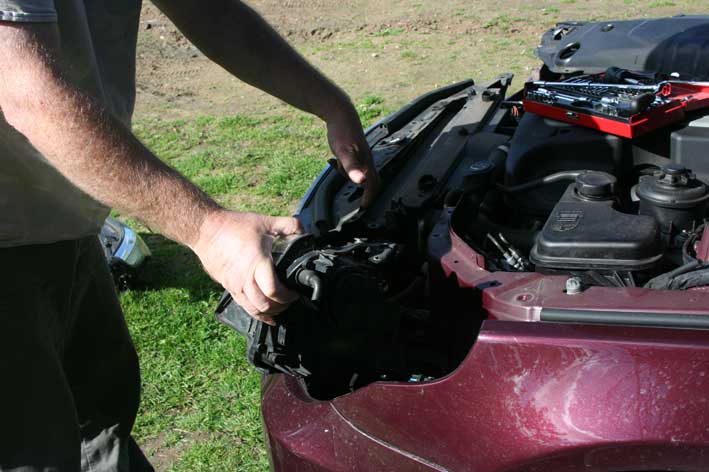
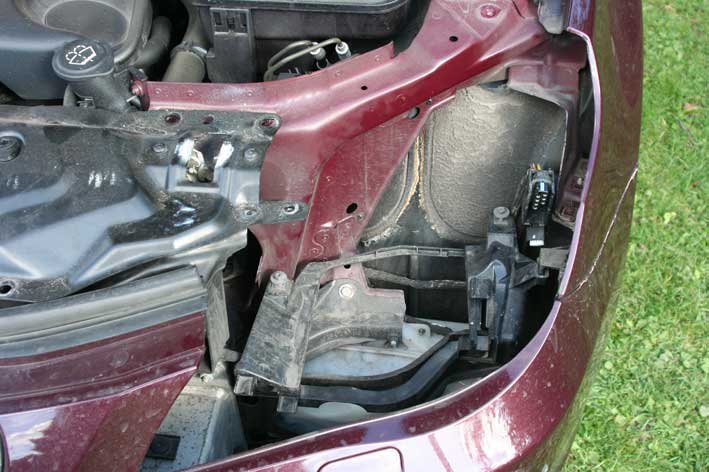
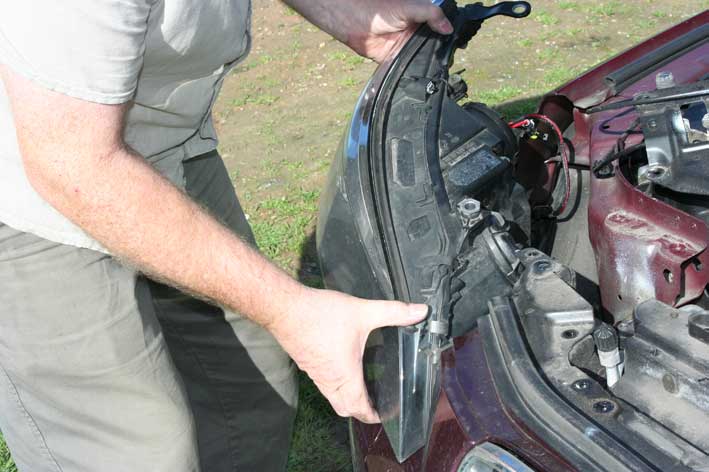
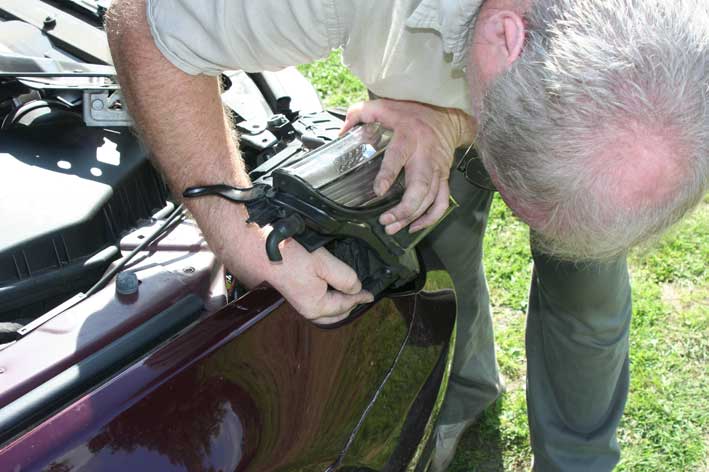
Now gently pull forward on the upper edge of the front grill and slide the headlamp slightly to the side and then out.
Repeat for the other side.
In my case, close the bonnet slightly so that my Llamas don't come along and nick all the bolts.

Get the headlamps resting on a good size table or work surface with a soft towel in place so as not to scratch the lenses.

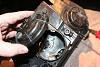
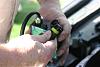
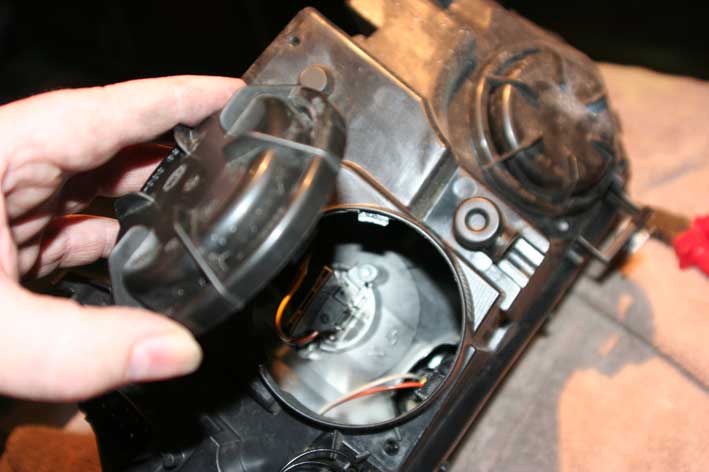
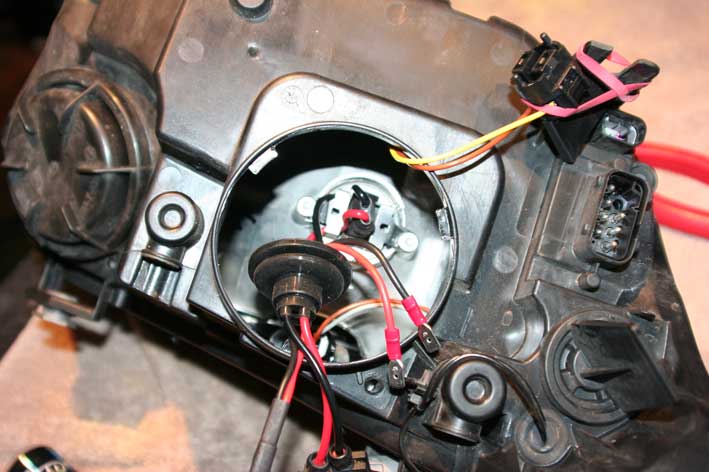
Remove the dipped beam lamp rear moisture seal plug by turning it and unscrewing it.
Remove the original lamp by twisting it a quarter of a turn anti clockwise. Note how the lamp sits in the hole, position wise, by looking at the cut out position on the lamp bezel. You'll need to fit the new lamp in the same position, however as it's not held in only one position like the original lamp, you'll need to make a mental note which way it goes.
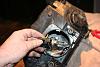
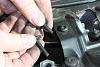
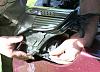
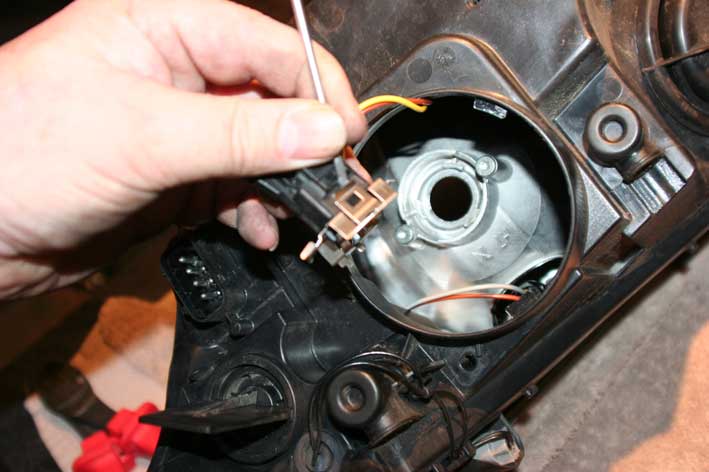
Remove the plug from the back of the lamp. On the end of the plug you will see a small steel clip. Using the small screwdriver, prise the clip from the plug.

For ease, keep the plug out of your way with a bit of string or a lacky band. The steel clip must be used again to hold in the new lamp.
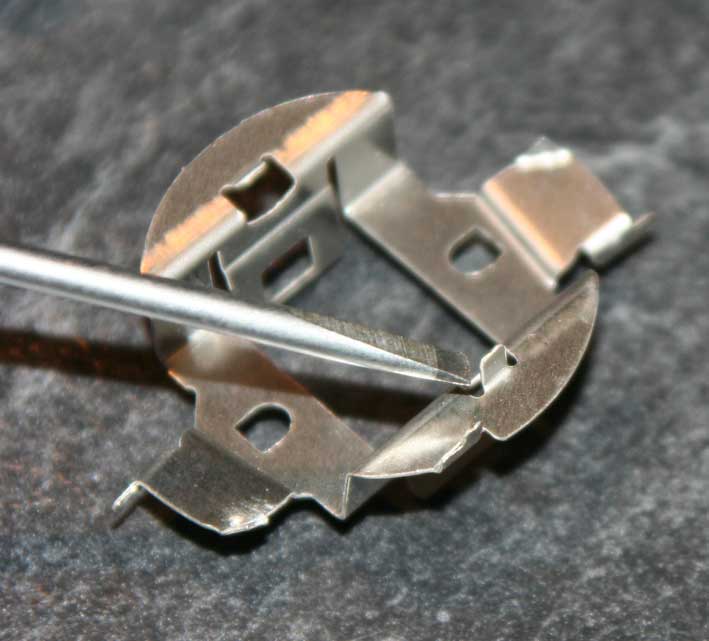
However, because of the design of the replacement lamp, the small lug on the clip will need to be flattened out with a pair of pliers.
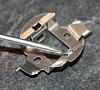
Once flat, it's ready for fitting.
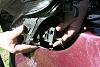
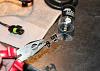
Slide the lamp into the clip backward (make sure you don't touch the lamps as the natural grease from your fingers will cause the lamp to get hotter than it should and blow) - you could cut the wires (the plugs are to large to go through the clip), however the lamps operate at a high voltage, and if you don't get the connections correct, they will bring up a lamp fault on your dash. Also, if you ever need to change a lamp, you'll need to cut them again. Make sure that it sits correctly in the clip and that the two wires have ample room so as not to become trapped.

Now is the bit I found to be the worse. Lower the new lamp into place making sure of the position as mentioned earlier (cut out on the lamp back faces up) and then slide the clip under to two retaining lugs, just as it was with the original lamp.
This bit is tricky only because the new lamp bezel is thicker than the original, so you have to push quite hard and turn at the same time and the clip is very sharp, so it digs into your fingers. Plus if you've got mauler hands like mine, they don't fit in the hole very easily!
Once done though, you'll easily see whether you've got it right or not as otherwise it won't sit flat.
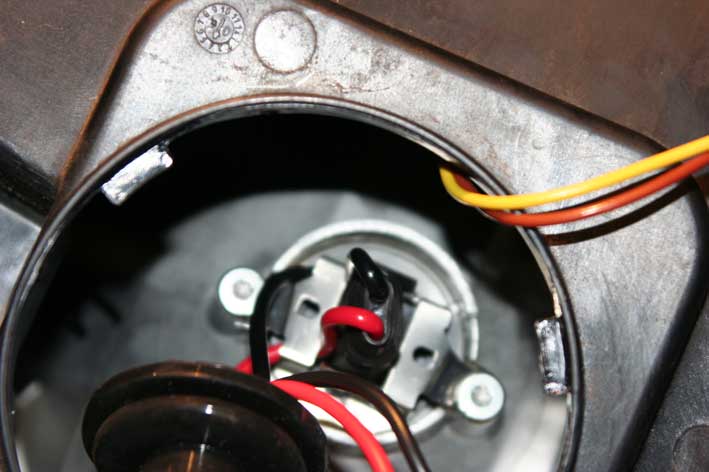
Look through the front of the headlamp and make sure you lamp orientation is correct (the exposed arc filament of the lamp should face almost directly downwards).
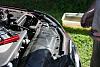
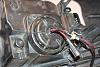
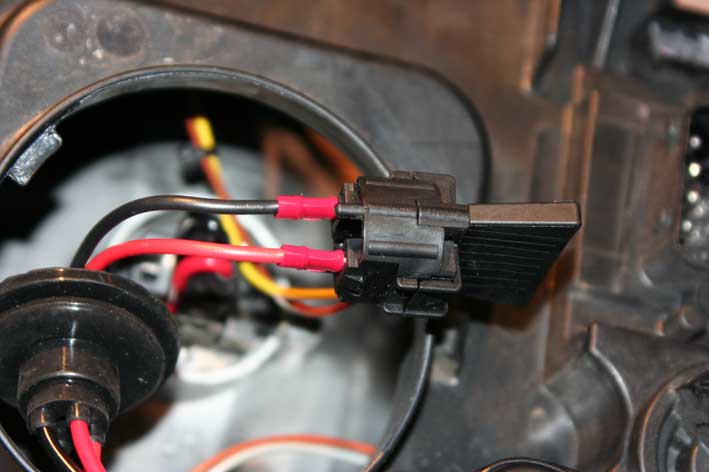
Plug in the new cables to the original plug - the positive (red) of the new wires fits into the yellow of the original plug and the black into the other. Push the plug inside of the headlamp back, there is plenty of room in there, but just make sure it cannot stop the headlamp tilting if you have self levelling lights.

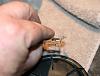
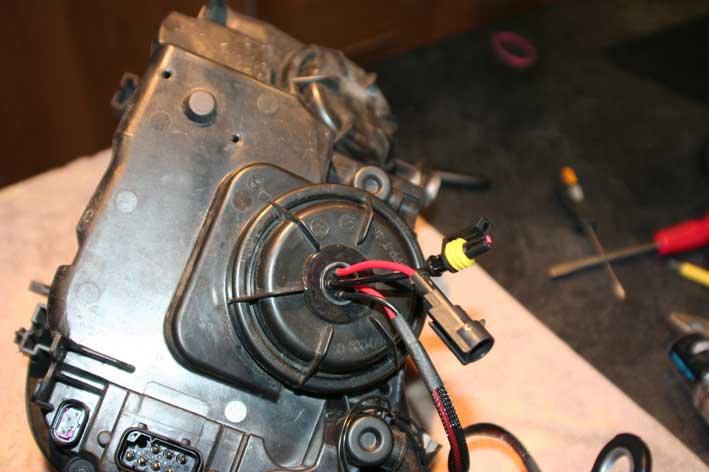
Now drill the hole in the centre of the moisture seal plug. Drill a smaller hole than you appear to need so that when the grommet goes in place it creates a moisture seal or else your headlamps will fog up when it's damp. I used a 25mm wood bit, but this may vary from brand to brand of lamp kits.
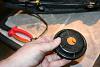
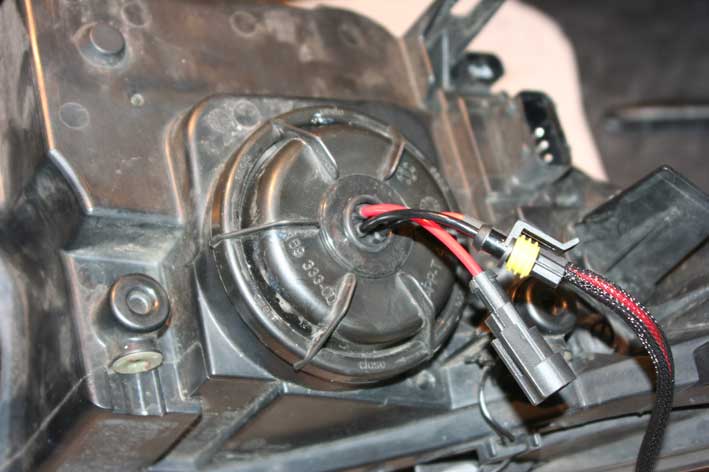
Once done, pull the new cables through and pull the grommet into place.
You should end up with a nice neat fitting.
Get the headlamps back to the car. Starting with the inner part of the headlamp, once again gently pull on the grill to allow the headlamp to be slotted back in. There's not a great deal of room, but you'll find it does go.


As soon as its started, go to the outside of the lamp assembly and put your plugs back in. Large one first, then the small one (if you try the other way round, the small connector fouls the larger one, stopping it going in).
Now, making sure that the headlamp is sliding back into place with the two torx screws at the back of the headlamp, gently put the headlamp completely back.

Put the two grill support bolts back into place and tighten and then replace the bonnet slam panel, making sure to slide it under the clip as seen below.
Fit back and do up all of the bonnet slam panel bolts and the two per headlight top bolts and two per headlamp hidden bolts. Gently push back on the headlamp as you tighten the bolts to make sure it's back flush in it's original position.

Refit the bonnet release cable into its retaining clip.
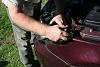
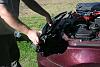
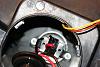
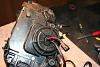
Plug in the new lamp leads to the ballast starter that is supplied with your new HID hit.
Fit the ballasts in a safe place behind the headlamp where they cannot fall and where the connections face down, so that any water splashing on them will naturally drip back off of the connectors. Hold them in place with cable ties, double sided stickies or by the screw plates supplied with some kits.
Have one final check that you've done up all of your bolts. Checking the lamps should be no hassle as ideally you've done as suggested and checked that right at the start.

Hey Presto, nice white and bright Xenon lamps. Now I just need to clean the damn thing!

So, I ordered a set of HID's off of E-Bay and have decided to fit them today. I'm sure that many of you have done this before, and it's not difficult, but just in case someone is out there and is a bit worried about how to do it, I've photographed the procedure and included it below.
For those of you in the know, my apologies for the boring blog entry.
=========
OK, so start with one slightly grubby 5 series E60/E61
NOTE* As a general rule I would advise removing the headlamp dipped beam moisture covers, removing the old lamps, and then plugging in the new ones while just resting them on the top, don't even bother to remove the new lamps from their protective plastic shroud, as they'll be safer that way. This way you can then start the car making sure that your kit does not bring on the lamp warning light failure. Kits all seem to say that they won't do this, however by checking first, you can save a whole lot of hassle by finding out their OK now, rather than when you've spent a couple of hours fitting them. You'll only need to try them for a minute as you don't want to get them hot.
You'll also need to following tools. A Torx T30 screwdriver bit and driver. Either a long screwdriver T30 or a 1/4" drive ratchet set with a long extension and an 8mm socket. A small flat blade screwdriver, a pair of pliers, a drill and a 25mm wood bit. Finally, a small container for the bolts and a cat to kick in case it all goes horribly wrong.
Get the bonnet up and let's see what we need to do.
First, remove the top two Torx bolts that hold the headlamp top in place.
Note, one is longer than the other. All other bolts are the same size.
Then, if you look down behind the headlamp, you'll find two more torx screws, but these ones have an 8mm head on them. You don't need to remove these, just undo them a few turns to allow the headlamp to slide out later.
Now remove all of the torx screws that hold down the bonnet slam panel. There are about 14 of them.
Lift out the bonnet release cable from its retaining clip and then lift up the slam panel by sliding it back slightly and then lift.
Put the slam panel onto the engine.
Underneath you will now see two more torx screws that are the final ones that hold the front grill assembly.
Slide the headlamp forward as far as it will go, then pull the outer side forward enought to get to the connectors at the side of the headlamp assembly.
First remove the small lower connector by squeezing the edges together and pulling.
Then remove the much larger connector by sliding it away from the headlamp which will release it from its latch.
Now gently pull forward on the upper edge of the front grill and slide the headlamp slightly to the side and then out.
Repeat for the other side.
In my case, close the bonnet slightly so that my Llamas don't come along and nick all the bolts.

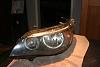
Get the headlamps resting on a good size table or work surface with a soft towel in place so as not to scratch the lenses.

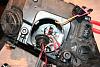
Remove the dipped beam lamp rear moisture seal plug by turning it and unscrewing it.
Remove the original lamp by twisting it a quarter of a turn anti clockwise. Note how the lamp sits in the hole, position wise, by looking at the cut out position on the lamp bezel. You'll need to fit the new lamp in the same position, however as it's not held in only one position like the original lamp, you'll need to make a mental note which way it goes.

Remove the plug from the back of the lamp. On the end of the plug you will see a small steel clip. Using the small screwdriver, prise the clip from the plug.
For ease, keep the plug out of your way with a bit of string or a lacky band. The steel clip must be used again to hold in the new lamp.
However, because of the design of the replacement lamp, the small lug on the clip will need to be flattened out with a pair of pliers.
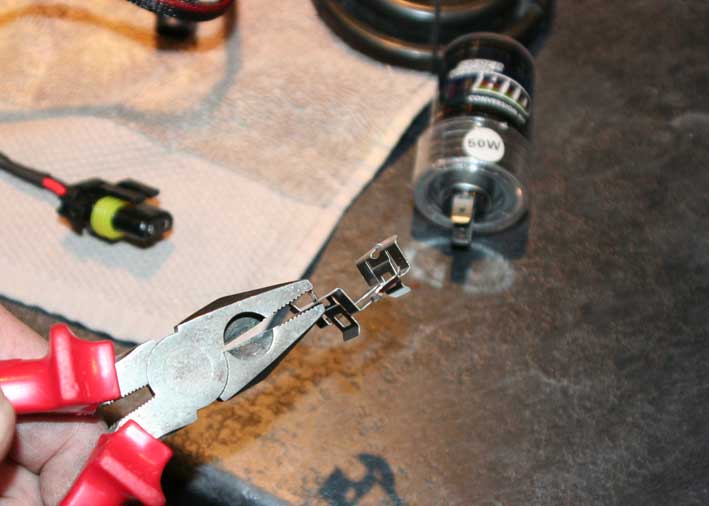
Once flat, it's ready for fitting.
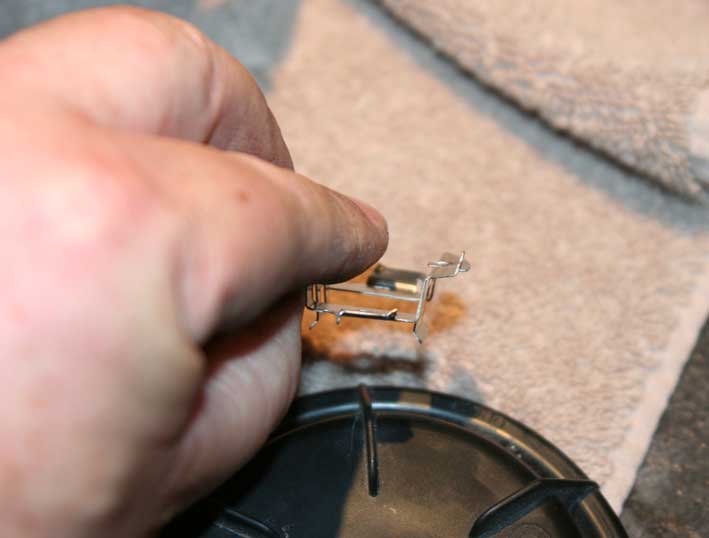
Slide the lamp into the clip backward (make sure you don't touch the lamps as the natural grease from your fingers will cause the lamp to get hotter than it should and blow) - you could cut the wires (the plugs are to large to go through the clip), however the lamps operate at a high voltage, and if you don't get the connections correct, they will bring up a lamp fault on your dash. Also, if you ever need to change a lamp, you'll need to cut them again. Make sure that it sits correctly in the clip and that the two wires have ample room so as not to become trapped.
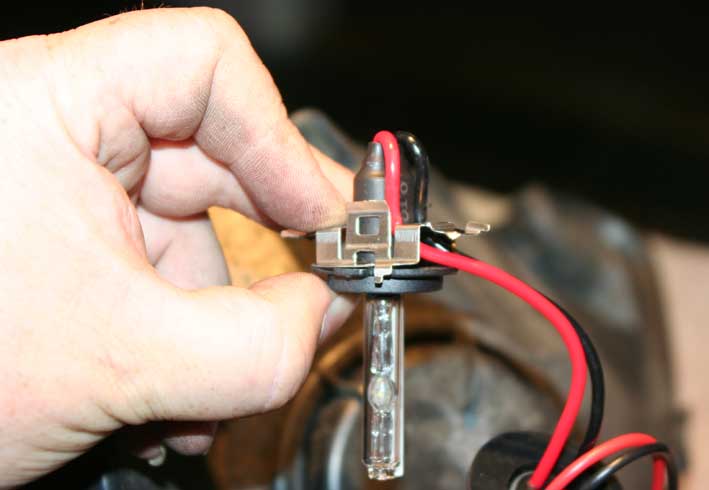
Now is the bit I found to be the worse. Lower the new lamp into place making sure of the position as mentioned earlier (cut out on the lamp back faces up) and then slide the clip under to two retaining lugs, just as it was with the original lamp.
This bit is tricky only because the new lamp bezel is thicker than the original, so you have to push quite hard and turn at the same time and the clip is very sharp, so it digs into your fingers. Plus if you've got mauler hands like mine, they don't fit in the hole very easily!
Once done though, you'll easily see whether you've got it right or not as otherwise it won't sit flat.
Look through the front of the headlamp and make sure you lamp orientation is correct (the exposed arc filament of the lamp should face almost directly downwards).
Plug in the new cables to the original plug - the positive (red) of the new wires fits into the yellow of the original plug and the black into the other. Push the plug inside of the headlamp back, there is plenty of room in there, but just make sure it cannot stop the headlamp tilting if you have self levelling lights.
Now drill the hole in the centre of the moisture seal plug. Drill a smaller hole than you appear to need so that when the grommet goes in place it creates a moisture seal or else your headlamps will fog up when it's damp. I used a 25mm wood bit, but this may vary from brand to brand of lamp kits.

Once done, pull the new cables through and pull the grommet into place.
You should end up with a nice neat fitting.
Get the headlamps back to the car. Starting with the inner part of the headlamp, once again gently pull on the grill to allow the headlamp to be slotted back in. There's not a great deal of room, but you'll find it does go.
As soon as its started, go to the outside of the lamp assembly and put your plugs back in. Large one first, then the small one (if you try the other way round, the small connector fouls the larger one, stopping it going in).
Now, making sure that the headlamp is sliding back into place with the two torx screws at the back of the headlamp, gently put the headlamp completely back.
Put the two grill support bolts back into place and tighten and then replace the bonnet slam panel, making sure to slide it under the clip as seen below.
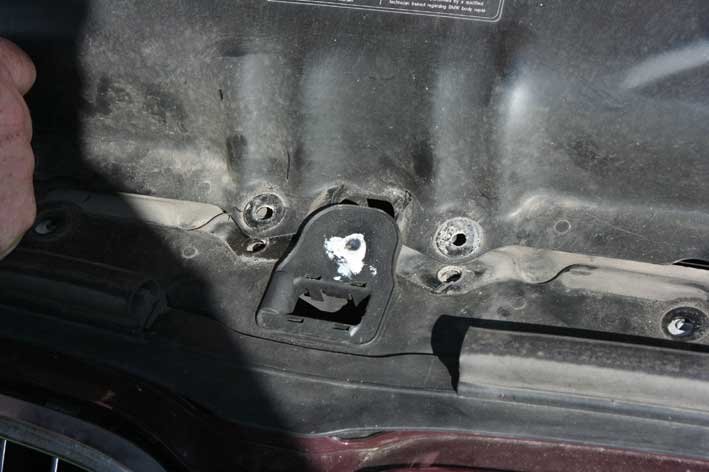

Fit back and do up all of the bonnet slam panel bolts and the two per headlight top bolts and two per headlamp hidden bolts. Gently push back on the headlamp as you tighten the bolts to make sure it's back flush in it's original position.


Refit the bonnet release cable into its retaining clip.
Plug in the new lamp leads to the ballast starter that is supplied with your new HID hit.

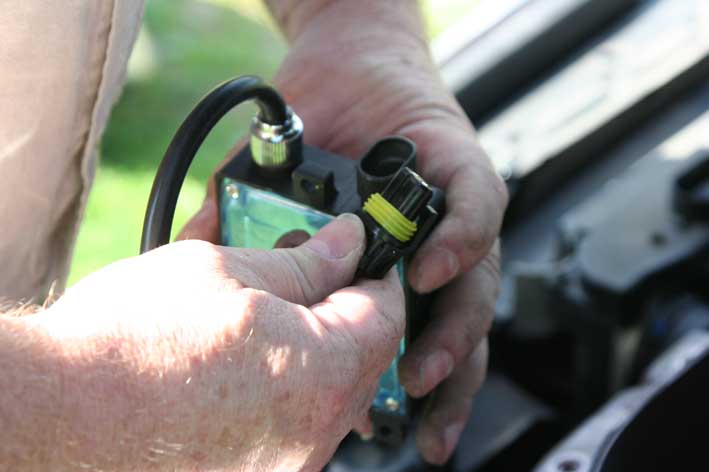
Fit the ballasts in a safe place behind the headlamp where they cannot fall and where the connections face down, so that any water splashing on them will naturally drip back off of the connectors. Hold them in place with cable ties, double sided stickies or by the screw plates supplied with some kits.
Have one final check that you've done up all of your bolts. Checking the lamps should be no hassle as ideally you've done as suggested and checked that right at the start.
Hey Presto, nice white and bright Xenon lamps. Now I just need to clean the damn thing!


 09-12-2010, 08:54 AM
#4
Senior Members
Join Date: Aug 2010
Location: Ct
Posts: 948
Likes: 0
Received 0 Likes
on
0 Posts
My Ride: 04' 545i, Sport Package, Black, Active Xenon, ARS, Aux Input
'10 Tahoe, Black on Black, leather, Nav/XM, 20" tires, full body kit, power 2nd row, loaded
'93 Jeep Wrangler, lifted 4.5", 33" meats, Rampage Recovery Bumper w/Tire Swing, etc
25' Aquasport Osprey, Center Console,2012 200 HO Etec
Awesome write-up and great pics. This is the kind of thread the forum needs more of! 
Good job!
Good job!

 09-12-2010, 09:58 AM
#6
Contributors
Join Date: Mar 2009
Location: Essex, UK.
Posts: 2,553
Likes: 0
Received 0 Likes
on
0 Posts
My Ride: 2006 530 d M-sport e60
NIce job doode , I`m still jealous of that colour
 , keep it safe as I may come down to Suffolk and swap yours for mine while your not looking
 j/k
j/k 
, I`m still jealous of that colour, keep it safe as I may come down to Suffolk and swap yours for mine while your not looking j/k
09-12-2010, 10:48 AM
#8
Contributors
Join Date: Mar 2009
Location: Essex, UK.
Posts: 2,553
Likes: 0
Received 0 Likes
on
0 Posts
My Ride: 2006 530 d M-sport e60
09-12-2010, 01:18 PM
#9
Members
Thread Starter
Join Date: Sep 2010
Location: UK, Beccles
Posts: 27
Likes: 0
Received 0 Likes
on
0 Posts
My Ride: 535D Touring E61
Thanks for the comments.
I'm at the dealers next Thursday, so hope to get the colour certified then.
Like the idea of Xenon fogs, may give that a go next.
Going to fit a Gateway 500 soon also, so may put down all the fitting for that so long as I'm not repeating what someone has already done.
Getting my new non run flats on Saturday, so am looking forward to improved ride. I'll also do a four wheel track and camber check as I am able to borrow some gear.
Not sure what else I really need?
I'm sure something will come up