Valentine One: Rear Parcel Shelf Install
 03-19-2005, 05:55 PM
#1
Contributors
Thread Starter

Join Date: Mar 2005
Location: U.S. of A.
Posts: 170
Likes: 0
Received 0 Likes
on
0 Posts
My Ride: 2005 545, Titanium Gray II, 6 Spd, CWP, Sat, LPP Laser Defense, V1 (hard-wired), iPod, 38% ceramic tint, CDV delete, H&R Street Performance Coil Overs, Forced Air Induction, DriveData Pro Camera System (4 cams), M5 Front Bumper
I'm re-posting some info that I put up on one of the Lidatek threads, as this is prolly more logical for it to have its own thread. 
Here are the written instructions. I'll post pics later this weekend when I can.
Also, if anyone would like detailed instructions on how I installed both a V1 and dual Lidatek LE-30's, let me know and I can either e-mail you or post them on the board.
--------
Rear Parcel Shelf - Access, V1 Installation
Tools/Parts You Will Need
- Flat blade screw driver
- T40 Torx screw driver or ratchet bit
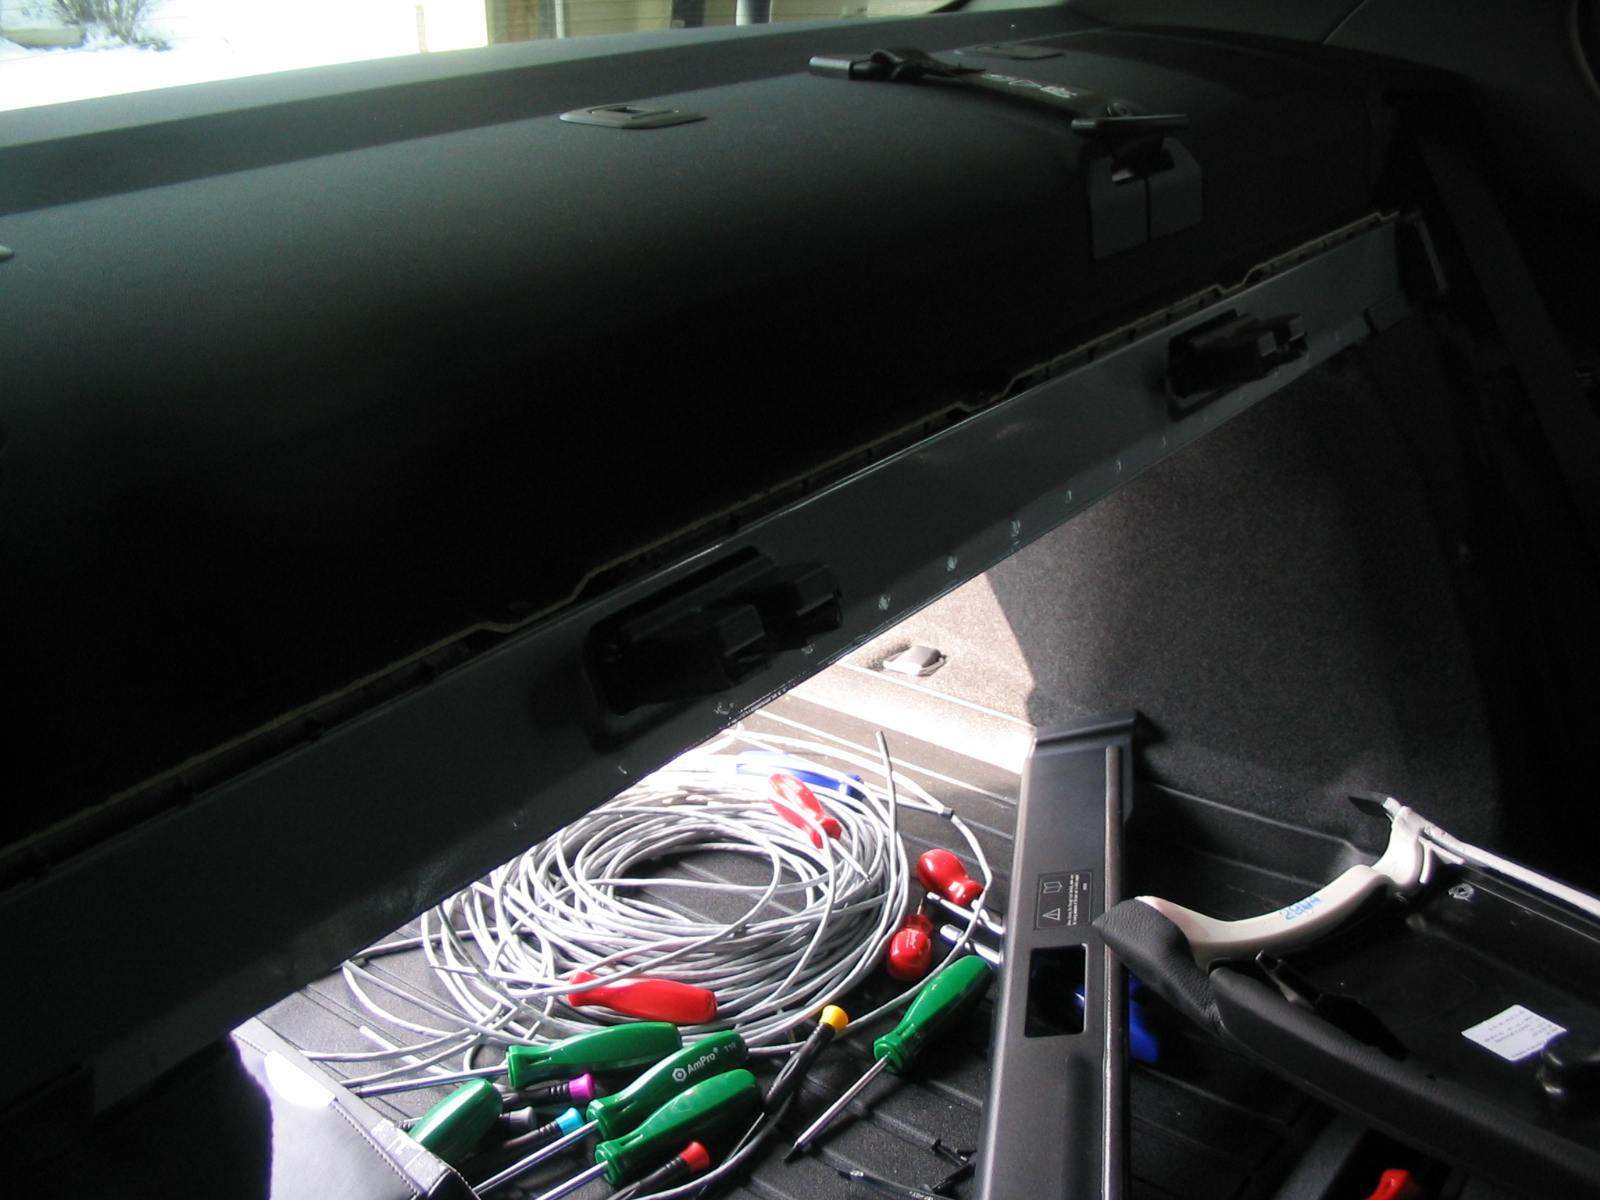
0. Remove trunk mat
Lift trunk mat covering spare tire. Pull the handle firmly toward you. The rubber it is attached to will stretch, allowing you to wrap the curved handle up over the lip on the bottom of the raised trunk lid.
Now carefully pull up those strange looking tongue-in-groove Styrofoam pads. Put them in a safe place where you will not accidentally tear them up while working.
1. Remove trunk panels
I suggest removing both passenger side and driver side. You'll have to decide for yourself which side to run the wires. Personally, I chose the drivers side because I planned to install a remote audio and concealed display unit up front within reach/sight of the driving position. I also wanted to run a wire long enough that if I ever opted for Beast Power's V1 / Lidatek integrated rear mirror that I'd have a long enough cable run. There is tons of room in the drivers side rear corner to stuff some extra "just in case" wiring.
2. Removing the Rear Seats - Part I
Easiest step. First you want to remove the back seat cushion (the part you sit on). Just pull up from the front part of the seat cushion. It should easily pop up. Reach up underneath the front lip of the bottom seat cushion, feel your way back about 2 or 3 inches from the front edge and about 6-9 inches or so from the drivers/passenger edge. Get a good grip and pull up firmly. The seat should easily pop up. If not then feel around for the latch as you are doing something wrong if this is not easier than it looks.
3. Removing the Rear Seats ? Part II
If you have fold-down rear seats, fold them down. If you don't have fold down seats then it's going to take a bit more work and sorry but I can't fully help you as my car does have the fold down seats!
I believe that if you have the fixed rear seat back then next you'll need to remove six (?) bolts. This will allow you to remove the seat back (I think... have not been able to verify... someone please post who knows).
4. Removing the Rear Seats ? Part III
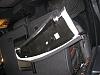
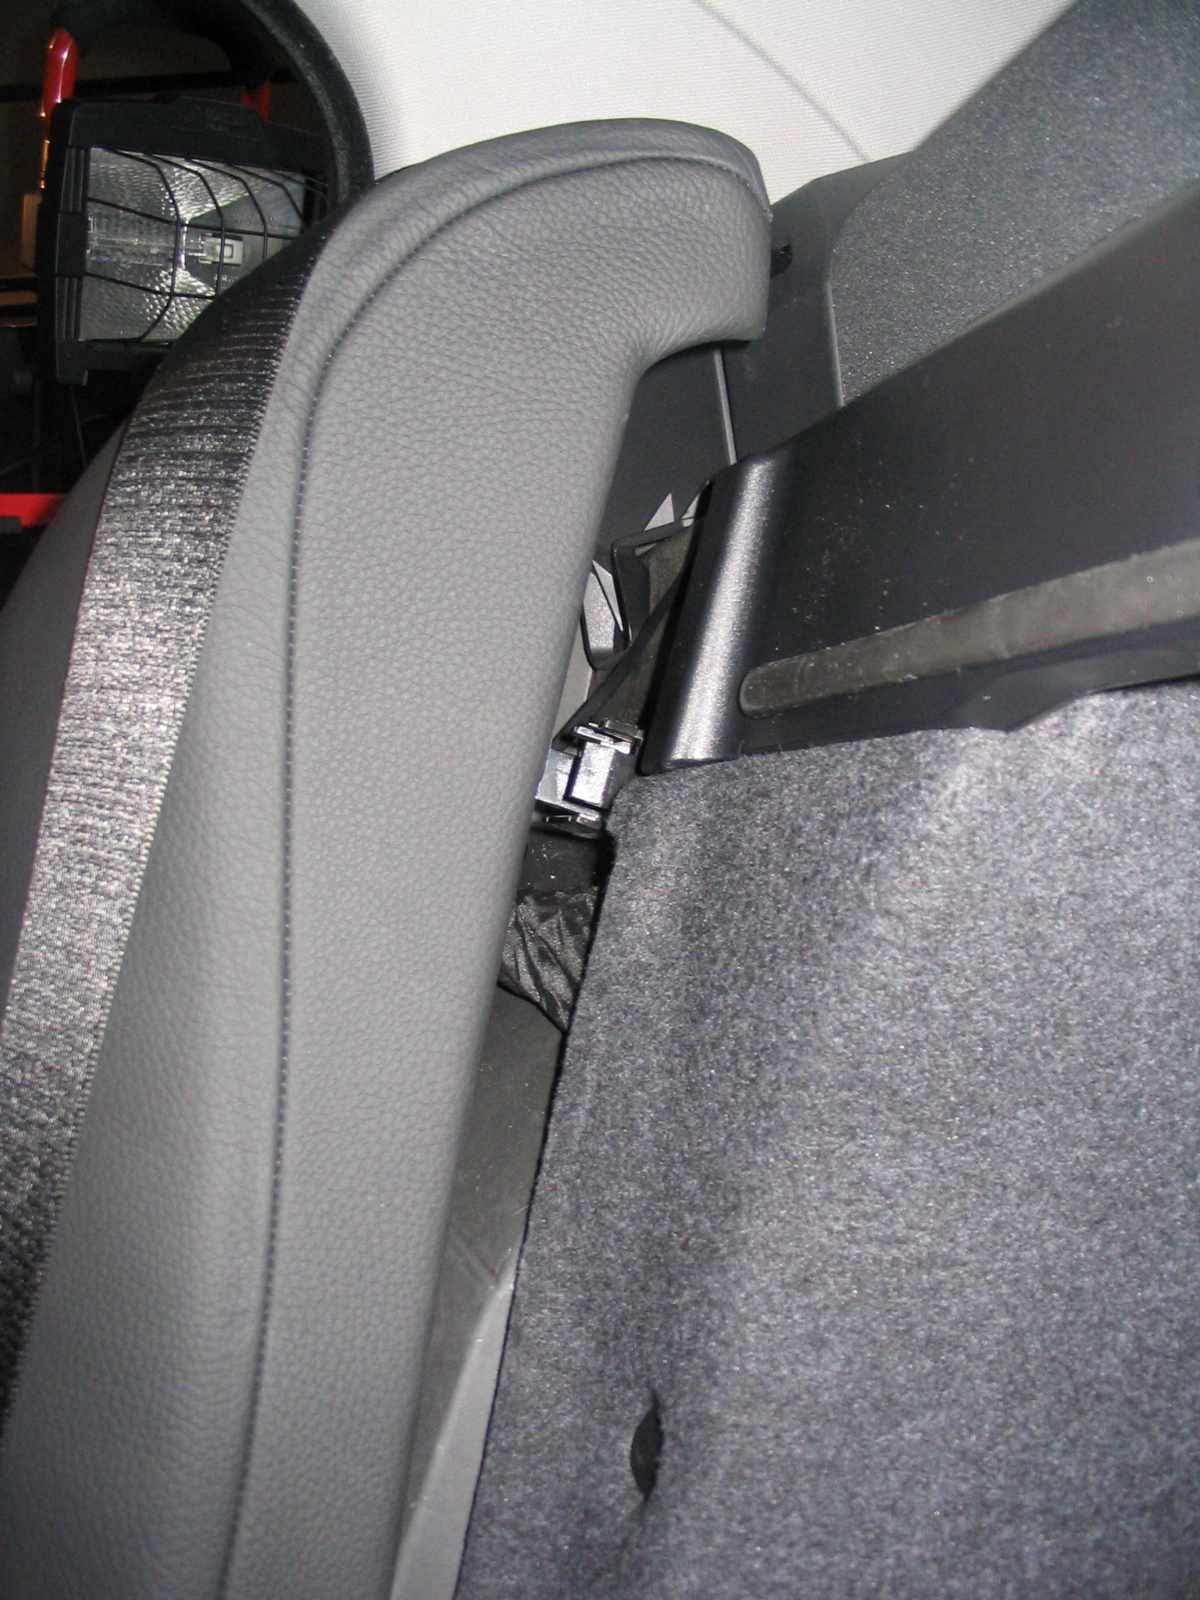
Remove the side bolsters to the outer rear seating positions (one on each side of the backseat). To do this pull the top portion of each side bolster toward you. Give them a good tug, pulling them forward toward the front of the car. They should pop out with some slight effort. Then lift upward and forward at the same time. The lower portion of each side bolster is secured by a metal "tooth" about an inch wide that is inserted into a groove. You may need to tug upward while pulling it out.
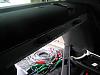
Now, do yourself a favor (hint: timesaver when you put this back together) and extract the plug for the top portion of the seat bolster from within the seat frame. I can't remember if you need to push the tab inside of it down or pull it up... I think you push it down, but it only moves one way (sorry!... doh.. my old age of 37 and my memory is already failing).
Once you wiggle this out, snap it onto the back of the seat bolster. The back of the side bolster has a short piece at the top that looks like a black tube about 2 inches wide. That is where you shove this clip. Make sure you point it in the correct direction. This will allow you to very easily snap the bolster back into the seat frame when you re-install them once you've run your wires.
[I must have spent 15 minutes the first time I put my seat back together before following this procedure, just trying to get the seat bolster back in the damn clip. Taking the clip out and sticking it on the end of the bolster is MUCH easier. original.gif]
At this point you should see a bunch of wires bound together bundled along both the drivers and passenger sides of the car, which are normally hidden beneath these side seat bolster things. This is how you will run your wires from the trunk are to the floor side sills. Look down and you'll see that there is a big gap in the floor sill on either side. This is your ticket when you get to the wiring part.
5. Loosen the felt lined covers
On either side of the rear seat there is a felt lined cover that extends from behind the rear seat and rests against the side bolster and goes back inside the trunk area. These covers are a pretty good size, maybe 2 or 2 1/2 feet long. You cannot fully access these until after removing the side bolsters of the rear seat back.
There is a clip inside the trunk area that attaches to a metal bracket. Remove the plastic nail / insert / plastic screw doo-hickey and pop out the screw for each one. This will give you more flexibility in running the wires in a few minutes.
Now, get in the back seat area and do the same for the clips on the other side. There is one near the top of the seat back, next to the side bolsters.
Now we are done with the prep for running the wires. But we still don't have access to the rear shelf. Almost there. You don't want to start running your wires until you get access beneath the shelf, because you will have some decisons to make on exactly where you to mount the V1.
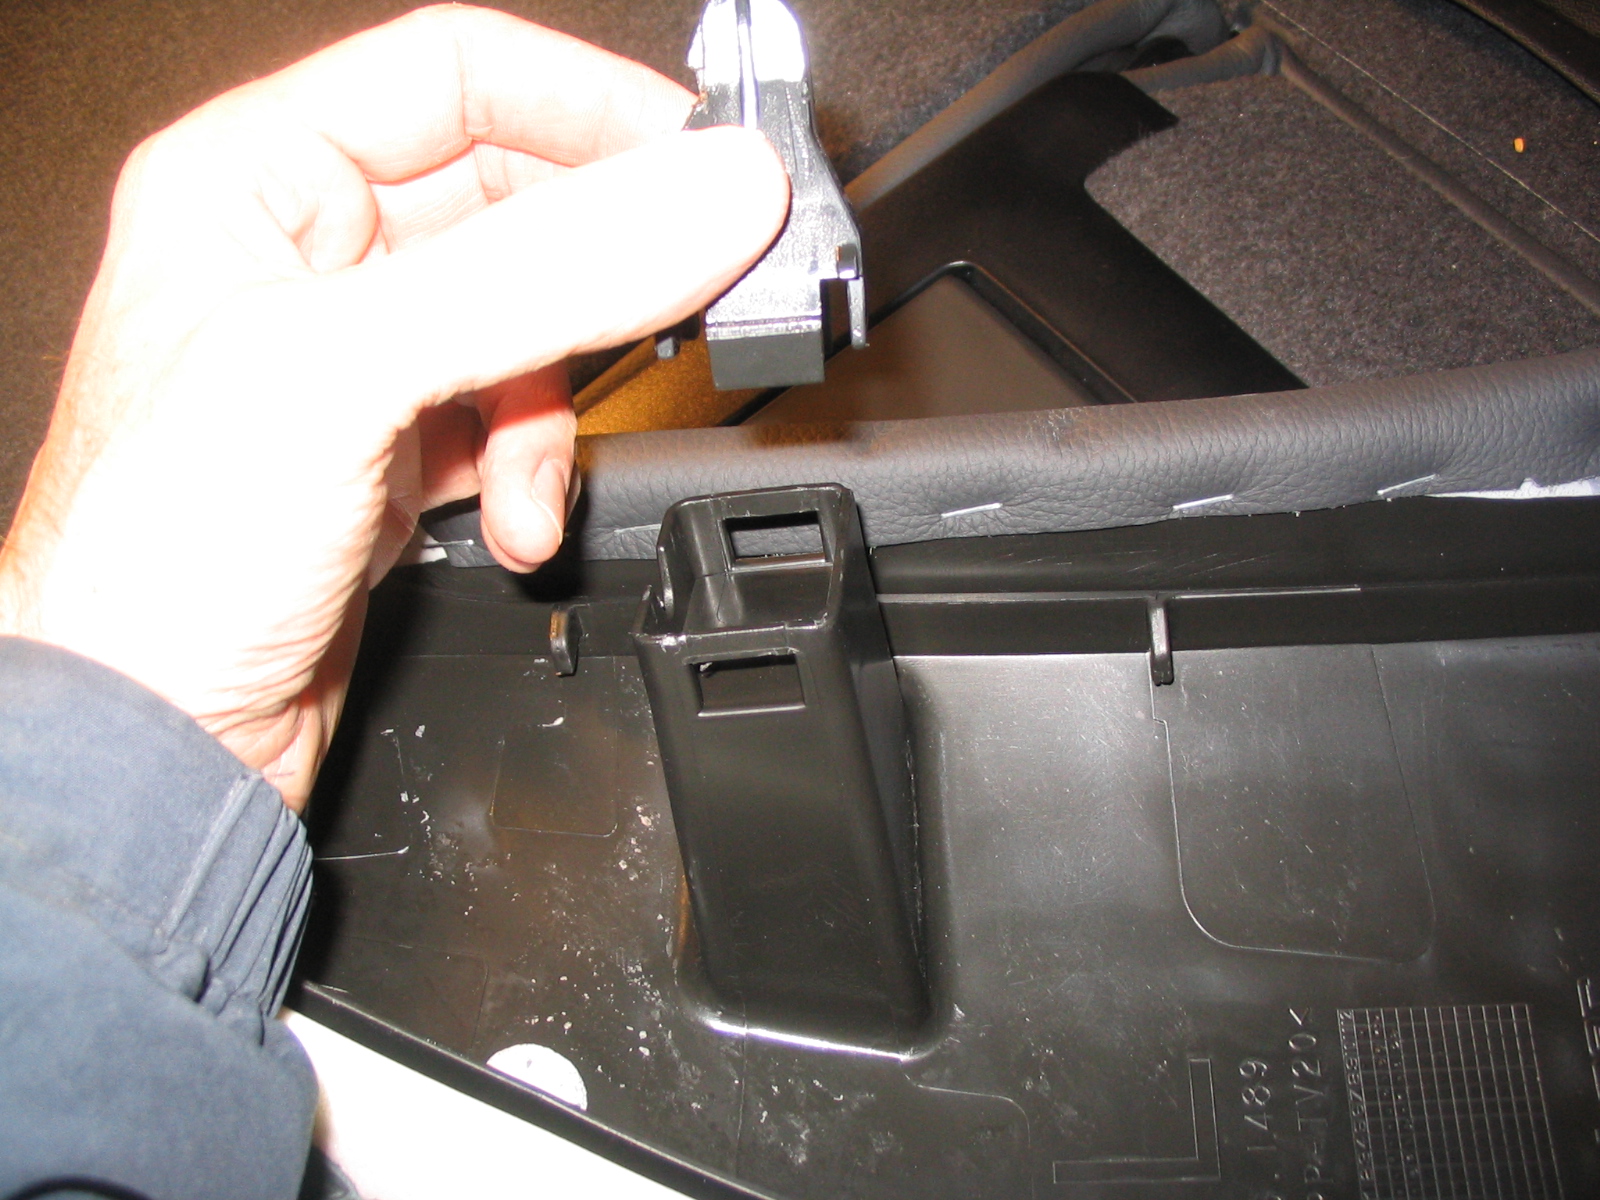
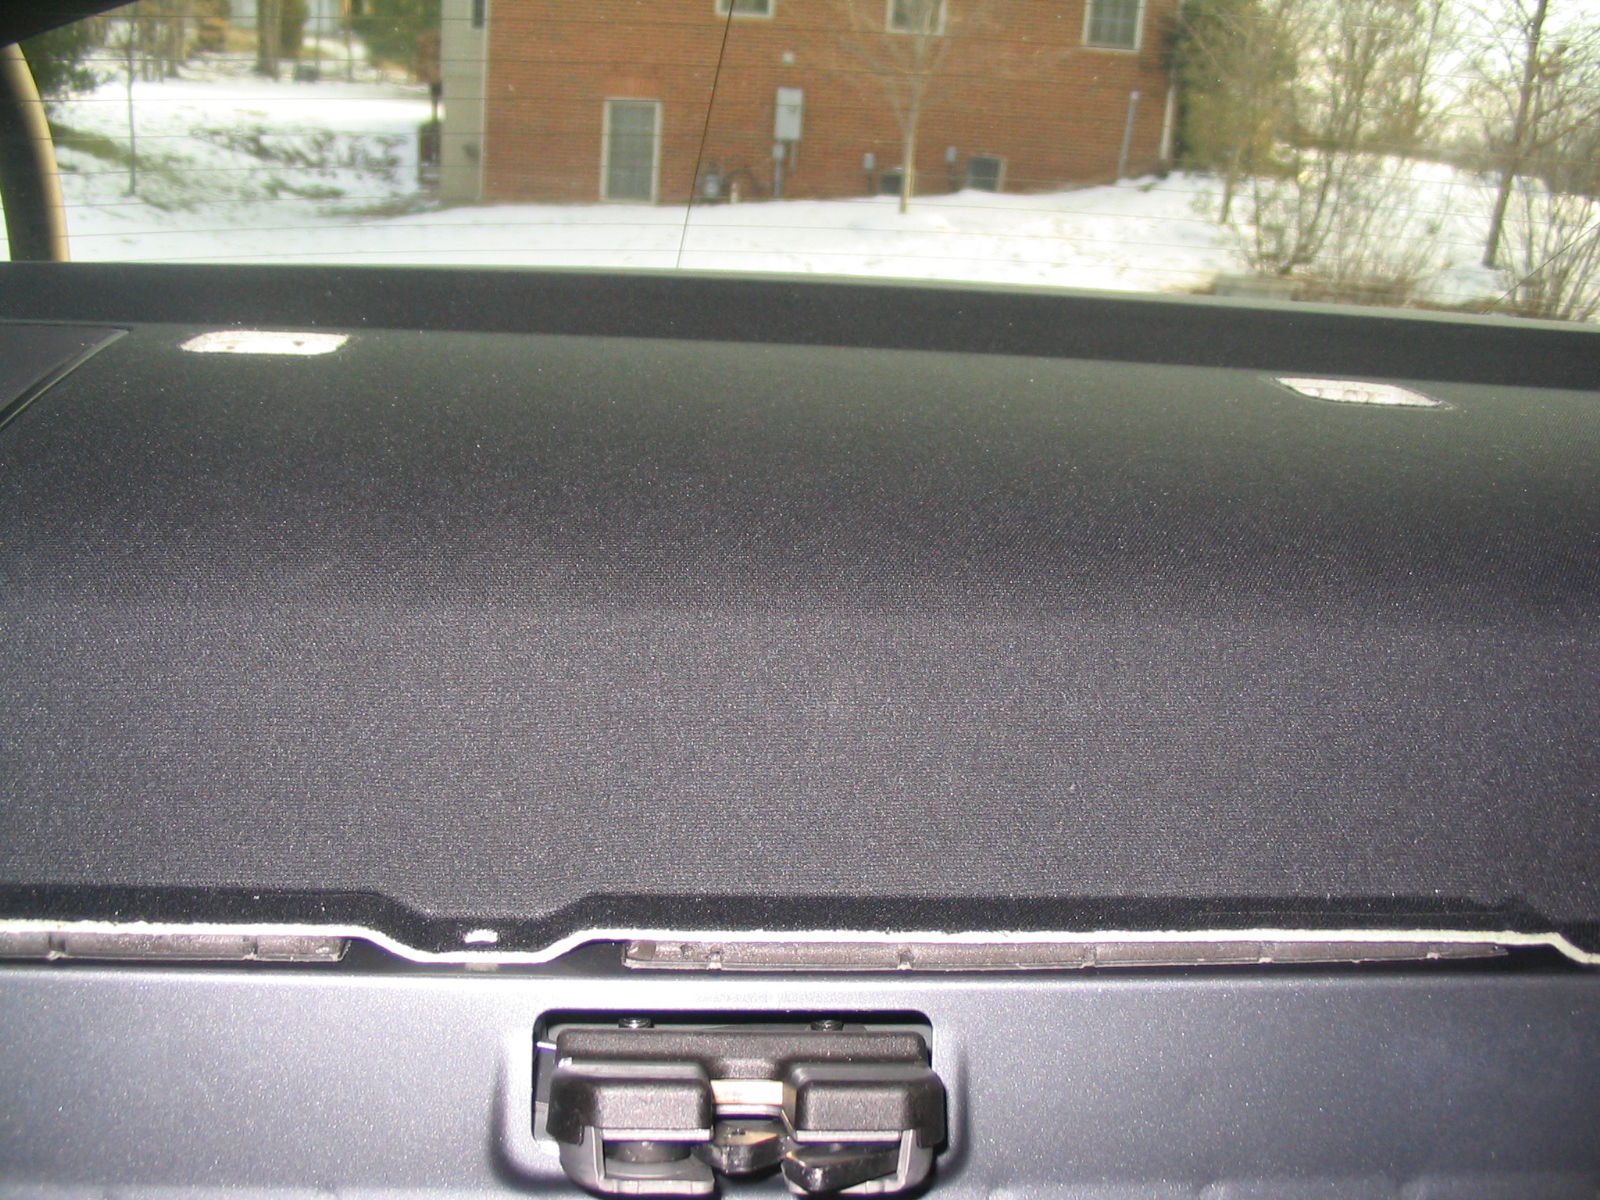
6. Remove covering over the edge of the rear shelf
There are 5 plastic nails along the top rail of this thing. Again I'm assuming you've got the fold down seats (if you don't then this step may not apply - I don't know).
Use a flat head screwdriver to loosen each screw by carefully prying it up. You should then be able to pull them out with your fingers. Pry out the jacket that each screw sits in and set aside all screws and jackets.
Now you have access to a cover that holds the rear shelf in place from the front side. Pull the cover off. It should slide off toward you. You may need to jiggle it around to loosen it up, but it should not be too difficult.
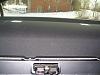
7. Remove the ISOFIX / LATCH bolts
Note: You'll need a T40 torx ("star") screwdriver or bit. I suggest a ratchet bit as most screwdrivers will not fit under the narrow rake of the rear window. You can purchase one at most auto hardware stores.
These things are another piece of cake. Once you get the screws loosened up they will lift right out, fully intact.
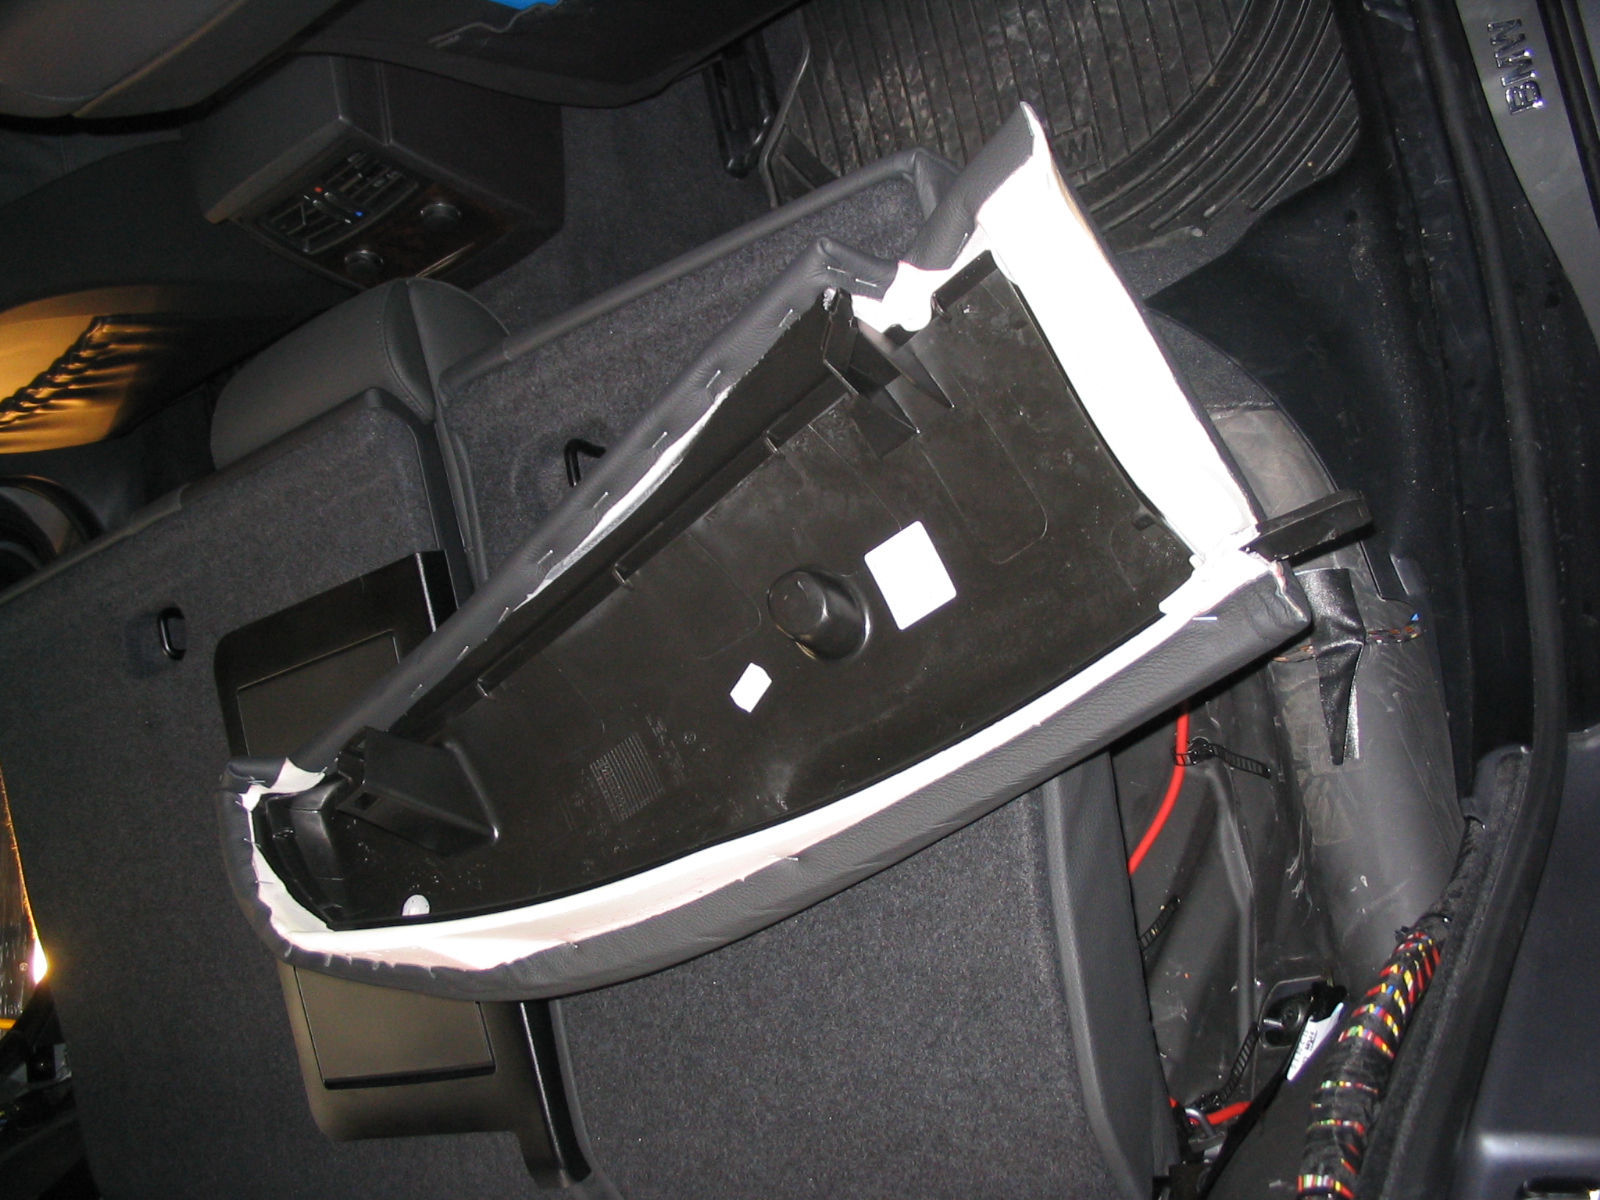
8. Lift up or pull out the rear shelf
Personally, I do not recommend removing the rear shelf at this point. I recommend lifting up the shelf and holding it up while you position your V1.
IMHO removing the rear shelf is just not necessary and it's a big PITA to get the damn thing back in properly. There are 2-3 side panels that are intertwined with the outer rear seat belt assemblies. These must all be removed in order to fully remove the rear parcel shelf. Aside from that PITA, getting the shelf back in is another PITA. Get the point? I strongly recommend just lifting up the shelf. There is plenty of play to allow you to work mounting the V1 and running / concealing wires.
All you need to do is lift the shelf up at any point that you would like. It is very pliable (don't get carried away... but you get the picture).
Now look around and start thinking about where you'd like your V1 positioned and how you will prevent it from moving around in there. Note: Before I buttoned up the install, I did some unscientific testing while I had my rear shelf apart. I placed the V1 where I thought it would work best for me and then took off for some spirited driving and high speed donuts in my neighborhood. I'm sure my neighbors now think I'm quite strange, but who cares. BTW, its amazing how much sound proofing of the exhaust noise that back seat provides. original.gif
After "testing" your mounting position you can move on to the wiring.
A few suggestions on positioning your V1 and how to keep it where you want it!
There are two challenges with the rear parcel shelf install. 1) how do you keep the V1 from moving around and pointing in the wrong direction, when you can't see it to know if it's pointed correctly or not? And 2) where exactly to mount it under the shelf.
For me, issue # 2 was easier to identify. I have a child seat in the center seating position, so the (ideal) position behind the center head rest was out. Through much back and forth between the back seat and front of the car, I determined there was a sufficient gap measured horizontally between the edge of the baby seat and the front passenger head rest where the V1 could "see" between them. So, this became my choice of location underneath the rear shelf.
Another concern I had - even if I moved the baby seat to an outboard position, there is a significant amount of metal in the top of the center seating position (above the ski bag) and to some extent within the top portion of the center back rest. It was enough to make me think that it could interfere with the V1's performance, though I honestly doubt that it would be significant. Bottom line for me was that my kid's safety (center of car) is more important to me than the V1 mounting location.
Regarding issue # 1 above - how to keep it in place - I came up with two ideas. One (the method I used) is to take the foam which holds the V1 in its box that it comes with from Valentine. Cut out the foam in front of and behind the V1 just to be sure you are not reducing its range any more than necessary. The remaining foam beaneath, above, and on the sides should be sufficient.
You'll notice there is not much room (vertically) inside the rear shelf area to begin with. I found that the height was just about perfectly matched to that of the V1. Having the V1 inside the foam meant that the rear shelf was essentially pressing it into place. This is especially true after you reinstall the ISOFIX brackets.
The other option I thought of was to fabricate a wooden box to hold the V1. Again I'd suggest using the foam that the V1 ships in from Valentine (or something similar) to hold the V1 comfortably in place inside your box.
The advantage to the wood box method is that you can be certain of holding it in place. Once you decide on placement of the box, there are seveal holes accessable from inside the trunk which could be used to drill a screw up into your wood box.
Good luck and please let me know of any errata or suggested improvements!
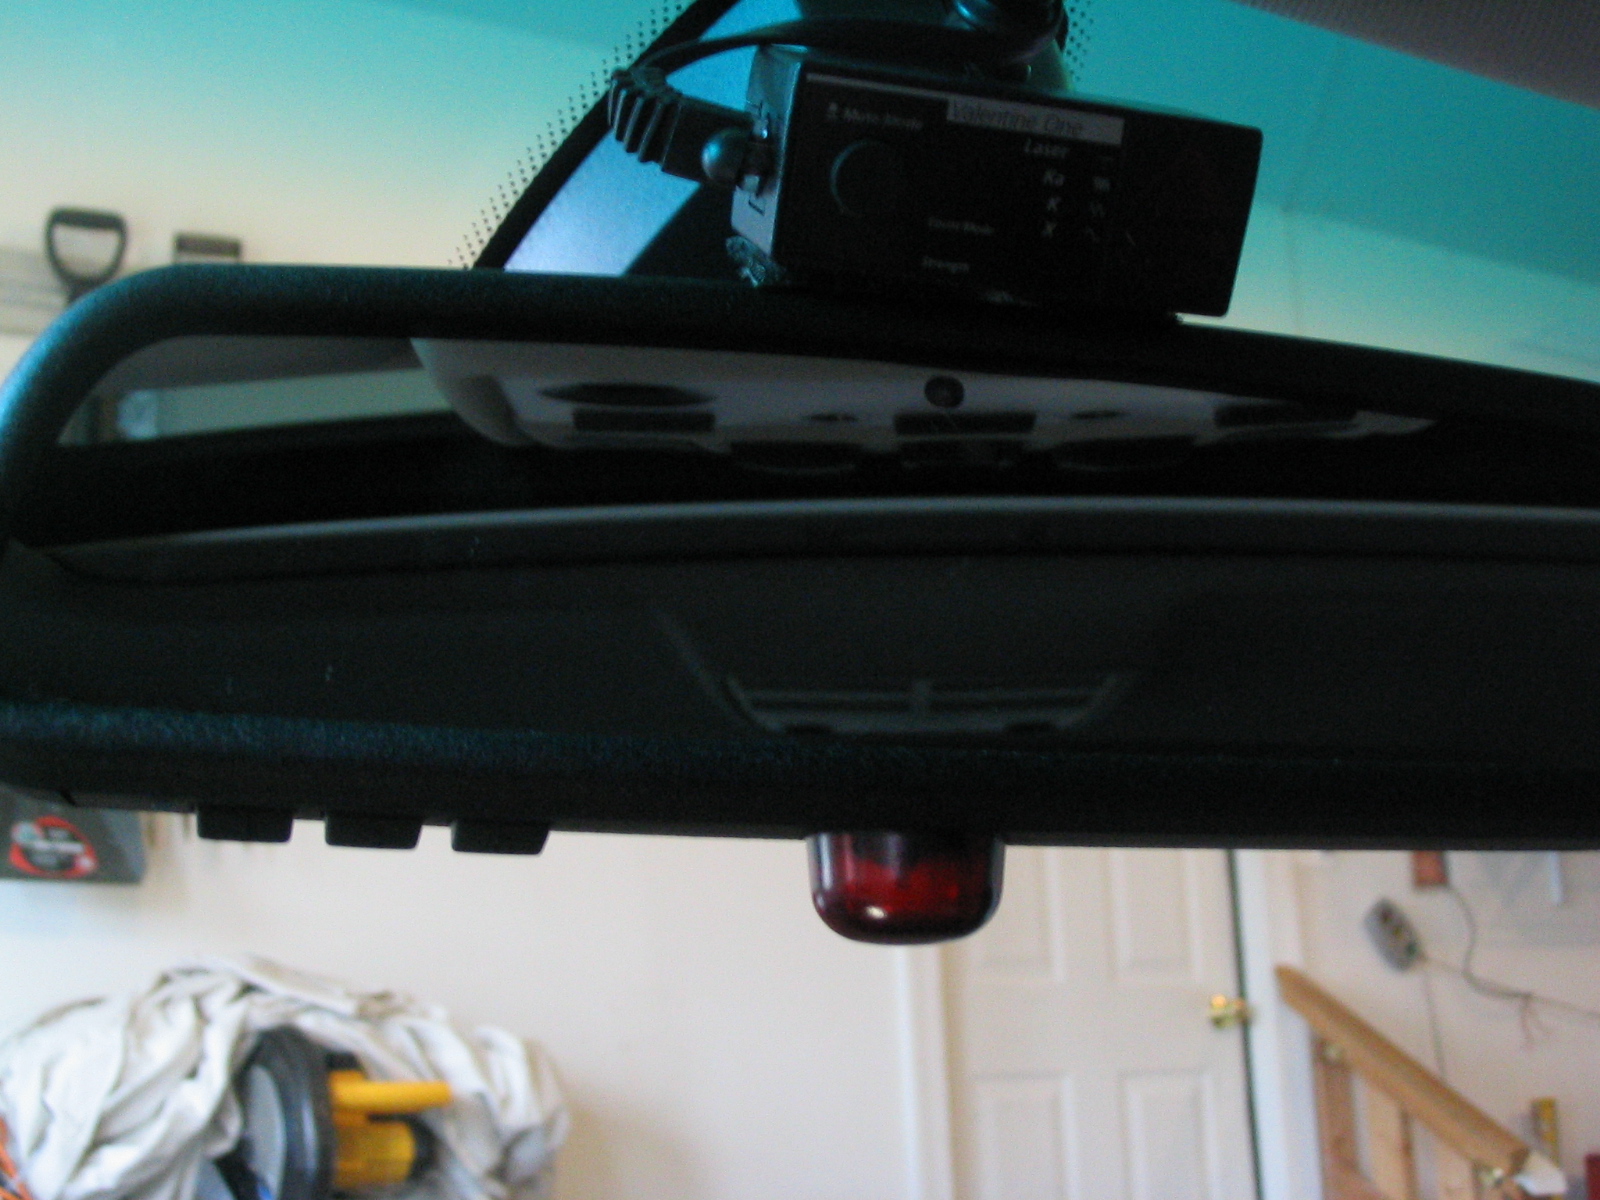
V1 Hidden under rear shelf
Here are the written instructions. I'll post pics later this weekend when I can.
Also, if anyone would like detailed instructions on how I installed both a V1 and dual Lidatek LE-30's, let me know and I can either e-mail you or post them on the board.
--------
Rear Parcel Shelf - Access, V1 Installation
Tools/Parts You Will Need
- Flat blade screw driver
- T40 Torx screw driver or ratchet bit
0. Remove trunk mat
Lift trunk mat covering spare tire. Pull the handle firmly toward you. The rubber it is attached to will stretch, allowing you to wrap the curved handle up over the lip on the bottom of the raised trunk lid.
Now carefully pull up those strange looking tongue-in-groove Styrofoam pads. Put them in a safe place where you will not accidentally tear them up while working.
1. Remove trunk panels
I suggest removing both passenger side and driver side. You'll have to decide for yourself which side to run the wires. Personally, I chose the drivers side because I planned to install a remote audio and concealed display unit up front within reach/sight of the driving position. I also wanted to run a wire long enough that if I ever opted for Beast Power's V1 / Lidatek integrated rear mirror that I'd have a long enough cable run. There is tons of room in the drivers side rear corner to stuff some extra "just in case" wiring.
2. Removing the Rear Seats - Part I
Easiest step. First you want to remove the back seat cushion (the part you sit on). Just pull up from the front part of the seat cushion. It should easily pop up. Reach up underneath the front lip of the bottom seat cushion, feel your way back about 2 or 3 inches from the front edge and about 6-9 inches or so from the drivers/passenger edge. Get a good grip and pull up firmly. The seat should easily pop up. If not then feel around for the latch as you are doing something wrong if this is not easier than it looks.
3. Removing the Rear Seats ? Part II
If you have fold-down rear seats, fold them down. If you don't have fold down seats then it's going to take a bit more work and sorry but I can't fully help you as my car does have the fold down seats!
I believe that if you have the fixed rear seat back then next you'll need to remove six (?) bolts. This will allow you to remove the seat back (I think... have not been able to verify... someone please post who knows).
4. Removing the Rear Seats ? Part III
Remove the side bolsters to the outer rear seating positions (one on each side of the backseat). To do this pull the top portion of each side bolster toward you. Give them a good tug, pulling them forward toward the front of the car. They should pop out with some slight effort. Then lift upward and forward at the same time. The lower portion of each side bolster is secured by a metal "tooth" about an inch wide that is inserted into a groove. You may need to tug upward while pulling it out.
Now, do yourself a favor (hint: timesaver when you put this back together) and extract the plug for the top portion of the seat bolster from within the seat frame. I can't remember if you need to push the tab inside of it down or pull it up... I think you push it down, but it only moves one way (sorry!... doh.. my old age of 37 and my memory is already failing).
Once you wiggle this out, snap it onto the back of the seat bolster. The back of the side bolster has a short piece at the top that looks like a black tube about 2 inches wide. That is where you shove this clip. Make sure you point it in the correct direction. This will allow you to very easily snap the bolster back into the seat frame when you re-install them once you've run your wires.
[I must have spent 15 minutes the first time I put my seat back together before following this procedure, just trying to get the seat bolster back in the damn clip. Taking the clip out and sticking it on the end of the bolster is MUCH easier. original.gif]
At this point you should see a bunch of wires bound together bundled along both the drivers and passenger sides of the car, which are normally hidden beneath these side seat bolster things. This is how you will run your wires from the trunk are to the floor side sills. Look down and you'll see that there is a big gap in the floor sill on either side. This is your ticket when you get to the wiring part.
5. Loosen the felt lined covers
On either side of the rear seat there is a felt lined cover that extends from behind the rear seat and rests against the side bolster and goes back inside the trunk area. These covers are a pretty good size, maybe 2 or 2 1/2 feet long. You cannot fully access these until after removing the side bolsters of the rear seat back.
There is a clip inside the trunk area that attaches to a metal bracket. Remove the plastic nail / insert / plastic screw doo-hickey and pop out the screw for each one. This will give you more flexibility in running the wires in a few minutes.
Now, get in the back seat area and do the same for the clips on the other side. There is one near the top of the seat back, next to the side bolsters.
Now we are done with the prep for running the wires. But we still don't have access to the rear shelf. Almost there. You don't want to start running your wires until you get access beneath the shelf, because you will have some decisons to make on exactly where you to mount the V1.
6. Remove covering over the edge of the rear shelf
There are 5 plastic nails along the top rail of this thing. Again I'm assuming you've got the fold down seats (if you don't then this step may not apply - I don't know).
Use a flat head screwdriver to loosen each screw by carefully prying it up. You should then be able to pull them out with your fingers. Pry out the jacket that each screw sits in and set aside all screws and jackets.
Now you have access to a cover that holds the rear shelf in place from the front side. Pull the cover off. It should slide off toward you. You may need to jiggle it around to loosen it up, but it should not be too difficult.
7. Remove the ISOFIX / LATCH bolts
Note: You'll need a T40 torx ("star") screwdriver or bit. I suggest a ratchet bit as most screwdrivers will not fit under the narrow rake of the rear window. You can purchase one at most auto hardware stores.
These things are another piece of cake. Once you get the screws loosened up they will lift right out, fully intact.
8. Lift up or pull out the rear shelf
Personally, I do not recommend removing the rear shelf at this point. I recommend lifting up the shelf and holding it up while you position your V1.
IMHO removing the rear shelf is just not necessary and it's a big PITA to get the damn thing back in properly. There are 2-3 side panels that are intertwined with the outer rear seat belt assemblies. These must all be removed in order to fully remove the rear parcel shelf. Aside from that PITA, getting the shelf back in is another PITA. Get the point? I strongly recommend just lifting up the shelf. There is plenty of play to allow you to work mounting the V1 and running / concealing wires.
All you need to do is lift the shelf up at any point that you would like. It is very pliable (don't get carried away... but you get the picture).
Now look around and start thinking about where you'd like your V1 positioned and how you will prevent it from moving around in there. Note: Before I buttoned up the install, I did some unscientific testing while I had my rear shelf apart. I placed the V1 where I thought it would work best for me and then took off for some spirited driving and high speed donuts in my neighborhood. I'm sure my neighbors now think I'm quite strange, but who cares. BTW, its amazing how much sound proofing of the exhaust noise that back seat provides. original.gif
After "testing" your mounting position you can move on to the wiring.
A few suggestions on positioning your V1 and how to keep it where you want it!
There are two challenges with the rear parcel shelf install. 1) how do you keep the V1 from moving around and pointing in the wrong direction, when you can't see it to know if it's pointed correctly or not? And 2) where exactly to mount it under the shelf.
For me, issue # 2 was easier to identify. I have a child seat in the center seating position, so the (ideal) position behind the center head rest was out. Through much back and forth between the back seat and front of the car, I determined there was a sufficient gap measured horizontally between the edge of the baby seat and the front passenger head rest where the V1 could "see" between them. So, this became my choice of location underneath the rear shelf.
Another concern I had - even if I moved the baby seat to an outboard position, there is a significant amount of metal in the top of the center seating position (above the ski bag) and to some extent within the top portion of the center back rest. It was enough to make me think that it could interfere with the V1's performance, though I honestly doubt that it would be significant. Bottom line for me was that my kid's safety (center of car) is more important to me than the V1 mounting location.
Regarding issue # 1 above - how to keep it in place - I came up with two ideas. One (the method I used) is to take the foam which holds the V1 in its box that it comes with from Valentine. Cut out the foam in front of and behind the V1 just to be sure you are not reducing its range any more than necessary. The remaining foam beaneath, above, and on the sides should be sufficient.
You'll notice there is not much room (vertically) inside the rear shelf area to begin with. I found that the height was just about perfectly matched to that of the V1. Having the V1 inside the foam meant that the rear shelf was essentially pressing it into place. This is especially true after you reinstall the ISOFIX brackets.
The other option I thought of was to fabricate a wooden box to hold the V1. Again I'd suggest using the foam that the V1 ships in from Valentine (or something similar) to hold the V1 comfortably in place inside your box.
The advantage to the wood box method is that you can be certain of holding it in place. Once you decide on placement of the box, there are seveal holes accessable from inside the trunk which could be used to drill a screw up into your wood box.
Good luck and please let me know of any errata or suggested improvements!
V1 Hidden under rear shelf
 03-19-2005, 06:10 PM
#2
Contributors
Thread Starter
Join Date: Mar 2005
Location: U.S. of A.
Posts: 170
Likes: 0
Received 0 Likes
on
0 Posts
My Ride: 2005 545, Titanium Gray II, 6 Spd, CWP, Sat, LPP Laser Defense, V1 (hard-wired), iPod, 38% ceramic tint, CDV delete, H&R Street Performance Coil Overs, Forced Air Induction, DriveData Pro Camera System (4 cams), M5 Front Bumper
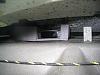
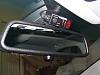
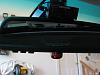
Another shot of V1 under rear shelf... this was how I decided to go... V1 held in place by foam padding....
Pulling free the side bolsters of the rear seat

What the backside of the side bolster looks like, and how to insert that clip into it

Last step is to remove the ISOFIX plugs...
Result of your labor:

Pulling free the side bolsters of the rear seat
What the backside of the side bolster looks like, and how to insert that clip into it
Last step is to remove the ISOFIX plugs...
Result of your labor:
 03-19-2005, 06:21 PM
#3
Super Moderator
Join Date: Mar 2004
Location: Pittsburgh, PA USA
Posts: 17,310
Likes: 0
Received 2 Likes
on
2 Posts
My Ride: G30 M550i
Model Year: 2018
Road Runner. Nice job -- I think. I'm not too sure I am able to tell exactly what you did from the photos. I realize you installed the V1 under the shelf but isn't that going to affect the performance of the unit? Aren't the antennas staring at metal?
Maybe I'm missing some important detail...
Maybe I'm missing some important detail...
03-20-2005, 03:38 AM
#4
Contributors
Thread Starter
Join Date: Mar 2005
Location: U.S. of A.
Posts: 170
Likes: 0
Received 0 Likes
on
0 Posts
My Ride: 2005 545, Titanium Gray II, 6 Spd, CWP, Sat, LPP Laser Defense, V1 (hard-wired), iPod, 38% ceramic tint, CDV delete, H&R Street Performance Coil Overs, Forced Air Induction, DriveData Pro Camera System (4 cams), M5 Front Bumper
Hi Rudy.
Sorry I didn't get better pics. It was difficult to hold the rear shelf up and take the pictures of the unit in there!
The unit is not pointing at metal, no. It is above the metal part of the shelf (which you can see from inside the trunk).
From a horizontal perspective (width of the car), it is located mid-way between the center and passenger head rests.
Inside the shelf there is a lot of padding below the V1, which helps to keep it in place.
I plan to take the seats and shelf apart again in a couple of months to verify that the unit has not moved around from everyday driving.
05-22-2005, 08:05 PM
#5
Members

Join Date: Feb 2005
Location: So. California
Posts: 237
Likes: 0
Received 0 Likes
on
0 Posts
My Ride: '05 545 Sport Week 9
Interesting install...so the sensor has an unobstructed view to the front of the car?
RE: Lidatek, can you post pics/information on how you wired it? thanks.
RE: Lidatek, can you post pics/information on how you wired it? thanks.
05-23-2005, 05:37 AM
#6
Contributors
Thread Starter
Join Date: Mar 2005
Location: U.S. of A.
Posts: 170
Likes: 0
Received 0 Likes
on
0 Posts
My Ride: 2005 545, Titanium Gray II, 6 Spd, CWP, Sat, LPP Laser Defense, V1 (hard-wired), iPod, 38% ceramic tint, CDV delete, H&R Street Performance Coil Overs, Forced Air Induction, DriveData Pro Camera System (4 cams), M5 Front Bumper
Originally Posted by TitaniumGray5' date='May 23 2005, 12:05 AM
Interesting install...so the sensor has an unobstructed view to the front of the car?
RE: Lidatek, can you post pics/information on how you wired it?? thanks.
RE: Lidatek, can you post pics/information on how you wired it?? thanks.
[snapback]132094[/snapback]
A more ideal scenario would be if the car seat were positioned in an outboard seating position in which case I would have placed the unit next to the center seat headrest. You need to be careful if you place the unit near the center headrest because there is a metal plate above the ski rack pass thru (if you have it) and the back of the center headrest. This plate could obviously obstruct the ability of the V1 to pick up any front radar. However, there is ample room between the center headrest and either side (tho I would recommend using the passenger side).
Another option is to go with an install inside the center headrest. There are a couple of threads on this board describing how to do this. Yet another option - a variation of the route I chose - is to put the V1 unit inside the rear passenger headrest, with the wire coming out from underneath the back rest of the rear seat.
For some pics of the LE-30 install, see this thread: http://forums.e60.net/index.php?showtopic=...ndpost&p=103949
I'll see if I can dig up some more pics of the completed project.
05-23-2005, 06:11 AM
#7
Contributors
Thread Starter
Join Date: Mar 2005
Location: U.S. of A.
Posts: 170
Likes: 0
Received 0 Likes
on
0 Posts
My Ride: 2005 545, Titanium Gray II, 6 Spd, CWP, Sat, LPP Laser Defense, V1 (hard-wired), iPod, 38% ceramic tint, CDV delete, H&R Street Performance Coil Overs, Forced Air Induction, DriveData Pro Camera System (4 cams), M5 Front Bumper
TitaniumGray5,
Here are more pics from my LE-30 thread: http://forums.e60.net/index.php?showtopic=...ndpost&p=132191
Here are more pics from my LE-30 thread: http://forums.e60.net/index.php?showtopic=...ndpost&p=132191
05-23-2005, 07:03 AM
#8
Contributors
Thread Starter
Join Date: Mar 2005
Location: U.S. of A.
Posts: 170
Likes: 0
Received 0 Likes
on
0 Posts
My Ride: 2005 545, Titanium Gray II, 6 Spd, CWP, Sat, LPP Laser Defense, V1 (hard-wired), iPod, 38% ceramic tint, CDV delete, H&R Street Performance Coil Overs, Forced Air Induction, DriveData Pro Camera System (4 cams), M5 Front Bumper
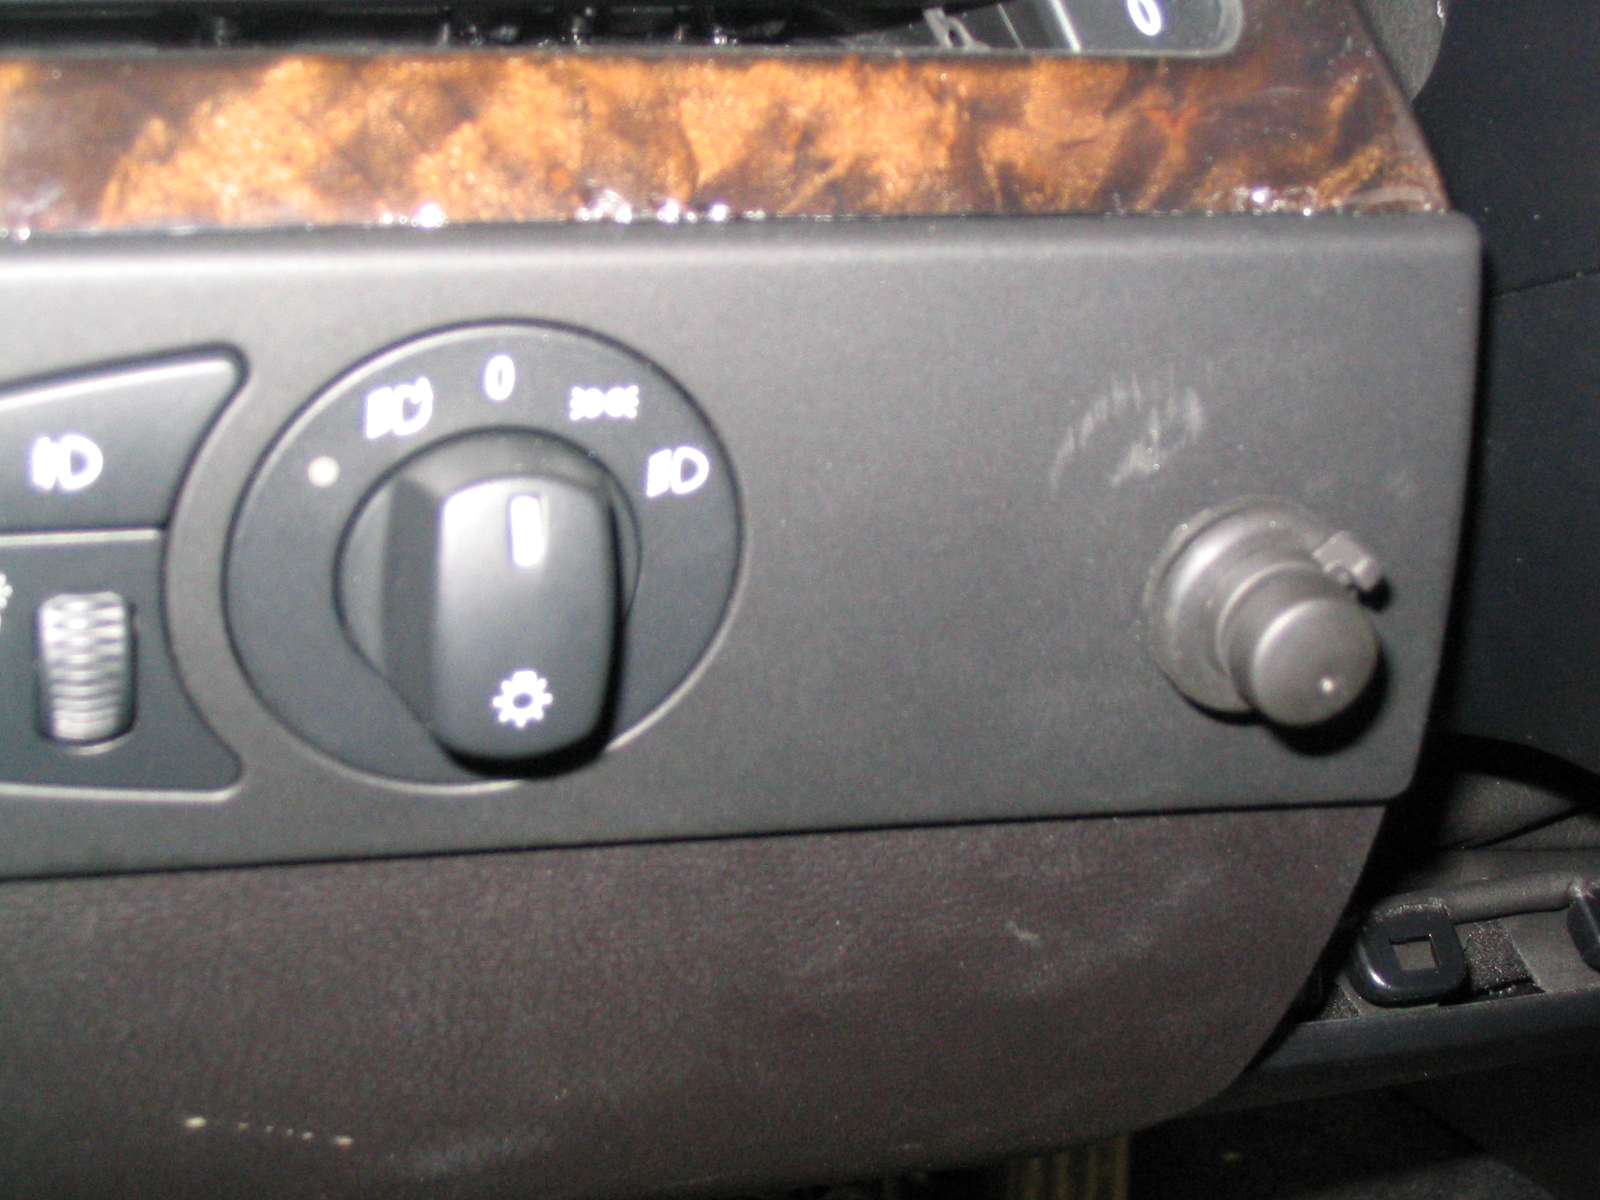
Pics of the final product.... on/off switch and display module.
V1 on/off switch is to the right of headlight switches.
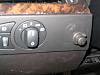
V1 on/off switch is to the right of headlight switches.

 05-23-2005, 08:16 AM
#9
Banned

Join Date: Jan 2005
Location: San Francisco Bay area
Posts: 2,882
Likes: 0
Received 0 Likes
on
0 Posts
My Ride: '05 545i, silver gray, black leather with anthracite maple wood, sport package, premium sound, navigation, cold weather package, electric rear sunshade, folding rear seat, satellite radio prep, PIAA 4150K fogs, red rear reflectors, hardwired Valentine One
Perhaps I'm being dense this morning, but isn't the rear sensor blocked? The rear sensor--and the directional arrow functionality it allows--is the best feature of the V1.
05-23-2005, 08:46 AM
#10
Contributors
Thread Starter
Join Date: Mar 2005
Location: U.S. of A.
Posts: 170
Likes: 0
Received 0 Likes
on
0 Posts
My Ride: 2005 545, Titanium Gray II, 6 Spd, CWP, Sat, LPP Laser Defense, V1 (hard-wired), iPod, 38% ceramic tint, CDV delete, H&R Street Performance Coil Overs, Forced Air Induction, DriveData Pro Camera System (4 cams), M5 Front Bumper
Originally Posted by stream' date='May 23 2005, 12:16 PM
Perhaps I'm being dense this morning, but isn't the rear sensor blocked?? The rear sensor--and the directional arrow functionality it allows--is the best feature of the V1.
[snapback]132232[/snapback]
