When you click on links to various merchants on this site and make a purchase, this can result in this site earning a commission. Affiliate programs and affiliations include, but are not limited to, the eBay Partner Network.
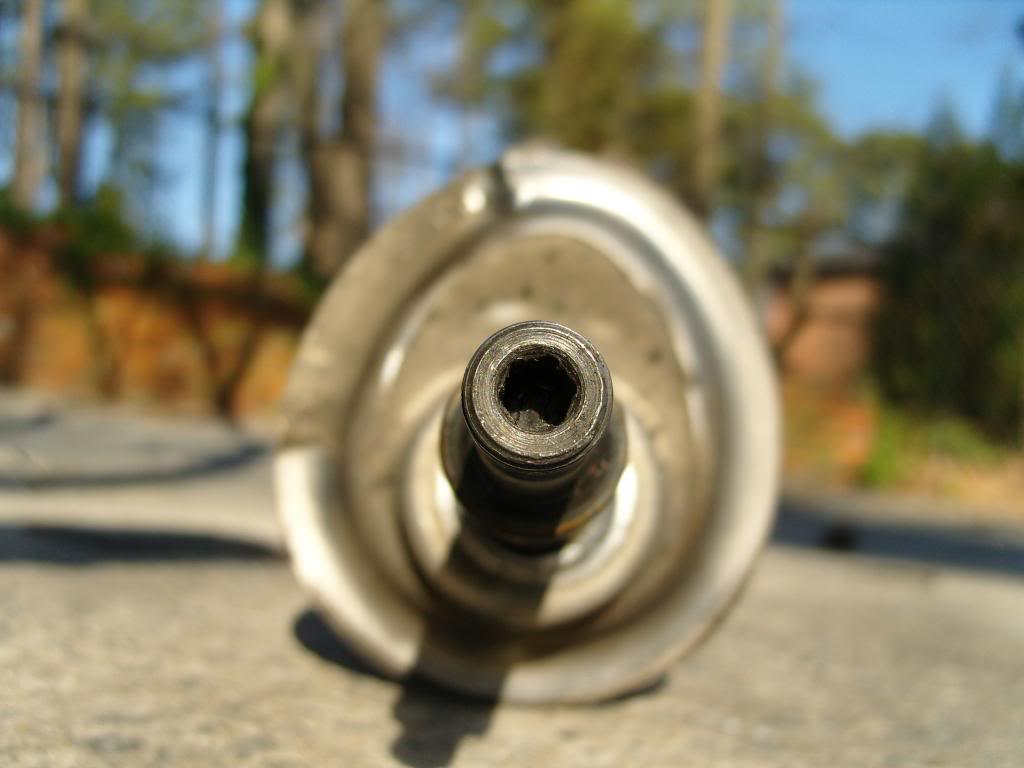
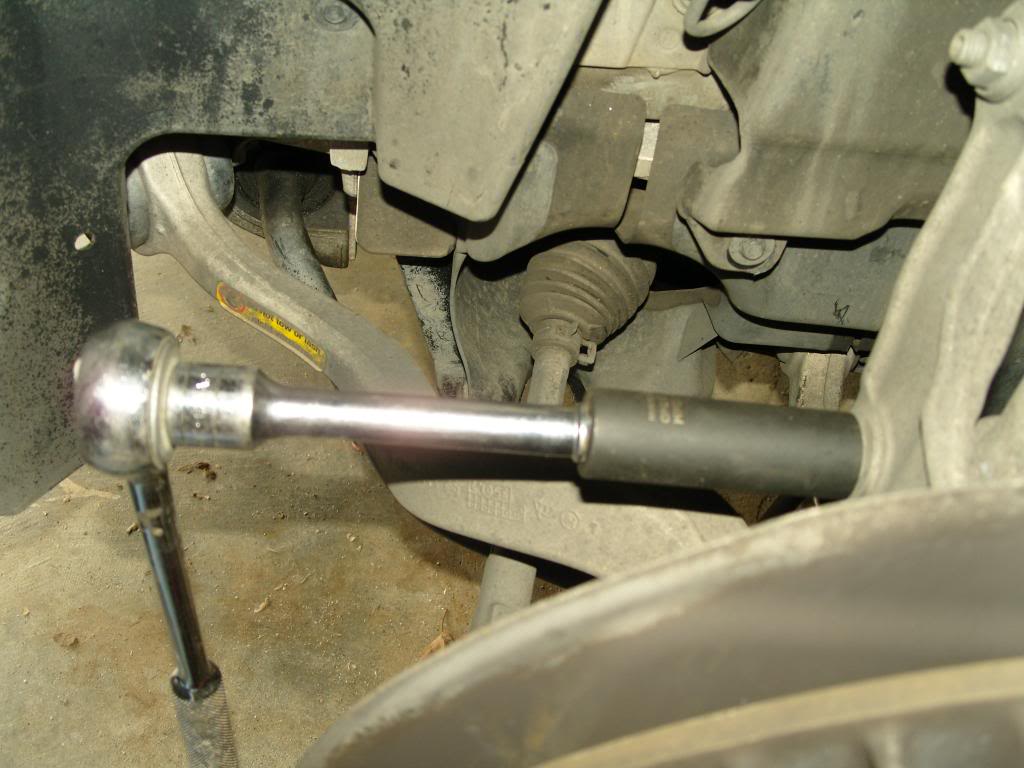
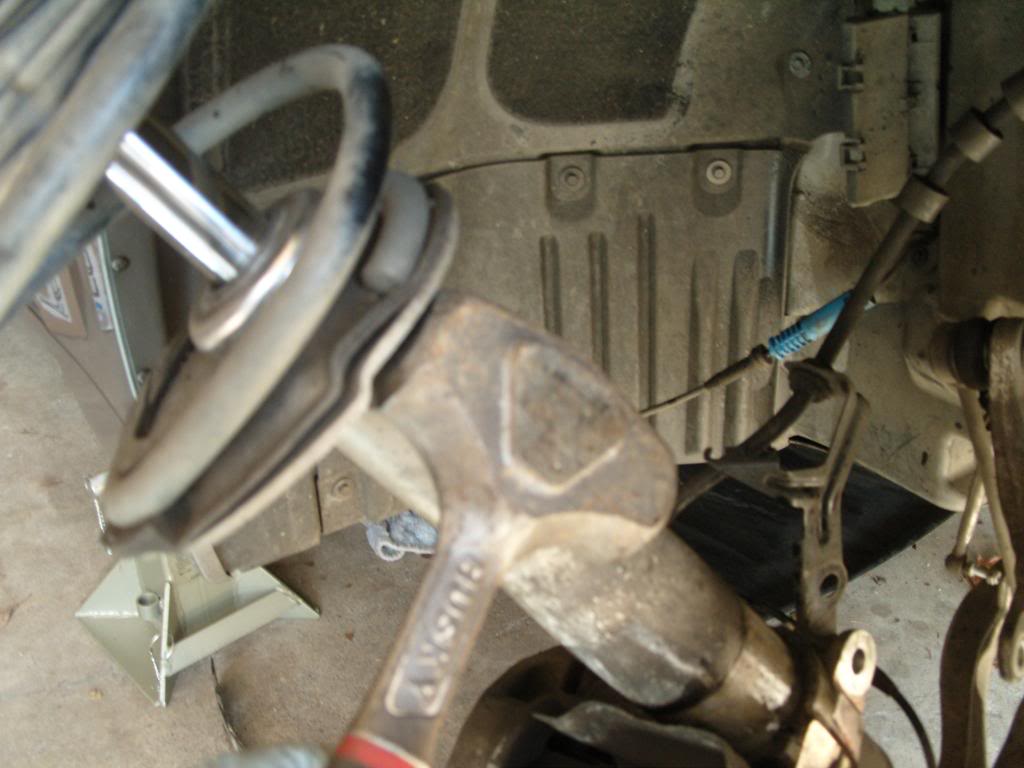
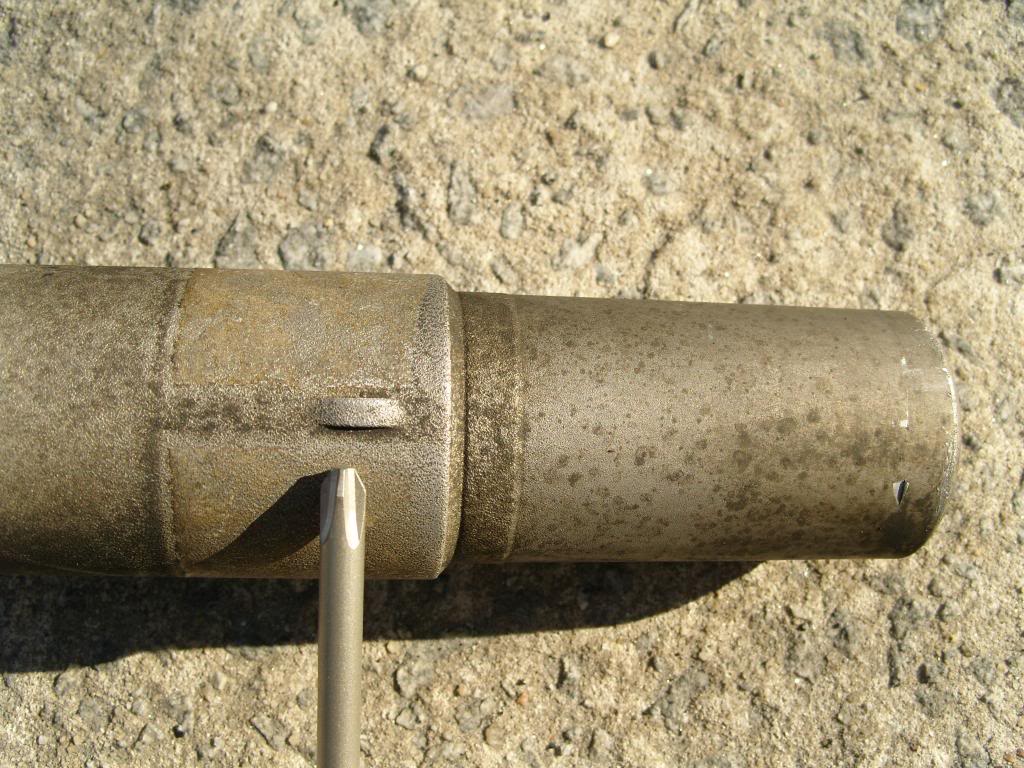
13/16� = 21mm. The ��drive (critical) allows for the bit above to extend through this socket once you remove the plastic insert found inside of the socket. It also has a hexagonal shaped end from which you will tighten using a combination hand wrench.
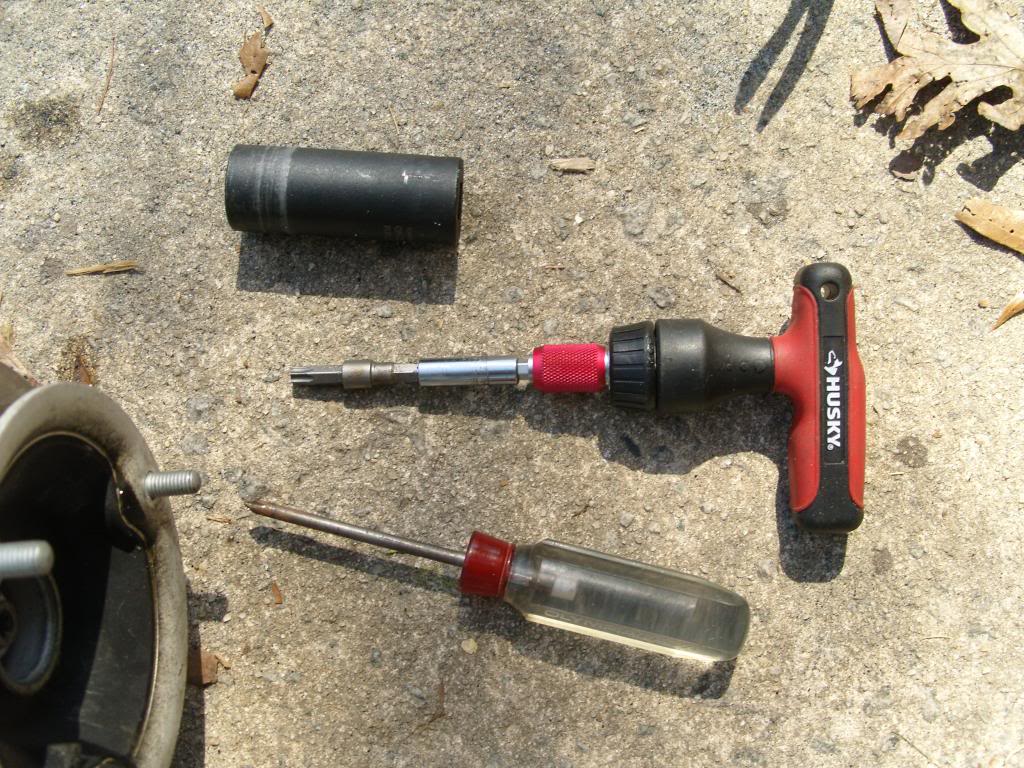
Otherwise, you�ll have to rig something up like this in order to loosen/tighten the nut on the strut piston rod:
It will work but it�s far from ideal.
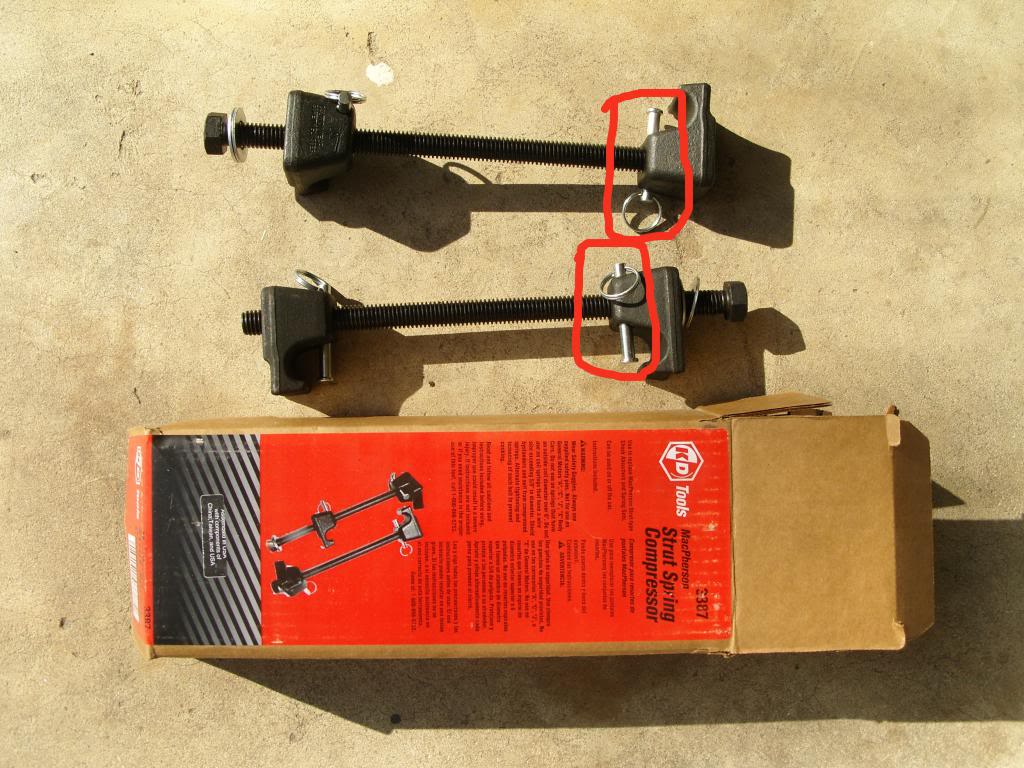
Collapsing the coil spring:
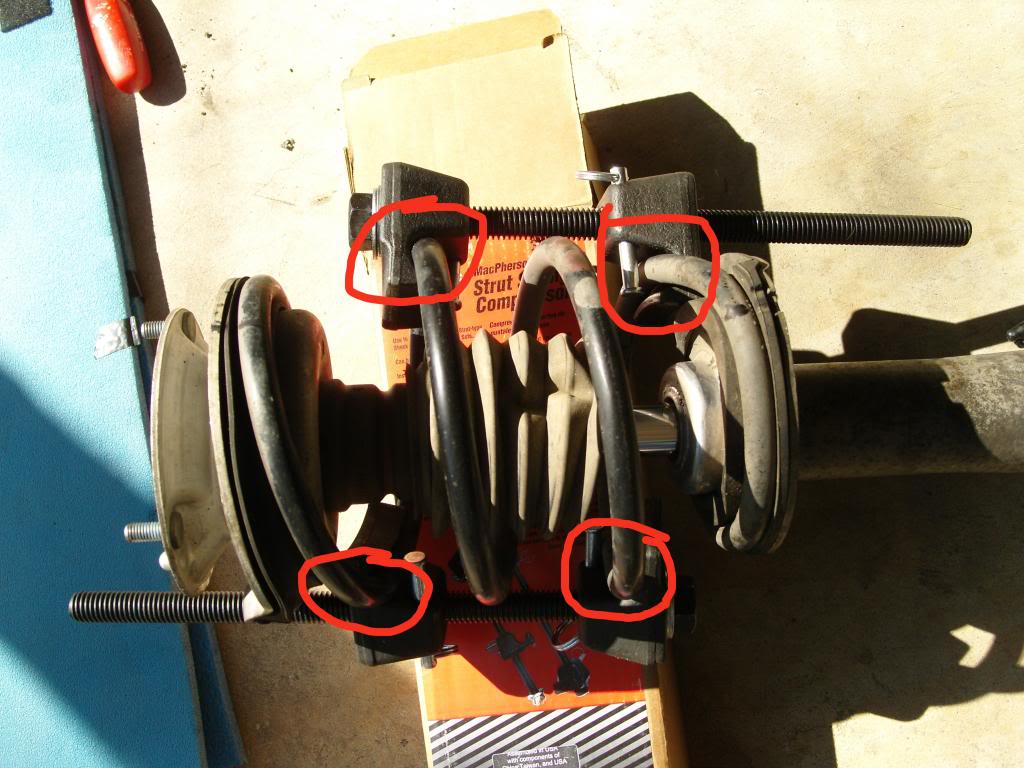
The Strut And Coil Spring Compressor needs to be setup as following:
The clamp heads are positioned on the coil spring itself and not on the top or bottom spring plates. Also, the bolt head is reversed from one shaft to the other.
Those �clamp heads� on each shaft need to be screwed to where they almost touch each other before the tension is removed from the strut piston rod nut. Therefore, they need to be positioned as close to 180 degrees (opposite sides) from each other as possible.
This is required if you�re replacing the top and bottom rubber gaskets, but more importantly, the strut compressor is not designed for attachment to the plates.
That third compressor shaft could have come in handy as placing the compressor shafts 180 degrees away from each other is verydifficult with the spring setup on a BMW since you need to position the heads on 3 rungs of the coil spring in order to collapse it sufficiently.
Odd Tools that came in Handy:
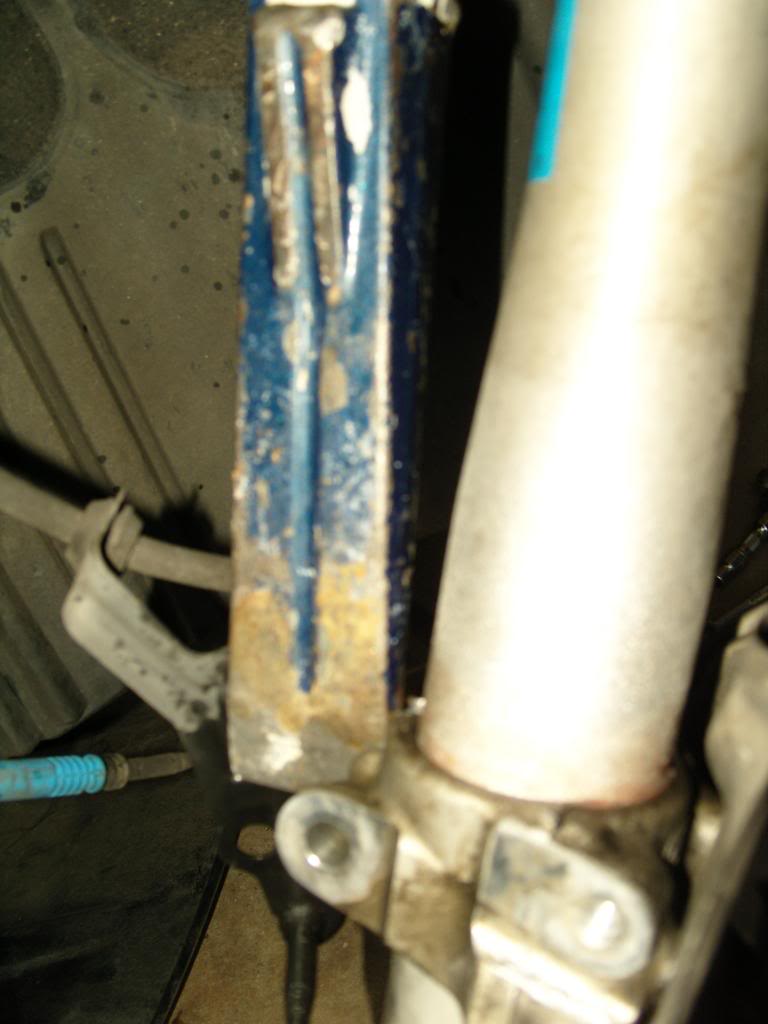
That�s a heavy duty steel wedge that was used to slightly separate the clamp holding the shock in place.
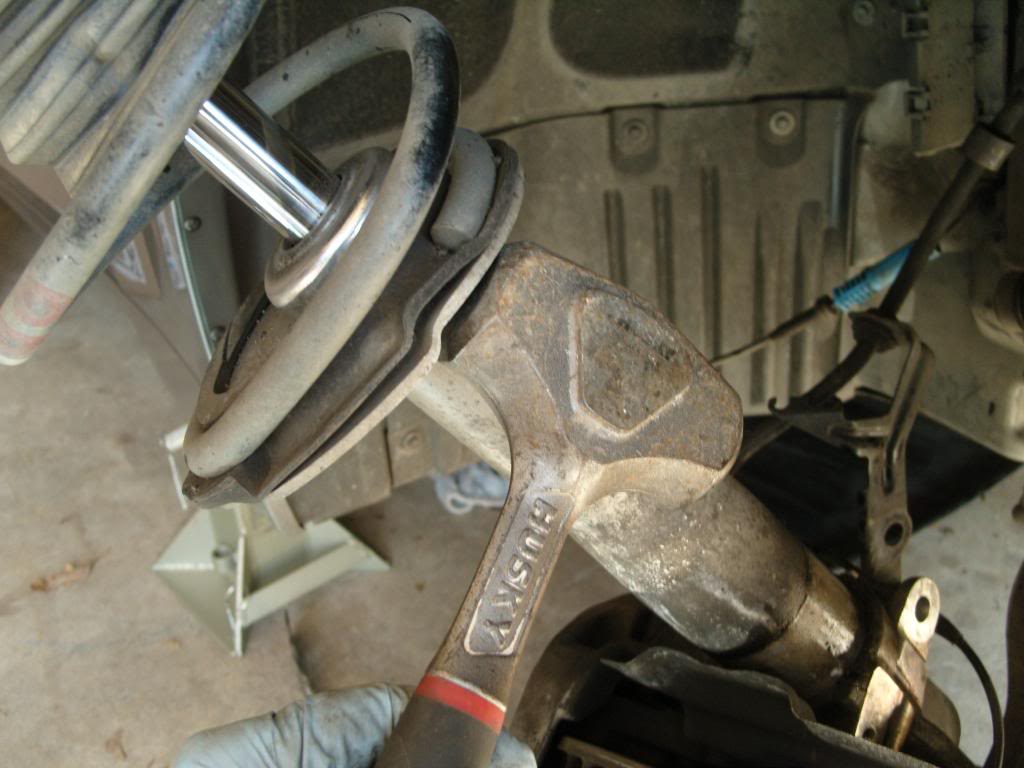
I tapped it into place using this steel mallet:
That mallet was also used to hammer on the old shocks lower coil spring support plate in order to remove the old shock.
How I replaced the struts:
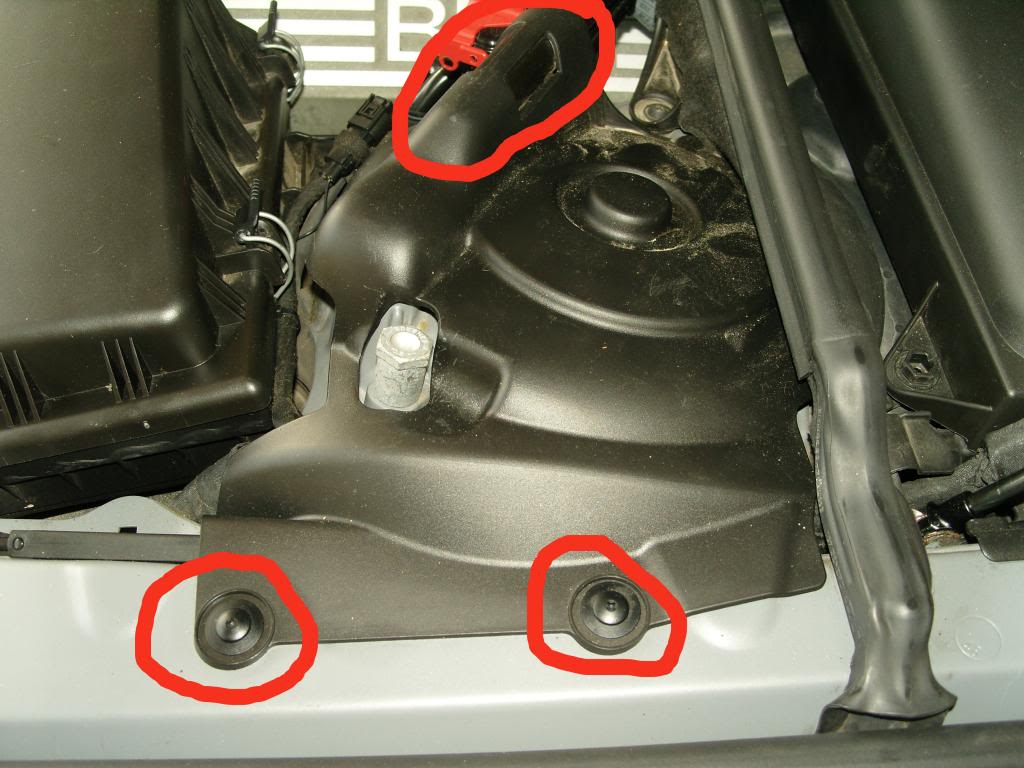
1. Remove the plastic shock tower cover plate found in the engine compartment.
Attempt to unscrew the two plastic rivets holding the panel in place. If you use a fine point Phillips screw driver, you might be able to unscrew them, but 2 out of 4 cracked, so pickup 4 of them from your local BMW dealer P/N 51481915964 $0.52 each.
Which discloses this:
2. Using a 13mm socket, and a 13mm wrench, loosen the 3 nuts �� but do not remove.
3. Slightly loosenthe lug nuts on both front wheels
4. Jack up the car at least 12� from the center point and place jack stands under the support points below the drivers and passenger front doors. �Place chocks behind/front of both rear wheels�
5. Remove the front wheels.
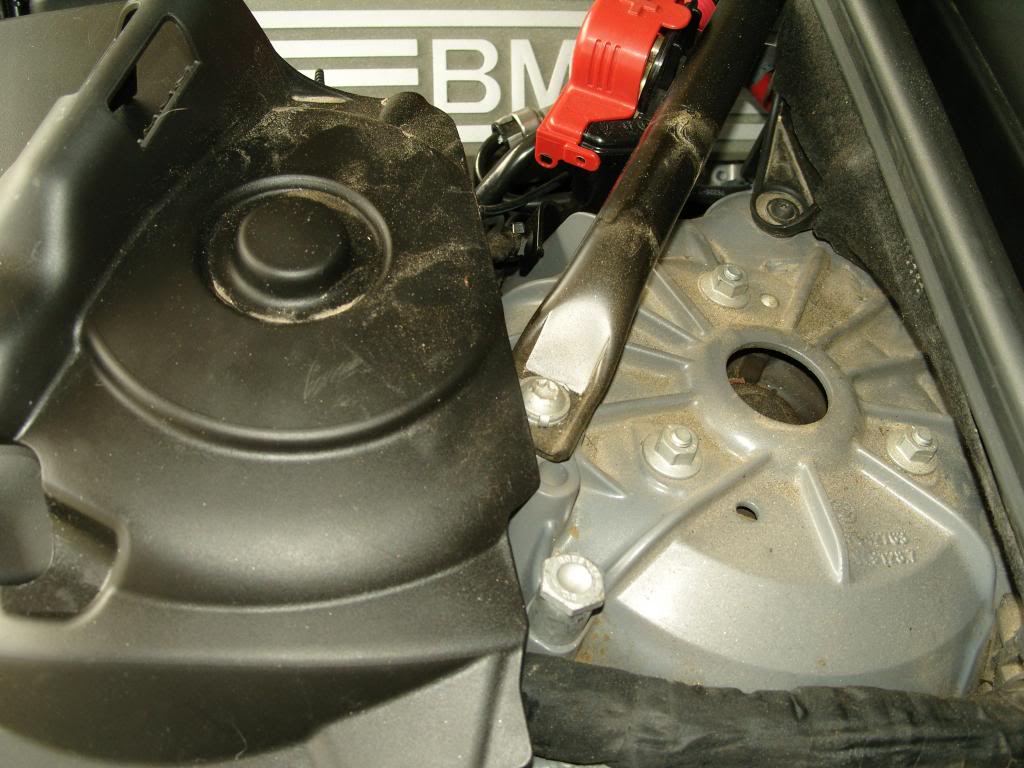
5a. Remove the plastic engine panel from the underside of the car.
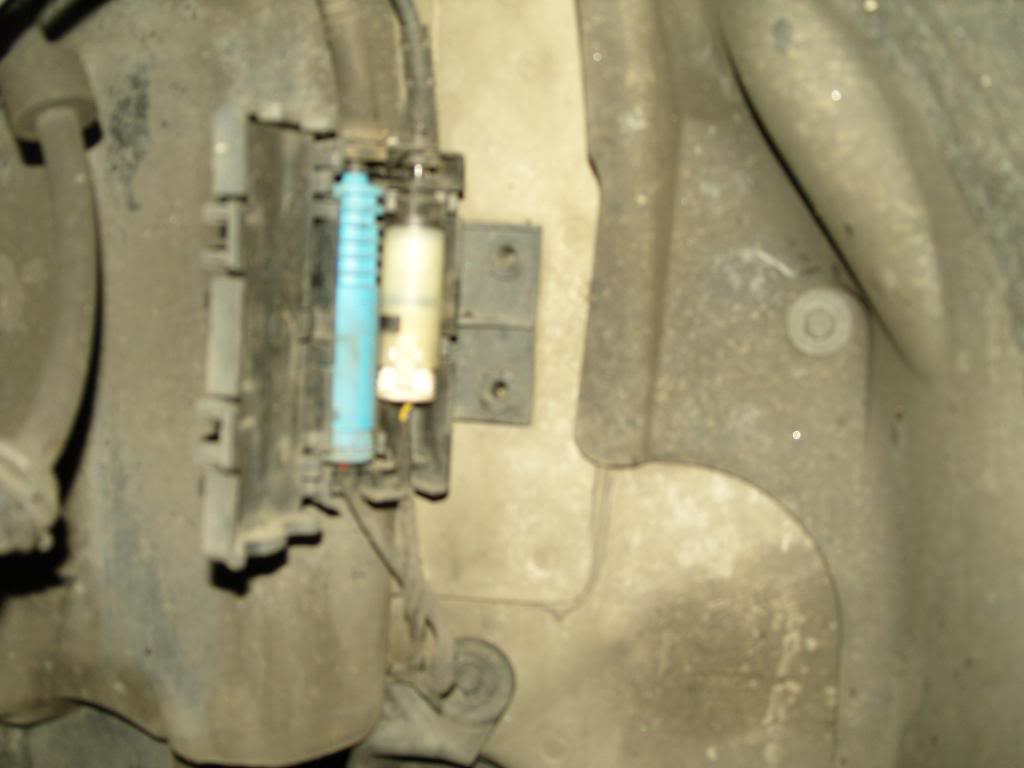
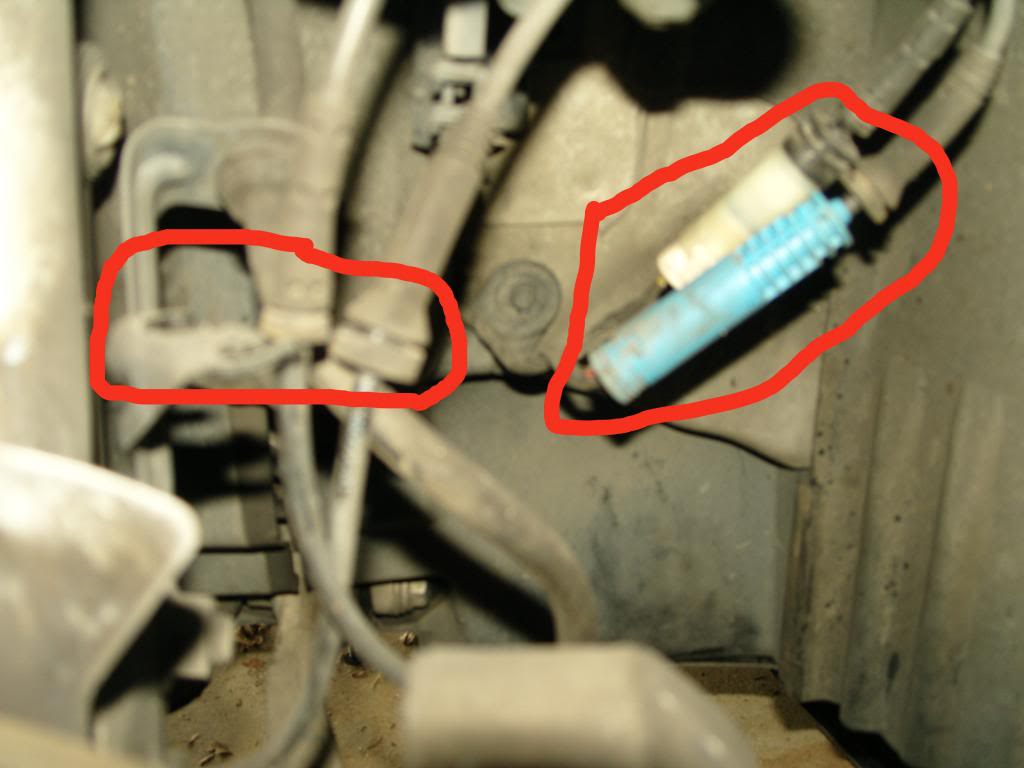
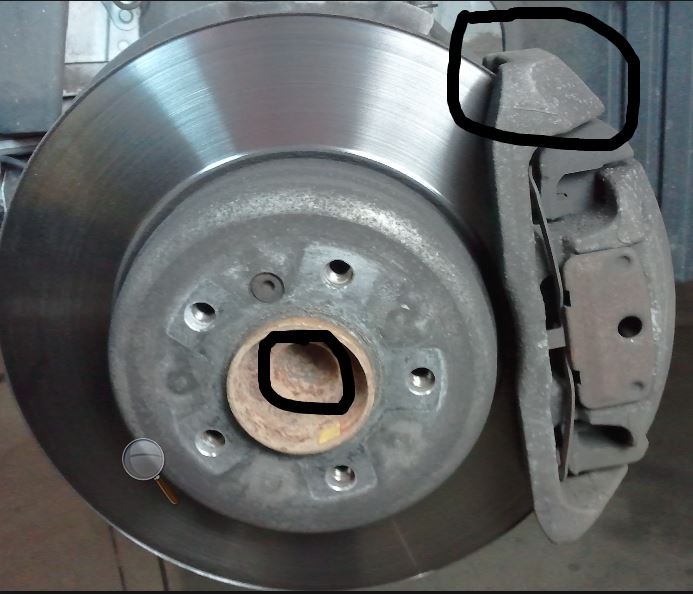
6. Open the plastic box inside the wheel well and release the two (drivers side) and one (passenger side) brake sensor wires so that they hang freely:
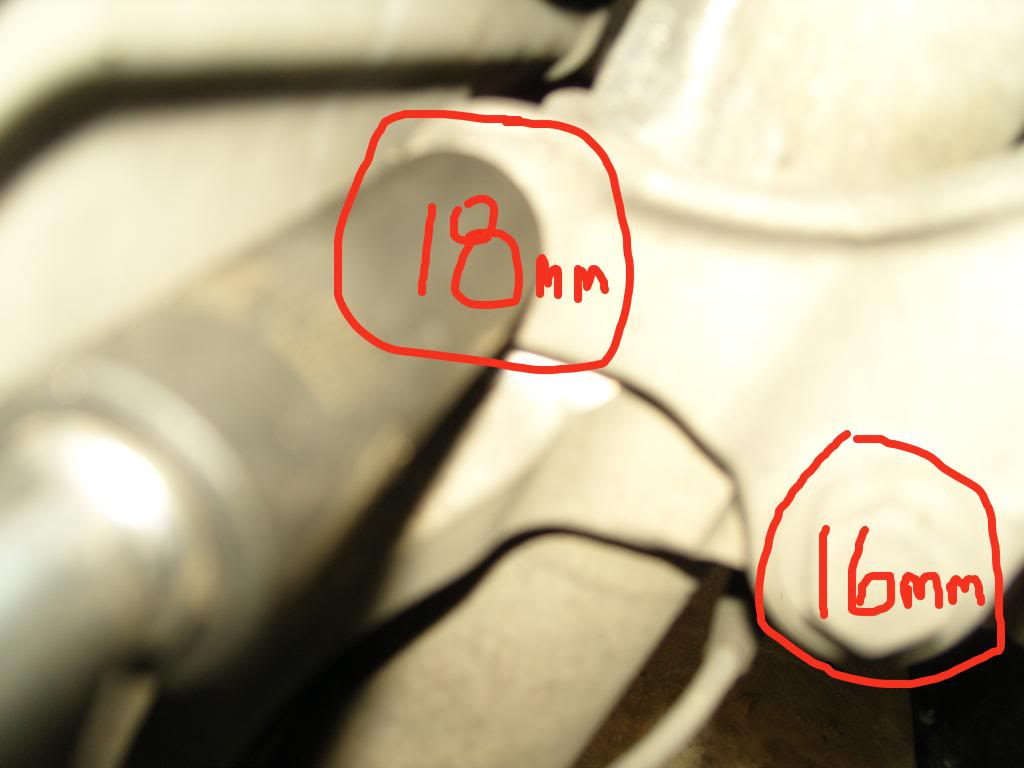
7. Loosen and remove the two bolts holding the lower portion of the strut body in place. One is 16mm and the other is 18mm with it having a nut attached.
Use opposing ratchets on the 18mm bolt head and corresponding nut
7b: On the passenger�s side: Remove the leveling sensor rod:
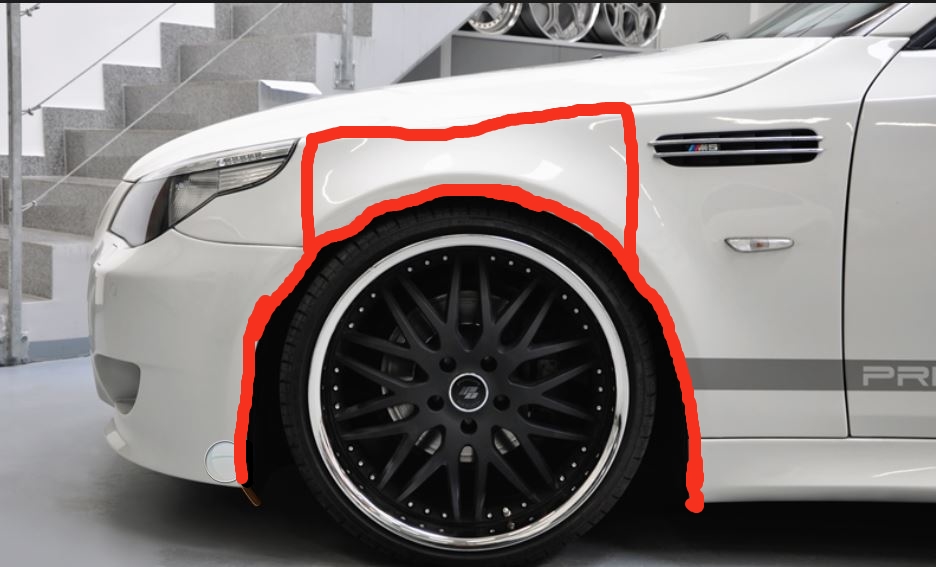
8. Now take ��electrical tape and place it on the lip/edge of the entire fender opening. Make sure all painted surfaces are covered on this lip area. Now take a piece of toolc hest / drawer liner 18� wide x 12� high and tape it into position centered above the wheel opening and covering the taped lip. (Forgot to take a picture).
But the red outlines the painted area that must be protected with electrical tape and some form of padding.
10. Now spray Seam Foam or other penetrating lubricate on the the area where the strut fits into the clamped area. Spray lightly onto the shock body about 1� up from where it enters the clamp area and have a towel handy to catch excess fluid.
11. Take a steel wedge and slightly tap it into the clamp opening:
While holding the wedge in place with one hand, use the mallet to hammer here:
Since you�re replacing the strut, hammer it pretty hard until the strut moves up about ��. (Notice the wet area where I had applied the Seam foam penetrating spray.)
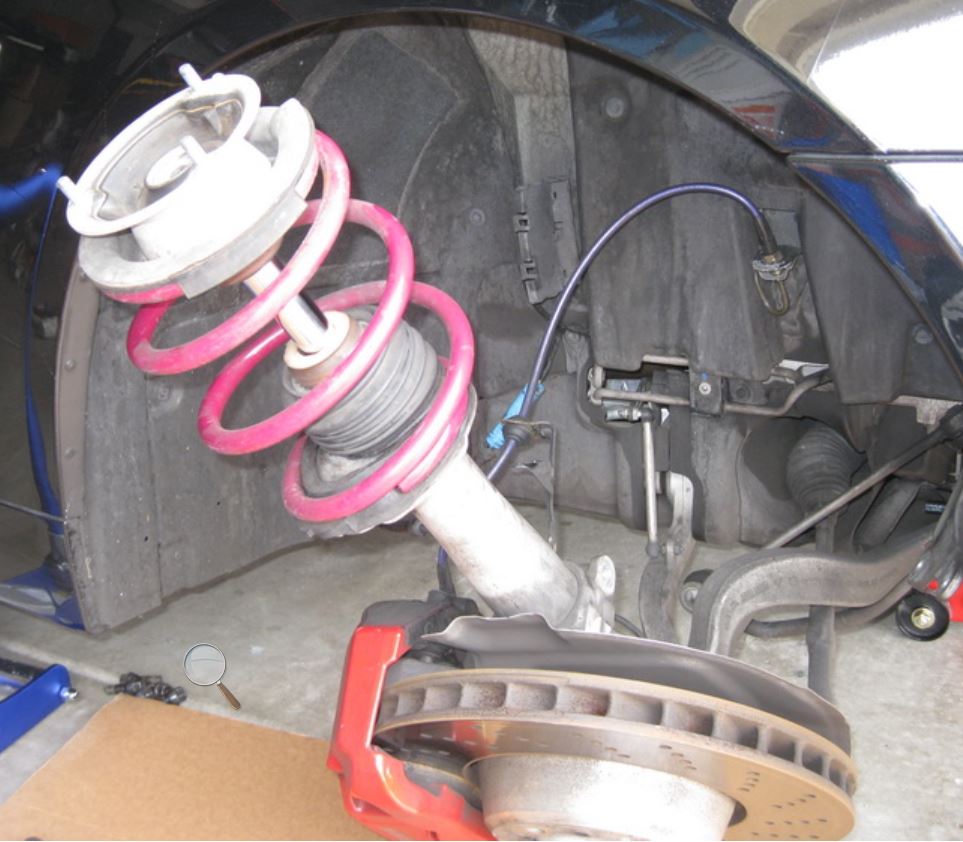
10. Turn the steering the wheel all the way to the right (driver�s side work) and to the left (passenger side work) so that the tie rod is pulled in towards the engine compartment.
11. Place a jack under the hub (center protruding) of the rotor and slightly raise it about ��
12. Now fully remove the top 3 nuts from the shock tower within the engine compartment.
13. Lower the jack and move it away from the area.
14. The strut is now free from the car body but still within the lower clamp and inner wheel well.
15. Here�s the part that can damage your inner fender lining and/or your fender body panel and painted surfaces.
I hope you�ve protected them.
You have two options here: Place a crowbar in the center hub area and push down with your foot or place your foot on the caliper area and push down.
The goal is to lower the suspension assembly so that you can move the strut out from within the wheel well without damaging your fender. Since your control arms and tie rod are still attached, they present a lot of resistance to pushing down on the rotor assembly. You have to lower it about 4� to clear the fender opening.
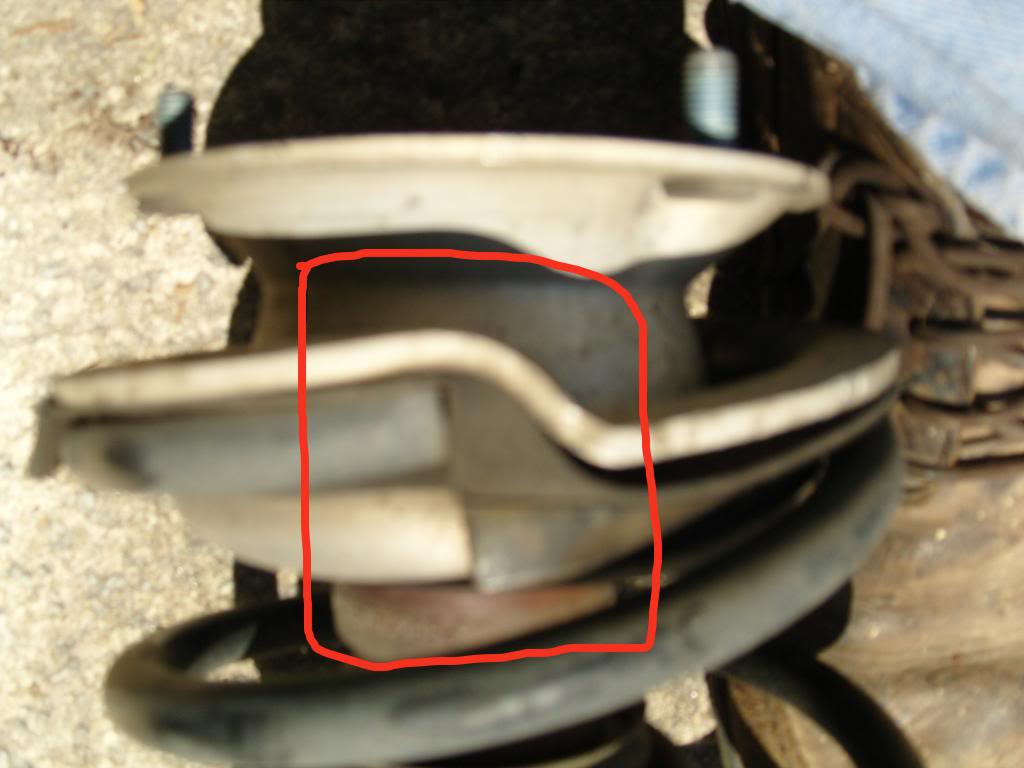
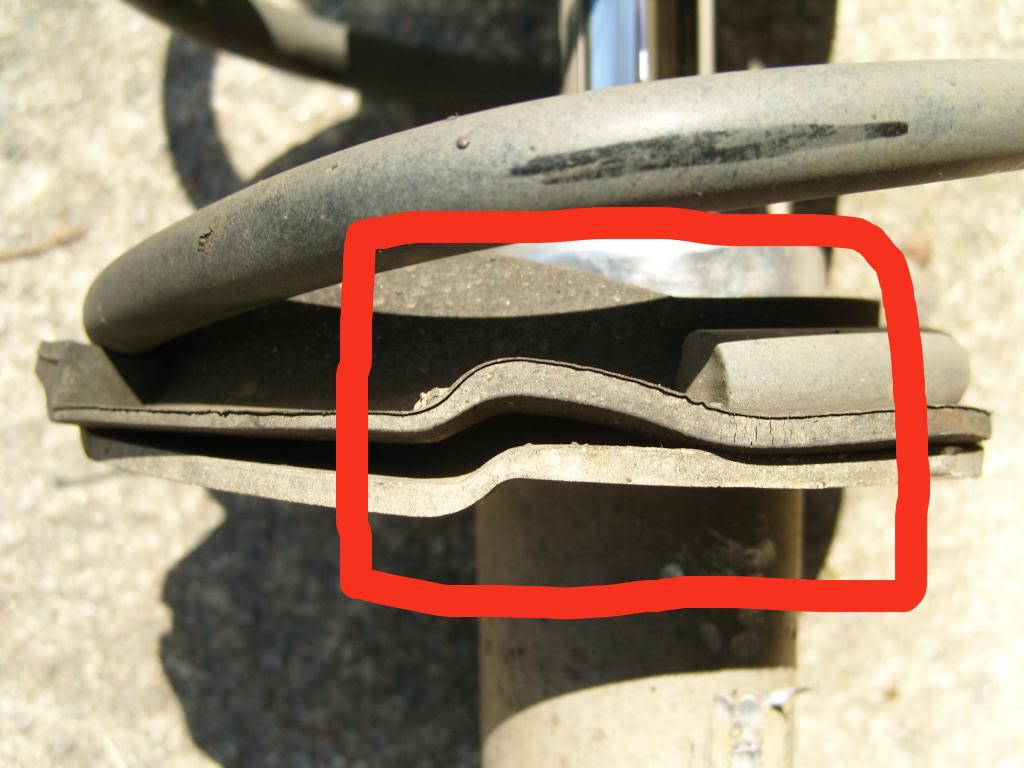
16. Now closely mark where the coil spring ends are located vs the strut plates:
Upper Shock Plate:
The larger circular portion of the spring sits directly against the rubber gasket.
Lower Shock plate:
The coil spring does not a butt the gasket.
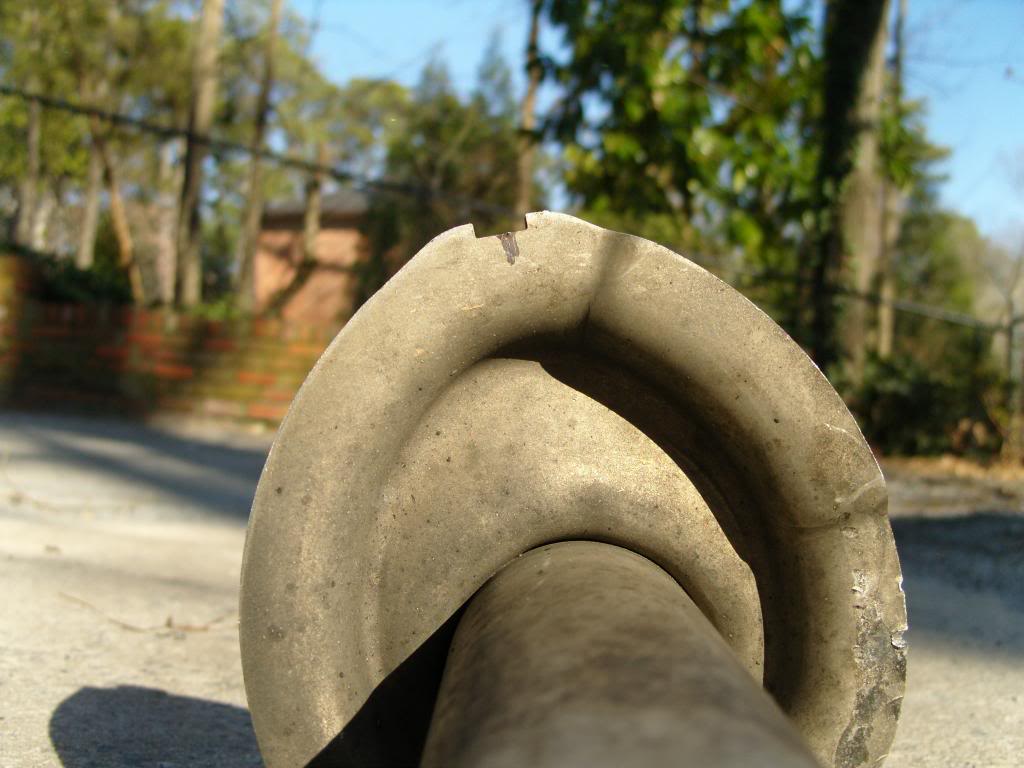
The coil spring is not round on the lower portion as shown by the lower spring plate:
That is how your coil spring must positioned after you install your new strut as well.
17. Attach your struts spring compressor tool. I used a KD Tools unit but I wouldn�t trust Harbor Freight. That�s up to you. Make sure it has security pins or hooks to hold the tool in place.
Attach to the coil spring only and not the spring support plates:
18. Now draw the clamp heads together until they almost touch each other. Alternate from side to side and make sure that the strut tool is maintaining that 180 degree opposite side position from each other.
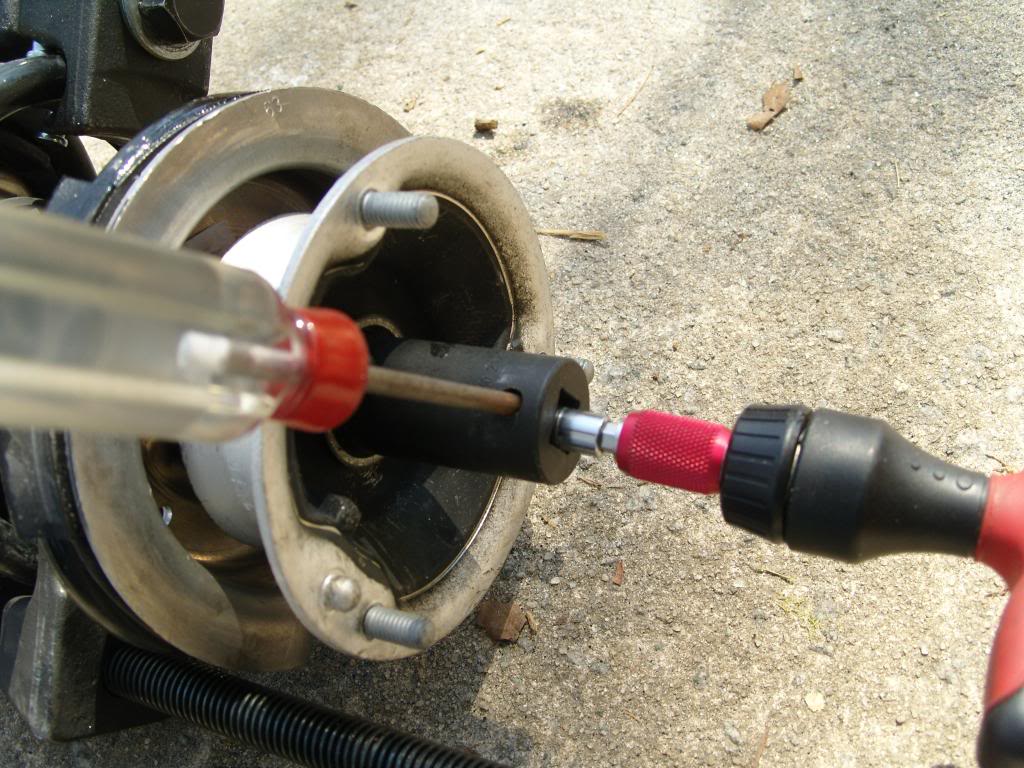
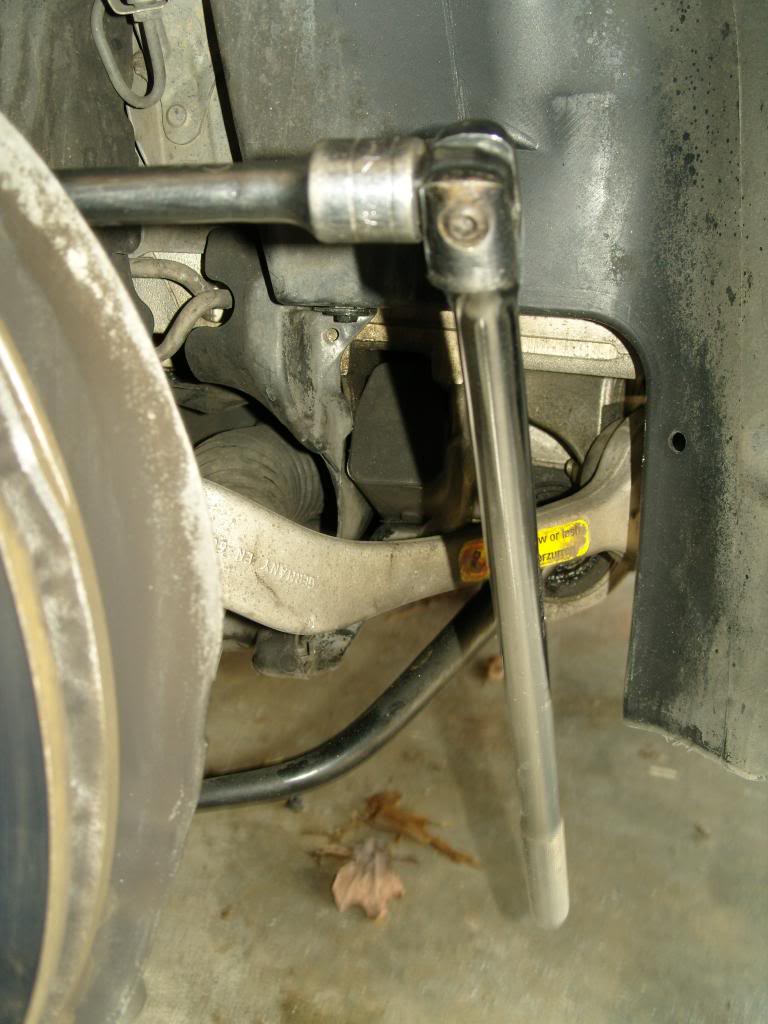
19. Take the extended T40 bit and insert into the end of the piston rod. Place the �” drive spark plug socket (with plastic insert removed) over the Torx bit and onto the nut. I didn’t have these two tools so I improvised as follows:
20. Remove the nut from the strut piston rod but make sure to note where the nut is positioned on the rod. (how many threads are visible) Also remember that the strut mount turns freely.
21. Reference this diagram before removing anything from the strut:
Stack the old parts as they come off of the strut rod.
22. Remove the coil spring.
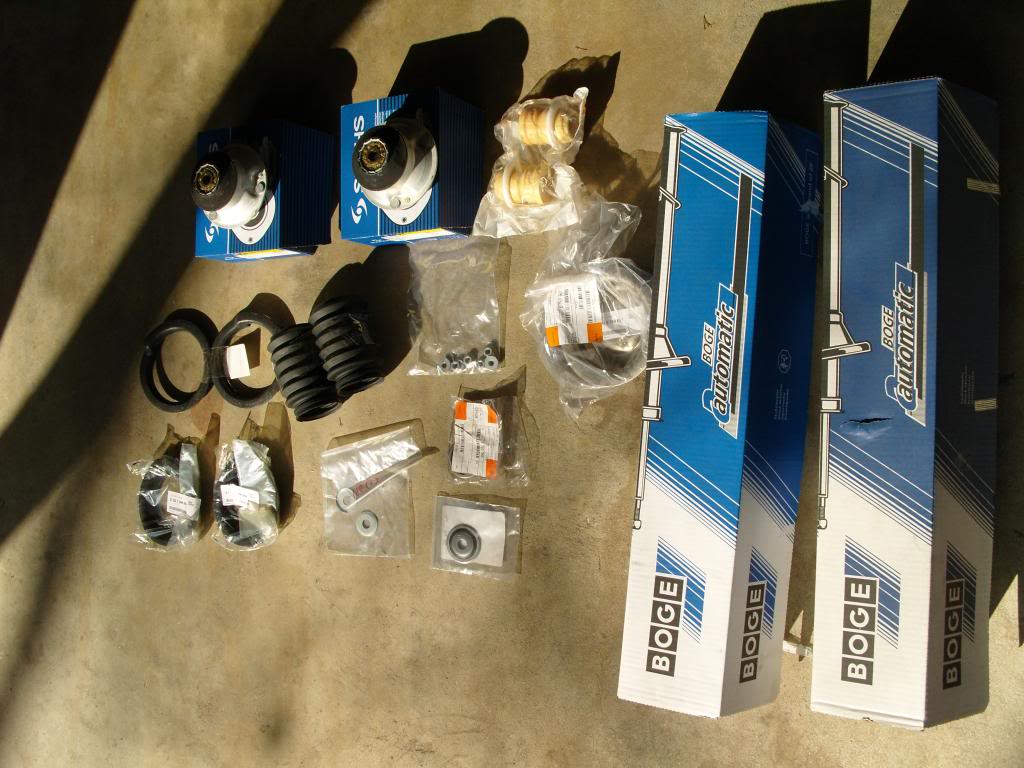
23. Time to reassemble with new parts:
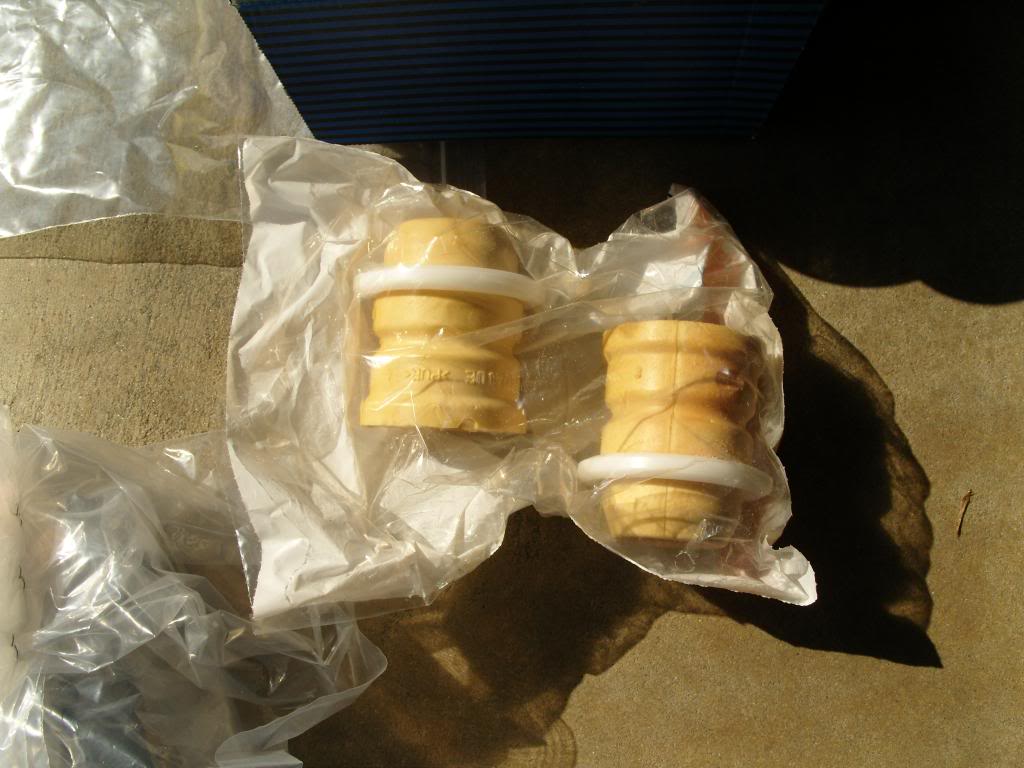
I replaced all rubber and strut mounts. The Boge struts came from rockauto.com:
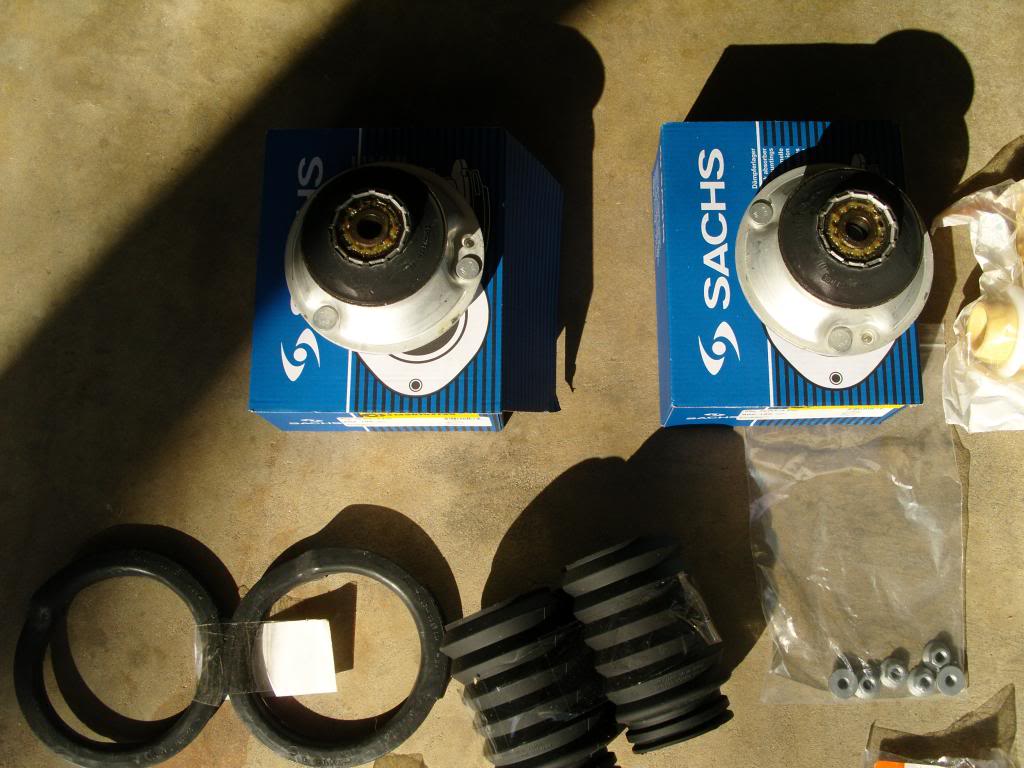
The strut mounts came from FCPEuro:
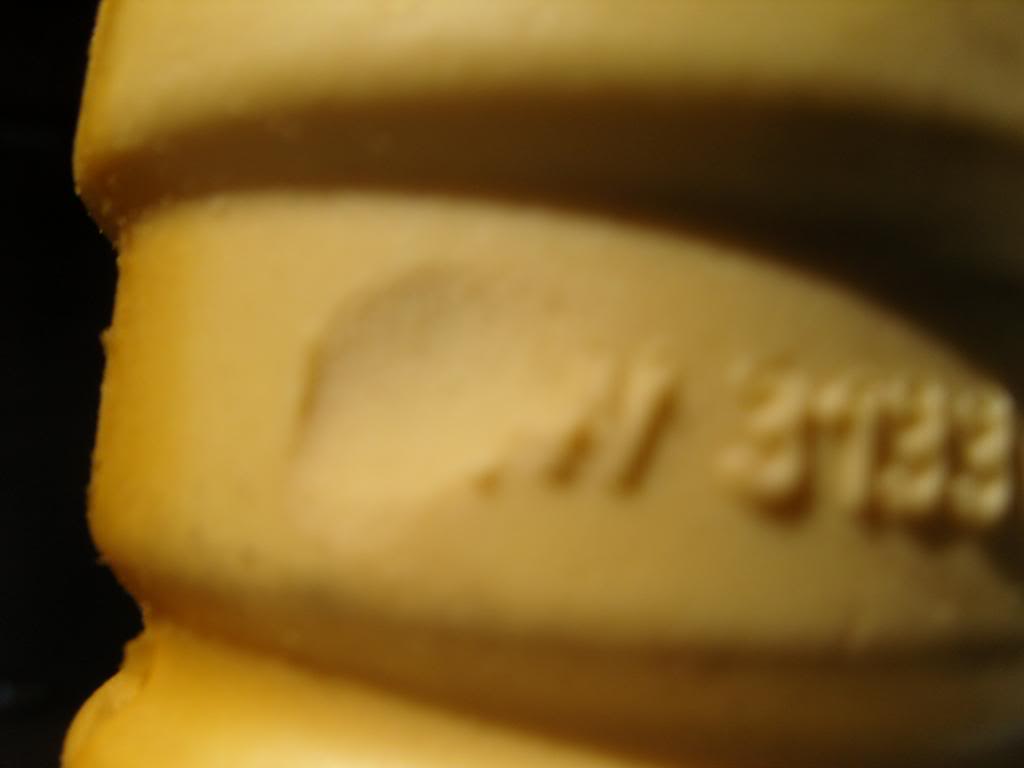
They are exact duplicates of the OEM ones down to the numbering on the rubber
The additional shock absorbers also came from FCPEuro:
They are also exact duplicates and even had the BMW logo shaved from them. They are made by REIN.
All of the other bits and pieces came from ebmwparts.com.
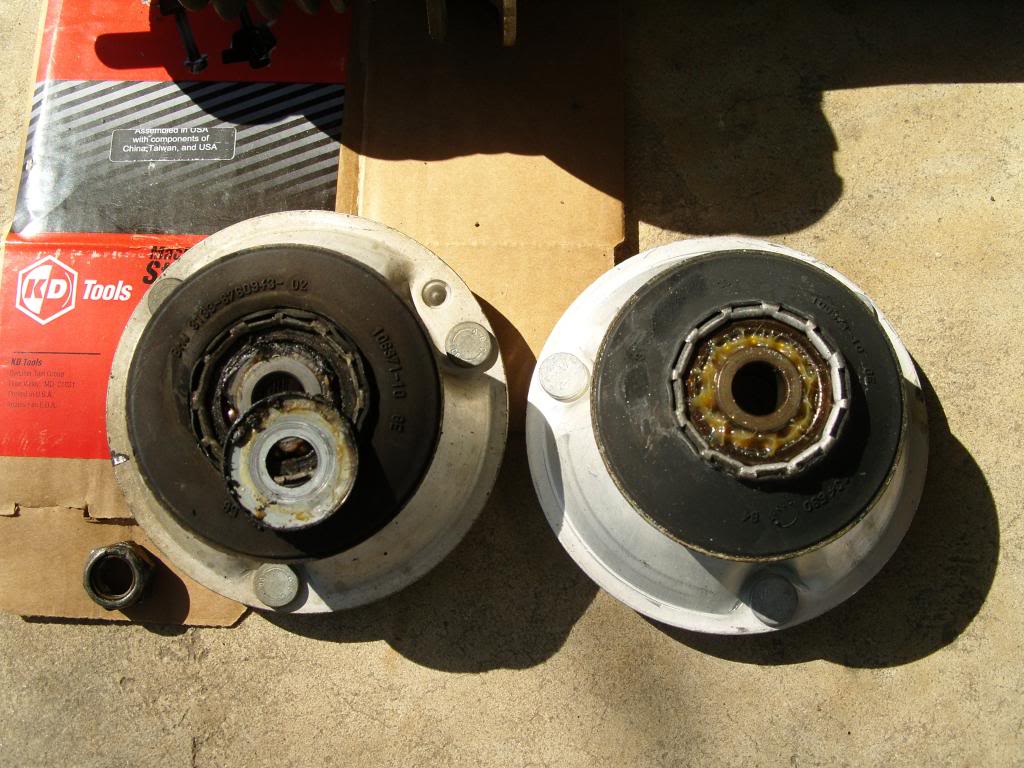
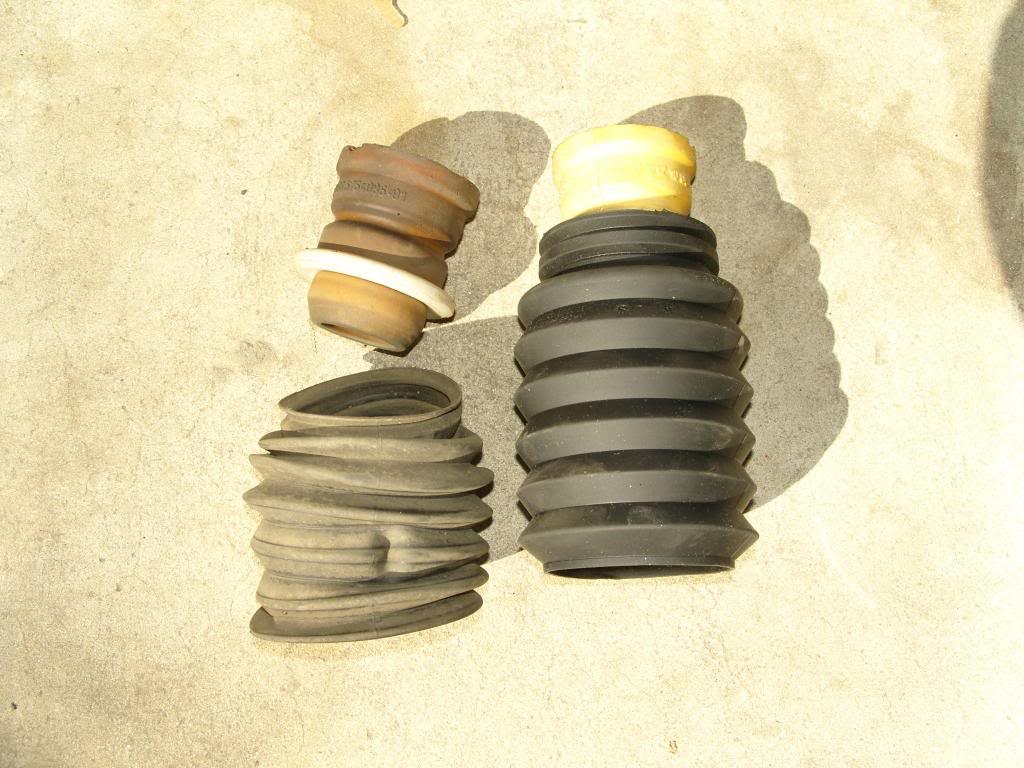
Old vs New:
Notice that the strut mount has ball bearings
24. Using the previous reference diagram, reassemble the new components onto the new strut. Look at the old part if you’re confused by the order as it will have tell tale marks left on it.
25. Now make sure that you have the coil spring in the proper position once you’ve attached the strut mount nut and before it’s been overly tightened. Remember that the smaller diameter end of the coil sits on the lower strut plate.
26. Place spring handclamps 2 or 3 over the lower coil spring and base plate
in order to keep/hold the coil spring in proper relations to the rubber gasket.
27. Now slowlyrelease the strut compressor checking the coil/gasket position.
28. Tighten up the piston rod nut and matching what existed before. The strut mount should turn freely as OEM.
29. Now grease the body of the strut that will be within the clamped area and the inner facing of the wheel clamp area. Also lightly spray the same greased area with the Sea Foam lubricant
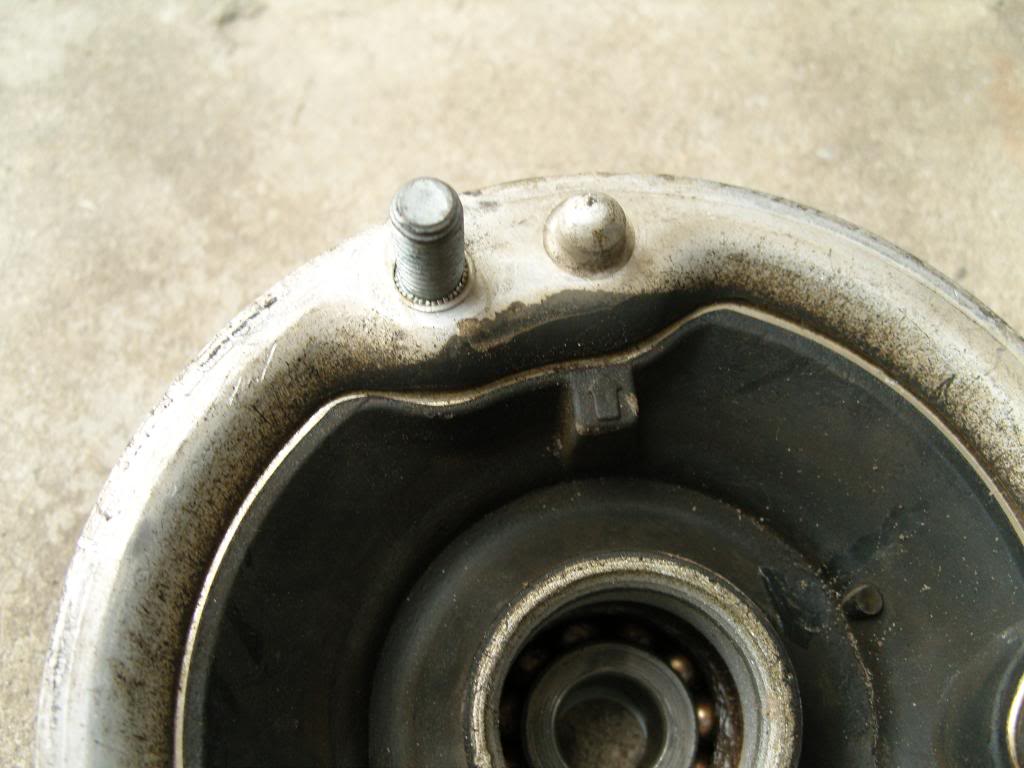
29. Time to place the strut back into the wheel assembly clamp. Make sure that this notch lines up with the opening:
30. Place the strut into the clamp opening and using your steel wedge slightly hammered into the clamp opening as before push and twist the strut into the clamp until it is fully seated. If it is being stubborn, place a scissor jack under the wheel hub and now kind of body hammer the strut into position using the jack as a foundation.
31. Now you are faced with the same problem in getting the strut assembly back into the wheel well without damaging your fender. Not easy!
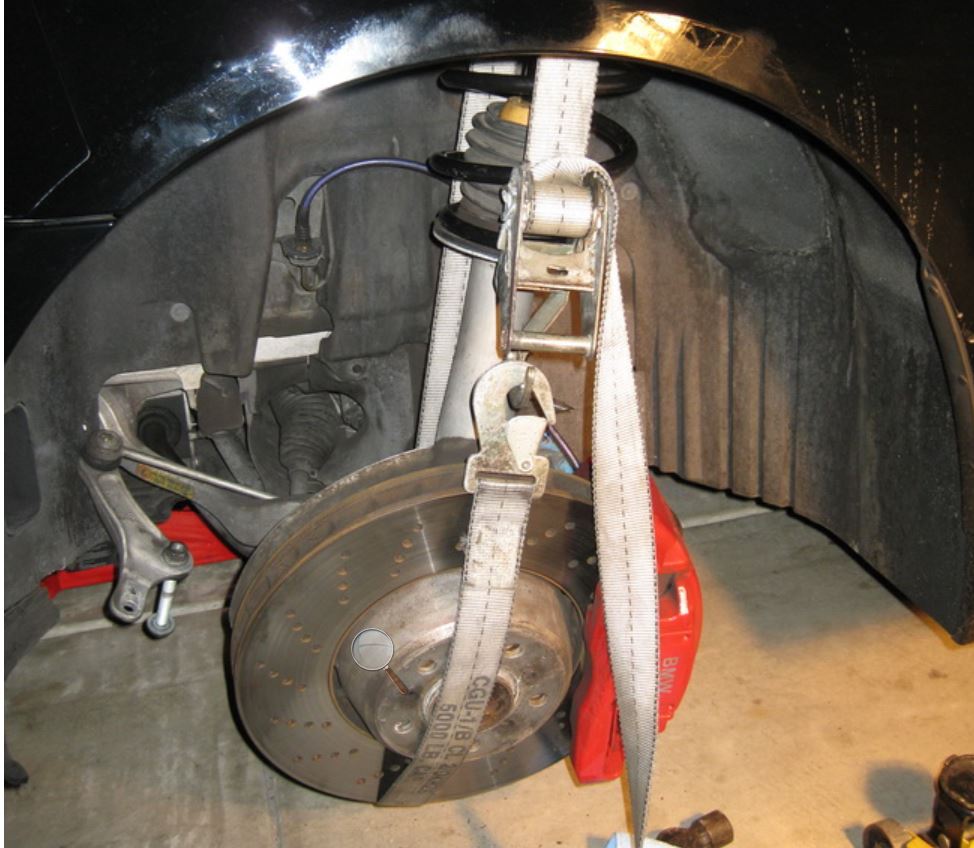
32. I relied on this somewhat dangerous but useful approach:
Your ratchet must be at least 5000lbs rated. Ratchet it down until it cannot compress anymore. Now carefully located back into the wheel well and release the ratchet.
33. Work in reverse order getting the strut back into position. Make sure that this pin aligns with the hole in the top shock tower:
34. Check the facing of your rotors to make sure no lubricant got on them. Clean with brake cleaner spray if necessary.
The job has a lot more potential pitfalls that needed to be explained before somebody decides to venture into this type of project.
Hopefully, it will be of assistance to those deciding, or committed, to doing it themselves.
Many do not realise that the strut mount twists upon ball bearings as an active part of the suspension. Therefore, just replacing the front struts without the strut mounts is a mistake in my opinion.
The coil spring must be properly positioned in order for the strut mount to turn freely when torqued to spec's. It's critical that the strut mount turn freely once the strut piston rod is tightened. It's trickier than it sounds, when using standard coil spring compressors, and not the specific BMW coil spring compressor tool.
I have no experience with aftermarket struts and coil springs for this car, but that strut mount must turn freely once torqued, even if you're using aftermarket stuff. If it doesn't, there will be premature wear on that bearing and another expensive repair.
Thanks for the write up...Would someone be willing to spell out part descriptions to the picture below. I need to order parts to have work done by my mechanic. I've used real oem for descriptions and finding parts on rockauto and fcp euro like mentioned in the thread.
Last edited by azmalu; Feb 4, 2019 at 11:37 PM.
Reason: added picture and reogrganized text.


 http://www.amazon.com/gp/product/B000U7XW9O/ref=gno_cart_title_1?ie=UTF8&psc=1&smid=A2ZSTDEXO9VTZF" /> http://www.amazon.com/gp/product/B000U7XW9O/ref=gno_cart_title_1?ie=UTF8&psc=1&smid=A2ZSTDEXO9VTZF">http://www.amazon.com/gp/product/B000U7XW9O/ref=gno_cart_title_1?ie=UTF8&psc=1&smid=A2ZSTDEXO9VTZF