
Following in the Footsteps of ucsbwsr - DIY Installation VRSF 7" FMIC on an E60 535i


Thread Starter
New Members
Joined: Mar 2012
Posts: 33
Likes: 0
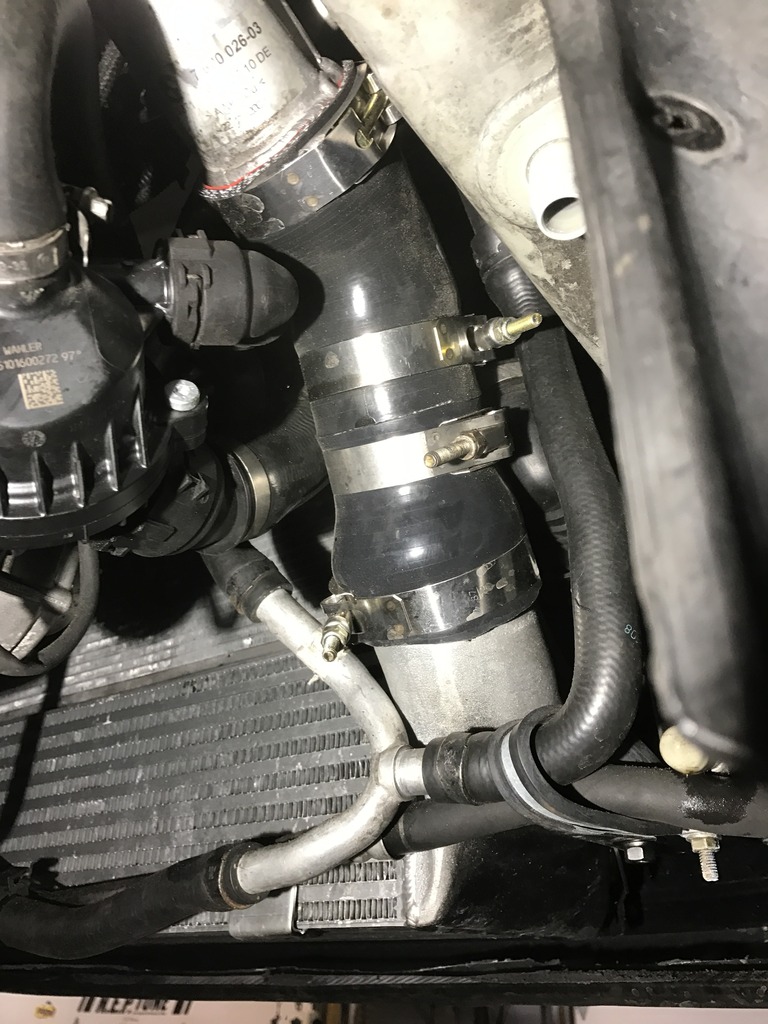
After reading the thread originally posted by ucsbwsr of how to to fit the 7" FMIC to our E60 N54 equipped cars, I was all in. I knew warmer months were ahead, I knew I was about to up the boost even more when going up to E65 fuel, and severe heat soak would be inevitable. Since I didn't want to deal with running meth, and I had access to E85, running E85 with a FMIC was exactly what I was looking for. The only problem is that most of the FMIC kits for the N54 are geared towards the 135i and 335i platforms. But it seemed like with a standard 135/335 kit, and a few miscellaneous couplers and pipes, we could make things work.
First off you'll need the VRSF 7" FMIC kit. I received the lower charge pipe upgrade, but DID NOT use it.
As far as extra components that you'll need, here are links to what I purchased extra. You could probably produce them yourself for much cheaper.
- a 15" long 2.5" 90 degree bend (http://store.max-redline.com/index.p...g-l-elbow.html)
- 4 more T-Bolt clamps (I got them from here - http://store.max-redline.com/index.p...r-exhaust.html)
- a 5" long 2.5" (http://store.max-redline.com/index.p...bo-5-long.html)
- a 45 degree 2.5" silicon elbow (http://store.max-redline.com/index.p...icon-hose.html)
- and a 30 degree 2.5" silicon elbow (Max-Redline didn't have these so I found them at SiliconIntakes.com - http://www.siliconeintakes.com/30-si...-30-p-196.html)
Once you've got all your parts together, now on to the actual installation:


NOTE: I've sinced revised this part of the installation in order to get the FMIC sitting perfectly straight and enhance the appearance of a bunch of small black zip ties. This required a decent amount of adjusting and the use of larger, 1/2" wide heavy-duty zip ties, so now I only have one on each side, but they're much beefier.


First off you'll need the VRSF 7" FMIC kit. I received the lower charge pipe upgrade, but DID NOT use it.
As far as extra components that you'll need, here are links to what I purchased extra. You could probably produce them yourself for much cheaper.
- a 15" long 2.5" 90 degree bend (http://store.max-redline.com/index.p...g-l-elbow.html)
- 4 more T-Bolt clamps (I got them from here - http://store.max-redline.com/index.p...r-exhaust.html)
- a 5" long 2.5" (http://store.max-redline.com/index.p...bo-5-long.html)
- a 45 degree 2.5" silicon elbow (http://store.max-redline.com/index.p...icon-hose.html)
- and a 30 degree 2.5" silicon elbow (Max-Redline didn't have these so I found them at SiliconIntakes.com - http://www.siliconeintakes.com/30-si...-30-p-196.html)
Once you've got all your parts together, now on to the actual installation:
NOTE: I've sinced revised this part of the installation in order to get the FMIC sitting perfectly straight and enhance the appearance of a bunch of small black zip ties. This required a decent amount of adjusting and the use of larger, 1/2" wide heavy-duty zip ties, so now I only have one on each side, but they're much beefier.
Last edited by chadillac2000; May 14, 2015 at 08:13 AM.


New Members
Joined: Jul 2015
Posts: 4
Likes: 0
From: Upstate newyork
My Ride: 09 535i Xdrive
Hey first off thank you for your post! Im attempting this install this week the pictures u posted dont show anymore anyway u can repost them or if its easier my email is sajadius7@gmail.com

New Members
Joined: Dec 2015
Posts: 93
Likes: 0
From: Boston
My Ride: E61 535Xit
I have this setup on my E61 and didn't use zip ties. I made mounting plates that use the factory screw holes.
<a href="http://s1270.photobucket.com/user/neptunenow/media/1226524E-B985-4047-9278-077DE4543C38.jpg.html" target="_blank"><img src="http://i1270.photobucket.com/albums/jj604/neptunenow/1226524E-B985-4047-9278-077DE4543C38.jpg" border="0" alt=" photo 1226524E-B985-4047-9278-077DE4543C38.jpg"/></a>
<a href="http://s1270.photobucket.com/user/neptunenow/media/276ADA37-C79D-410D-BC4F-53693EDB6479.jpg.html" target="_blank"><img src="http://i1270.photobucket.com/albums/jj604/neptunenow/276ADA37-C79D-410D-BC4F-53693EDB6479.jpg" border="0" alt=" photo 276ADA37-C79D-410D-BC4F-53693EDB6479.jpg"/></a>
<a href="http://s1270.photobucket.com/user/neptunenow/media/0091F628-846B-44E7-9C72-F57A4BD31F41.jpg.html" target="_blank"><img src="http://i1270.photobucket.com/albums/jj604/neptunenow/0091F628-846B-44E7-9C72-F57A4BD31F41.jpg" border="0" alt=" photo 0091F628-846B-44E7-9C72-F57A4BD31F41.jpg"/></a>
Painted to give the stealth look and protect the aluminum.
<a href="http://s1270.photobucket.com/user/neptunenow/media/978E5C40-8FE1-443C-91B2-B74A5F804B1F_1.jpg.html" target="_blank"><img src="http://i1270.photobucket.com/albums/jj604/neptunenow/978E5C40-8FE1-443C-91B2-B74A5F804B1F_1.jpg" border="0" alt=" photo 978E5C40-8FE1-443C-91B2-B74A5F804B1F_1.jpg"/></a>
And here is how the pipes are joined and reduced to fit the outlets.

Last edited by RCB; Oct 6, 2016 at 08:33 PM.
New Members
Joined: Jul 2016
Posts: 89
Likes: 0
From: San Mateo, CA
My Ride: E61 535xi 6MT, '81 Scirocco Turbo Ragtop
Model Year: 2010
Hey first off thank you for your post! Im attempting this install this week the pictures u posted dont show anymore anyway u can repost them or if its easier my email is sajadius7@gmail.com
Jeff

Thread
Thread Starter
Forum
Replies
Last Post
chadillac2000
E60, E61 Parts, Accessories and Mods
42
Sep 13, 2017 11:15 AM