
DIY E60/E61 Rear Upper Windshield Moulding Seal Install

Thread Starter
New Members
Joined: Aug 2015
Posts: 6
Likes: 0
From: Sin City
My Ride: 05' 545i Slow Edition
What good is it to own a luxury ride that looks like crap.. So, hands on 
Got the rubber at Amazon from BMW it self for $36.00. Shipping is free if you have Prime, if not you fucked. I was quoted like $78.00 at the town stealership, about $59.00 if buyin' from a shop.
Install time is anywhere between 30 - 90 min depending on your skill level.
Tools used..
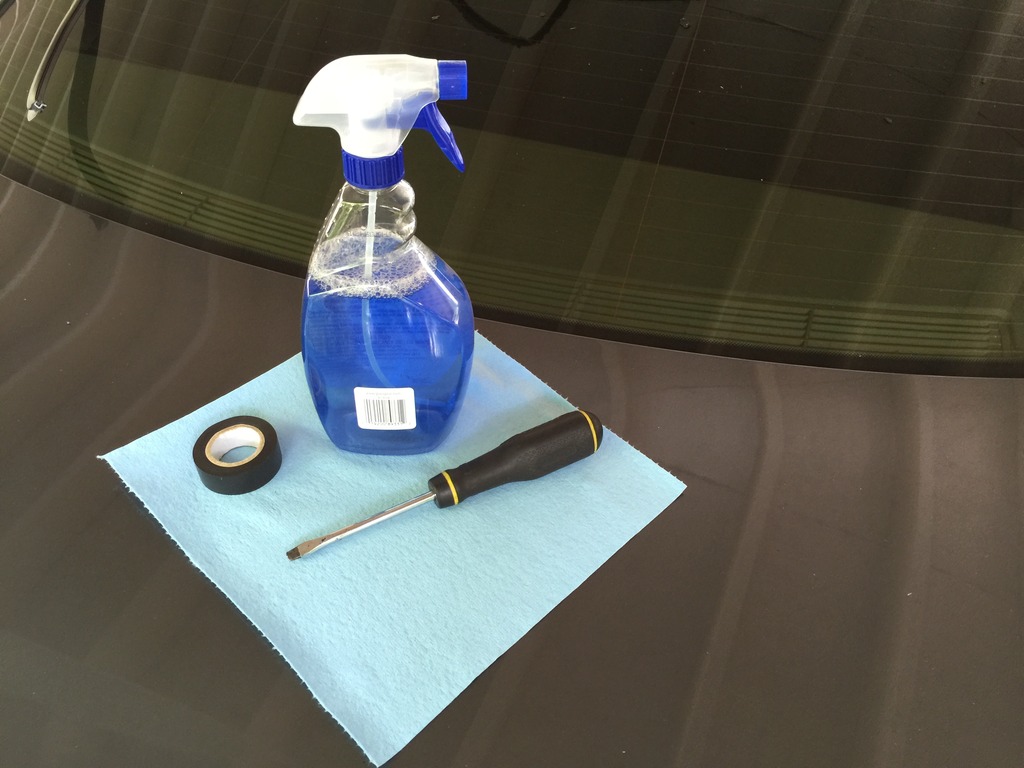
Ahhhh! What's the tape for?
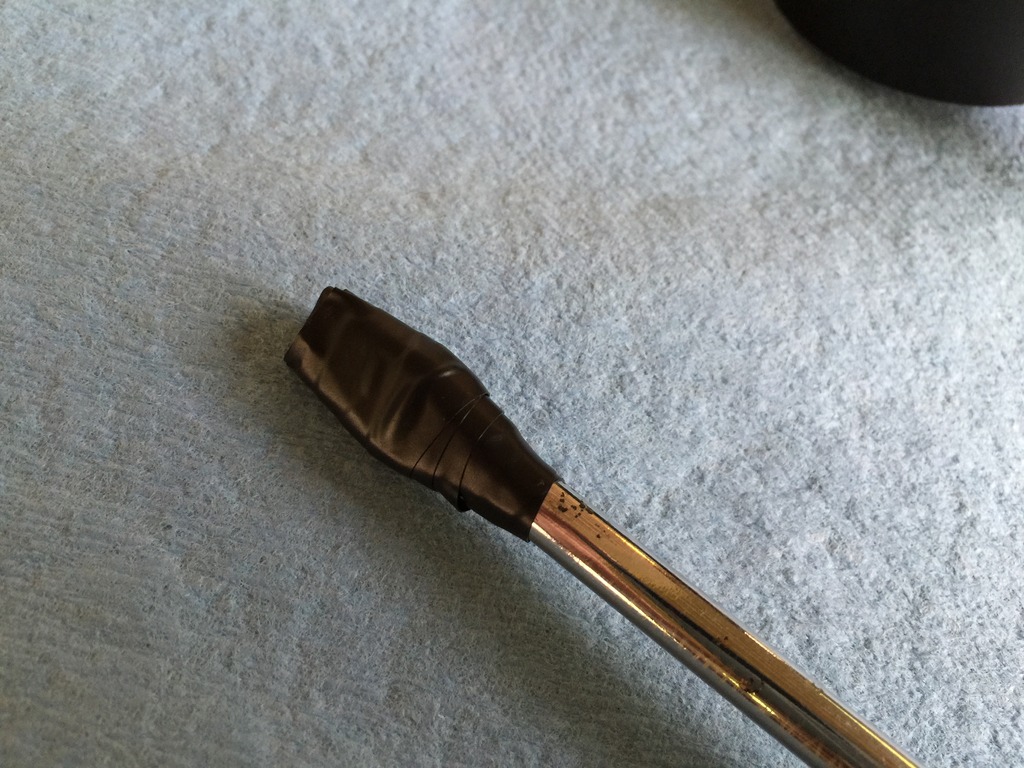
Or you don't need tape and scratch the shit out of everything, your call
De-install/install process:
1. Open trunk and pry out from the corner slowly.
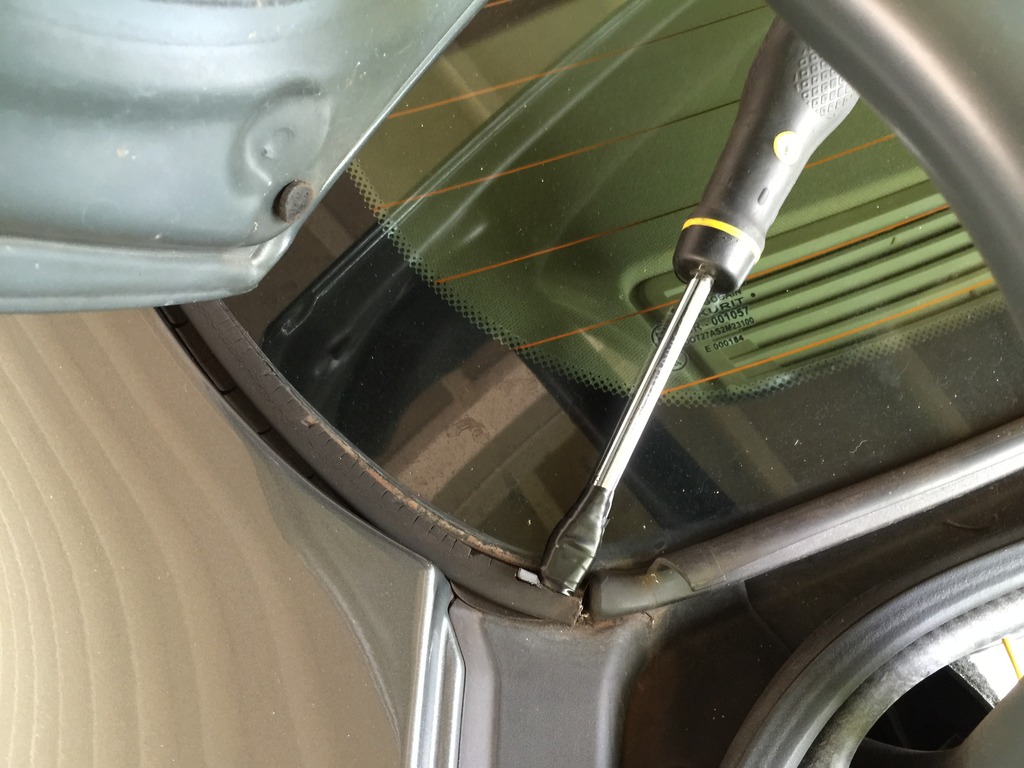
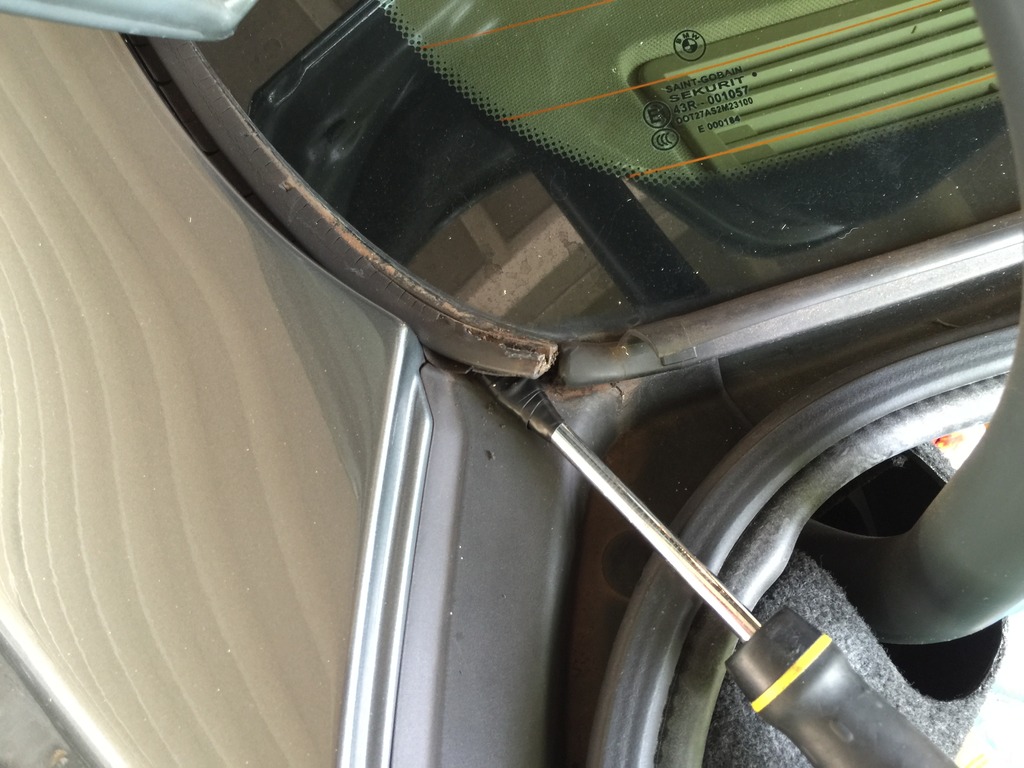

2. At this point you can just use your hand or your hook if you are a pirate to pull it out. Slow down when you hit the corner or you will snap the rubber and have to start all over again.
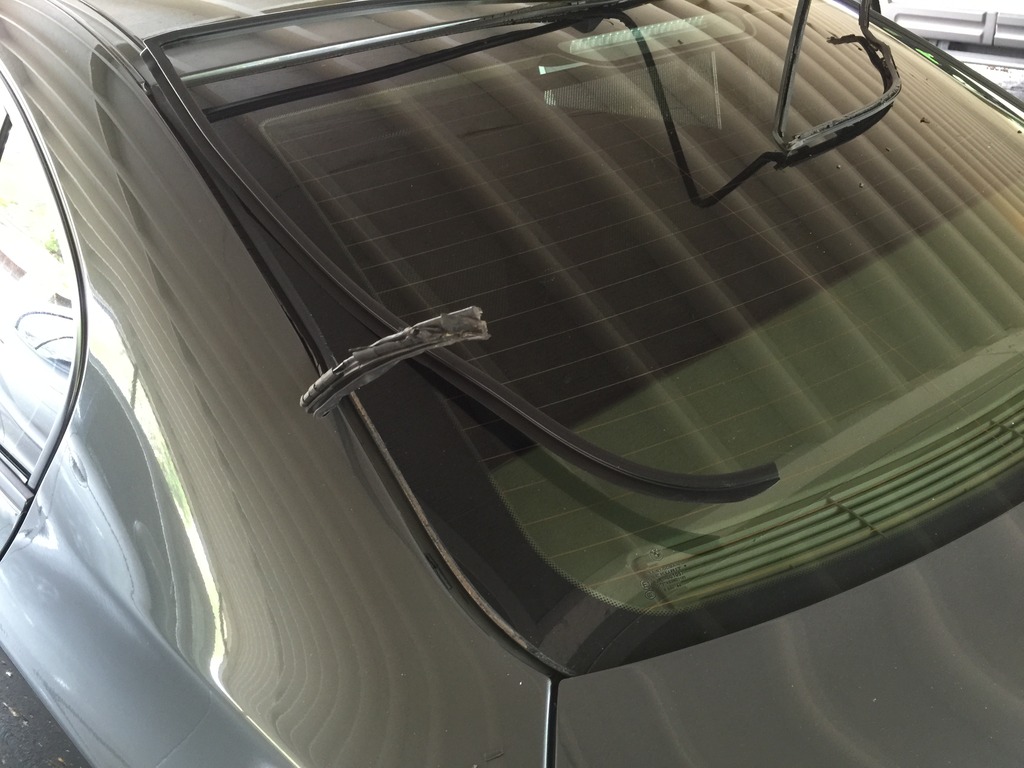
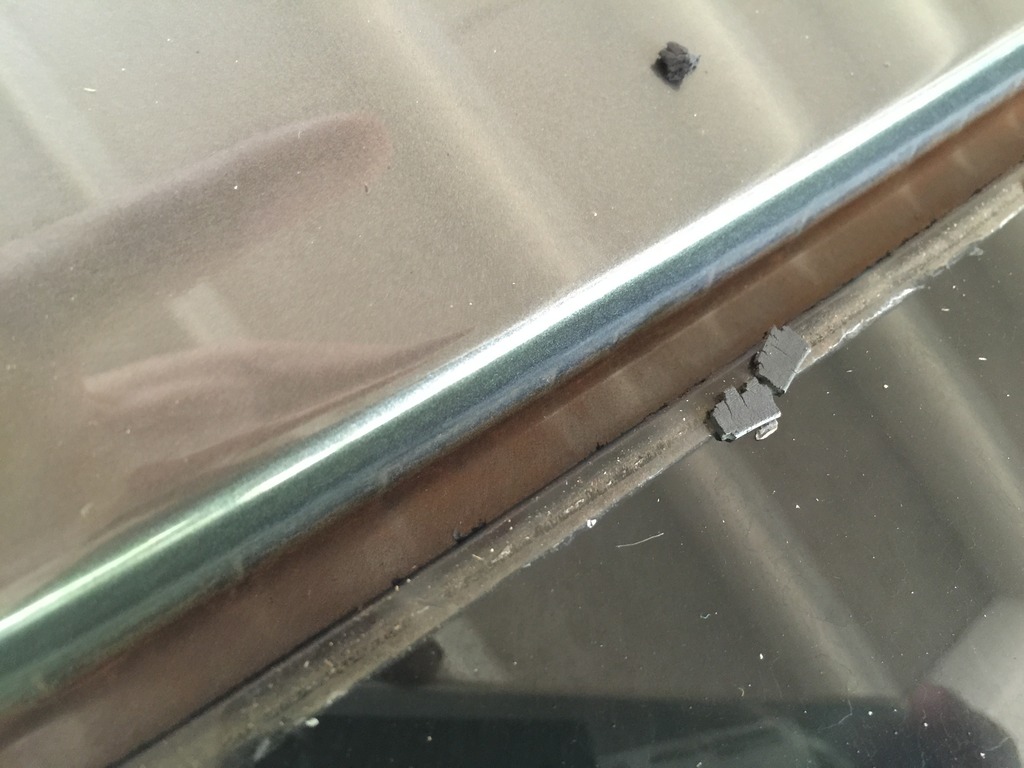
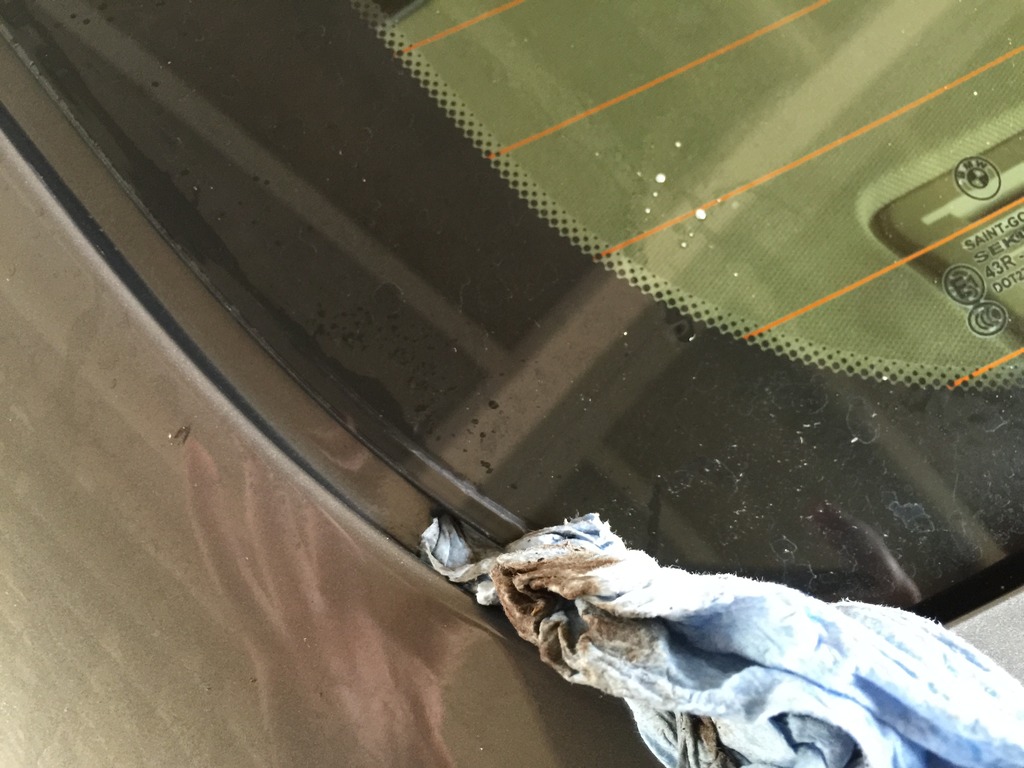
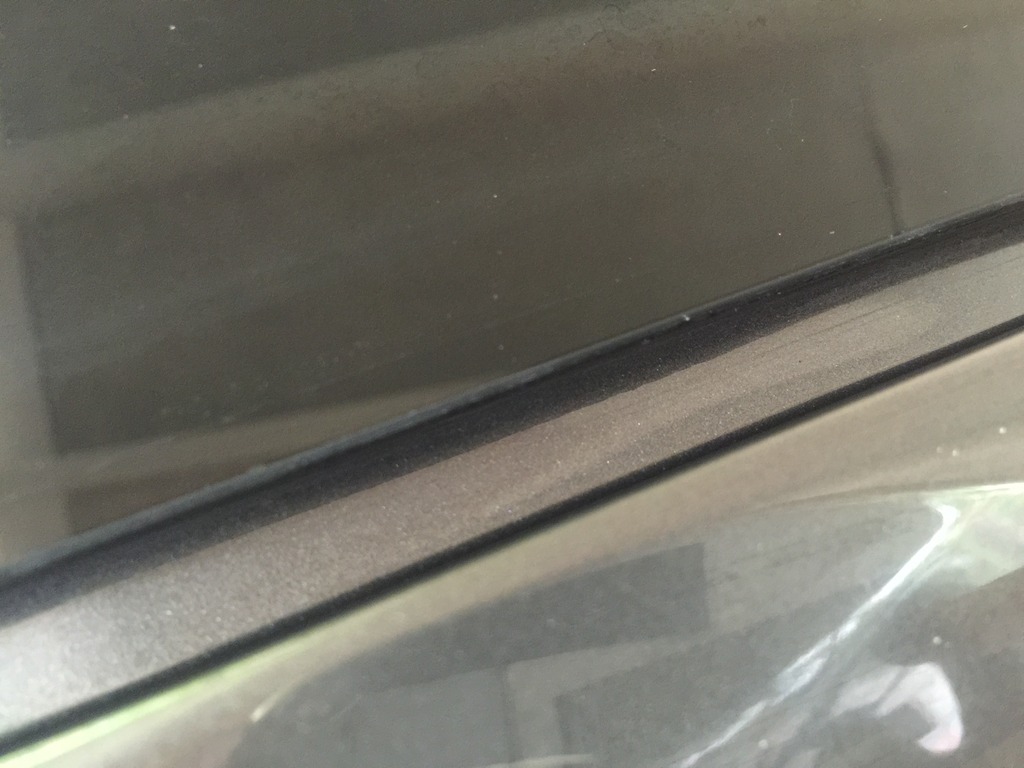
3. Once it's all out, spray Windex to clean the edge of the glass and the drain gutter where the seal goes.
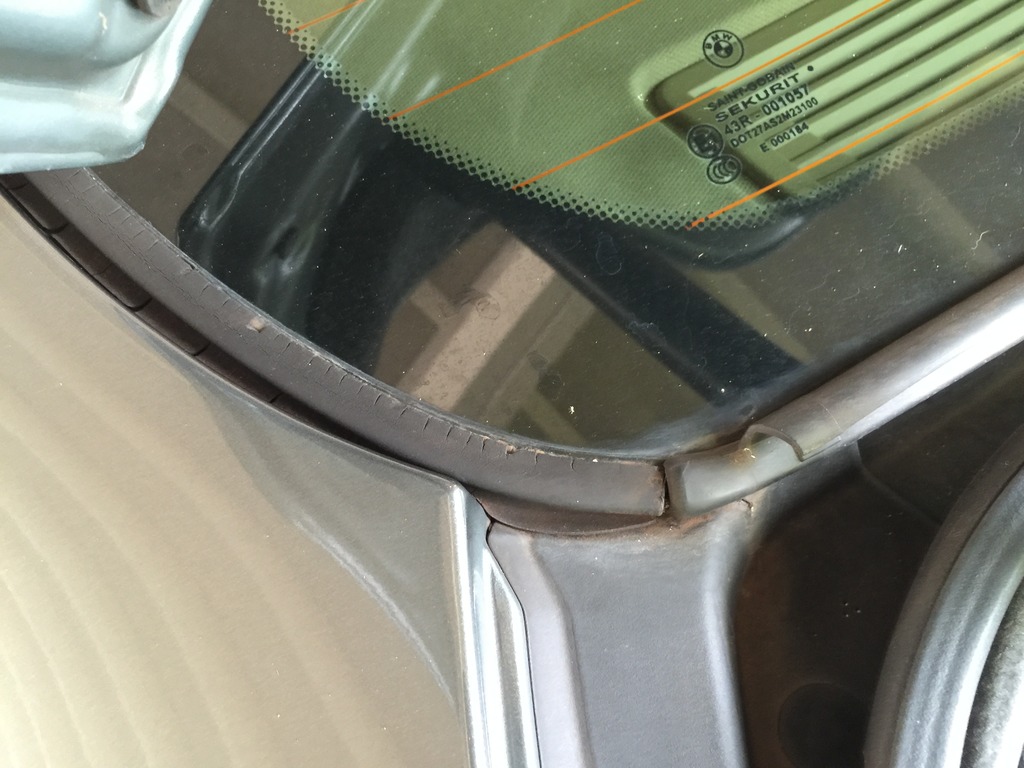
So, from this:
To this:
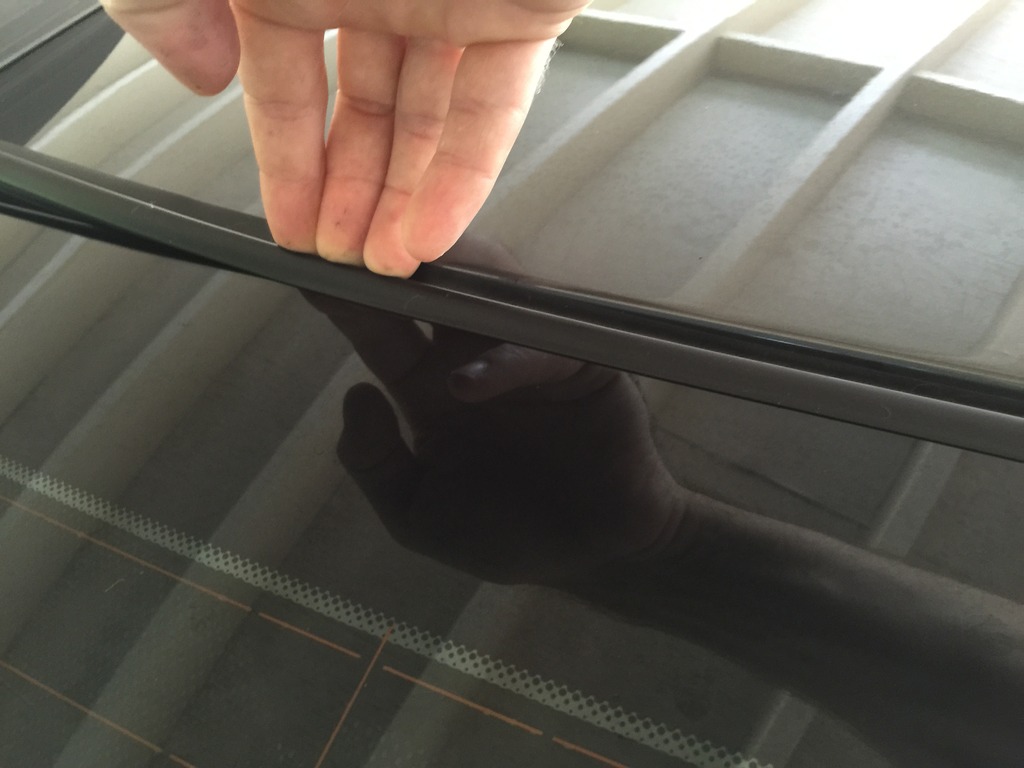
4. Once cleaned up, align the seal from both top corners and apply pressure inwards with your fingers or if thick fingers with anything you want to use that wont mess up the seal and put the condom in.
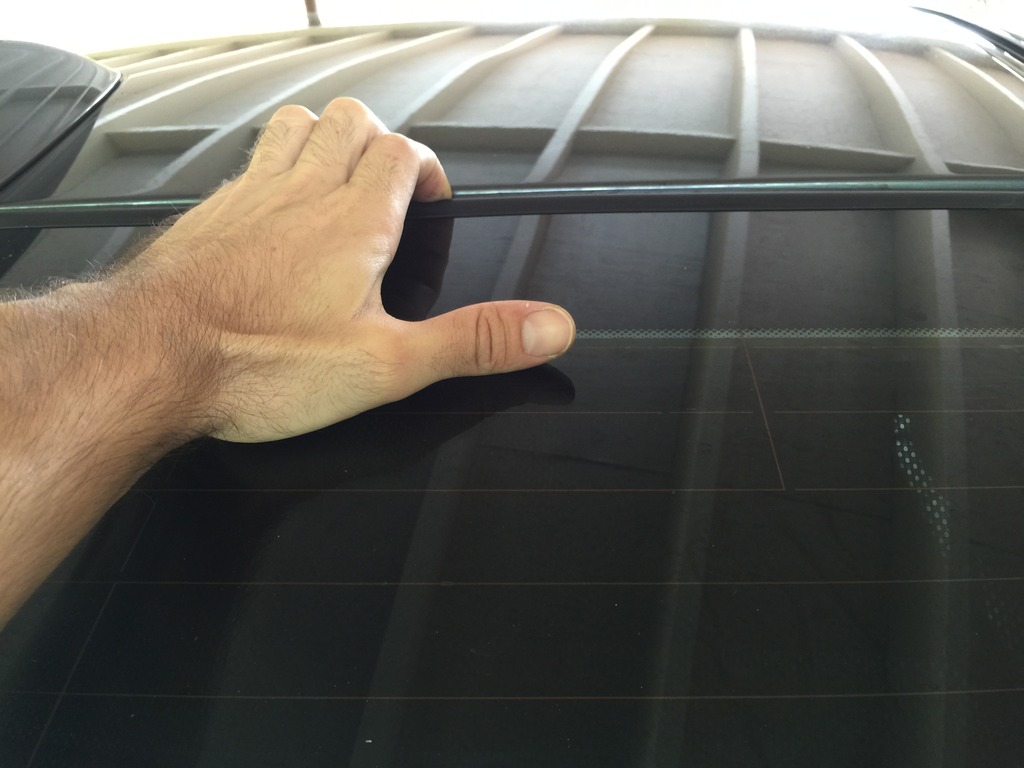
5. After the seal it's on, reapply pressure again all around for a tidy seal.
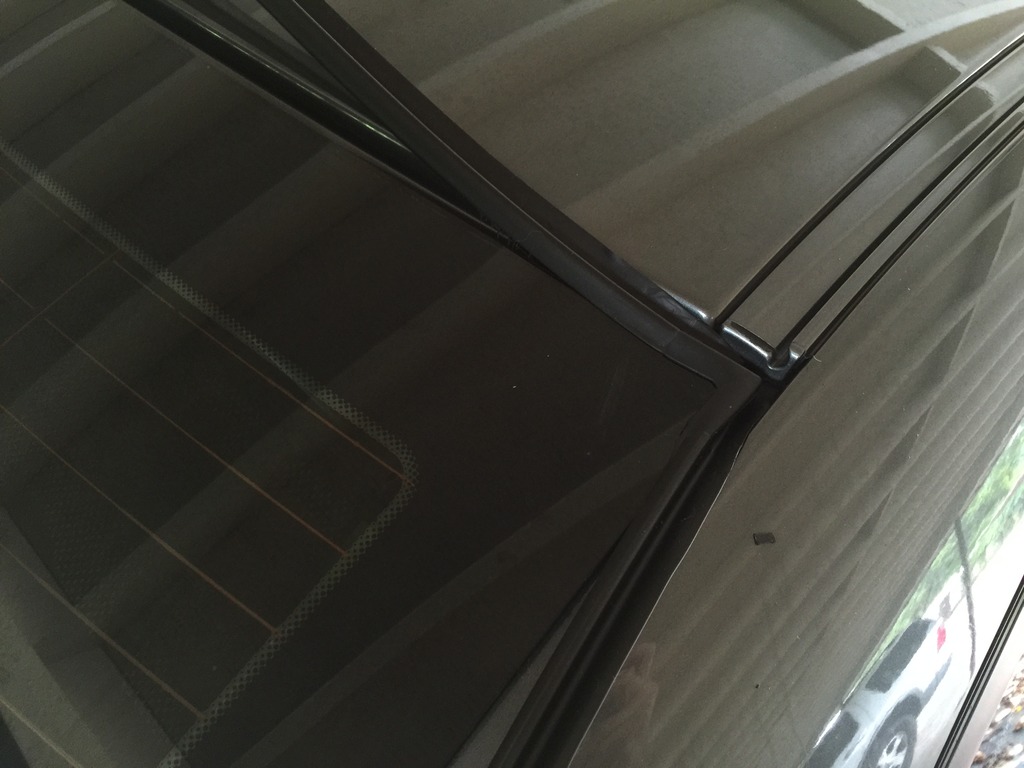
When the job is completed this is what it should look like, if it doesn't ahhh you probably not ready to work on your own car just yet

*** I didn't use any silicone , but it's your car. You CAN put some on or not. It's up to you. The windshield its sealed already and the seal is tight and well designed. ***
Oh, and for those that have said that the stealership charges for windshield removal for this job.. Ay ay ay amigo")
Cheers!
L.
Got the rubber at Amazon from BMW it self for $36.00. Shipping is free if you have Prime, if not you fucked. I was quoted like $78.00 at the town stealership, about $59.00 if buyin' from a shop.
Install time is anywhere between 30 - 90 min depending on your skill level.
Tools used..

Ahhhh! What's the tape for?

Or you don't need tape and scratch the shit out of everything, your call
De-install/install process:
1. Open trunk and pry out from the corner slowly.


2. At this point you can just use your hand or your hook if you are a pirate to pull it out. Slow down when you hit the corner or you will snap the rubber and have to start all over again.

3. Once it's all out, spray Windex to clean the edge of the glass and the drain gutter where the seal goes.
So, from this:

To this:


4. Once cleaned up, align the seal from both top corners and apply pressure inwards with your fingers or if thick fingers with anything you want to use that wont mess up the seal and put the condom in.


5. After the seal it's on, reapply pressure again all around for a tidy seal.

When the job is completed this is what it should look like, if it doesn't ahhh you probably not ready to work on your own car just yet

*** I didn't use any silicone , but it's your car. You CAN put some on or not. It's up to you. The windshield its sealed already and the seal is tight and well designed. ***
Oh, and for those that have said that the stealership charges for windshield removal for this job.. Ay ay ay amigo
Cheers!
L.

Thread
Thread Starter
Forum
Replies
Last Post
TexaZ3
Complete Car Sales
17
May 6, 2015 09:54 AM
thesalboy
Other BMW Models
2
Apr 8, 2015 09:13 AM