
DIY - Control arm, bushings, tension strut, wishbones

Thread Starter
Senior Members
Joined: Jun 2009
Posts: 2,680
Likes: 7
My Ride: E60 530i
DIY - Control arm, bushings, tension strut, wishbones whatever you want to call them!
31126760182 - 16 Right wishbone
31126760181 - 16 Wishbone, left
31126774825 - 11 LEFT tension strut WITH RUBBER MOUNTING
31126774825 - 11 Right tension strut with rubber mounting
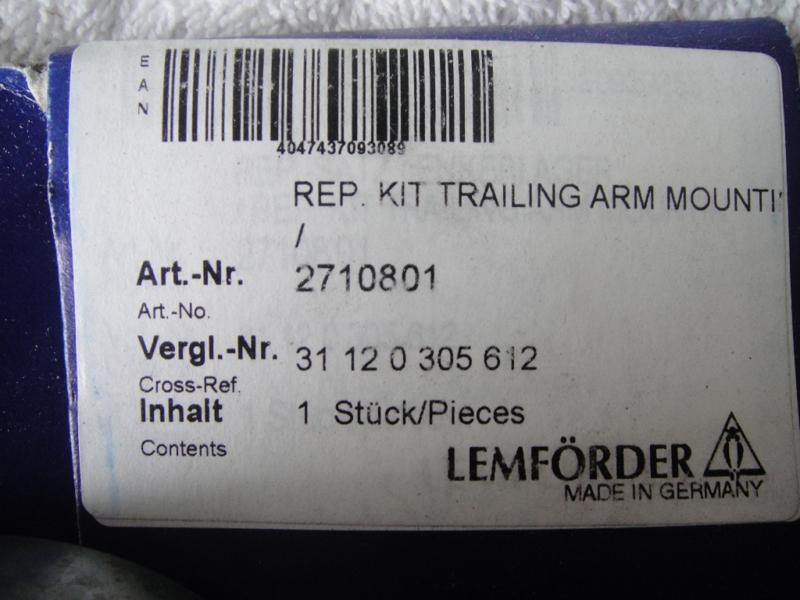
31120305612 - Tension Strut Bushing (RUBBER MOUNTING) ONLY


Hydralic floor jack
bushing press (ONLY IF REPLACING 31120305612)
cresent wrenches (just in case)
vise grips (just in case)
3/8" socket wrench
3/8" driver extension
18mm 3/8" socket
T30 Torx Bit 3/8" socket
T40 Torx bit 3/8" socket
10mm socket (use 3/8" socket or an adapter)
7/8" cresent wrench
13/16" cresent wrench
10mm cresent wrench
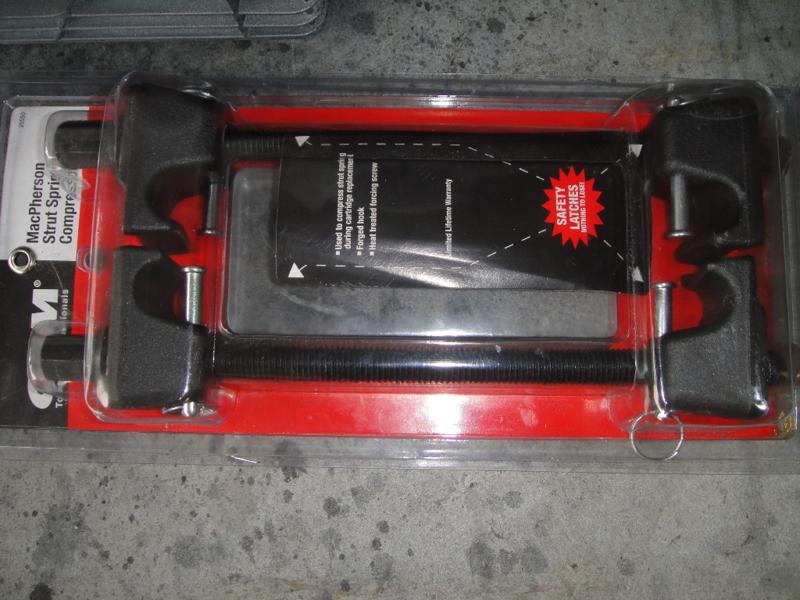
strut spring compressors - including appropriate wrench/tool to adjust them.
Prying device/fork
PB Blaster Penetrating catalyst
Break parts cleaner - any will do, just get the cheapest.
Marking device (marker or pencil)
Note: always good to have the whole set Torx Bit set in case you had aftermarket parts that skew in size.
The instructions will assume you have some technical knowledge of the pre-requisites. If you don't then refer to the other DIY posts that these hard working brothers did. I won't delve into those and I haven't the patience of time. And in this day and age I don't want to liable if you follow instructions and forgot to do some stupid common sense move and forgot to put on a parking break or something.
The process will go the same exept for the RIGHT side wishbone will have another little piece you have to undo
I forgot which size sockets/wrenches I used so please someone feel free to chime in and edit the number below with appropriate socket size.
Wishbone removal/installation
1w) loosen wheel or wheels, jackup car, put on jack stand and remove wheel/wheels

2w) Remove your tie rod boot covers (and any undercarriage covers you need to)
2.1w) for the right side (passenger) you will need to remove a tiny stabilizer link when you remove the boot cover. You will use your 10mm socket and cresent wrench. You only need remove the side attached to the wishbone and move it out of your way (in a secured manner)
3w) spray all nuts and bolts with PB and let sit for a few minutes
4w) Take one of your sockets and an appropriate wrench (for lack of one tool i used cresent wrench) and break the nut/bolt combo. Start with the rubber bushing side first. Do not fully unscrew, Leave this intact by a few threads.
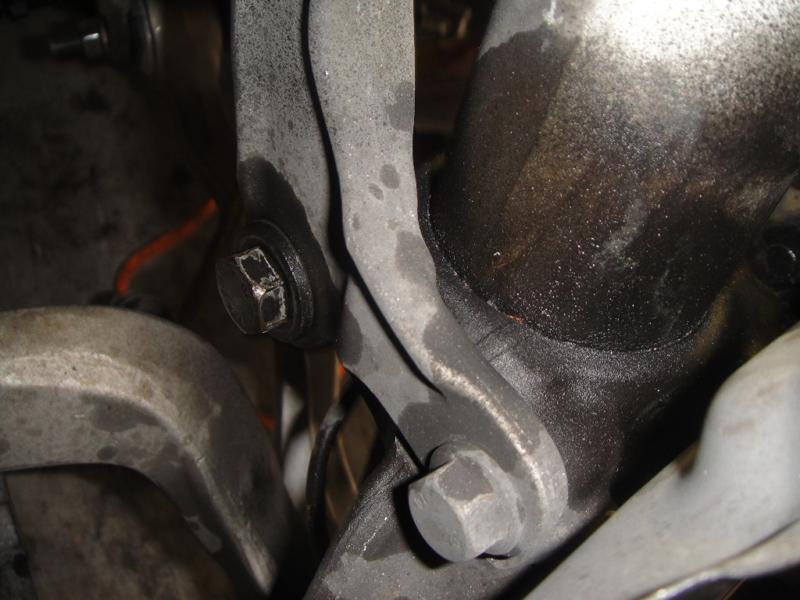
5w) Take cresent wrench and break the nut on the comination nut (attached to the hub assembly) once you break this nut it may move the ball joint's bolt - If this happens use the appropriate torx bit to hold the bolt steady while unscrewing.

6w) Unscrew the bushing nut and remove the entire wishbone.
7w) reverse steps in the exact order to complete.
Tension strut removal/installation
1c) if you are doing this in combo with your wishbone, complete the wishbone FIRST.
2c) using one of your sockets start with the rubber bushing first. Break the nut/bolt combo. Do not fully unscrew, Leave this intact by a few threads.
3c) Take cresent wrench and break the nut on the comination nut (attached to the hub assembly) once you break this nut it may move the ball joint's bolt - If this happens use the appropriate torx bit to hold the bolt steady while unscrewing. Do not fully unscrew, Leave this intact by a few threads.
4c) now you will notice you have a problem the strut end is in your way! YAY!
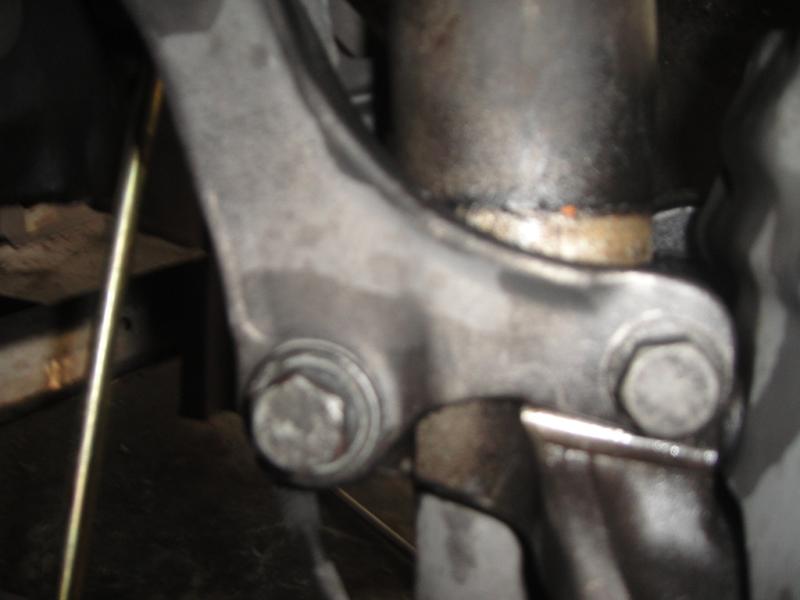
5C) This is where things get fun. look at where the hub assembly attaches to the strut and you will find a nut/bolt combo. You should have already sprayed this and also sprayed along its top and bottom. If you want to clean it with break parts cleaner you can and then mark the bottom where it meets the strut. Chances are it's dirty already and when you move it you will definately be able to see where it's clean and not and that's your marking point. So now that you're breaking the nut/bolt and loosening it, do not take it off. You just want to loosen it so it is no longer forcefully clamped onto the strut. Take your jack and put a piece of wood, cloth or some cardboard and CENTER IT UNDER YOUR Rotor. Compress the strut spring and then attach your spring compressors. This will save you time.....or you can manually compress the spring and turn it 1/2" at a time, up to you.

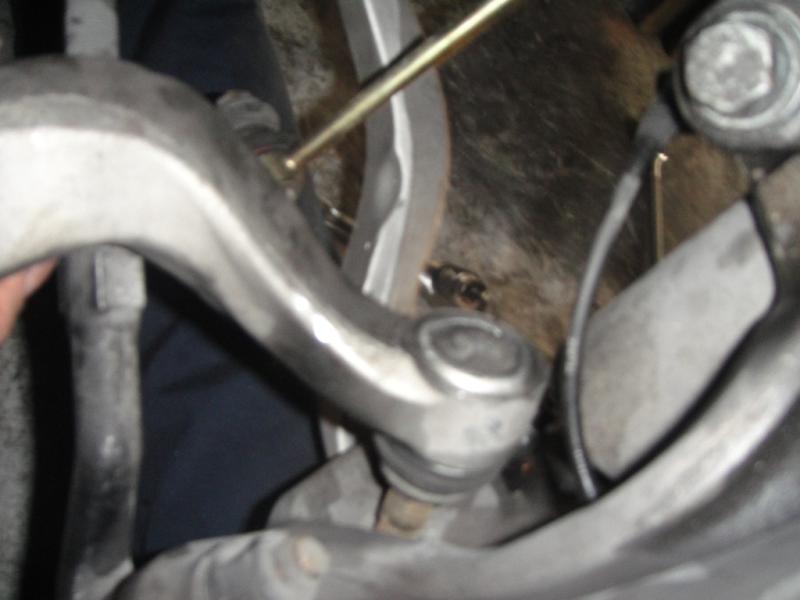
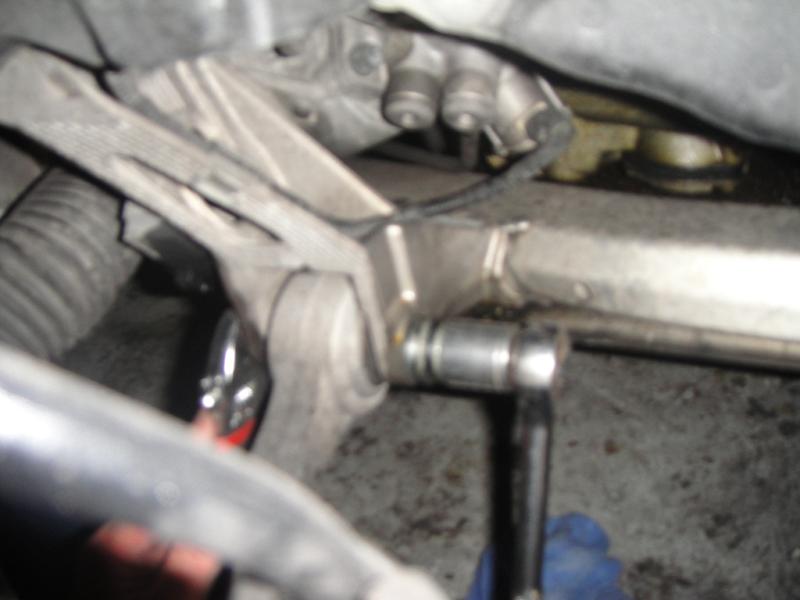
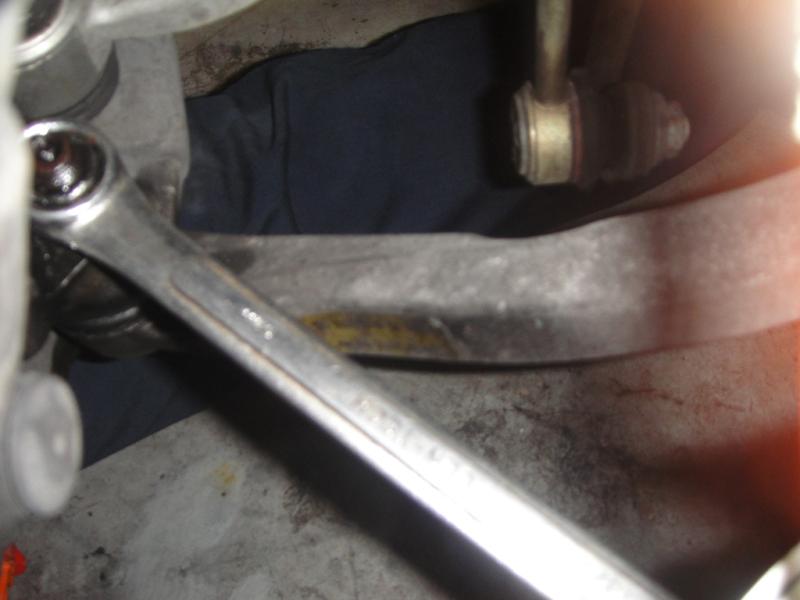
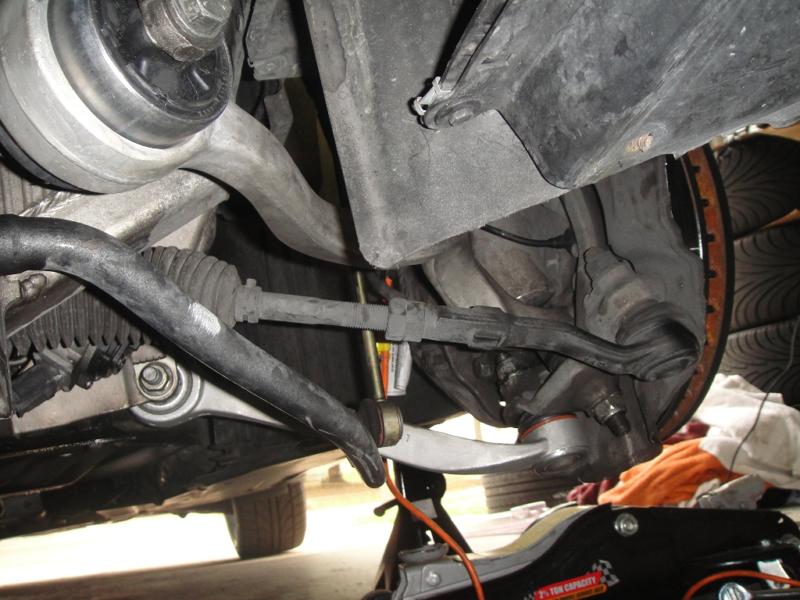
6C) Once you have your spring compressed you can remove the jack and should pry the bottom of the strut up and away from the hub assembly. You will need about 1/2" clearance. You can now take out the bolt holding the rubber bushing part of the arm. The photo shown is about right but that is me angling the ball joint out of its place...it's a tight fit but I've done this before so you may need more room. I'm sure you'll figure out how to wiggle it out.
7C) reverse to put back together!
Note: YOur spring is compressed! Use the hydralic floor jack under your rotor to compress it more so that you can easily and quickly loosen the spring compressors. Before taking complete tension off make sure your springs have not turned and that the spring pad is aligned with the strut etc. Take most of the tension off and slowly lower the jack. You spring will decompress and most likely push the strut back into place on the hub assembly. If not, wiggle it back into its postion and attach the arms before tightening.
Bushing replacement

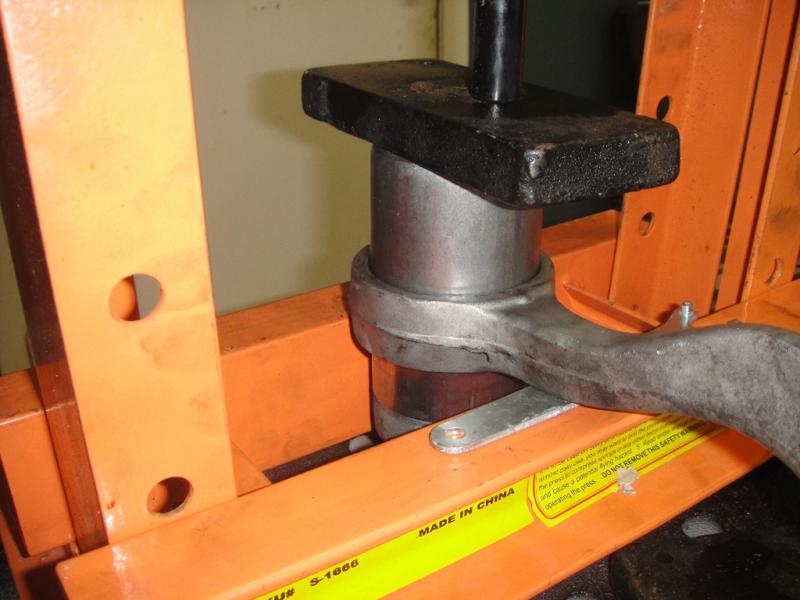
I bought this 6-ton shop press from Harbor Freight Tools for like around $50. You can find 20% off coupons online too.

1b) Setup your press. You'll have to figure out how you want to do that. I decided to put mine on a not so sturdy foldable bench because I like adventures!
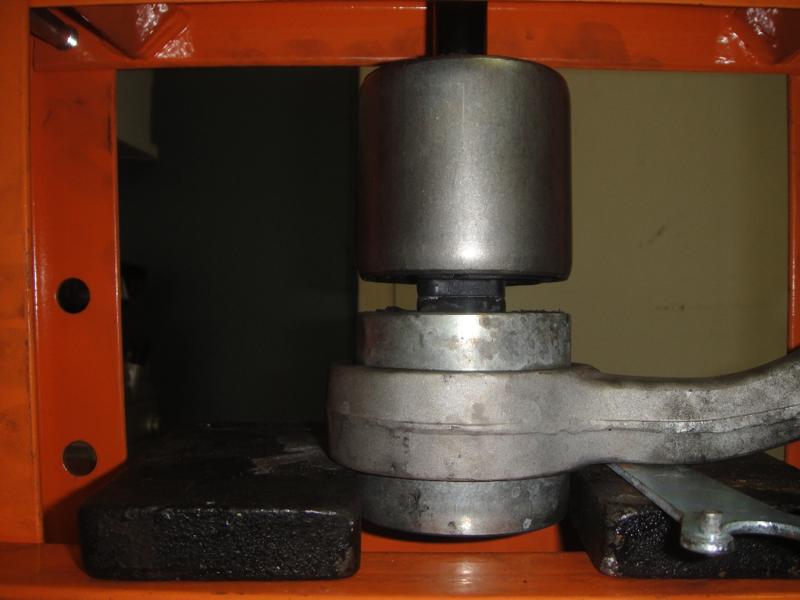
2b) I used the old sleeve on top of the new sleeve to show you how you will press this. I have an old bushing that I use as a guide to push the current bushing I'm replacing halfway out of the arm. Why? because the metal/rubber middle does flex and why should I use my new bushing for most of the work? So I I'm going to create a new bushing press sleeve because they're good to have on hand.


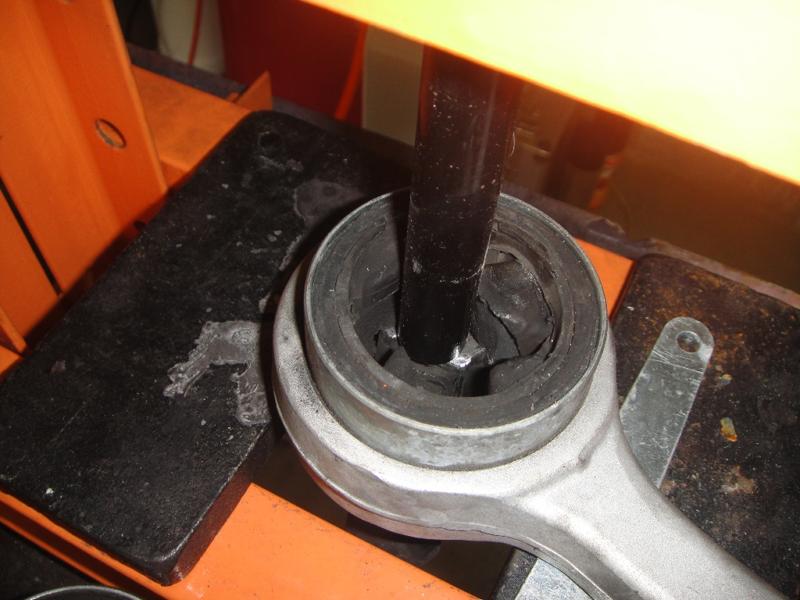
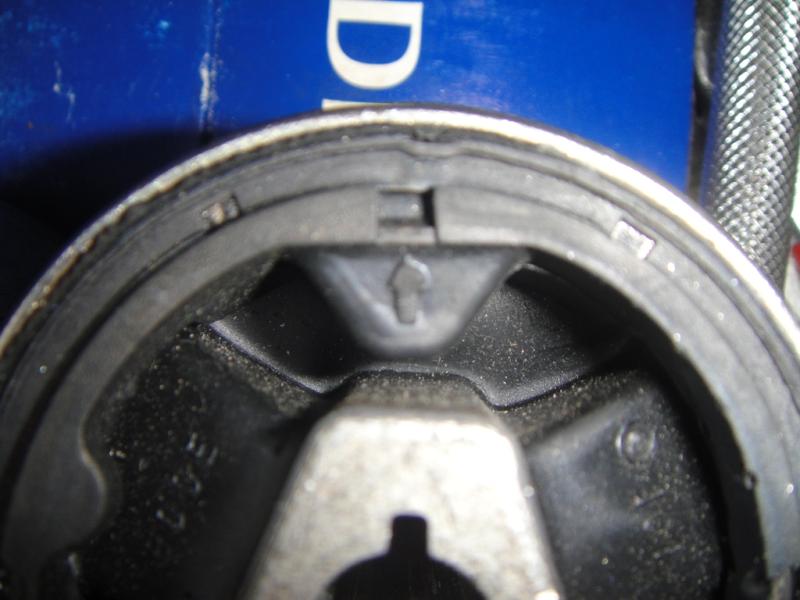
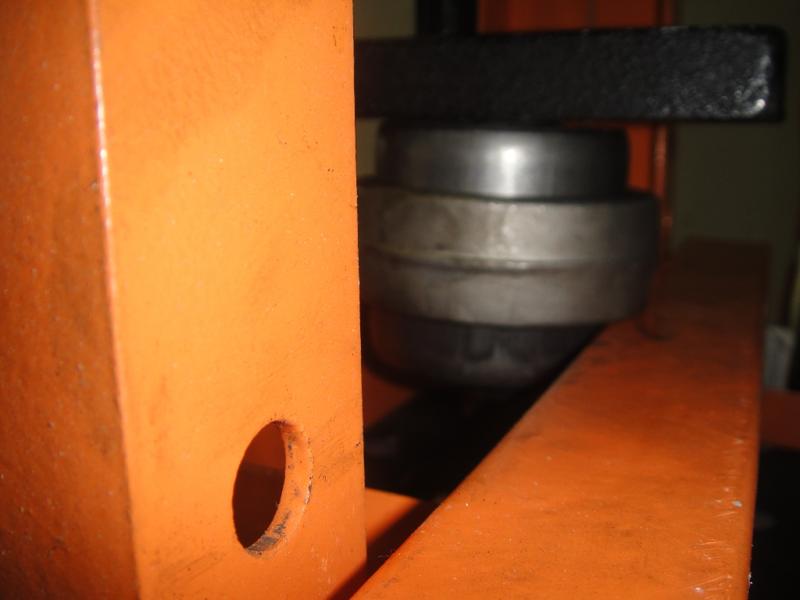
3b) now that you have the busing halfway out of the arm(it should be level with one end of the arm holder) you can now take your new bushing and mark it off. look at the arrow, and it's really hard to miss since the top looks like a flatened triangle. draw a verticl line. Match this up with the arm's arrow and set in place.
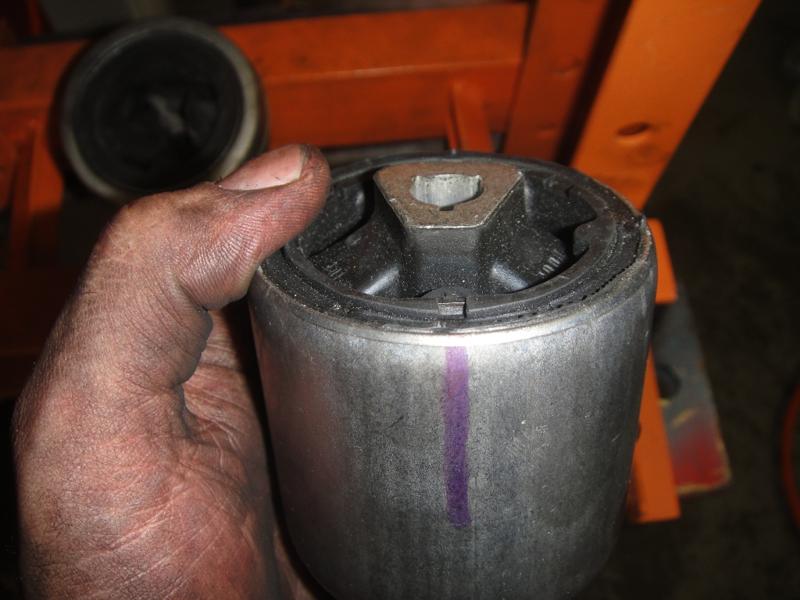
4b) since the bushing's sleeve has a beveled edge it should fit nicely in the arm and stay put. you do not want to press the middle as it will blow out the bushing. Instead find something durable (press plates) and lay on top of the bushing. It will press the rubber down just a bit until it is supported by the outer base. I would have placed the sleeve (old bushing) on top of the new bushing but I didn't have clearance. i was going to cut the sleeve down to match up with the top of the rubber piece so i didnt flex that but I was impatient and i've done this before. next time i'll find a good sleeve that I'll have clearance for. I've also noticed that the sleeves have some sort of light sealant on them but I did not find this in TIS. However, I can tell when i press that it's much harder than it's supposed to be so if you put some lube around it temporarily that's fine. I'll discuss a remedy later should you want to pursue.
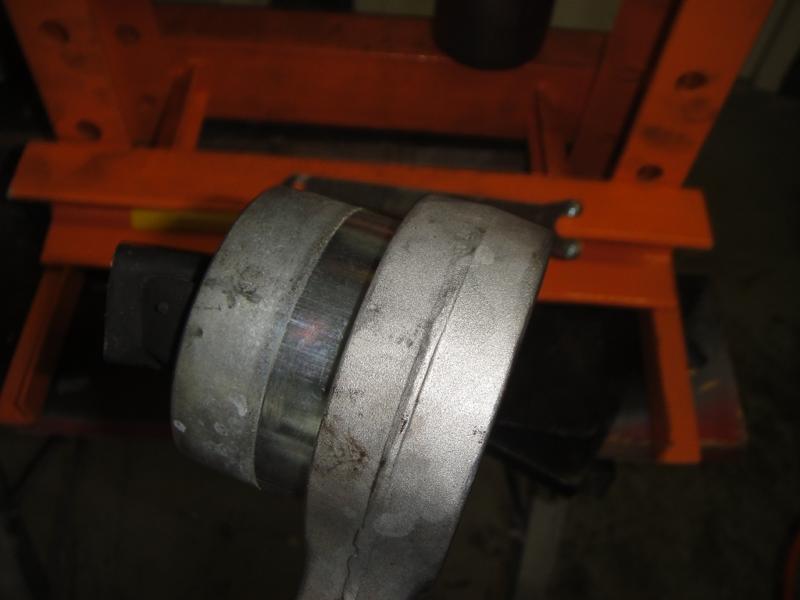
5b) once your lined up start pressing and make sure it stays lined up. If not, back off pressure, realign and do again. Now once the old bushing pops out you're almost good. Take note to keep the sleeve even on both sides.


7b) Put arm back on!
If you want to take the cautious route you can add some loctite after you install. You can use your finger to press it between the arm and the bushing. You could also use JBWeld as well. Make sure if you do this to put the car back on it's original stance and let sit for 24 hours to let the epoxy cure. Those sleeve will not move trust me.
8b) ENJOY your ride and new ride feel!

Hope this helps you stay away from the stealership! Good luck
Senior Members
Joined: Nov 2007
Posts: 400
Likes: 0
From: Irving, TX (DFW)
My Ride: 05 545i 6MT
Very nice DIY ! ! ! 
FYI: Meyle makes the HD replacement bushing for front control arm bushing BUT I could not find vendor in the US has access to this HD part for E60??? They all no such part #??
http://meyleusa.com/improved_bmw.htm
FYI: Meyle makes the HD replacement bushing for front control arm bushing BUT I could not find vendor in the US has access to this HD part for E60??? They all no such part #??
http://meyleusa.com/improved_bmw.htm
Thread Starter
Senior Members
Joined: Jun 2009
Posts: 2,680
Likes: 7
My Ride: E60 530i
Yep, I'm aware that Meyle makes the Heavy Duty http://meyleusa.com/improved_bmw.htm
I found them to be no different from the Lemforder ones that I had on hand. Lemforder does not indicate 'heavy duty' but they surely don't appear to be fluid filled bushings either. But who knows, I have yet to break one open to find out . Actually I had these on hand and replaced the right hand a while ago but the left was not yet cracked so I took my time.
You can get the Meyle HD from the following:
http://meyleusa.com/Jobbers%20and%20Retail.htm
I found them to be no different from the Lemforder ones that I had on hand. Lemforder does not indicate 'heavy duty' but they surely don't appear to be fluid filled bushings either. But who knows, I have yet to break one open to find out
. Actually I had these on hand and replaced the right hand a while ago but the left was not yet cracked so I took my time.You can get the Meyle HD from the following:
http://meyleusa.com/Jobbers%20and%20Retail.htm
Contributors
Joined: Aug 2004
Posts: 1,110
Likes: 0
From: Quincy, MA, USA
My Ride: E60 530i
Model Year: 2004
Engine: M54
Very good writeup with lots of pictures !!!! May I ask where did you put the jack stand and where did you jack up one side of your car. It looks like you jacked up one side at a time to perform the DIY.
Thread Starter
Senior Members
Joined: Jun 2009
Posts: 2,680
Likes: 7
My Ride: E60 530i
I did jack up one side at a time....just more convenient for me for this job.
u put the jack stand where the BMW jack locks in. I jacked up on the side with a plate in order to distribute weight. If you look closely you can see the plate and where I positioned the jack......that little cup on the hydralic jack can do damage to your undercarriage plastic if you don't jack up with a plate and jack up in correct position....it's happened to me before.
u put the jack stand where the BMW jack locks in. I jacked up on the side with a plate in order to distribute weight. If you look closely you can see the plate and where I positioned the jack......that little cup on the hydralic jack can do damage to your undercarriage plastic if you don't jack up with a plate and jack up in correct position....it's happened to me before.
Contributors
Joined: Aug 2004
Posts: 1,110
Likes: 0
From: Quincy, MA, USA
My Ride: E60 530i
Model Year: 2004
Engine: M54
I did jack up one side at a time....just more convenient for me for this job.
u put the jack stand where the BMW jack locks in. I jacked up on the side with a plate in order to distribute weight. If you look closely you can see the plate and where I positioned the jack......that little cup on the hydralic jack can do damage to your undercarriage plastic if you don't jack up with a plate and jack up in correct position....it's happened to me before.
u put the jack stand where the BMW jack locks in. I jacked up on the side with a plate in order to distribute weight. If you look closely you can see the plate and where I positioned the jack......that little cup on the hydralic jack can do damage to your undercarriage plastic if you don't jack up with a plate and jack up in correct position....it's happened to me before.
Senior Members
Joined: Nov 2007
Posts: 400
Likes: 0
From: Irving, TX (DFW)
My Ride: 05 545i 6MT
Yep, I'm aware that Meyle makes the Heavy Duty http://meyleusa.com/improved_bmw.htm
I found them to be no different from the Lemforder ones that I had on hand. Lemforder does not indicate 'heavy duty' but they surely don't appear to be fluid filled bushings either. But who knows, I have yet to break one open to find out. Actually I had these on hand and replaced the right hand a while ago but the left was not yet cracked so I took my time.
You can get the Meyle HD from the following:
http://meyleusa.com/Jobbers%20and%20Retail.htm
I found them to be no different from the Lemforder ones that I had on hand. Lemforder does not indicate 'heavy duty' but they surely don't appear to be fluid filled bushings either. But who knows, I have yet to break one open to find out
. Actually I had these on hand and replaced the right hand a while ago but the left was not yet cracked so I took my time.You can get the Meyle HD from the following:
http://meyleusa.com/Jobbers%20and%20Retail.htm
This was 2 months a go. Probably should be available by the time I need my bushing replaced
Probably after 2-3 days of driving for all the suspension bushing to properly seated.
Thread Starter
Senior Members
Joined: Jun 2009
Posts: 2,680
Likes: 7
My Ride: E60 530i
As far as an alignment...do a road test. if you notice no difference right away you're good. If you do, give it a week for everything to settle.
IF you replace your outer tie rod ends...which I will do shortly and add a DIY...you can get it very close assuming your car is already aligned (not 0 but within spec) but eventually you will need an alignment. Just use a little white spray paint before hand and count threads.
As far as alignment, some Tires Plus stores have the same Hunter laser alignment and specs the BMW dealership does for half the price. $120 for a lifetime alignment which INCLUDES Road Force Balancing your wheels. Never had an issue. Paying $249 at the dealer vs. $120 at Tires Plus is a no brainer to me.
I looked at the photo again, you positioned the floor jack a little bit "behind" BMW jack point. Also, you mentioned to use a "plate". In the photo, it was a grey color "pad". Was it a metal or plastic or wood plate in rectangular shape ? If we can jack up one side of the car from that position, then there is no need to use the center jack point under the engine/tranny area. That center jack point is convenience to jack up both sides at the same time.
The plate I used was the same plate you see on the press machine. Just an iron plate. If you have 1" ....I do not use the center jack point because it's still hard to get my jackstands in the proper places when i do and also because you have to use muscle and I just play it safe.....sometimes I use my legs to break the nut/bolt....what if I got an adrenaline rush and moved the car too much?
