Brake fluid change DIY
 08-18-2008, 07:07 AM
#1
Contributors
Thread Starter
Join Date: Jul 2005
Location: Salem, NH USA
Posts: 445
Likes: 0
Received 0 Likes
on
0 Posts
Many people, BMW included, recommend that brake fluid be changed every two years. I don't think that is often enough, and prefer to do it once a year. There are those that would have you believe that if you do it yourself you could Do Awful Things to your car; chances are these same people want to charge you $200 for brake fluid changes. If you're capable of changing a tire, you can change your own brake fluid. Really. It's that easy.
I'm showing it here for a 2008 535i, but this process works for any BMW that will fit the bleeder cap.
Note: I've included a lot of pictures, but I'm no graphic artist. I spent 10 minutes trying out how to make a perfect line with arrows in Paint Shop Pro and gave up and did it freehand.
There are a few ways to do a one person brake fluid change, but the two most popular are the vacuum method and pressure method. In each, the idea is basically the same: keep the master cylinder filled with fluid to prevent the introduction of air into the system, while at the same time bleeding the brake lines to get the old fluid out and the new fluid in.
Both the vacuum and pressure methods have their own pros, cons, quirks, and things to look out for. Using the vacuum method, you would attach a vacuum bleeder (such as the Mityvac 6830, http://www.mityvac.com/pages/products_bcbe.asp) to the bleed valve on the caliper and suck the fluid out. At the same time, you'd either manually refill the master cylinder or have some sort of device attached to it to have it auto-refill.
This method works well, however I don't like the devices used to refill the master cylinder. Since most systems try to be generic, you have to attach a plate to the master cylinder using bungee cords or the like, which I'm not a big fan of. Too much hassle.
Using the pressure method, you fill a pressure tank with brake fluid and attach it to the master cylinder. As you bleed fluid from the line, the pressure sends fluid from the tank into the master cylinder, keeping it filled and keeping air out. The drawback to this method: if the attachment between the tank and the master cylinder isn't tight, or if it bursts, brake fluid can spray everywhere. Since brake fluid can harm paint, this isn't a desired event. Why do I still prefer this method? Because BavAuto sells a pressure bleeder with a screw on attachment that fits BMW master cylinders perfectly.
So - let's get to changing fluid using the pressure method!
First, we need to obtain a few things.
1) A pressure bleeder and catch bottle. I use one from BavAuto (www.bavauto.com), part number PB03K - $69.90
2) A turkey baster, aka Redneck Impregnating Device. If you have a fluid evacuator, that works just fine too.
3) Brake fluid. I use ATE Super Blue (or Gold, depending on which kind I used before).
4) A garbage bag. More on this later.
5) Shop towels and latex gloves. Brake fluid can be nasty stuff. Keep it away from your eyes, mouth, etc. No chugging.
6) Safety glasses.
7) Some sort of drop cloth for the side of the car. I use one from Griots.
Not pictured: socket wrench, 17mm socket for the tires, torque wrench, 9mm box wrench, 11mm box wrench, funnel, 13mm socket, flat head screwdriver, T25 torx screwdriver, monkey wrench.

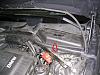
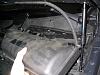
The first thing we need to do is to remove the pieces in the engine bay that are hiding the master cylinder from us.
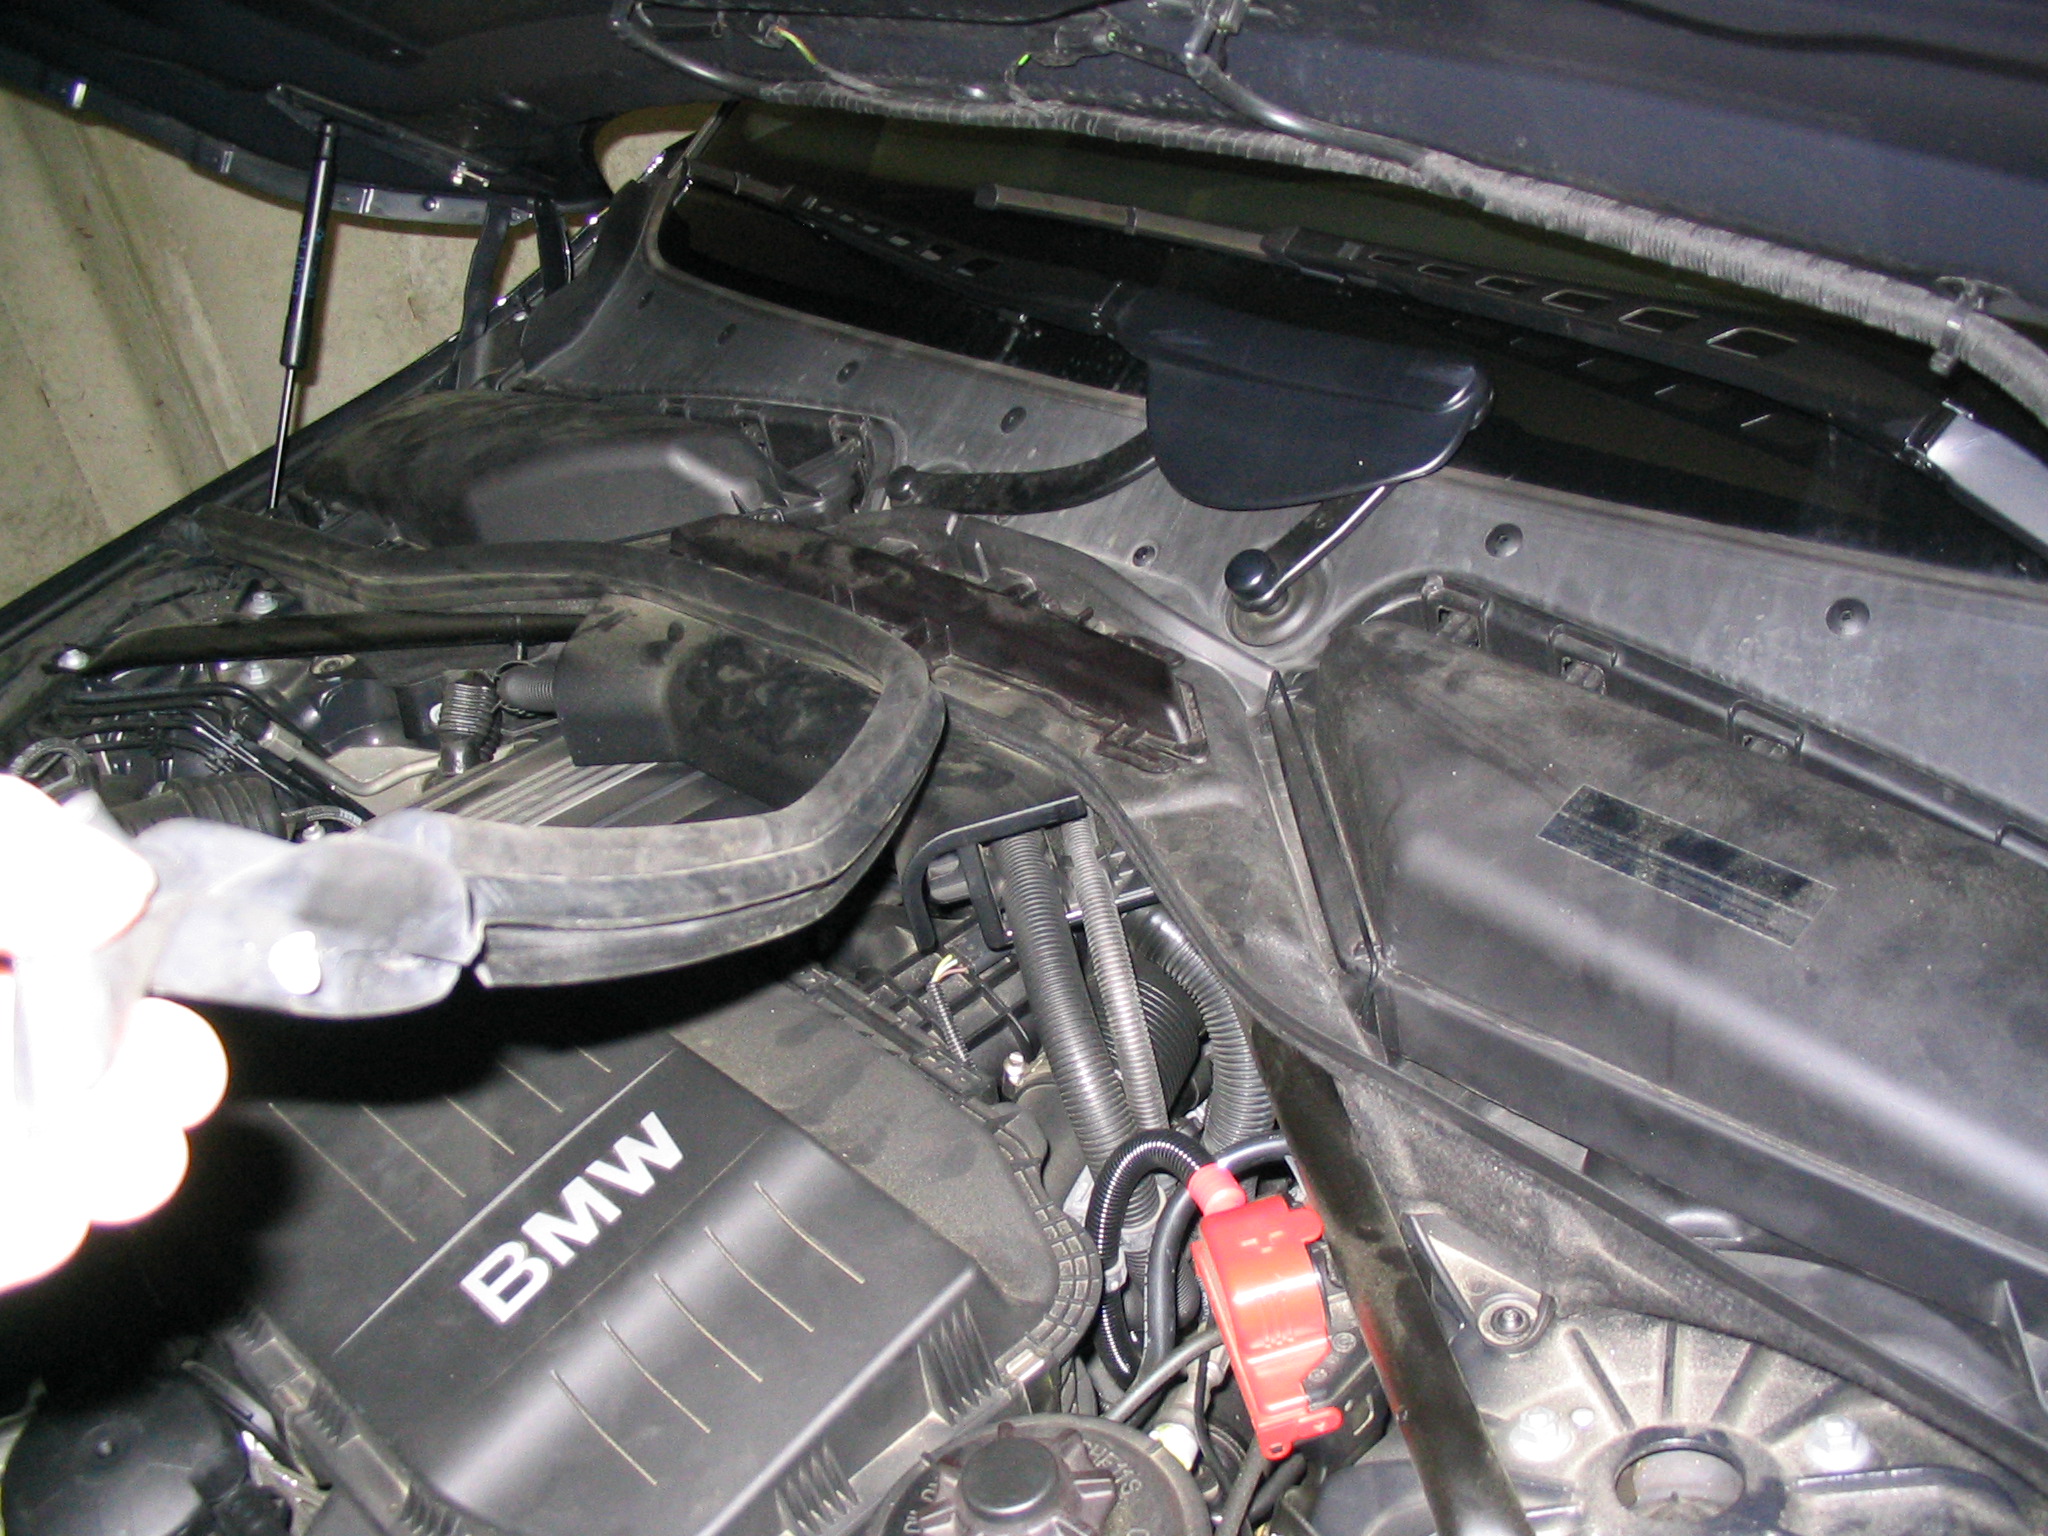
Remove the rubber trim (circled in the picture) that goes from side to side. Just pull up on it. You can remove the whole thing and set it aside, or just remove the right half (assuming a left hand drive car).
Now we need to remove the filter and housing. Use a 13mm socket to loosen the circled nut; it doesn't need to be unscrewed, just turned 90 degrees - it will remain attached to the filter housing. Then use a flathead screwdriver to unhook the hold-down, then remove the filter and housing.
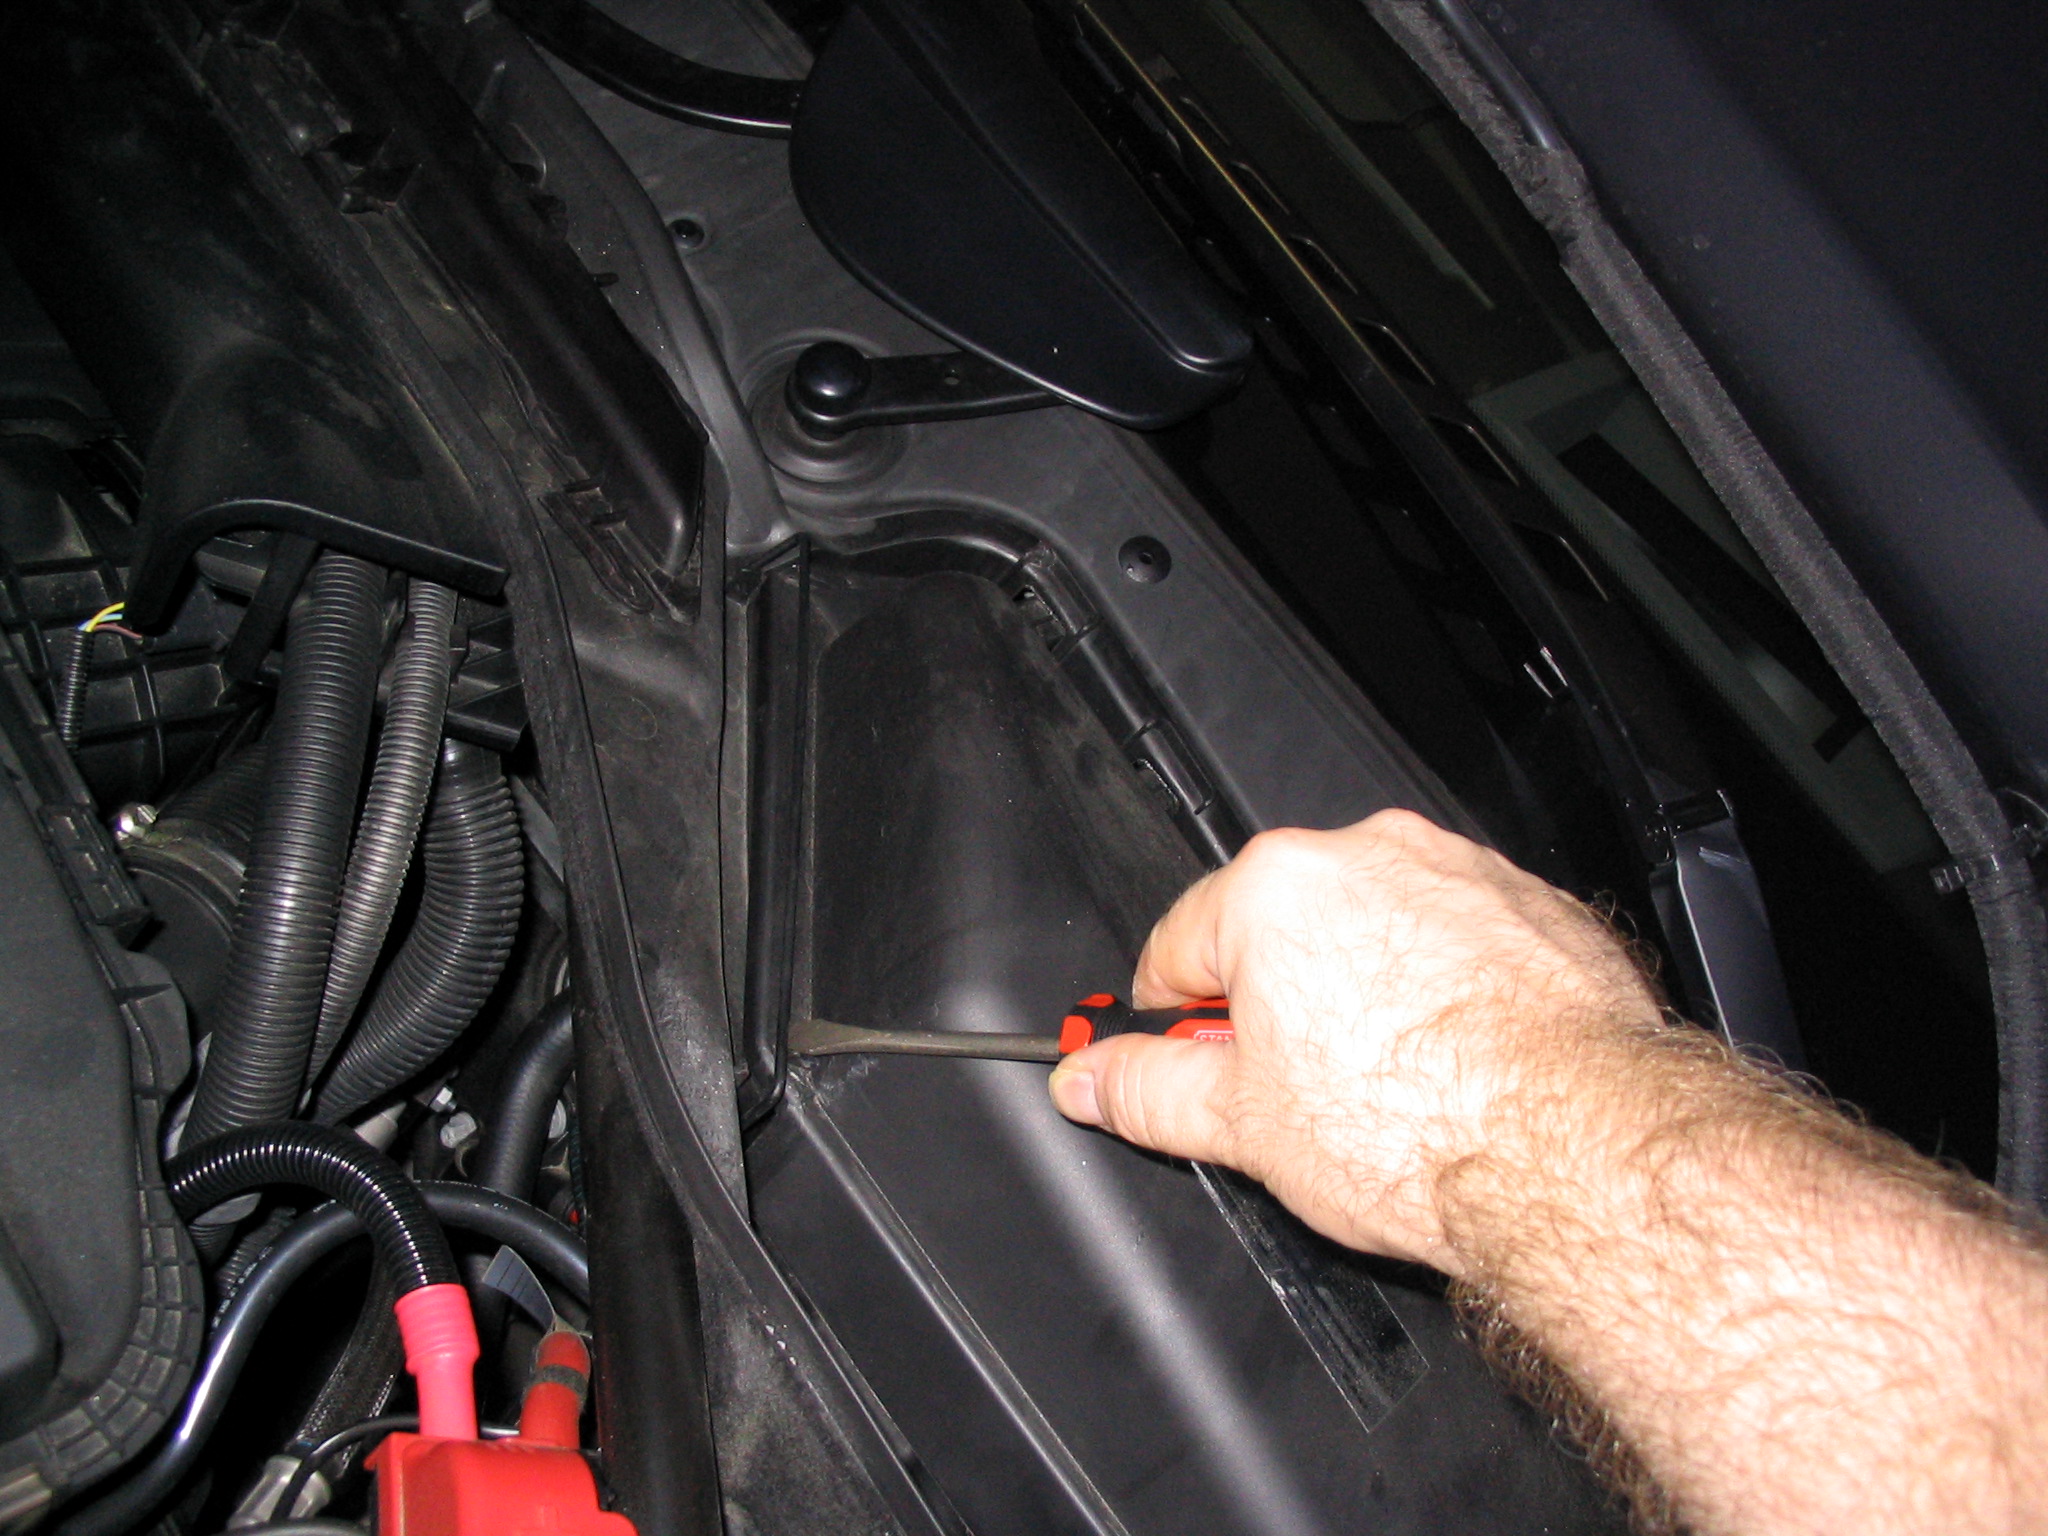
Next remove the trim piece along the side

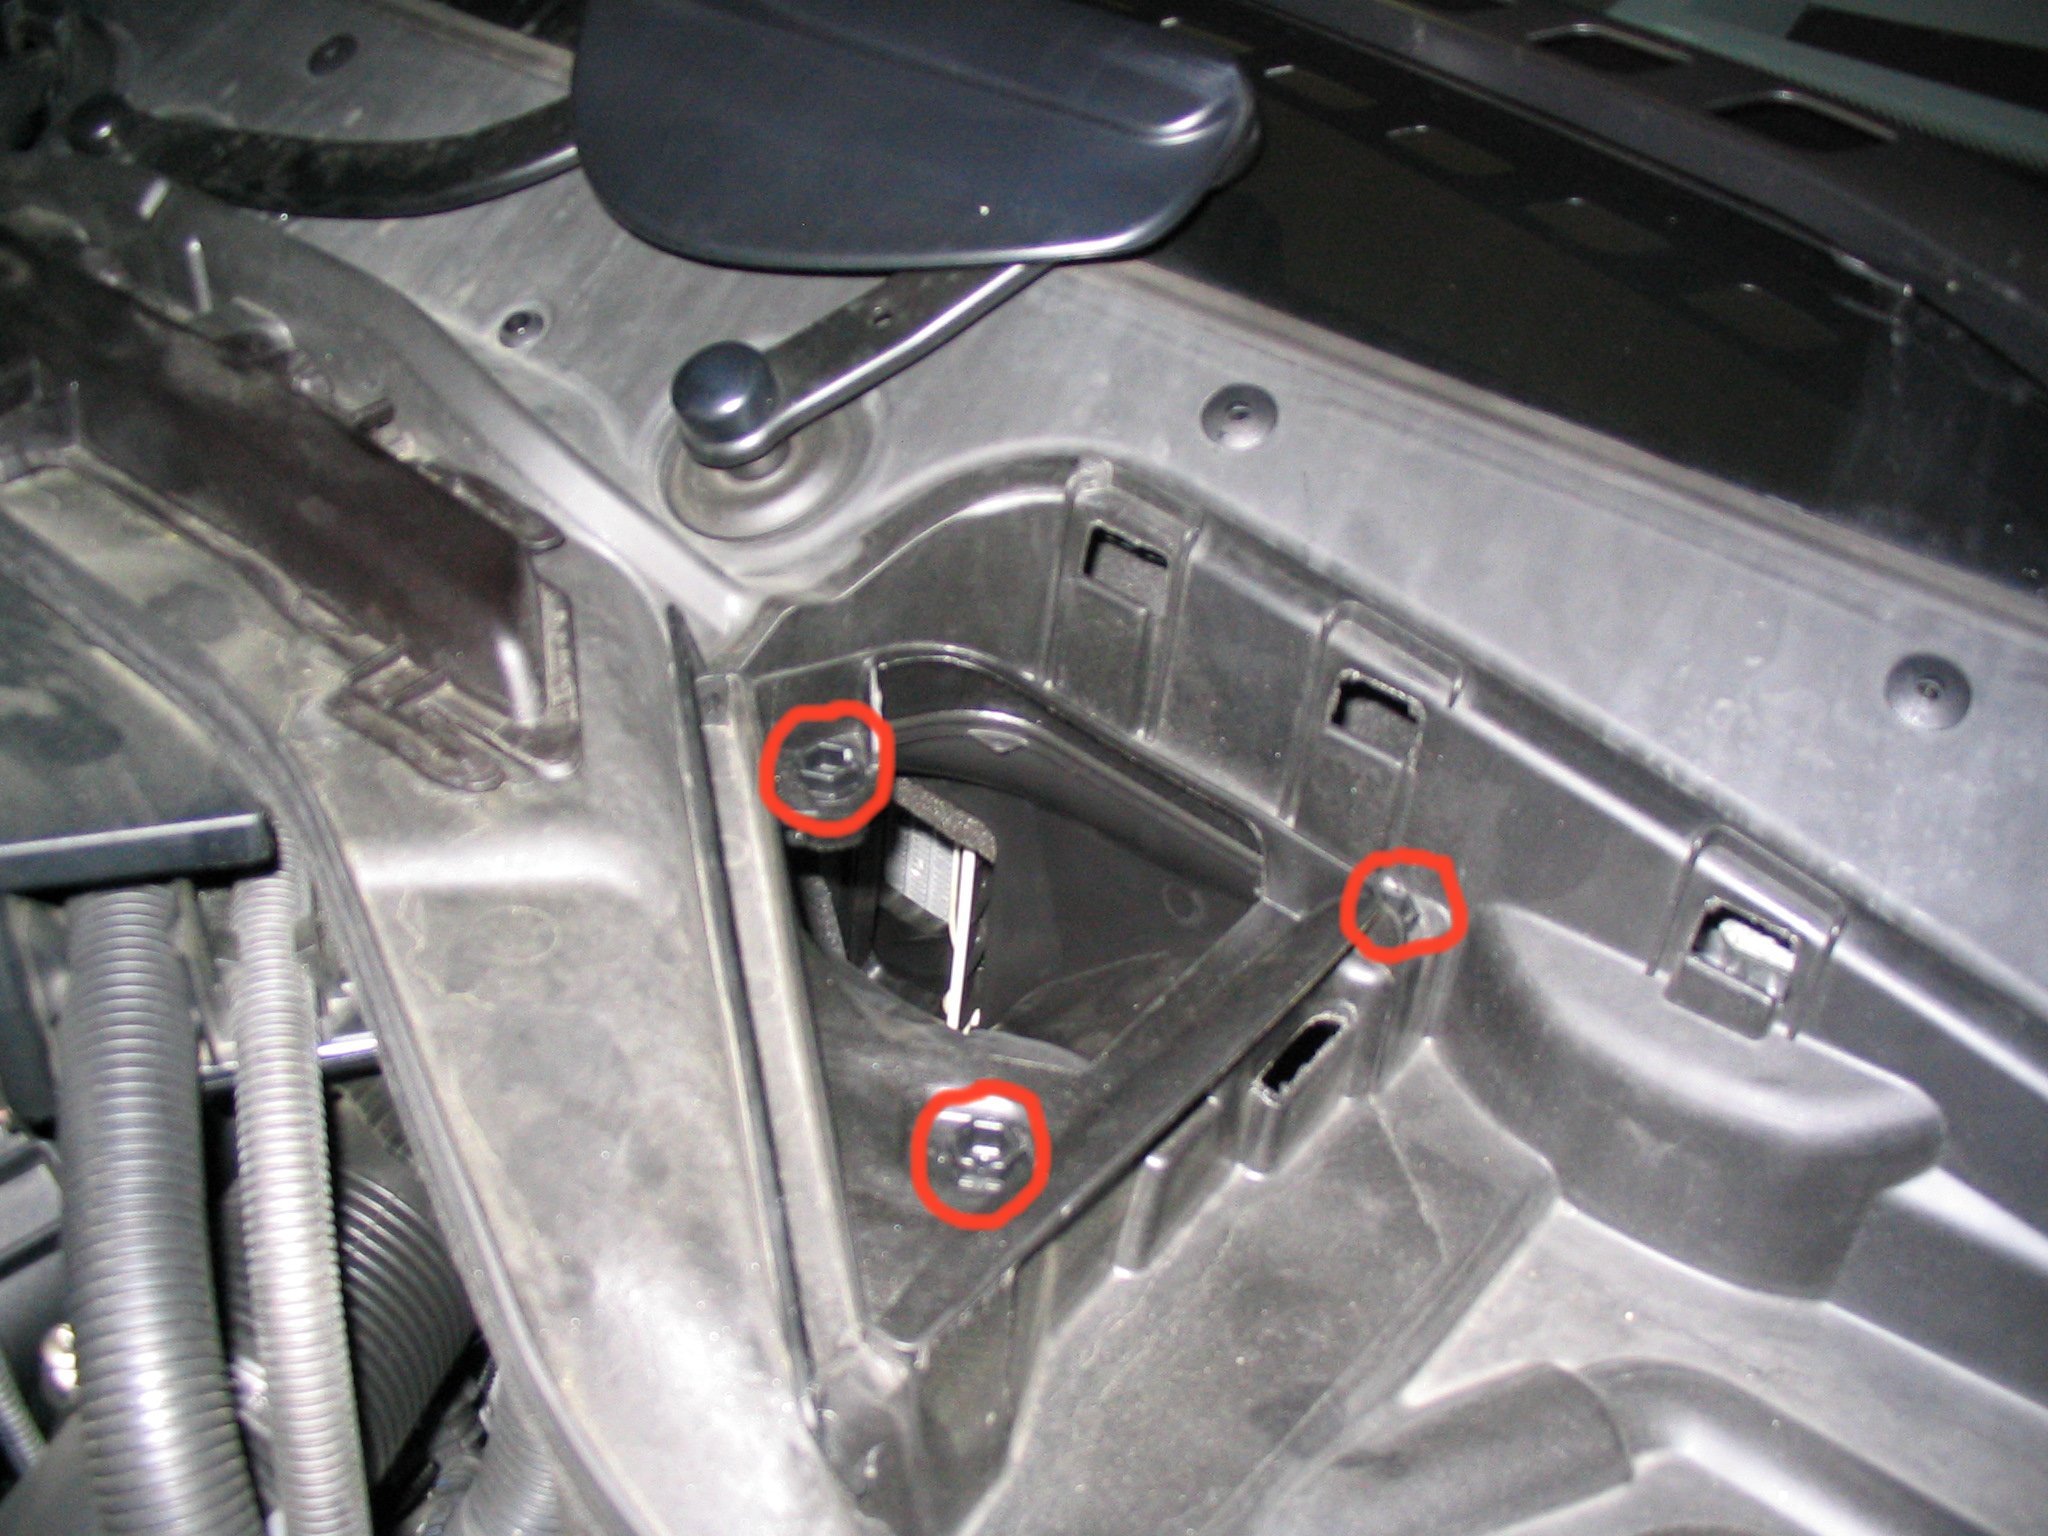
Next loosen the three circled nuts. Again, just turn 90 degrees to loosen.
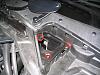
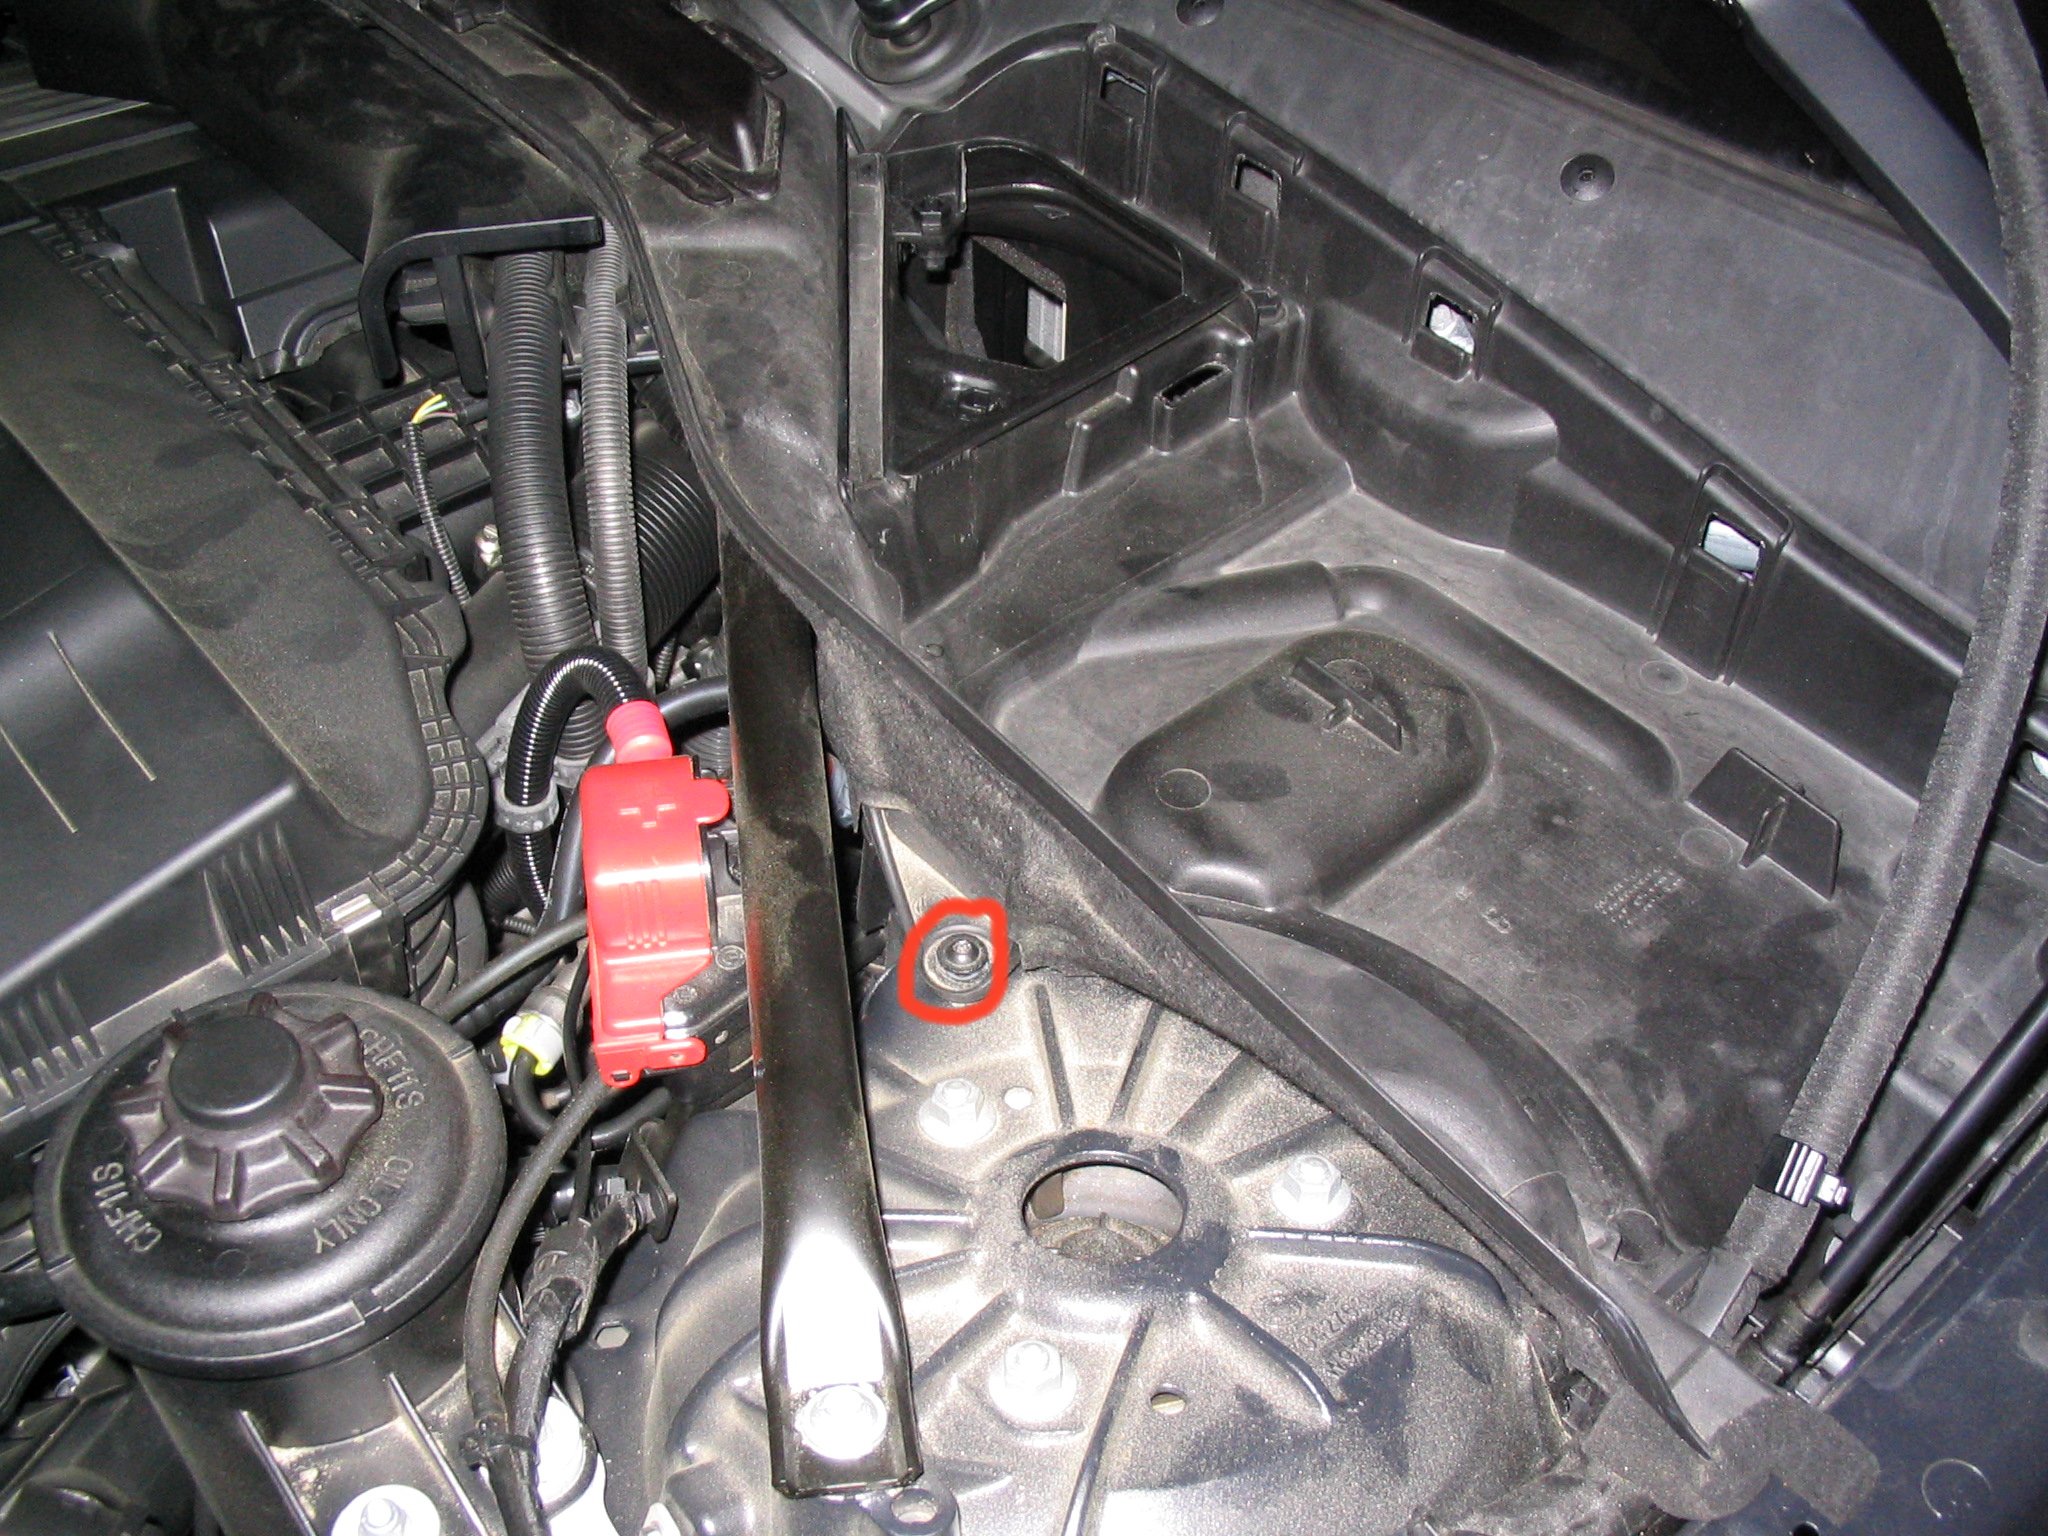
Now use the T25 torx screwdriver to remove the circled screw.
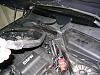
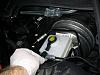
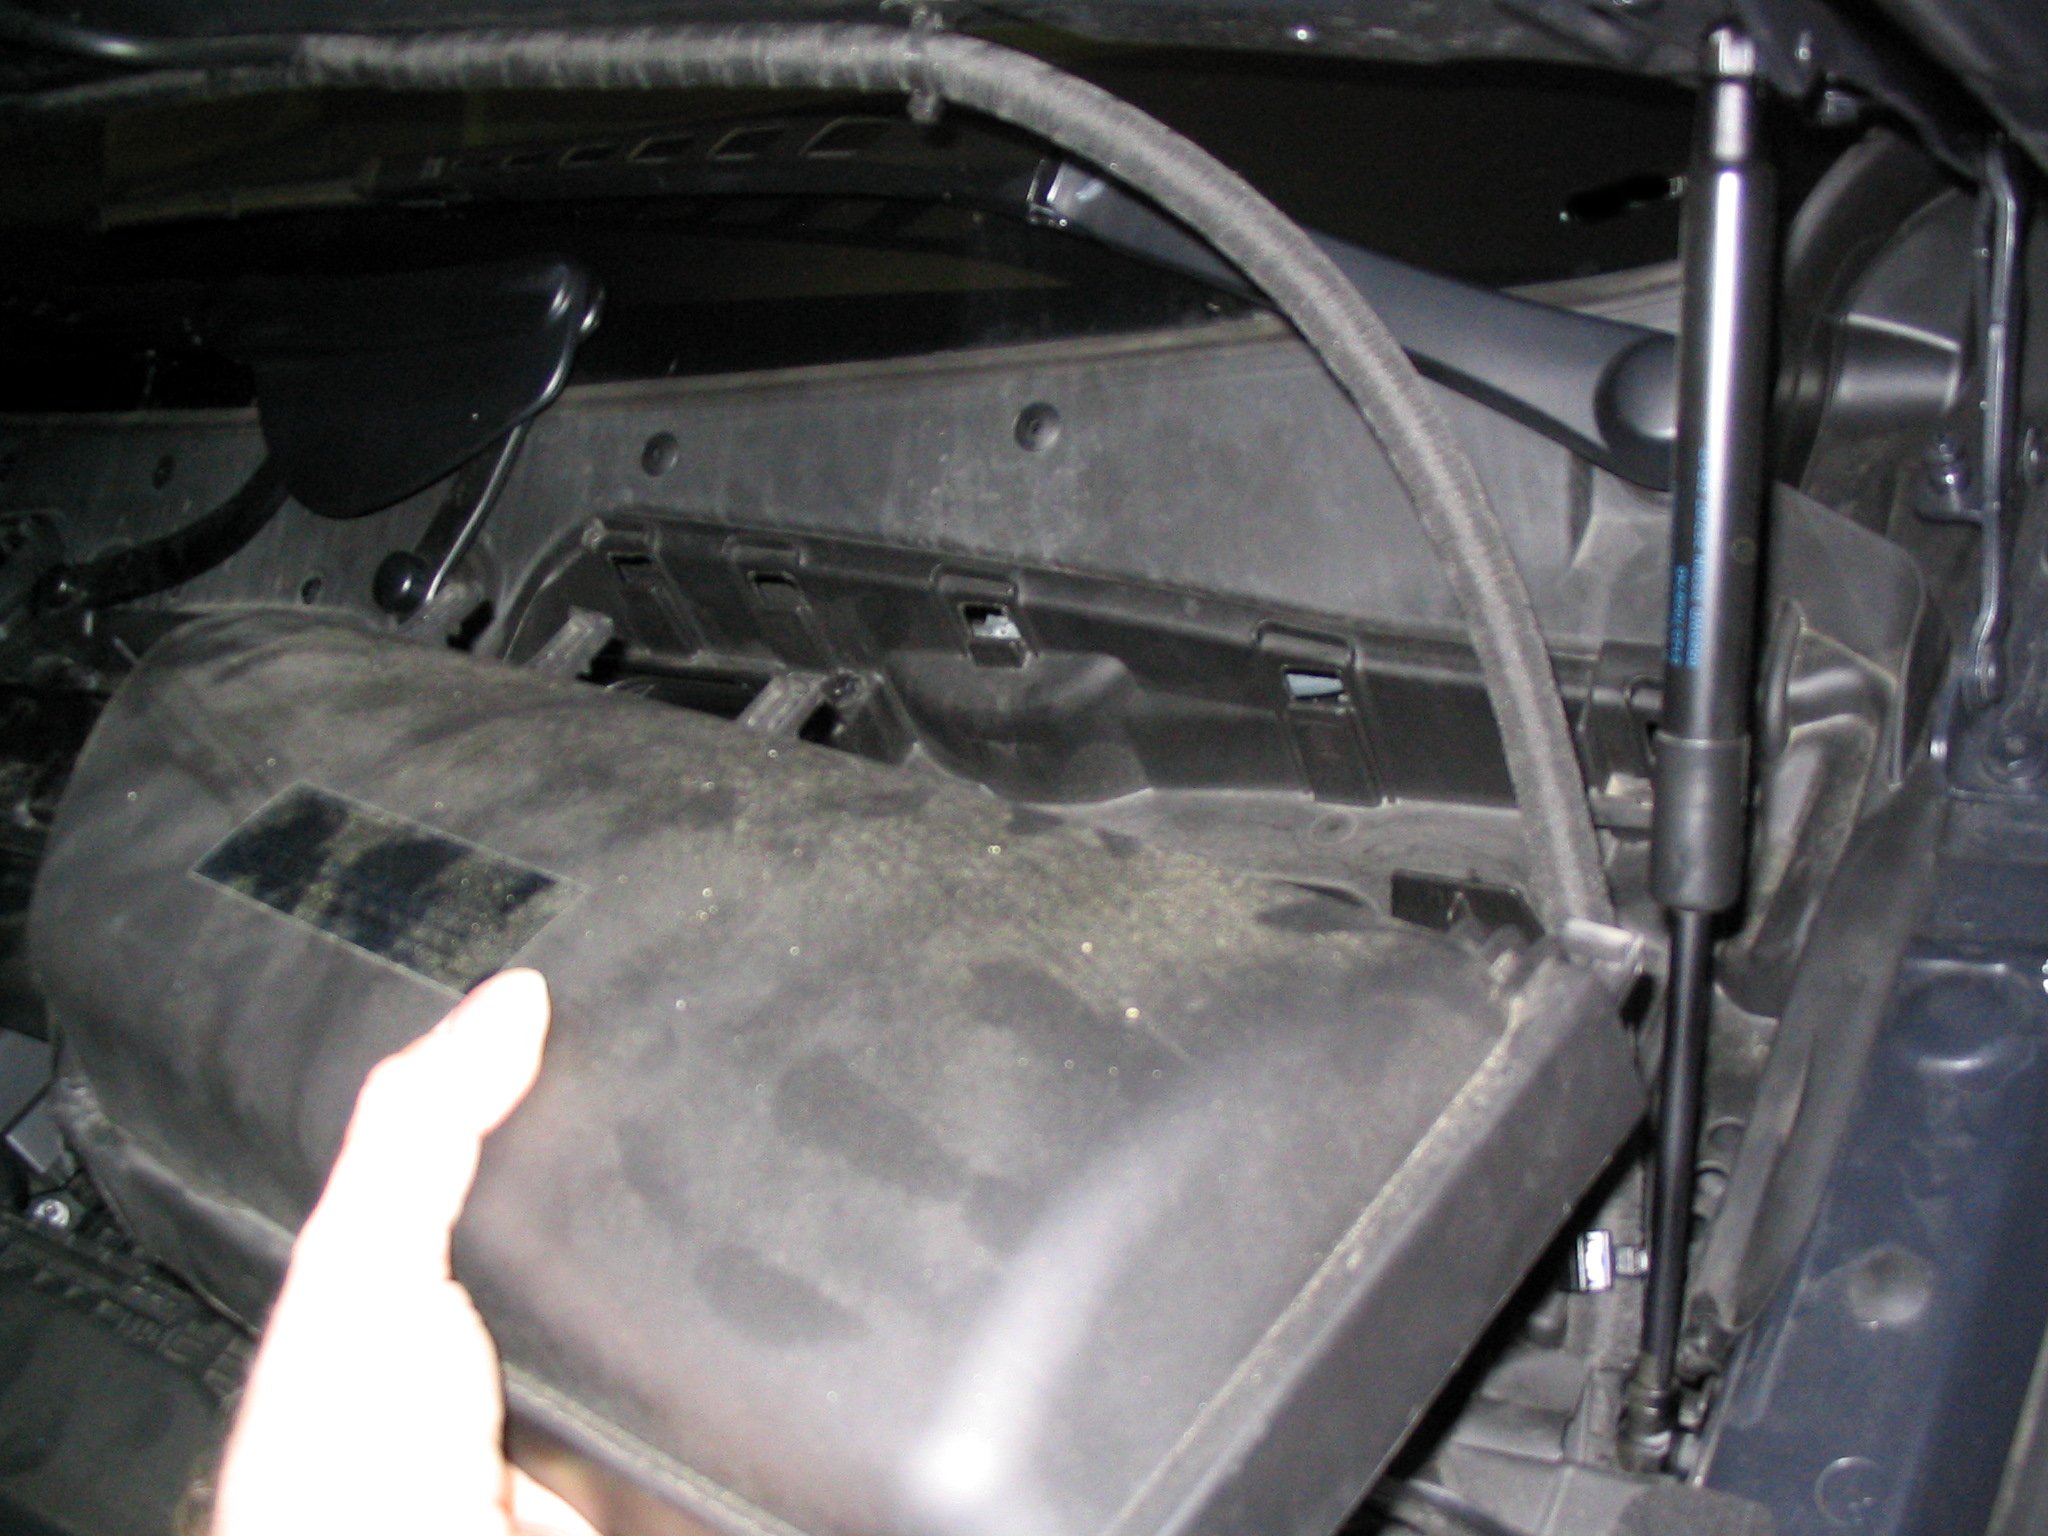
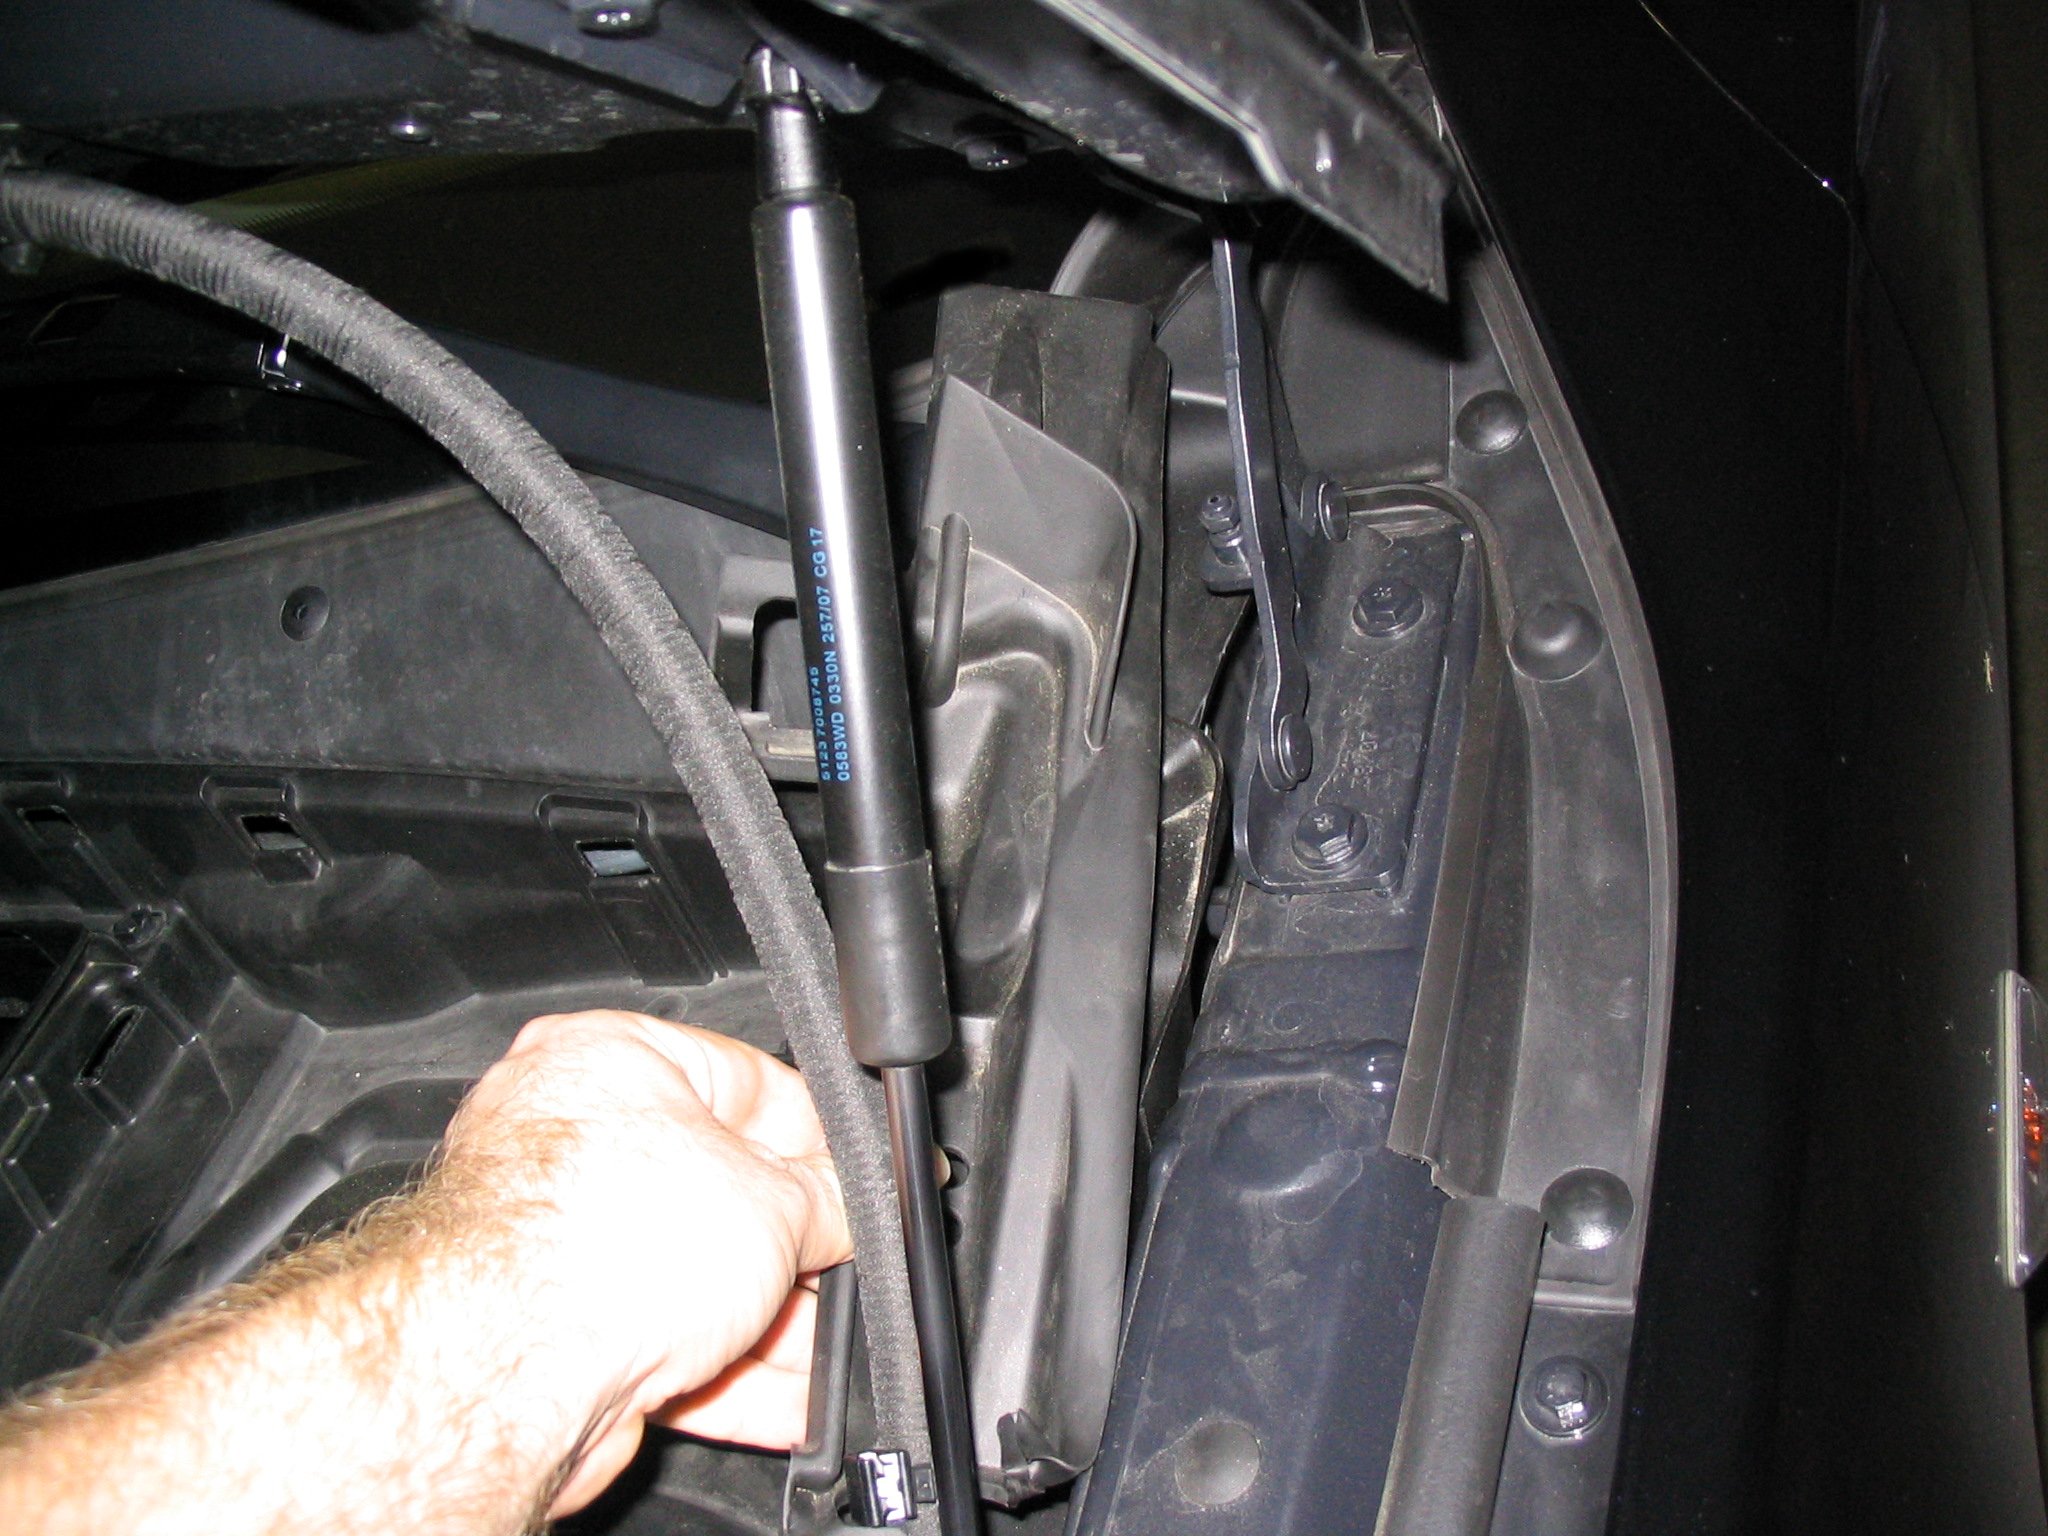
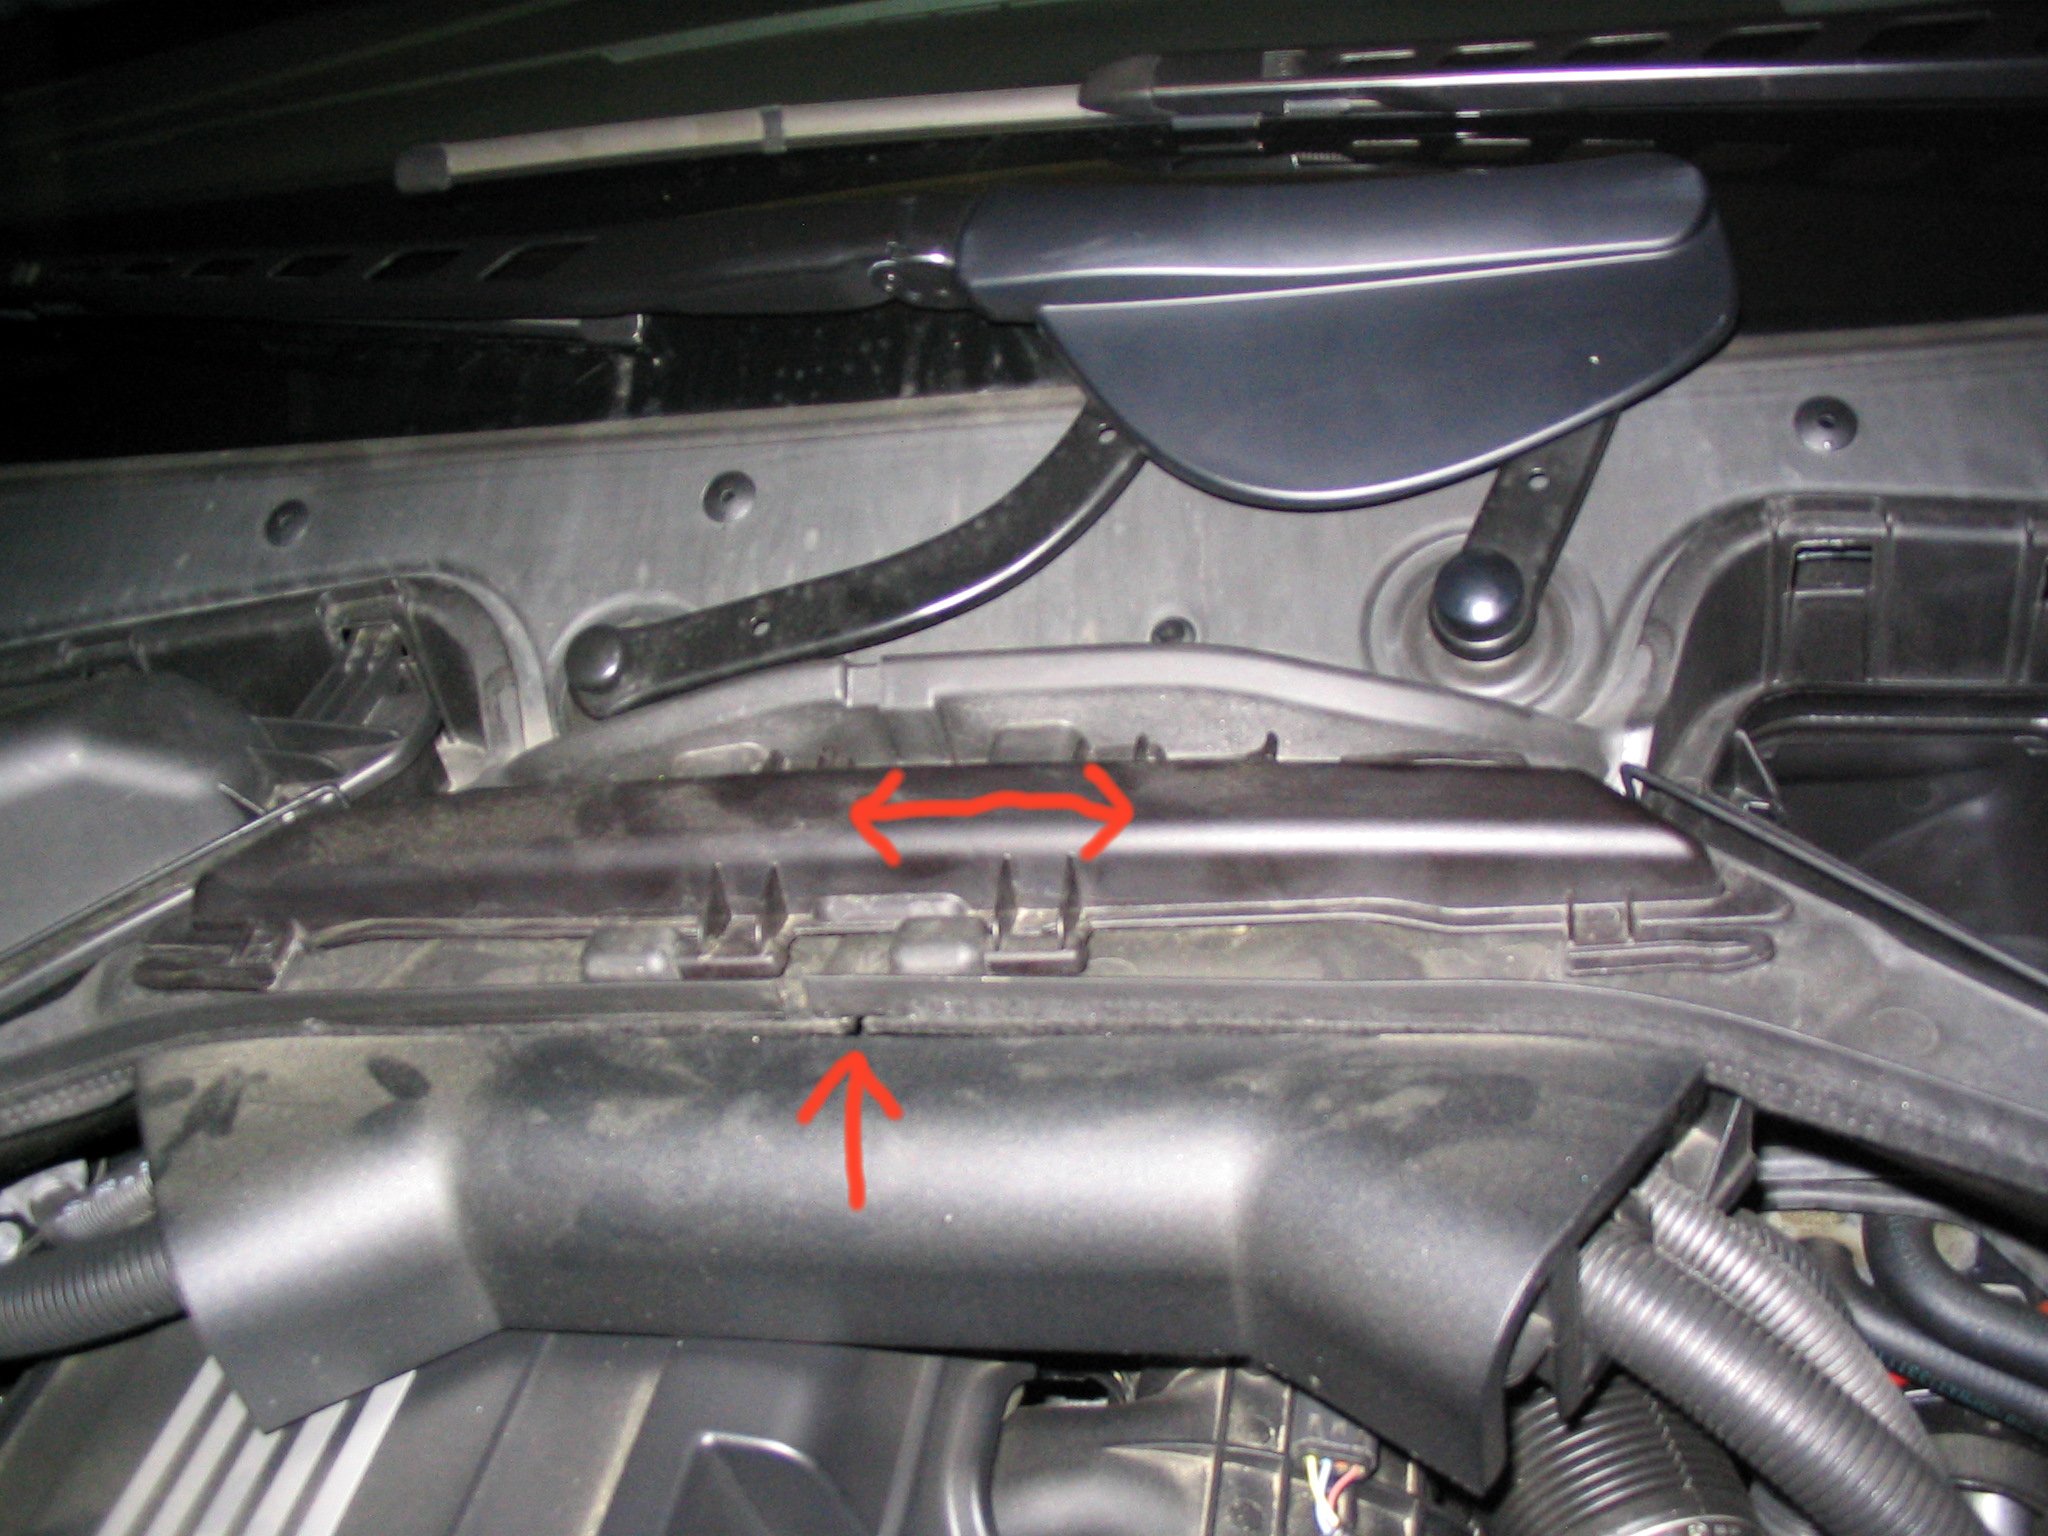
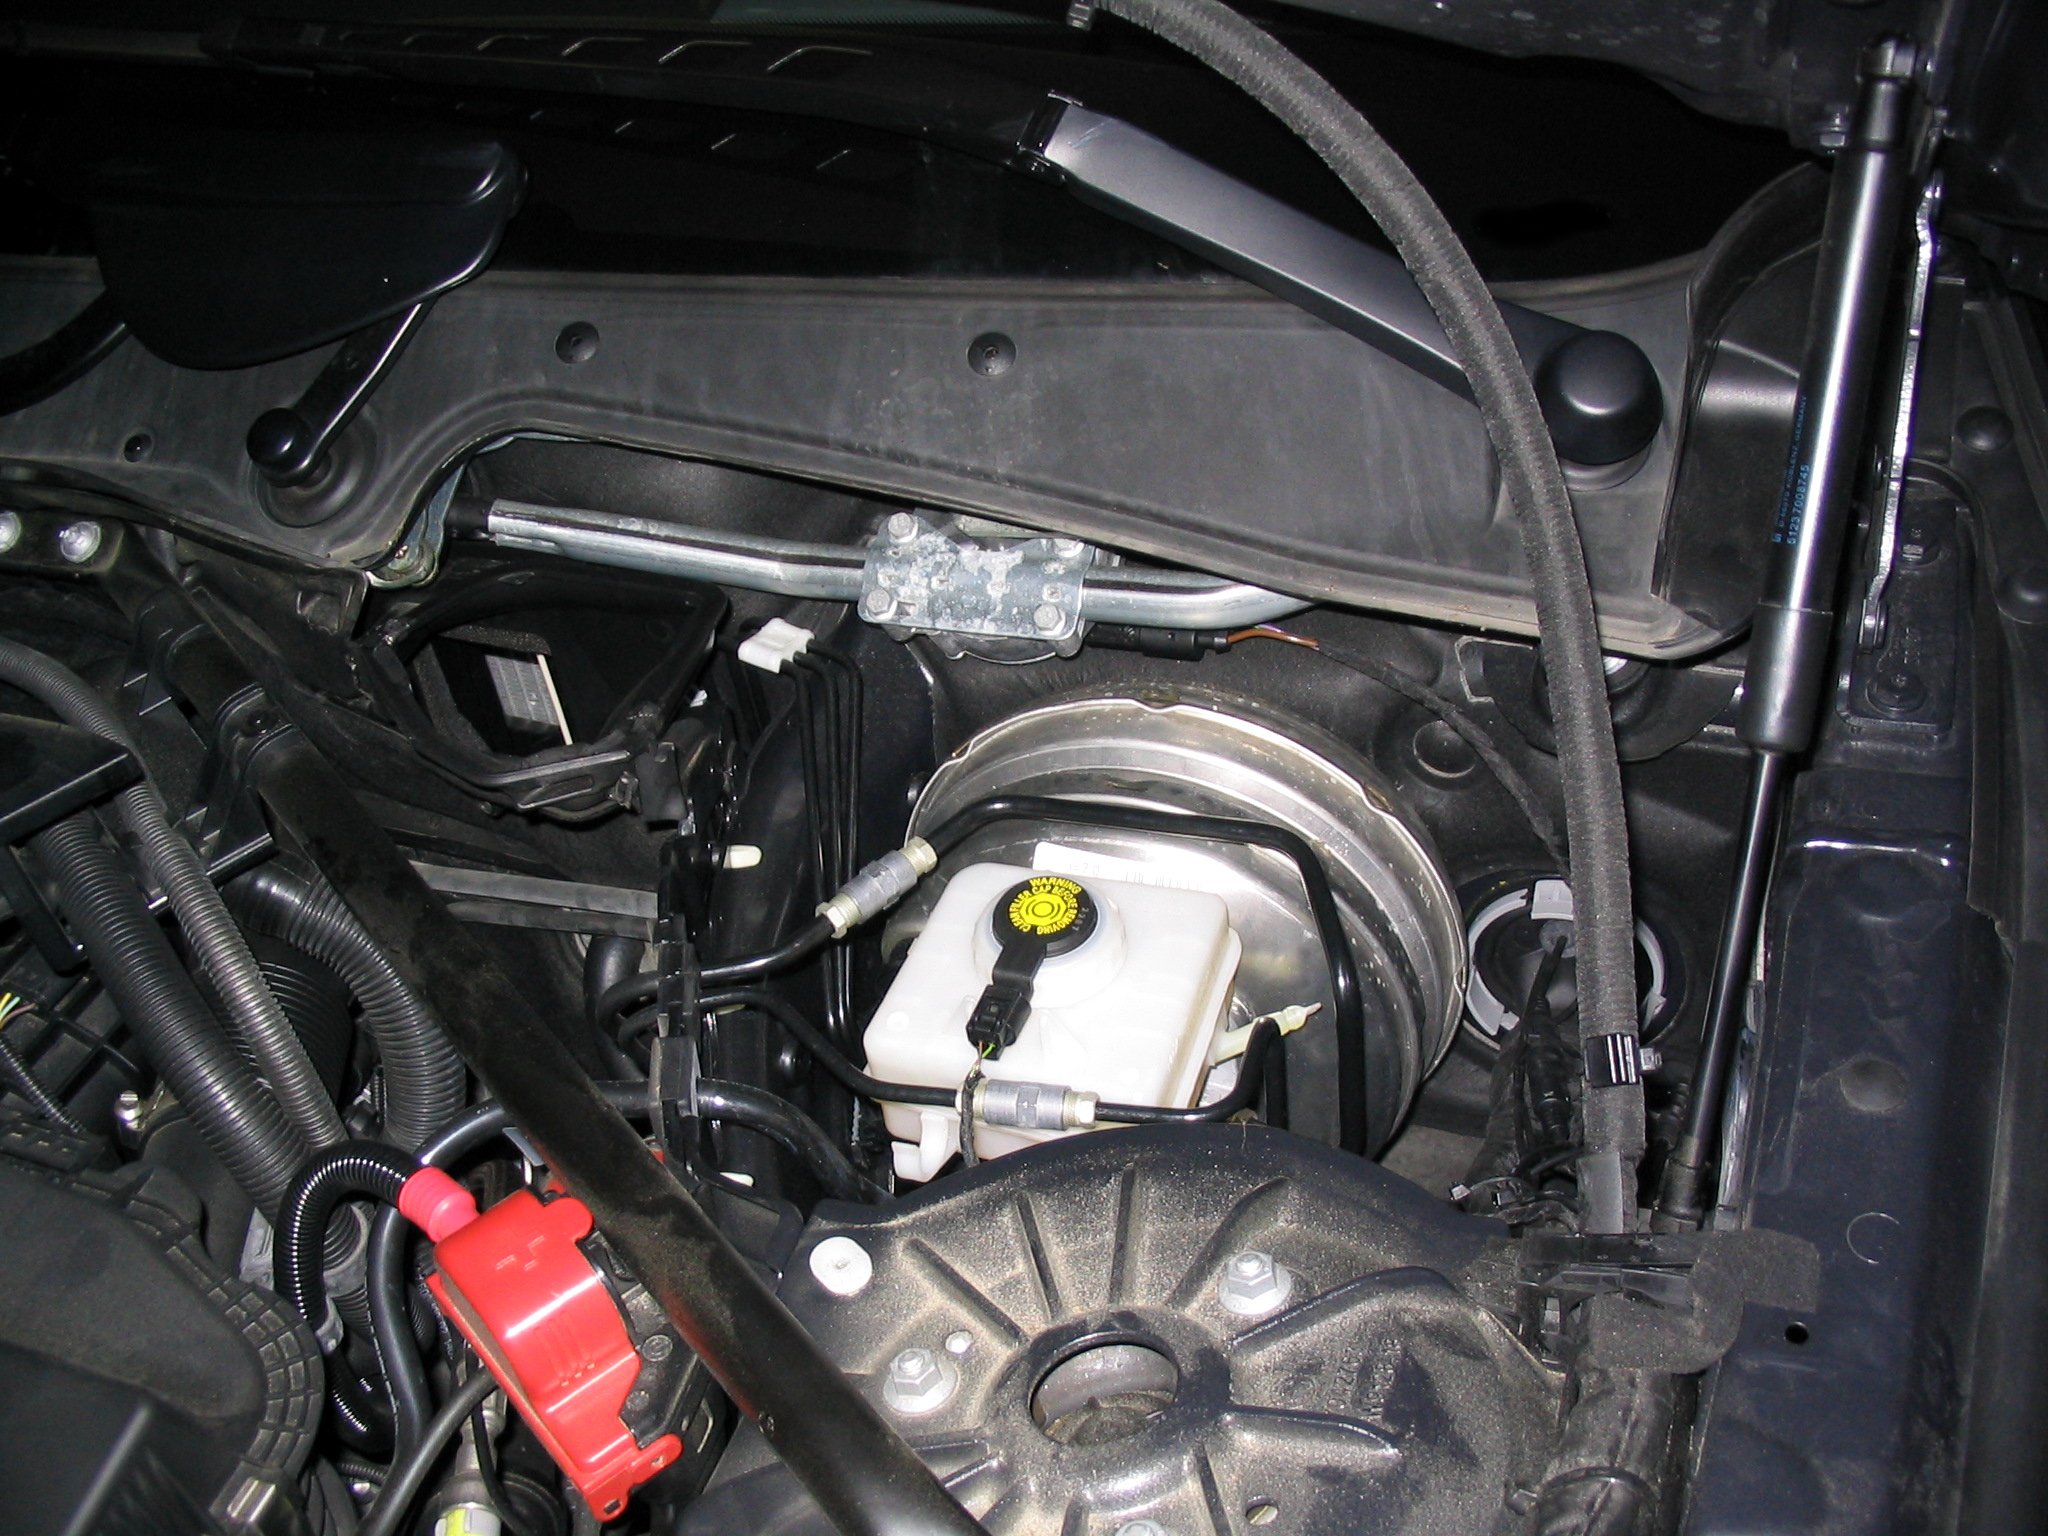
Now we need to remove the big trim piece. It's in two pieces, and we only need to remove half of it. The two pieces are held together using a sliding, locking piece above them. The single headed arrow in the picture below shows the spot where the two pieces meet; the double headed arrow shows the piece that slides (slightly) and locks the two pieces together. This piece doesn't come out easy (or least for me); what I do is slide the top piece to the right, and lift up on the whole thing. Once the top piece "pops" out, the whole big piece lifts out to reveal the master cylinder.

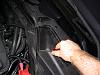
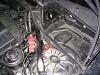
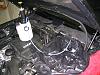
The next thing we want to do is get the pressure bleeder filled and hooked up, but before we do that we need to clean off the master cylinder. After that is done, disconnect the plug attached to the cap so we can get the cap out of the way (the picture shows me holding the plug by the wires - don't pull the wires, pull the plug itself.
To make sure nothing contaminates the cap and its parts, I put the whole thing in a zip top plastic bag.
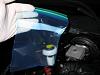
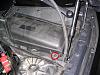
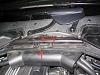
Next comes the garbage bag. Since brake fluid can do nasty things, it's best to protect the engine bay as best you can. To do that, poke a hole in a garbage bag and stretch it around the master cylinder - make sure it is wrapped tight around the edges. Even better, make sure you have full coverage from the master cylinder, through the engine bay, and down the left front quarter panel. In other words, don't have any exposed paint.

Use the turkey baster (or fluid vacuum) to suck out most of the fluid from the master cylinder. Leave a little in there so no air gets into the system. After that's done, fill the master cylinder with fresh brake fluid; use a clean funnel so you don't spill any.
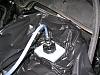
Now attach the cap for the pressure bleeder onto the master cylinder, and MAKE SURE IT IS TIGHT. Finger tight isn't good enough - get a monkey wrench and make sure that sucker is on there good. This system is going to be under pressure, and if this cap isn't tight enough, brake fluid will flow from underneath the cap.
Put on your gloves and glasses, fill the pressure bleeder with brake fluid, and pump to 20 PSI.
Attach the pressure bleeder to the cap. Do it in one smooth motion - push down on the cap until it snaps into place. You did a few dry runs to practice this before, right?
Check the area around the cap for leaks.
Now we're ready to bleed the brakes! The order (for a left hand drive car) is: back right, back left, front right, front left.
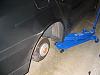
Jack up the right rear and remove the tire. Yes, I know my car needs washing. Shaddap.
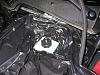
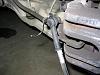
The bleed valve is on the left hand side of the caliper, and is protected by a little rubber hat.
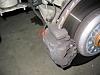

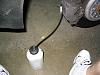
Put the catch bottle attachment onto the bleed valve...
... and use the box wrench to open the bleed valve. Look! Nice golden brake fluid going into our catch bottle.
When the stream turns blue - you're through!
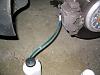
The stream won't go from gold to dark blue instantly - it will start getting darker, then green (yellow and blue make green!), then light blue, then dark blue. Give it time - you have plenty of fluid, so better safe than sorry.
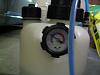
Here's how much fluid it takes to drain the back right side. Not much!
After you do one, check the pressure bottle to make sure you have plenty of fluid and pressure left. If you need more pressure, just pump a few times. It holds the pressure pretty well, so I doubt you'll have to add much. Just like when I was in high school, I only had to pump once. Zing!
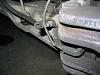
The front left caliper has some sort of attachment on it (don't know what it is - anyone?) - just remove it to get to the bleed valve, but make sure to put it back when you're done.
Once you've done all four, release the pressure in the bottle by pressing on the pressure release valve. Before removing the cap, I'd wrap a few shop towels around the master cylinder just to be sure you don't get brake fluid anywhere, then unscrew the cap and replace it with the real one. Don't forget to plug it back in!
Before putting everything back together, I'd fire up the car and make sure you don't get any warning messages.
Re-assemble all the trim pieces, and you're done! Congratulations - you just saved $200.
I'm showing it here for a 2008 535i, but this process works for any BMW that will fit the bleeder cap.
Note: I've included a lot of pictures, but I'm no graphic artist. I spent 10 minutes trying out how to make a perfect line with arrows in Paint Shop Pro and gave up and did it freehand.
There are a few ways to do a one person brake fluid change, but the two most popular are the vacuum method and pressure method. In each, the idea is basically the same: keep the master cylinder filled with fluid to prevent the introduction of air into the system, while at the same time bleeding the brake lines to get the old fluid out and the new fluid in.
Both the vacuum and pressure methods have their own pros, cons, quirks, and things to look out for. Using the vacuum method, you would attach a vacuum bleeder (such as the Mityvac 6830, http://www.mityvac.com/pages/products_bcbe.asp) to the bleed valve on the caliper and suck the fluid out. At the same time, you'd either manually refill the master cylinder or have some sort of device attached to it to have it auto-refill.
This method works well, however I don't like the devices used to refill the master cylinder. Since most systems try to be generic, you have to attach a plate to the master cylinder using bungee cords or the like, which I'm not a big fan of. Too much hassle.
Using the pressure method, you fill a pressure tank with brake fluid and attach it to the master cylinder. As you bleed fluid from the line, the pressure sends fluid from the tank into the master cylinder, keeping it filled and keeping air out. The drawback to this method: if the attachment between the tank and the master cylinder isn't tight, or if it bursts, brake fluid can spray everywhere. Since brake fluid can harm paint, this isn't a desired event. Why do I still prefer this method? Because BavAuto sells a pressure bleeder with a screw on attachment that fits BMW master cylinders perfectly.
So - let's get to changing fluid using the pressure method!
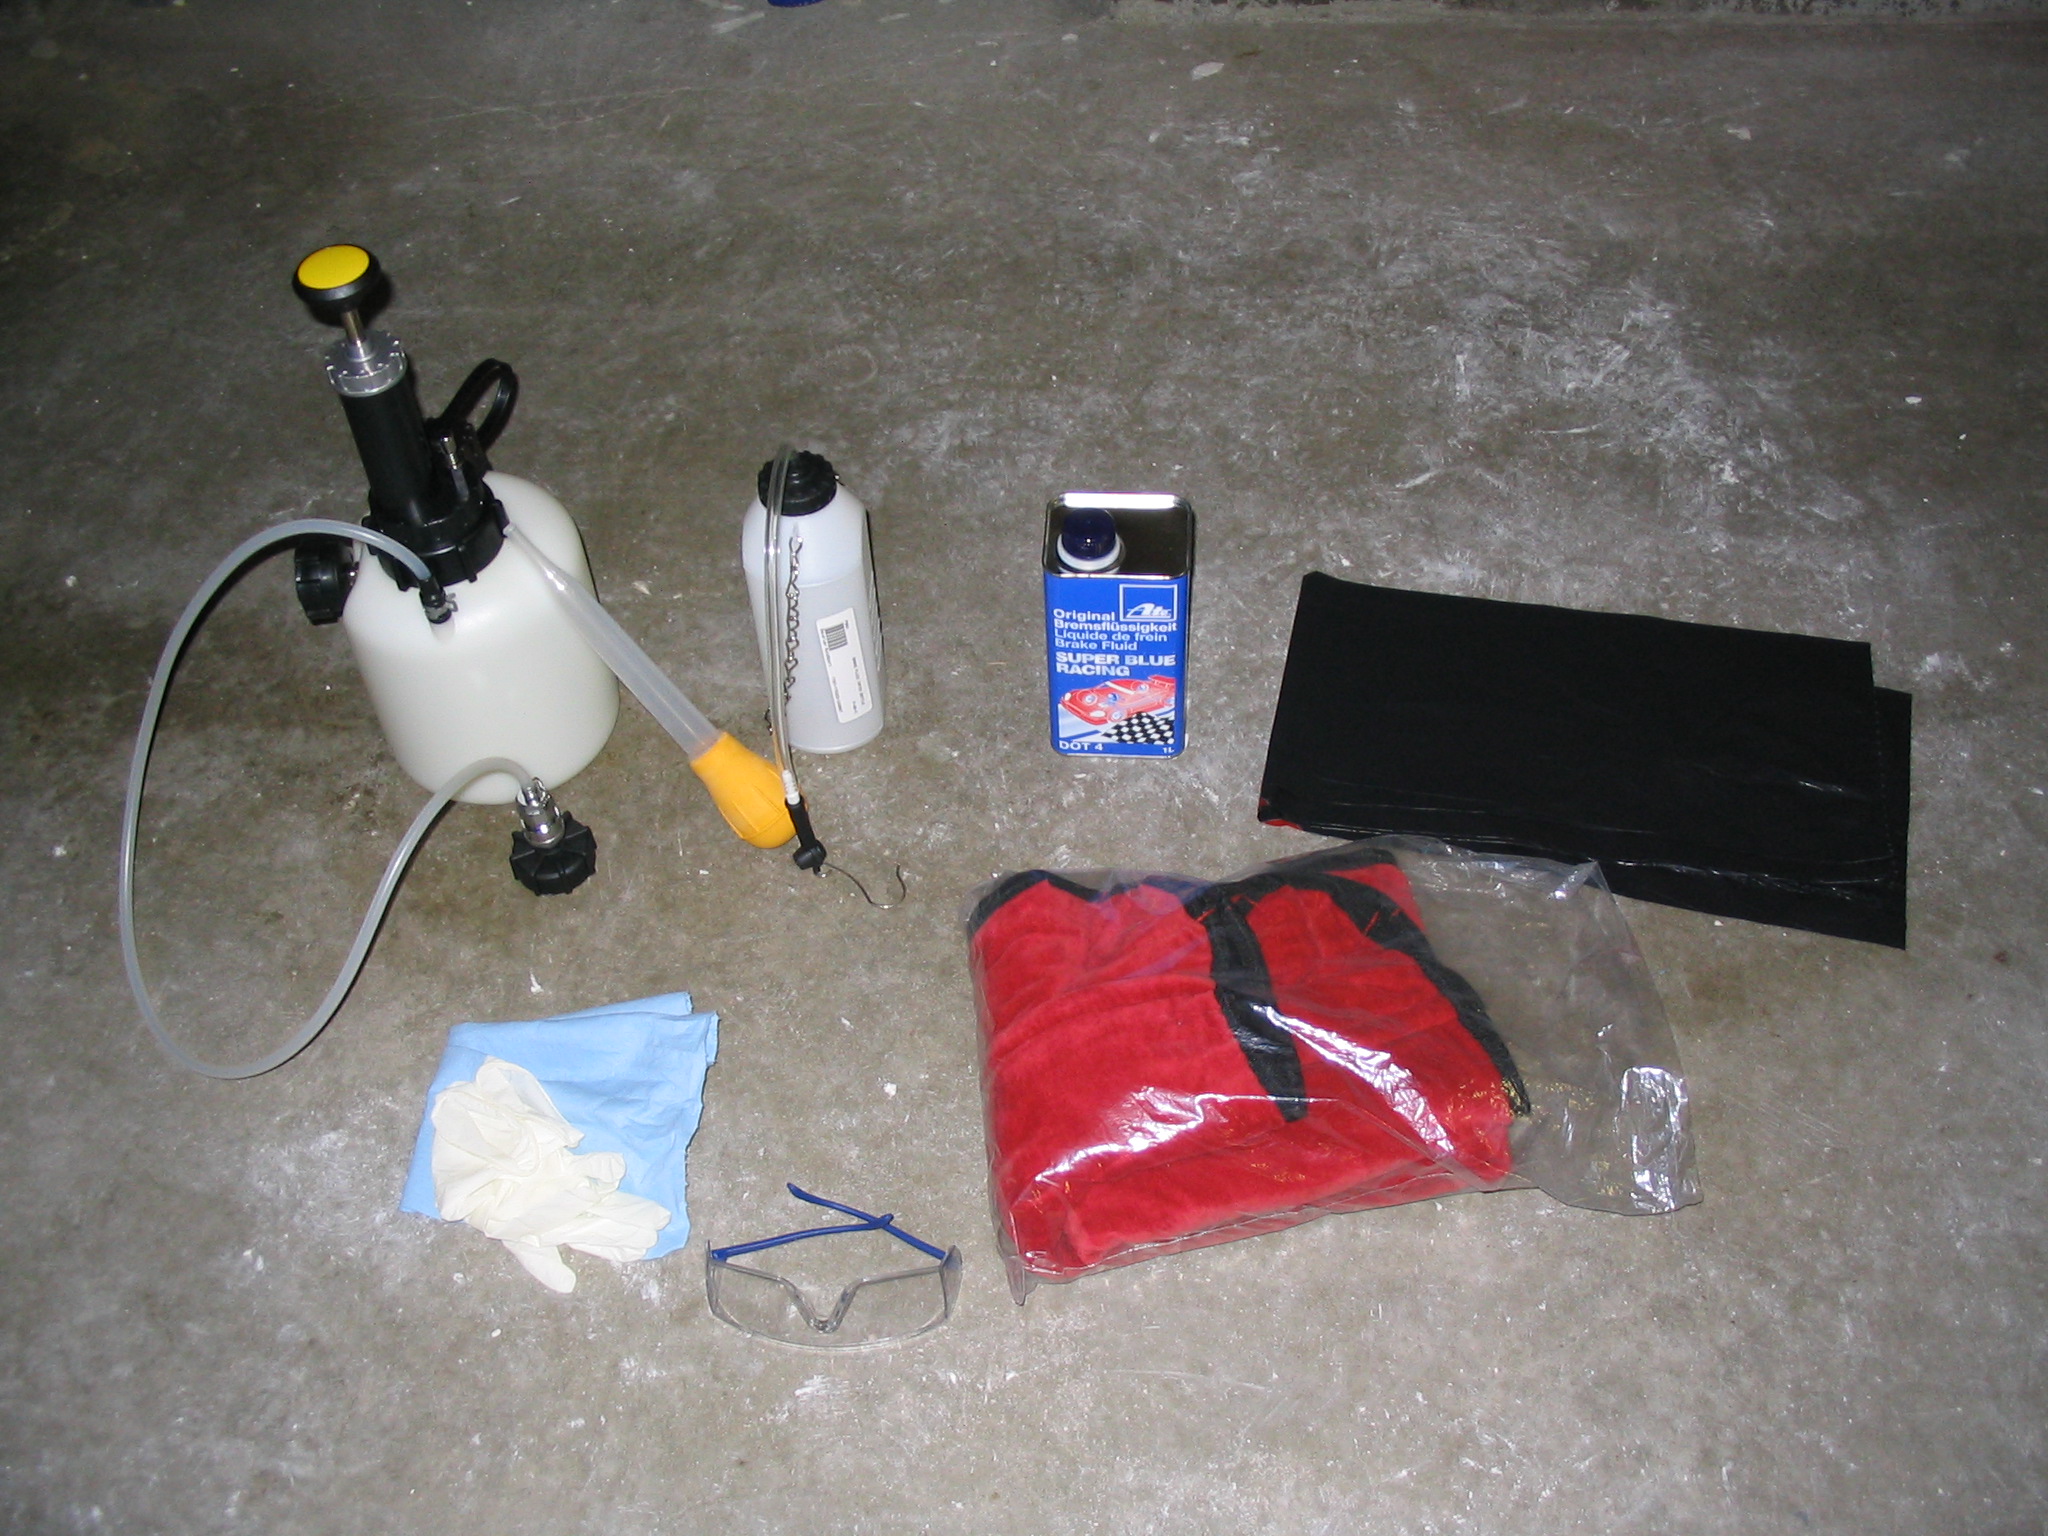
First, we need to obtain a few things.
1) A pressure bleeder and catch bottle. I use one from BavAuto (www.bavauto.com), part number PB03K - $69.90
2) A turkey baster, aka Redneck Impregnating Device. If you have a fluid evacuator, that works just fine too.
3) Brake fluid. I use ATE Super Blue (or Gold, depending on which kind I used before).
4) A garbage bag. More on this later.
5) Shop towels and latex gloves. Brake fluid can be nasty stuff. Keep it away from your eyes, mouth, etc. No chugging.
6) Safety glasses.
7) Some sort of drop cloth for the side of the car. I use one from Griots.
Not pictured: socket wrench, 17mm socket for the tires, torque wrench, 9mm box wrench, 11mm box wrench, funnel, 13mm socket, flat head screwdriver, T25 torx screwdriver, monkey wrench.
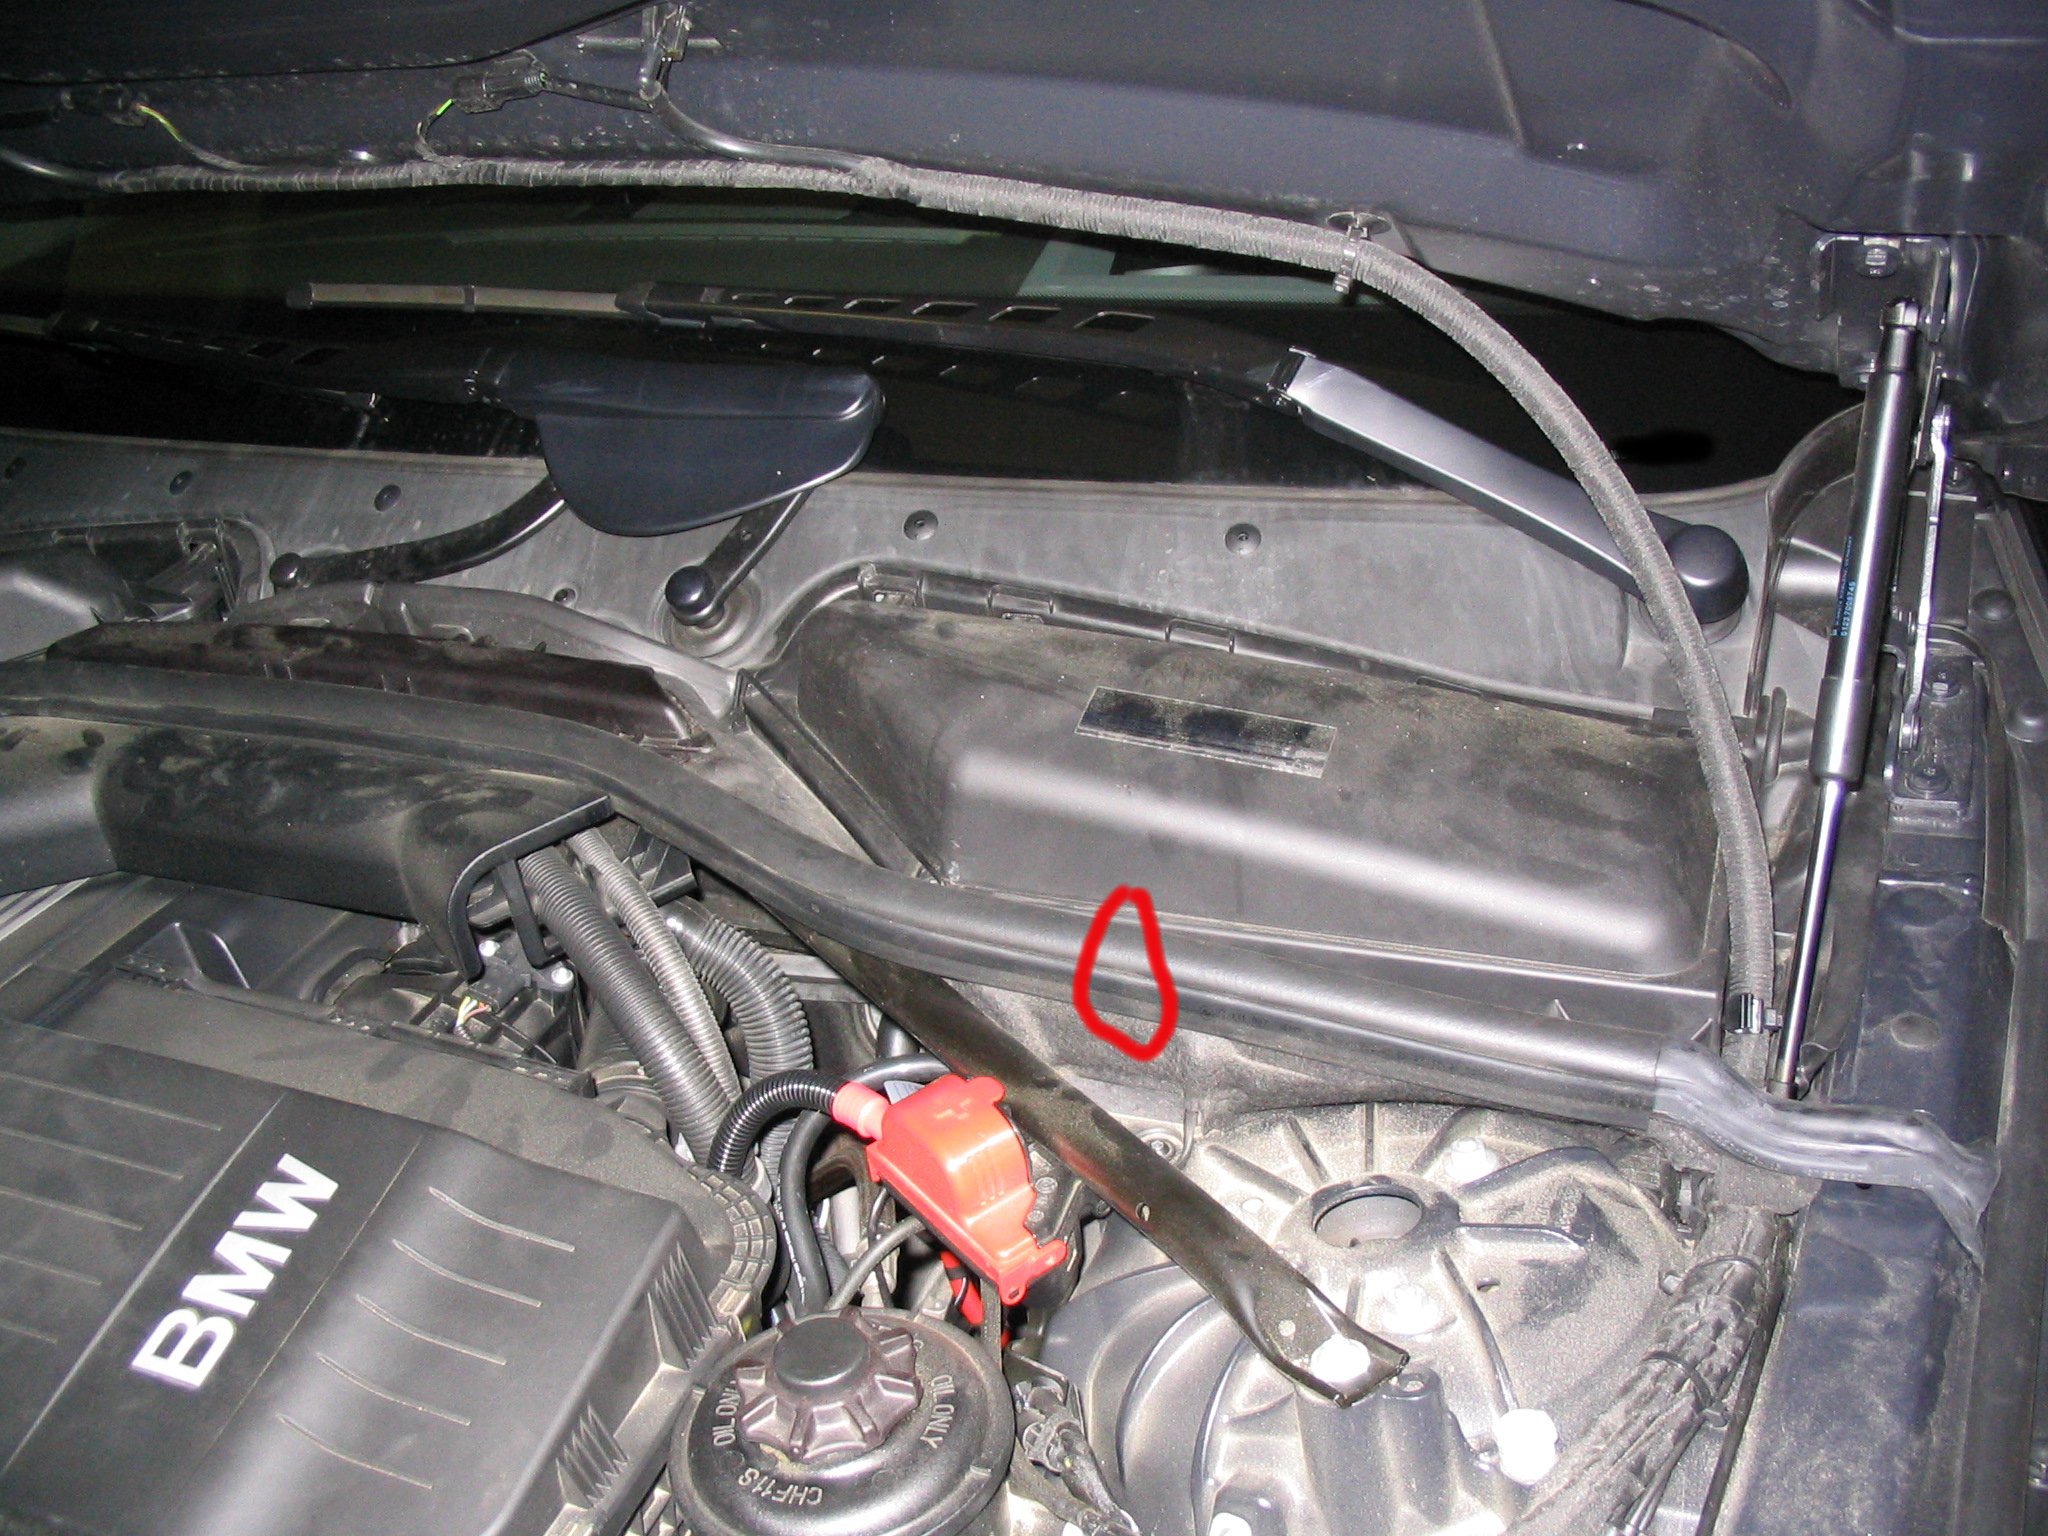
The first thing we need to do is to remove the pieces in the engine bay that are hiding the master cylinder from us.
Remove the rubber trim (circled in the picture) that goes from side to side. Just pull up on it. You can remove the whole thing and set it aside, or just remove the right half (assuming a left hand drive car).
Now we need to remove the filter and housing. Use a 13mm socket to loosen the circled nut; it doesn't need to be unscrewed, just turned 90 degrees - it will remain attached to the filter housing. Then use a flathead screwdriver to unhook the hold-down, then remove the filter and housing.

Next remove the trim piece along the side
Next loosen the three circled nuts. Again, just turn 90 degrees to loosen.
Now use the T25 torx screwdriver to remove the circled screw.
Now we need to remove the big trim piece. It's in two pieces, and we only need to remove half of it. The two pieces are held together using a sliding, locking piece above them. The single headed arrow in the picture below shows the spot where the two pieces meet; the double headed arrow shows the piece that slides (slightly) and locks the two pieces together. This piece doesn't come out easy (or least for me); what I do is slide the top piece to the right, and lift up on the whole thing. Once the top piece "pops" out, the whole big piece lifts out to reveal the master cylinder.
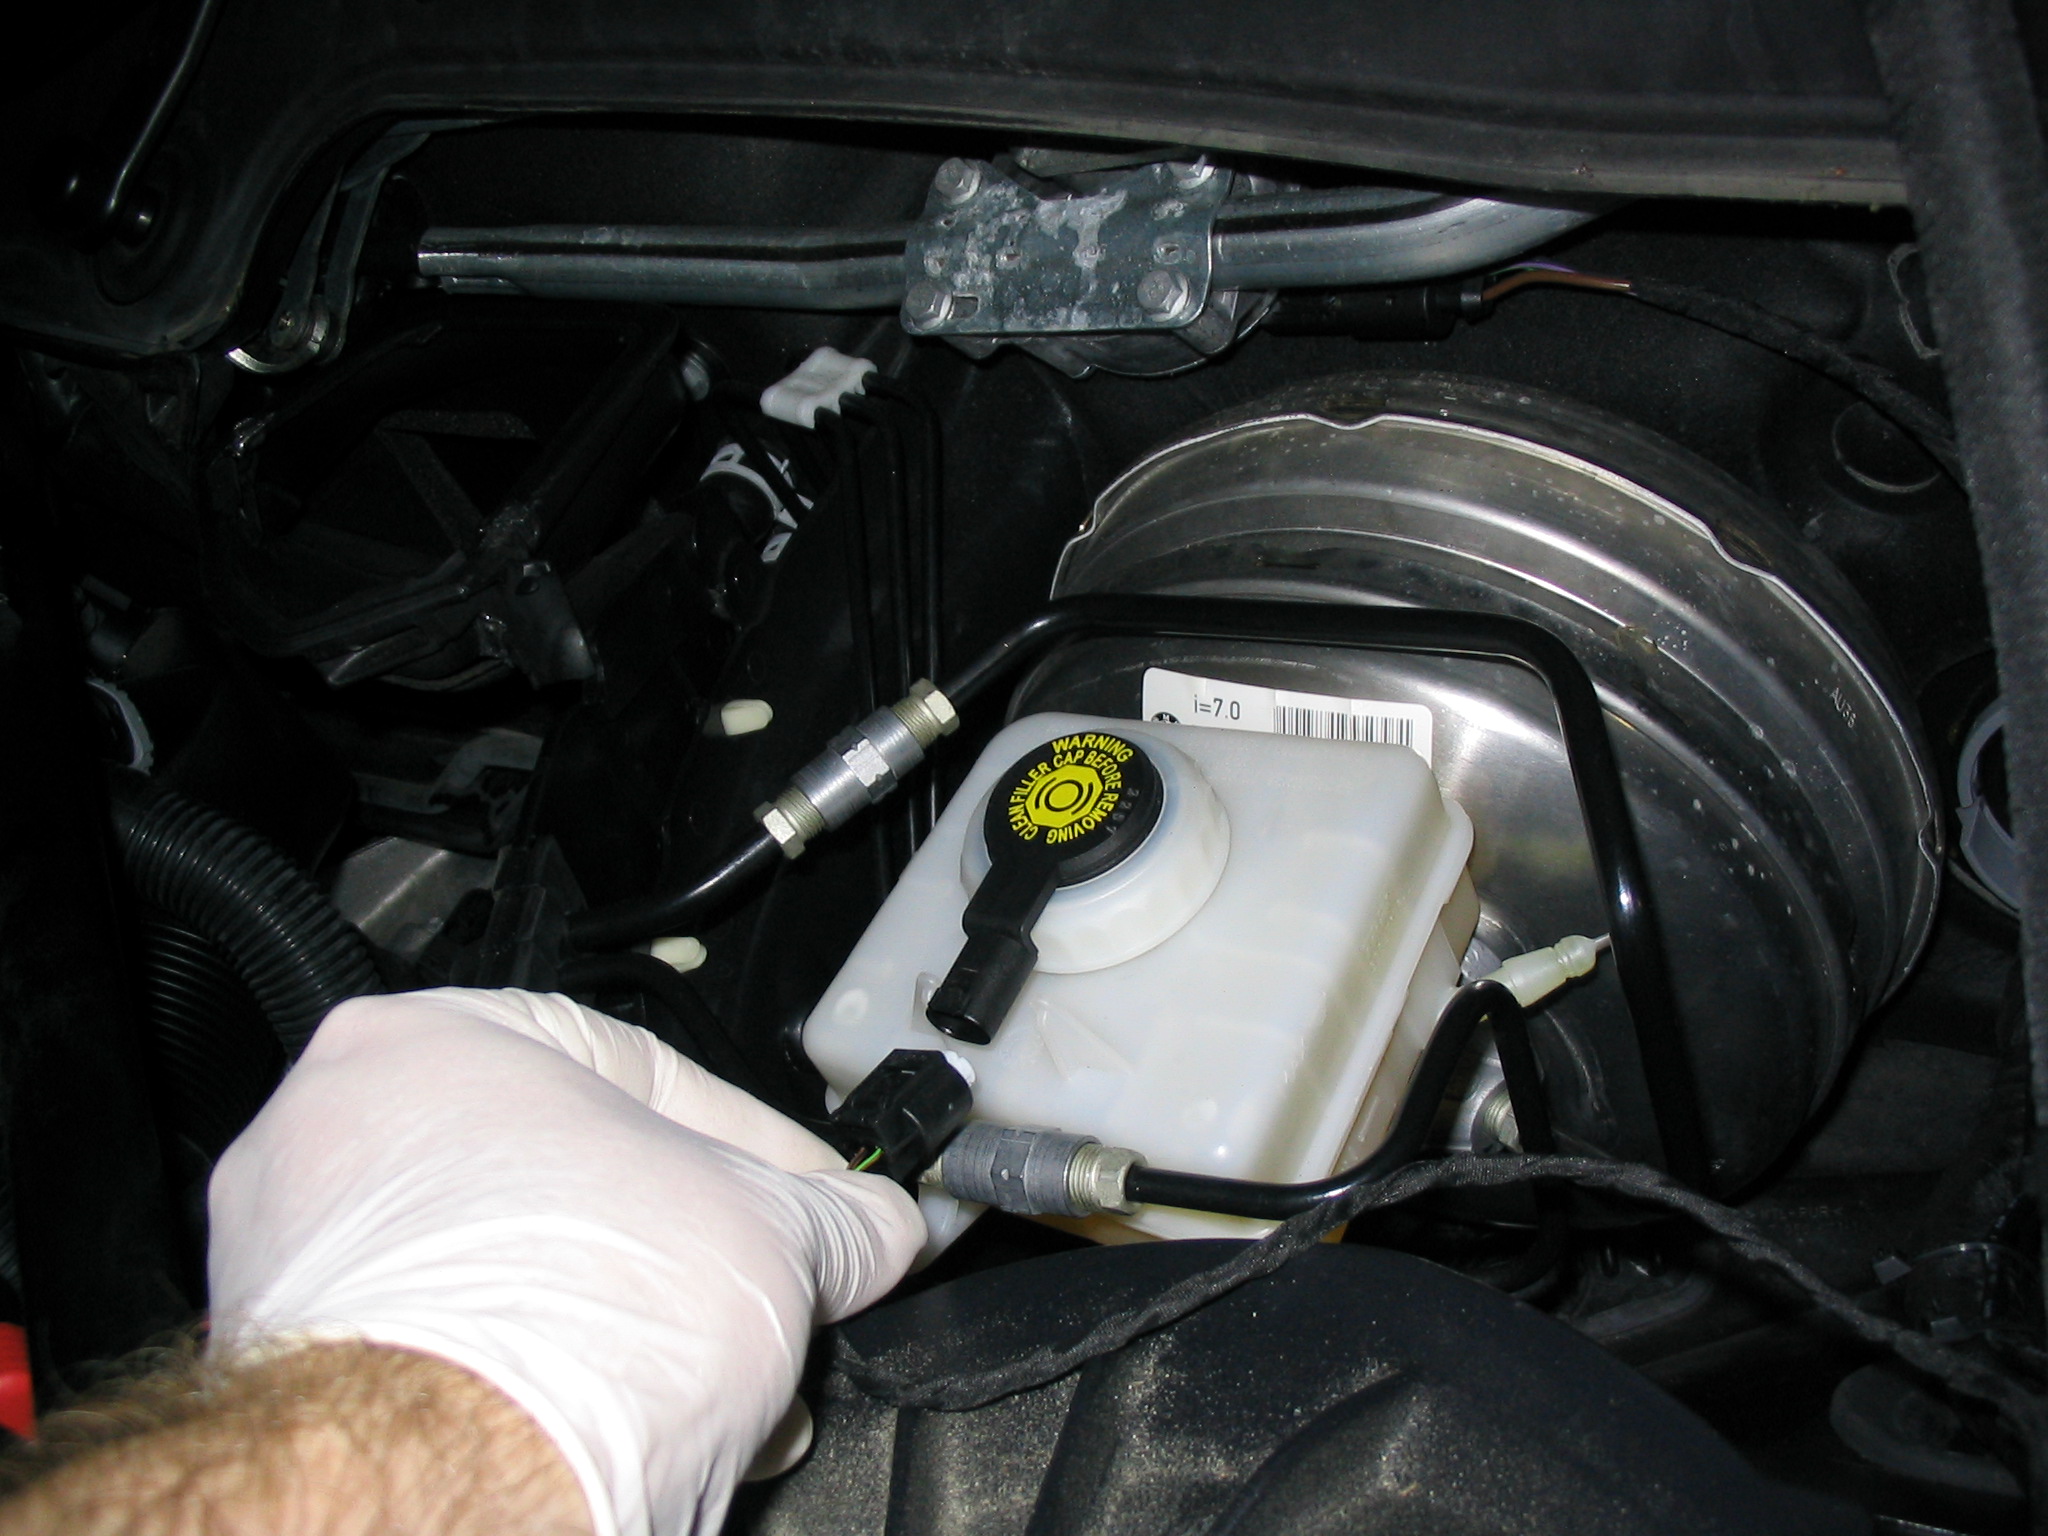
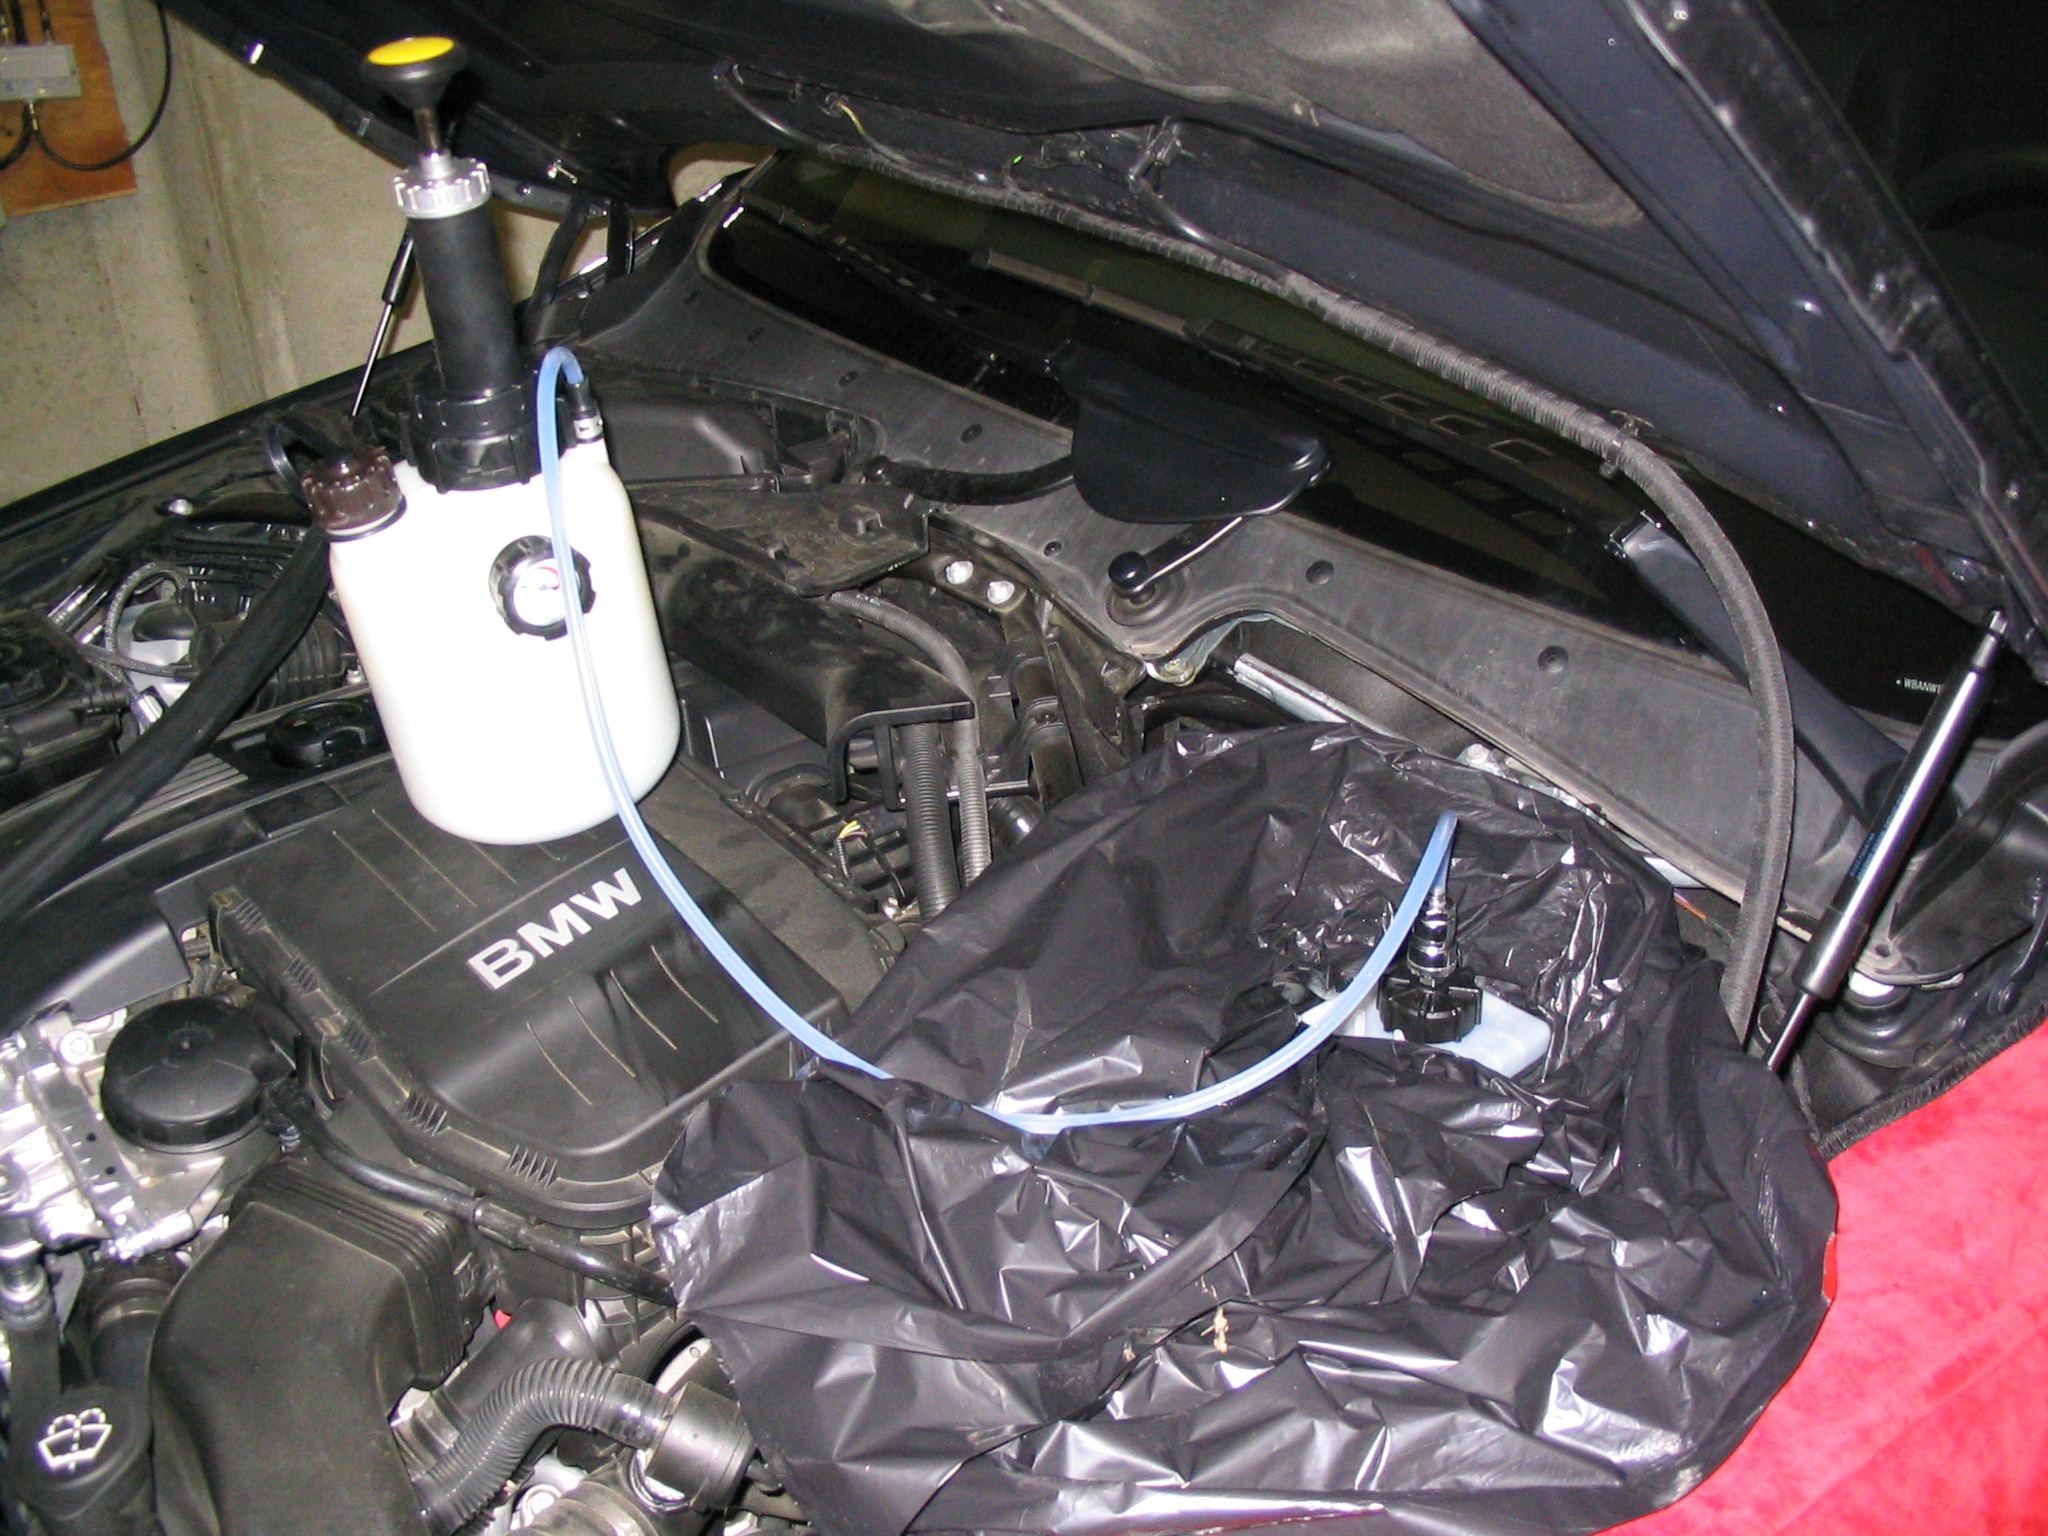
The next thing we want to do is get the pressure bleeder filled and hooked up, but before we do that we need to clean off the master cylinder. After that is done, disconnect the plug attached to the cap so we can get the cap out of the way (the picture shows me holding the plug by the wires - don't pull the wires, pull the plug itself.
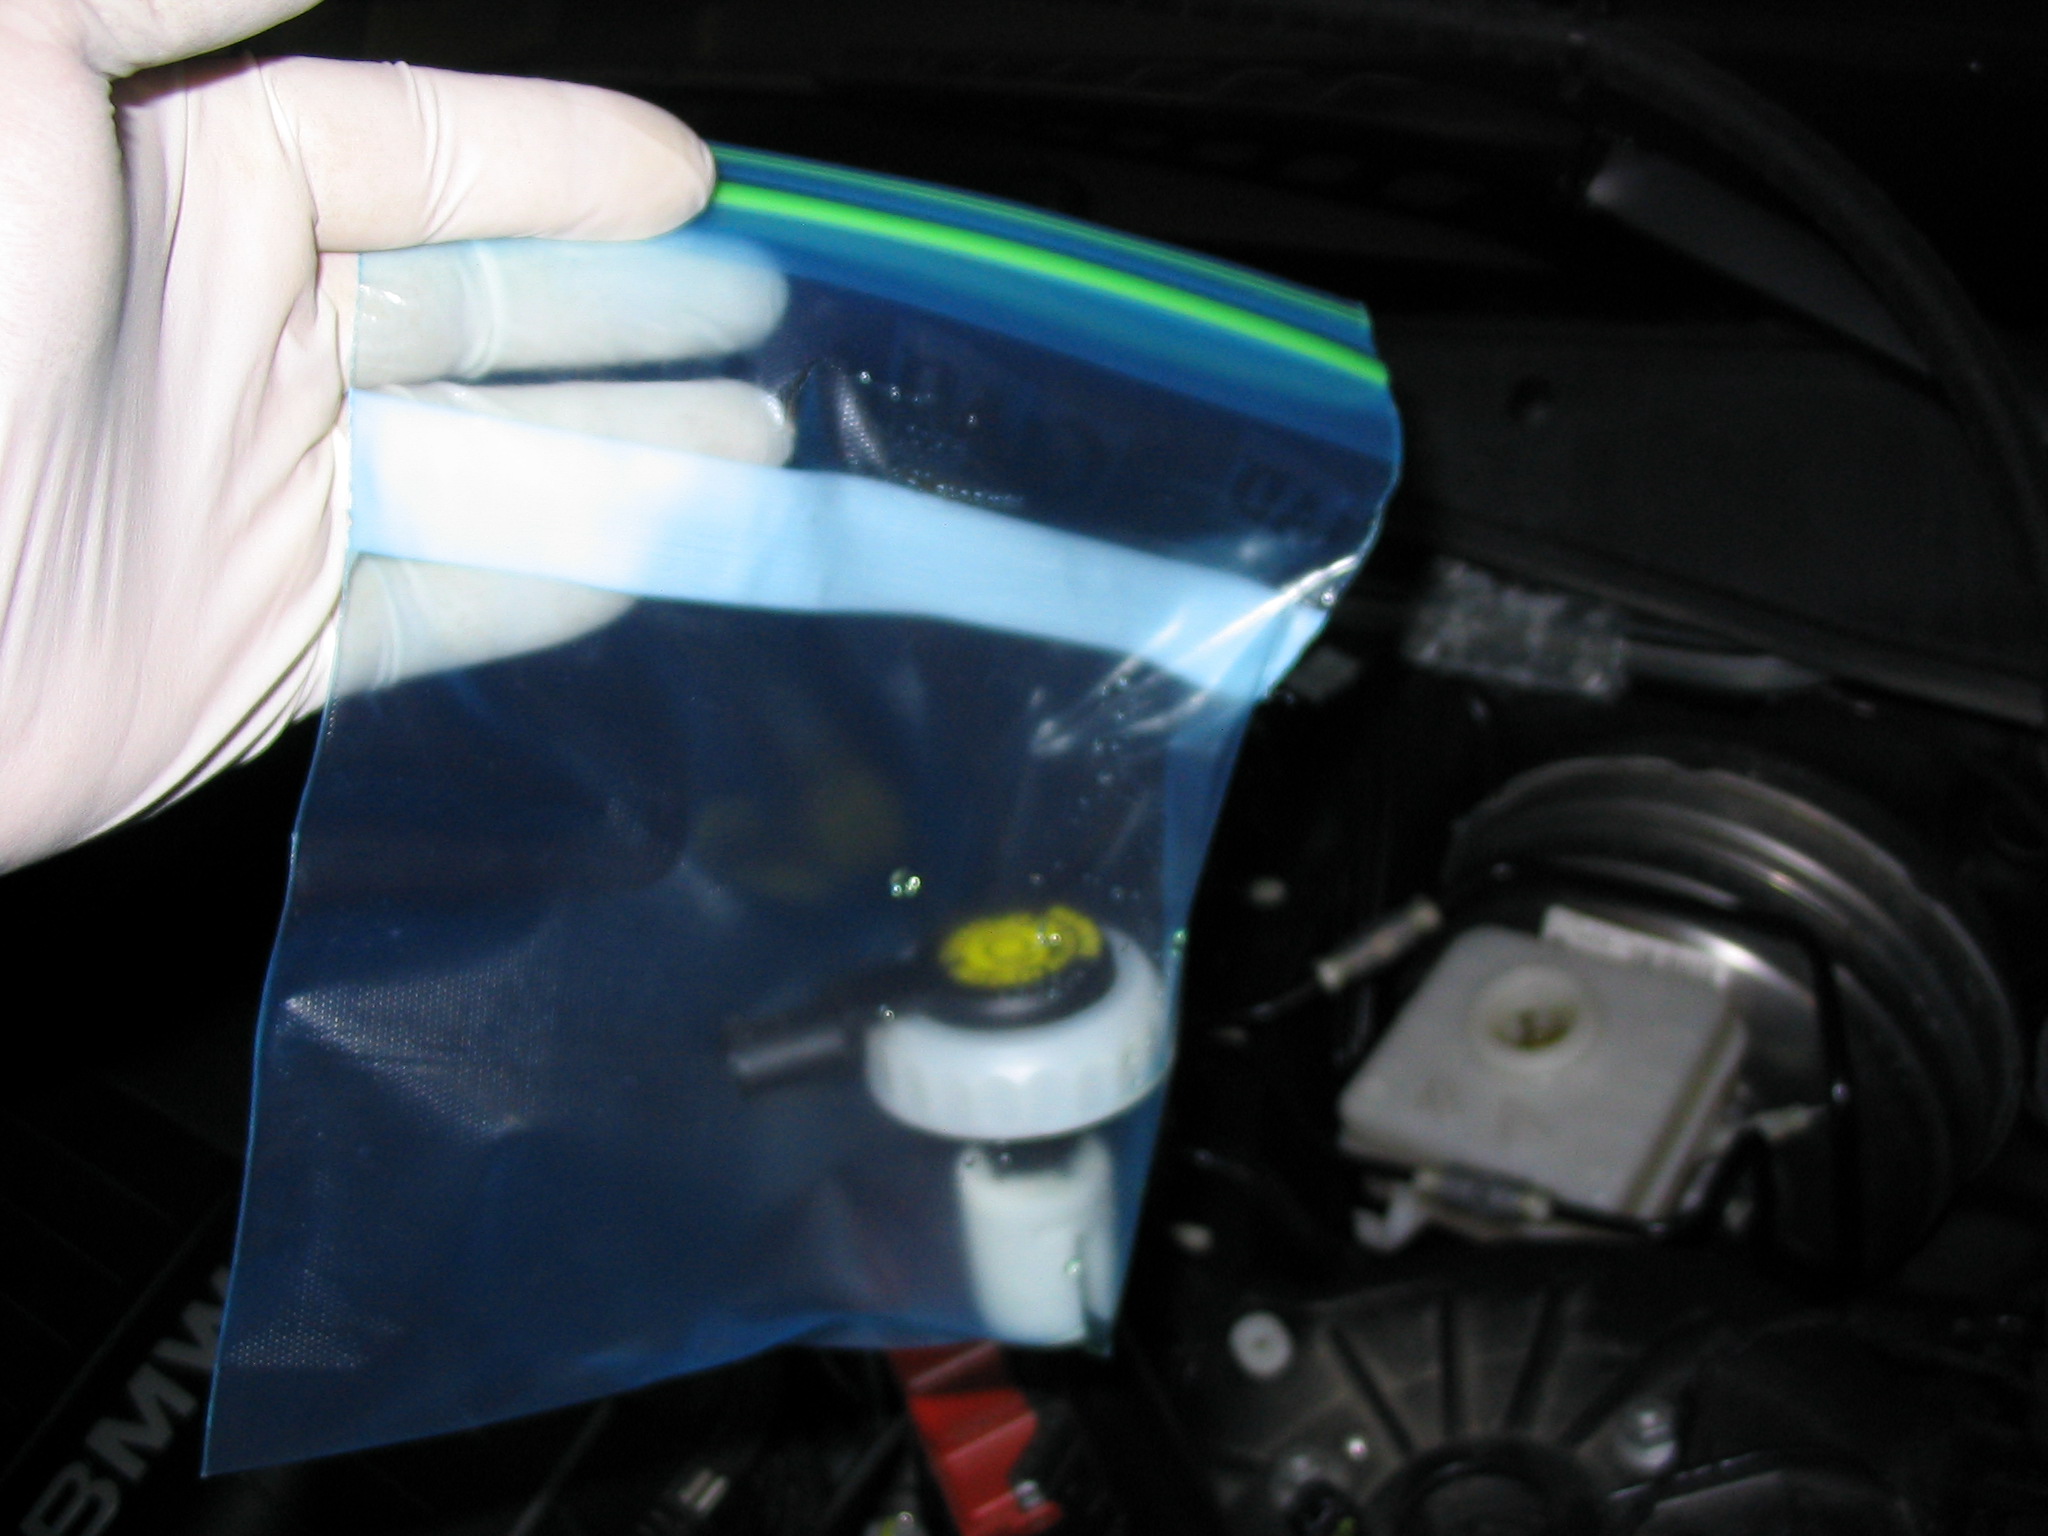
To make sure nothing contaminates the cap and its parts, I put the whole thing in a zip top plastic bag.
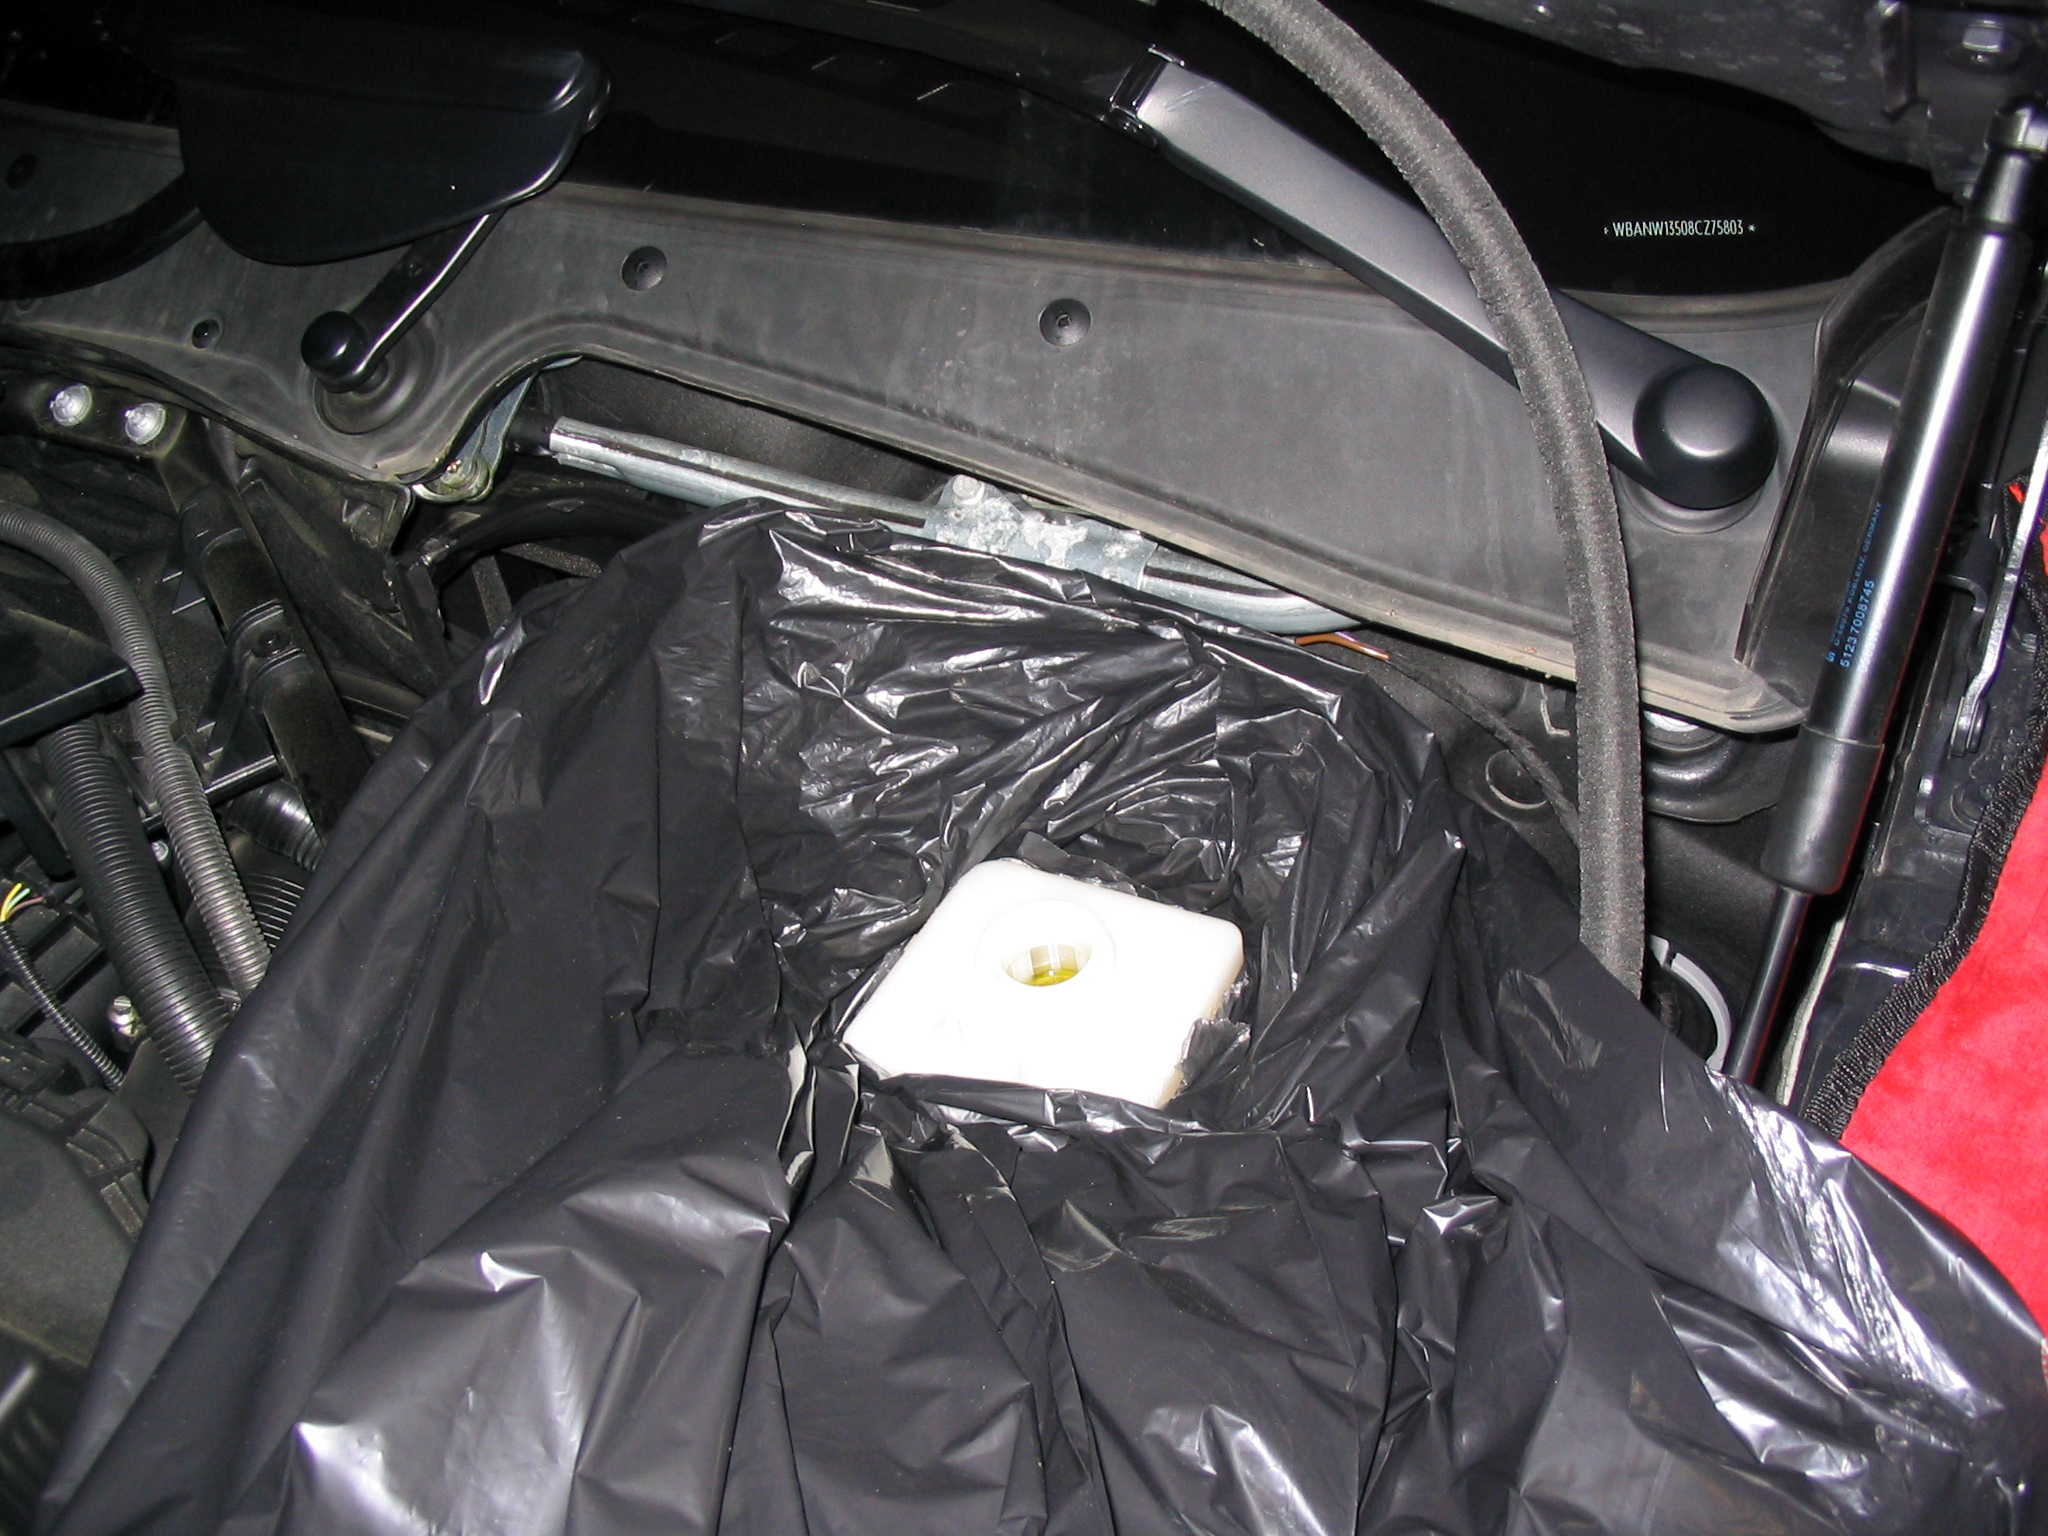
Next comes the garbage bag. Since brake fluid can do nasty things, it's best to protect the engine bay as best you can. To do that, poke a hole in a garbage bag and stretch it around the master cylinder - make sure it is wrapped tight around the edges. Even better, make sure you have full coverage from the master cylinder, through the engine bay, and down the left front quarter panel. In other words, don't have any exposed paint.
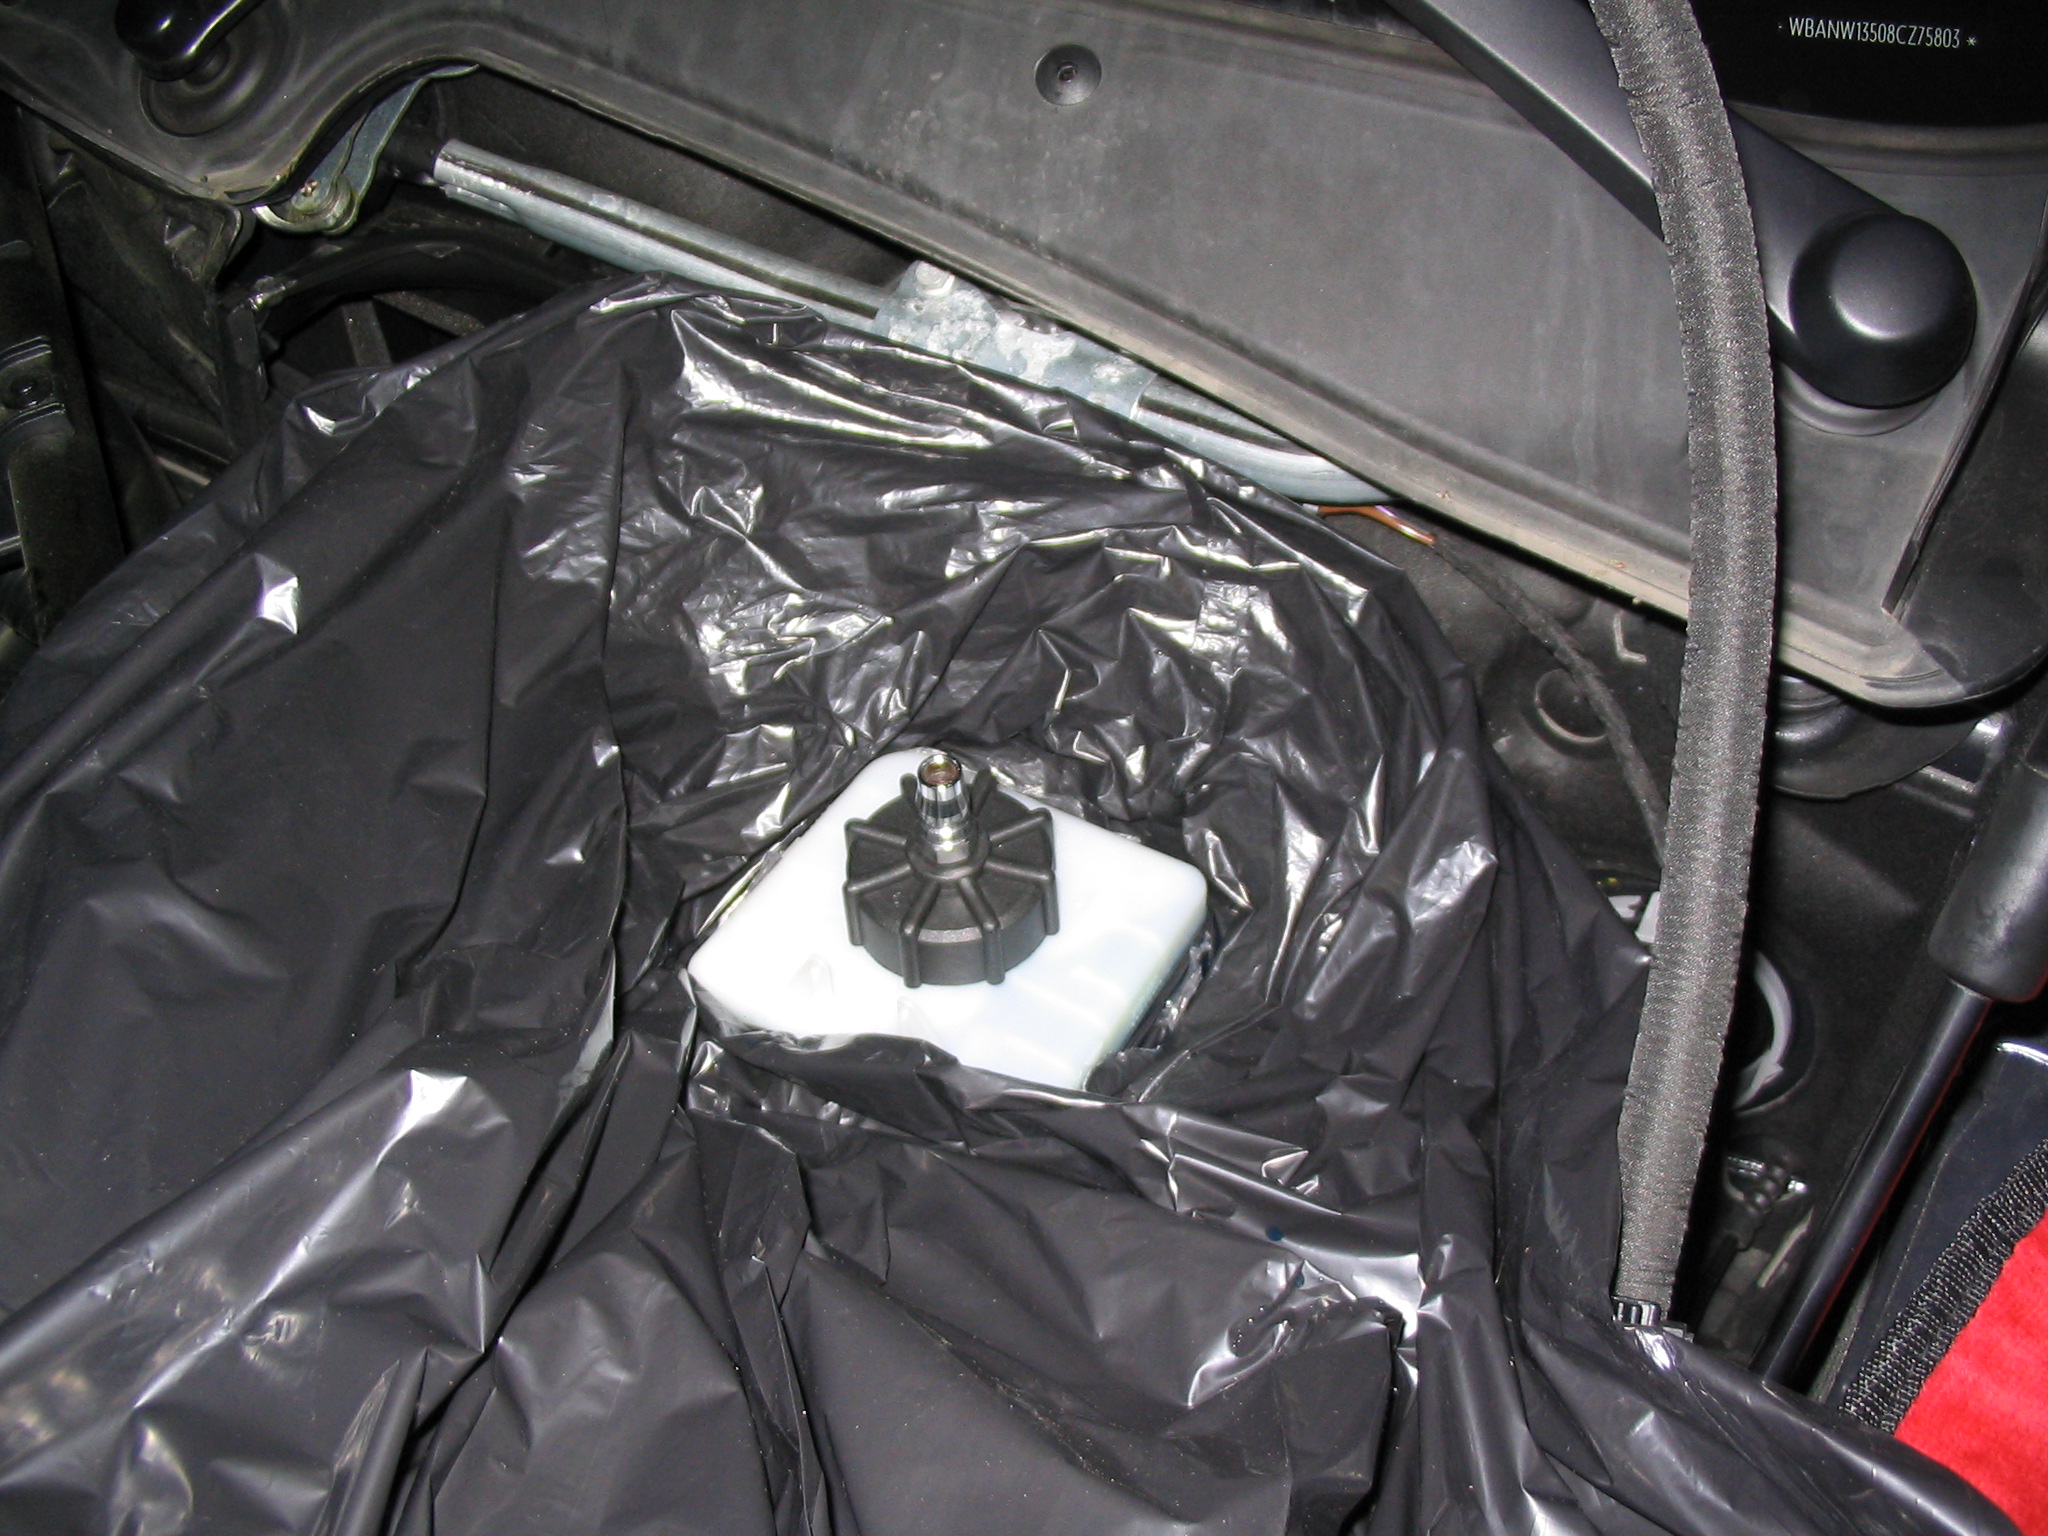
Use the turkey baster (or fluid vacuum) to suck out most of the fluid from the master cylinder. Leave a little in there so no air gets into the system. After that's done, fill the master cylinder with fresh brake fluid; use a clean funnel so you don't spill any.
Now attach the cap for the pressure bleeder onto the master cylinder, and MAKE SURE IT IS TIGHT. Finger tight isn't good enough - get a monkey wrench and make sure that sucker is on there good. This system is going to be under pressure, and if this cap isn't tight enough, brake fluid will flow from underneath the cap.
Put on your gloves and glasses, fill the pressure bleeder with brake fluid, and pump to 20 PSI.
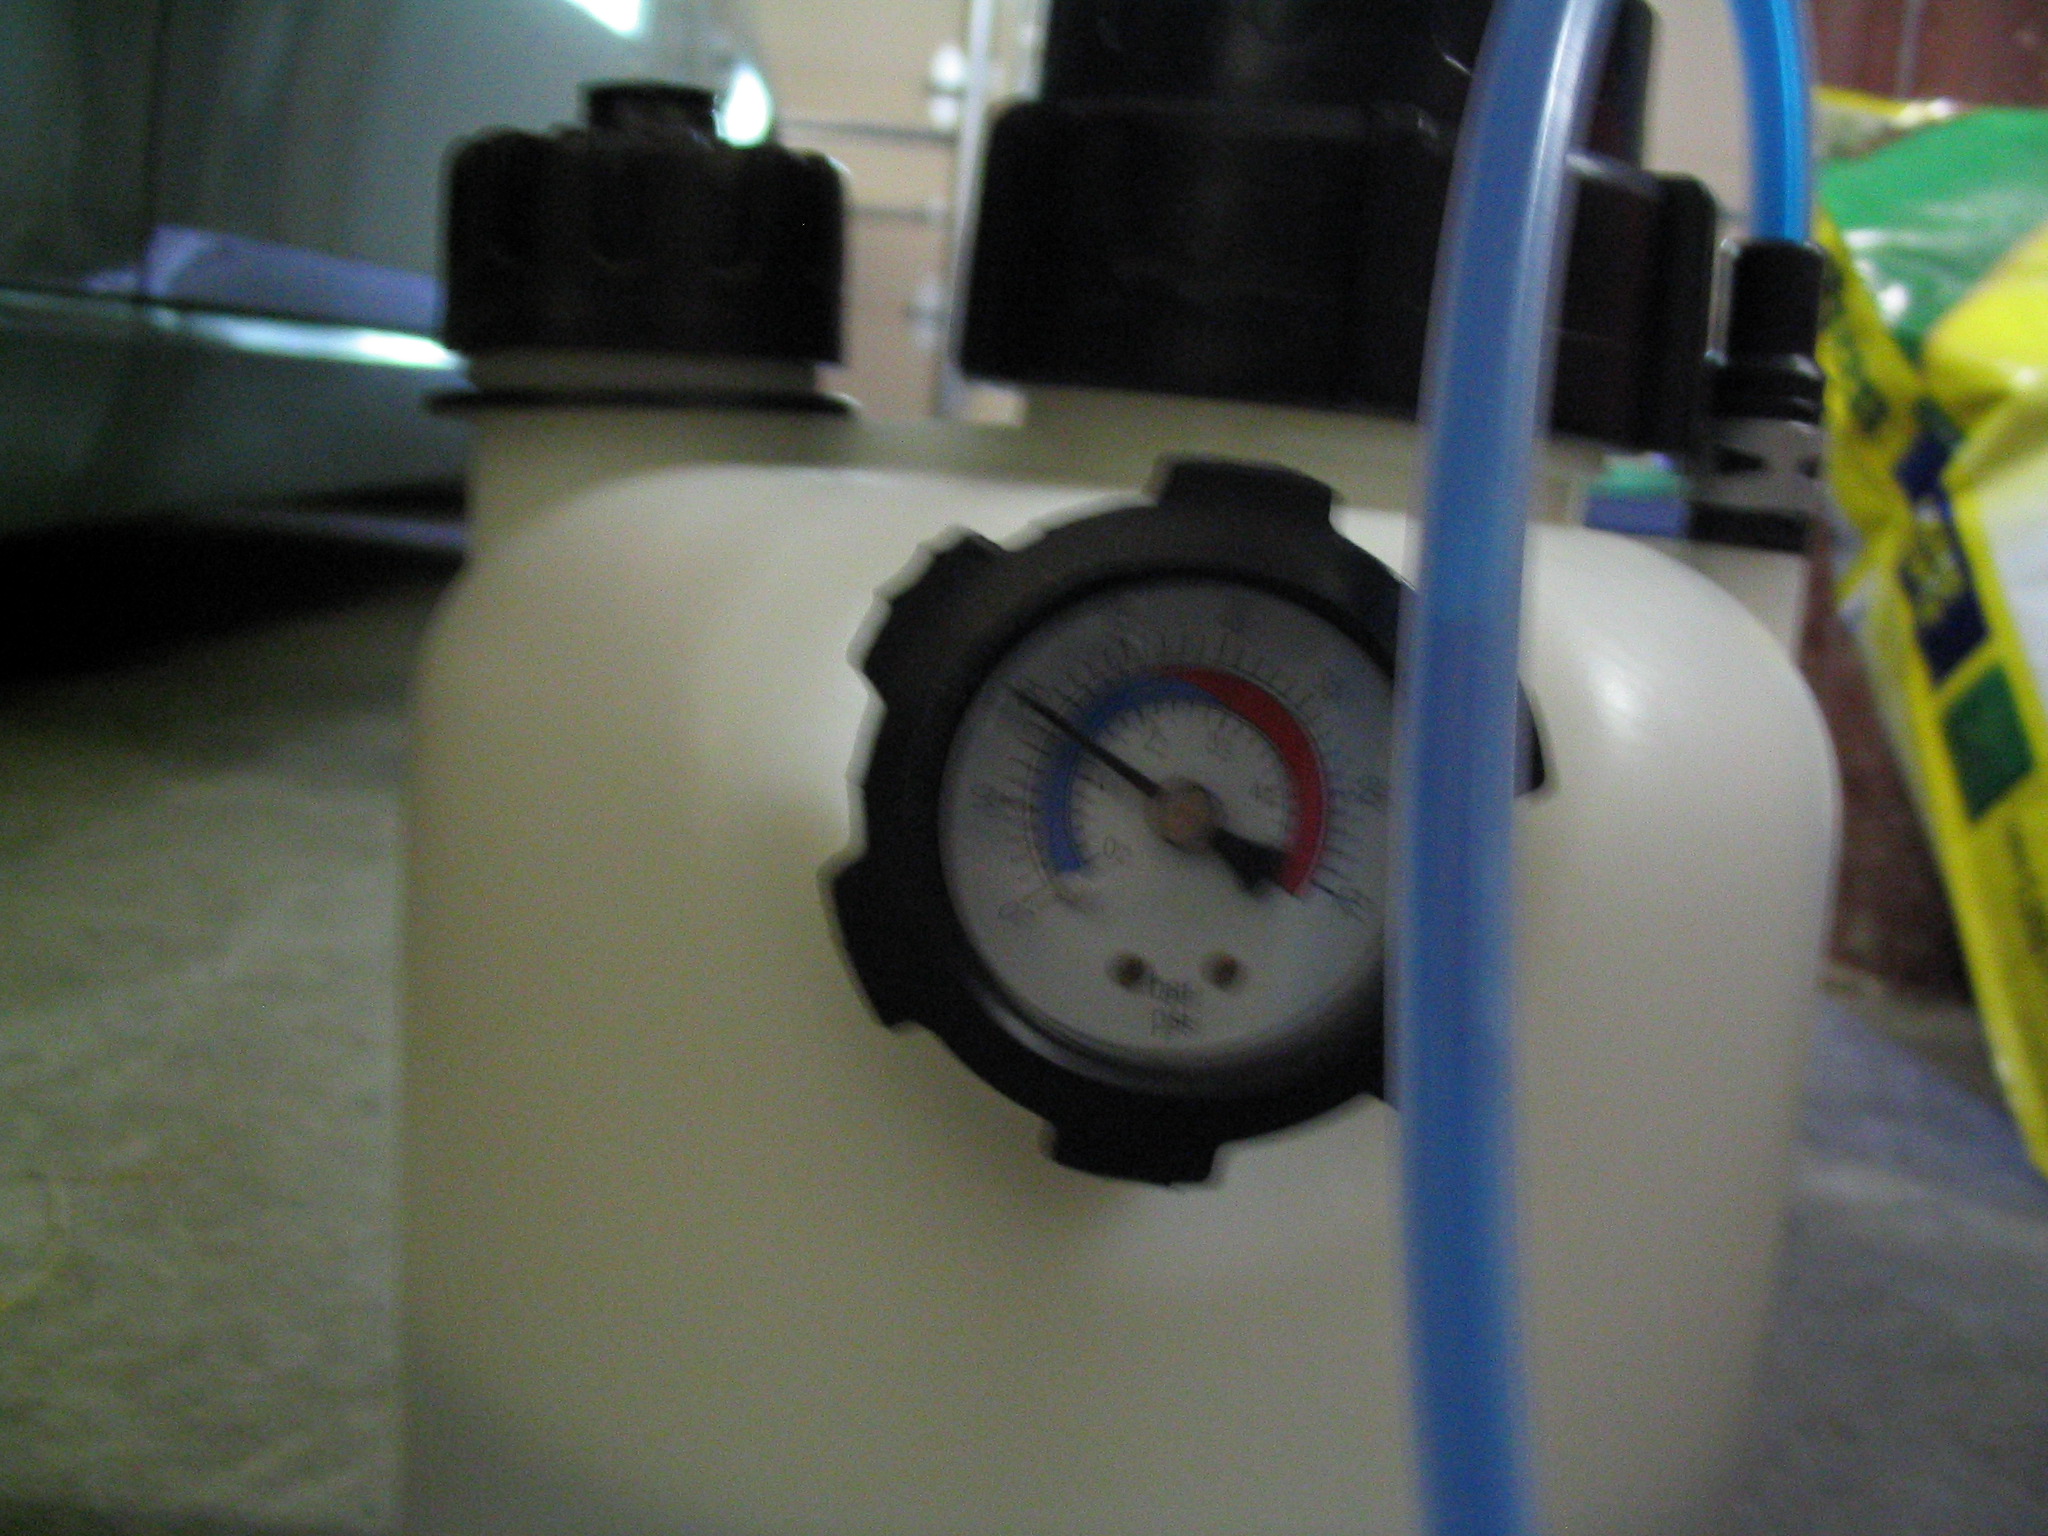
Attach the pressure bleeder to the cap. Do it in one smooth motion - push down on the cap until it snaps into place. You did a few dry runs to practice this before, right?
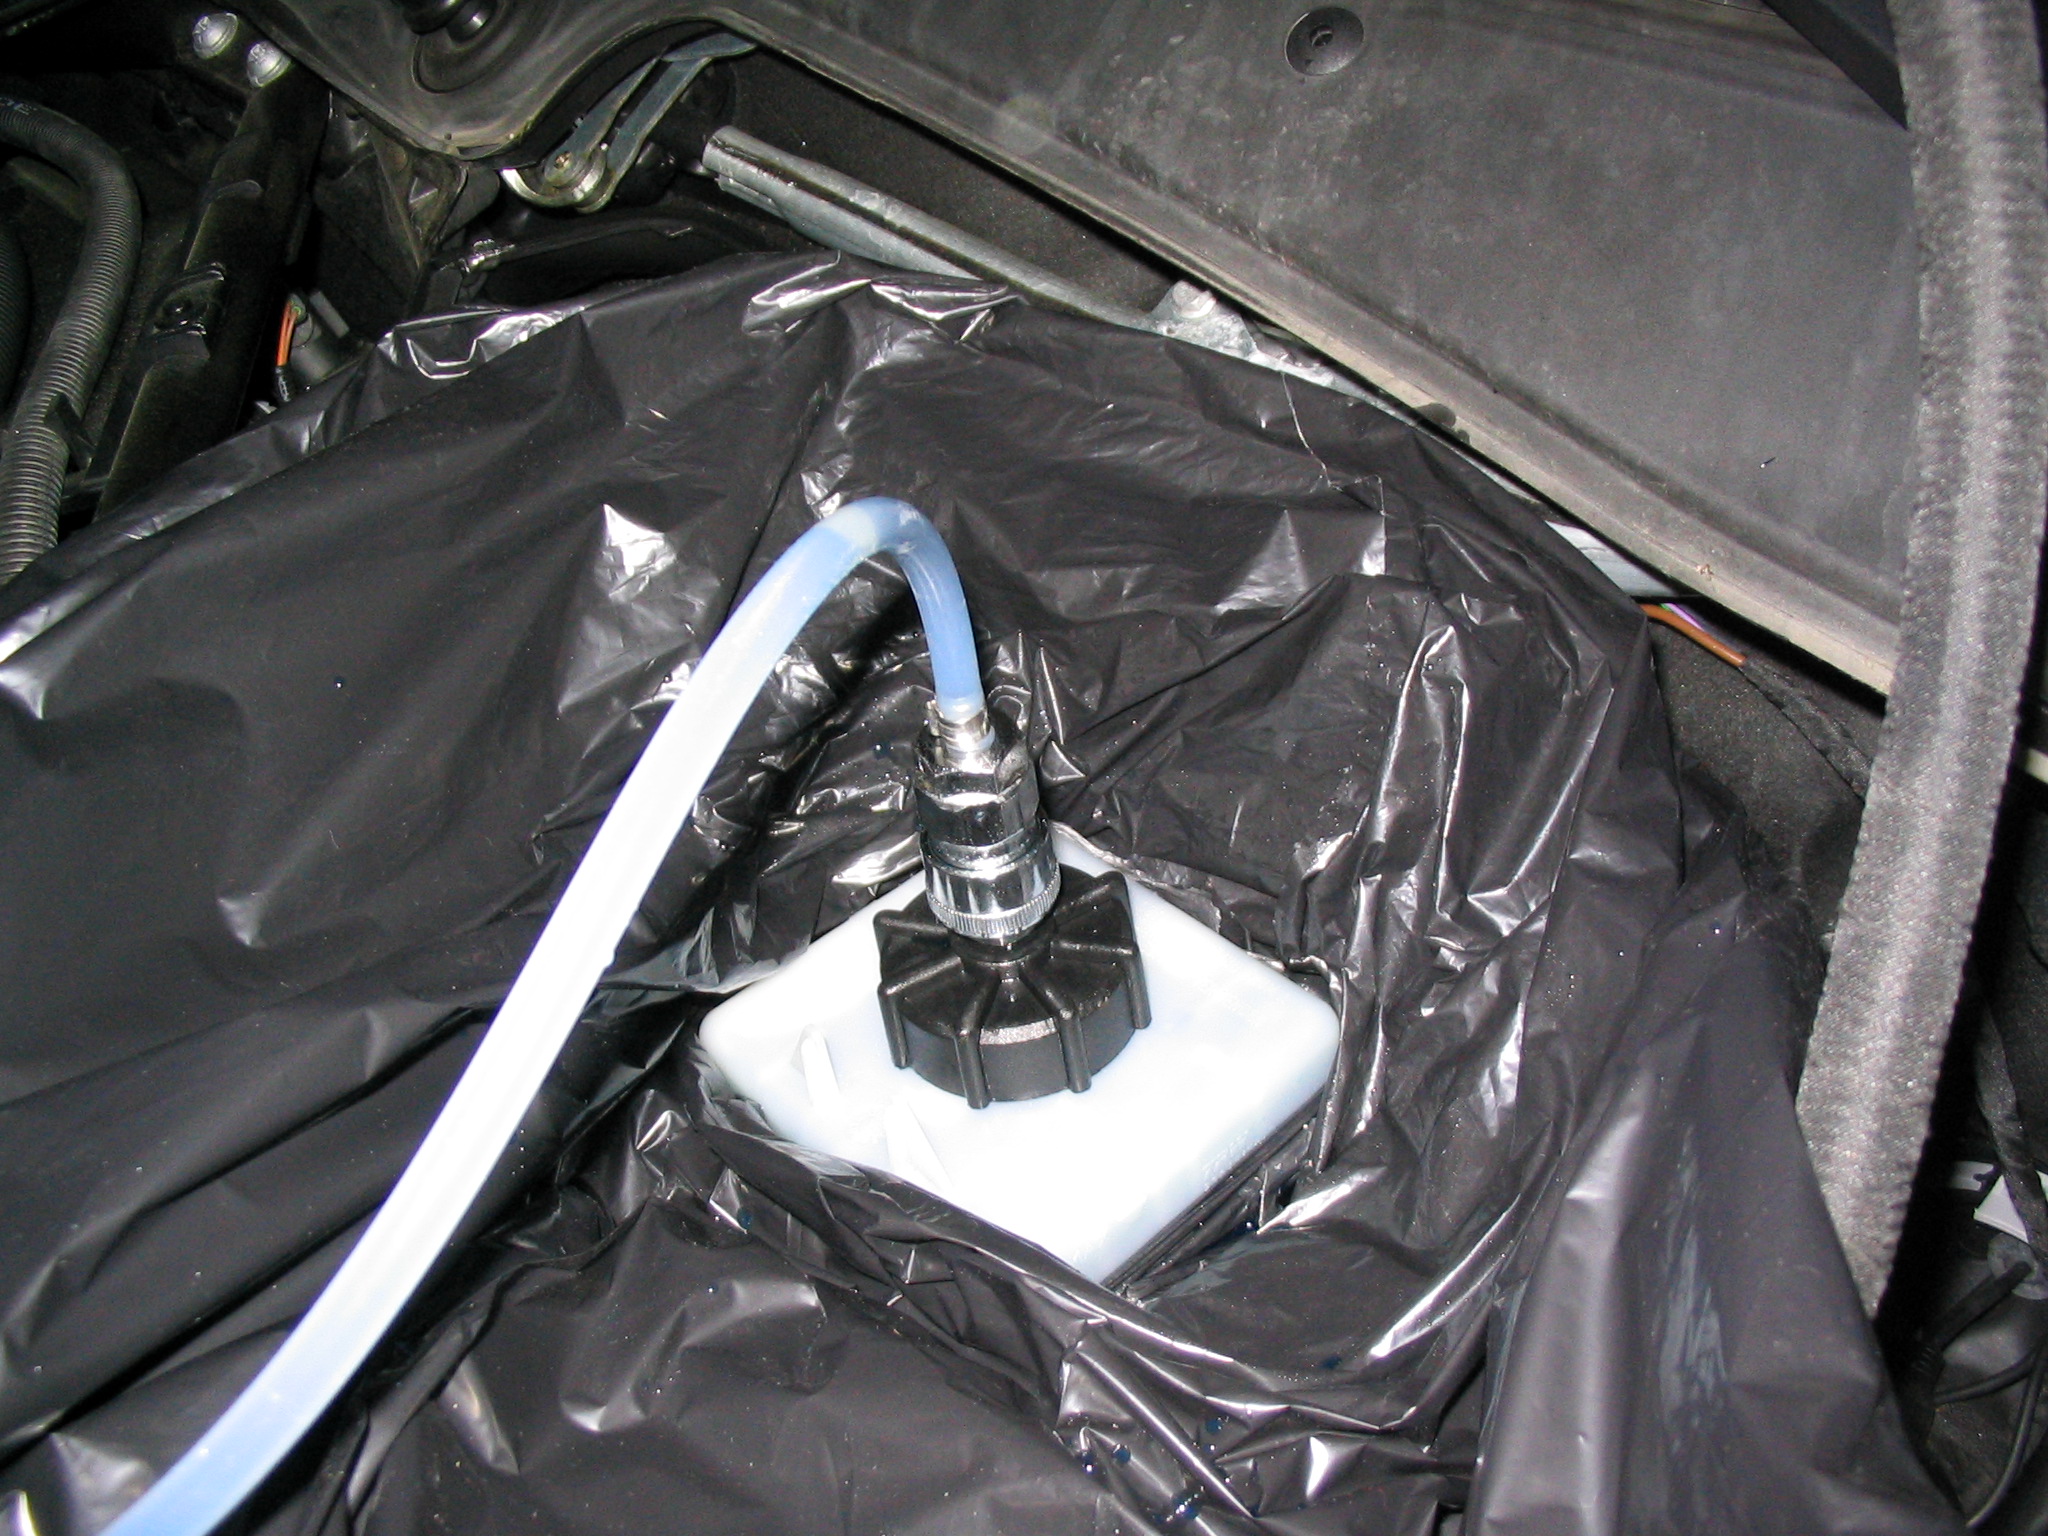
Check the area around the cap for leaks.
Now we're ready to bleed the brakes! The order (for a left hand drive car) is: back right, back left, front right, front left.
Jack up the right rear and remove the tire. Yes, I know my car needs washing. Shaddap.
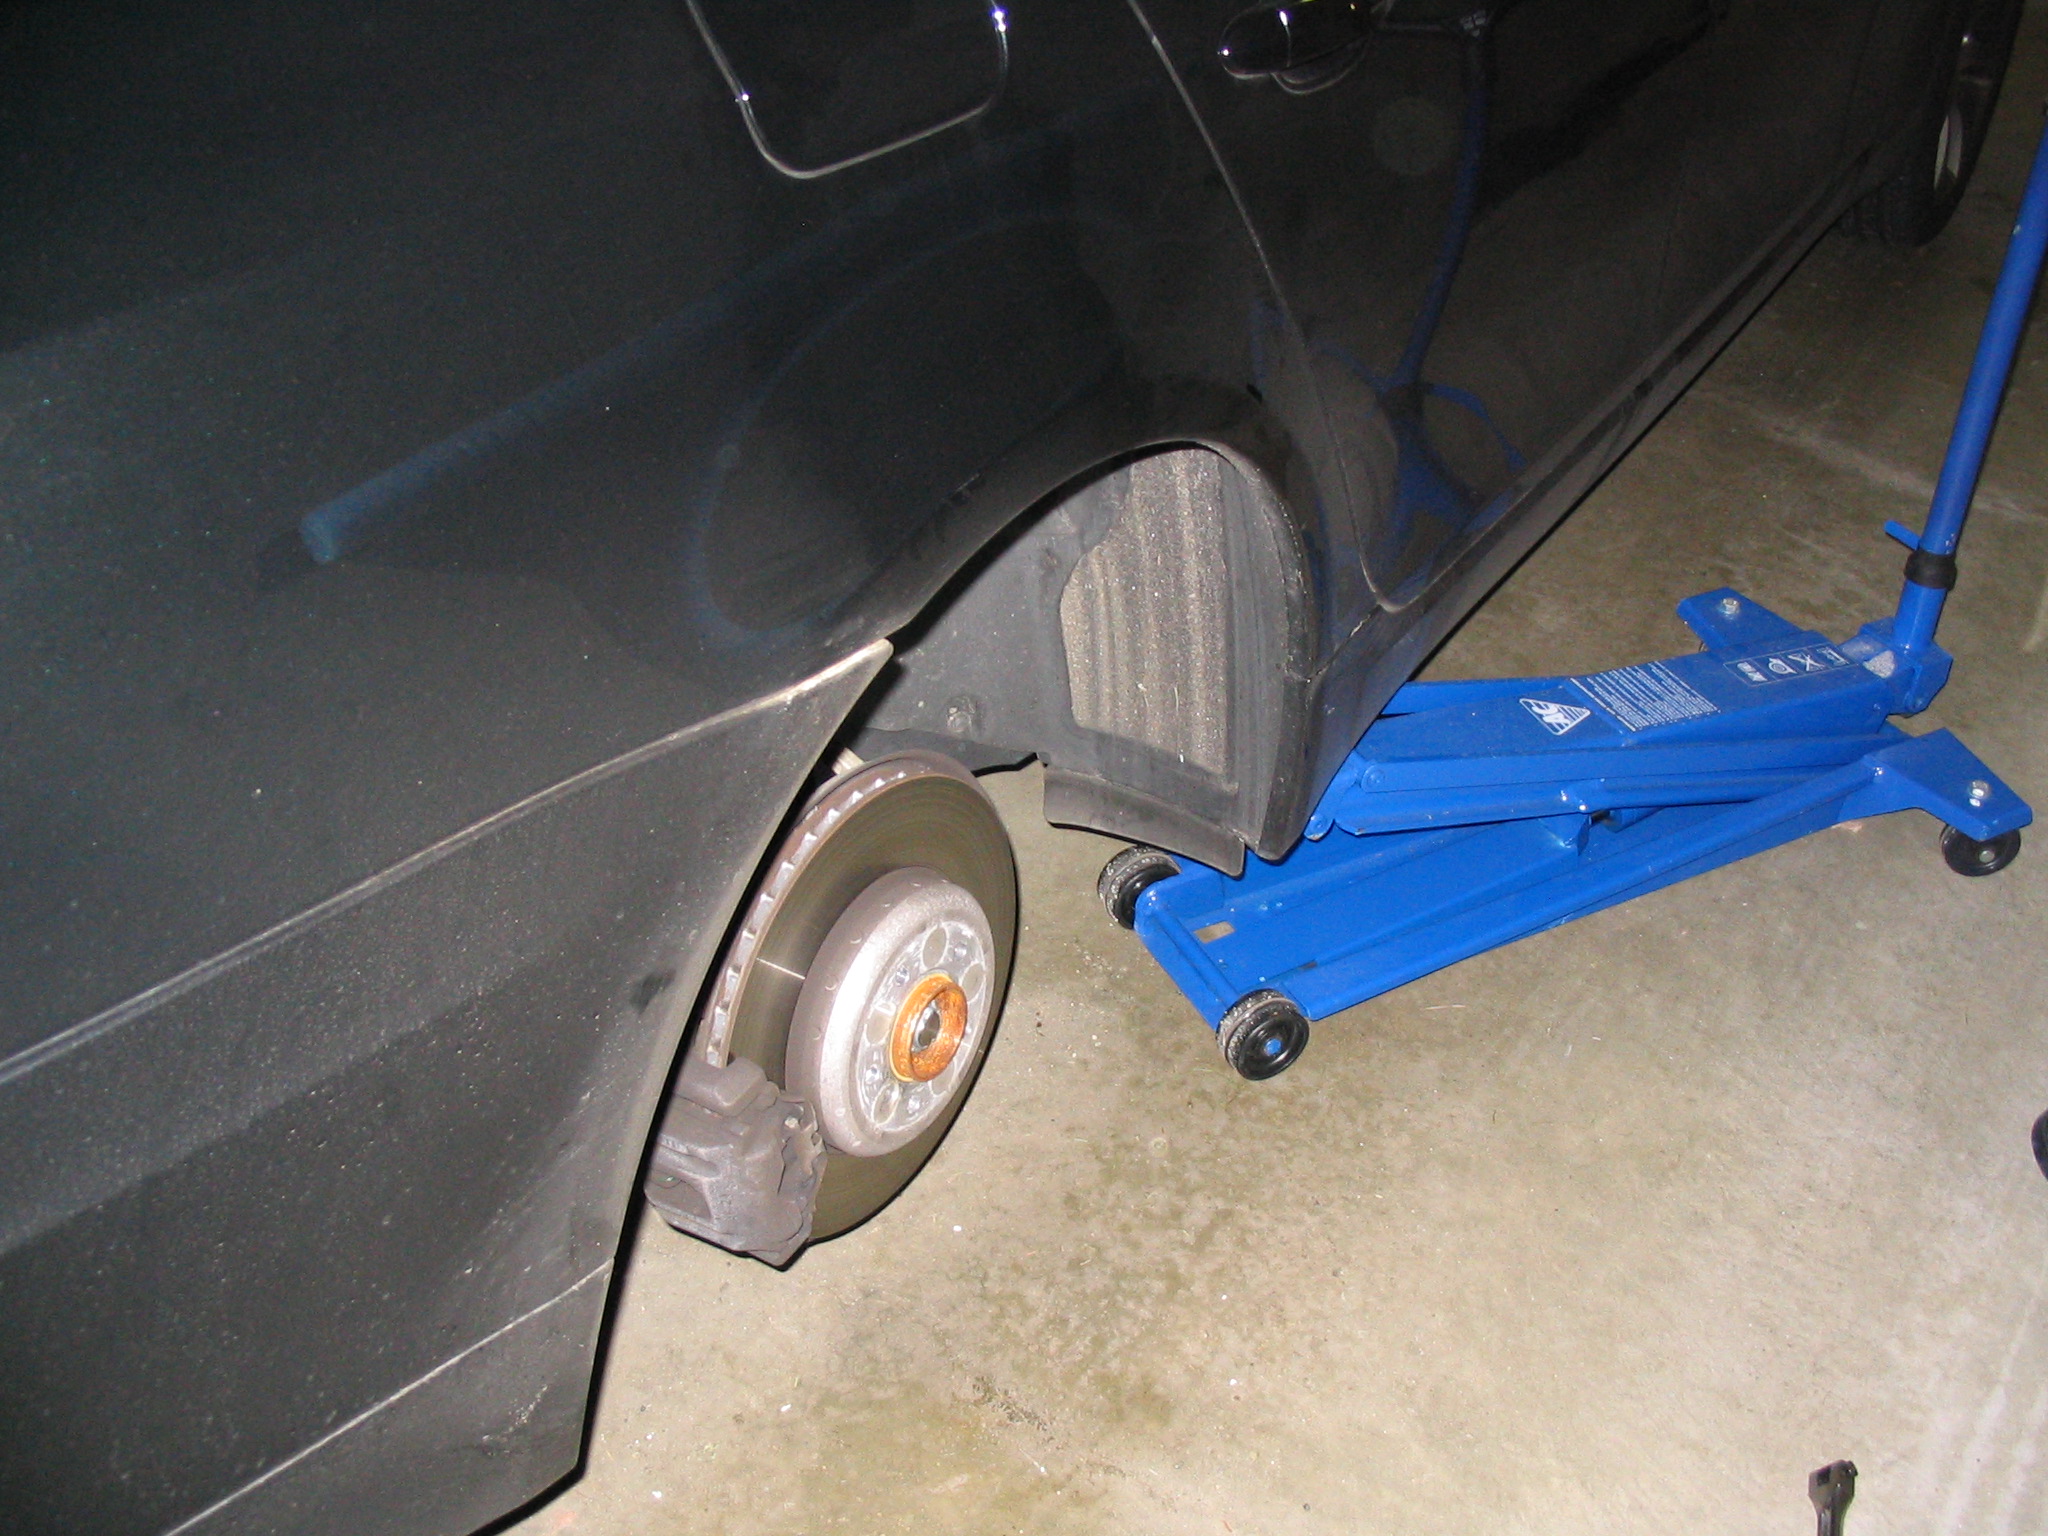
The bleed valve is on the left hand side of the caliper, and is protected by a little rubber hat.


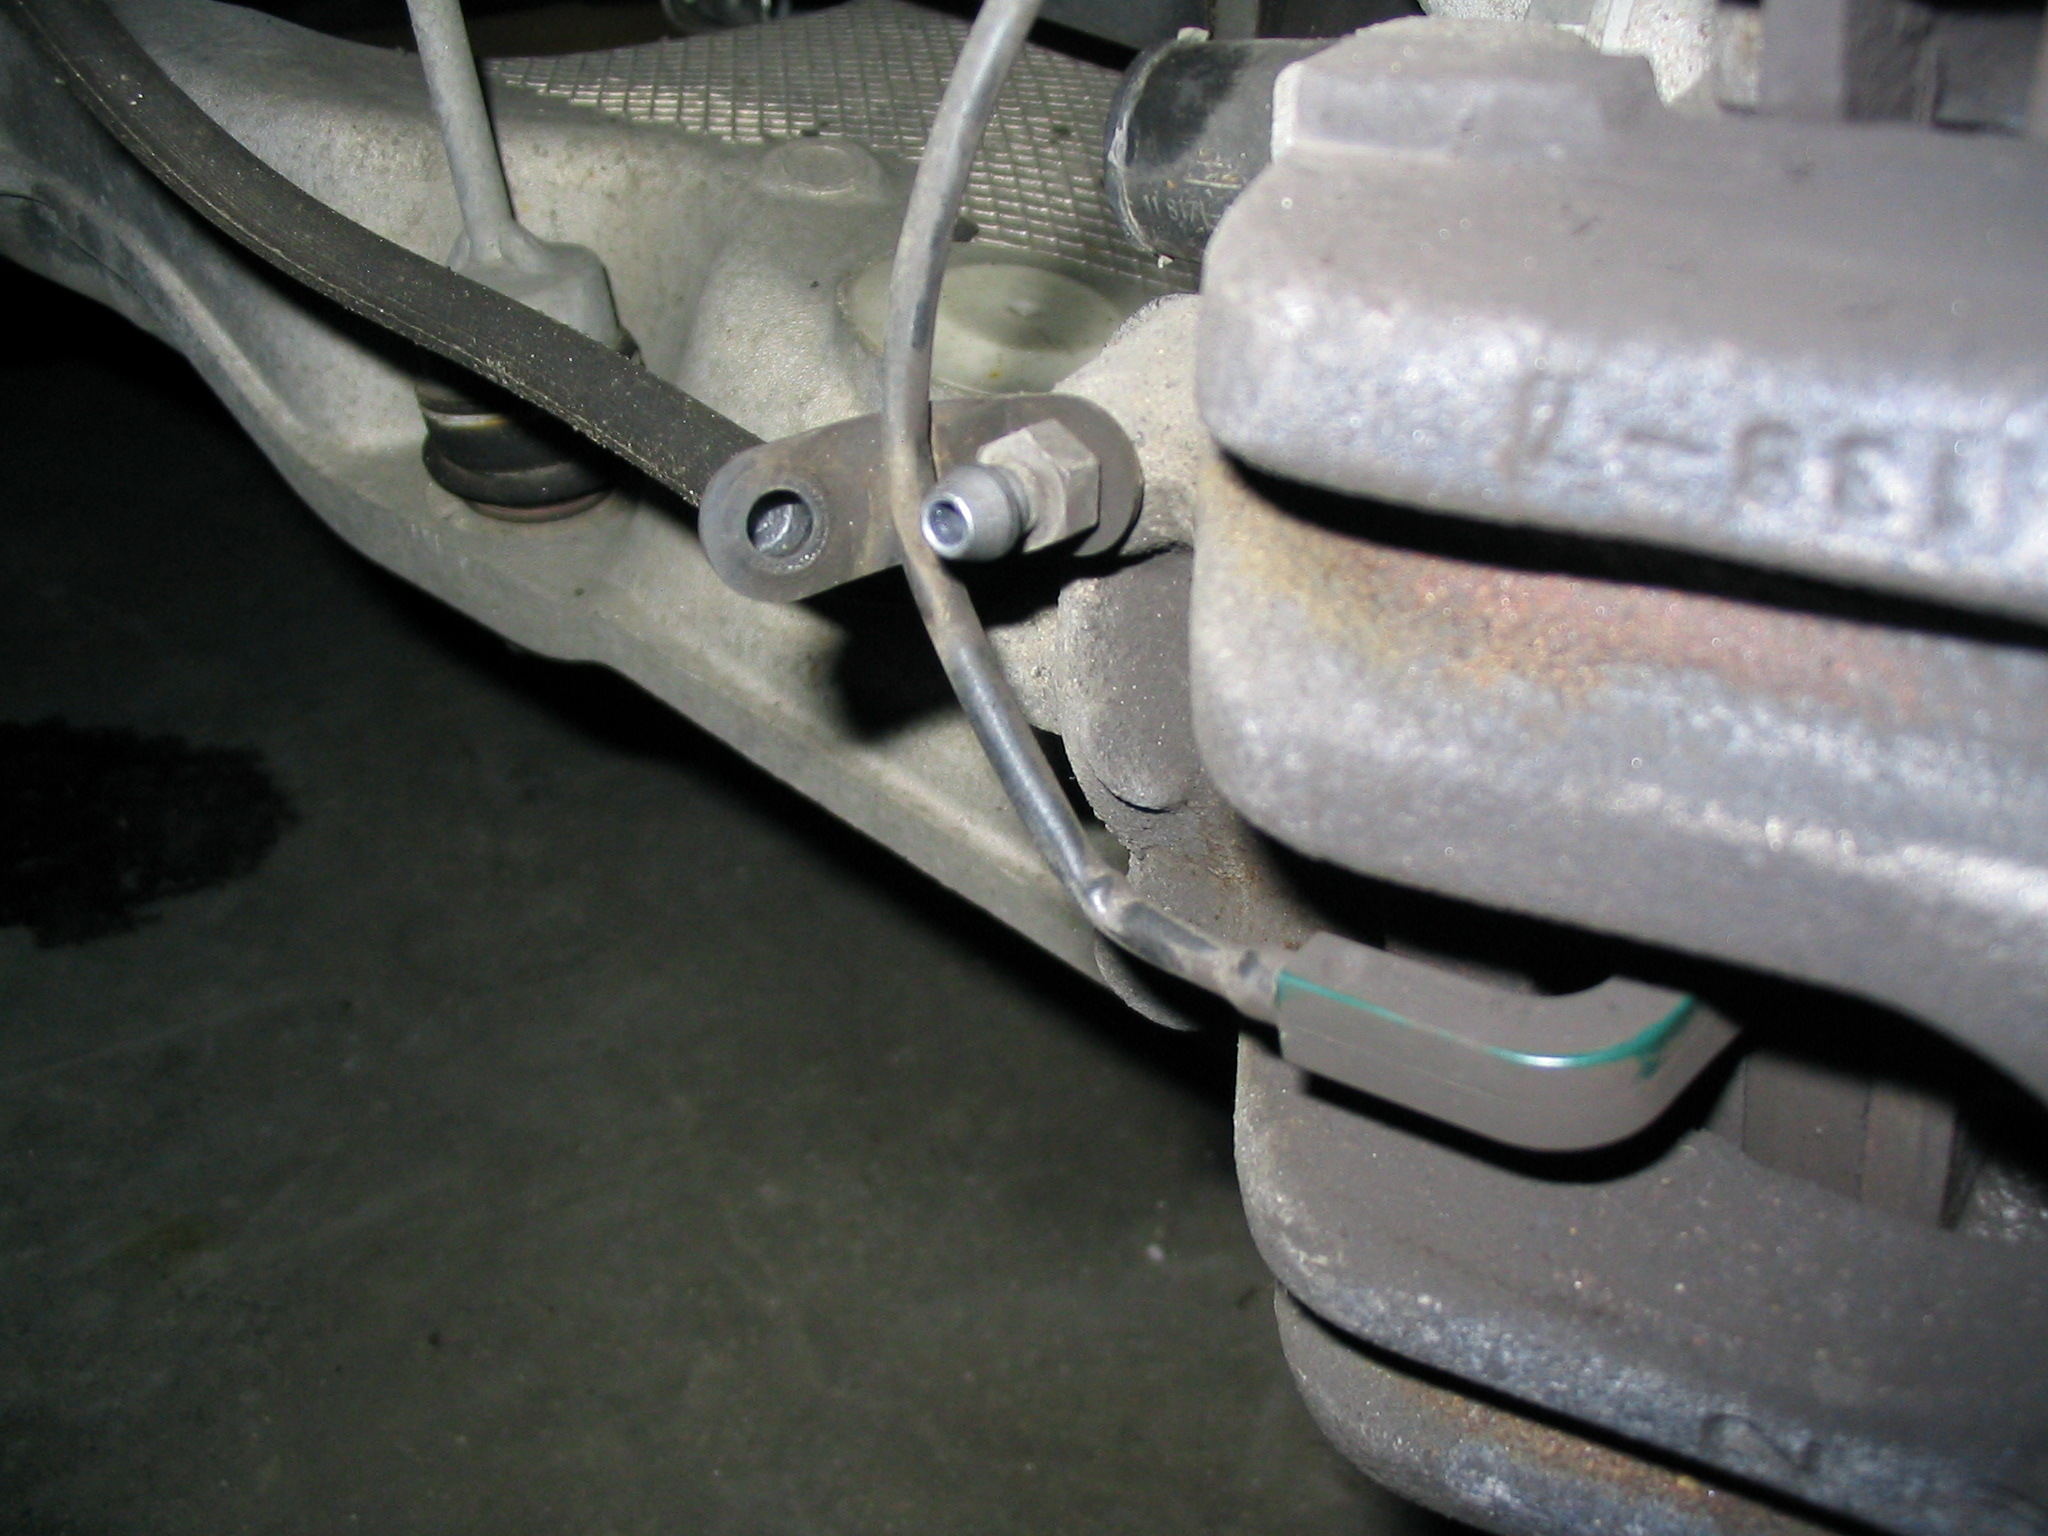
Put the catch bottle attachment onto the bleed valve...

... and use the box wrench to open the bleed valve. Look! Nice golden brake fluid going into our catch bottle.
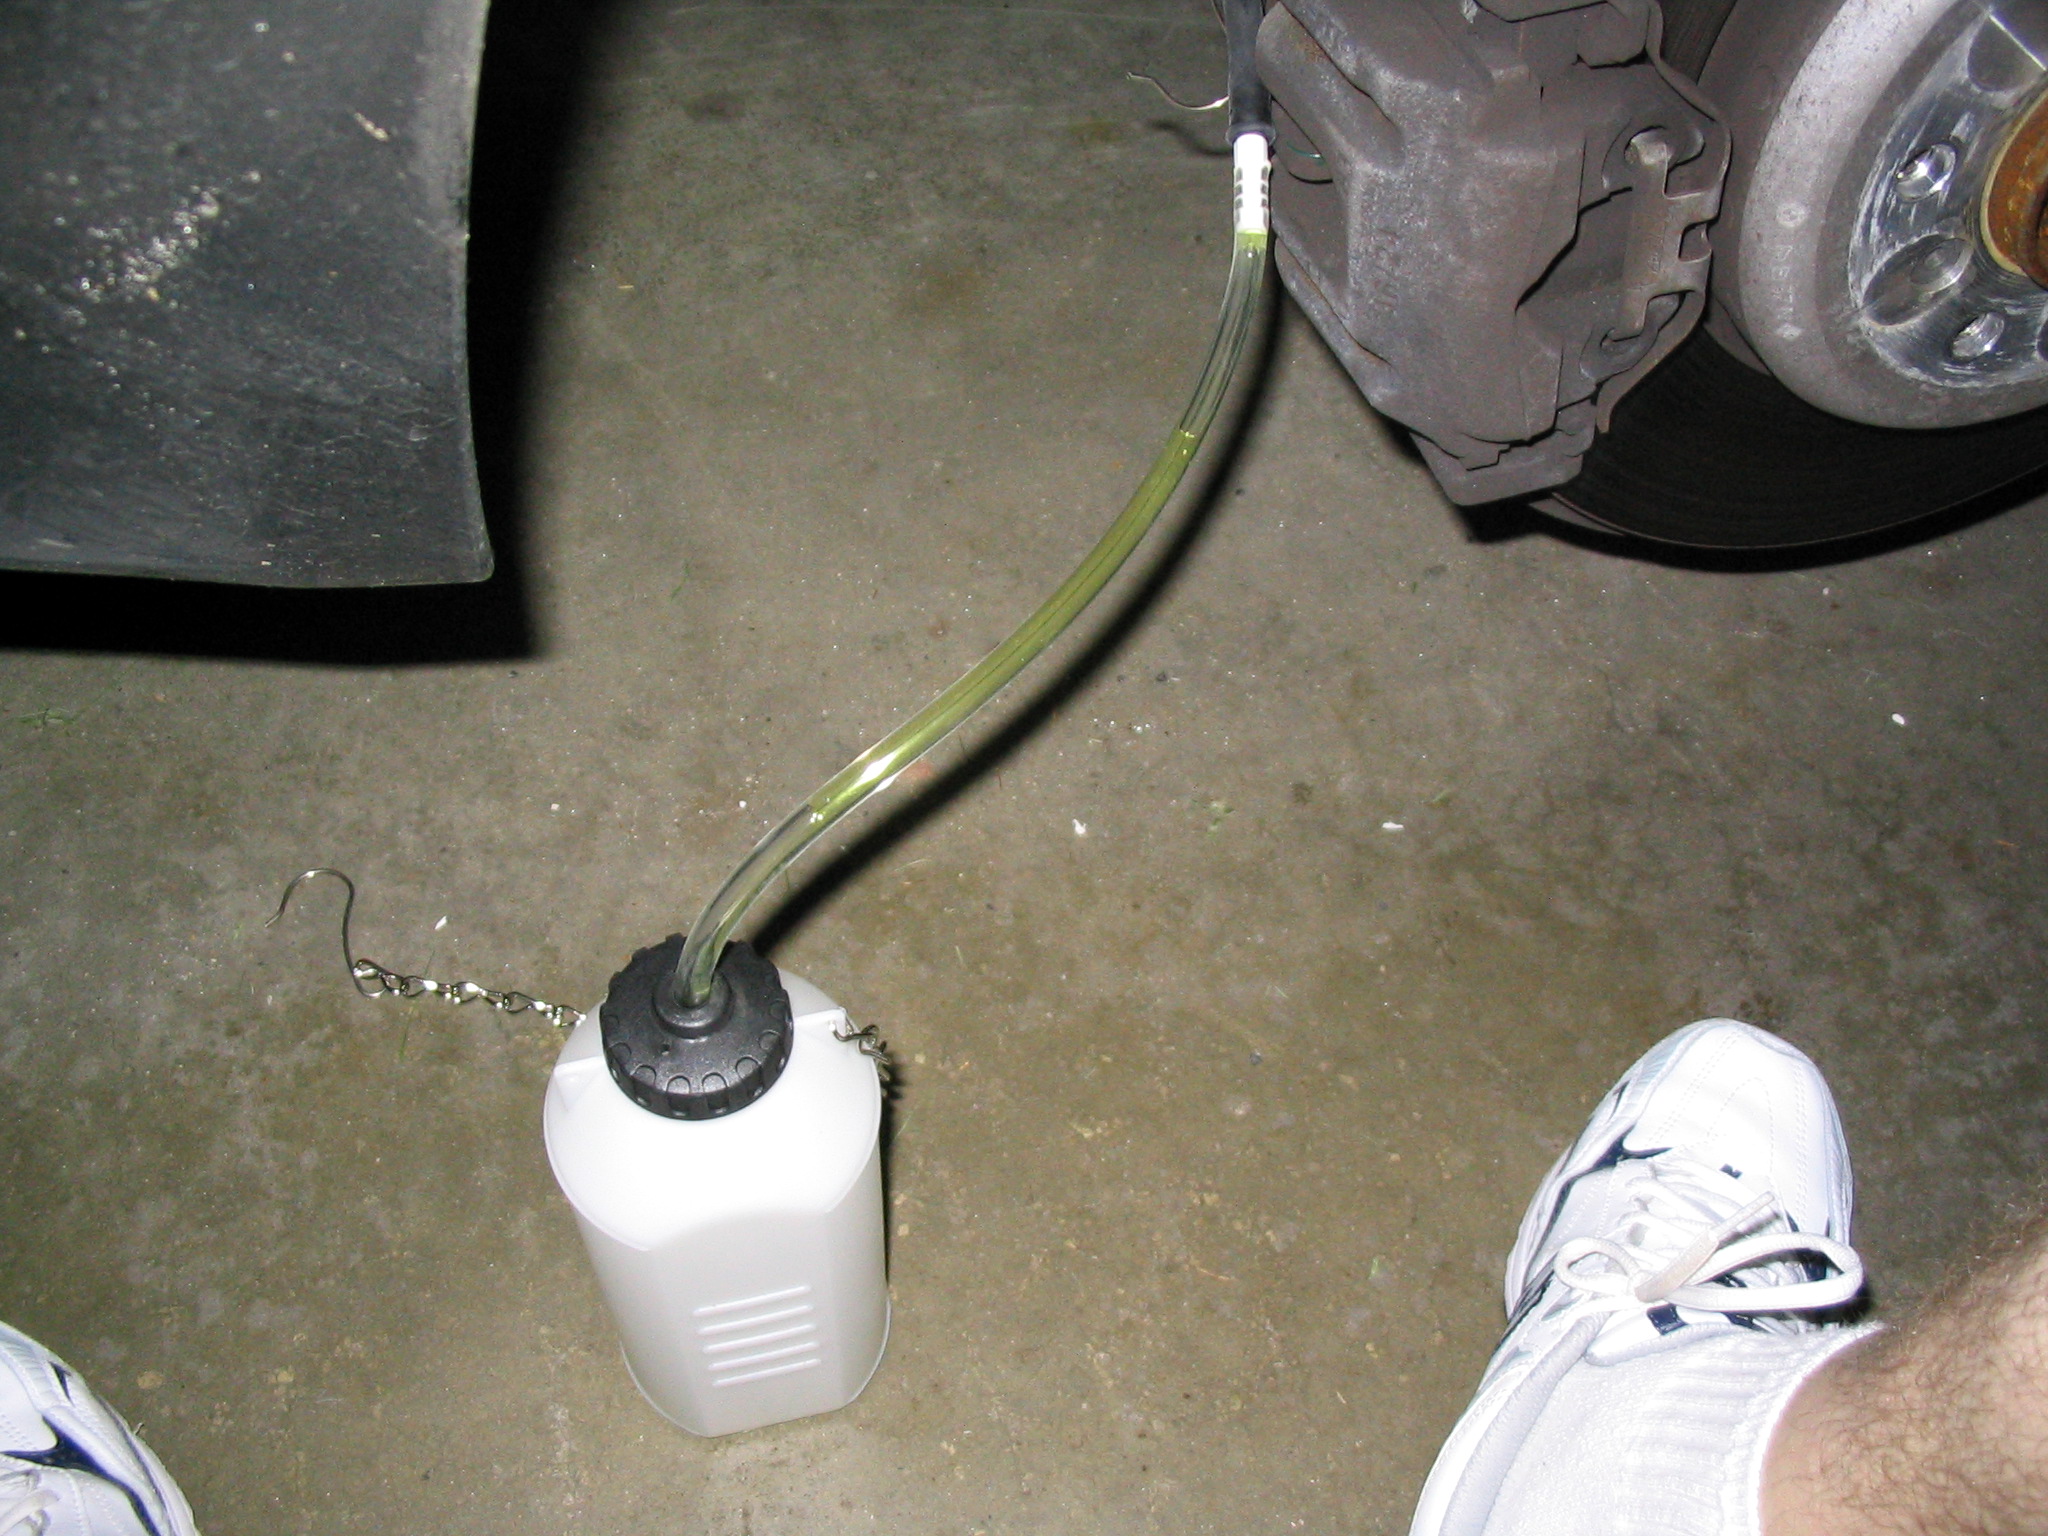
When the stream turns blue - you're through!
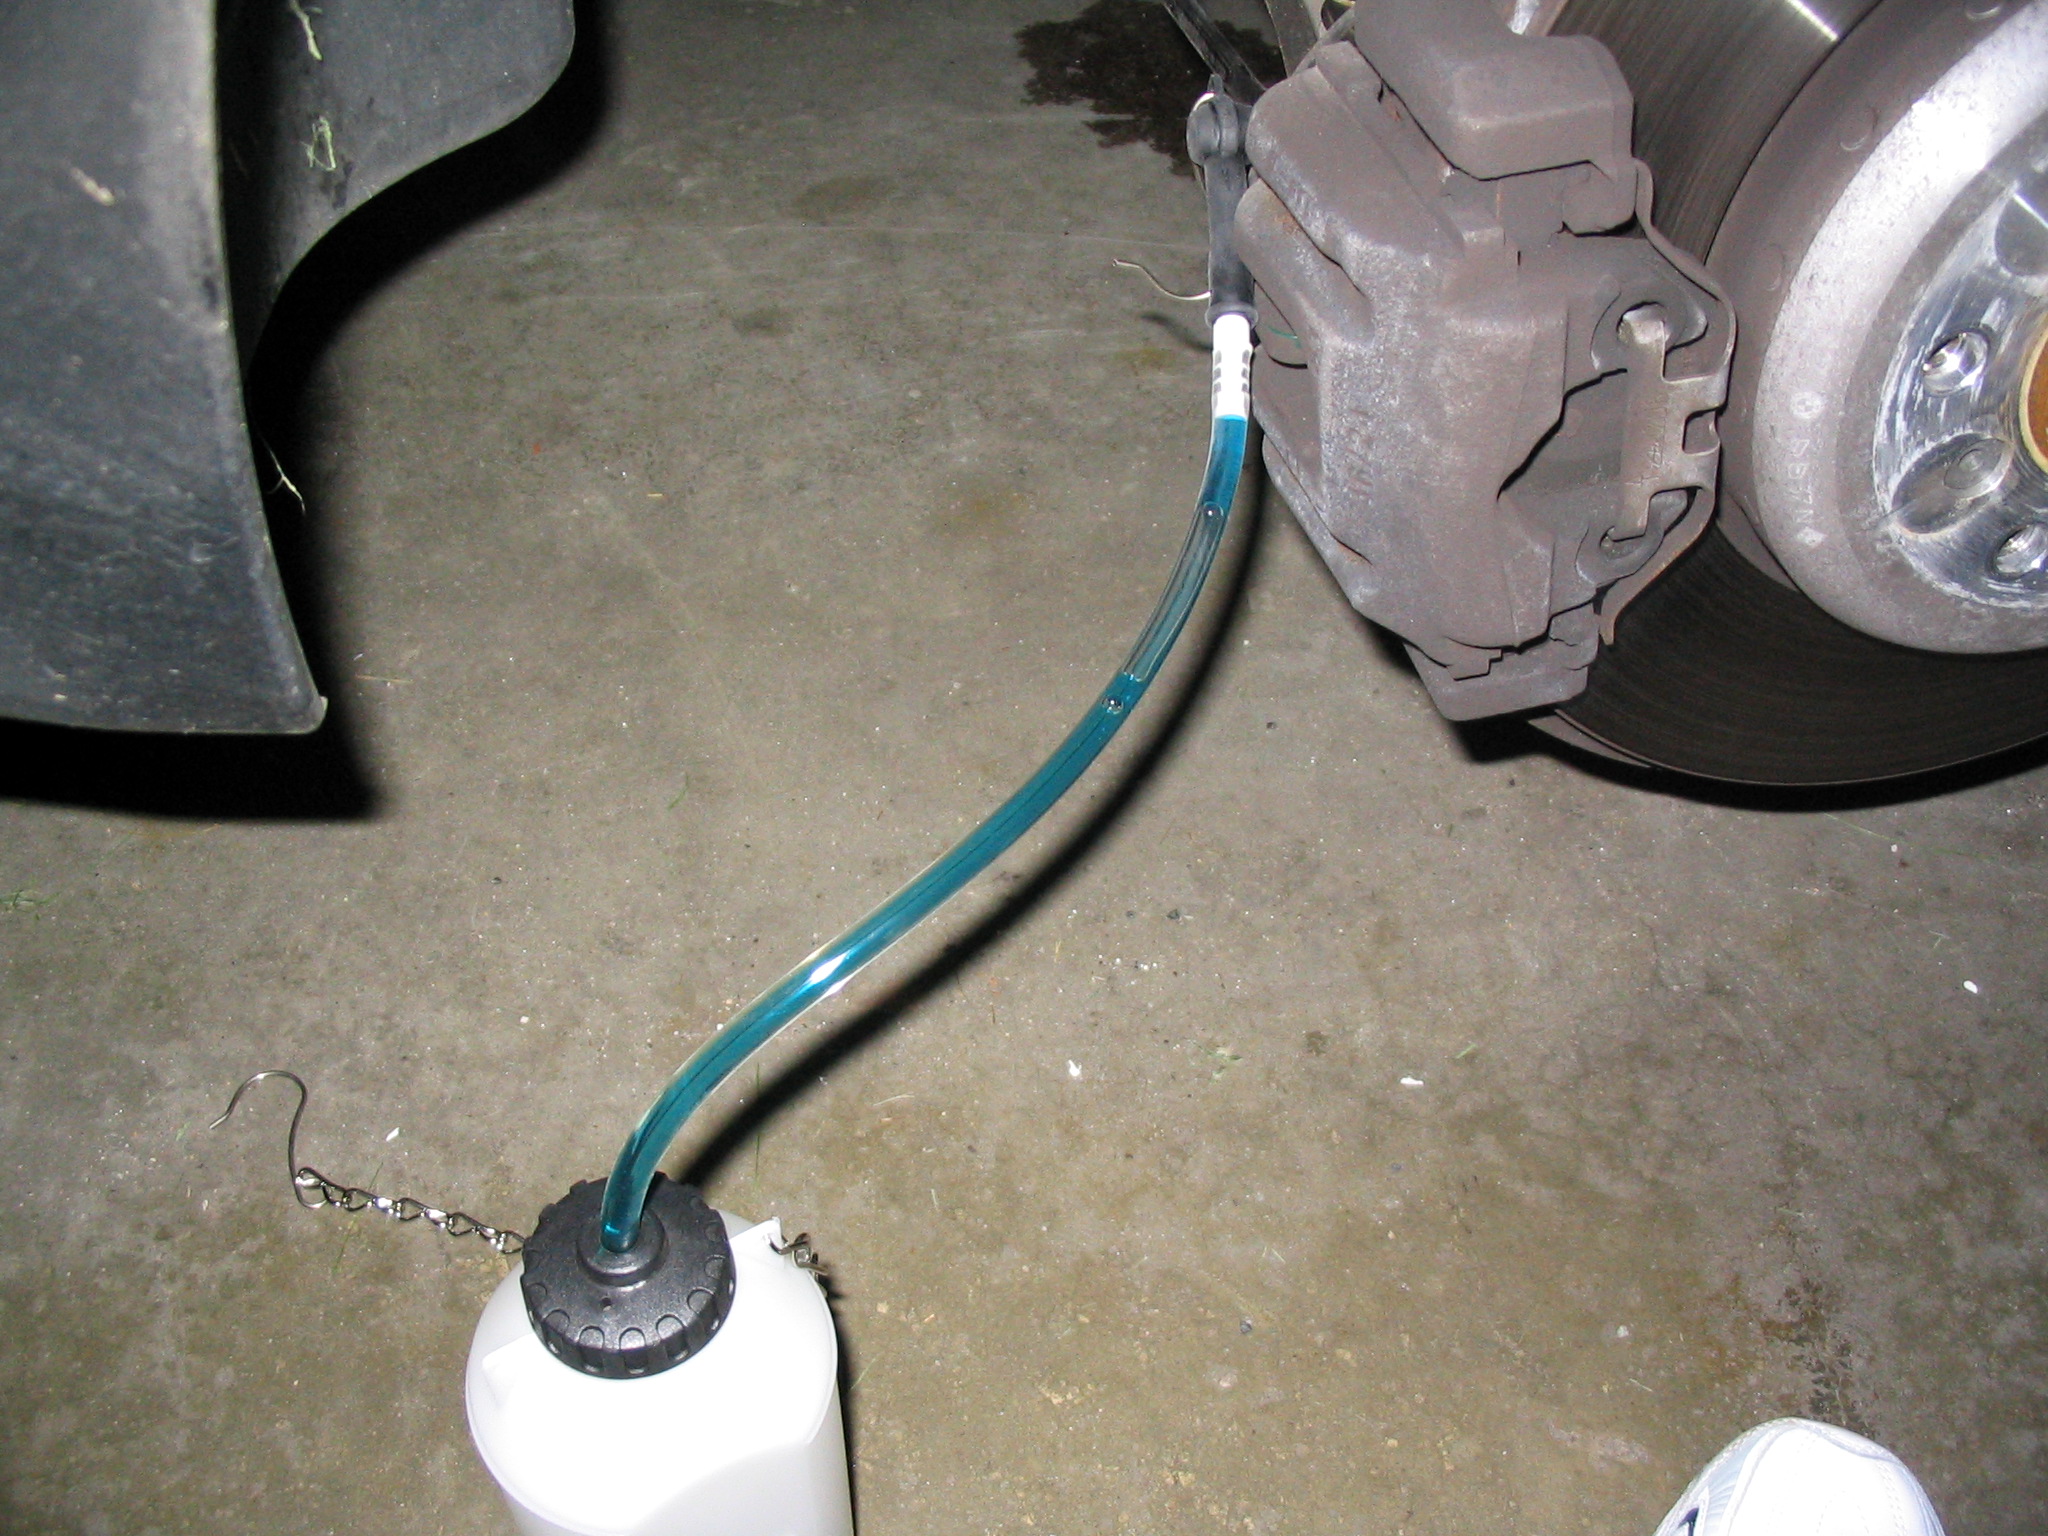
The stream won't go from gold to dark blue instantly - it will start getting darker, then green (yellow and blue make green!), then light blue, then dark blue. Give it time - you have plenty of fluid, so better safe than sorry.
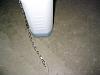
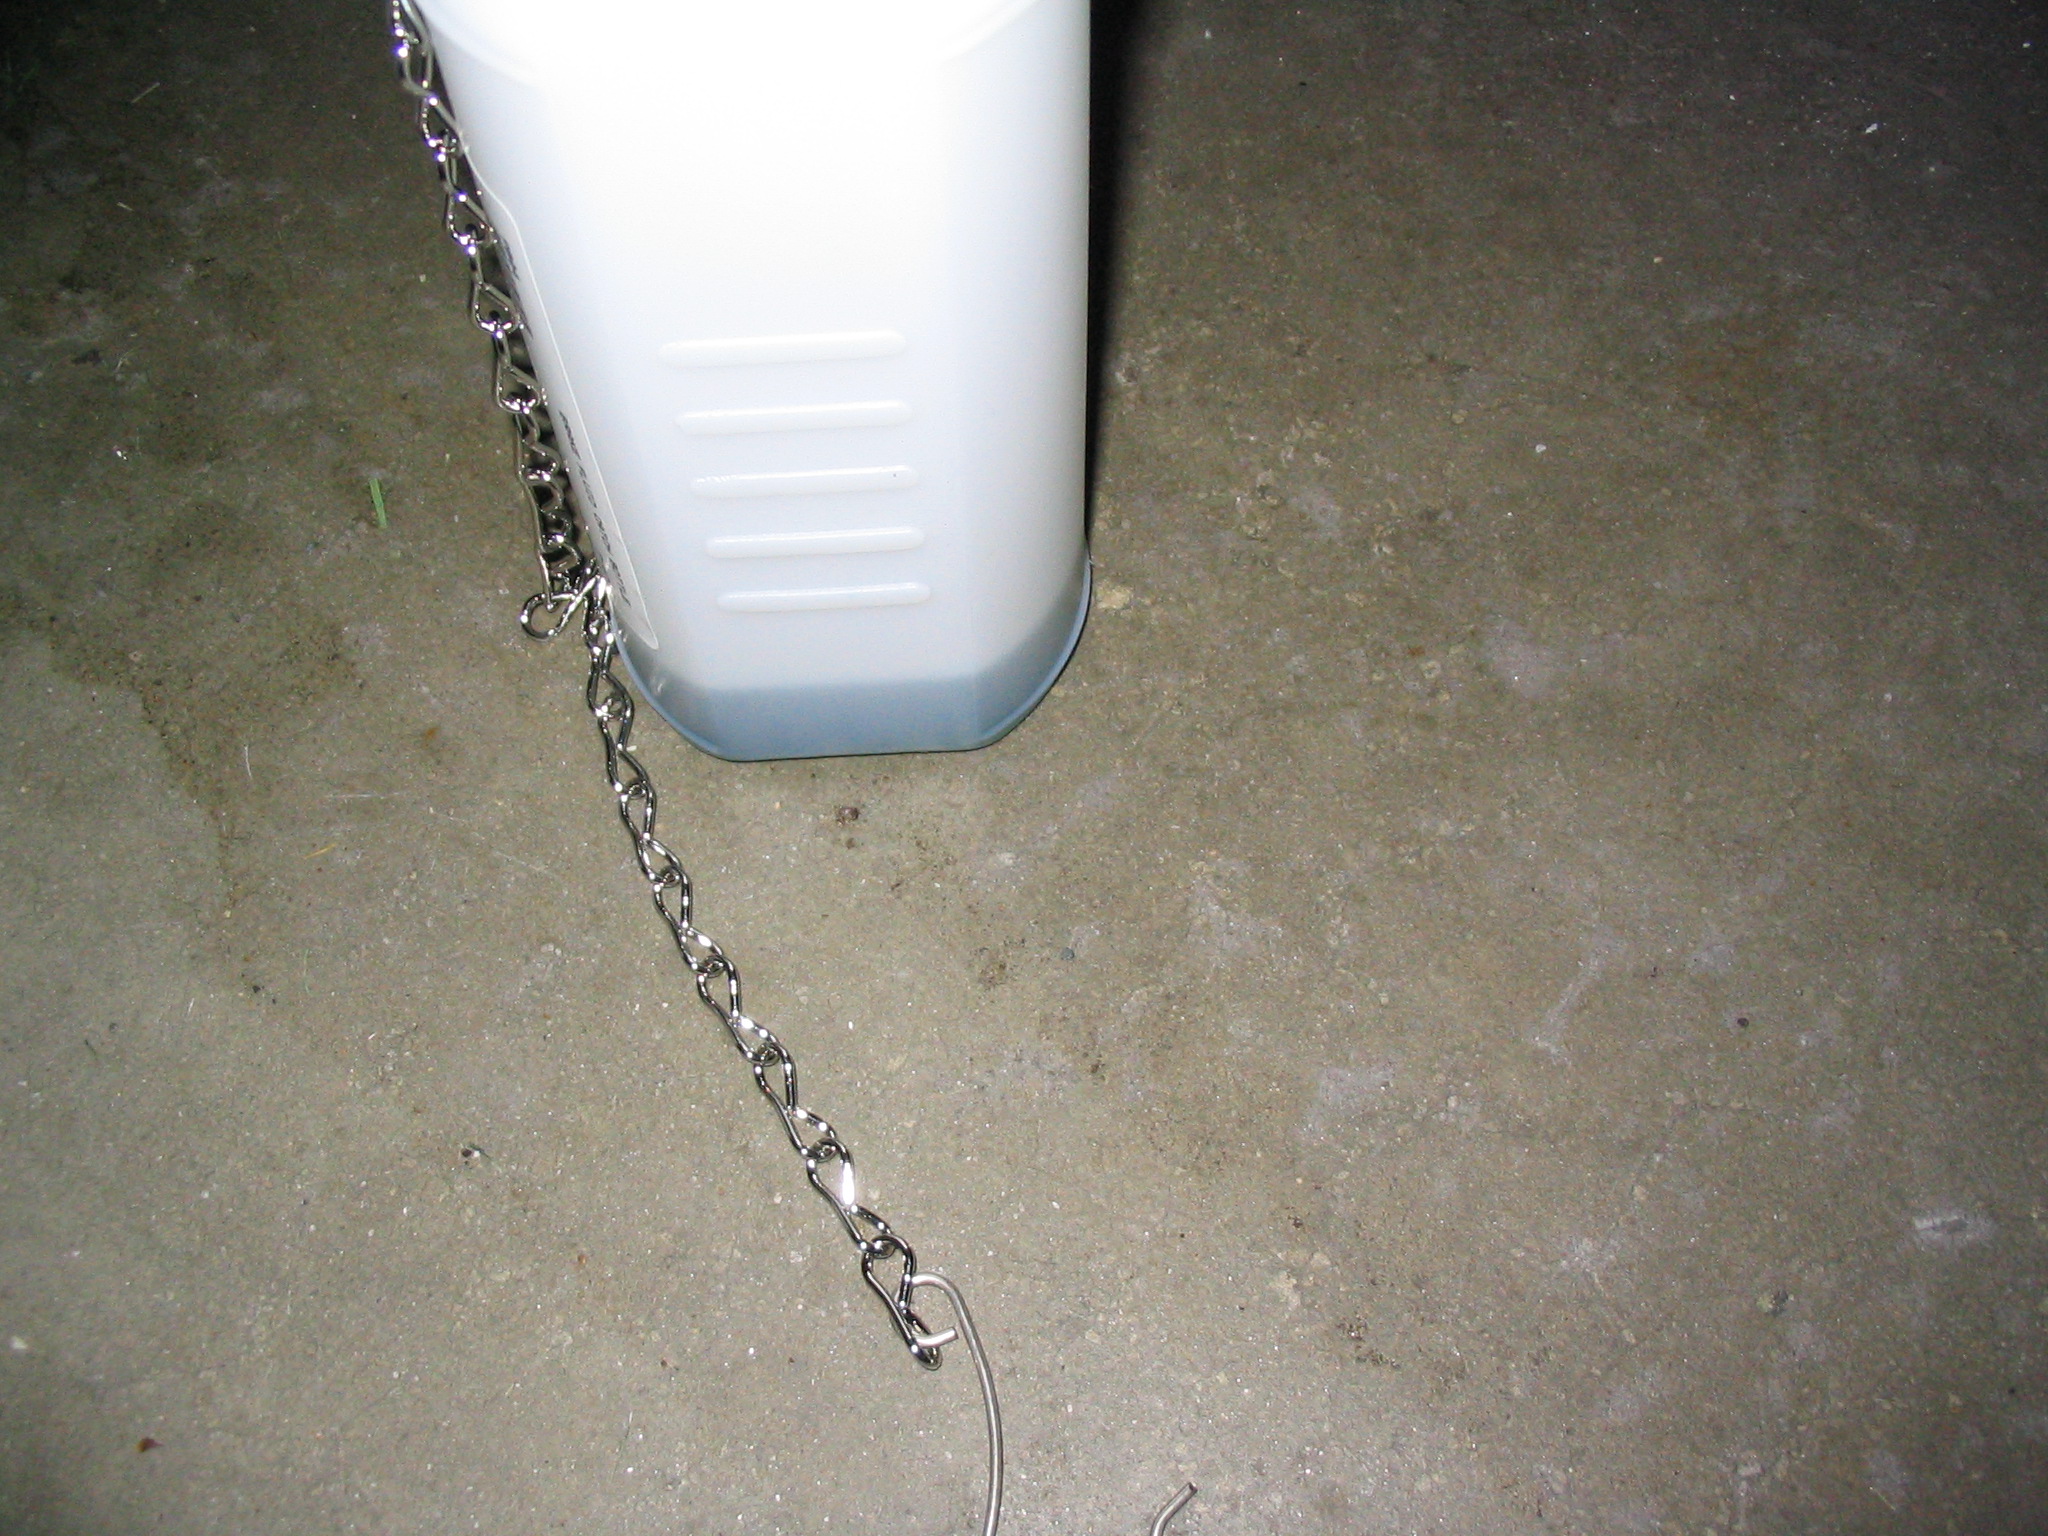
Here's how much fluid it takes to drain the back right side. Not much!
After you do one, check the pressure bottle to make sure you have plenty of fluid and pressure left. If you need more pressure, just pump a few times. It holds the pressure pretty well, so I doubt you'll have to add much. Just like when I was in high school, I only had to pump once. Zing!
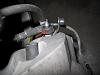
The front left caliper has some sort of attachment on it (don't know what it is - anyone?) - just remove it to get to the bleed valve, but make sure to put it back when you're done.

Once you've done all four, release the pressure in the bottle by pressing on the pressure release valve. Before removing the cap, I'd wrap a few shop towels around the master cylinder just to be sure you don't get brake fluid anywhere, then unscrew the cap and replace it with the real one. Don't forget to plug it back in!
Before putting everything back together, I'd fire up the car and make sure you don't get any warning messages.
Re-assemble all the trim pieces, and you're done! Congratulations - you just saved $200.


 .
.
 08-21-2008, 11:11 AM
#9
Contributors
Thread Starter
Join Date: Jul 2005
Location: Salem, NH USA
Posts: 445
Likes: 0
Received 0 Likes
on
0 Posts
Originally Posted by lcc014' post='651541' date='Aug 21 2008, 12:52 PM
It adds a lot of confident to others who have not done this before :-D
08-21-2008, 11:25 AM
#10
Contributors
Join Date: Aug 2004
Location: Quincy, MA, USA
Posts: 1,103
Likes: 0
Received 0 Likes
on
0 Posts
My Ride: E60 530i
Model Year: 2004
Engine: M54
Originally Posted by bdkinnh' post='651621' date='Aug 21 2008, 03:11 PM
It really is pretty easy, especially with the BavAuto bleeder. If I had to do it again, I think I'd buy the bleeder without the catch bottle - it really isn't needed. A length of plastic tubing that fits the bleeder valve snug is really all you need (plus something to catch the fluid in, of course).
Thanks,