
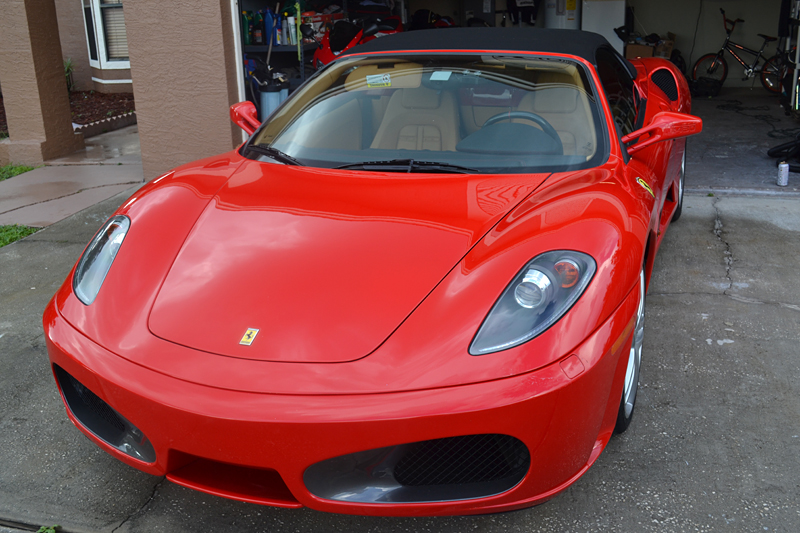
Ferrari F430 Spider Paint Correction and Detail


Thread Starter
Former Vendor
Joined: Aug 2013
Posts: 138
Likes: 0
From: Stuart
My Ride: Daily Driver
This Ferrari F430 Spider belongs to a long-time client of mine. I was excited to come out of "semi-retirement" and give it some love. Plus it was a chance to play with Wolfgang's excellent Uber Compound.
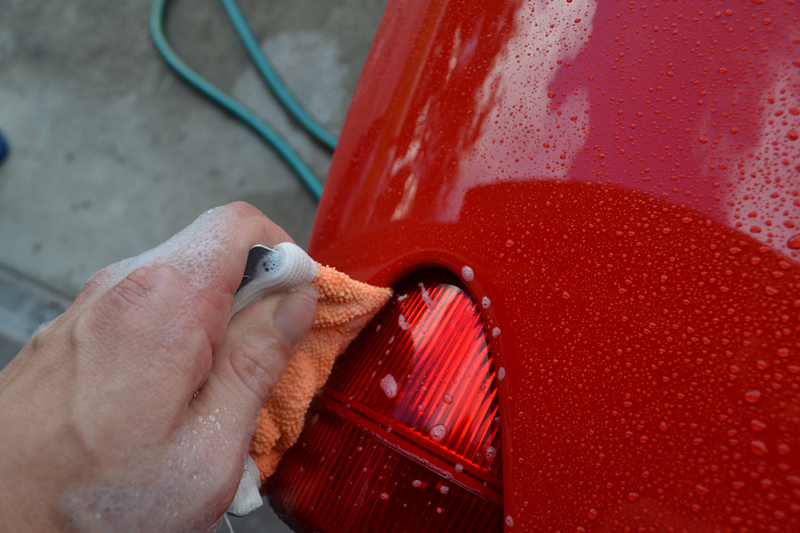
With pretty much every detail I do, I start by washing the car. The way I wash the car is pretty much the same as when I wash my own cars. I start with the wheels, then clean the detail areas, and finally carefully wash the whole body.
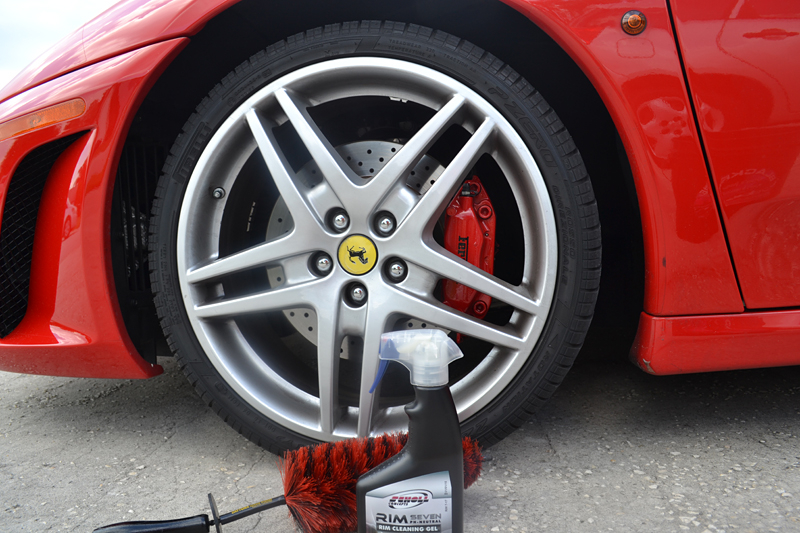
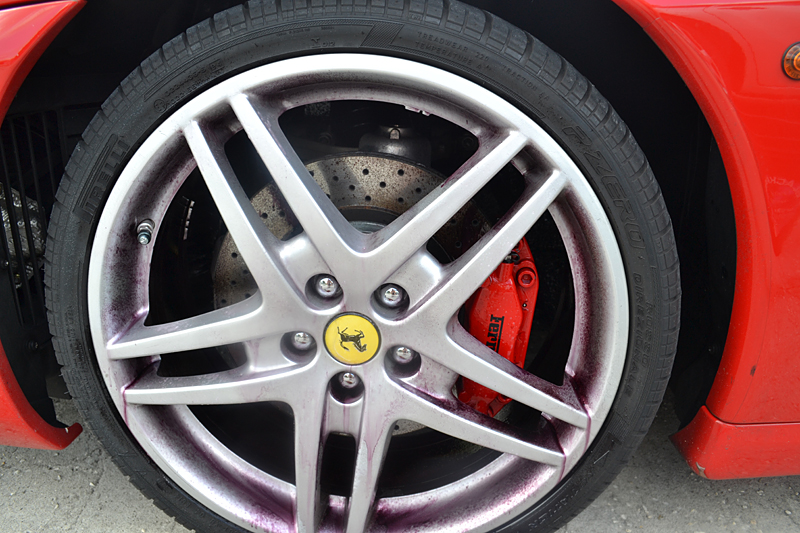
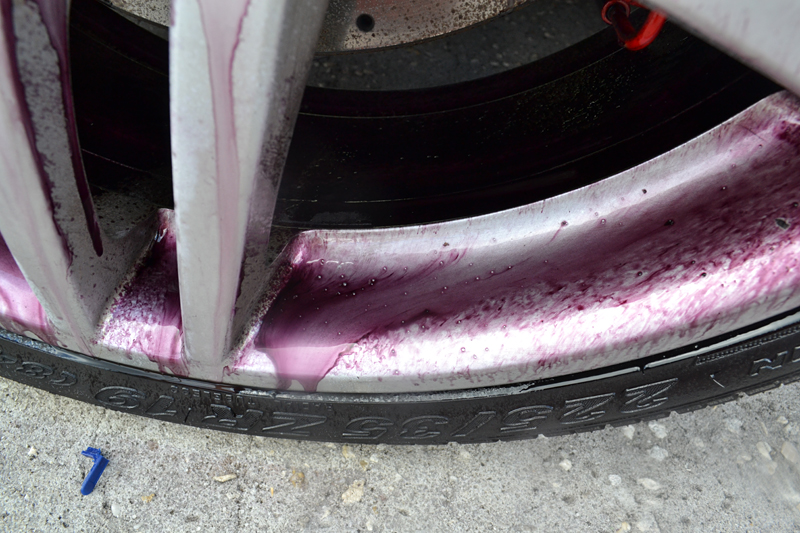
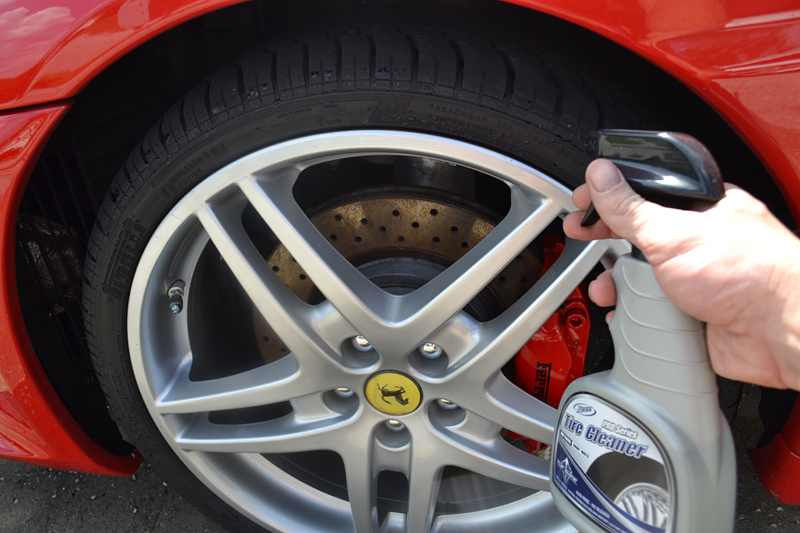
The wheels on this Ferrari had a light coating of brake dust, so it was a create chance to play with Scholl Concepts RIM7 Rim Cleaning Gel. Scholl performed well, scoring the highest wheel cleaning ability and most color-changing effect in the AutopiaForums Wheel Cleaner Review.
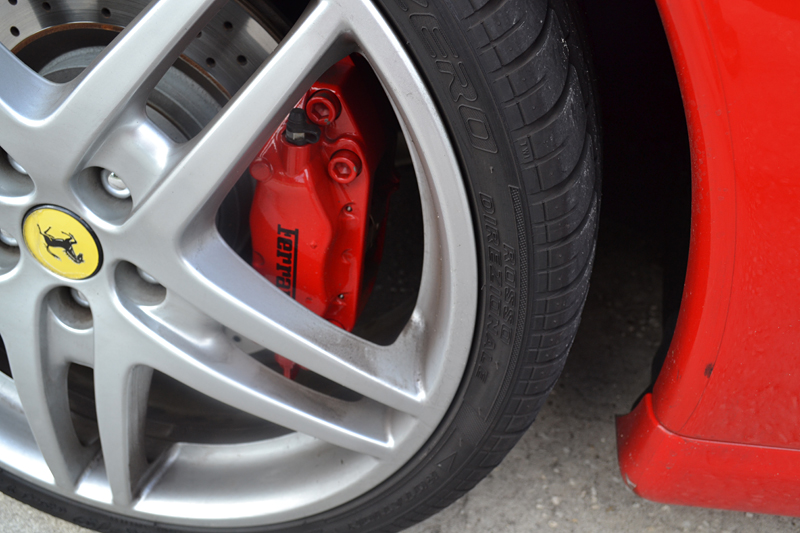
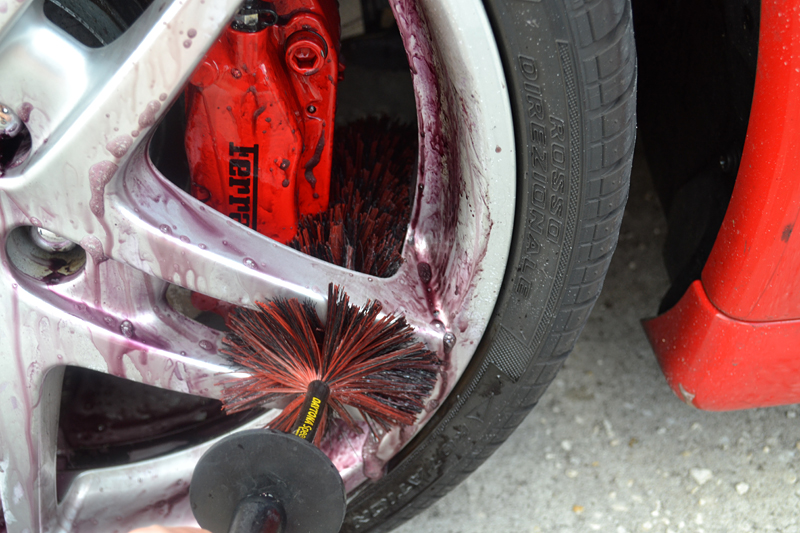
In addition to Scholl's, I used a Daytona Speed Master Wheel Brush to clean deep inside the barrels, between the spokes, and in-and-around the brake calipers.
Scholl Concepts RIM7 Rim Cleaning Gel has excellent color-changing properties in addition to its powerful cleaning ability (necessary due to Ferriar's use of very soft sport pads).
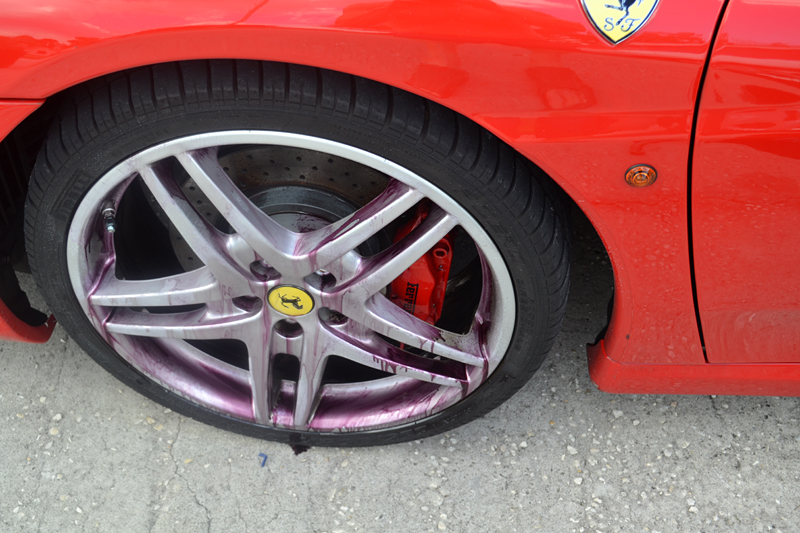
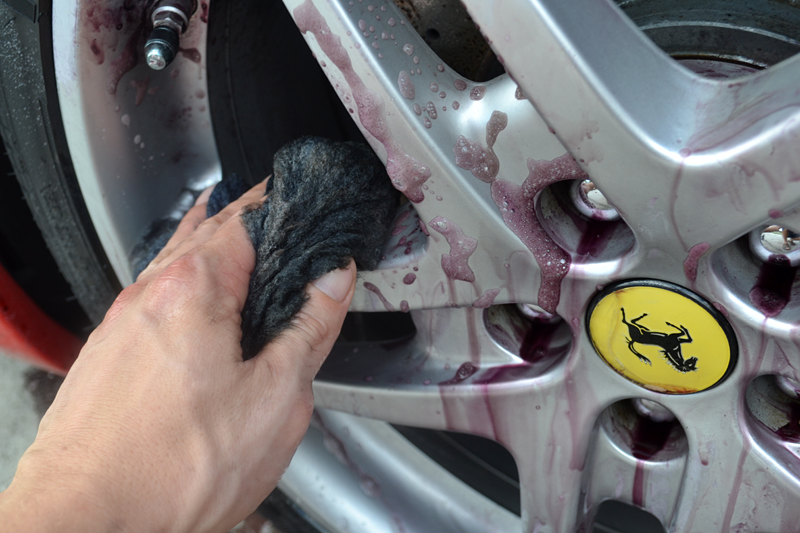
For cleaning the face and spokes of the wheel, I agitated the cleaner with an ultra-soft Lake Country Wool Wheel Wash Mitt. This super-soft, ultra-dense mitt does an excellent job of cleaning even the most delicate surfaces without scratching them.
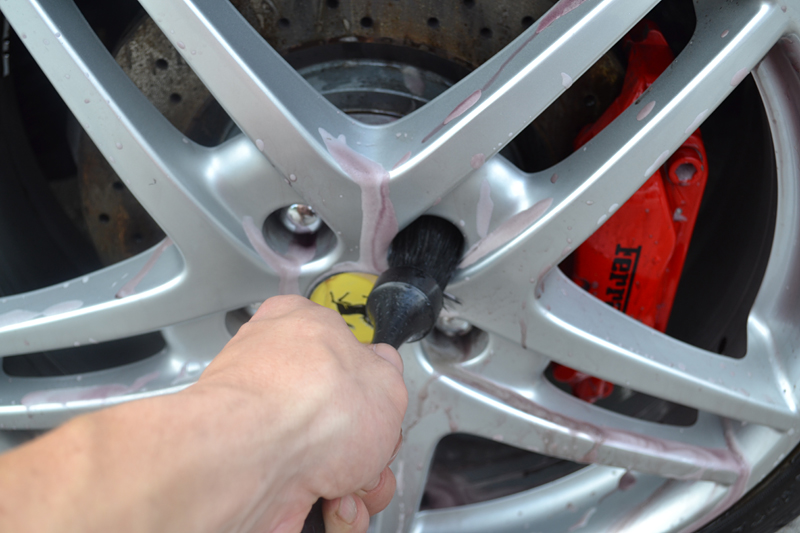
For tidying up the lug recesses and detail surfaces around the brake caliper, I love using a Wheel Woolies Boar's Hair Detail Brush. Not only does it have excellent cleaning power, but as importantly, it will not scratch delicate surfaces. Detailing is more than cleaning, it is preserving the surfaces as well.
A quick rinse revealed a well detailed wheel. Now it's time to clean the tires and wheel wells.

For the tires, I turned to one of my favorite tire cleaners - TUF SHINE Tire Cleaner.
Even before scrubbing, the brown runoff from the tire showed how flithy this otherwise cleaning-looking tire was, and more importantly, how effective TUF SHINE Tire Cleaner is.
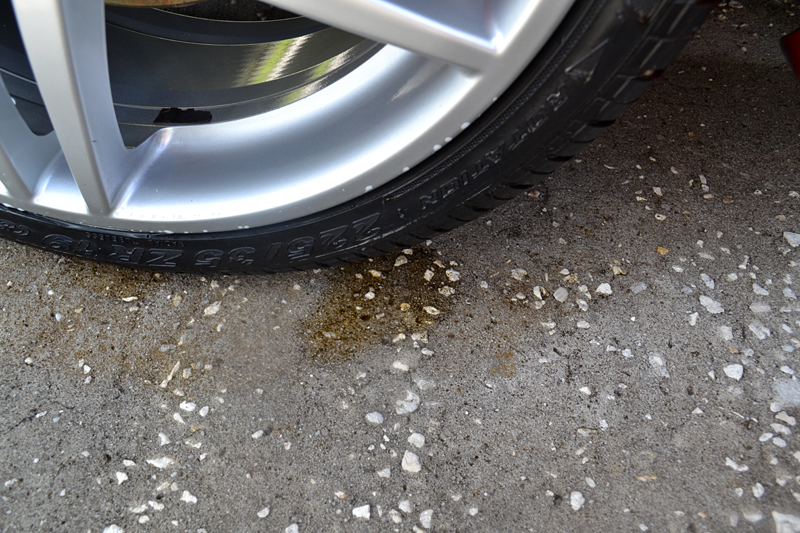
To ensure the tires were perfectly clean, I agitated them with the also-awesome TUF SHINE Tire Brush and rinsed clean.
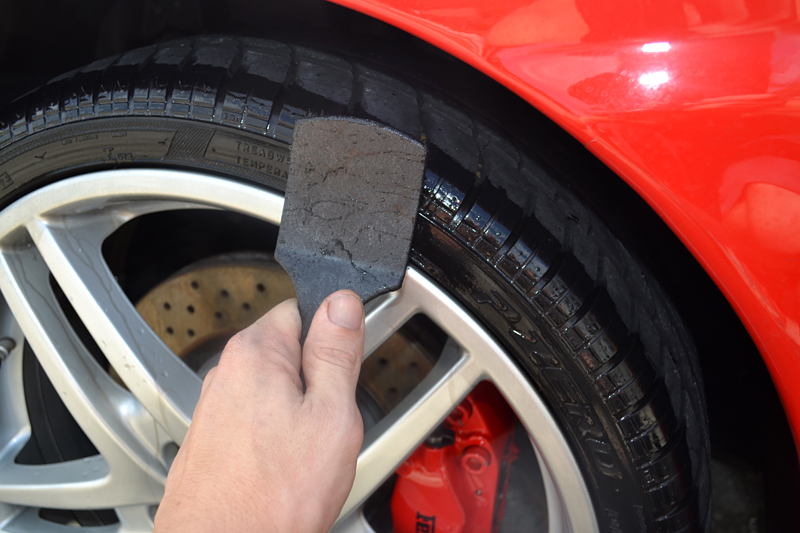
To combat the grime, tar, and bug splatter that gives any detailed car an otherwise unfinished look, I used a 4:1 dilution of BLACKFIRE All-In-One APC.
Cleaning and scrubbing was down with the soft-touch Wheel Woolies (large) Wheel Mop.
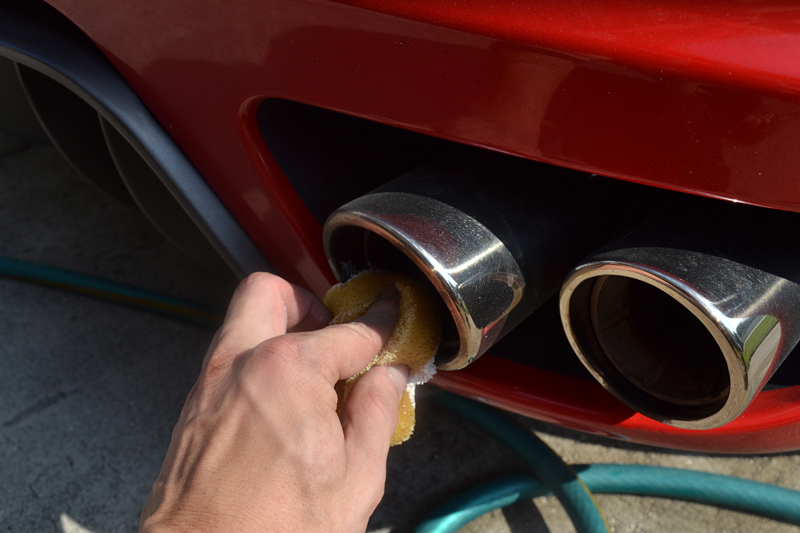
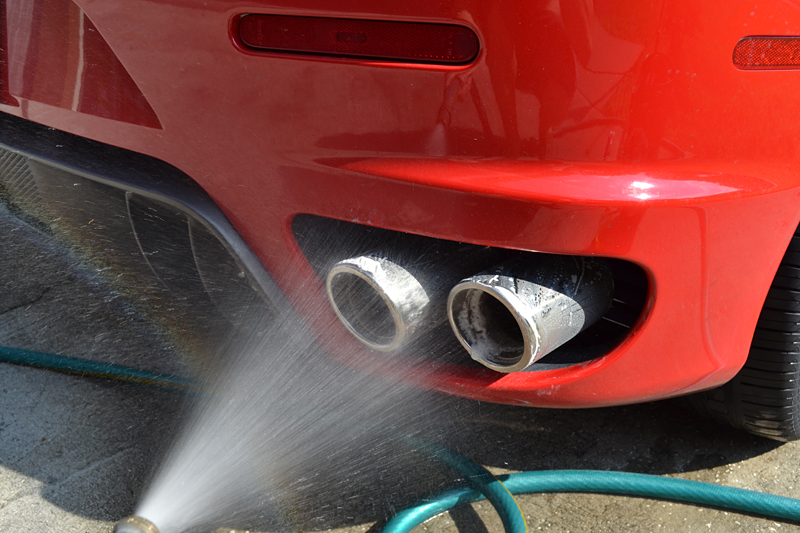
Both the stainless surrounds and rough-cast titanium exhaust pipes had seen better days (probably when this Ferrari was crafted). While the soot of unburned fuel and combustion excess shows that this Ferrari is driven the way it should be, it can be a pain to clean off of the rough-cast titanium inner pipe.

Marine 31 Stainless Steel & Aluminum Brightening Soap provides a good solution. This is a polish & soap combination that will cut through difficult scum and add a light sheen to metal surfaces. This is important because the rough-cast titanium should NOT have a highly-polished, high-gloss finish.
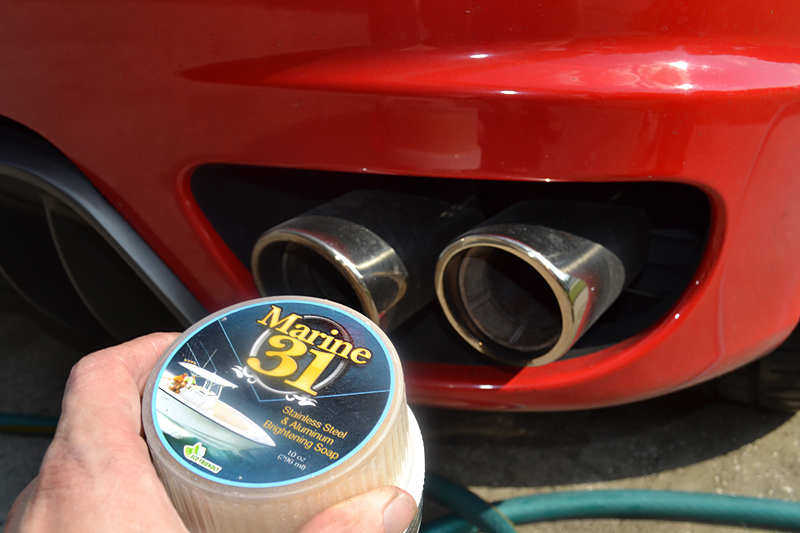
Application is easy. Simply wet the included sponge, dip into the powdered soap/polish and lightly scrub. The polishing agents, effective on brightening metal, also make quick work of the heavy built up of soot.

After the detail work was complete I gave the car a bath using BLACKFIRE Wet Diamond Conditioning Shampoo and a Aussie Merino Wool Wash Mitt.
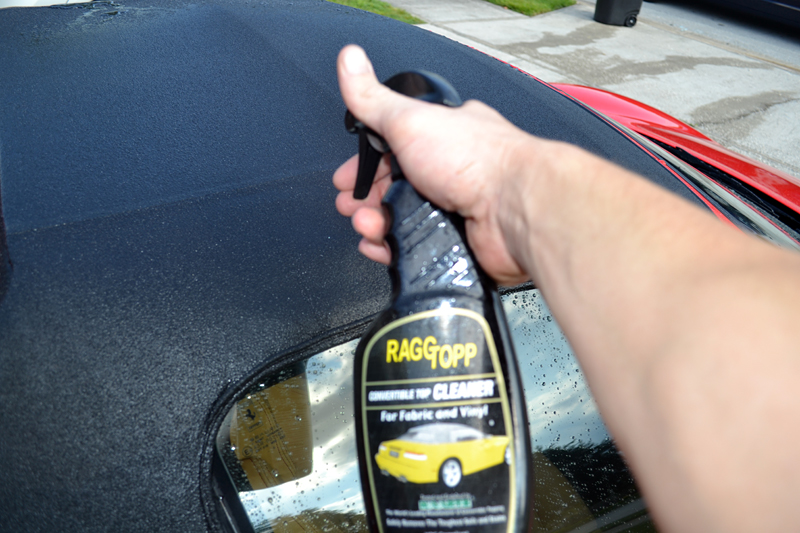
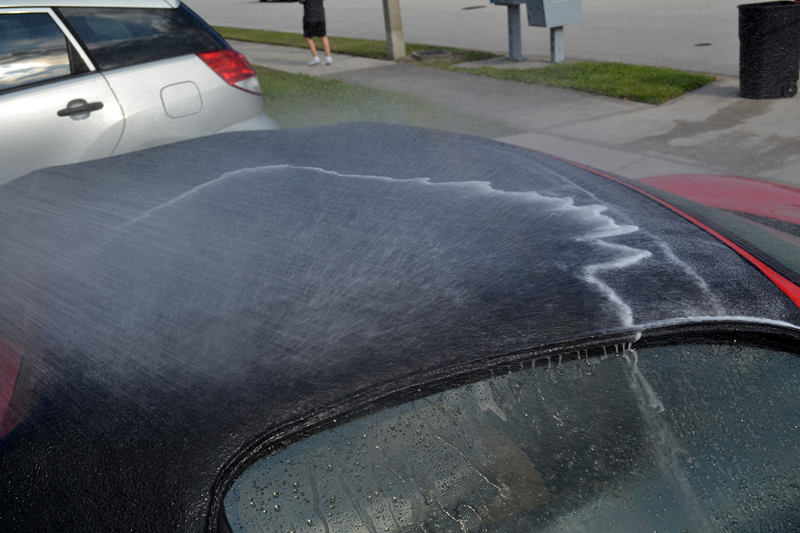
I also washed the top with RaggTopp Fabric and Vinyl Convertible Top Cleaner, which is part of the RaggTopp Convertible Top Cleaner & Protectant Kit I would be using later.
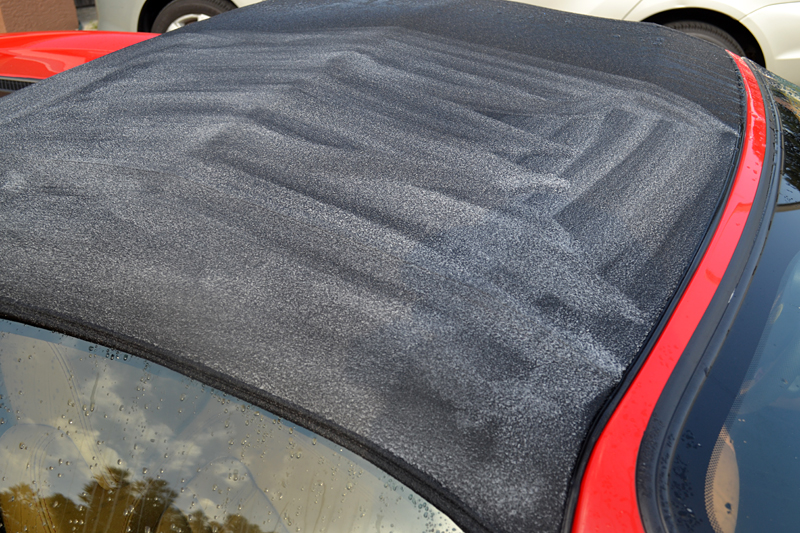
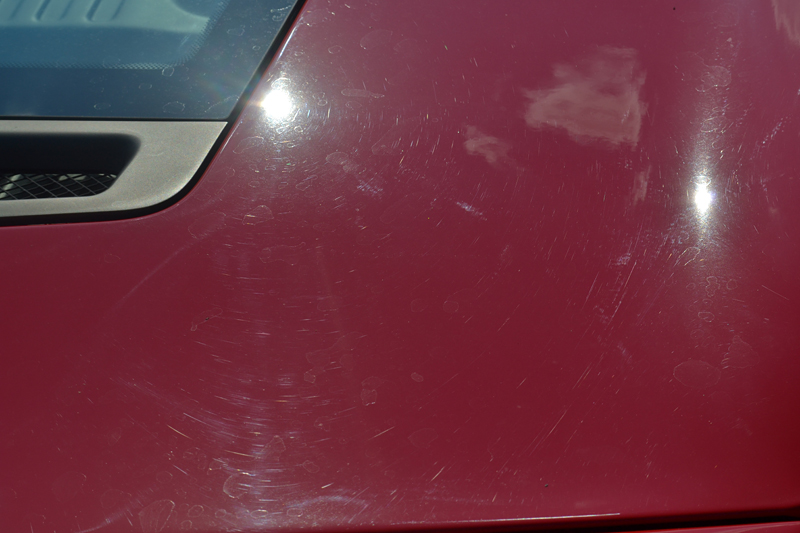
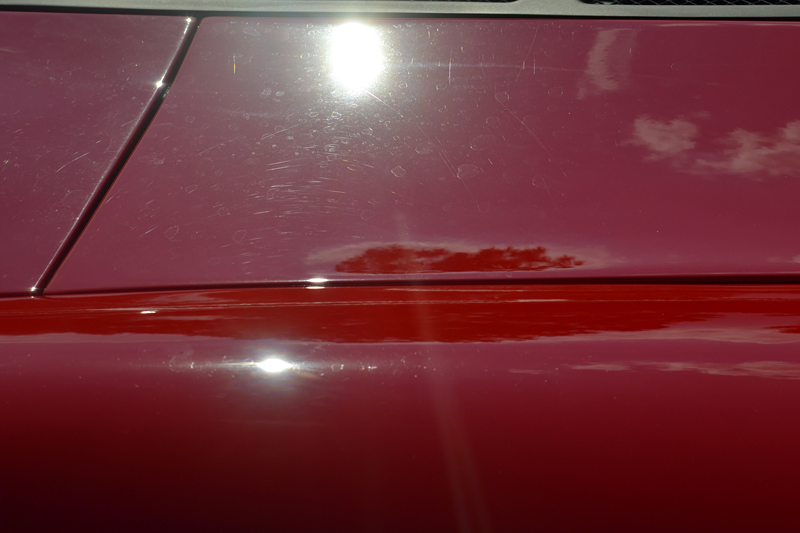
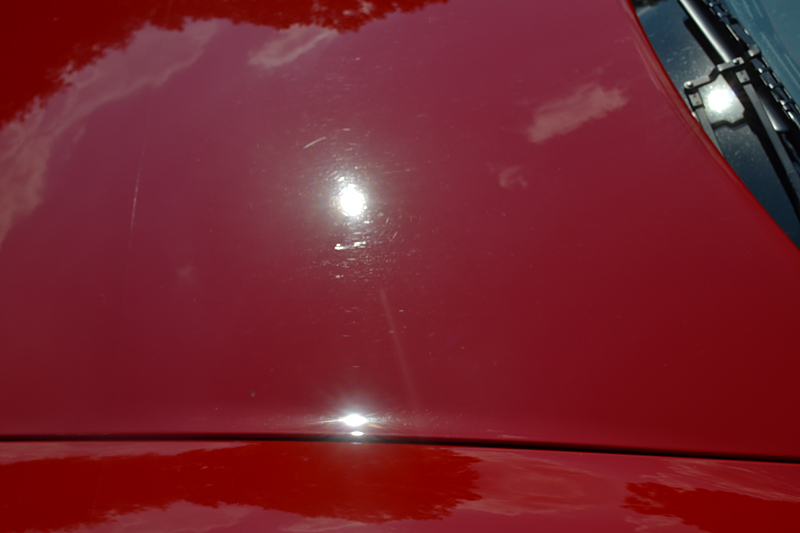
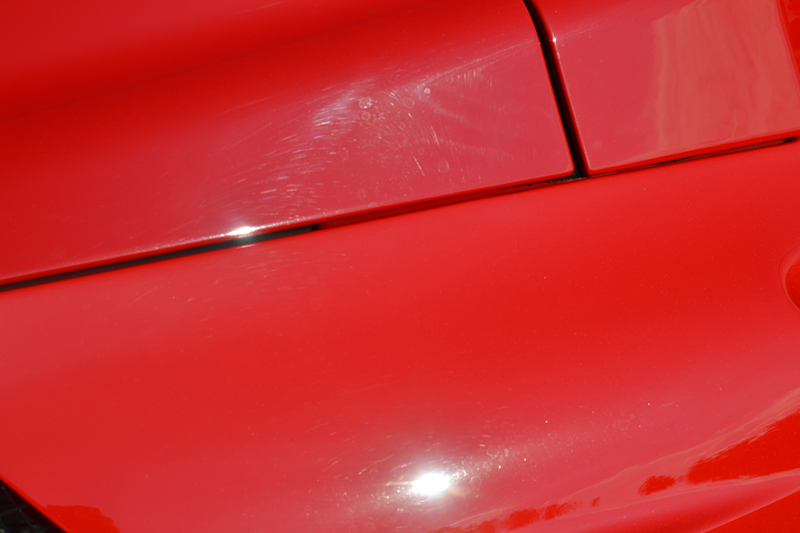
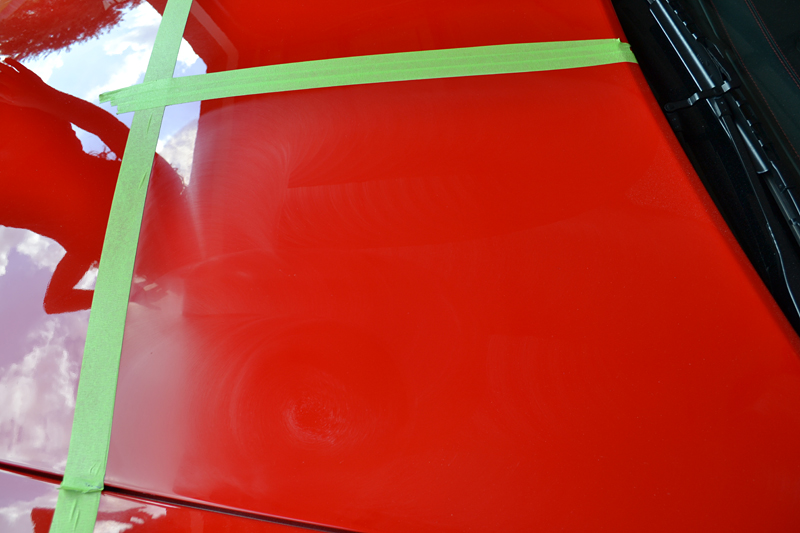
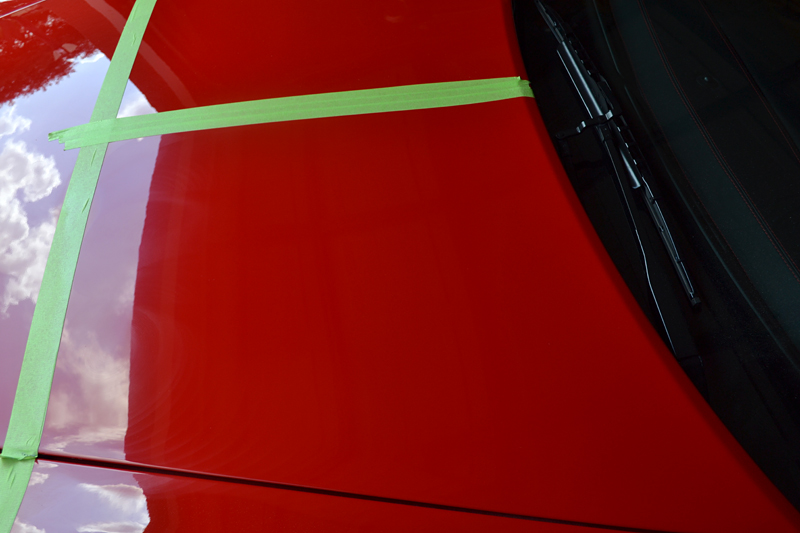
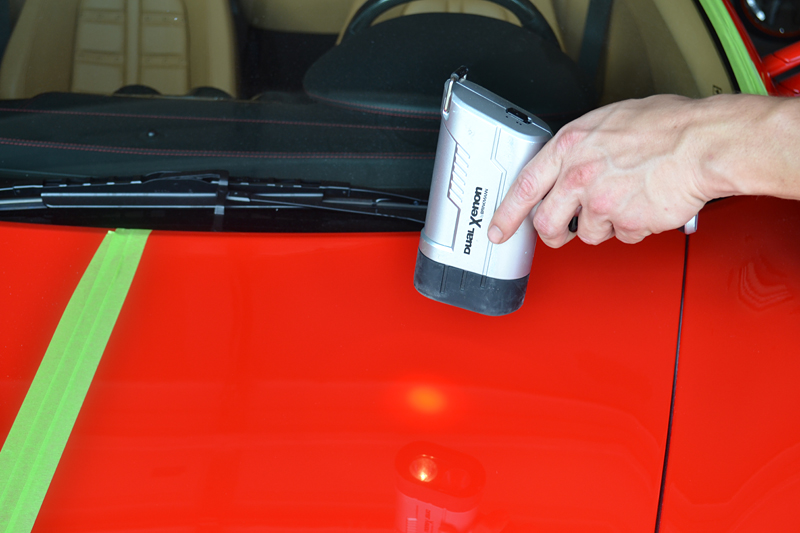
Here are some pictures of the paint after washing. Up close it lacked depth & luster while being riddled with hard water spots and swirl marks.
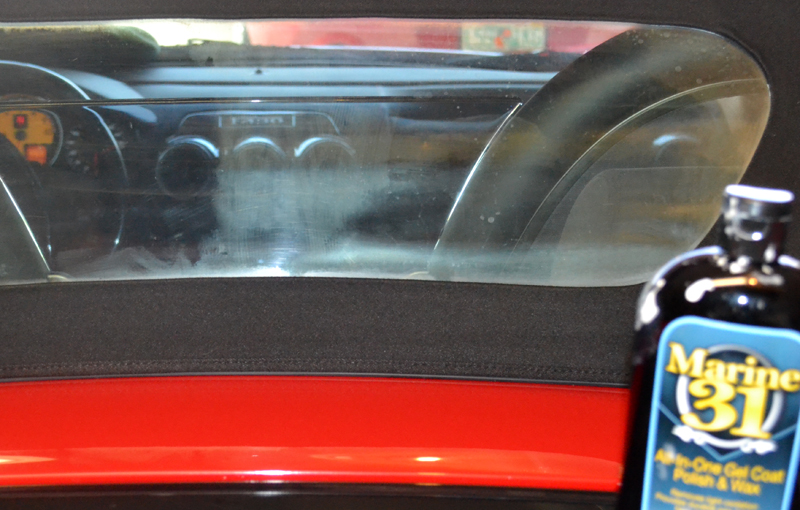
Before starting the paint correction, I wanted to fix a nagging problem that is common to Ferrari convertibles, as well as any other car that has canvas windows - fogging. Fogging occurs when the canvas oxidizes and/or becomes covered in film.
Marine 31 All-In-One Gel Coat Polish & Wax is an excellent abrasive sealant designed for the wet nautical environment. It will easily clean away the fogging while leaving behind a moisture-resistant barrier (helping to stop oxidation in its tracks).
You can see the left (driver's) side part of the window has already been treated and is clear vs. the foggy right side.
Totally done....

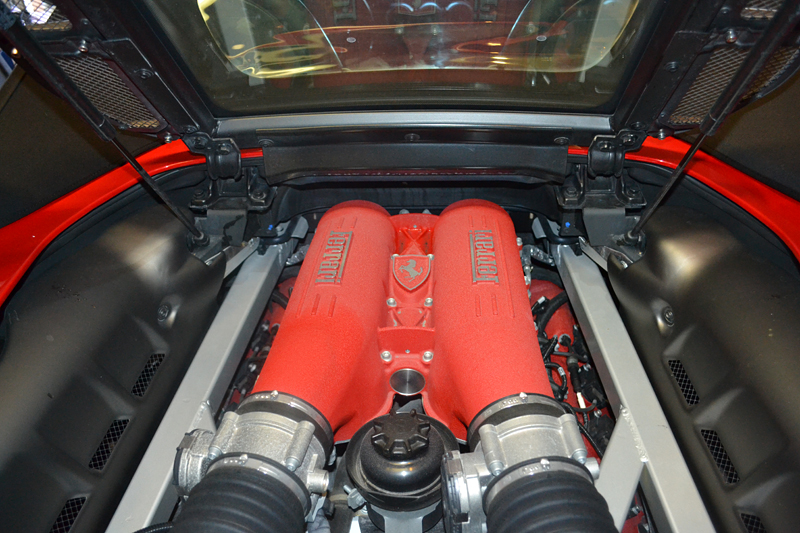
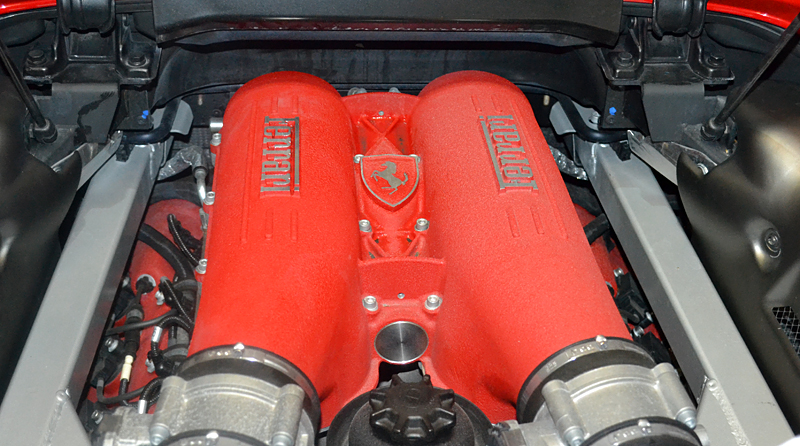
The last area I wanted to detail before starting on the paint was the engine. Italian's have a knack for creating truly functional pieces of art. No where is this better displayed than in the heart of every Ferrari - it's engine.
I personally love engine detailing. It is a matter of cleaning, polishing and enhancing every detail imaginable, from the nuts and bolts to the valve covers. I am convinced that no other aspect of detailing requires you to be as creative or requires as much patience as engine detailing.
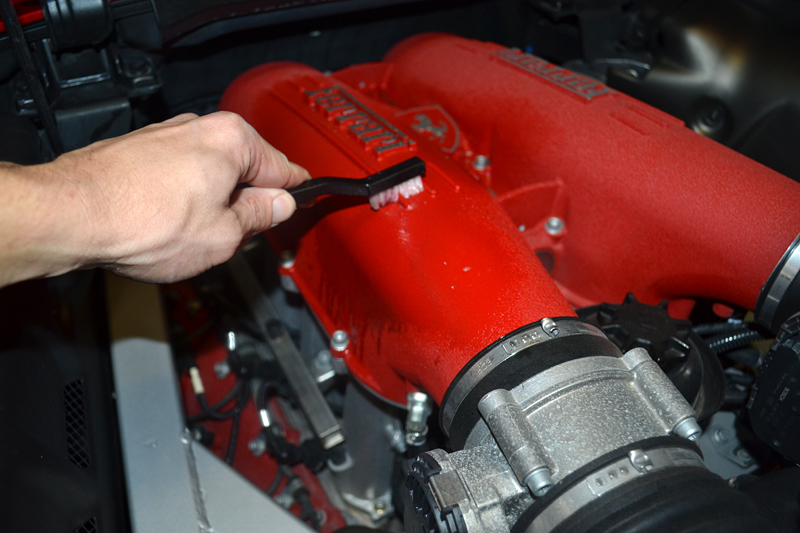
I started by lightly scrubbing the engine bay with a nylon-bristle detail brush and dilute BLACKFIRE All-In-One APC. After cleaning, the solution was then wiped off the surface with an all purpose microfiber dampened by BLACKFIRE Wet Diamond Rinseless Wash, ensuring the surface was clean and free of sticky residues.
With pretty much every detail I do, I start by washing the car. The way I wash the car is pretty much the same as when I wash my own cars. I start with the wheels, then clean the detail areas, and finally carefully wash the whole body.
The wheels on this Ferrari had a light coating of brake dust, so it was a create chance to play with Scholl Concepts RIM7 Rim Cleaning Gel. Scholl performed well, scoring the highest wheel cleaning ability and most color-changing effect in the AutopiaForums Wheel Cleaner Review.
In addition to Scholl's, I used a Daytona Speed Master Wheel Brush to clean deep inside the barrels, between the spokes, and in-and-around the brake calipers.
Scholl Concepts RIM7 Rim Cleaning Gel has excellent color-changing properties in addition to its powerful cleaning ability (necessary due to Ferriar's use of very soft sport pads).
For cleaning the face and spokes of the wheel, I agitated the cleaner with an ultra-soft Lake Country Wool Wheel Wash Mitt. This super-soft, ultra-dense mitt does an excellent job of cleaning even the most delicate surfaces without scratching them.
For tidying up the lug recesses and detail surfaces around the brake caliper, I love using a Wheel Woolies Boar's Hair Detail Brush. Not only does it have excellent cleaning power, but as importantly, it will not scratch delicate surfaces. Detailing is more than cleaning, it is preserving the surfaces as well.
A quick rinse revealed a well detailed wheel. Now it's time to clean the tires and wheel wells.
For the tires, I turned to one of my favorite tire cleaners - TUF SHINE Tire Cleaner.
Even before scrubbing, the brown runoff from the tire showed how flithy this otherwise cleaning-looking tire was, and more importantly, how effective TUF SHINE Tire Cleaner is.
To ensure the tires were perfectly clean, I agitated them with the also-awesome TUF SHINE Tire Brush and rinsed clean.
To combat the grime, tar, and bug splatter that gives any detailed car an otherwise unfinished look, I used a 4:1 dilution of BLACKFIRE All-In-One APC.
Cleaning and scrubbing was down with the soft-touch Wheel Woolies (large) Wheel Mop.
Both the stainless surrounds and rough-cast titanium exhaust pipes had seen better days (probably when this Ferrari was crafted). While the soot of unburned fuel and combustion excess shows that this Ferrari is driven the way it should be, it can be a pain to clean off of the rough-cast titanium inner pipe.
Marine 31 Stainless Steel & Aluminum Brightening Soap provides a good solution. This is a polish & soap combination that will cut through difficult scum and add a light sheen to metal surfaces. This is important because the rough-cast titanium should NOT have a highly-polished, high-gloss finish.
Application is easy. Simply wet the included sponge, dip into the powdered soap/polish and lightly scrub. The polishing agents, effective on brightening metal, also make quick work of the heavy built up of soot.
After the detail work was complete I gave the car a bath using BLACKFIRE Wet Diamond Conditioning Shampoo and a Aussie Merino Wool Wash Mitt.
I also washed the top with RaggTopp Fabric and Vinyl Convertible Top Cleaner, which is part of the RaggTopp Convertible Top Cleaner & Protectant Kit I would be using later.
Here are some pictures of the paint after washing. Up close it lacked depth & luster while being riddled with hard water spots and swirl marks.
Before starting the paint correction, I wanted to fix a nagging problem that is common to Ferrari convertibles, as well as any other car that has canvas windows - fogging. Fogging occurs when the canvas oxidizes and/or becomes covered in film.
Marine 31 All-In-One Gel Coat Polish & Wax is an excellent abrasive sealant designed for the wet nautical environment. It will easily clean away the fogging while leaving behind a moisture-resistant barrier (helping to stop oxidation in its tracks).
You can see the left (driver's) side part of the window has already been treated and is clear vs. the foggy right side.
Totally done....
The last area I wanted to detail before starting on the paint was the engine. Italian's have a knack for creating truly functional pieces of art. No where is this better displayed than in the heart of every Ferrari - it's engine.
I personally love engine detailing. It is a matter of cleaning, polishing and enhancing every detail imaginable, from the nuts and bolts to the valve covers. I am convinced that no other aspect of detailing requires you to be as creative or requires as much patience as engine detailing.
I started by lightly scrubbing the engine bay with a nylon-bristle detail brush and dilute BLACKFIRE All-In-One APC. After cleaning, the solution was then wiped off the surface with an all purpose microfiber dampened by BLACKFIRE Wet Diamond Rinseless Wash, ensuring the surface was clean and free of sticky residues.
Thread Starter
Former Vendor
Joined: Aug 2013
Posts: 138
Likes: 0
From: Stuart
My Ride: Daily Driver
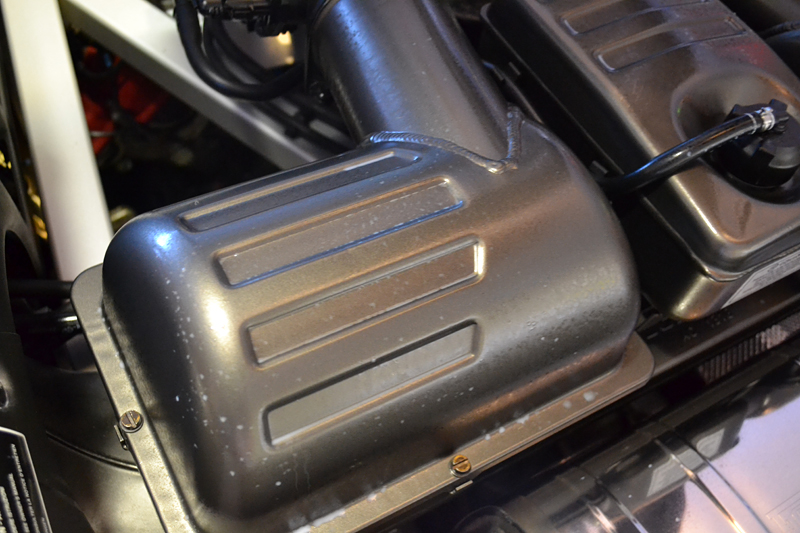
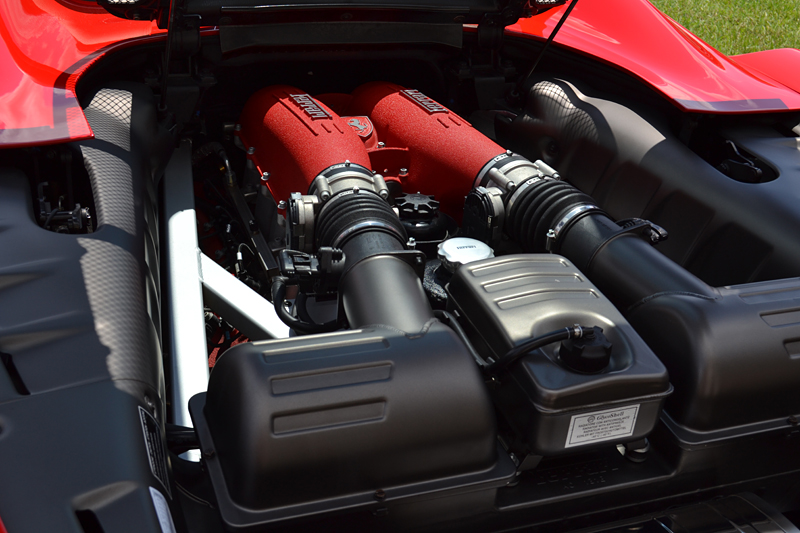
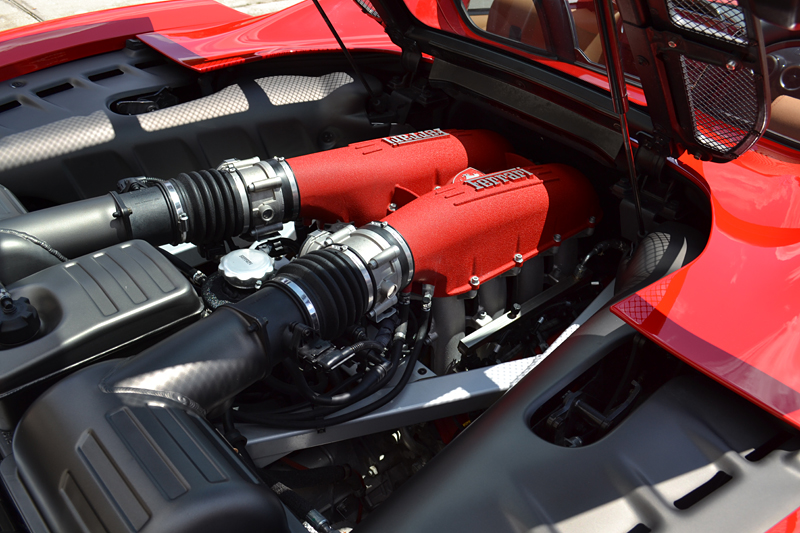
The right side of the engine cover has been cleaned, and looks much brighter and saturated. Now it is just a matter of repeating the process over the entire surface area of the Ferrari's 4.3L V8 engine and compartment.
Pay attention to the small areas, such as the black heat shield which is visible through the Ferrari's mesh screen. No matter how shiny your paint and how clean your wheels, if the detail areas aren't clean the car will look unfinished. The more you detail the big areas, the most the detail ares will stand out and detract from your work.

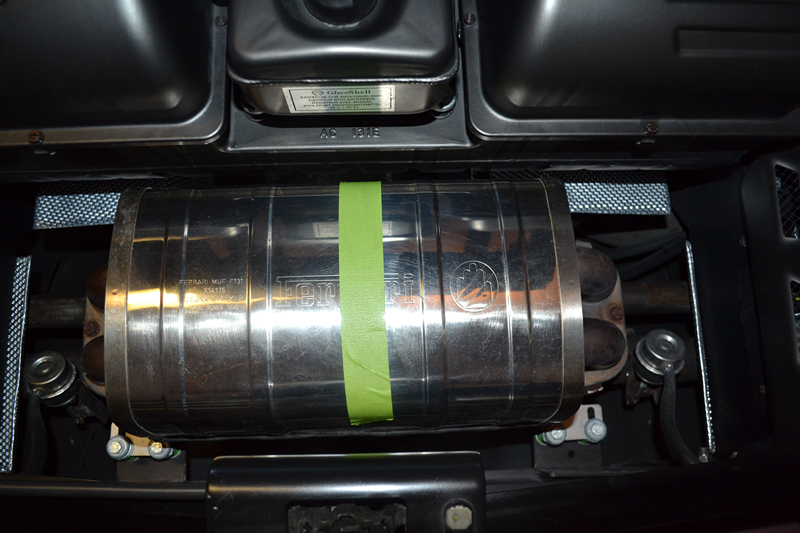
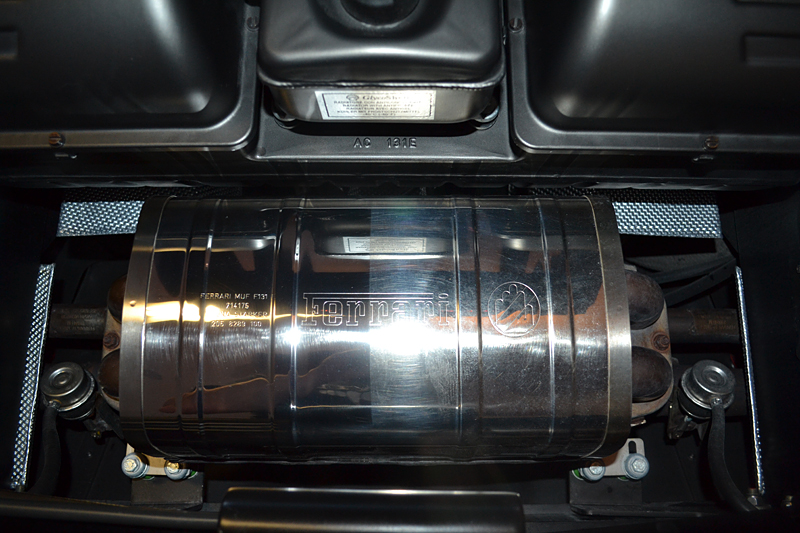
The Ferrari's glorious "sound box" can get a little dull with time, heat and age. Luckily a light metal polish can make quick work of it.
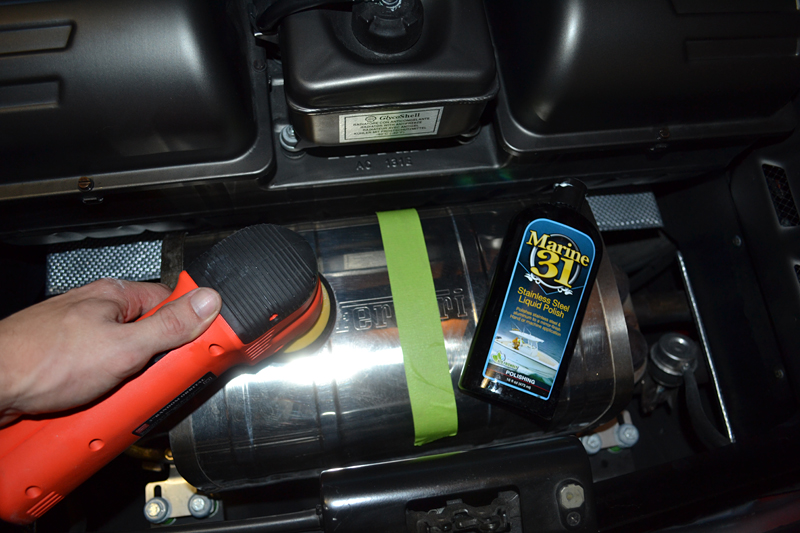
A Griot's Garage 3-inch Polisher, Marine 31 Stainless Steel Liquid Polish, and Meguiar's 3-inch DA Microfiber Cutting Disc quickly restored a deep-luster to the stainless muffler.
Finally, my favorite engine coating, Sonus Trim % Motor Kote was used on the entire engine compartment. This also "sealant" leaves behind a rich stain sheen and helps repel dirt and dust.
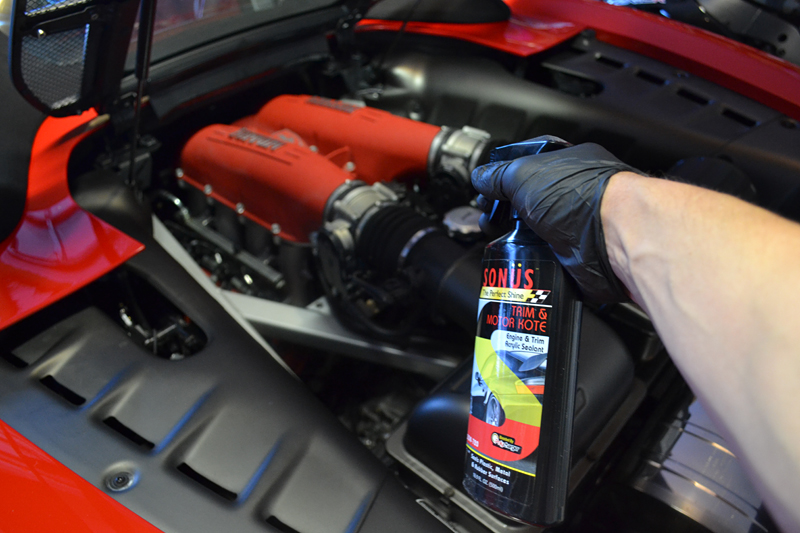
Lightly mist on and leave it alone (for several hours)....
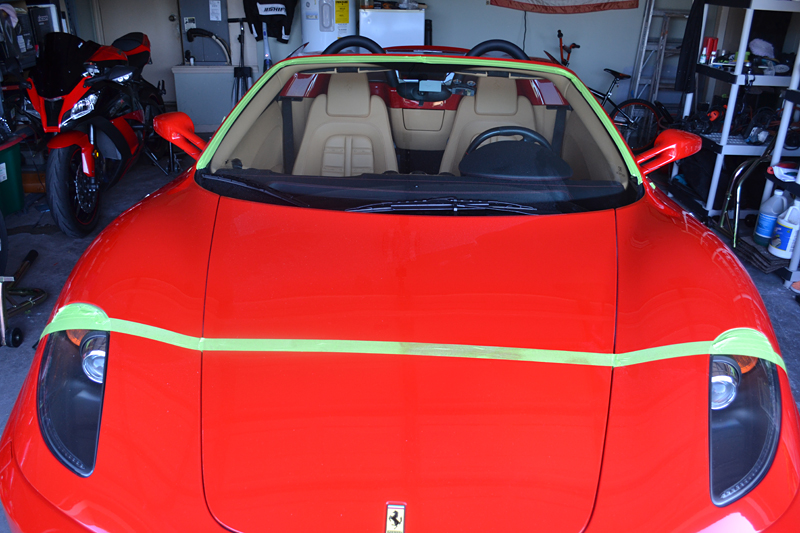
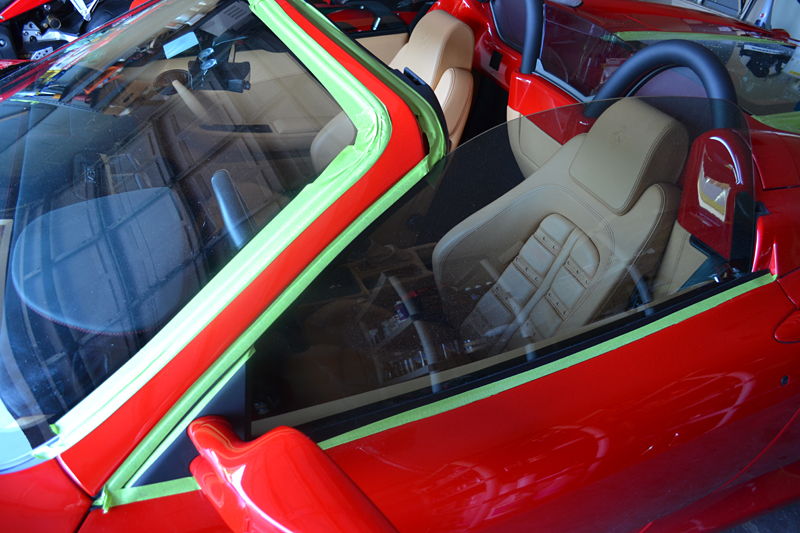
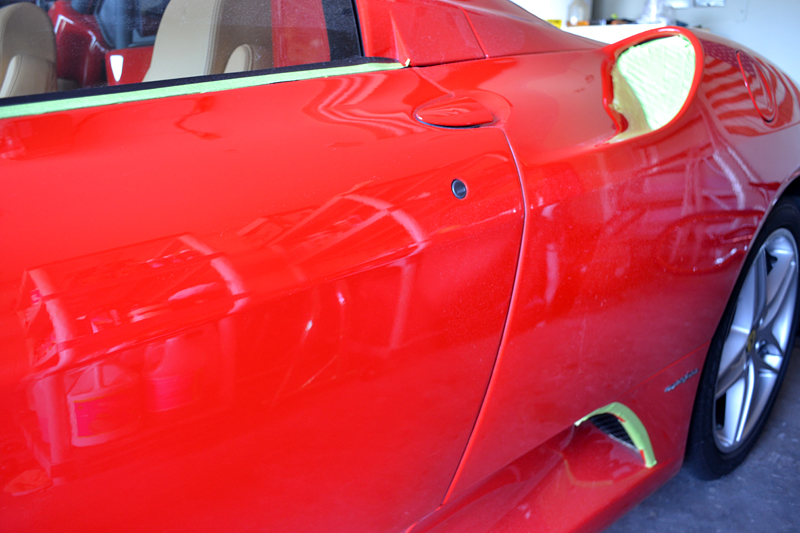
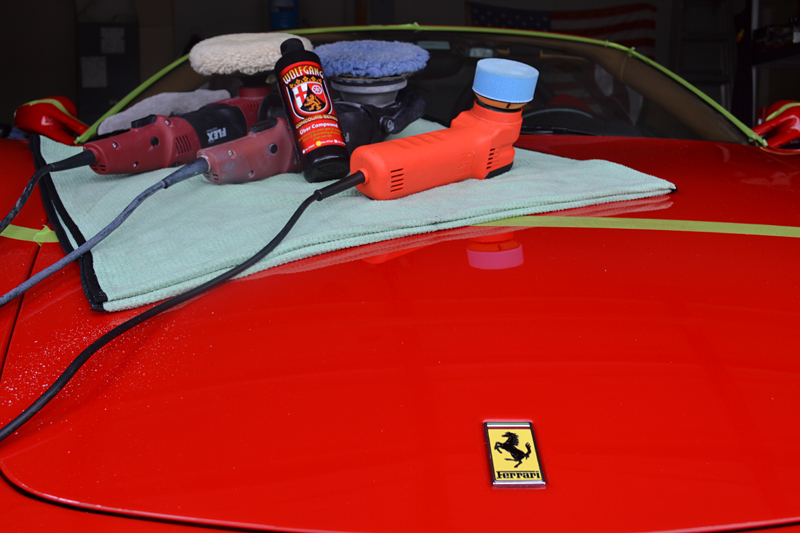
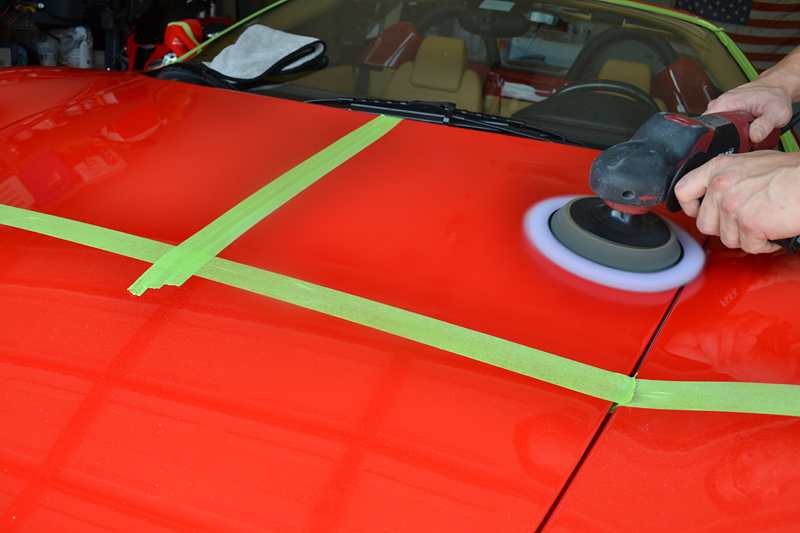
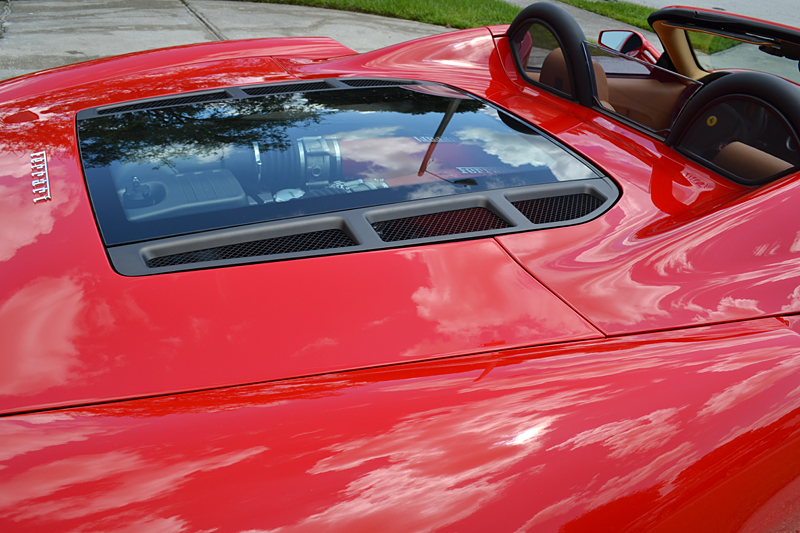
With the wheels detailed, the paint clean, and the engine compartment drying, it was time to start the paint correction! First 3M Scotch "Painter's" Tape was used to mask any seems, trim, edges, or paint film (hence the stripe across the front) that could be damaged by polishing.
The engine intake vents (above and in front of the rear tires) were masked off to prevent dust and dirt from building up in there.
The engine vents were also taped up to keep the freshly detailed engine clean.

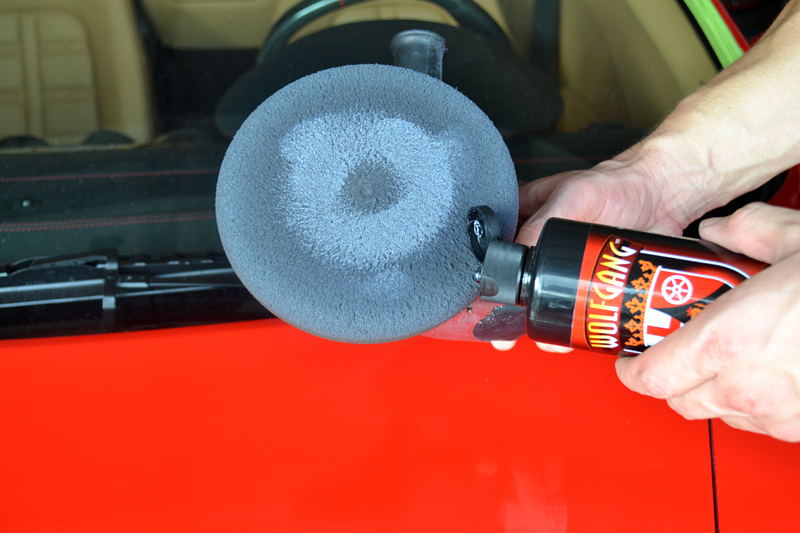
Wolfgang Uber Compound
I really wanted to push the limits of Wolfgang Uber Compound when correcting the finish of this Ferriar's paint. Wolgang Uber Compound uses a blend of micro and diminishing abrasive technologies that allows you to adapt it's cut and finish depending on the pad you use.
Wolfgang Uber Compound is a fairly aggressive paint compound with one HUGE exception. It finishes as good (if not better) than most medium to medium-fine paint polishes. This effectively eliminates a second polishing step on most paints. On some lighter-colored hard paints, Wolfgang Uber Compound will finish to a high-gloss, swirl-free finish as well (when used with a finishing pad).
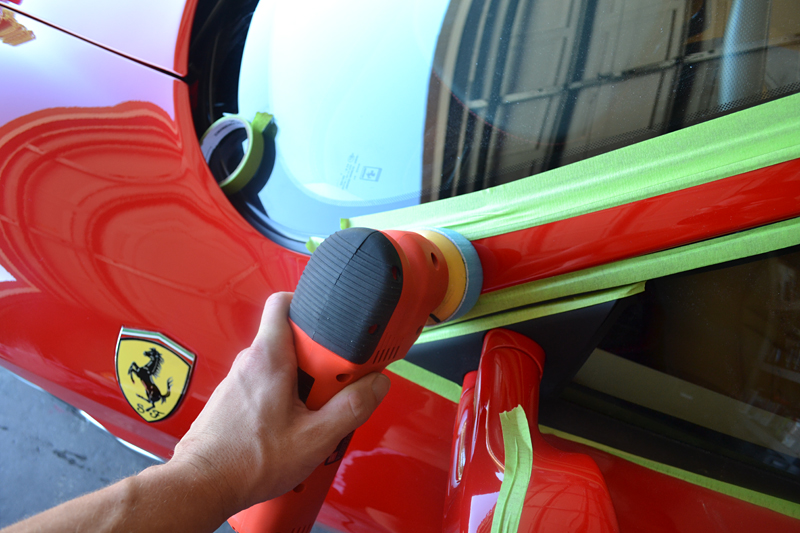
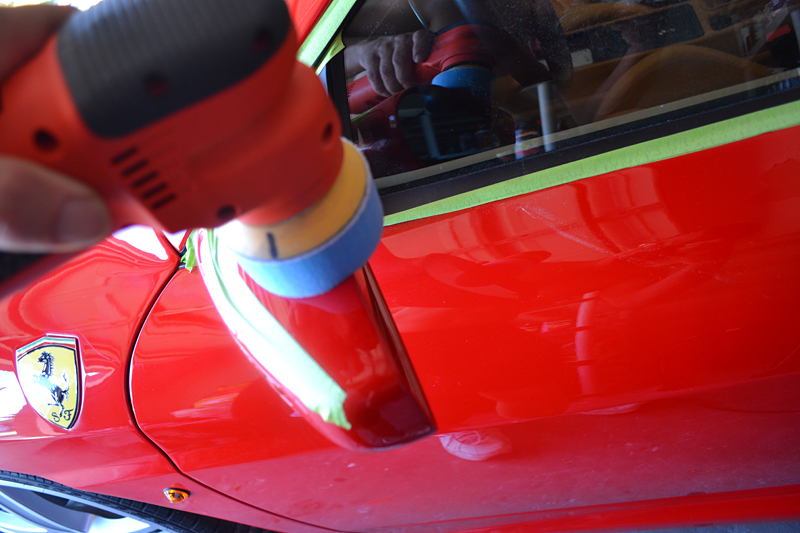
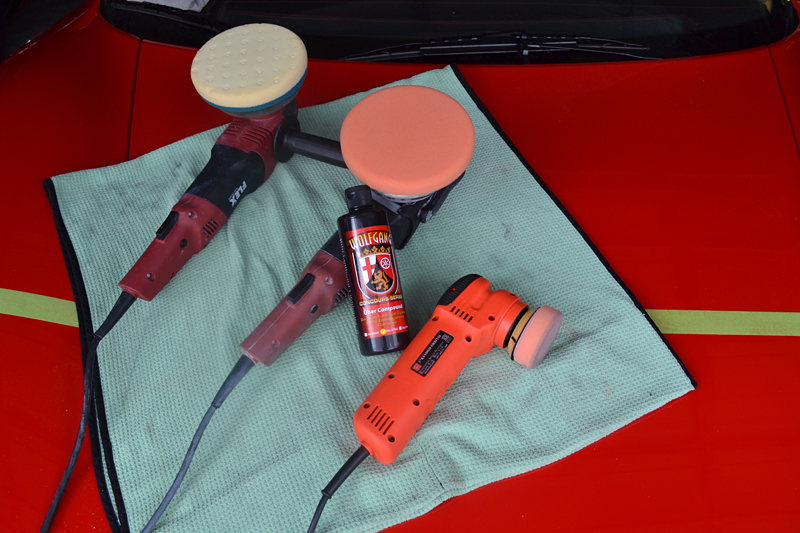
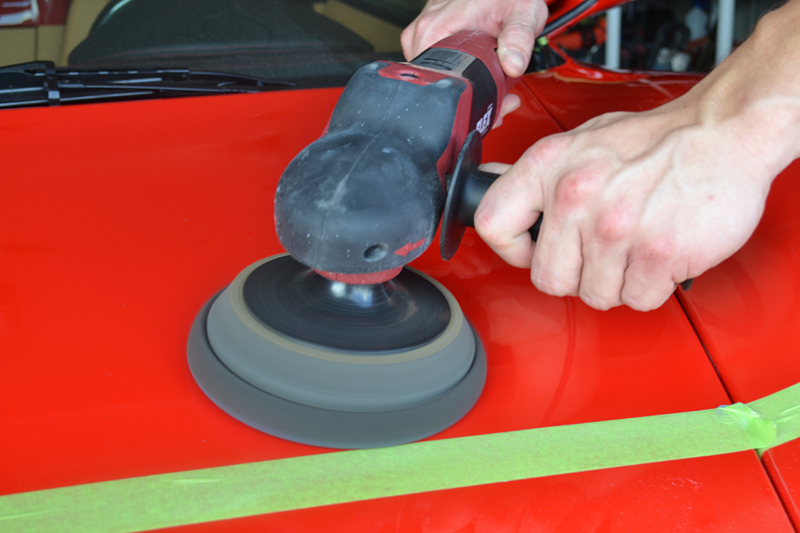
The tight spots were corrected with the Griot's Garage 3 inch Polisher and a 3-inch Cyan Cutting Pad.
Larger surfaces were corrected with a variety of tools and pads including a FLEX PE Rotary, FLEX 3401 DA, and Griot's 3 Inch Polisher using a 4-ply Cutting Wool Pad, a Purple Foamed Wool pad or the 3-inch Cyan Foam Pad.
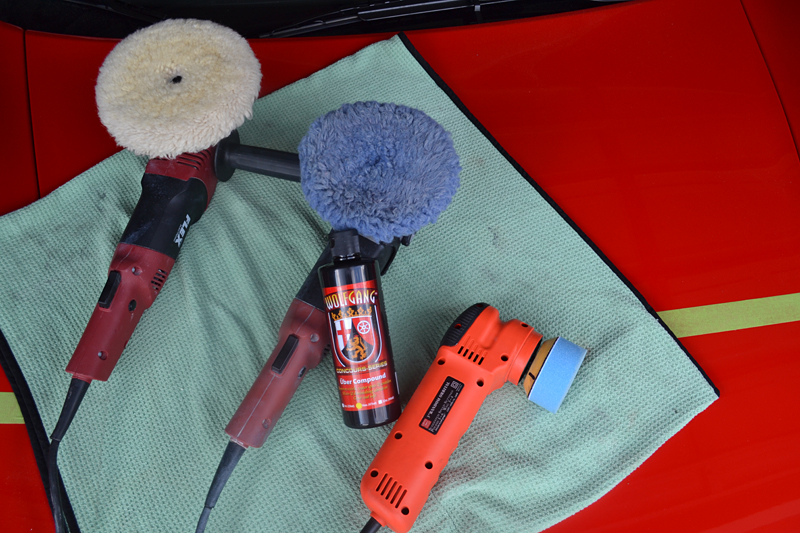
I also wanted to test Uber Compounds ability as a medium polish. In this case I lined up the same polishers with a CCS Hi-Gloss White Polishing Pad and a pair of Hydro-Tech Tangerine Pads (both 6.5 inch and 3 inch)
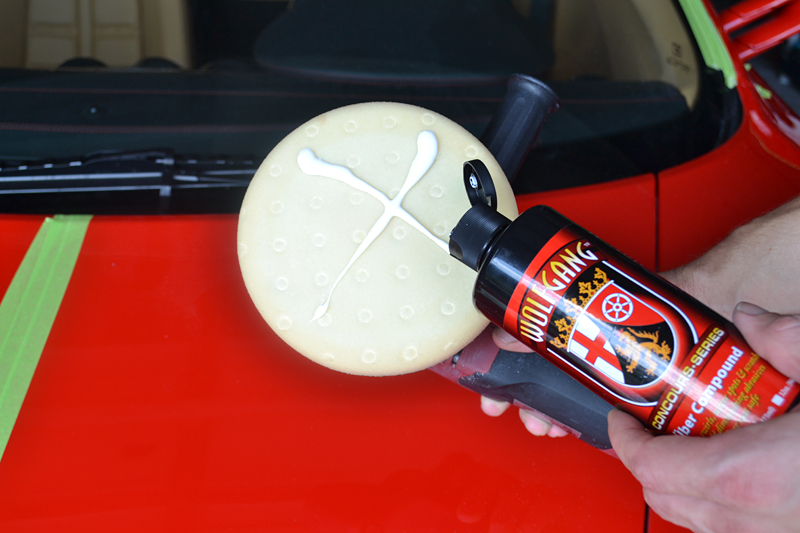
Wolgang Uber Compound in action.
If you are using a fresh, dry pad, start your polishing session by slightly priming the pad. I found that, regardless of style of machine or pad type, Uber Compound works well with a simple "X" across the face.
Regardless of machine, polish a small area (somewhat close to 2' x 2') at a time, using overlapping strokes. With a rotary polisher keep your pressure light but firm, with a DA polisher use a little more pressure.
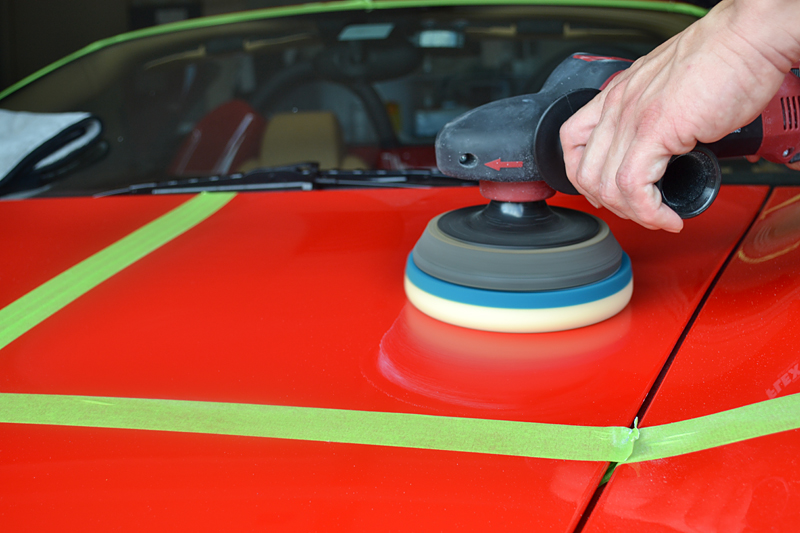
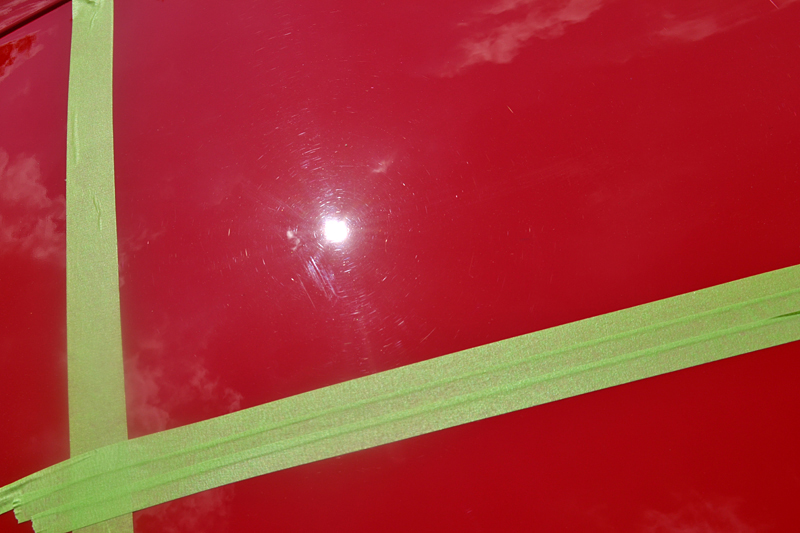
Uber Compound will leave an opaque film on the surface. This is the surface 30 seconds after starting the polishing cycle. Continue working until the surface begins to clear. (This will take slightly longer on a DA polisher).
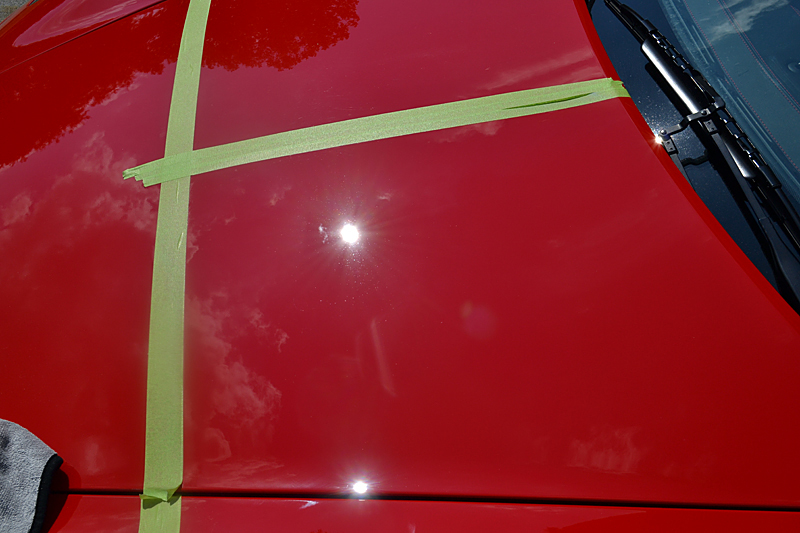
Here is the same spot after the film has begun to turn clear. (It is more visible in person than in the photo). Uber Compound is ready for wipe off. Note: Always use a soft microfiber towel to wipe away residues to avoid scratching.
Inspect your work for desired results...
IF YOU DON'T GET THE DESIRED RESULTS YOU CAN ALWAYS STEP UP TO A MORE AGGRESSIVE PAD!
In the sunlight: Here is the before side.
And after side.
Pay attention to the small areas, such as the black heat shield which is visible through the Ferrari's mesh screen. No matter how shiny your paint and how clean your wheels, if the detail areas aren't clean the car will look unfinished. The more you detail the big areas, the most the detail ares will stand out and detract from your work.
The Ferrari's glorious "sound box" can get a little dull with time, heat and age. Luckily a light metal polish can make quick work of it.
A Griot's Garage 3-inch Polisher, Marine 31 Stainless Steel Liquid Polish, and Meguiar's 3-inch DA Microfiber Cutting Disc quickly restored a deep-luster to the stainless muffler.
Finally, my favorite engine coating, Sonus Trim % Motor Kote was used on the entire engine compartment. This also "sealant" leaves behind a rich stain sheen and helps repel dirt and dust.
Lightly mist on and leave it alone (for several hours)....
With the wheels detailed, the paint clean, and the engine compartment drying, it was time to start the paint correction! First 3M Scotch "Painter's" Tape was used to mask any seems, trim, edges, or paint film (hence the stripe across the front) that could be damaged by polishing.
The engine intake vents (above and in front of the rear tires) were masked off to prevent dust and dirt from building up in there.
The engine vents were also taped up to keep the freshly detailed engine clean.
Wolfgang Uber Compound
I really wanted to push the limits of Wolfgang Uber Compound when correcting the finish of this Ferriar's paint. Wolgang Uber Compound uses a blend of micro and diminishing abrasive technologies that allows you to adapt it's cut and finish depending on the pad you use.
Wolfgang Uber Compound is a fairly aggressive paint compound with one HUGE exception. It finishes as good (if not better) than most medium to medium-fine paint polishes. This effectively eliminates a second polishing step on most paints. On some lighter-colored hard paints, Wolfgang Uber Compound will finish to a high-gloss, swirl-free finish as well (when used with a finishing pad).
The tight spots were corrected with the Griot's Garage 3 inch Polisher and a 3-inch Cyan Cutting Pad.
Larger surfaces were corrected with a variety of tools and pads including a FLEX PE Rotary, FLEX 3401 DA, and Griot's 3 Inch Polisher using a 4-ply Cutting Wool Pad, a Purple Foamed Wool pad or the 3-inch Cyan Foam Pad.
- FLEX PE Rotary/4 PLY WOOL: This combination provided the most cutting power, quickly removing the water marks, and quickly chased away the deepest marks in this Ferrari's paint. Despite the aggressive cutting power, the Uber Compound remained cool on the surface and provided a light-swirl finish.
- FLEX 3401/Purple Foamed WOOL- This combination was "just right". I removed 99% of the paint defects from this Ferrari without removing too much paint. It provided a swirl-free, slightly hazy finish that was only visible when compared to a side that had been final polished.
- Griot's 3 inch Polisher/ CYAN Foam - This combination was used around emblems, tight body lines and otherwise hard-to-access areas. Used like this, Wolfgang Uber Compound takes on the performance of a powerful medium polish instead of a nasty cutting compound. The defects melted away and the finish was only slightly hazy when compared to side-by-side to any area that had been final polished.
I also wanted to test Uber Compounds ability as a medium polish. In this case I lined up the same polishers with a CCS Hi-Gloss White Polishing Pad and a pair of Hydro-Tech Tangerine Pads (both 6.5 inch and 3 inch)
- FLEX PE/White CCS High-Gloss Pad - Smooth and controlled where two words that sprang to mind when I employed this combination. It created slightly less levels of cut than the FLEX 3401/Purple Wool combo above, but left behind a swirl-free, nearly haze free finish with no visible holograms. An excellent medium-step combination.
- FLEX 3401/Tangerine Hydro-Tech Pad - This combination created a high-gloss mirror-like finish while providing a good cutting combination. There was no haze or visible swirl marks in the red paint, although final polishing did create a just-slightly deeper shine.
- Griots 3 Inch Polisher/Tangerine Hydro-Tech Pad- This combination created a high-gloss mirror-like finish while providing a good polishing action. There was no haze or visible swirl marks in the red paint, although final polishing did create a just-slightly deeper shine.
Wolgang Uber Compound in action.
If you are using a fresh, dry pad, start your polishing session by slightly priming the pad. I found that, regardless of style of machine or pad type, Uber Compound works well with a simple "X" across the face.
Regardless of machine, polish a small area (somewhat close to 2' x 2') at a time, using overlapping strokes. With a rotary polisher keep your pressure light but firm, with a DA polisher use a little more pressure.
Uber Compound will leave an opaque film on the surface. This is the surface 30 seconds after starting the polishing cycle. Continue working until the surface begins to clear. (This will take slightly longer on a DA polisher).
Here is the same spot after the film has begun to turn clear. (It is more visible in person than in the photo). Uber Compound is ready for wipe off. Note: Always use a soft microfiber towel to wipe away residues to avoid scratching.
Inspect your work for desired results...
IF YOU DON'T GET THE DESIRED RESULTS YOU CAN ALWAYS STEP UP TO A MORE AGGRESSIVE PAD!
In the sunlight: Here is the before side.
And after side.
Thread Starter
Former Vendor
Joined: Aug 2013
Posts: 138
Likes: 0
From: Stuart
My Ride: Daily Driver
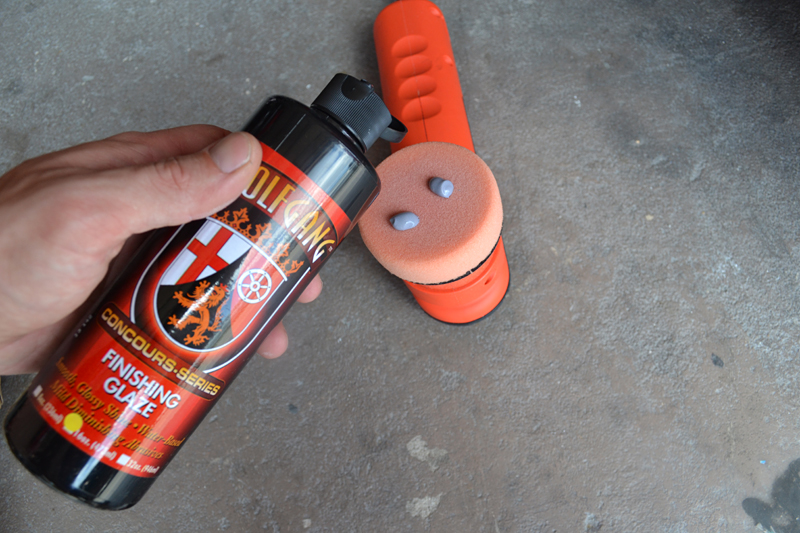
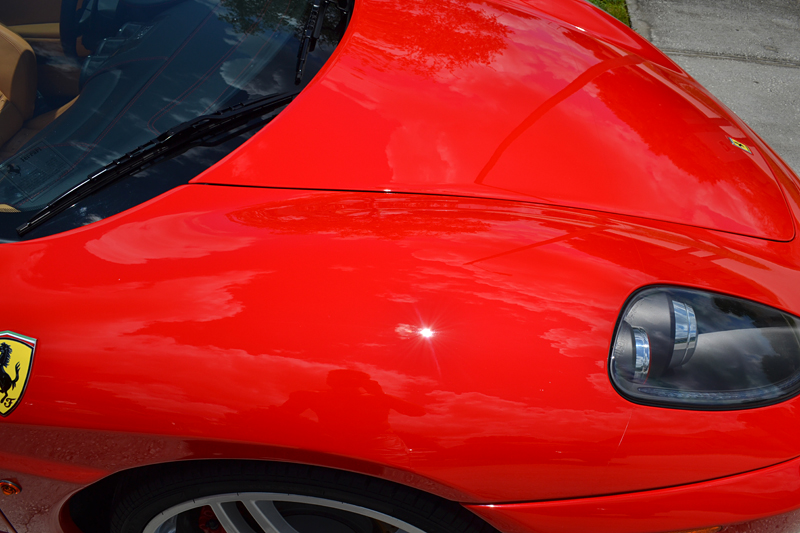
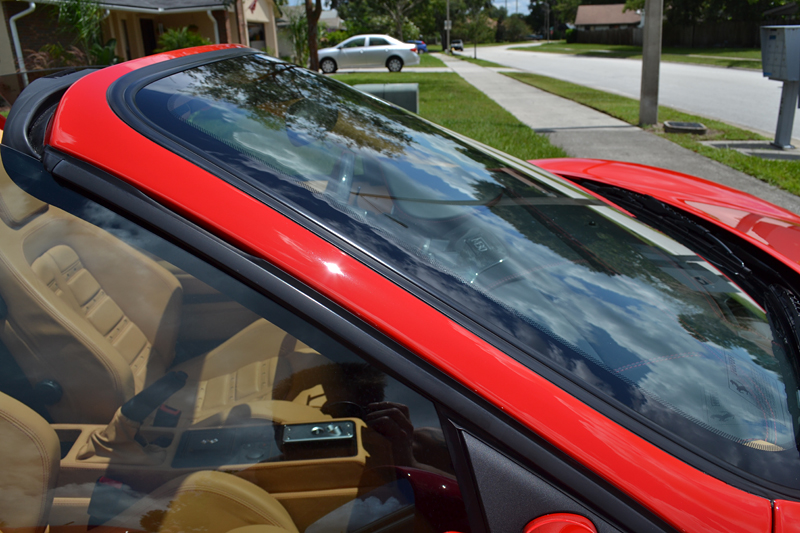
For final polishing I used Wolfgang Finishing Glaze 3.0. This easy-to-use finishing polish is free of fillers and does an excellent job at refining the small imperfections so you are left with a truly mirror-smooth finish that will will reflect brightly.
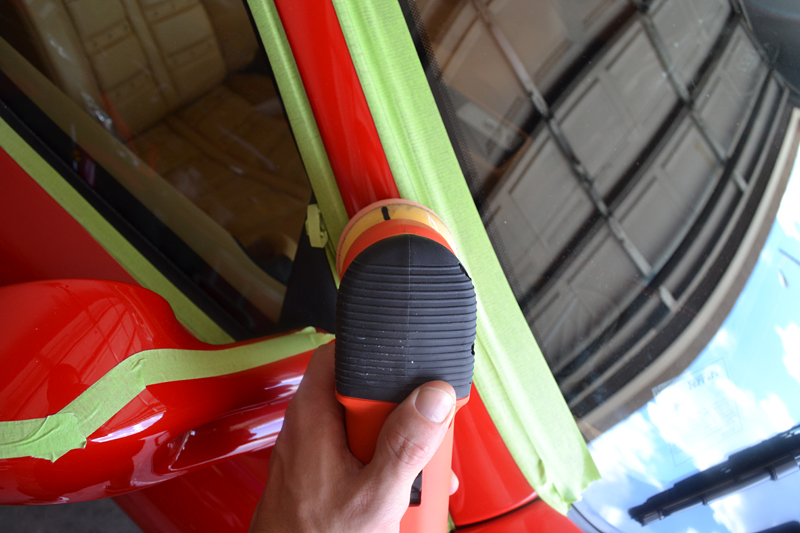
For the larger areas I used the FLEX PE Rotary with a Gray Finishing Pad.
For tighter areas I used the Tangerine Hydro-Tech 3-inch Pad on the Griot's Garage 3 inch Polisher.
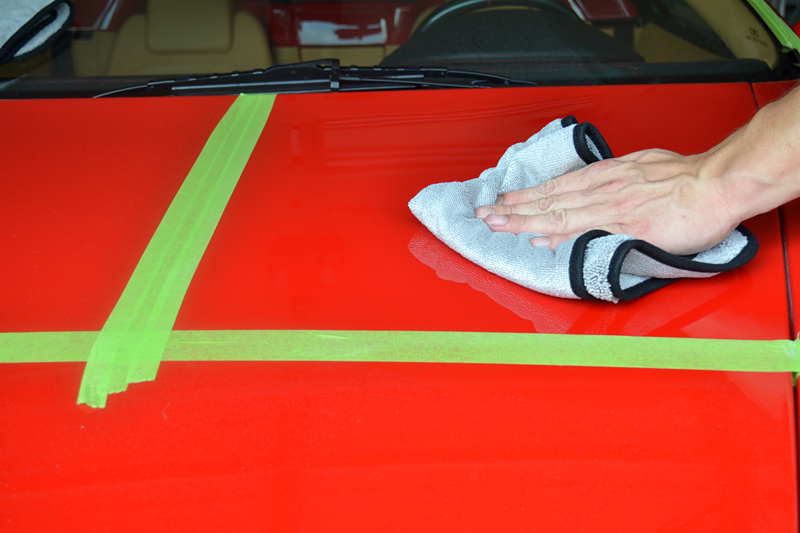
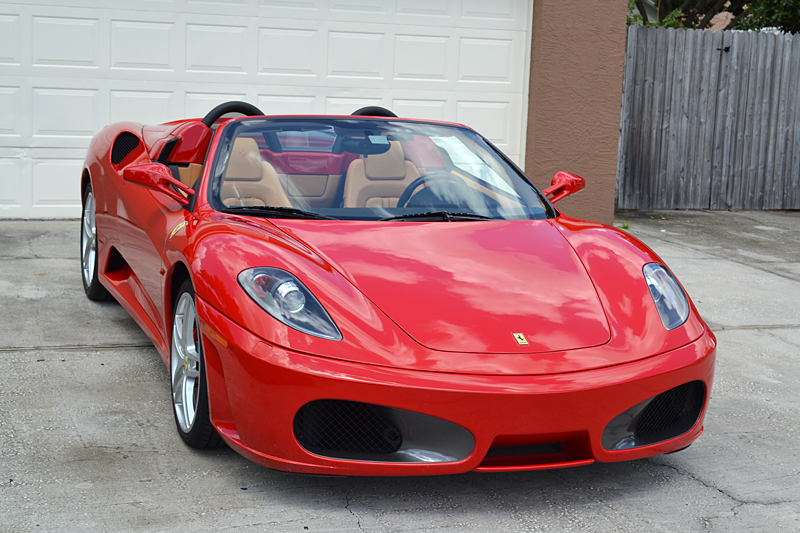
Finally the Ferrari made its way outside for a post-polishing wash. Even under a fine layer of polishing dust, the now brilliant red paint shone brightly.
Wrapping a microfiber bonnet around a an old credit card is a great way to clean the detail areas. The car was washed carefully using the same process in the beginning.
After washing and drying, two coats of RaggTopp Convertible Top Protectant were applied.
To complete the all-Wolfgang detail on the exterior of the paint, I chose to apply two coats of the now-famous Wolfgang Concours Fuzion Estate Wax. Fuzion has a reputation giving blood-pumping hues a high level of color saturation. I wanted this Ferrari too look like it was dripping red.

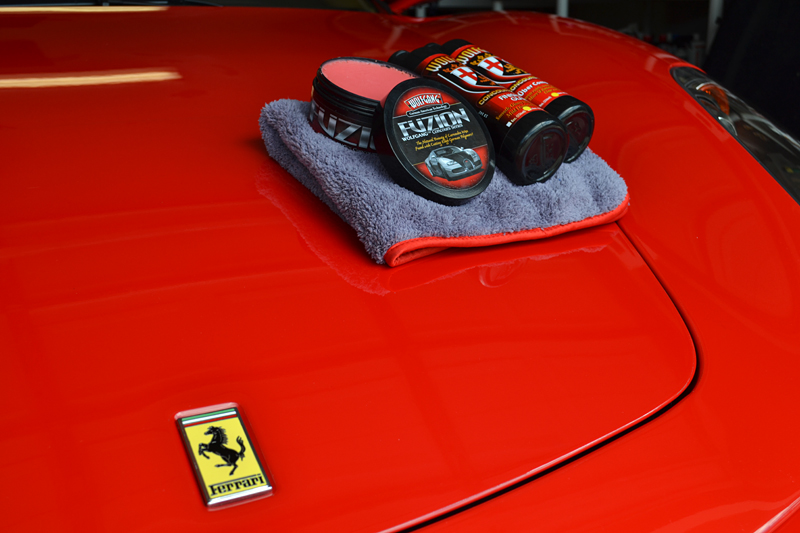
Wolfgang Fuzion Estate Wax is proof that great-looking premium boutique waxes do not need to be difficult to apply. Simply give a foam applicator a 1/4 turn in the jar to load a small amount.
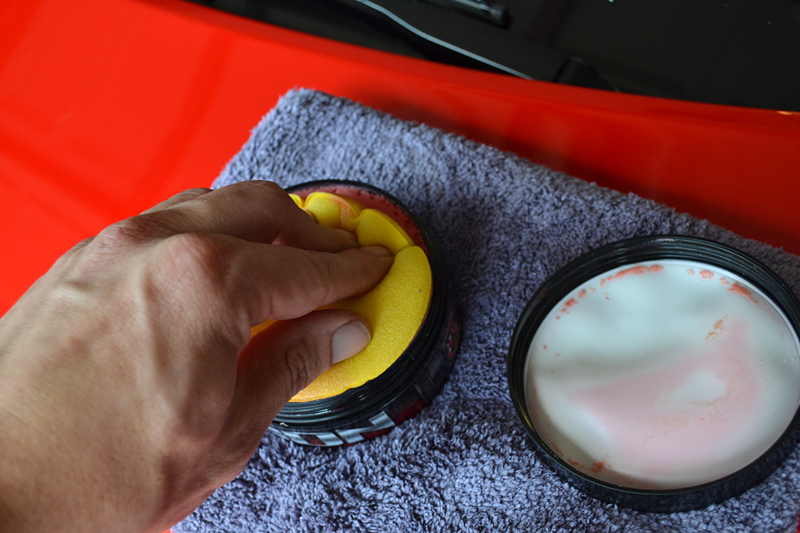
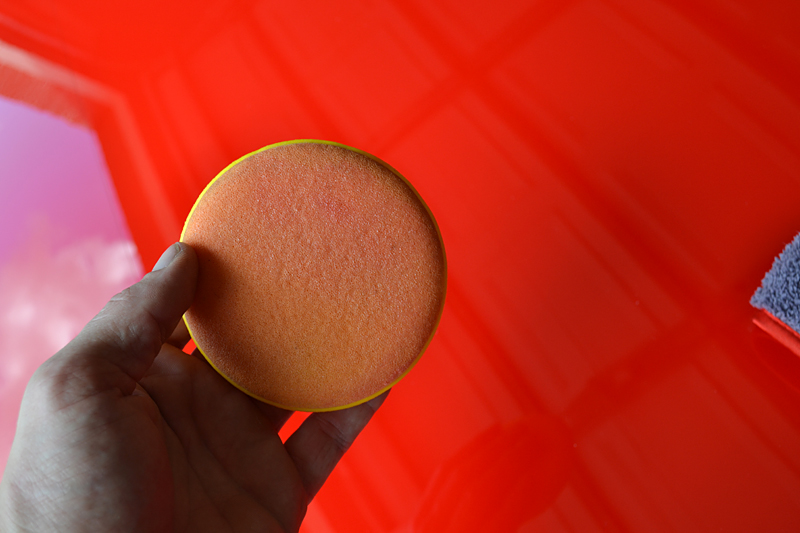
Apply a very light coat to the paint work.
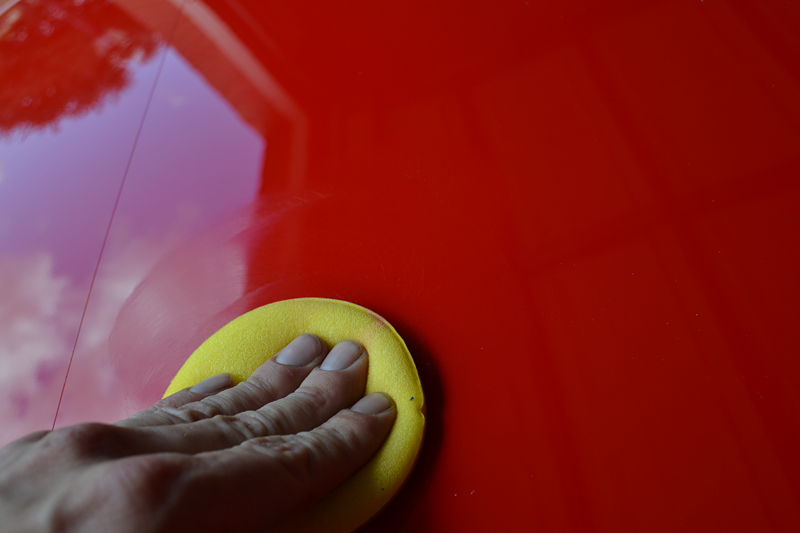
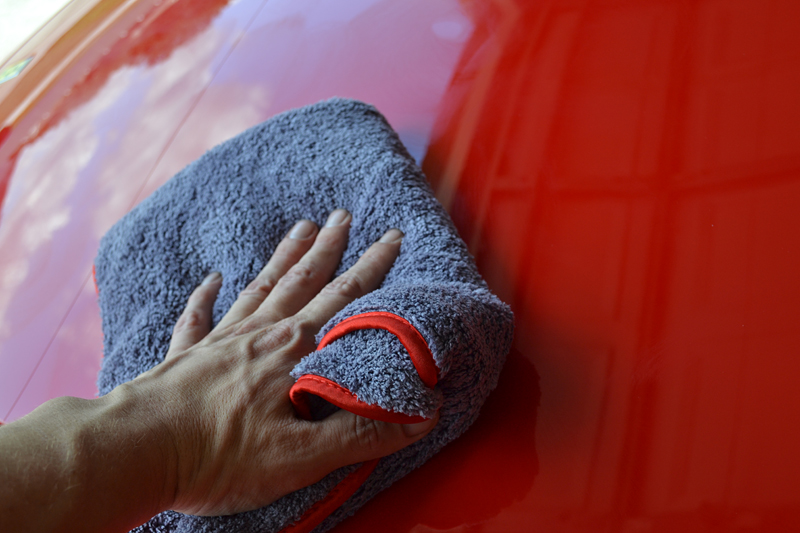
Then buff off immediately. Do not let Fuzion dry, there is no need. Use a soft microfiber towel, such as the luxurious Chinchilla Microfiber Buffing Cloth, to bring out a unmistakably-wet carnauba shine.
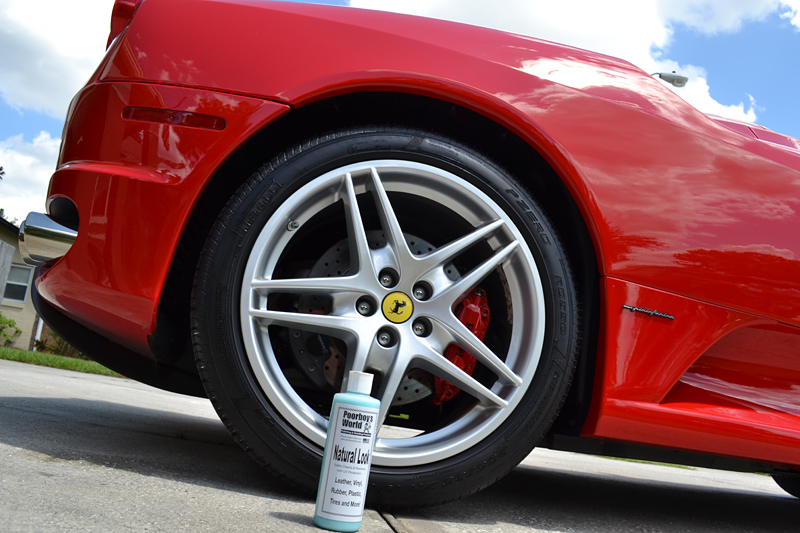
Finally the tires and trim were dressed with Poorboy's excellent Natural Look Dressing.
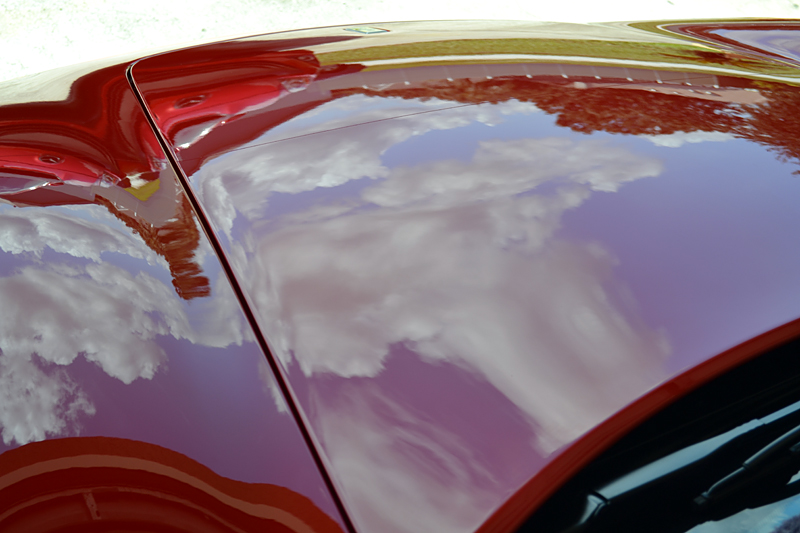
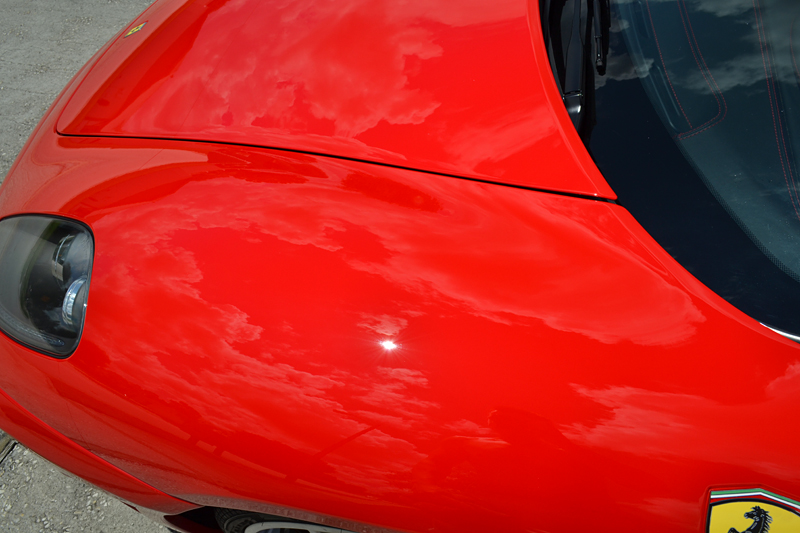
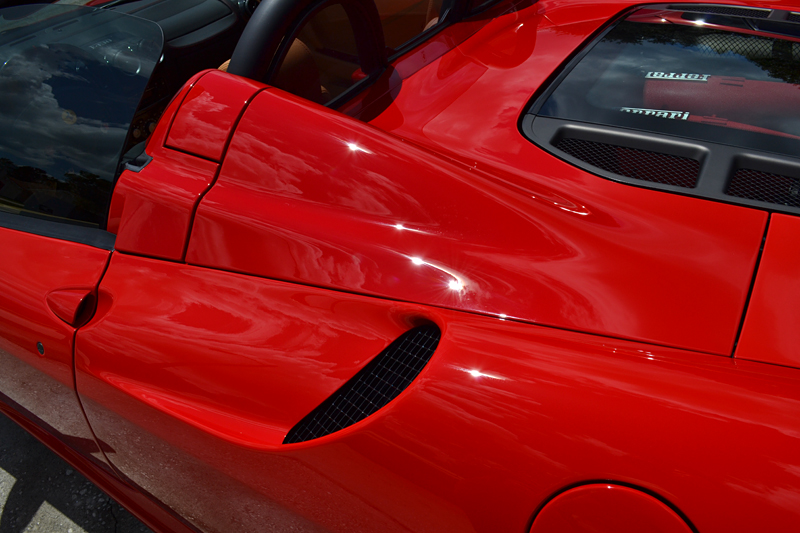
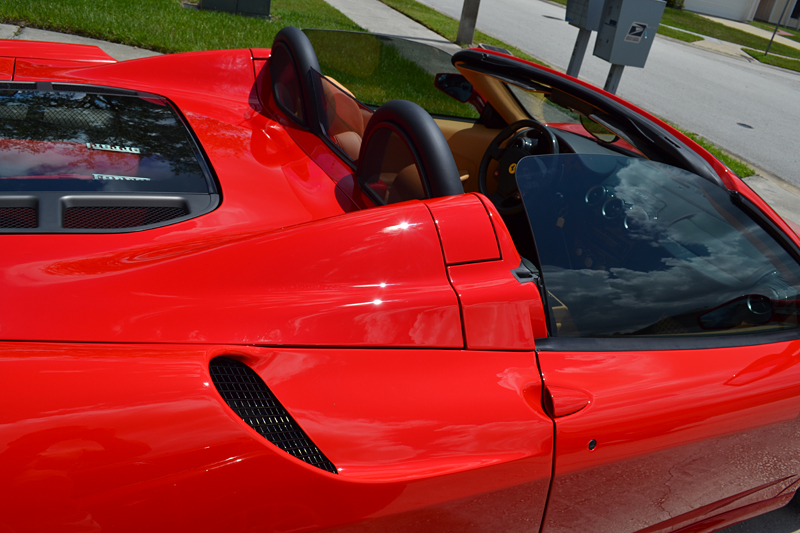
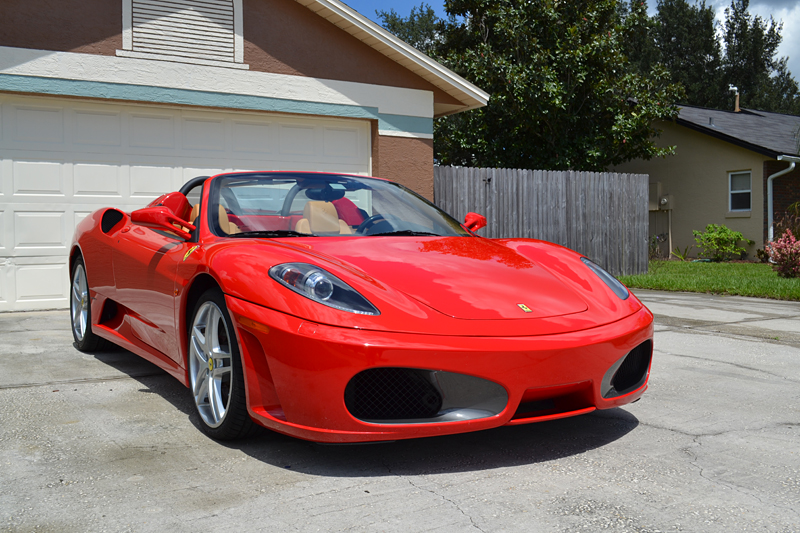
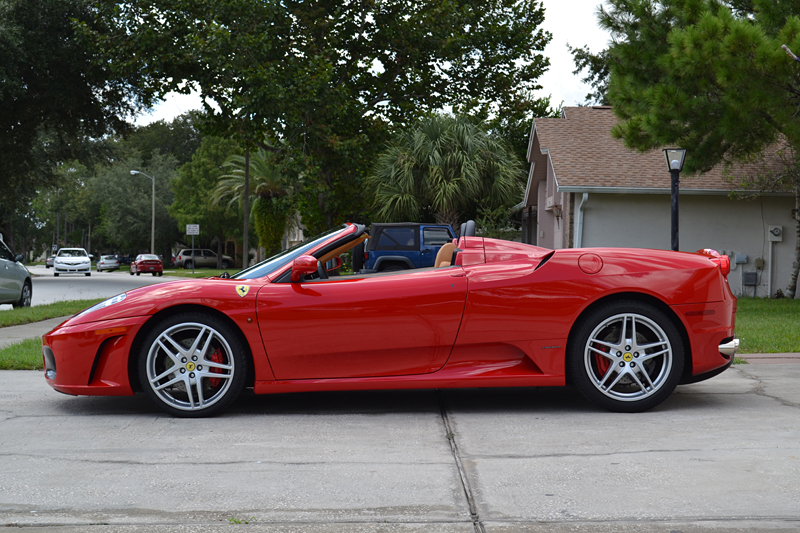
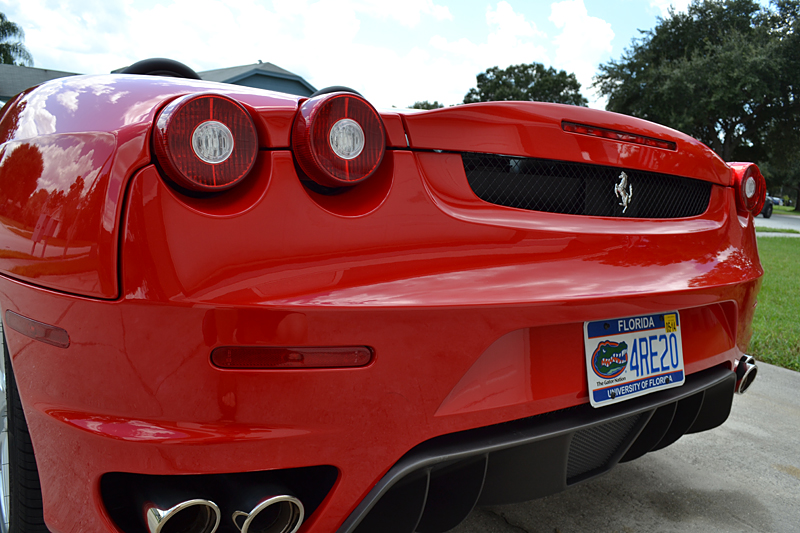
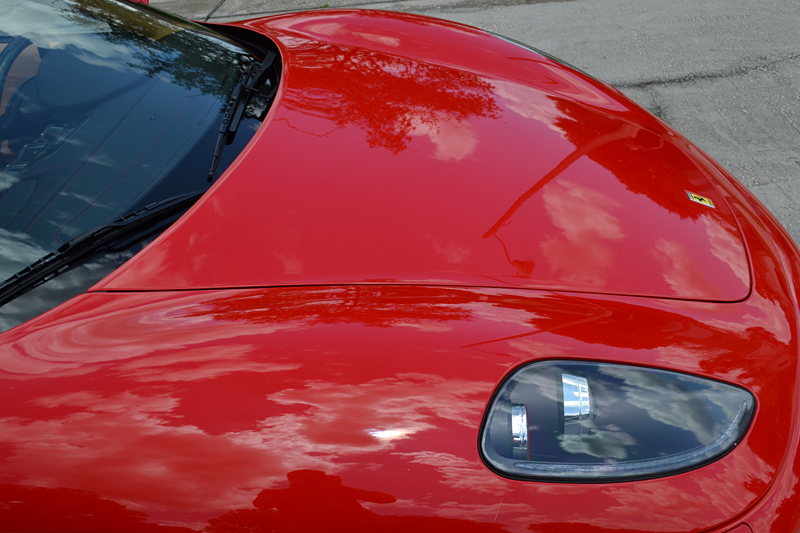
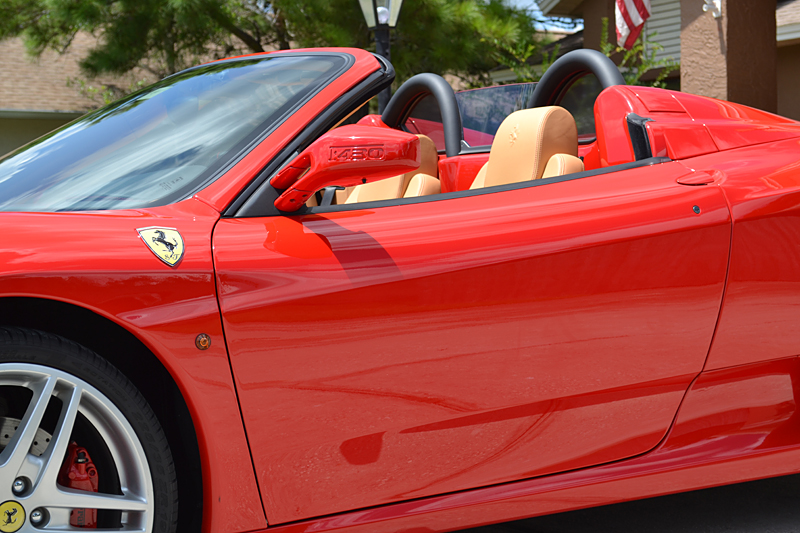
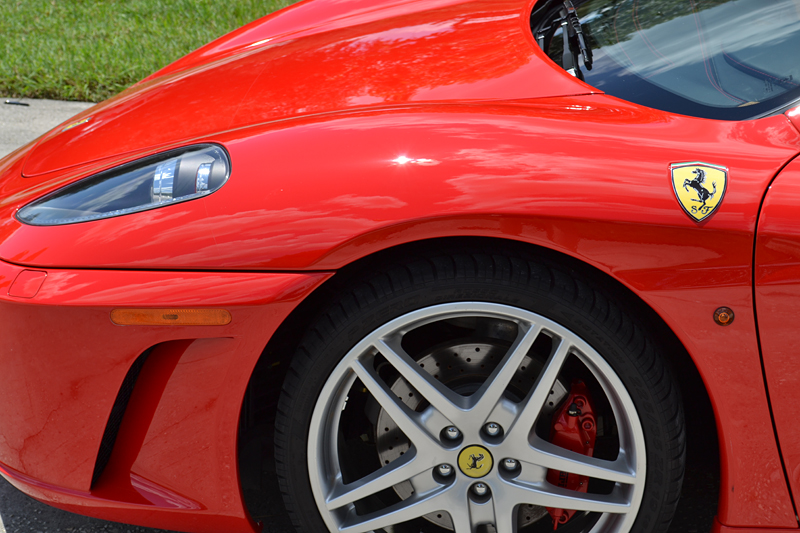
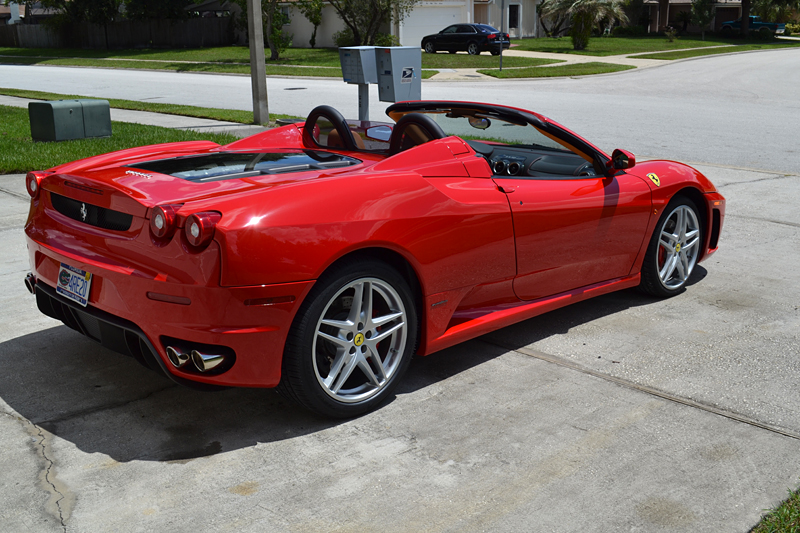
Here are the after photos, in a variety of lighting conditions. Art courtesy of Ferrari, shine courtesy of Wolfgang.

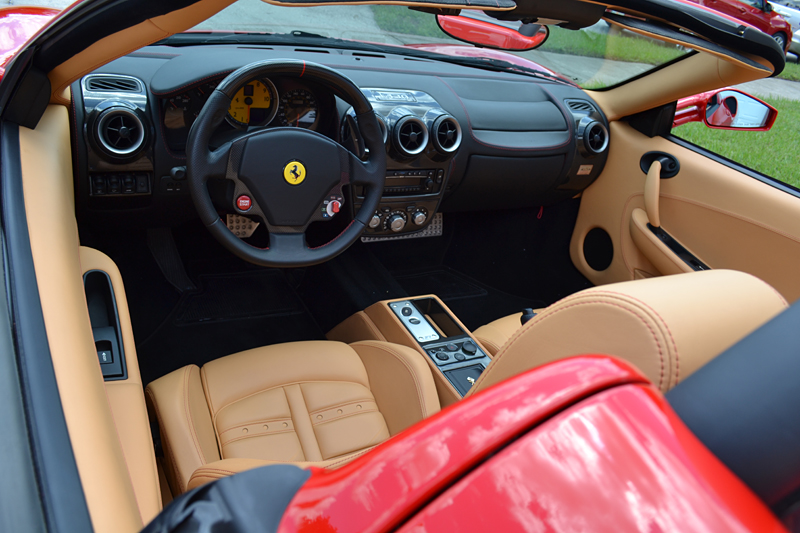
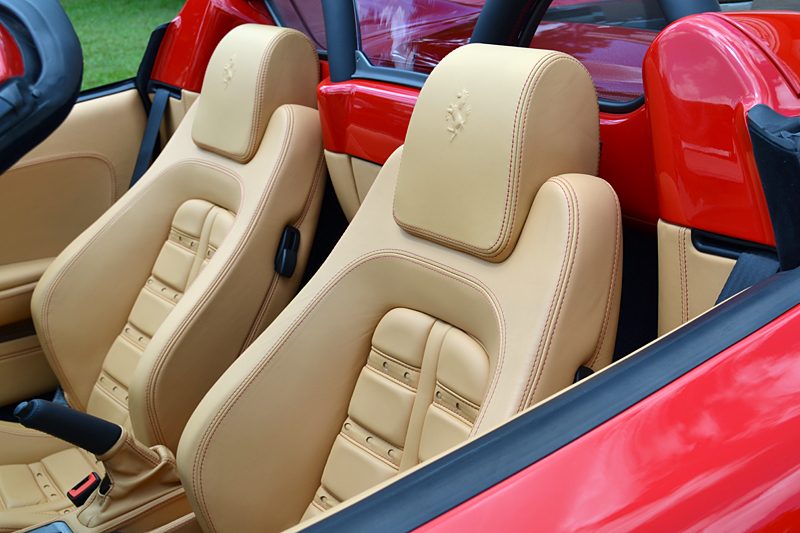
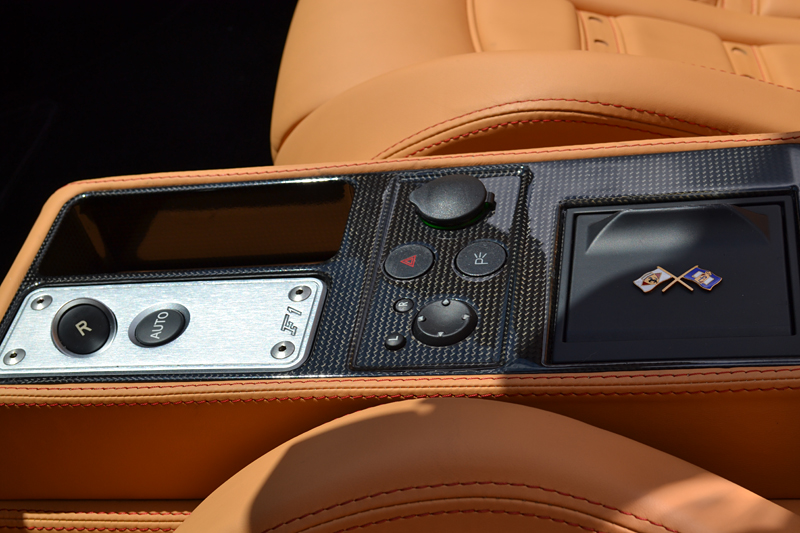
The interior received a full detail and Leatherique treatment (which will be the subject of a separate write up).
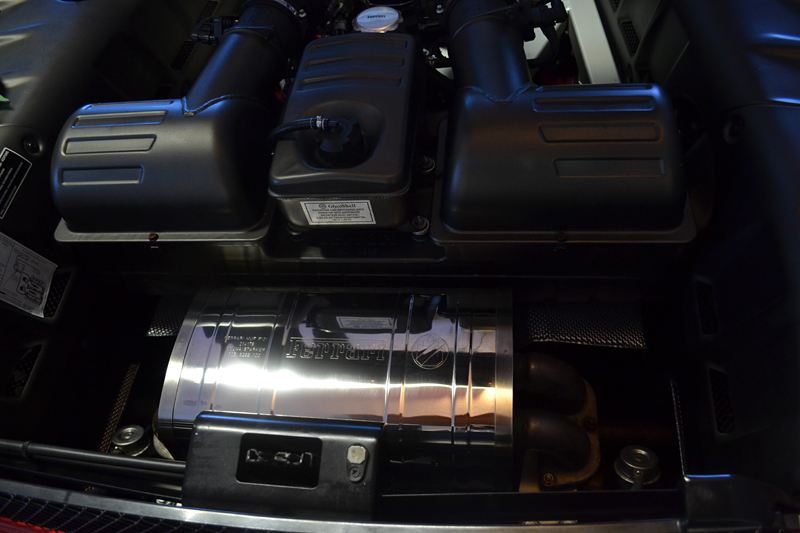
The engine compartment afters.
For the larger areas I used the FLEX PE Rotary with a Gray Finishing Pad.
For tighter areas I used the Tangerine Hydro-Tech 3-inch Pad on the Griot's Garage 3 inch Polisher.
Finally the Ferrari made its way outside for a post-polishing wash. Even under a fine layer of polishing dust, the now brilliant red paint shone brightly.
Wrapping a microfiber bonnet around a an old credit card is a great way to clean the detail areas. The car was washed carefully using the same process in the beginning.
After washing and drying, two coats of RaggTopp Convertible Top Protectant were applied.
To complete the all-Wolfgang detail on the exterior of the paint, I chose to apply two coats of the now-famous Wolfgang Concours Fuzion Estate Wax. Fuzion has a reputation giving blood-pumping hues a high level of color saturation. I wanted this Ferrari too look like it was dripping red.
Wolfgang Fuzion Estate Wax is proof that great-looking premium boutique waxes do not need to be difficult to apply. Simply give a foam applicator a 1/4 turn in the jar to load a small amount.
Apply a very light coat to the paint work.
Then buff off immediately. Do not let Fuzion dry, there is no need. Use a soft microfiber towel, such as the luxurious Chinchilla Microfiber Buffing Cloth, to bring out a unmistakably-wet carnauba shine.
Finally the tires and trim were dressed with Poorboy's excellent Natural Look Dressing.
Here are the after photos, in a variety of lighting conditions. Art courtesy of Ferrari, shine courtesy of Wolfgang.
The interior received a full detail and Leatherique treatment (which will be the subject of a separate write up).
The engine compartment afters.

Thread
Thread Starter
Forum
Replies
Last Post
umnitza
Vendor Classifieds
1
Nov 3, 2015 02:58 PM