Ferrari 288 GTO: Full correction and restorative detail using Scholl and Wolf's
 09-30-2013, 05:50 AM
#1
Former Vendor
Thread Starter

Join Date: Aug 2013
Location: Stuart
Posts: 138
Likes: 0
Received 0 Likes
on
0 Posts
My Ride: Daily Driver
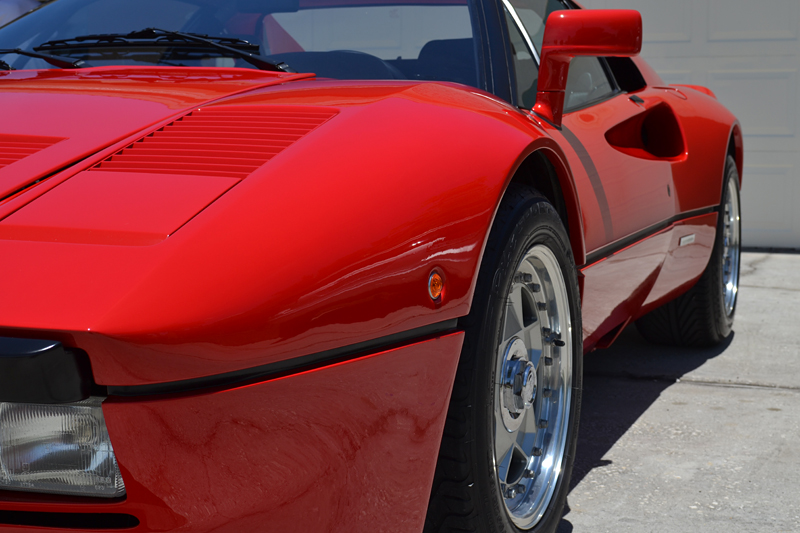
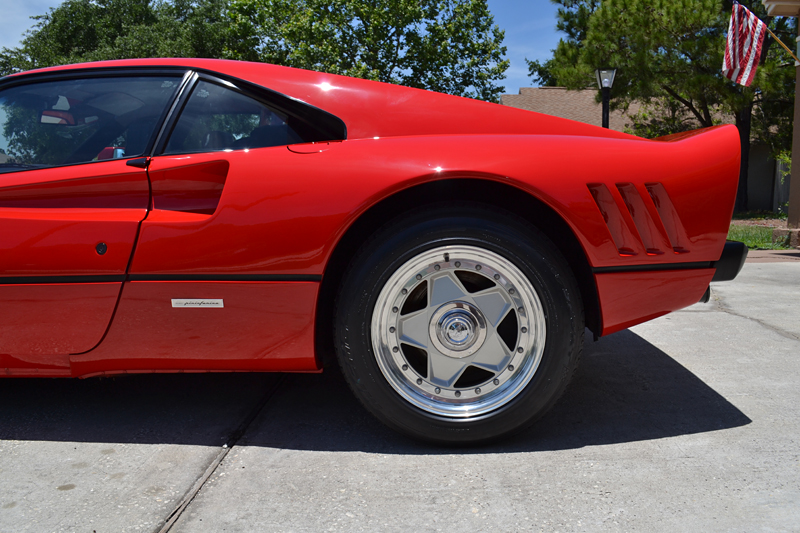
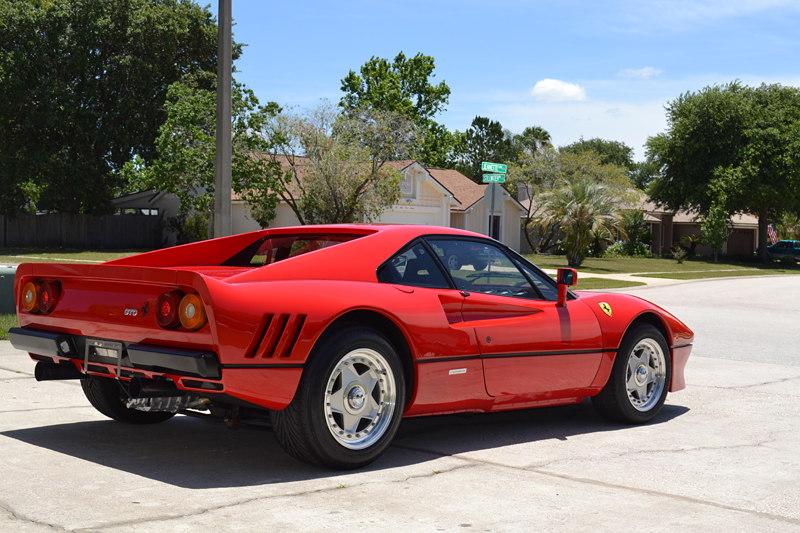
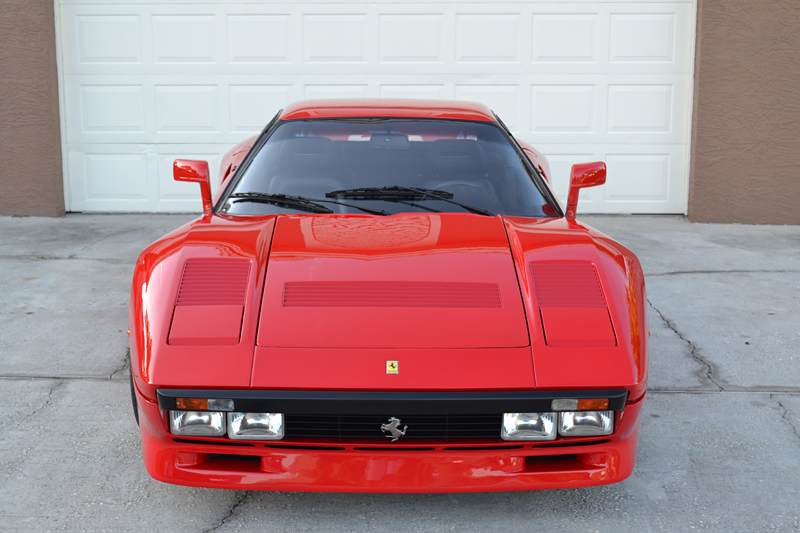
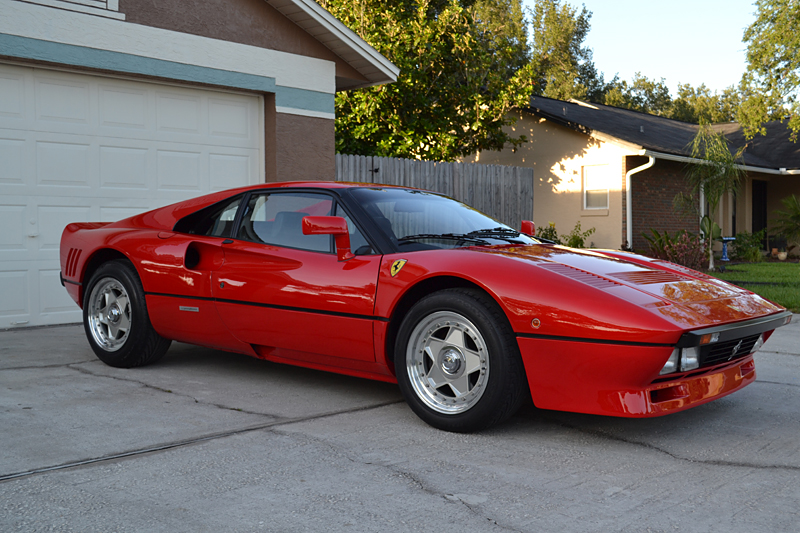
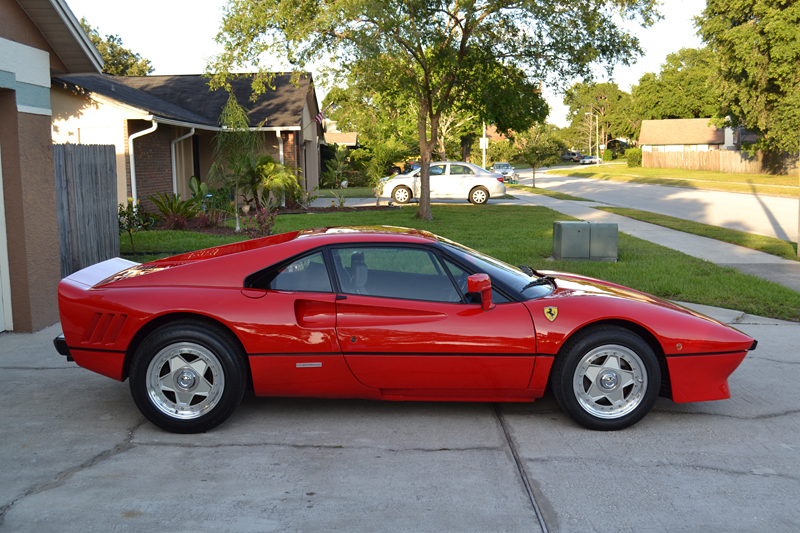
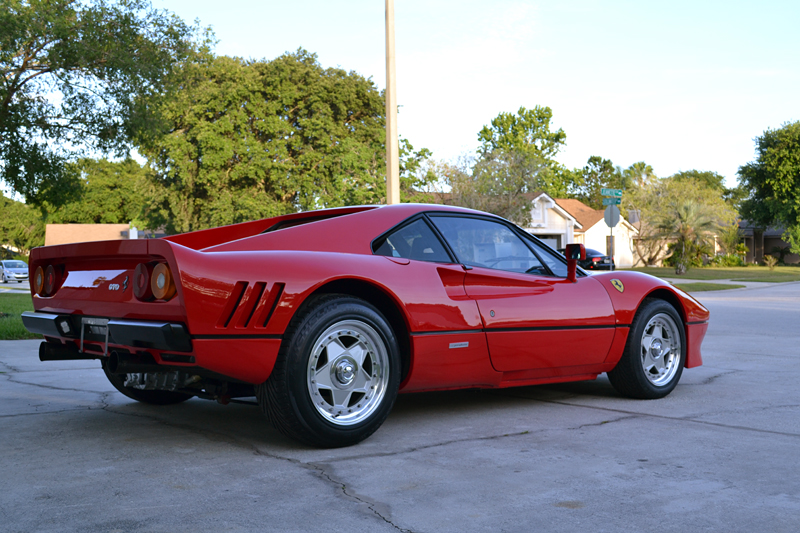
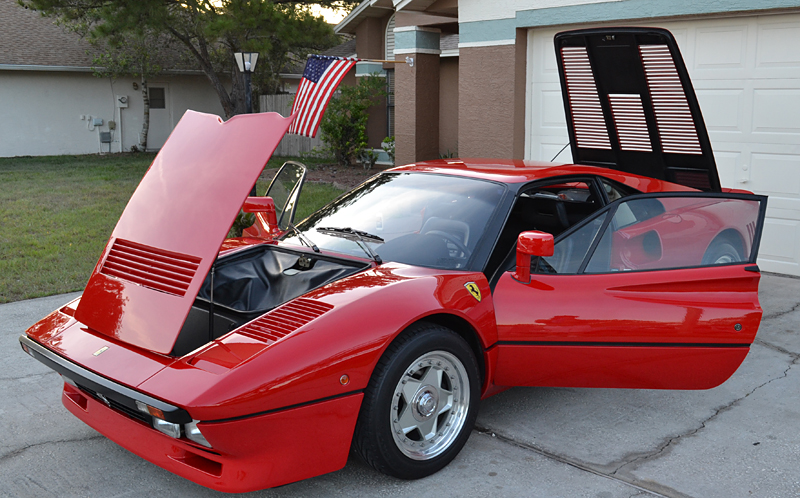
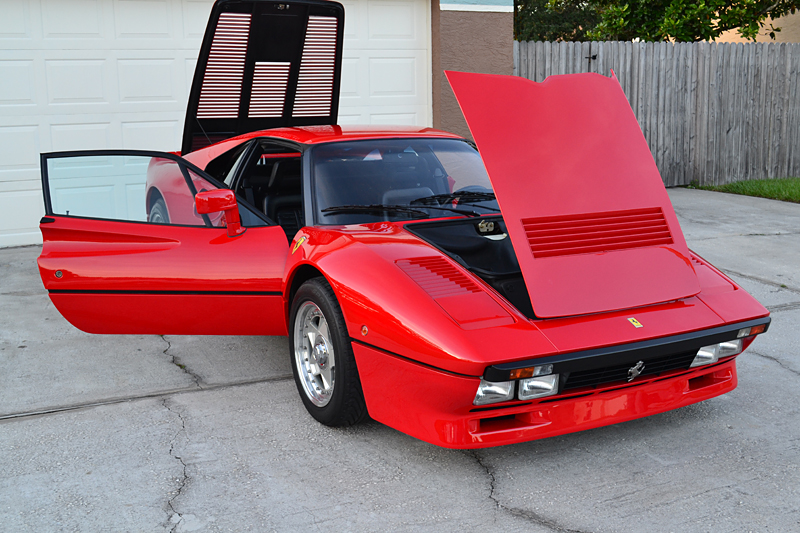
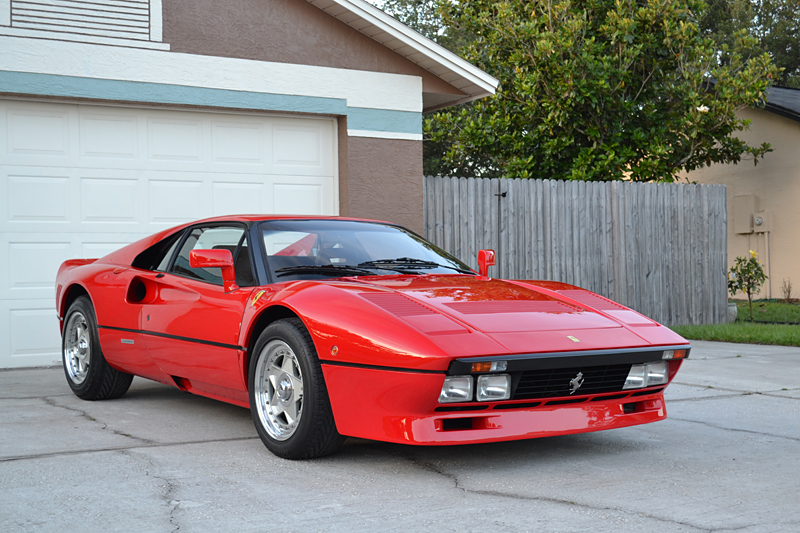
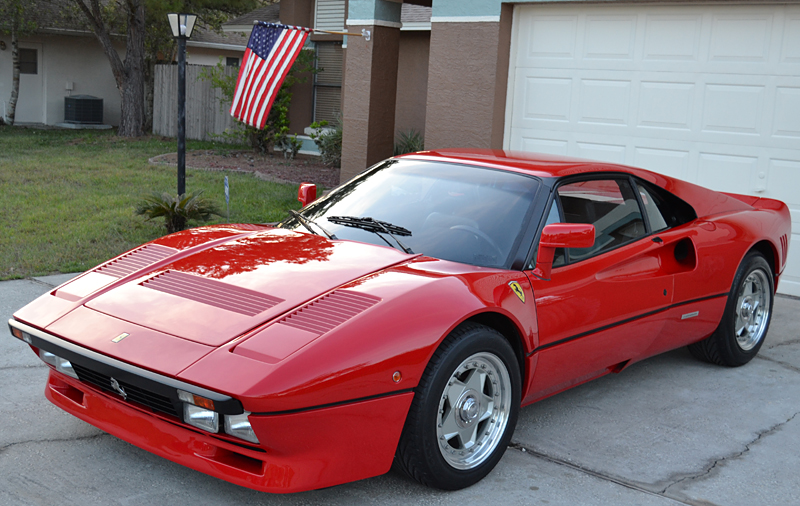
The Ferrari 288 GTO is a landmark car, and a rare one. This example, one of only 272 produced, remains a true example of Ferrari's passion for race car technology in a hand-built road variant. In a time when Corvettes had 225 horsepower, the GTO had (an underrated) 400. When lightweight sports cars pushed 4000 pounds, the GTO was around 2500.
This hand built super car featured a composite body made of kevlar fiber, aluminum, or fiberglass. The value of these cars have skyrocketed in the last 2 years, with this example being worth 1.43 million dollars. It was my mission to make it look like the million dollar Ferrari that it is.
Initial Condition:
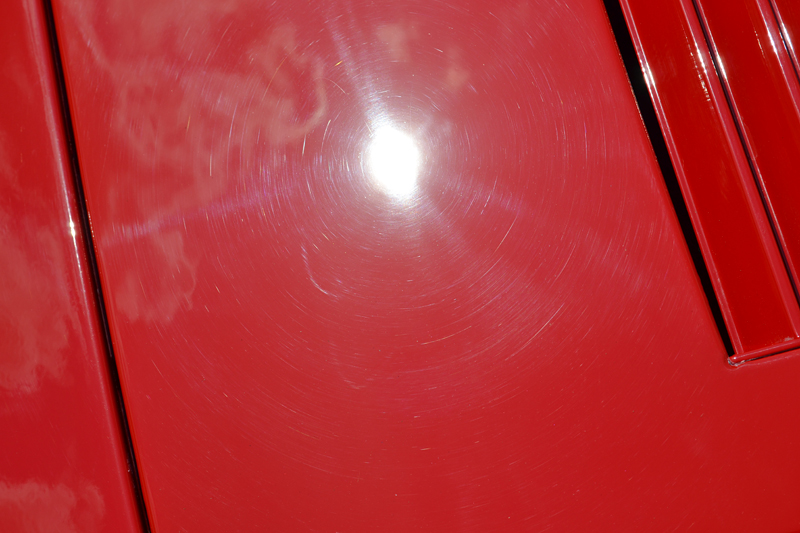
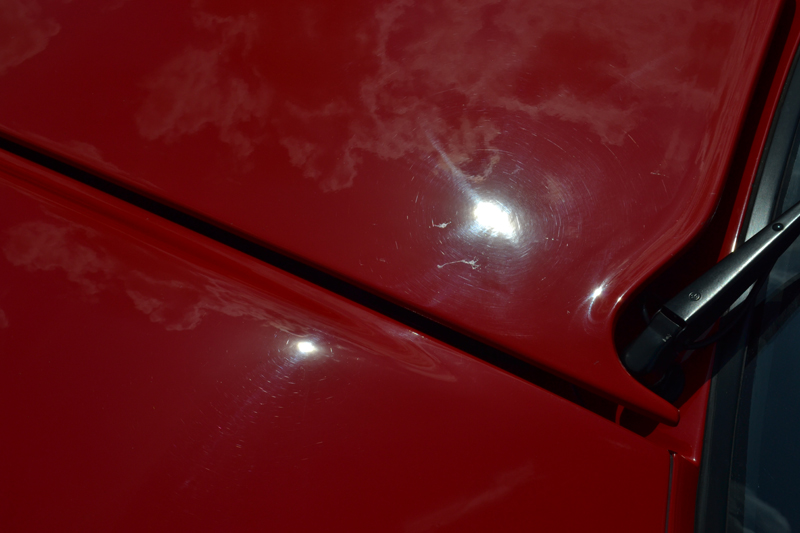
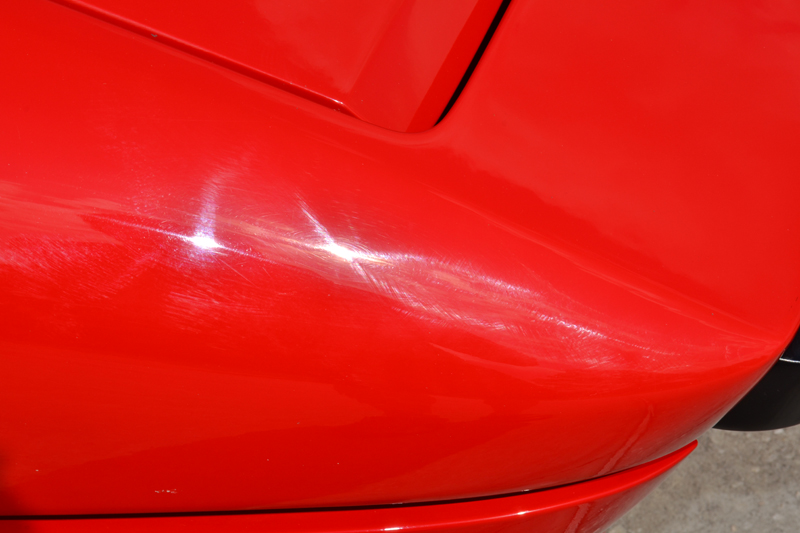
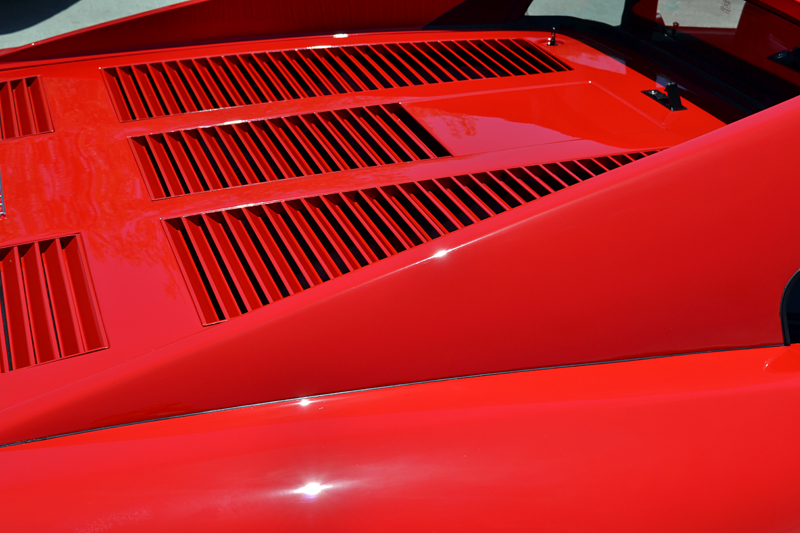
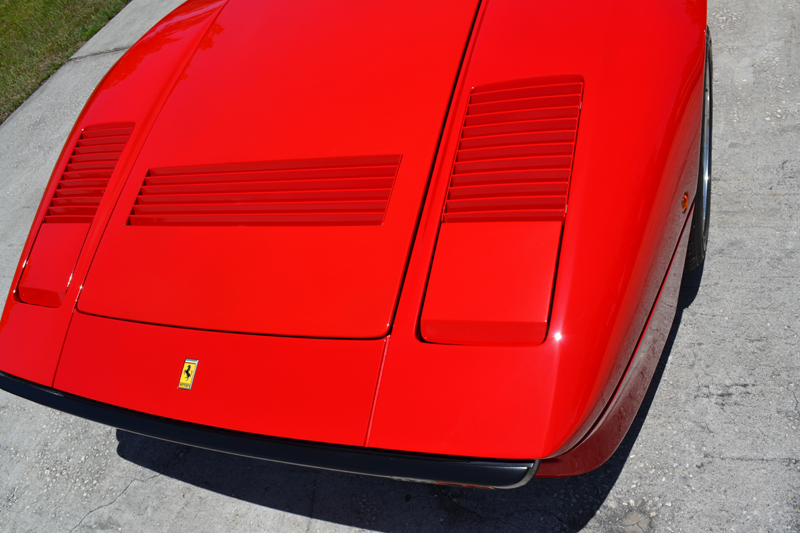
With only 4000 miles (6000 km) on the clock, this GTO is very original. However 30 years have passed since its creation and the tell tale marks of improper handling were evident: scratches, swirl marks, oxidation, water marks and more:
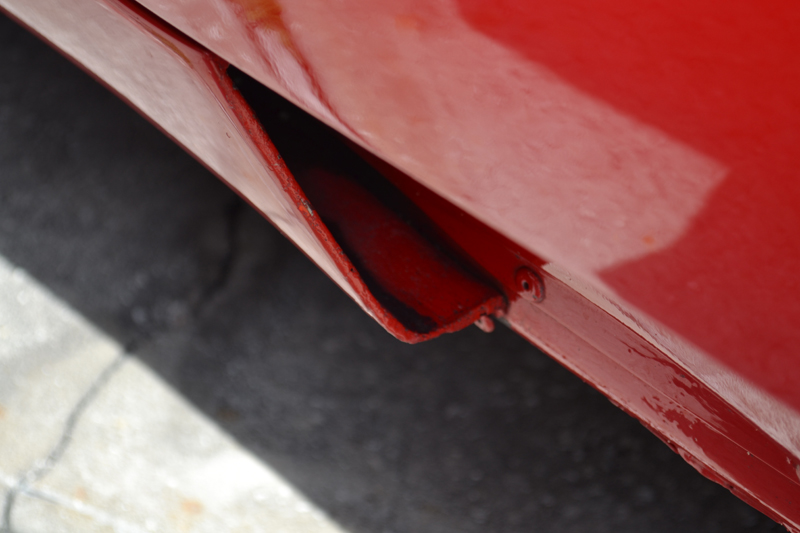
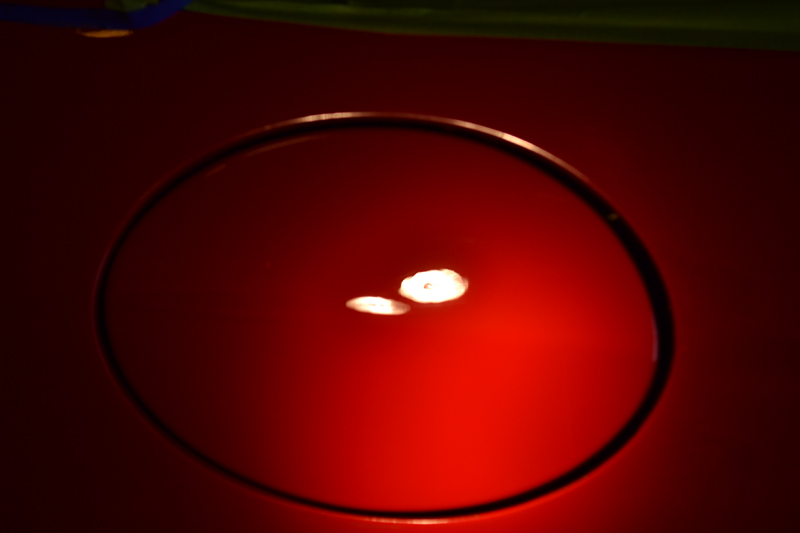
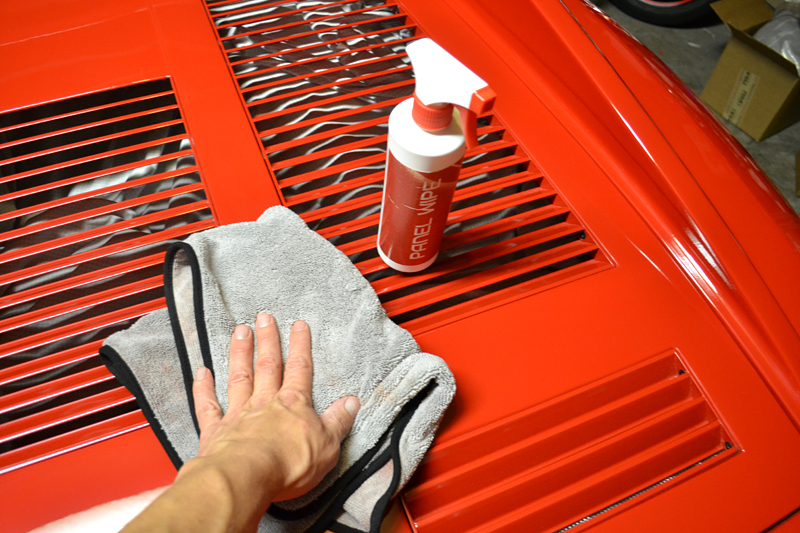
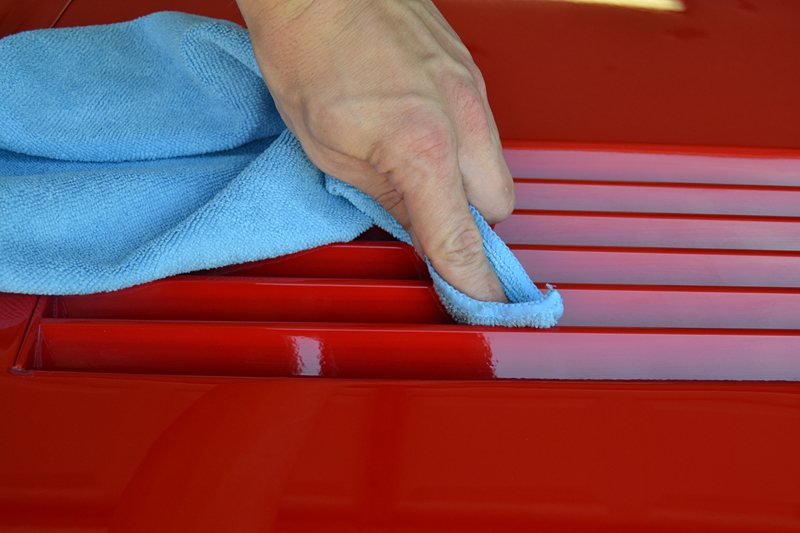
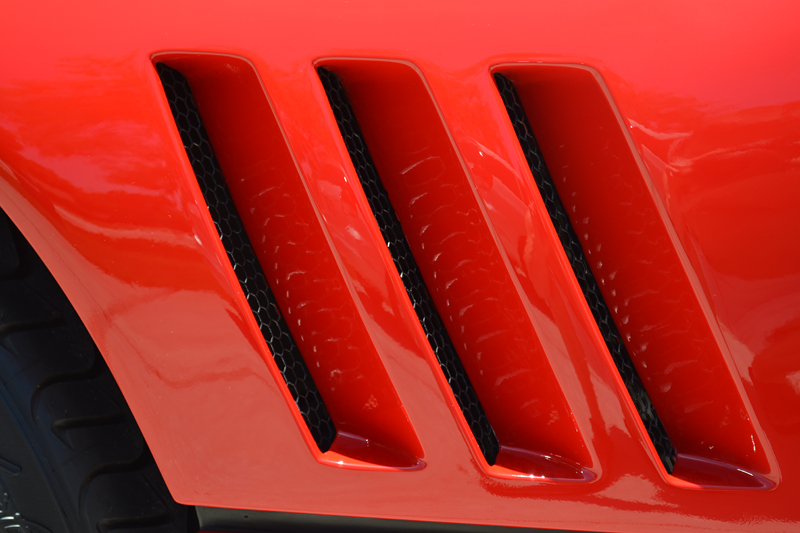
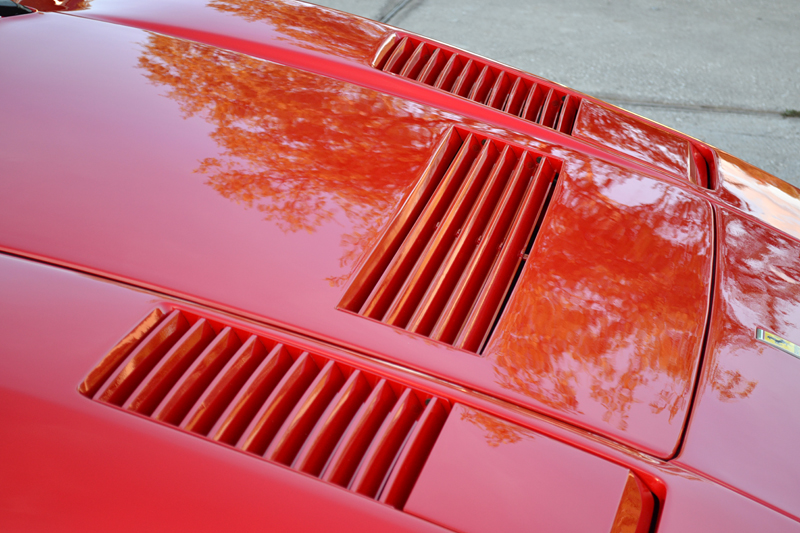
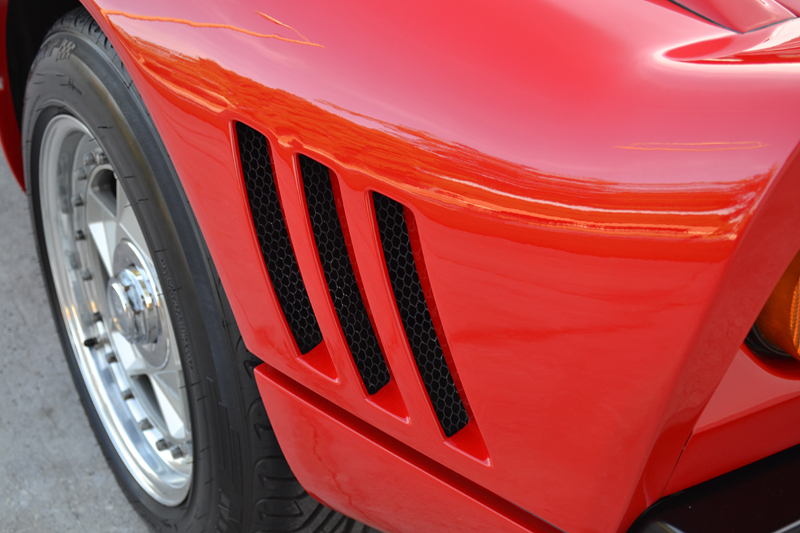
Grease and road pitch had accumulated into the side vents.
Buffer trails:
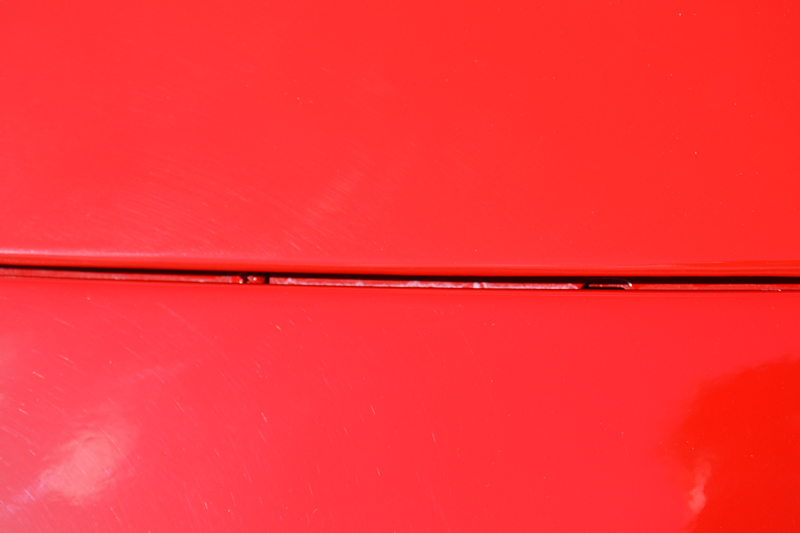
Wax and compound lined every jamb and body seam.
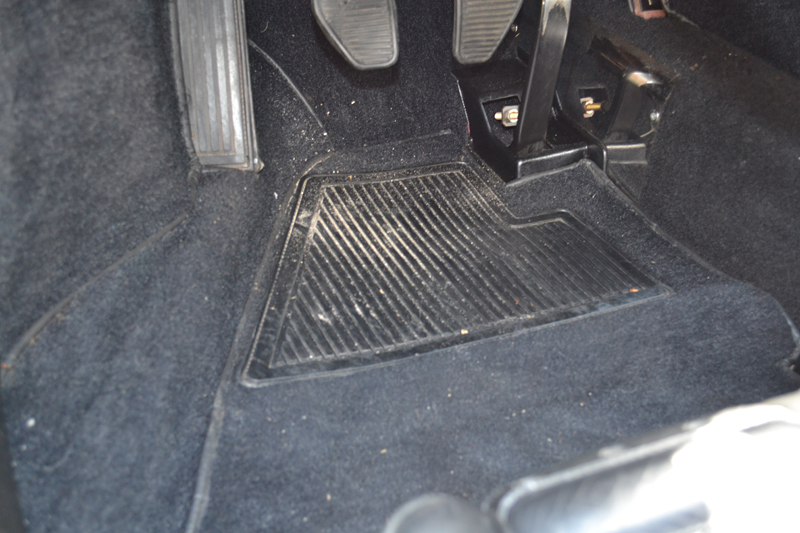
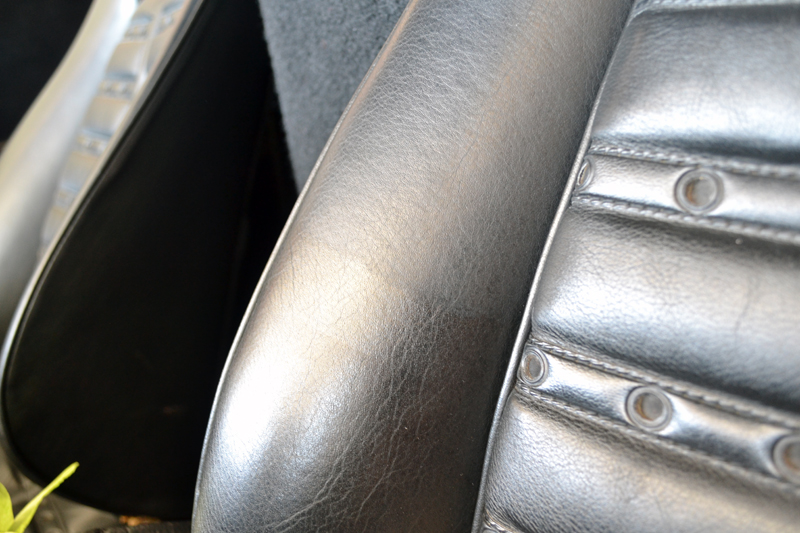
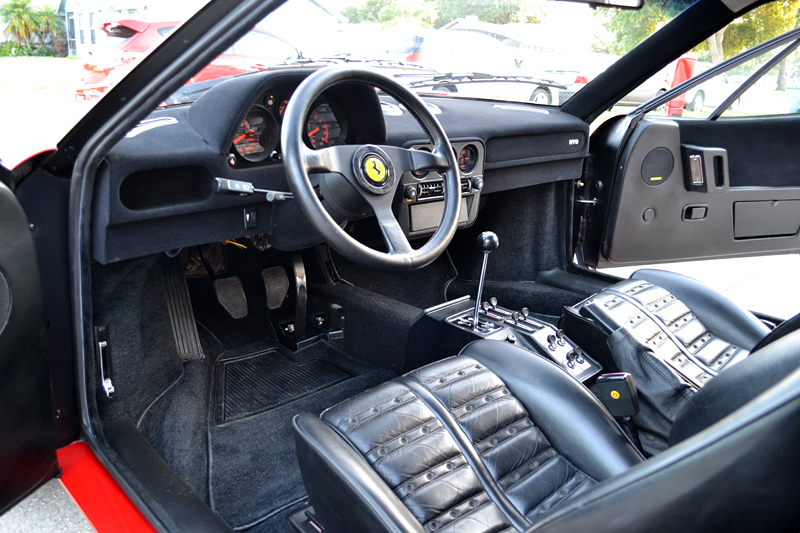
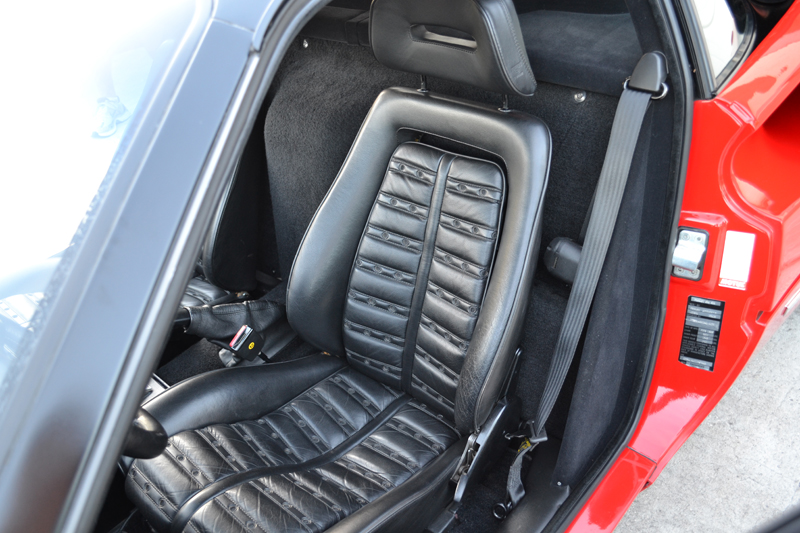
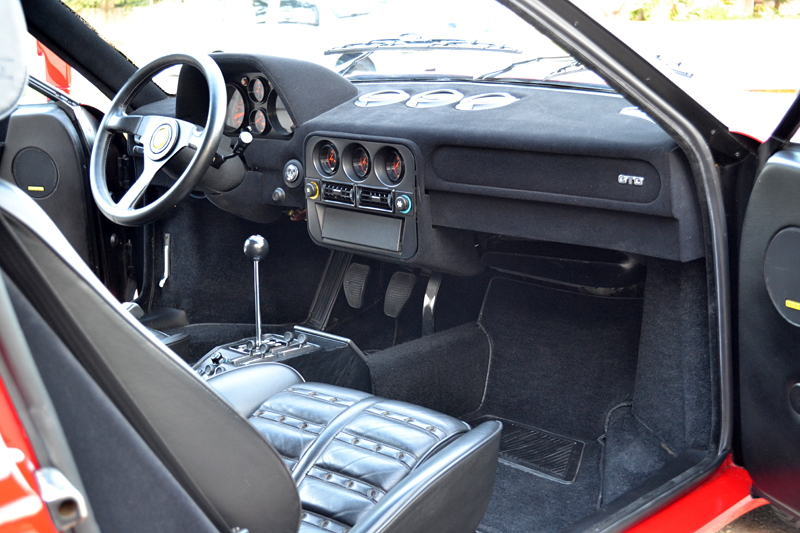
Despite some minor cracking in the leather seats, the original interior was in great shape. Just a little soiling from being moved around:
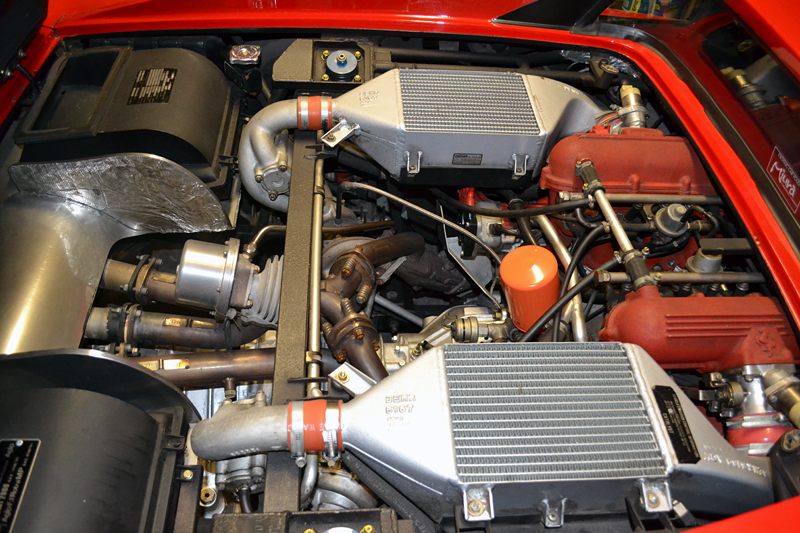
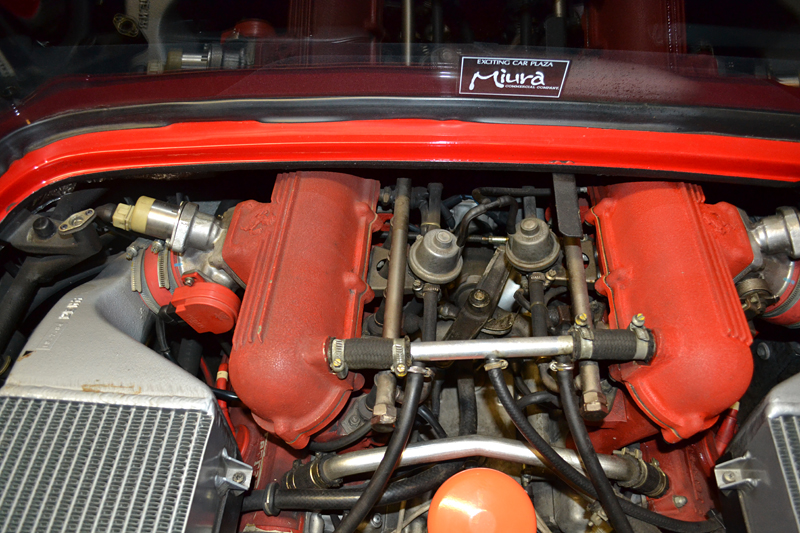
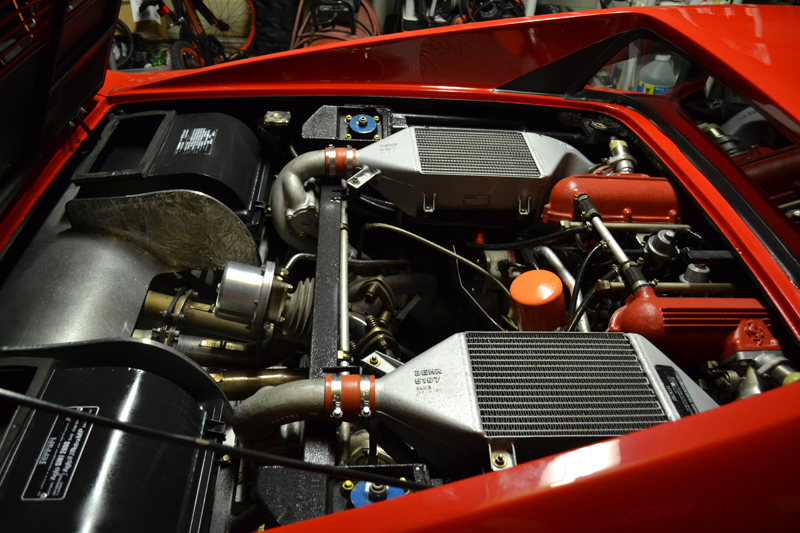
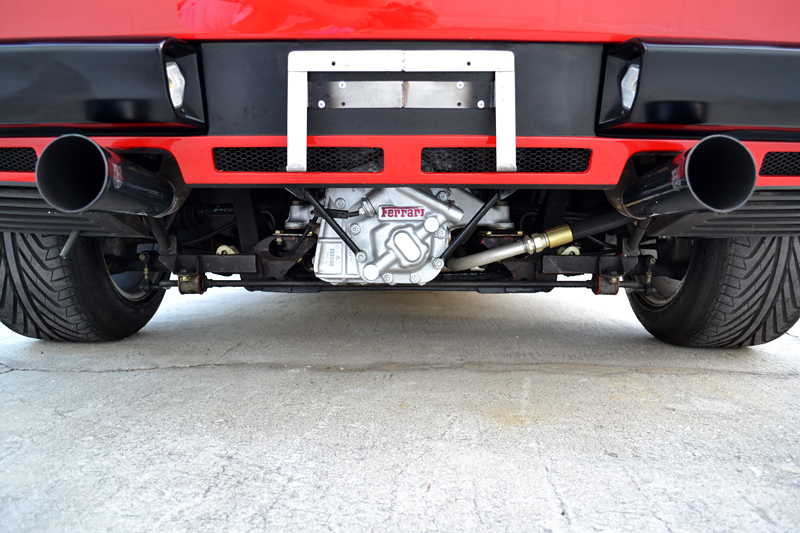
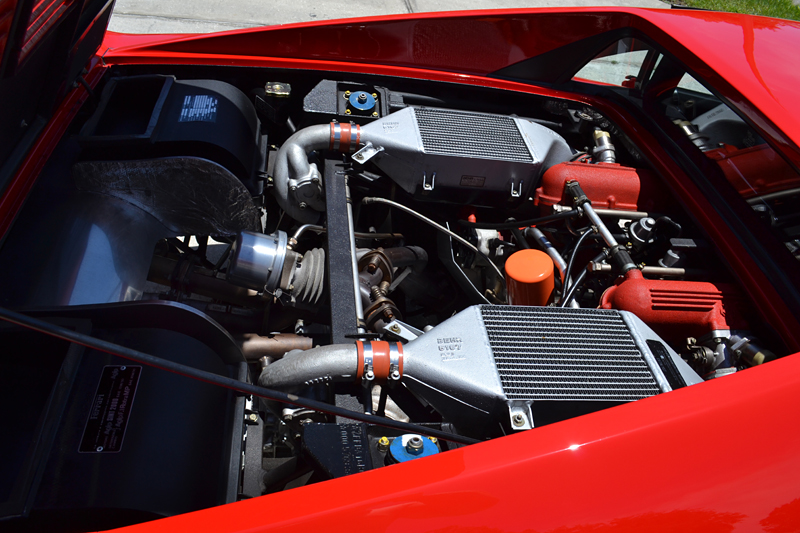
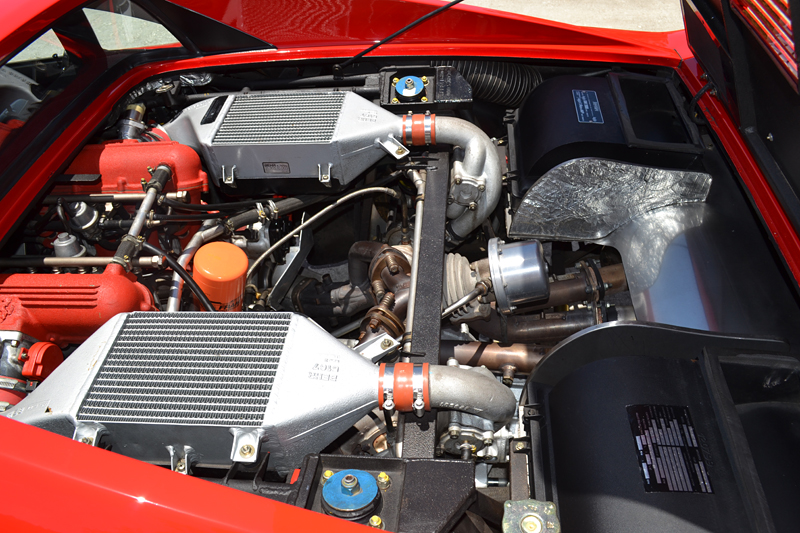
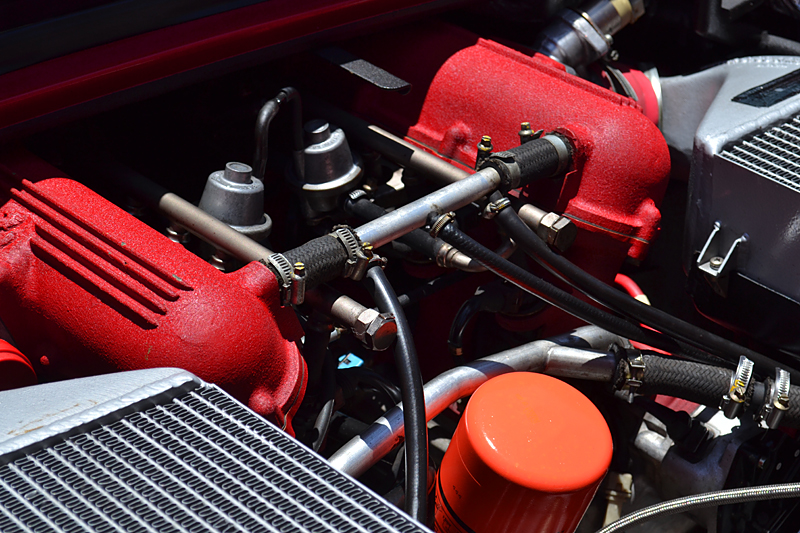
The engine was another story, as 30 years of grime, grease, and soil was everywhere! Ferrari's famous 2.8L Twin Turbo V8 needed some major attention and time.
Engine Detailing:
Products Used:
Mytee VS1500 Fiberbird Vapor Steamer
BLACKFIRE All-In-One APC
All Purpose & Wheel Microfiber Towels
Menzerna Polishing Cream Metal Polish
Sonus Trim & Motor Kote
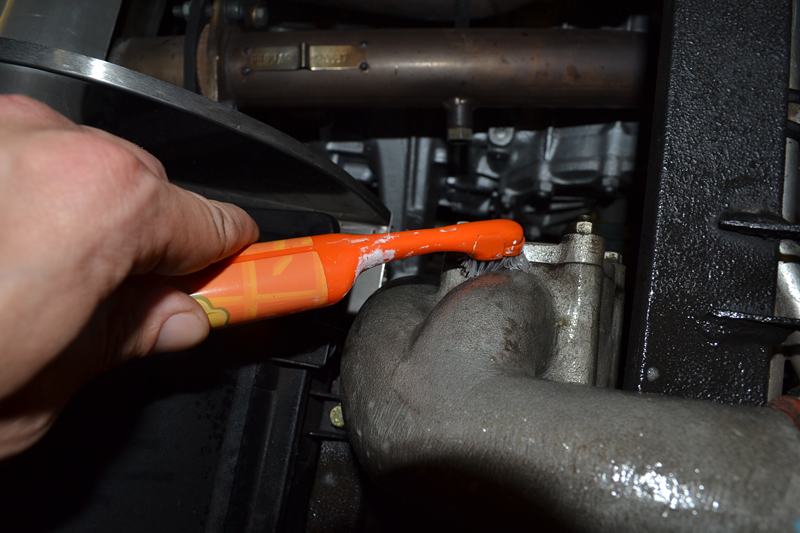
An old toothbrush (Sponge Bob)
Old cotton towels
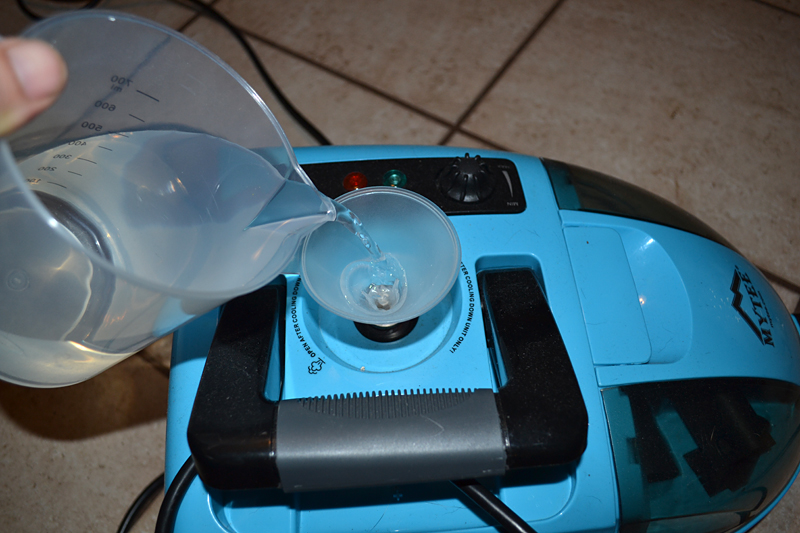
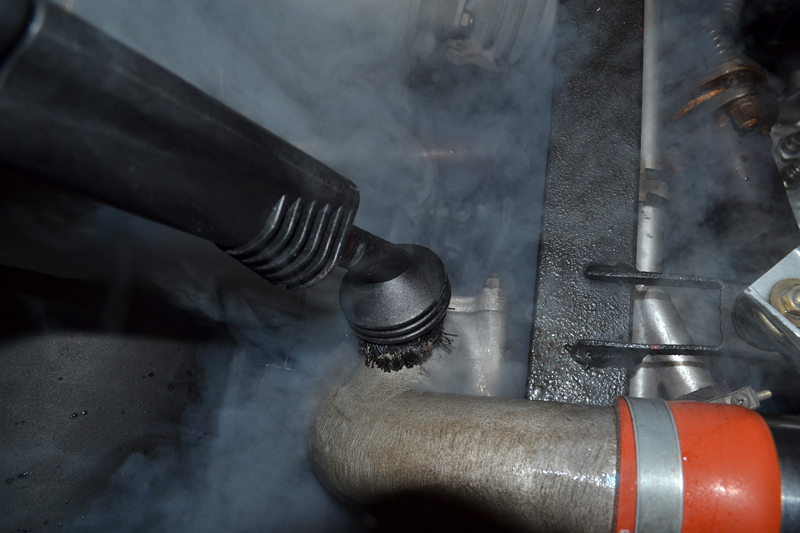
The Mytee Firebird is an easy-to-handle steamer that is big on power and cleaning ability. It is very easy-to-use as well. Simply add deionized water into the machine and turn on. It super heats the water into a grease killing steam.
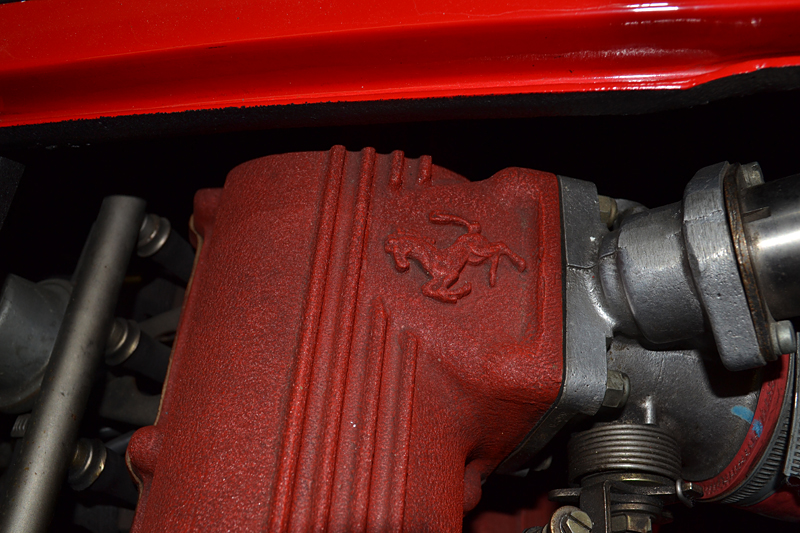
The entire engine was covered in a greasy soot. It was very evident on the red colored intake covers:
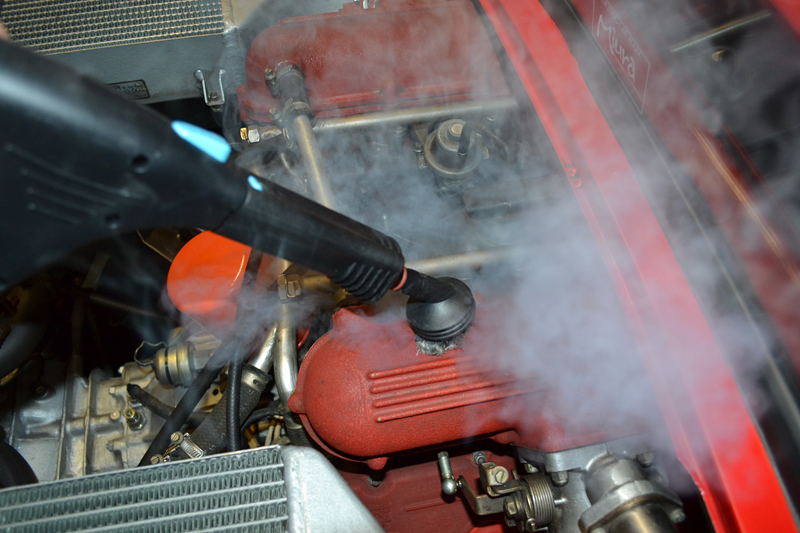
With the nylon brush attachment, I gently agitated the surface while spraying steam.
A light wipe with an old terry cloth towel....
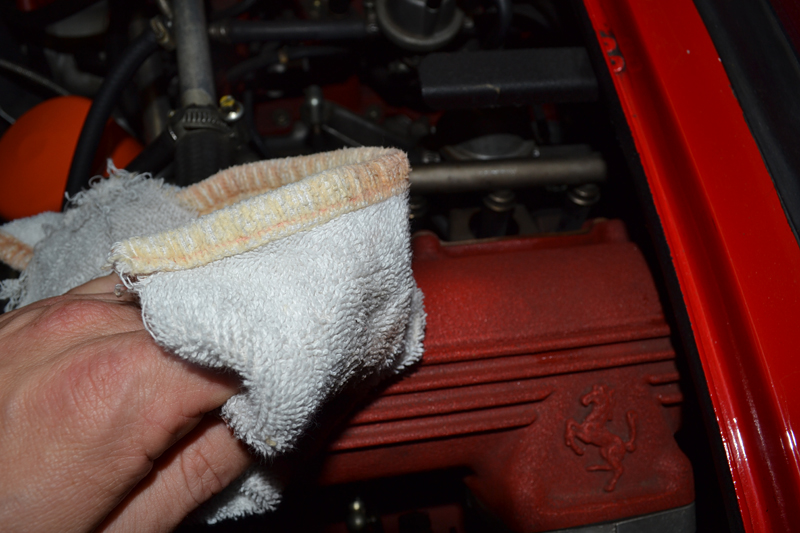
And the resulting "clean" spot:
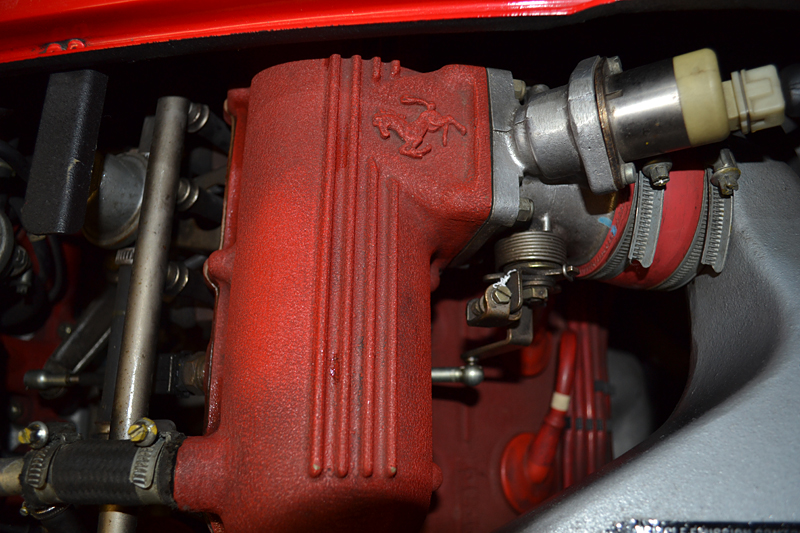
The right-side cover after cleaning...
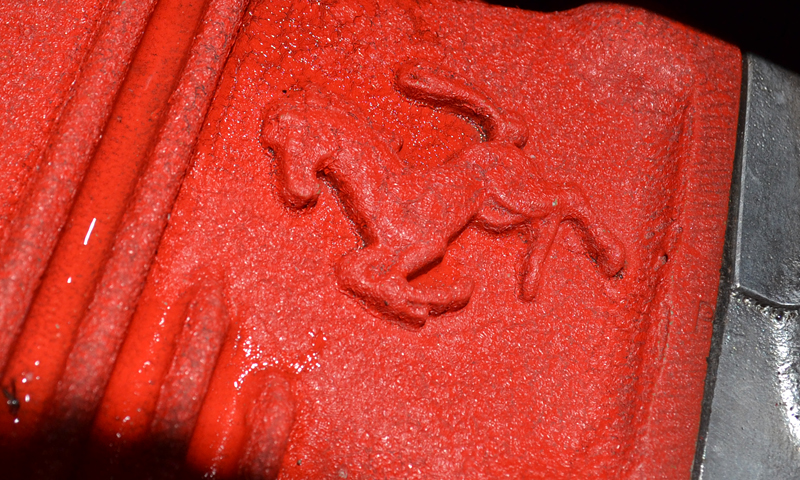
For stubborn spots (such as round the horse and in the ribs of the cover) the surface was lightly brushed with a 4:1 diluted mixtured of BLACKFIRE All-In-One APC before steaming.
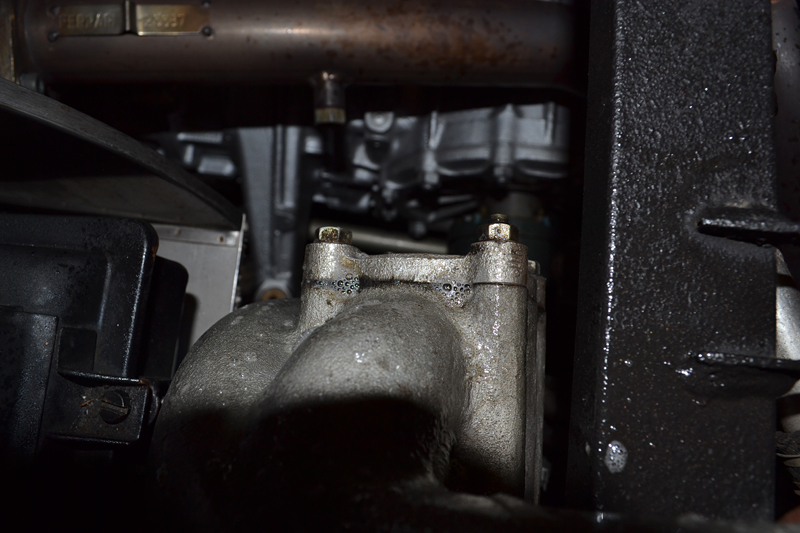
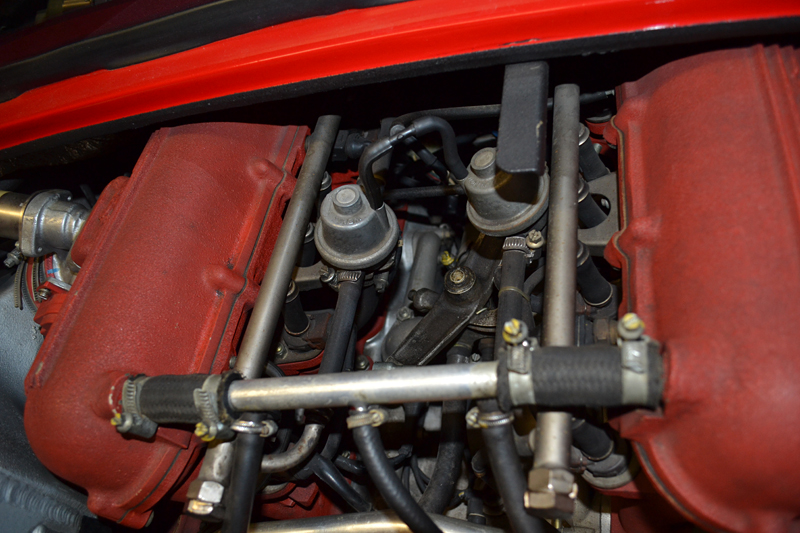
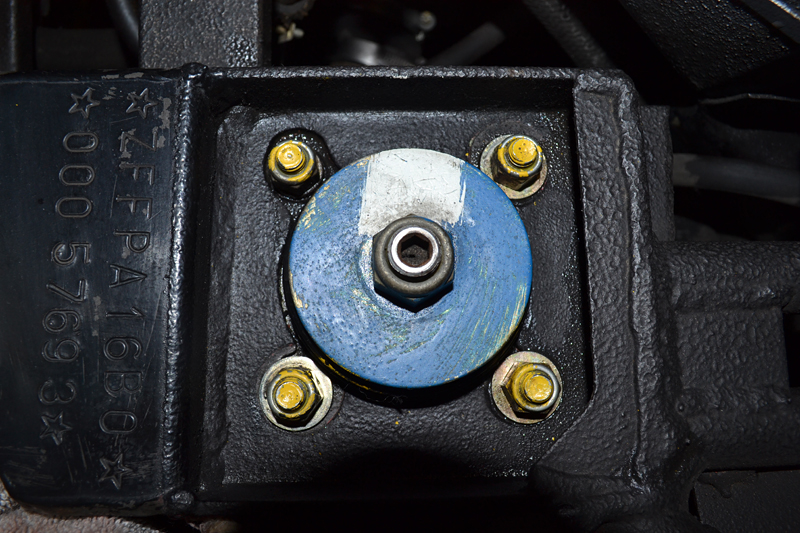
Looking at these suspension mounts, it is clear to see the grime in the valley, around each bolt, and on the head of each bolt.
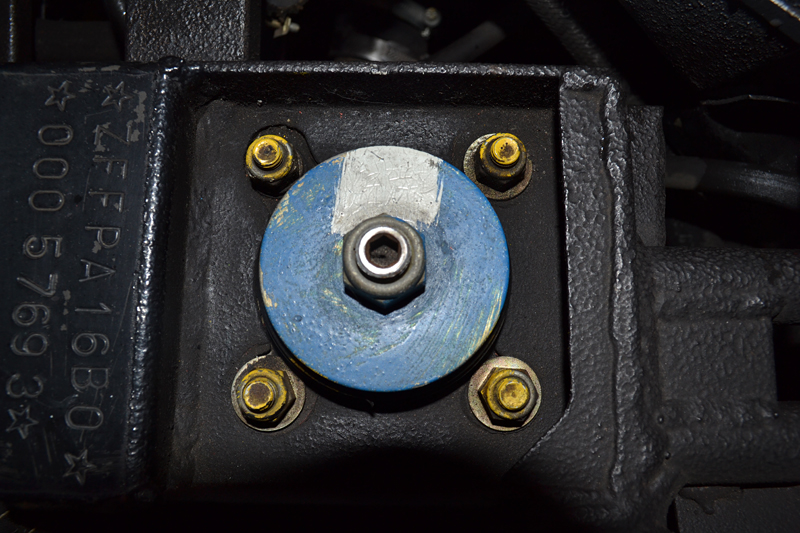
After carefully cleaning.
The throttle linkage before...

And after...

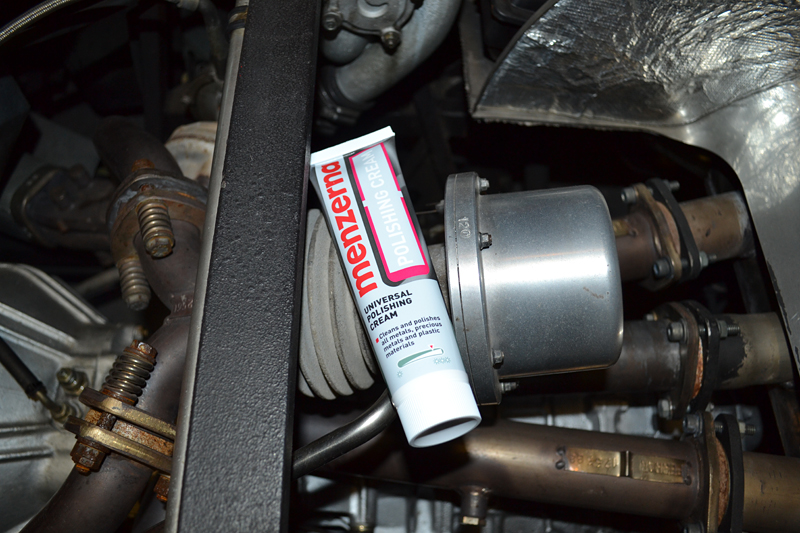
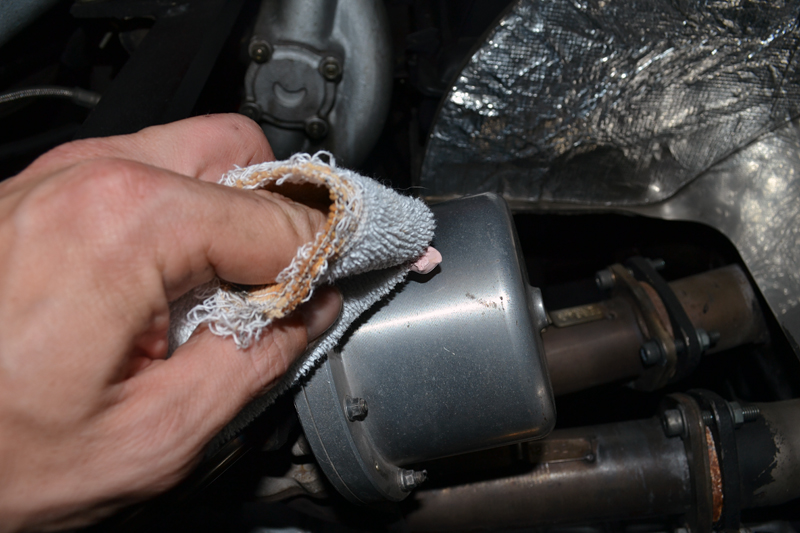
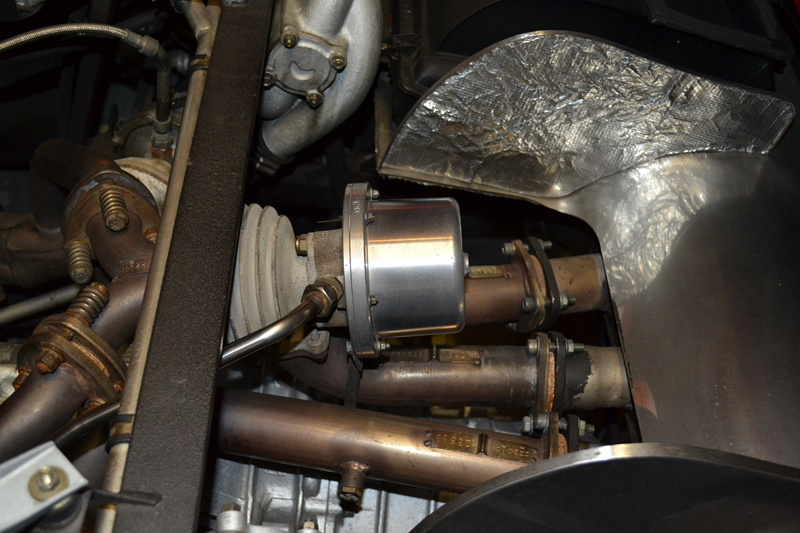
Metal pieces where lightly polished with Menznera's fast-acting Polishing Cream.
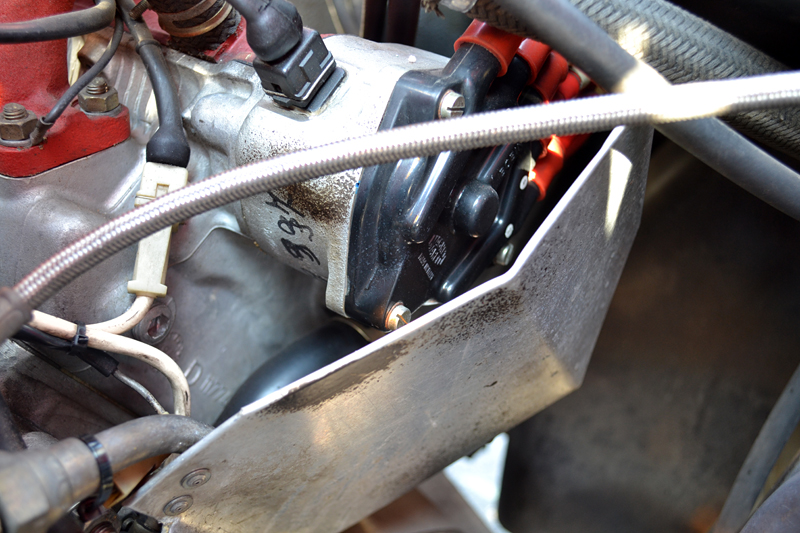
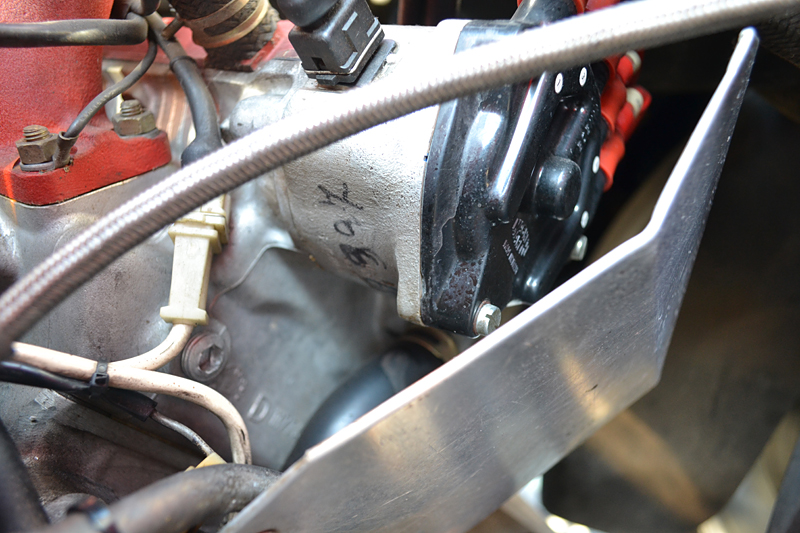
This picture really shows the amount of cleaning (and care) required. Many hand built Ferrari's have numerous paint marks and marker scripts that were scribbled on as the car was built. Cleaning around these marks, while removing all soiling, is time consuming... However, it is important to maintain the car's history.
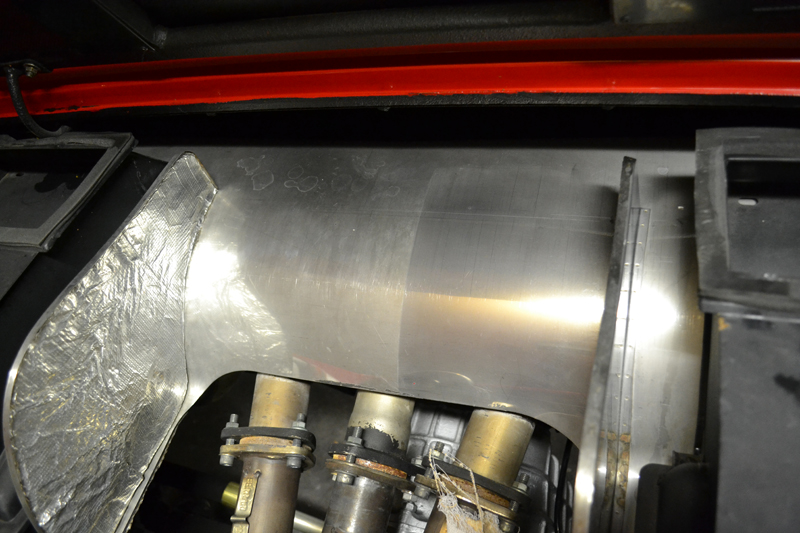
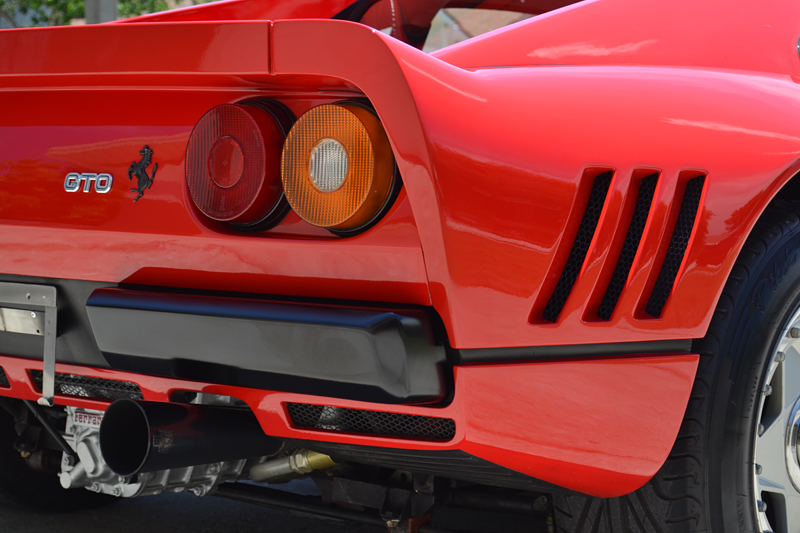
The last thing that needed a light clean up was the rear shielding. This should have a shiny (although not chrome like!) appearance void of any stains, water spots, or oxidation.
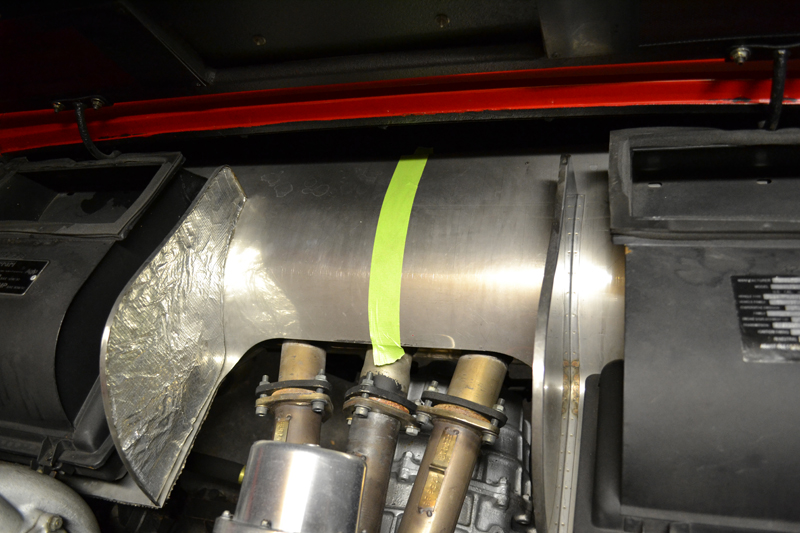
Once again Menzerna Polishing Cream was used, this time with a Griot's Garage 3-Inch Polisher and Meguiar's DA Microfiber Cutting Disk. In order to AVOID creating too much gloss I purposely short cycled the polish and used the aggressive microfiber disk. A longer-cycle and shorter pad would have resulted in a finish with too much gloss (and thus detract from the vehicle's originality).

This hand built super car featured a composite body made of kevlar fiber, aluminum, or fiberglass. The value of these cars have skyrocketed in the last 2 years, with this example being worth 1.43 million dollars. It was my mission to make it look like the million dollar Ferrari that it is.
Initial Condition:
With only 4000 miles (6000 km) on the clock, this GTO is very original. However 30 years have passed since its creation and the tell tale marks of improper handling were evident: scratches, swirl marks, oxidation, water marks and more:
Grease and road pitch had accumulated into the side vents.
Buffer trails:
Wax and compound lined every jamb and body seam.
Despite some minor cracking in the leather seats, the original interior was in great shape. Just a little soiling from being moved around:
The engine was another story, as 30 years of grime, grease, and soil was everywhere! Ferrari's famous 2.8L Twin Turbo V8 needed some major attention and time.
Engine Detailing:
Products Used:
Mytee VS1500 Fiberbird Vapor Steamer
BLACKFIRE All-In-One APC
All Purpose & Wheel Microfiber Towels
Menzerna Polishing Cream Metal Polish
Sonus Trim & Motor Kote
An old toothbrush (Sponge Bob)
Old cotton towels
The Mytee Firebird is an easy-to-handle steamer that is big on power and cleaning ability. It is very easy-to-use as well. Simply add deionized water into the machine and turn on. It super heats the water into a grease killing steam.
The entire engine was covered in a greasy soot. It was very evident on the red colored intake covers:
With the nylon brush attachment, I gently agitated the surface while spraying steam.
A light wipe with an old terry cloth towel....
And the resulting "clean" spot:
The right-side cover after cleaning...
For stubborn spots (such as round the horse and in the ribs of the cover) the surface was lightly brushed with a 4:1 diluted mixtured of BLACKFIRE All-In-One APC before steaming.
Looking at these suspension mounts, it is clear to see the grime in the valley, around each bolt, and on the head of each bolt.
After carefully cleaning.
The throttle linkage before...
And after...
Metal pieces where lightly polished with Menznera's fast-acting Polishing Cream.
This picture really shows the amount of cleaning (and care) required. Many hand built Ferrari's have numerous paint marks and marker scripts that were scribbled on as the car was built. Cleaning around these marks, while removing all soiling, is time consuming... However, it is important to maintain the car's history.
The last thing that needed a light clean up was the rear shielding. This should have a shiny (although not chrome like!) appearance void of any stains, water spots, or oxidation.
Once again Menzerna Polishing Cream was used, this time with a Griot's Garage 3-Inch Polisher and Meguiar's DA Microfiber Cutting Disk. In order to AVOID creating too much gloss I purposely short cycled the polish and used the aggressive microfiber disk. A longer-cycle and shorter pad would have resulted in a finish with too much gloss (and thus detract from the vehicle's originality).
 09-30-2013, 05:51 AM
#2
Former Vendor
Thread Starter
Join Date: Aug 2013
Location: Stuart
Posts: 138
Likes: 0
Received 0 Likes
on
0 Posts
My Ride: Daily Driver
This combination produced the exact finish I was hoping to achieve. The total results (after some hand polishing) are at the end.
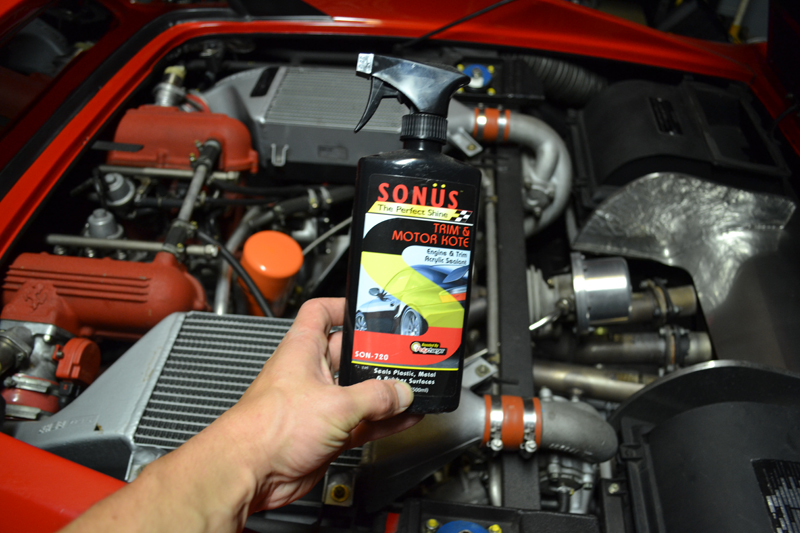
Finally two light coats of SONUS Trim & Motor Kote were lightly misted over the entire engine compartment to create a natural, dark finish and provide excellent protection.
In total, over six hours were spent cleaning and polishing the Ferrari's famous engine. It wasn't done yet, but we will revisit it later in this thread.
Interior Detailing:
Products Used:
Metro Vac 'N Blo Portable Auto Vacuum
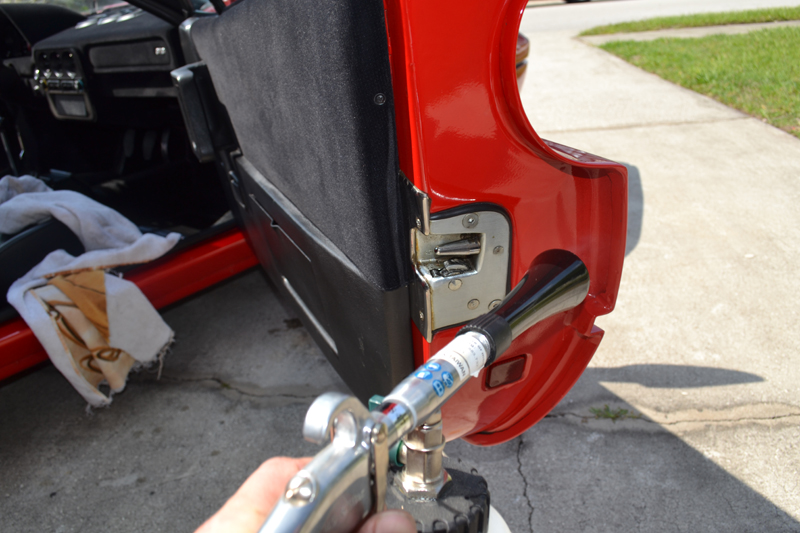
Tornador Black Car Cleaning Gun
Mytee VS1500 Firebird Vapor Steamer
Detailing Brush Kit
BLACKFIRE All-In-One APC (10:1/for use in Tornador Black)
Leather Master Car Interior Strong Leather Cleaner
Leather Master Car Interior Leather Vital
Leather Master Leather Protection Cream
Shop Towels/Rags
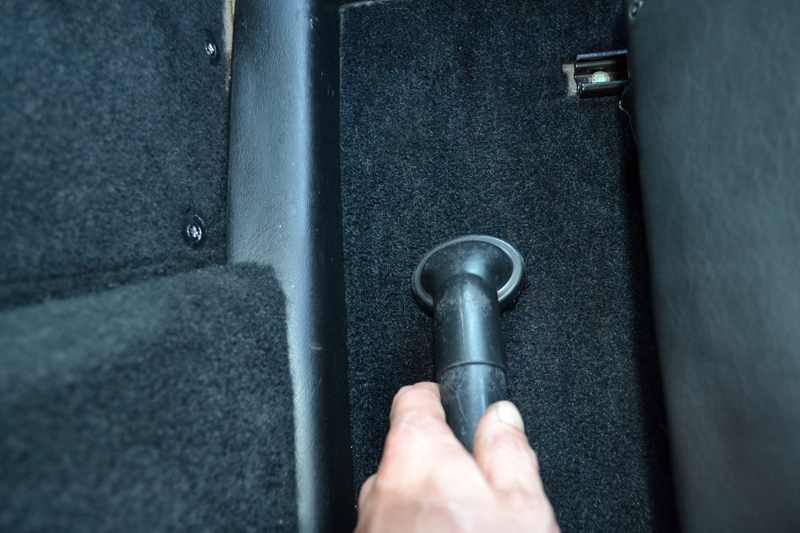
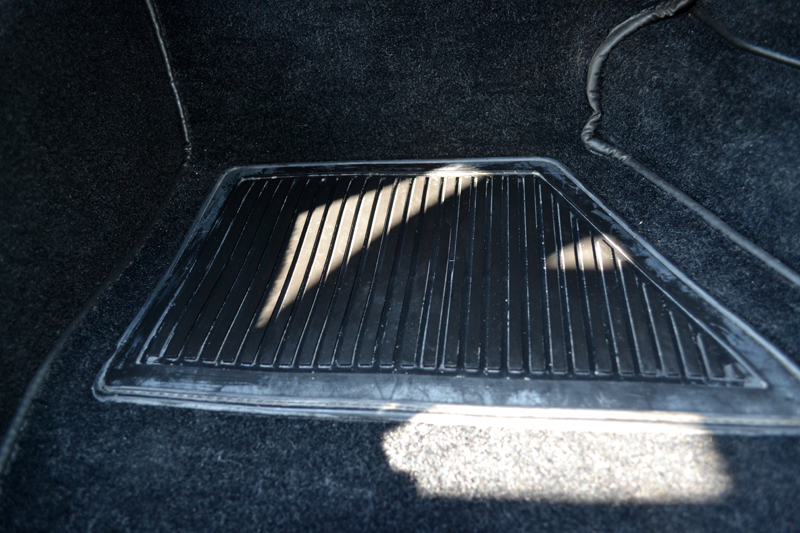
Using the Metro Vac attachments on the my Metro Vac 'N Blow, I started by vacuuming all of the lose soil out of the Ferrari's cockpit.
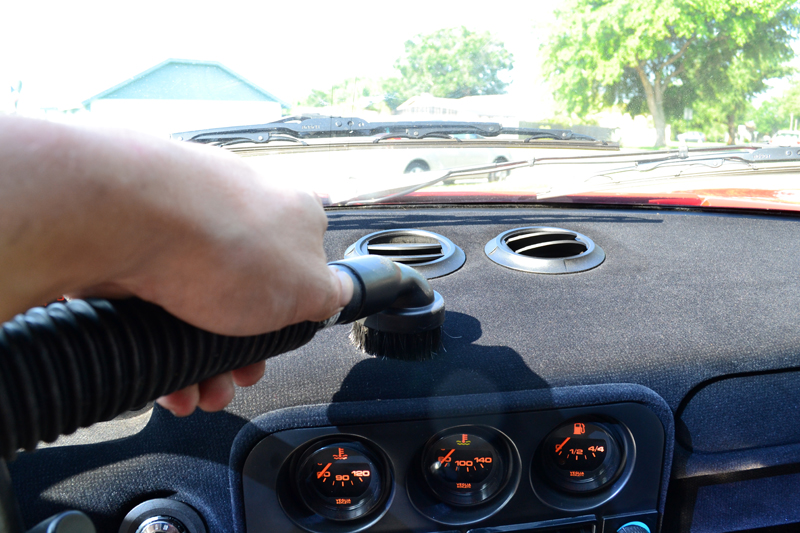
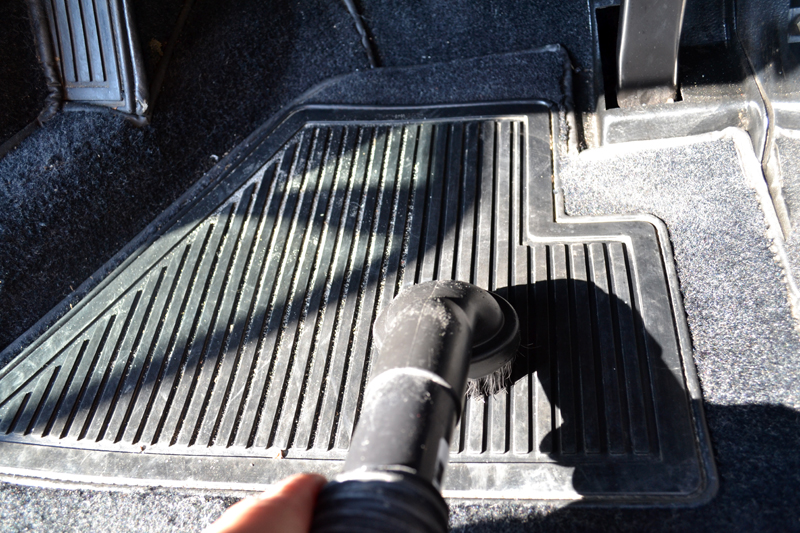
Next I used the mighty Mytee to steam away years of oxidation on the floor mats and seat belt handles.
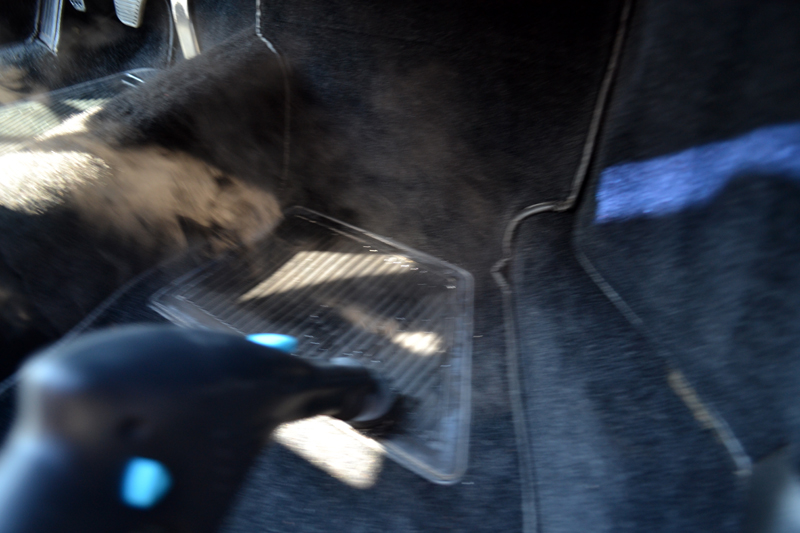
In order to deep clean the surfaces and remove any hidden soiling, I gave the interior a powerful blast of tornado-charged air with the Tornador Black. The high-pressure, high-volume spray removes dust and grime from the most hidden areas as well as "fluff's" the carpet, blasting deep-buried particulate back to the surface for easy clean up.
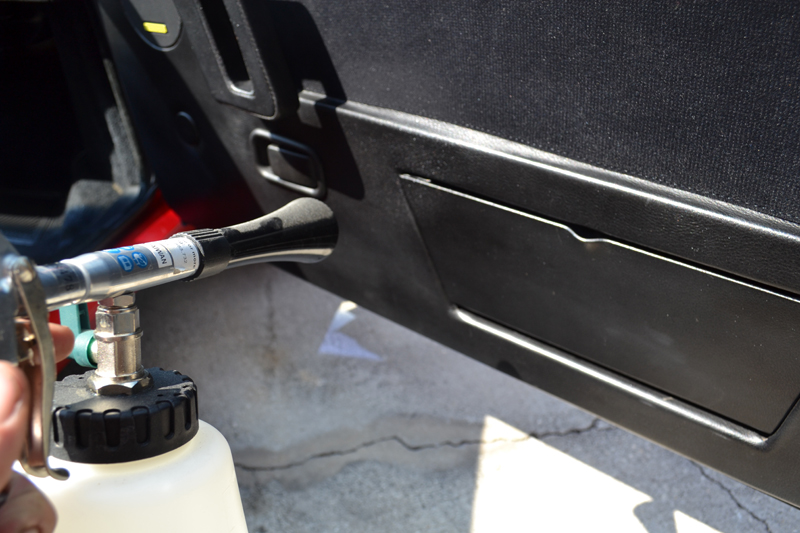
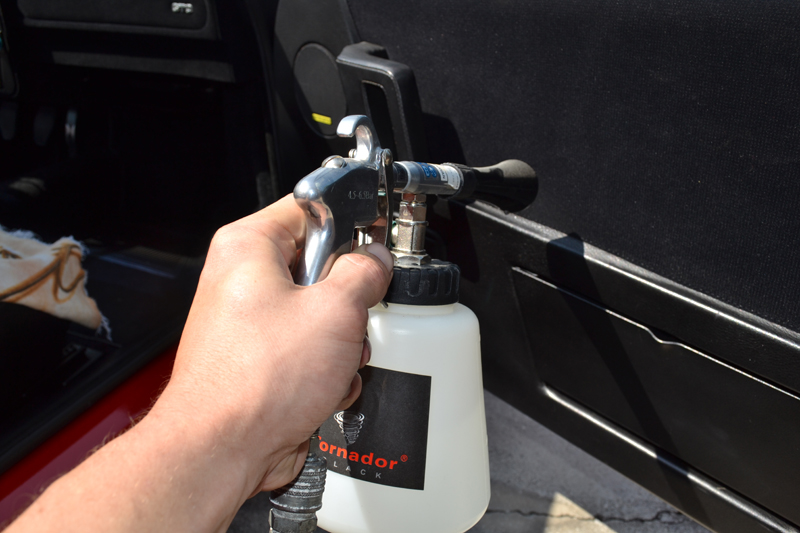
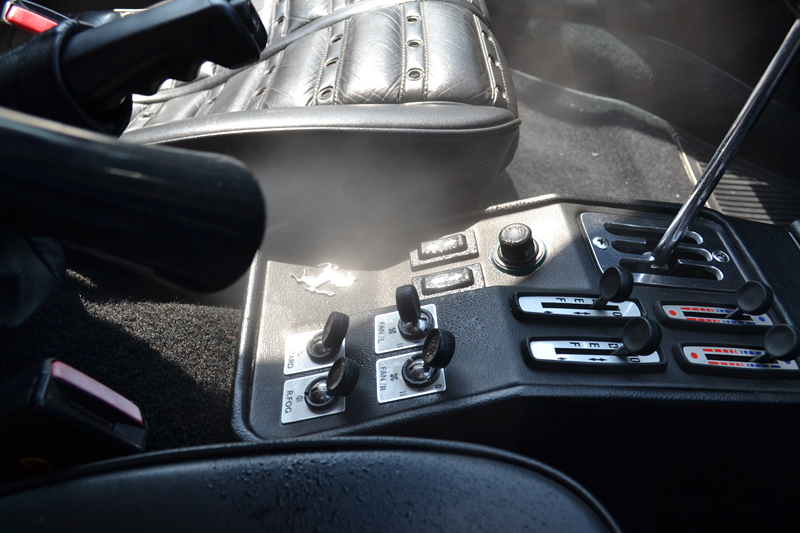
The powerful spray of the Tornador Black dissolved years of built-up grime and revealed the door shuts true beauty.
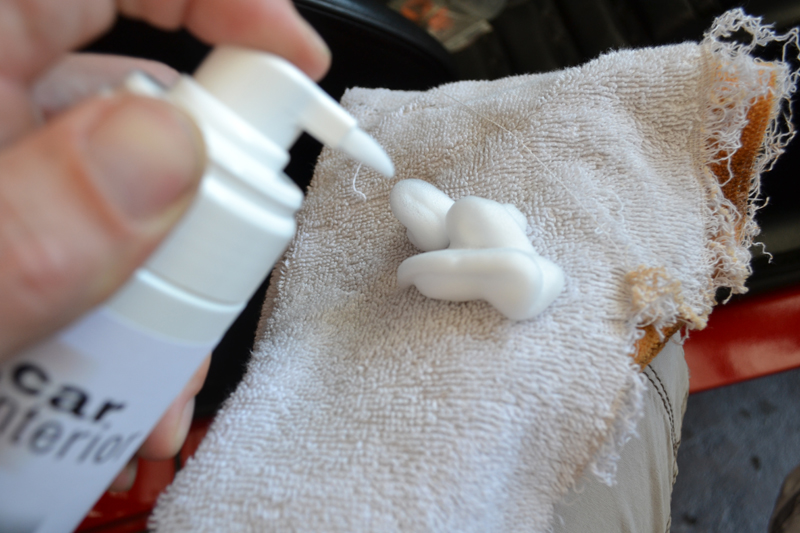
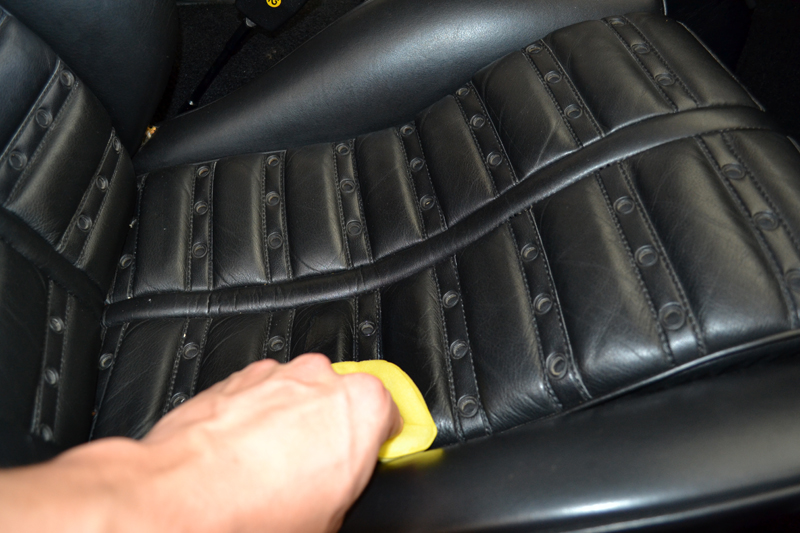
Leather Master's excellent Leather Strong Cleaner was the ideal choice for cleaning, without damaging, the Ferrari's aging leather. All Leather Master cleaners are water based and safe for all leather finish types (minus suede). It has a shaving cream foam consistency. Wipe a section of the seat with the cleaner, then flip the towel over and wipe dry.
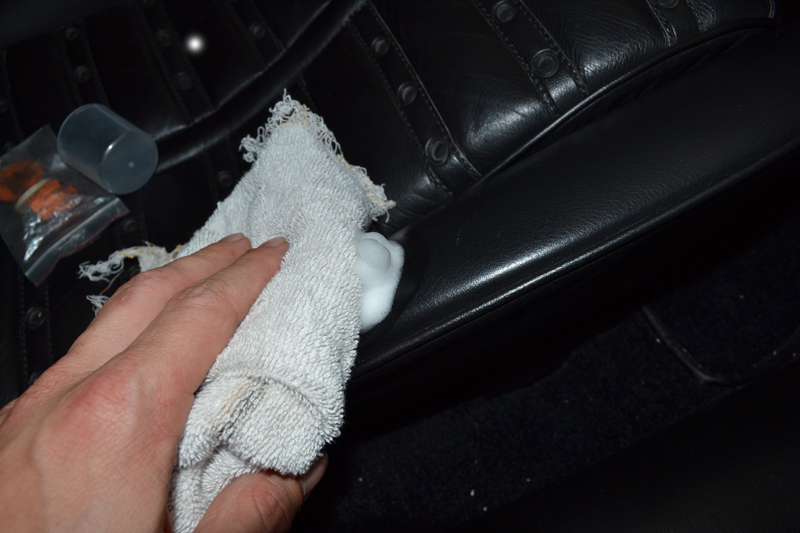
To demonstrate Leather Master's powerful yet gentle cleaning I placed a piece of 3M tape on the seat.
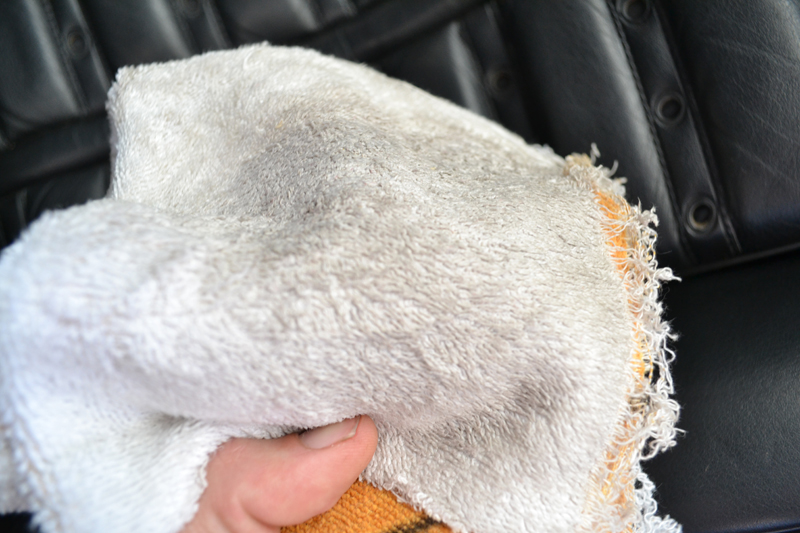
In this results picture, you can see the top has been cleansed. The natural, satin, clean finish has been restored.
Steering wheels are notorious for grime and body oil saturation. The wheel of the 288 GTO was no exception. Leather Master Leather Strong Cleaner made quick work of 30 year's of buildup.

After deep cleaning the leather it was time to rejuvinate it with Leather Master Leather Vital. This easy-to-apply (just evenly spread a small amount over the seat and allow to dry) product penetrates the leather and softens it. This product is normally used on premium furniture to restore its showroom soft feel making it the perfect choice when working on this Ferrari's delicate hides.
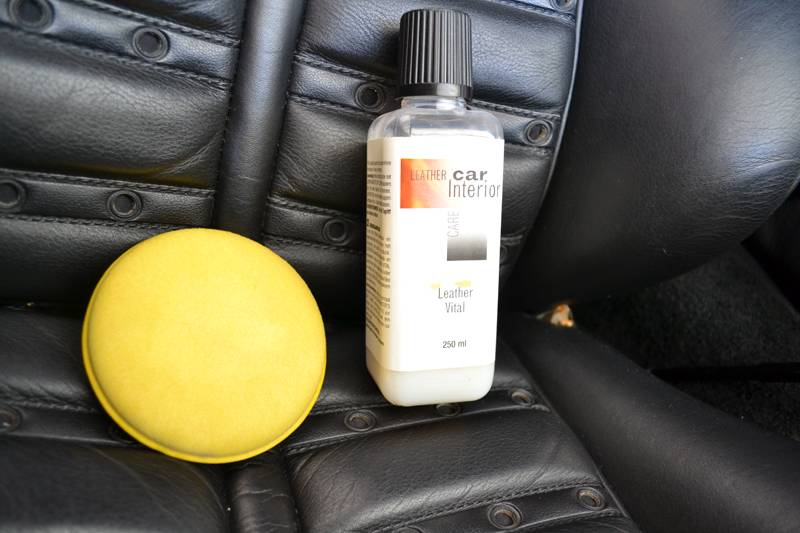
After allowing the Vital to soak in and dry (1 hour) a thin coat of Leather Master Leather Protection Cream was lightly applied to all of the leather surfaces using a microfiber applicator. Leather Protection Cream creates a water resistant barrier to prevent staining, abrasion, and other damages.

With the interior and leather detailed, it was time to wash this prancing horse's body and prepare it for surgery.
Finally two light coats of SONUS Trim & Motor Kote were lightly misted over the entire engine compartment to create a natural, dark finish and provide excellent protection.
In total, over six hours were spent cleaning and polishing the Ferrari's famous engine. It wasn't done yet, but we will revisit it later in this thread.
Interior Detailing:
Products Used:
Metro Vac 'N Blo Portable Auto Vacuum
Tornador Black Car Cleaning Gun
Mytee VS1500 Firebird Vapor Steamer
Detailing Brush Kit
BLACKFIRE All-In-One APC (10:1/for use in Tornador Black)
Leather Master Car Interior Strong Leather Cleaner
Leather Master Car Interior Leather Vital
Leather Master Leather Protection Cream
Shop Towels/Rags
Using the Metro Vac attachments on the my Metro Vac 'N Blow, I started by vacuuming all of the lose soil out of the Ferrari's cockpit.
Next I used the mighty Mytee to steam away years of oxidation on the floor mats and seat belt handles.
In order to deep clean the surfaces and remove any hidden soiling, I gave the interior a powerful blast of tornado-charged air with the Tornador Black. The high-pressure, high-volume spray removes dust and grime from the most hidden areas as well as "fluff's" the carpet, blasting deep-buried particulate back to the surface for easy clean up.
The powerful spray of the Tornador Black dissolved years of built-up grime and revealed the door shuts true beauty.
Leather Master's excellent Leather Strong Cleaner was the ideal choice for cleaning, without damaging, the Ferrari's aging leather. All Leather Master cleaners are water based and safe for all leather finish types (minus suede). It has a shaving cream foam consistency. Wipe a section of the seat with the cleaner, then flip the towel over and wipe dry.
To demonstrate Leather Master's powerful yet gentle cleaning I placed a piece of 3M tape on the seat.
In this results picture, you can see the top has been cleansed. The natural, satin, clean finish has been restored.
Steering wheels are notorious for grime and body oil saturation. The wheel of the 288 GTO was no exception. Leather Master Leather Strong Cleaner made quick work of 30 year's of buildup.
After deep cleaning the leather it was time to rejuvinate it with Leather Master Leather Vital. This easy-to-apply (just evenly spread a small amount over the seat and allow to dry) product penetrates the leather and softens it. This product is normally used on premium furniture to restore its showroom soft feel making it the perfect choice when working on this Ferrari's delicate hides.
After allowing the Vital to soak in and dry (1 hour) a thin coat of Leather Master Leather Protection Cream was lightly applied to all of the leather surfaces using a microfiber applicator. Leather Protection Cream creates a water resistant barrier to prevent staining, abrasion, and other damages.
With the interior and leather detailed, it was time to wash this prancing horse's body and prepare it for surgery.
09-30-2013, 05:52 AM
#3
Former Vendor
Thread Starter
Join Date: Aug 2013
Location: Stuart
Posts: 138
Likes: 0
Received 0 Likes
on
0 Posts
My Ride: Daily Driver
Exterior Prep:
Products Used:
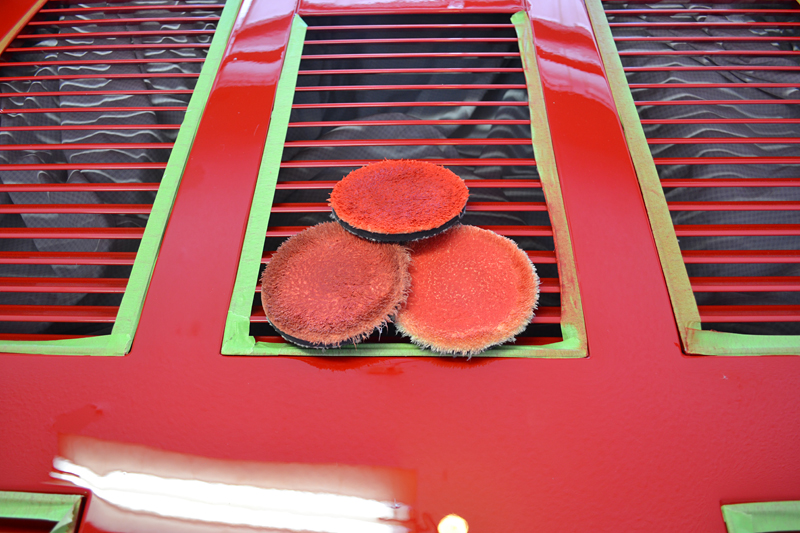
2 BLACKFIRE Buckets with Grit Guard Inserts
CarPro Merino Lambswool Mitt
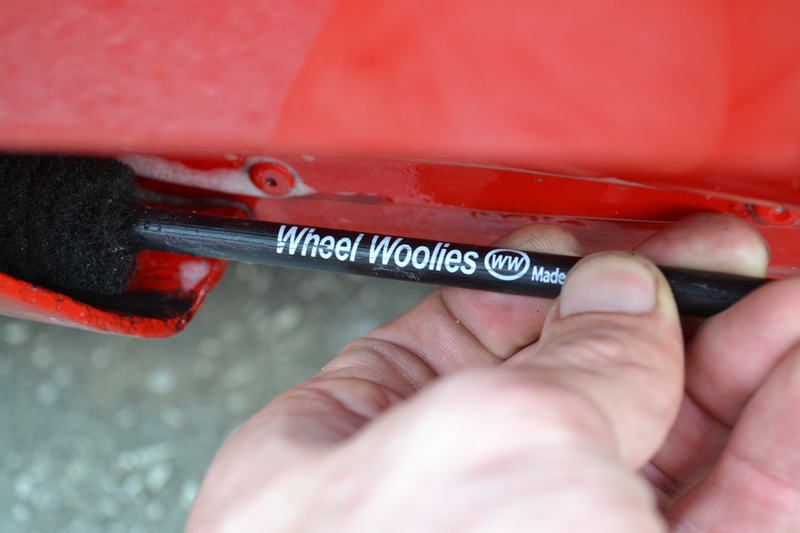
Wheel Woolies (3 sizes)
Wheel Woolies Spoke Wheel Brush
Pinnacle XMT Gel Shampoo & Conditioner
Wolf's Chemicals DeIronizer Gel
BLACKFIRE Poly Clay II
BLACKFIRE Clay Lubricant
Supreme 530 Microfiber Towels
Cobra Guzzler Waffle Weave Towel
Metro Vac Master Blaster Air Dryer
Tuf Shine Tire Cleaner
BLACKFIRE All-In-One (1:1) APC
3M Premium Automotive Masking Tape 18 mm
3M Premium Automotive Masking Tape 36 mm
3M Vinyl Tape
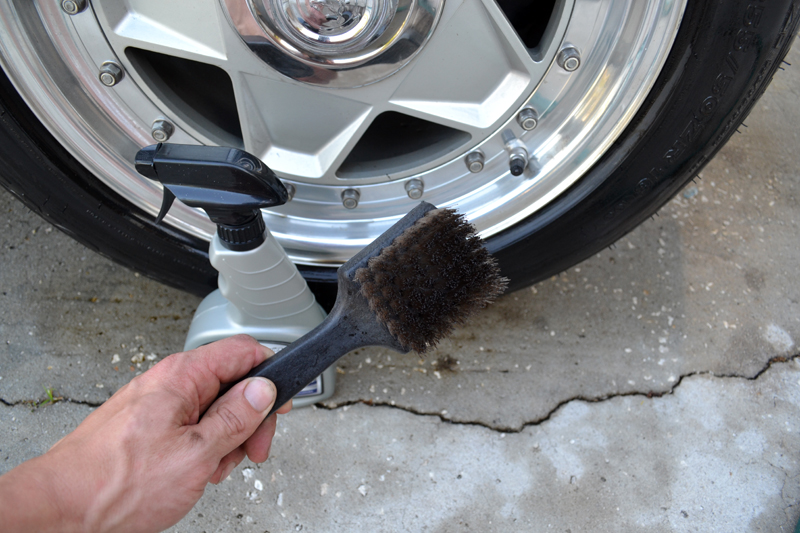
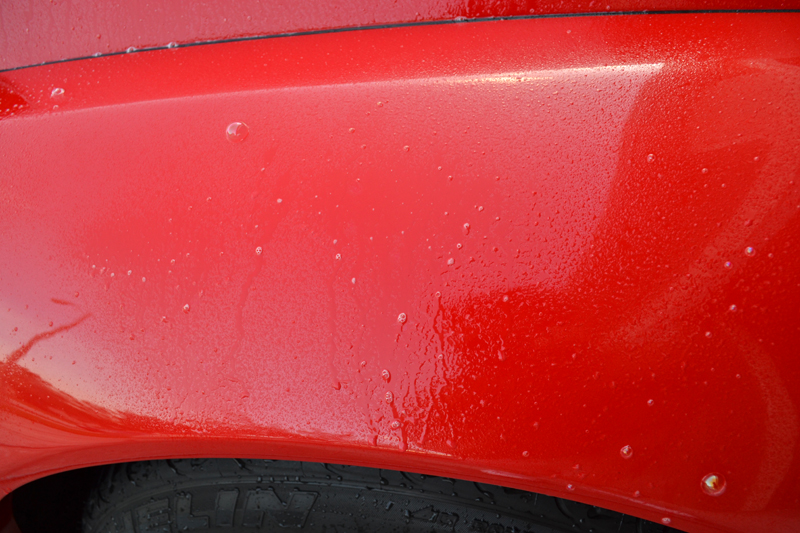
Before correcting the finish and restoring a factory-fresh gloss, the body must be carefully washed and decontaminated. I started by using a strong dilution of BLACKFIRE All-In-One APC with the small Wheel Woolie brush and microfiber towels to remove tar, grease, and contamination from the 288 GTO's lower panels and crevices.
Then I cleaned the tires with TUF SHINE's excellent Tire Cleaner and brush. There was so much built-up and caked-on tire dressing (likely 30 years worth) that it took some time to cut through all of the layers.
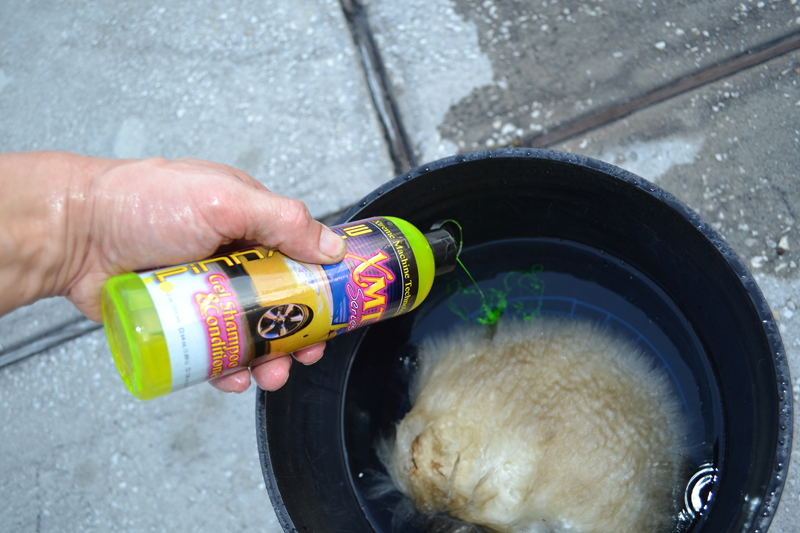
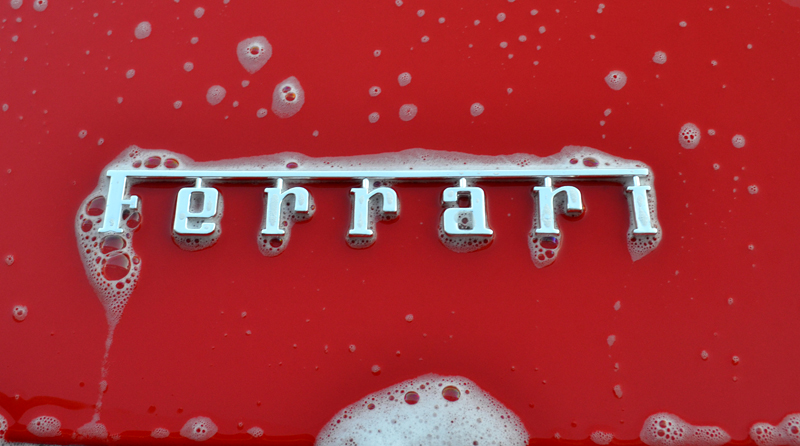
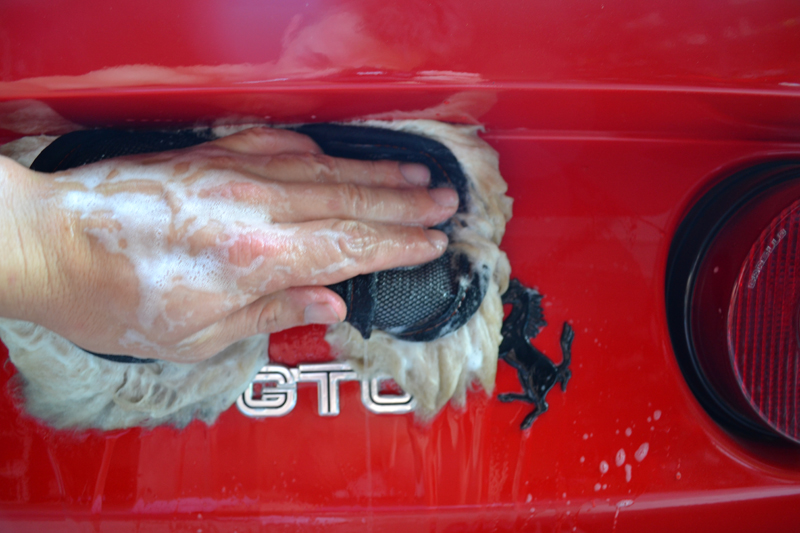
Next I mixed Pinnale XMT Gel Shampoo & Conditioner into 4 gallons of water to provide ample lubrication. A merino wool lambskin washmitt was chosen to gently lift dirt from the Ferriari's 30 year old paint.
After carefully rinising and drying the surface, I lightly misted Wolf's Chemicals DeIronizer Decon Gel on to all of the exterior surfaces including the paint, wheels, exhaust pipes, glass and more.
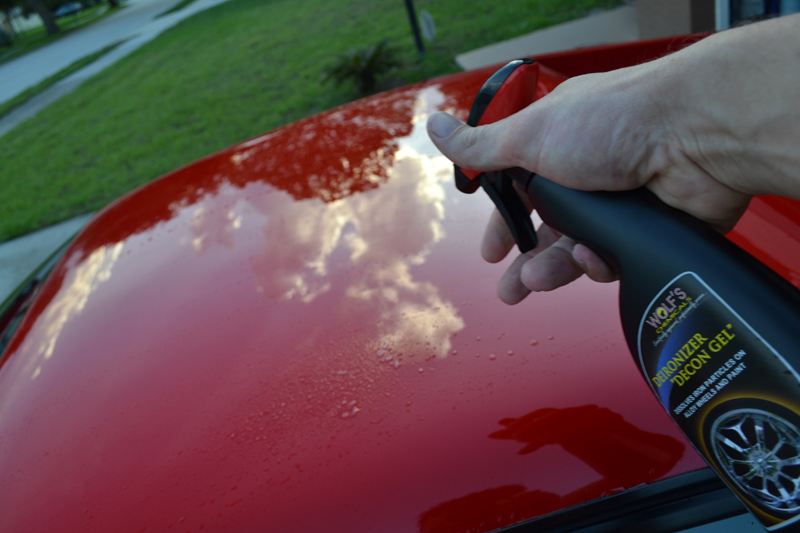
While hard to capture on red, the surface did turn slightly purple indicating that some iron contamination was being removed.
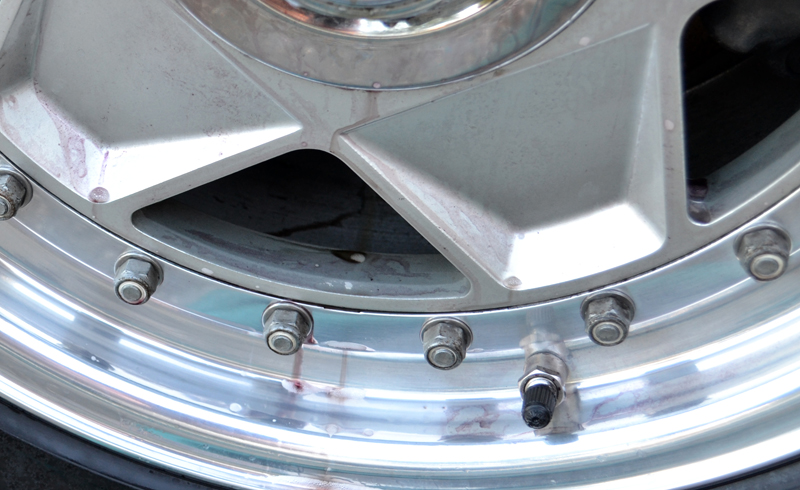
As Decon Gel worked on the single-stage paint finish of the Ferrari, the wheels were cleaned by lightly agitating the Decon Gel with numerous Wheel Woolies.
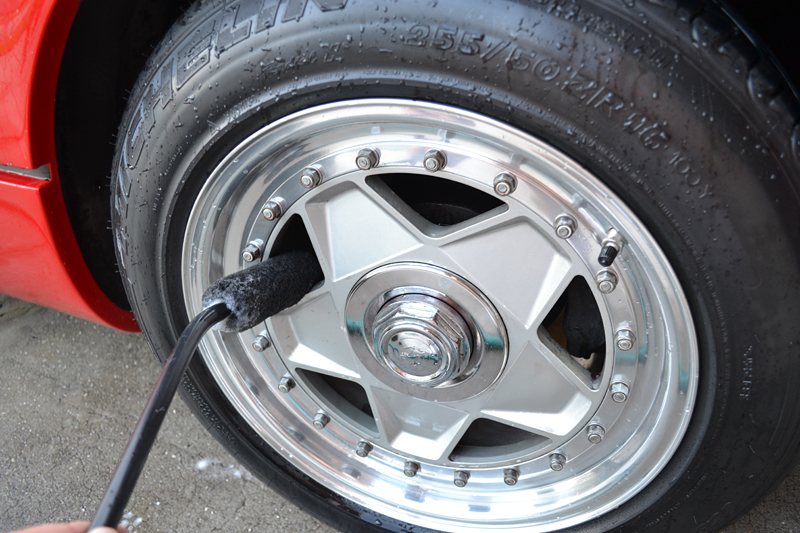
You can see the purple runoff as Decon Gel dissolved the iron fallout from years of embedded brake dust.
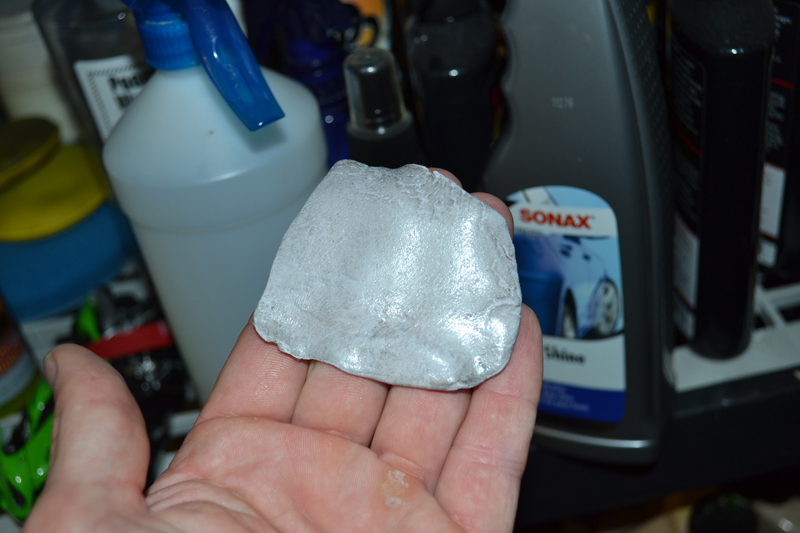
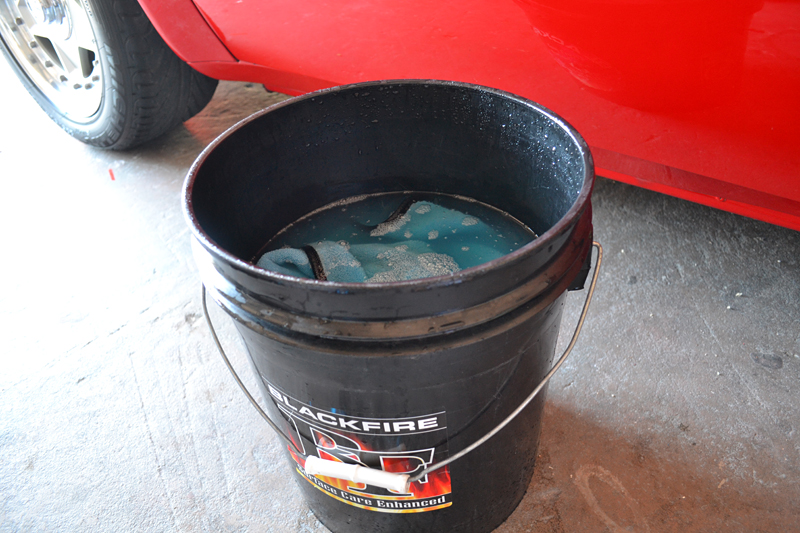
After rinsing the surface clean, BLACKFIRE Poly Clay II was used (with BLACKFIRE Clay Lubricant) to remove the remaining foreign contaminants from the GTO's paint. The once-fresh gray clay bar began to turn brown with the amount of contamination removed.
I carefully dried every square inch of the Ferrari (including the engine) with a combination of the Metro Vac Master Blaster and the excellent Guzzler Waffle Weave towels.
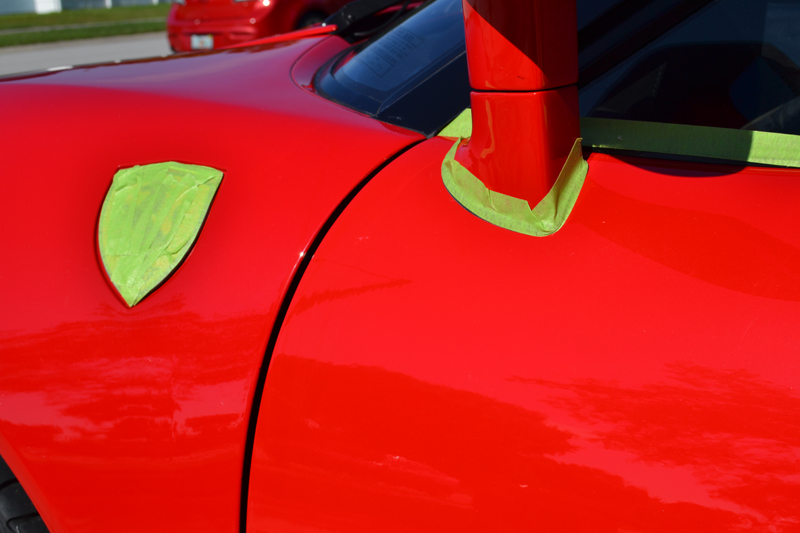
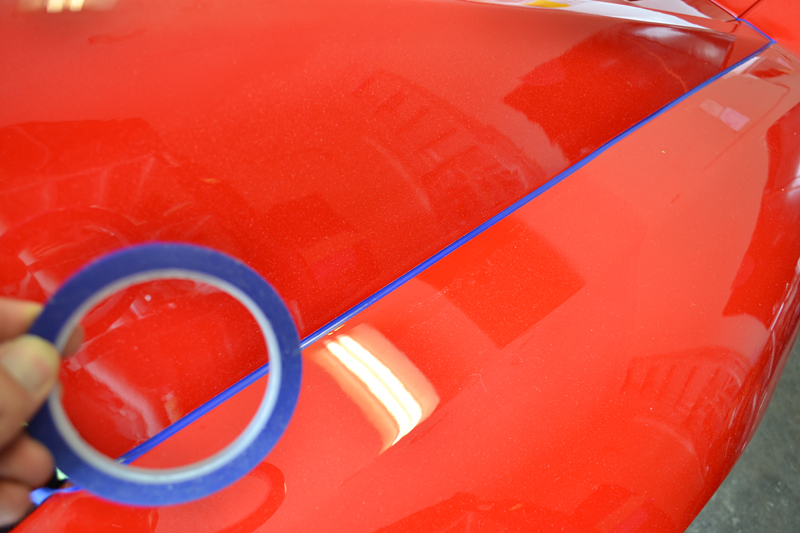
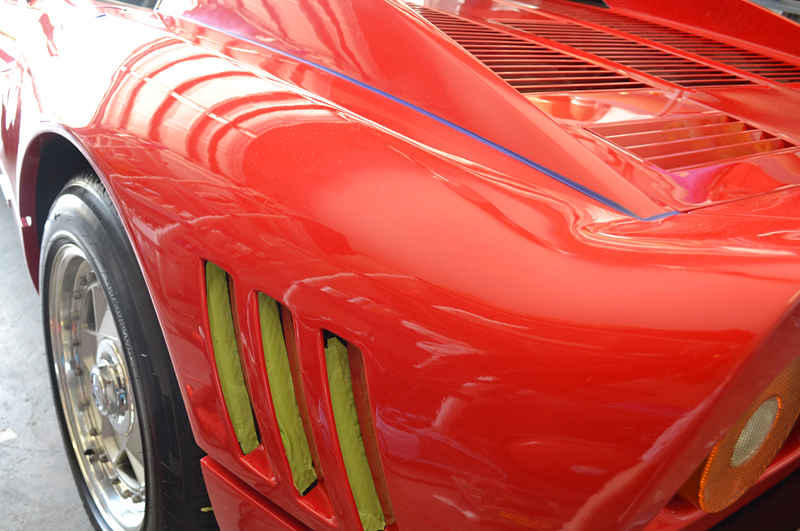
Next I carefully masked off all of the rubber trim and any item that could be damaged with various thicknesses of 3M Premium Automotive Masking Tape.
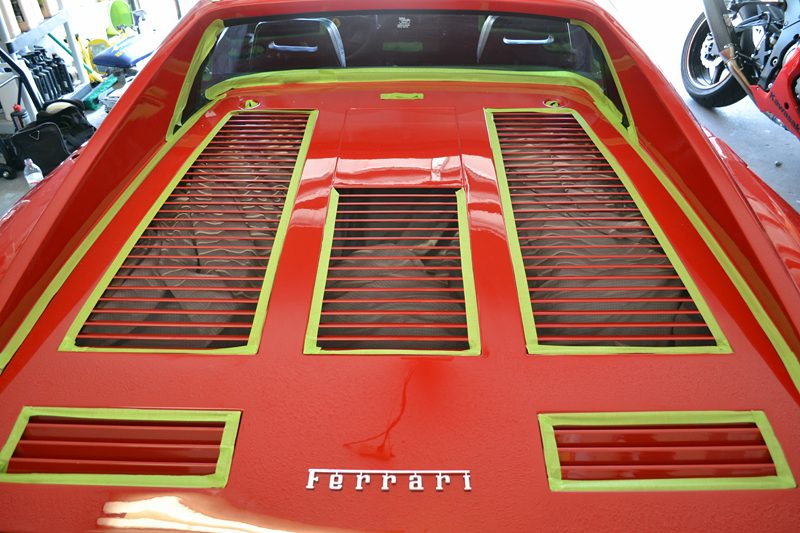
3M's thin and flexiable Vinyl Tape was used to mask the thin, caulk-like rubber molding common to Ferriar's of this vintage.
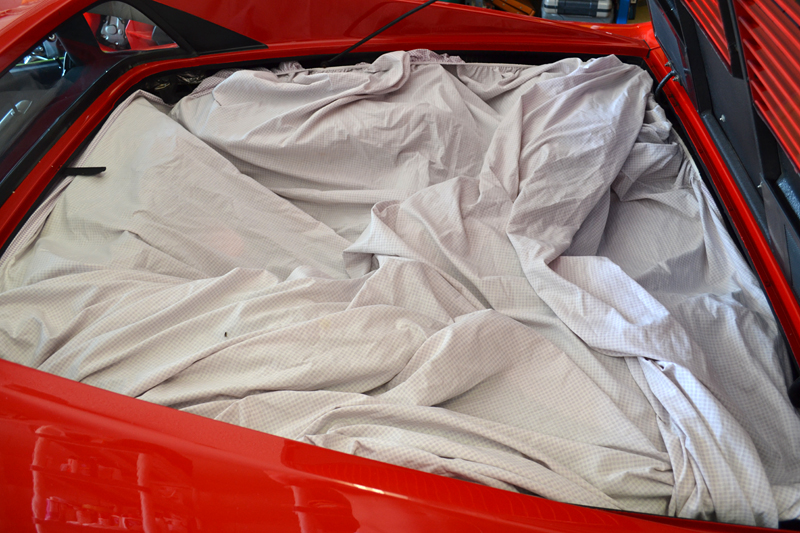
Finally an old bed sheet was layed over the Ferrair's presintly detailed 2.8 Twin Turbo V8 to shield from polishing dust.
Products Used:
2 BLACKFIRE Buckets with Grit Guard Inserts
CarPro Merino Lambswool Mitt
Wheel Woolies (3 sizes)
Wheel Woolies Spoke Wheel Brush
Pinnacle XMT Gel Shampoo & Conditioner
Wolf's Chemicals DeIronizer Gel
BLACKFIRE Poly Clay II
BLACKFIRE Clay Lubricant
Supreme 530 Microfiber Towels
Cobra Guzzler Waffle Weave Towel
Metro Vac Master Blaster Air Dryer
Tuf Shine Tire Cleaner
BLACKFIRE All-In-One (1:1) APC
3M Premium Automotive Masking Tape 18 mm
3M Premium Automotive Masking Tape 36 mm
3M Vinyl Tape
Before correcting the finish and restoring a factory-fresh gloss, the body must be carefully washed and decontaminated. I started by using a strong dilution of BLACKFIRE All-In-One APC with the small Wheel Woolie brush and microfiber towels to remove tar, grease, and contamination from the 288 GTO's lower panels and crevices.
Then I cleaned the tires with TUF SHINE's excellent Tire Cleaner and brush. There was so much built-up and caked-on tire dressing (likely 30 years worth) that it took some time to cut through all of the layers.
Next I mixed Pinnale XMT Gel Shampoo & Conditioner into 4 gallons of water to provide ample lubrication. A merino wool lambskin washmitt was chosen to gently lift dirt from the Ferriari's 30 year old paint.
After carefully rinising and drying the surface, I lightly misted Wolf's Chemicals DeIronizer Decon Gel on to all of the exterior surfaces including the paint, wheels, exhaust pipes, glass and more.
While hard to capture on red, the surface did turn slightly purple indicating that some iron contamination was being removed.
As Decon Gel worked on the single-stage paint finish of the Ferrari, the wheels were cleaned by lightly agitating the Decon Gel with numerous Wheel Woolies.
You can see the purple runoff as Decon Gel dissolved the iron fallout from years of embedded brake dust.
After rinsing the surface clean, BLACKFIRE Poly Clay II was used (with BLACKFIRE Clay Lubricant) to remove the remaining foreign contaminants from the GTO's paint. The once-fresh gray clay bar began to turn brown with the amount of contamination removed.
I carefully dried every square inch of the Ferrari (including the engine) with a combination of the Metro Vac Master Blaster and the excellent Guzzler Waffle Weave towels.
Next I carefully masked off all of the rubber trim and any item that could be damaged with various thicknesses of 3M Premium Automotive Masking Tape.
3M's thin and flexiable Vinyl Tape was used to mask the thin, caulk-like rubber molding common to Ferriar's of this vintage.
Finally an old bed sheet was layed over the Ferrair's presintly detailed 2.8 Twin Turbo V8 to shield from polishing dust.
09-30-2013, 05:52 AM
#4
Former Vendor
Thread Starter
Join Date: Aug 2013
Location: Stuart
Posts: 138
Likes: 0
Received 0 Likes
on
0 Posts
My Ride: Daily Driver
Paint Correction:
Products Used:
Flex XC 3401 VRG Dual Action Orbital Polisher
Griots Garage 6 Inch Random Orbital Polisher
Griot's Garage Professional Random Orbital 3 Inch Polisher
Lake Country 6-Inch Hybrid Power Finish Wool Pads
Lake Country 5 1/2-Inch White Foam Flat Polishing Pads
Lake Country Purple Foamed-Wool Pads
Lake Country 4 1/4 Inch Ultra-Fiber DA Microfiber Pads
Lake Country 4-Inch White Foam "Spot Buff" CCS Pads
Sonus Der Wonder Microfiber Polishing Towels
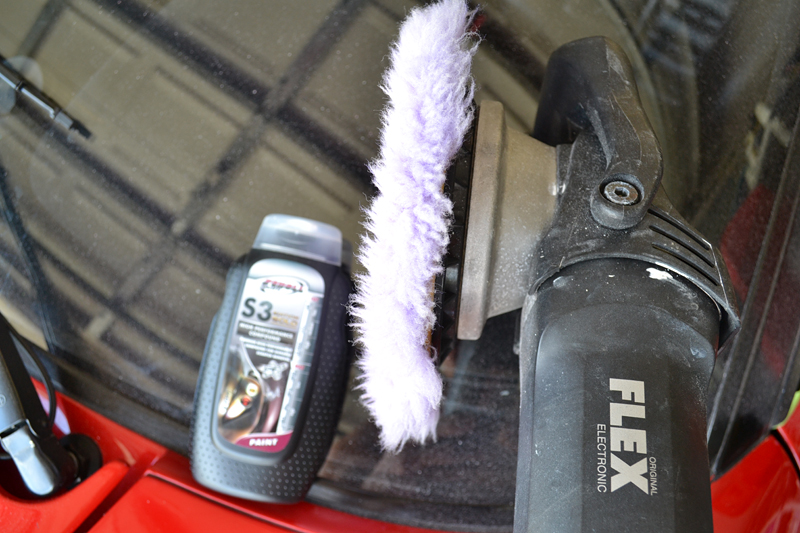
Scholl Concepts S3 Gold Edition High Performance Compound
Scholl Concepts S40 Anti-Hologram Polish
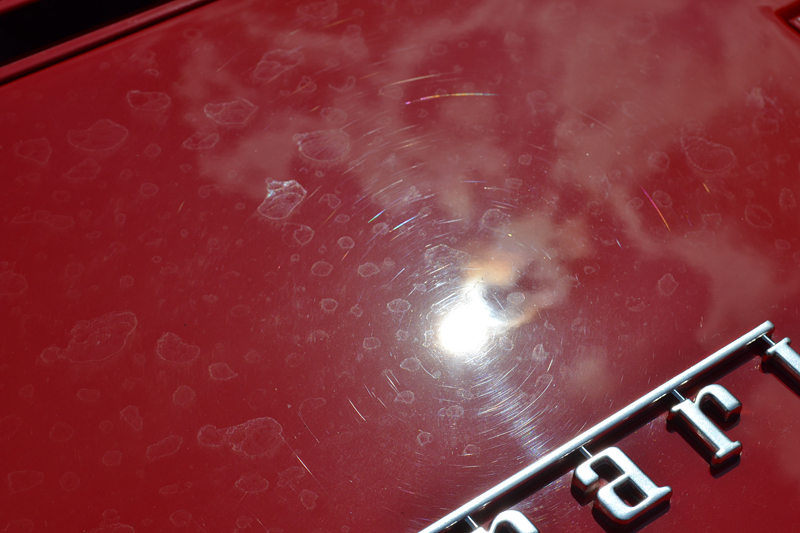
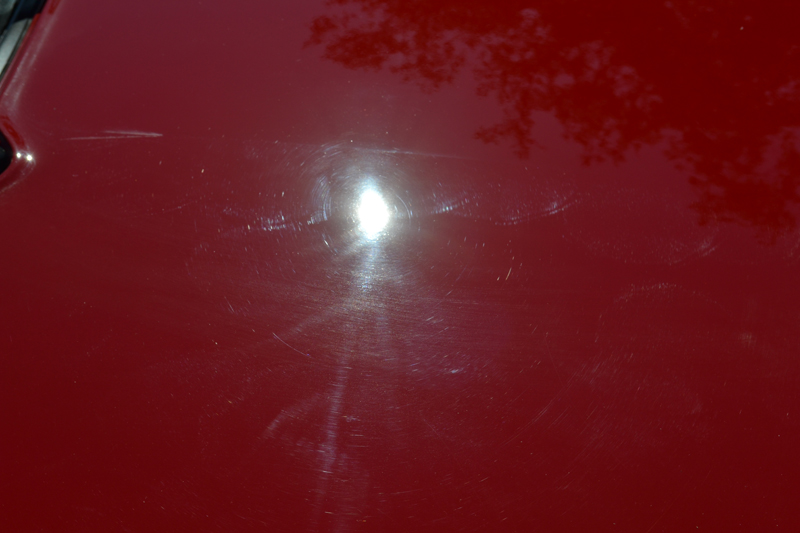
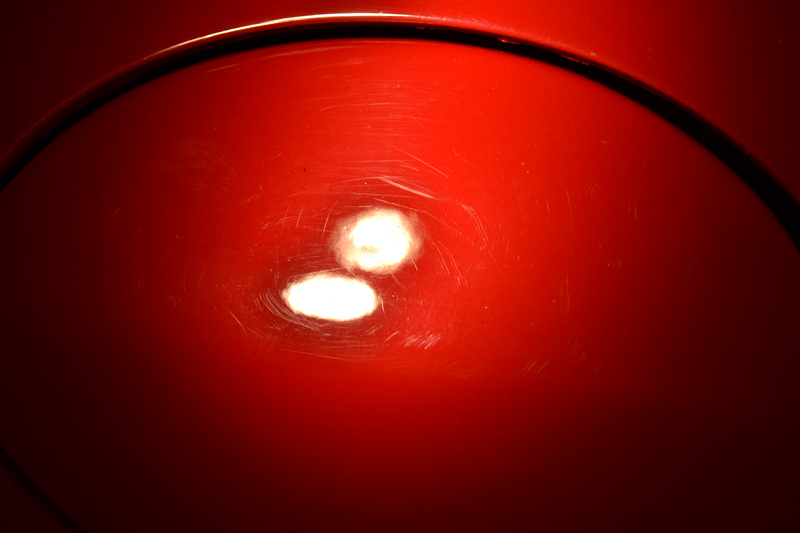
The last picture taken of the 288 GTO's defects in the sunlight. This is the last time these defects would be seen again!
Scholl Concepts S3 Gold Edition High Performance Compound:
Scholl's easy-cutting compound proved to be a defect killer when used with both the Lake Country Foamed Wool and Hybrid Power Finish Wool Pads on the Flex 3401. It produced a high amount of cutting action while running cool and remaining easy to wipe off.
Scholl Concepts S3 produced a high-gloss finish considering the amount of corrective power. The advanced nano abrasives worked perfectly against the Ferrari's aged paint removing 90 % of the defects in one pass. Some defects, such as the water etching prominent on the roof, required up to three passes for total perfection.
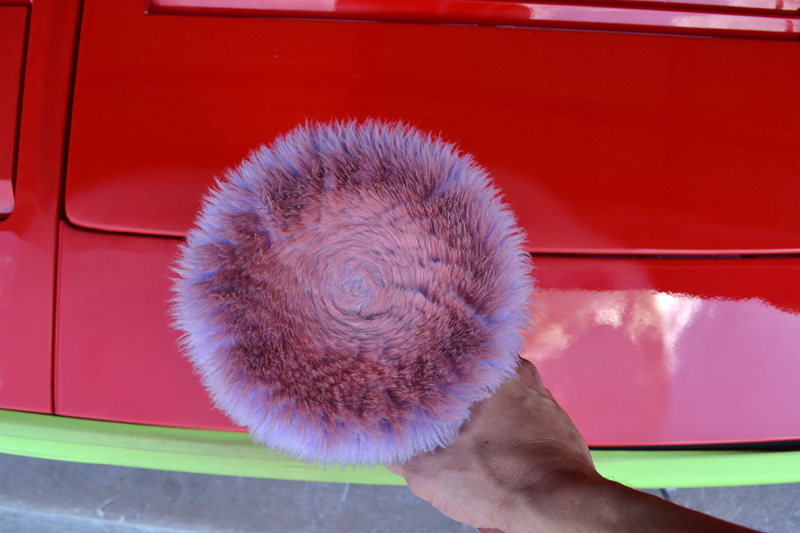
The single-stage paint "bleeding" on the wool pad.
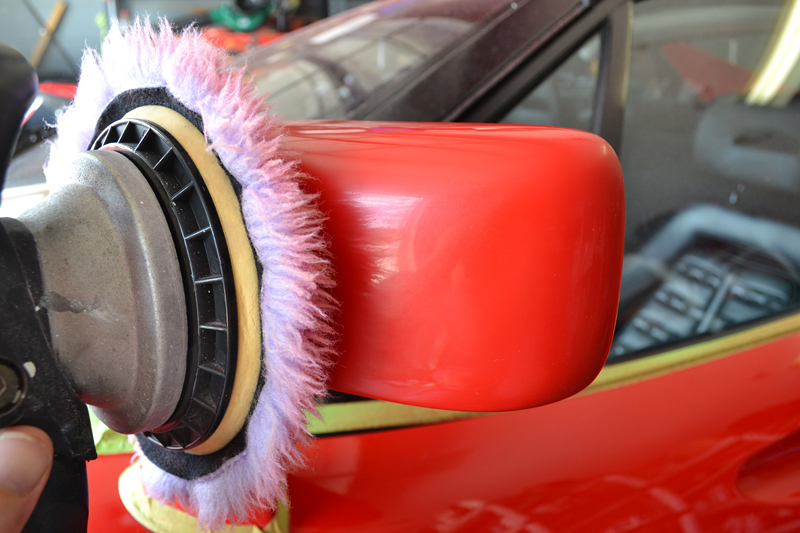
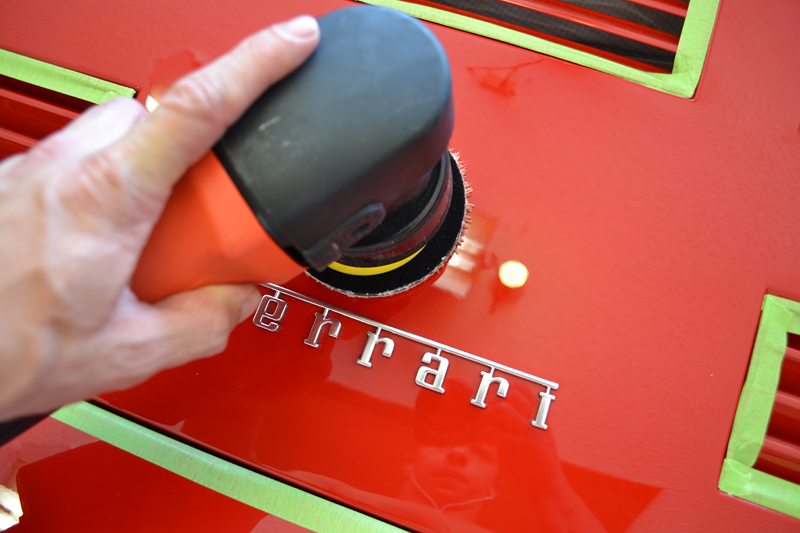
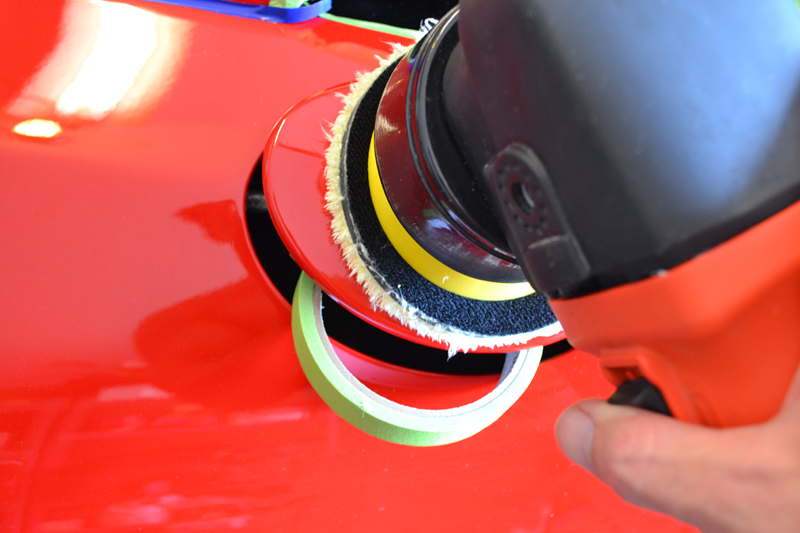
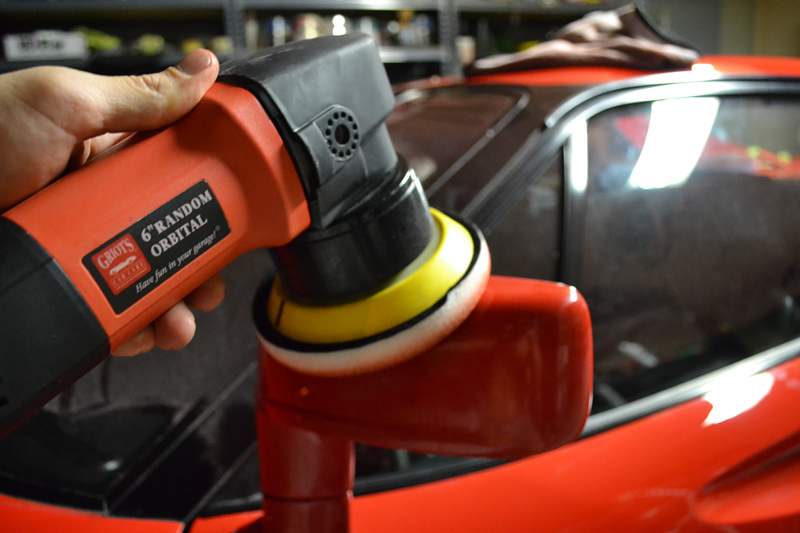
No spot was left un polished. For the smaller areas such as bumper lips, around emblems or the engine bonnet, a 3 Inch Griot's Garage DA Polisher was used, this time with a 4 1/4 inch Lake Country Ultra Fiber cutting disc.
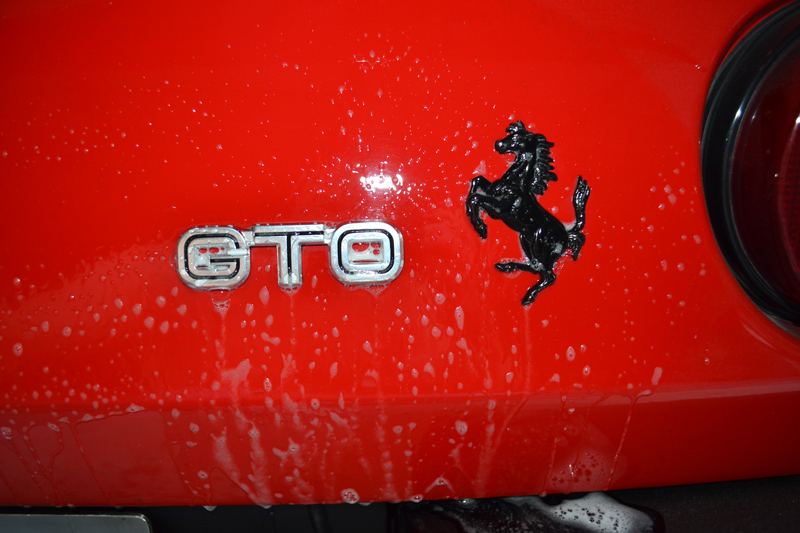
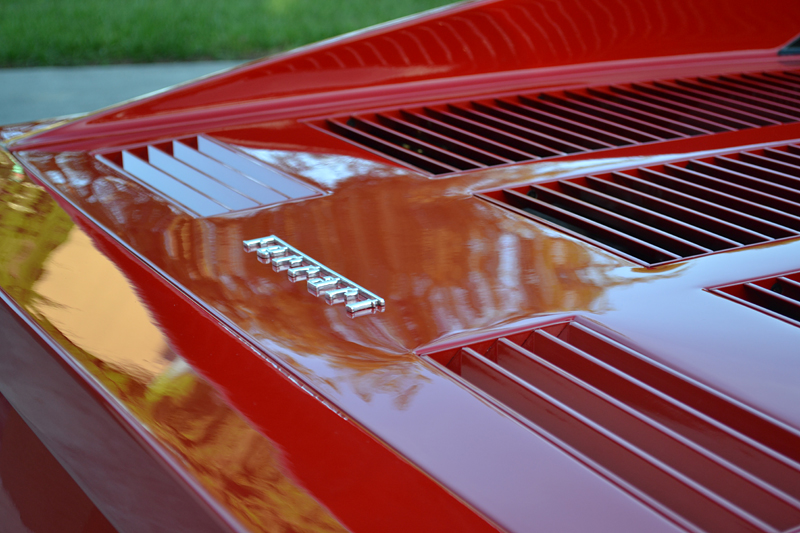
In the picture below you can clearly see the scratches and swirl marks that outline the famous Ferrari text.
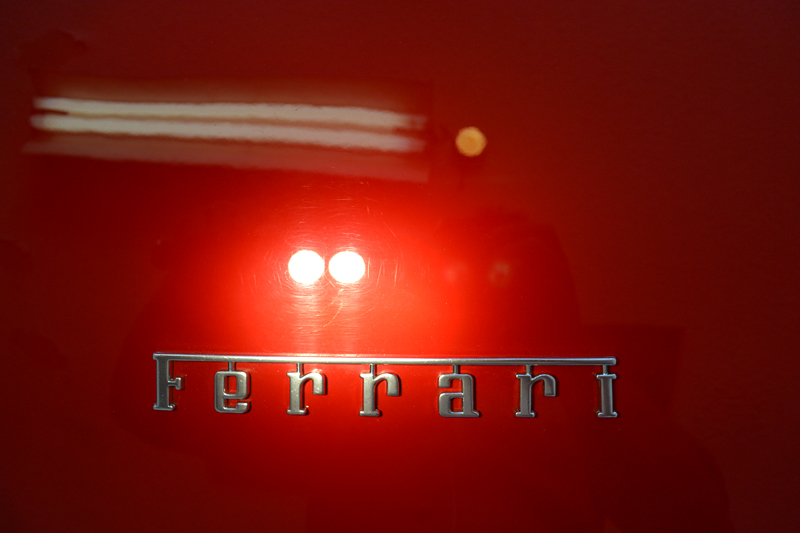
The combination of the short-orbit Griot's 3 inch polisher, microfiber cutting pad, and Scholl Concepts S3 Gold Edition made quick work, eliminating all of the swirls and 95% of the deeper scratches in just one pass.
This combination proved powerful on number detail parts, such as the gas and oil filler lids.
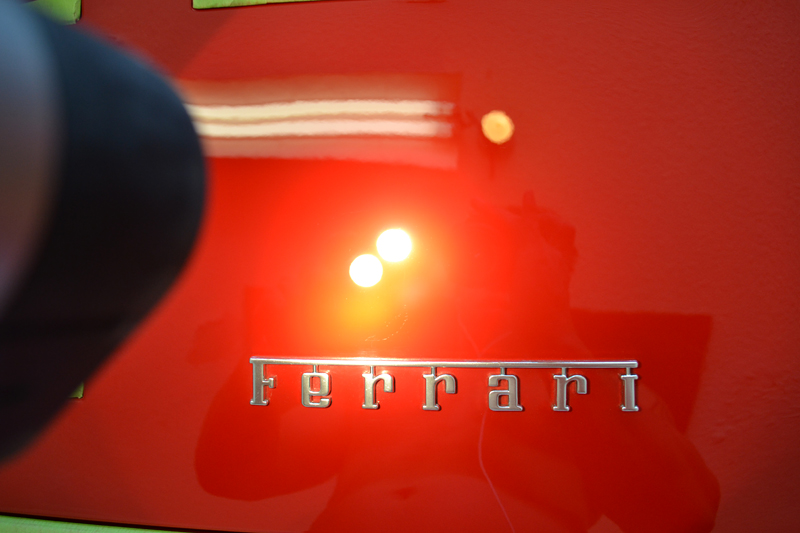
The results of "spot" polishing....
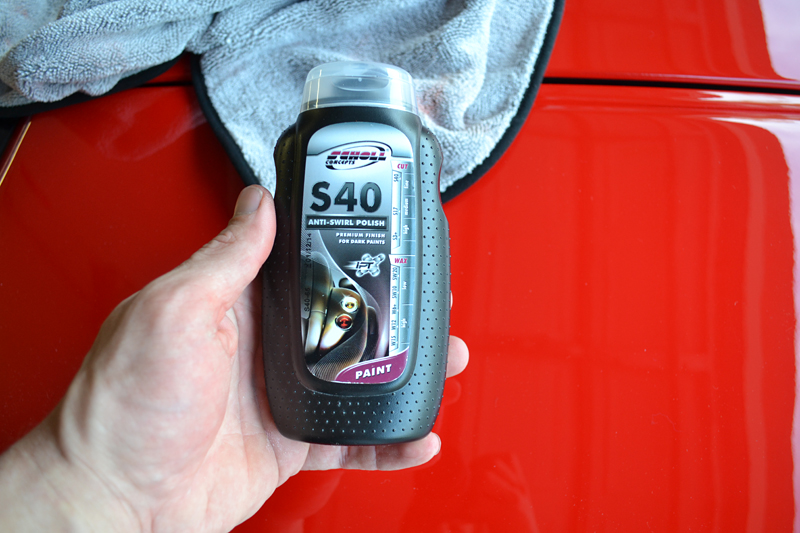
Scholl Concepts S3 Gold Edition High Performance Compound left a high-gloss finish that needed very little followup polishing. For the final polishing step, I switched their follow-up polish, S40 Anit-Hologram Finishing Polish.
Scholl Concepts S40 Anti-Hologram Finishing Polish:
Scholl Concepts S40 promised to deliver a high-gloss, swirl-free paint finish and it delivered. It was extremely easy to use, requiring only a few small drops to adequately polish a section. Scholl recommends using a firmer polishing pad with this polish so both a 5.5 inch Lake Country White Pad and a 4 inch Lake Country White CCS pad were used, on the Griot's 6 inch DA and the Griot's 3 inch DA respectfully.
S40 was extremely easy to wipe off and left a flawless finish that rivaled the appearance of any finishing polish. A subsequent wipe down with Gtechniq Panel Wipe revealed no filling and a true, glossy, level surface.
The results of polishing single-stage red paint..

Ater polishing I carefully wipe every square inch with Gtechniq Panel Wipe to remove any residual oils that could interfere with the protection step.
Clean Up:
Products Used:
BLACKFIRE Wash Bucket with Grit Guard Insert
Wolf's Chemicals Mean Green "Wash & Wipe" Rinseless Car Wash
Miracle Towels
S100 Detailing Swabs
Wolf's Chemicals The Outsider Exterior APC
I carefully washed each square inch with Wolf's Mean Green rinseless solution then blew out every crevice with the venerable Metro Master Blaster. The Miracle Towel provides the right cleaning power to remove any dust and polishing oils without scratching the newly polished and perfected surface.
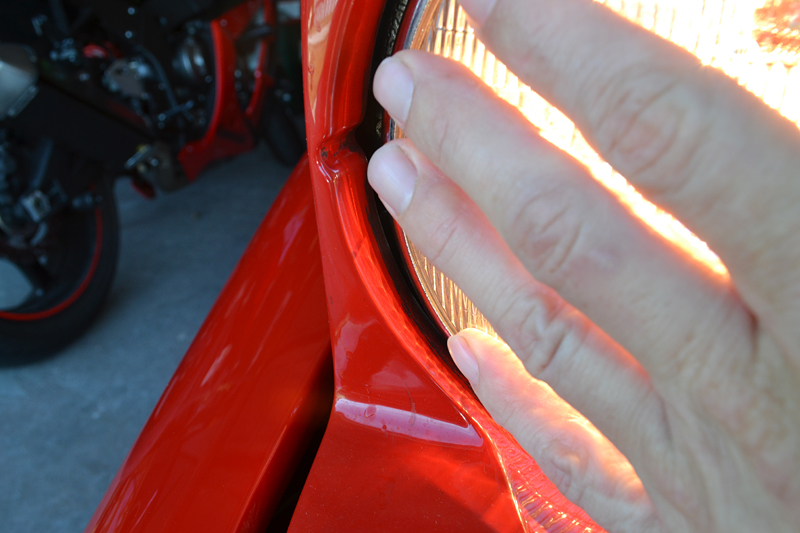
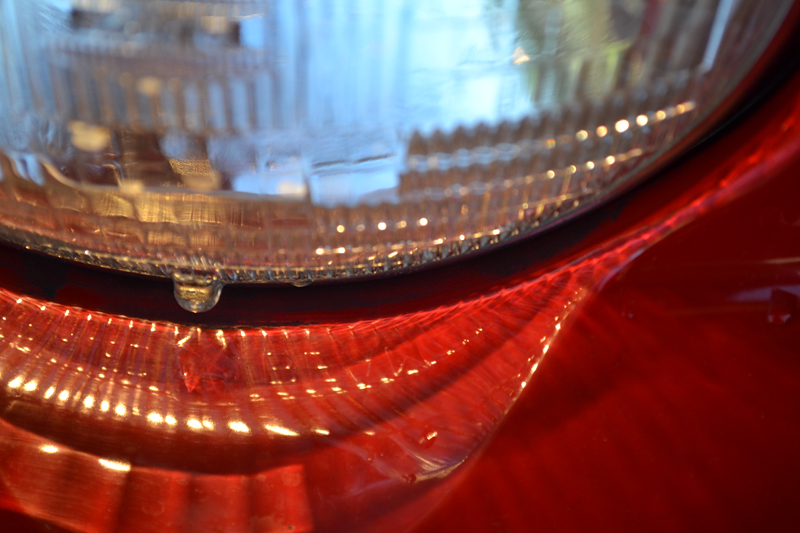
The headlight buckets were lifted to clean around and underneath them.
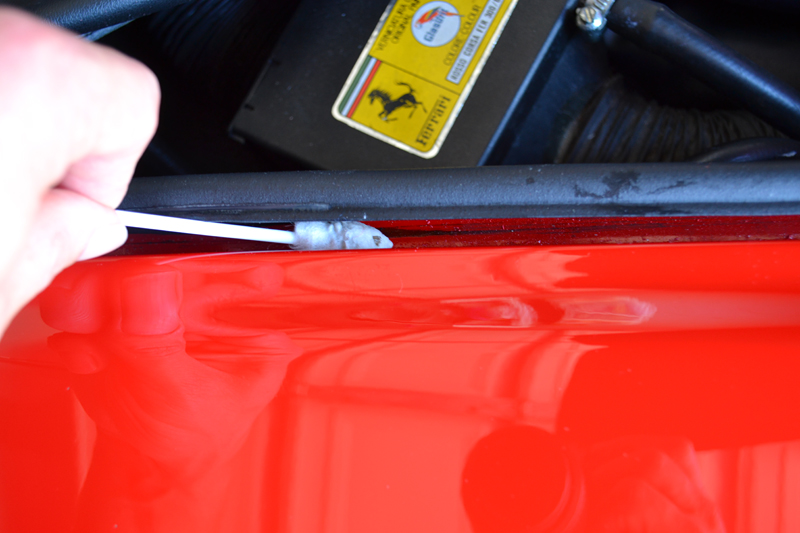
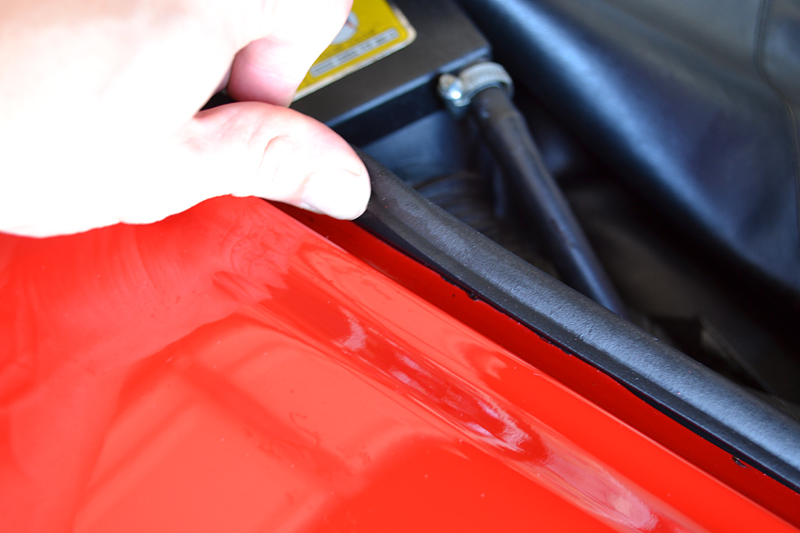
The trunk and engine shuts had a lot of gunk behind the weather seals that had to be removed.
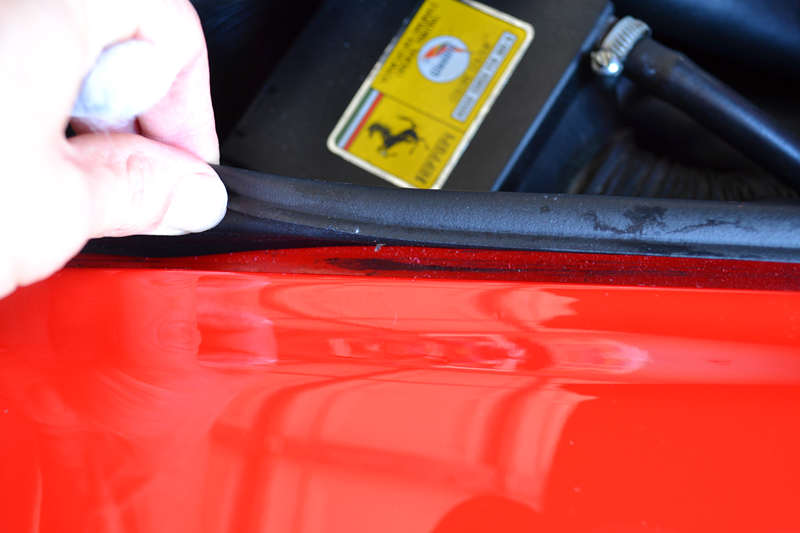
Wolf's paint safe Outside Exterior APC and a S100 Detailing Swab made quick work of any accumulated grease and grime.
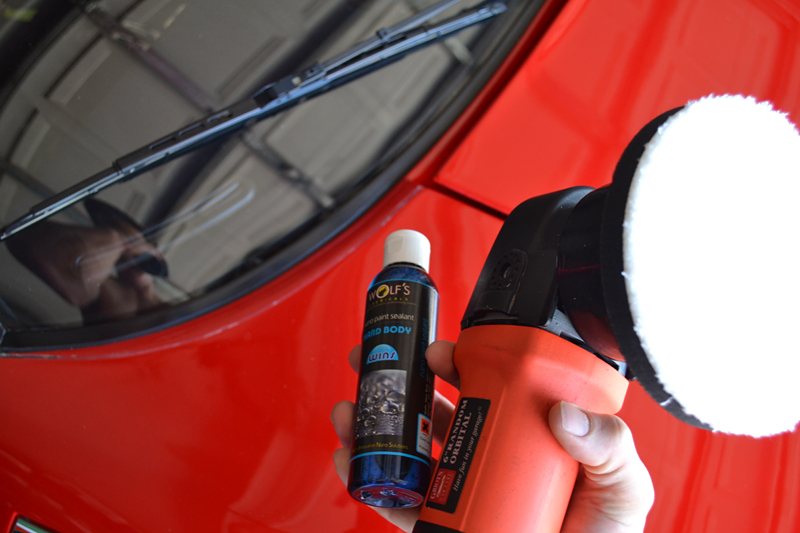
Protection:
Products Used:
Wolf's Chemicals Hard Body Nano Coating
Griots Garage 6 Inch Random Orbital Polisher
Meguiar's DA Microfiber Finishing Disc
Supreme 530 Microfiber Towels
Wolf's Chemicals Hard Body Nano Coating:
Hard Body has quickly gained favor with some of the world's finest detailers, and for good reason. This nano sealant forms a permanent coating on all paint types to provide immeasurable protection with extreme durability. The last-like nano particles create a deep, glossy appearance that sheds water effortlessly for up to two years!
I found Hard Body extremely easy to apply by machine, although hand application is recommended. I used Meguiar's soft Microfiber DA Finishing Disc on the Griot's Garage 6 Inch DA. I kept the speed low (2-3) and moved quickly, overlapping each stroke and covering the entire Ferrari with the high-gloss coating.
A microfiber towel was used to apply, and remove, Hard Body from all nooks and crannies.
When applied properly, Hard Body will form an almost invisible layer that is impossible to capture on red paint. All residues removed effortlessly after 15 minutes with a Supreme 530 Microfiber Towel.
Products Used:
Flex XC 3401 VRG Dual Action Orbital Polisher
Griots Garage 6 Inch Random Orbital Polisher
Griot's Garage Professional Random Orbital 3 Inch Polisher
Lake Country 6-Inch Hybrid Power Finish Wool Pads
Lake Country 5 1/2-Inch White Foam Flat Polishing Pads
Lake Country Purple Foamed-Wool Pads
Lake Country 4 1/4 Inch Ultra-Fiber DA Microfiber Pads
Lake Country 4-Inch White Foam "Spot Buff" CCS Pads
Sonus Der Wonder Microfiber Polishing Towels
Scholl Concepts S3 Gold Edition High Performance Compound
Scholl Concepts S40 Anti-Hologram Polish
The last picture taken of the 288 GTO's defects in the sunlight. This is the last time these defects would be seen again!
Scholl Concepts S3 Gold Edition High Performance Compound:
Scholl's easy-cutting compound proved to be a defect killer when used with both the Lake Country Foamed Wool and Hybrid Power Finish Wool Pads on the Flex 3401. It produced a high amount of cutting action while running cool and remaining easy to wipe off.
Scholl Concepts S3 produced a high-gloss finish considering the amount of corrective power. The advanced nano abrasives worked perfectly against the Ferrari's aged paint removing 90 % of the defects in one pass. Some defects, such as the water etching prominent on the roof, required up to three passes for total perfection.
The single-stage paint "bleeding" on the wool pad.
No spot was left un polished. For the smaller areas such as bumper lips, around emblems or the engine bonnet, a 3 Inch Griot's Garage DA Polisher was used, this time with a 4 1/4 inch Lake Country Ultra Fiber cutting disc.
In the picture below you can clearly see the scratches and swirl marks that outline the famous Ferrari text.
The combination of the short-orbit Griot's 3 inch polisher, microfiber cutting pad, and Scholl Concepts S3 Gold Edition made quick work, eliminating all of the swirls and 95% of the deeper scratches in just one pass.
This combination proved powerful on number detail parts, such as the gas and oil filler lids.
The results of "spot" polishing....
Scholl Concepts S3 Gold Edition High Performance Compound left a high-gloss finish that needed very little followup polishing. For the final polishing step, I switched their follow-up polish, S40 Anit-Hologram Finishing Polish.
Scholl Concepts S40 Anti-Hologram Finishing Polish:
Scholl Concepts S40 promised to deliver a high-gloss, swirl-free paint finish and it delivered. It was extremely easy to use, requiring only a few small drops to adequately polish a section. Scholl recommends using a firmer polishing pad with this polish so both a 5.5 inch Lake Country White Pad and a 4 inch Lake Country White CCS pad were used, on the Griot's 6 inch DA and the Griot's 3 inch DA respectfully.
S40 was extremely easy to wipe off and left a flawless finish that rivaled the appearance of any finishing polish. A subsequent wipe down with Gtechniq Panel Wipe revealed no filling and a true, glossy, level surface.
The results of polishing single-stage red paint..
Ater polishing I carefully wipe every square inch with Gtechniq Panel Wipe to remove any residual oils that could interfere with the protection step.
Clean Up:
Products Used:
BLACKFIRE Wash Bucket with Grit Guard Insert
Wolf's Chemicals Mean Green "Wash & Wipe" Rinseless Car Wash
Miracle Towels
S100 Detailing Swabs
Wolf's Chemicals The Outsider Exterior APC
I carefully washed each square inch with Wolf's Mean Green rinseless solution then blew out every crevice with the venerable Metro Master Blaster. The Miracle Towel provides the right cleaning power to remove any dust and polishing oils without scratching the newly polished and perfected surface.
The headlight buckets were lifted to clean around and underneath them.
The trunk and engine shuts had a lot of gunk behind the weather seals that had to be removed.
Wolf's paint safe Outside Exterior APC and a S100 Detailing Swab made quick work of any accumulated grease and grime.
Protection:
Products Used:
Wolf's Chemicals Hard Body Nano Coating
Griots Garage 6 Inch Random Orbital Polisher
Meguiar's DA Microfiber Finishing Disc
Supreme 530 Microfiber Towels
Wolf's Chemicals Hard Body Nano Coating:
Hard Body has quickly gained favor with some of the world's finest detailers, and for good reason. This nano sealant forms a permanent coating on all paint types to provide immeasurable protection with extreme durability. The last-like nano particles create a deep, glossy appearance that sheds water effortlessly for up to two years!
I found Hard Body extremely easy to apply by machine, although hand application is recommended. I used Meguiar's soft Microfiber DA Finishing Disc on the Griot's Garage 6 Inch DA. I kept the speed low (2-3) and moved quickly, overlapping each stroke and covering the entire Ferrari with the high-gloss coating.
A microfiber towel was used to apply, and remove, Hard Body from all nooks and crannies.
When applied properly, Hard Body will form an almost invisible layer that is impossible to capture on red paint. All residues removed effortlessly after 15 minutes with a Supreme 530 Microfiber Towel.
09-30-2013, 05:53 AM
#5
Former Vendor
Thread Starter
Join Date: Aug 2013
Location: Stuart
Posts: 138
Likes: 0
Received 0 Likes
on
0 Posts
My Ride: Daily Driver
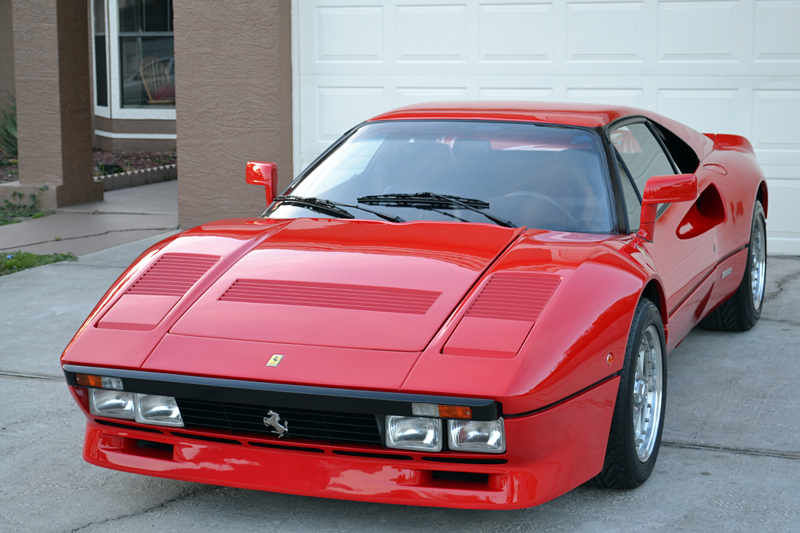
Pictures In Direct Sunlight:
Day three was quickly coming to a close and there was still some detail work to be completed. However, I wanted to capture some pictures of the almost done Ferrari in the bright Florida sunlight as I was on schedule to finish around dusk...
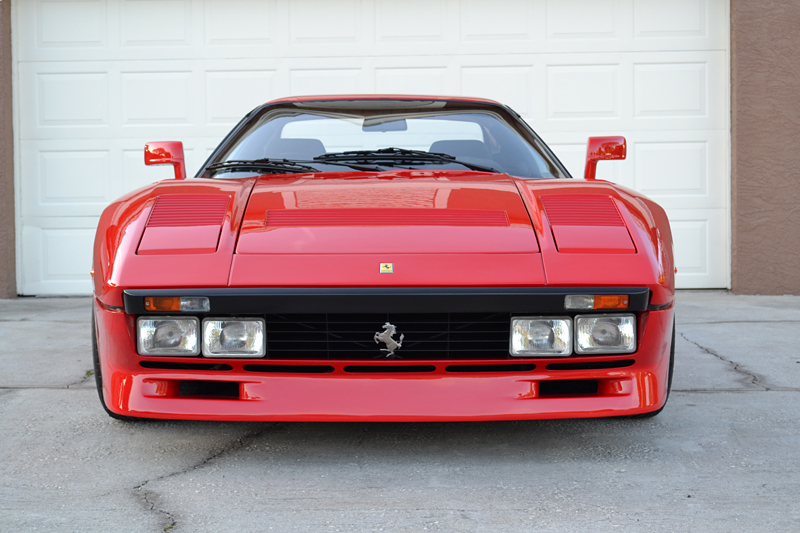
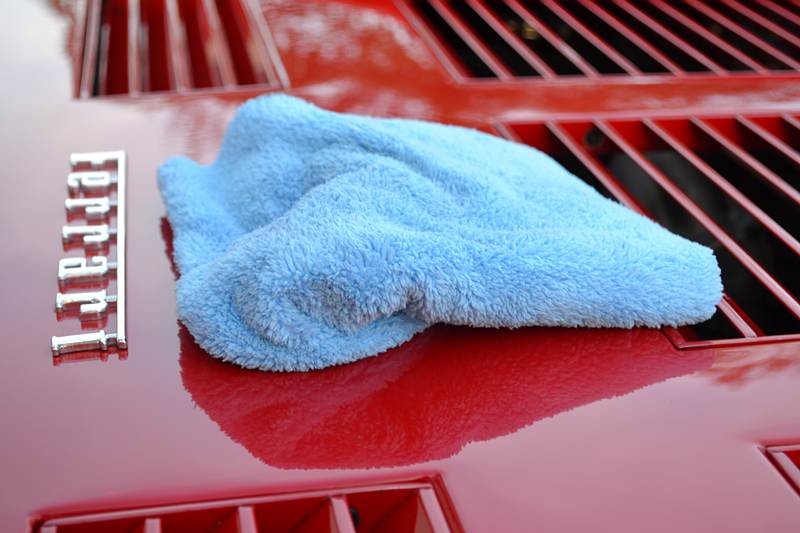
The brilliant, swirl-free finish:
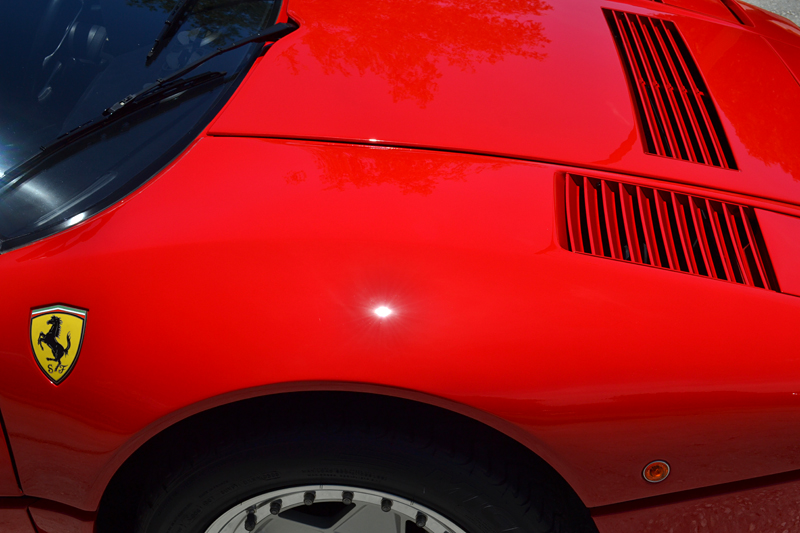
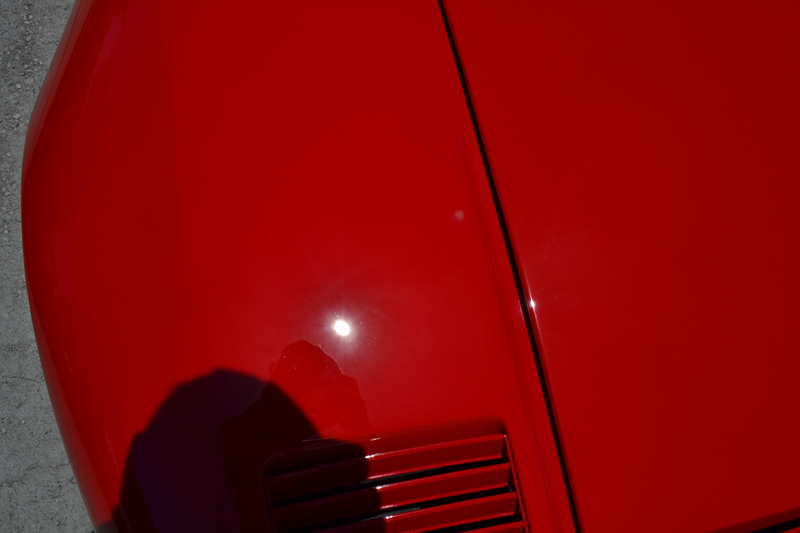
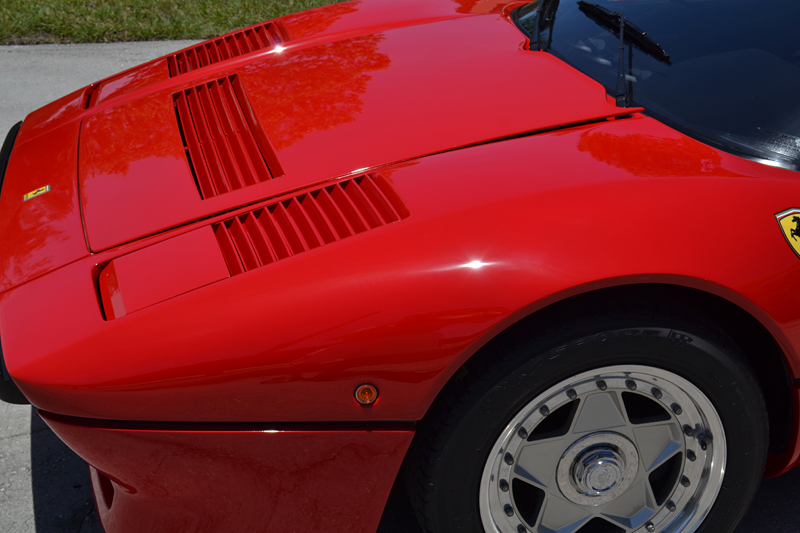
The glossy, candy-like reflections resulting from the intensive paint polishing and Hard Body paint coating.

Final Touches:
Products Used:
Wolf's Chemicals The Insider Interior APC
S100 Detailing Swabs
All Purpose Microfiber Towels
BLACKFIRE Wet Diamond Aluminum Show Polish
BLACKFIRE Total Eclispse Tire Gel
Ultima Trim & Tire Guard Plus
Day three was quickly coming to a close and there was still some detail work to be completed. However, I wanted to capture some pictures of the almost done Ferrari in the bright Florida sunlight as I was on schedule to finish around dusk...
The brilliant, swirl-free finish:
The glossy, candy-like reflections resulting from the intensive paint polishing and Hard Body paint coating.
Final Touches:
Products Used:
Wolf's Chemicals The Insider Interior APC
S100 Detailing Swabs
All Purpose Microfiber Towels
BLACKFIRE Wet Diamond Aluminum Show Polish
BLACKFIRE Total Eclispse Tire Gel
Ultima Trim & Tire Guard Plus
09-30-2013, 05:54 AM
#6
Former Vendor
Thread Starter
Join Date: Aug 2013
Location: Stuart
Posts: 138
Likes: 0
Received 0 Likes
on
0 Posts
My Ride: Daily Driver
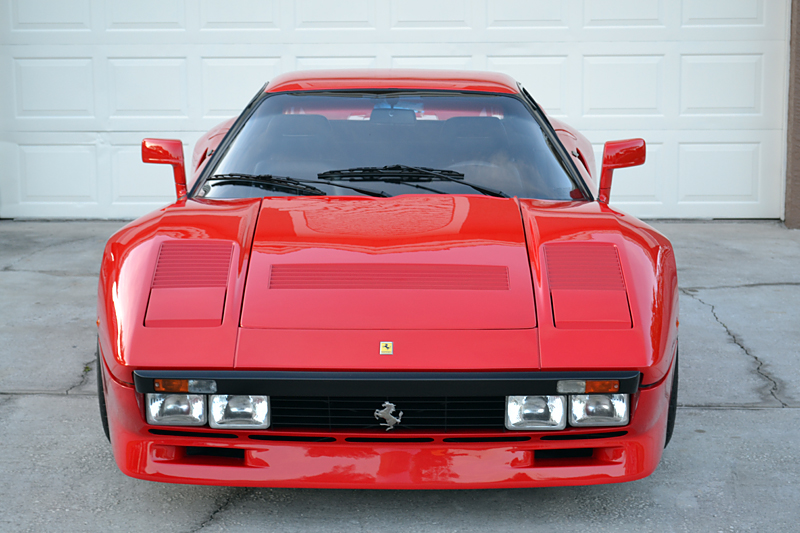
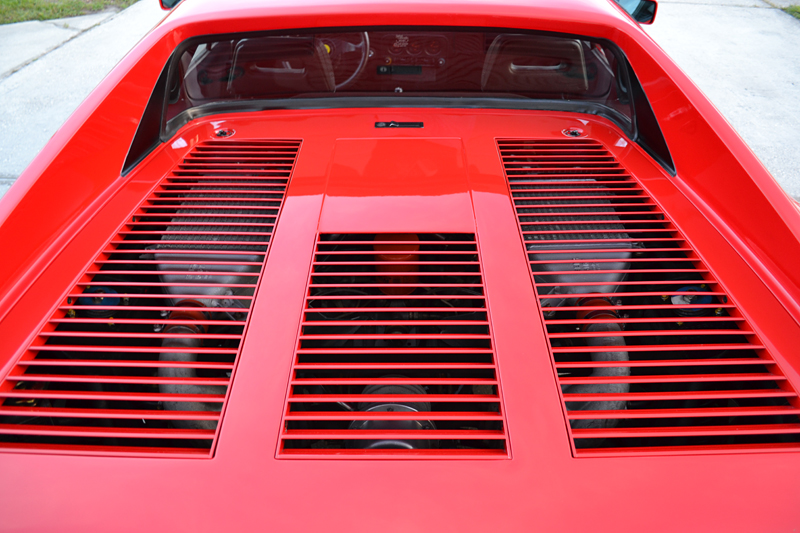
Final Pictures:
With the exterior buttoned up, it was time to snap a few final pictures.. The sun was beginning to crest below the horizon, creating the "golden hour" in which color saturation is easy to capture on (digital) film.


With the exterior buttoned up, it was time to snap a few final pictures.. The sun was beginning to crest below the horizon, creating the "golden hour" in which color saturation is easy to capture on (digital) film.

 09-30-2013, 06:48 AM
#8
Contributors

Join Date: Nov 2005
Location: nyc
Posts: 1,256
Likes: 0
Received 0 Likes
on
0 Posts
My Ride: 2010 M5 alpine white, black full leather, etc.
This Ferrari is an absolutely remarkable vehicle; an automotive benchmark, which you skillfully restored to pristine condition. Do you have any shots of the 288 before you started your work?
I would appreciate seeing exactly what was its condition as delivered to you..
I would appreciate seeing exactly what was its condition as delivered to you..
09-30-2013, 05:07 PM
#9
New Members
Join Date: Sep 2013
Location: Toronto
Posts: 13
Likes: 0
Received 0 Likes
on
0 Posts
My Ride: 08-550i M Sport
BRAVO !!! 
You'd make a killing here in Toronto. The most Ferrari's per capita in the world.
(Technically, in Woodbridge Ontario.)
I just got inspired me to work on my BOSS 302.
Although, I don't have the tools or the knowhow but your detailed step by step I'm sure will help us.
You're awesome to share this post with us as it is already a lot of work you put into the car, let alone your steps, products and pictures.
10-04-2013, 07:23 AM
#10
Former Vendor
Thread Starter
Join Date: Aug 2013
Location: Stuart
Posts: 138
Likes: 0
Received 0 Likes
on
0 Posts
My Ride: Daily Driver
The before's and after shots take place through out the thread. I have a couple total before shots from my iphone when they were delivering it. I try to present the before/after's step-by-step so you can see the totality of the work at the end.