
Detailed 2007 GTI. My most informative detail to date.
 11-16-2009 | 01:44 PM
#1

Thread Starter
Members
Joined: Jul 2009
Posts: 105
Likes: 0
From: Toronto, Ontario
VW GTI Full Correction ? Step by Step Write-Up
A few months ago I promised to detail my cousins VW GTI however I have been busy with client details and I wanted to make sure that I had enough time to take a lot of step by step pictures and do a full correction.
Ok so to the present day. My cousin went on vacation so I chose two days out of the two weeks he was away to work on his vehicle. Thankfully our schedules worked out and I had freed up two days so I could detail his GTI.
Ok so let us get started. I am going to try something a little different this time around by accompanying the pictures with product and process information. So bare with me and hopefully you will enjoy the write up as much as I have enjoyed writing it up.
BEFORES
So before I do anything to the car I like to go around with my D40. You can use any camera with a decent quality pixel rate but I find that DSLR provides for better depth and sharpness. Even though I do a walk through at the beginning I find that the process of snapping quality pictures really helps with me with prioritizing trouble areas. If surprises pop up I make sure to call the customer to let him know of the issue before proceeding. It really saves me and customer time and hassle.


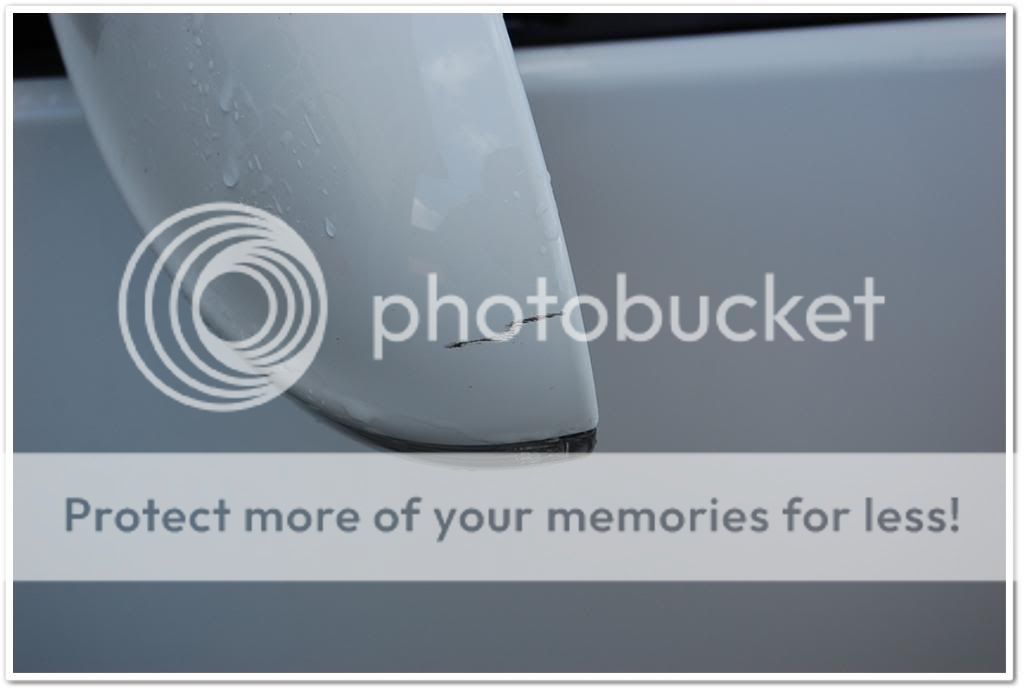
Possible bird etching issue on this particular panel.

Scratch on driver side mirror with paint transfer. Possible solutions could be heat gun and a light wipe, ISA wipe (isopropyl and water 50:50 mix), clay & clay lube and polishing.


A few months ago I promised to detail my cousins VW GTI however I have been busy with client details and I wanted to make sure that I had enough time to take a lot of step by step pictures and do a full correction.
Ok so to the present day. My cousin went on vacation so I chose two days out of the two weeks he was away to work on his vehicle. Thankfully our schedules worked out and I had freed up two days so I could detail his GTI.
Ok so let us get started. I am going to try something a little different this time around by accompanying the pictures with product and process information. So bare with me and hopefully you will enjoy the write up as much as I have enjoyed writing it up.
BEFORES
So before I do anything to the car I like to go around with my D40. You can use any camera with a decent quality pixel rate but I find that DSLR provides for better depth and sharpness. Even though I do a walk through at the beginning I find that the process of snapping quality pictures really helps with me with prioritizing trouble areas. If surprises pop up I make sure to call the customer to let him know of the issue before proceeding. It really saves me and customer time and hassle.
Possible bird etching issue on this particular panel.
Scratch on driver side mirror with paint transfer. Possible solutions could be heat gun and a light wipe, ISA wipe (isopropyl and water 50:50 mix), clay & clay lube and polishing.
11-16-2009 | 01:45 PM
#2
Thread Starter
Members
Joined: Jul 2009
Posts: 105
Likes: 0
From: Toronto, Ontario


The GTI is obviously dull but there is also a noticeable grayish tinge but it is nothing to be overly concerned about.
WASH
Ok so I?ve done the post detail walk through now let us move on to the wash phase of the detail. After my washes I always like to snap additional pictures because you never know what could be hiding underneath all that dirt. Dirt may not be dirt and maybe a scratch.

My tools of choice for washing this GTI?s paint is as follows:
2 Grit Guards
2 Sheepskin Wash Mitts
1 Detail Brush
Chemicals Guys Maxi Suds
Optimum No Rinse
Optimum Power Clean
I mix all three together. 1 oz of Maxi Suds, 1 oz of ONR and 2 oz of PC. I like a little suds so I use Maxi Suds to lift the dirt, ONR is added to soften the water and to pull the dirt away from the paintwork and PC to get rid of any existing wax or sealant even though this particular GTI did not have any protection to speak off.

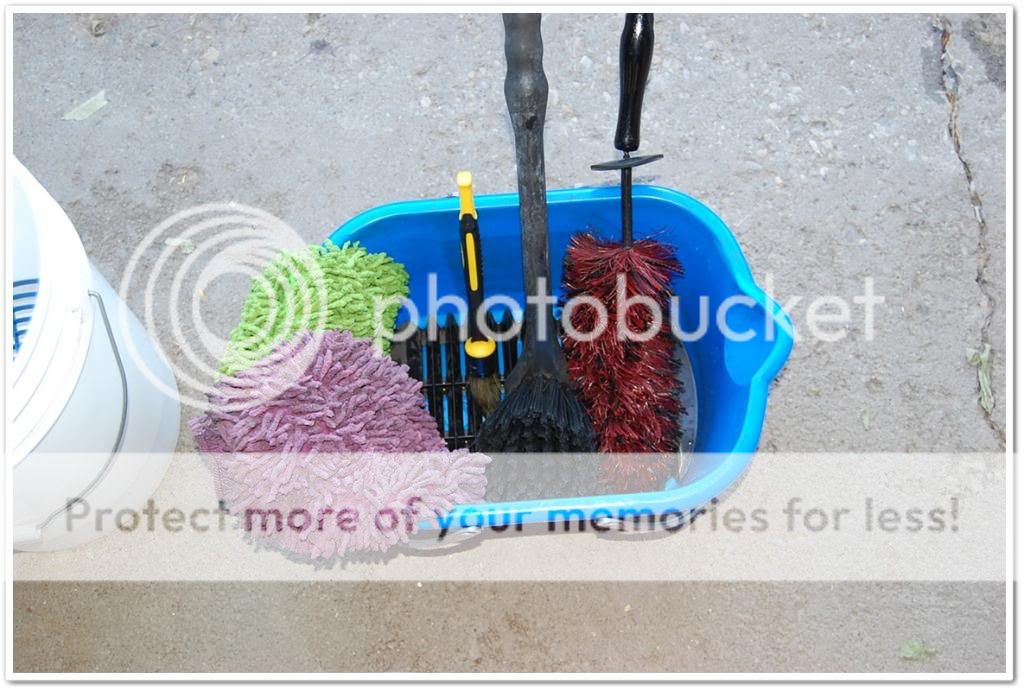
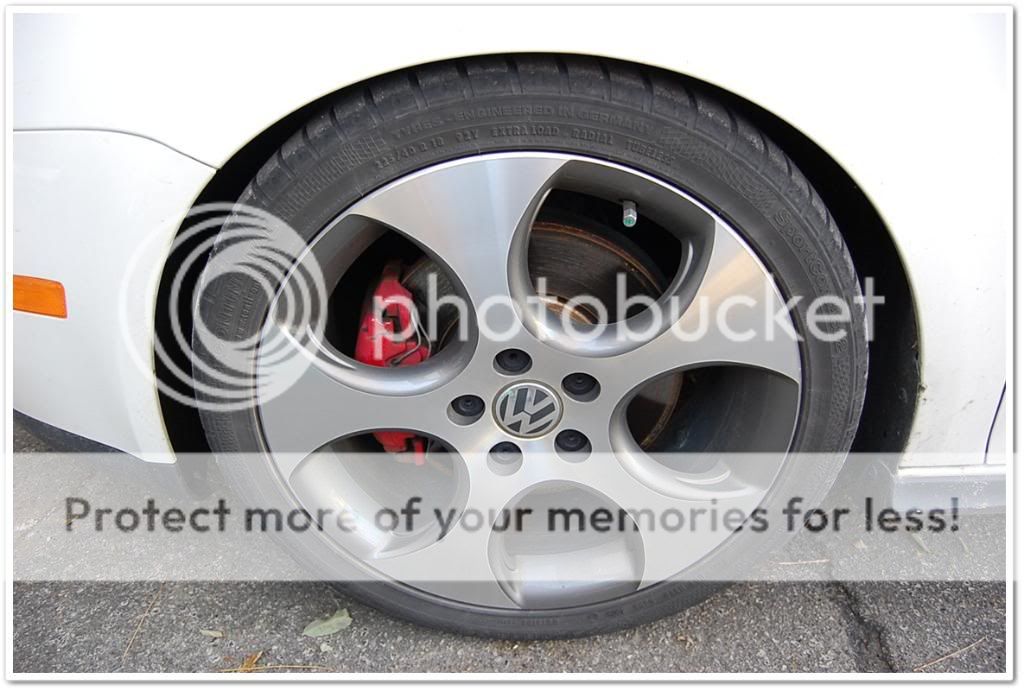
The tools that I used for the wheels are:
Detail brush (which are brilliant for lug nuts)
Grit guard
One bucket
Daytona Wheel Brush (completely invaluable when cleaning inner rims)
2 Chenille wash Mitts
Chemical Guys Wheel Gel ( 1 part water 1 part Wheel Gel used directly on surface)
Optimum Power Clean (1.5 oz of Power Clean used in bucket solution)


When rinsing wheels it is always safer to wash your wheels when they have cooled down. If you rinse a vehicle that has just been driven you risk the rotor warping because the rotor is hot while the water is cold. GTI was picked up the day before so the wheels were cool so there were no issues rinsing the wheels.

Coating the caliper and wheel with Chemical Guys Wheel Gel.
11-16-2009 | 01:45 PM
#3
Thread Starter
Members
Joined: Jul 2009
Posts: 105
Likes: 0
From: Toronto, Ontario

CG Wheel Gel also sprayed on tires.

You can see the wheel gel working and pulling the dirt away from the tire. This will help the longevity and look of your favourite tire dressing by having a clean canvas to work on.

Here is the Daytona brush in action. I scrub by brushing in side to side and back and forth motion to get the best cleaning action. Again I can?t emphasize how much it?s helped me keep my hands from getting tiny cuts from the rotors.


The Daytona Brush bent and being used behind the spokes.


The chenille mitt being used for the face of the rim. Although I prefer using the detail brush or zymol brush I find that the chenille mitt saves me some time because it has more coverage. I still use the detail brush for the corners of spokes.

Detail brush being used for the lug nuts.

All cleaned up.

Whoops almost forgot the calipers. When cleaning your calipers or the inner rims if you find that it?s being blocked by a spoke or caliper just roll your vehicle backward or forward to clean the previously inaccessible area.
11-16-2009 | 01:46 PM
#4
Thread Starter
Members
Joined: Jul 2009
Posts: 105
Likes: 0
From: Toronto, Ontario

Another example of a wheel scrub down.

Clean and Clear bucket. Keep that in mind for after the wash.

1 ounce of ONR going in the bucket.


1 ounce of Maxi Suds going into the bucket


2 ounces of Power clean going into the bucket.


A quick blast of the hose and voila! A wonderful symphony of colours.

GTI being rinsed down.
11-16-2009 | 01:47 PM
#5
Thread Starter
Members
Joined: Jul 2009
Posts: 105
Likes: 0
From: Toronto, Ontario

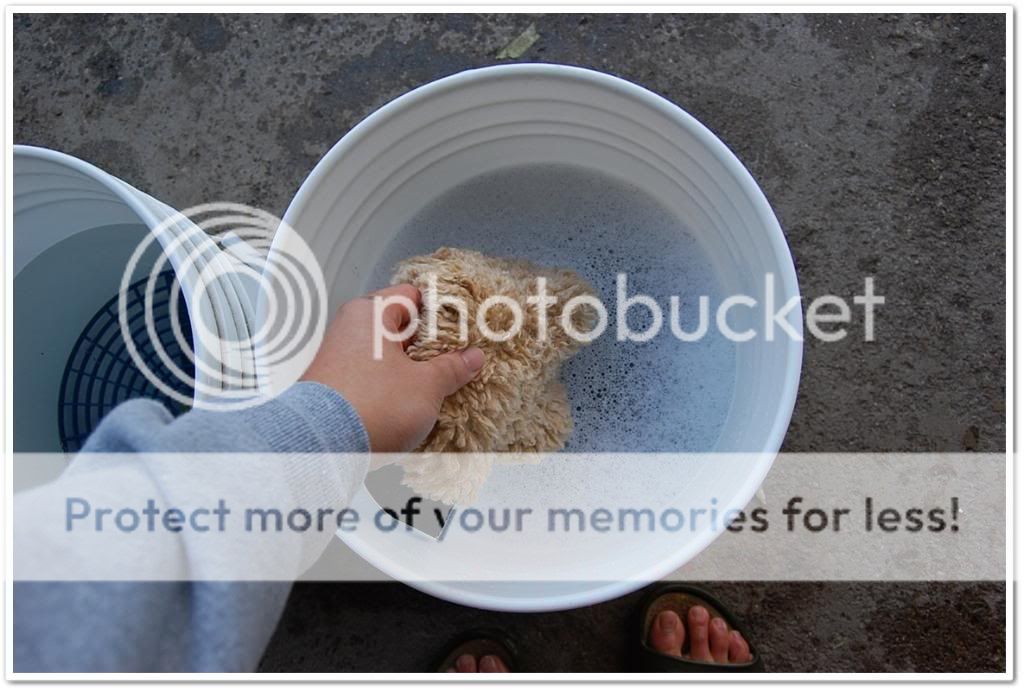
2 bucket wash method being practiced. At the beginning of the process you have two clean sheepskin wash mitts in the suds bucket while the bucket with clean water remains untouched until the first pass with the mitt on the paintwork.


Mitt doing it?s thing. Always start from the top of the car down that means, roof -> pillars -> hood -> trunk -> upper panels -> lower panels and bumper.

Place your dirty mitt into the clean bucket. Give it a quick shake to loosen the dirt away from the mitt. The grit guard will do its job by keeping the dirt at the bottom.


A mitt from the suds is now being used to clean. Repeat the process until the entire vehicle is done.

Mitt from clean water bucket rung out and then placed into the suds. I made sure that the mitt I had just used on the panel did not come in contact with the mitt soaking in the clean water bucket. I remove and ring the mitt in the clean water bucket first and then transferred it into the suds bucket. Only then did I place the dirty mitt into the rinsing bucket.


Dirty mitt from an extra dirty panel.


 11-16-2009 | 01:48 PM
#7
Thread Starter
Members
Joined: Jul 2009
Posts: 105
Likes: 0
From: Toronto, Ontario
DRYING

My trusty Makita was used to knock out hidden water areas in the gas tank, in between trim areas and tiny crevices that my hands would usually be unable to get to.

For the rest of the vehicle 3 waffle weave drying towels were used. You can get away with two but I find using three much more efficient. I don?t like wet towels. In terms of the quality of the waffle weave, nothing but the best should touch your paint. The last thing I am sure anyone wants is for their products used for cleaning to induce marring in the paint.


Before I forget a shot of the water after washing the GTI.

Moving onto claying. I used Riccardo Yellow and clay lube which was a mix of OPT Quick
Instant Detailer and ONR. I find using QID alone with clay lube causes hazing on the paint. Easily preventable if you dry each panel as you clay rather than leaving it to haze. I chose to use ONR with QID just because I feel the clay glides a little more with the ONR mixed in.

The Riccardo clay is rolled into a ball and then flattened out.


Here I am claying the GTI. I find when claying I use the up and down and side to side motion. I have had some clients when claying ask me why the clay at first seems to start removing a certain contaminant then kind of stops working and usually more often than not it?s because they were only claying in one direction rather than in the up and down and side to side motions.
So if you notice that a contaminant is not coming be sure to do both motions and if that doesn?t work bump the clays aggressiveness up but be aware than you will probably need to follow up with a polish to get rid of the light marring left by the clay.


My trusty Makita was used to knock out hidden water areas in the gas tank, in between trim areas and tiny crevices that my hands would usually be unable to get to.
For the rest of the vehicle 3 waffle weave drying towels were used. You can get away with two but I find using three much more efficient. I don?t like wet towels. In terms of the quality of the waffle weave, nothing but the best should touch your paint. The last thing I am sure anyone wants is for their products used for cleaning to induce marring in the paint.
Before I forget a shot of the water after washing the GTI.
Moving onto claying. I used Riccardo Yellow and clay lube which was a mix of OPT Quick
Instant Detailer and ONR. I find using QID alone with clay lube causes hazing on the paint. Easily preventable if you dry each panel as you clay rather than leaving it to haze. I chose to use ONR with QID just because I feel the clay glides a little more with the ONR mixed in.
The Riccardo clay is rolled into a ball and then flattened out.
Here I am claying the GTI. I find when claying I use the up and down and side to side motion. I have had some clients when claying ask me why the clay at first seems to start removing a certain contaminant then kind of stops working and usually more often than not it?s because they were only claying in one direction rather than in the up and down and side to side motions.
So if you notice that a contaminant is not coming be sure to do both motions and if that doesn?t work bump the clays aggressiveness up but be aware than you will probably need to follow up with a polish to get rid of the light marring left by the clay.
11-16-2009 | 01:48 PM
#8
Thread Starter
Members
Joined: Jul 2009
Posts: 105
Likes: 0
From: Toronto, Ontario

Drying the hood with a waffle weave after claying.

When you notice the clay is starting to get loaded(dirty). Fold and flatten the clay back out and voila you have new clay. However if you drop the clay at anytime just throw the clay out. It isn?t worth saving that extra little bit because dirt in the clay will end up scratching your car and that just isn?t worth it.


PAINT MEASUREMENT
Now on to measuring the paint thickness of the paint. The Defelsko 6000 was used to measure the paint. The paint on the GTI was relatively healthy except for the roof where you?ll see from the pictures it hit 78 microns. This area will be discussed when I start polishing.


POLISHING

My tools for polishing were 2 x Metabo PE12-175 polishers, 6? Sonus White Polishing Pads, 4? Flat LC polishing pads, 3M Sun Gun, 3M Backing Plate, Rubbish Boys Backing Plate, Meguiars 105, Meguiars 205 and Menzerna 106FF.
For most of the car except the roof Meguiars 105 was used with the 6? and 4? pads. M205 with 6? and 4? was used on the roof.
Polishing Steps
900 rpm light pressure ? medium pressure
1100 rpm heavy pressure
900 rpm medium pressure - light pressure
When I neared the end of a pass there was almost no pressure on the pad. I lifted the rotary to make sure my arms were sustaining most of the rotaries weight. By doing this the finish that was attained in my opinion was almost LSP ready. I then followed up M105 with M205 with the same process except that I kept the RPMS at 900rpm the entire time.

I love how thick the Sonus pads are. Too bad they have been discontinued.

I apologize for the blurry pics. It?s hard to take pictures on your own thankfully on the second day my gf came by and helped towards the end of the detail.
11-16-2009 | 01:49 PM
#9
Thread Starter
Members
Joined: Jul 2009
Posts: 105
Likes: 0
From: Toronto, Ontario

Door ding.

After 3 passes with M105 on 4 inch pad. I could have used a more aggressive pad or even wet sanding but I didn?t think it was necessary to take it to a more aggressive level when I felt that the results were more than satisfactory.

The result.

Remember the scratch and paint transfer on the side mirror? Gone.

Sorry defects were a little hard to take on the white. However in this particularly picture you?ll notice the 3M sun guns reflection is a little hazy and trust me there was quite a bit of swirls.
Haziness and swirls gone.

Cleaned up.

Cleaned up.

Cleaned up.
11-16-2009 | 01:49 PM
#10
Thread Starter
Members
Joined: Jul 2009
Posts: 105
Likes: 0
From: Toronto, Ontario


Here I am correcting the bumper. Yes I love my shorts and my crocs. Those aren?t my socks I swear.

I will be using a 4 inch LC pad with M105 on the bumper lip area. This area needed about 3 passes.


Here I am taping off the rubber near the bumper lip area. Even though I am working at such low RPM?s its just good practice to tape. When using a rotary or even a DA the corners of the pad can burn subsequent perpendicular areas. Be aware and you are better safe than sorry so make sure you tape off.

Polishing away. If you look closely the pad is not touching the increased grade of the paint where the paint meets the trunk.

Now to the hatch. I propped the hatch open with a microfiber towel placed on the bumper while using a polishing bottle to prop it up. It gives me better access to the paintwork in that particular area.


