
Car Detailer in GTA [Toronto/Markham/Unionville]


Members
Joined: Feb 2009
Posts: 98
Likes: 0
From: Toronto
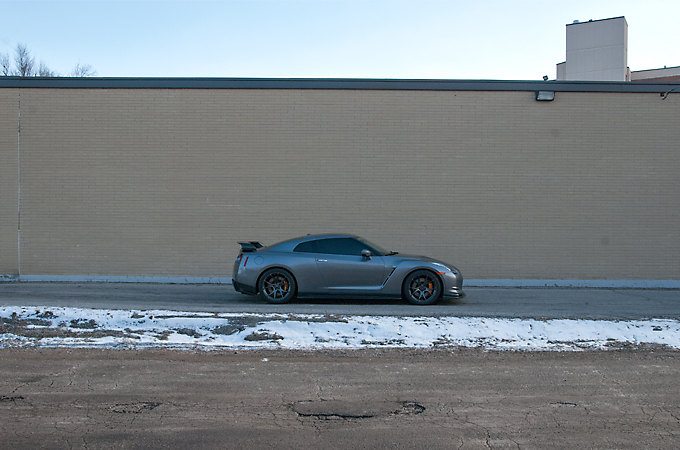
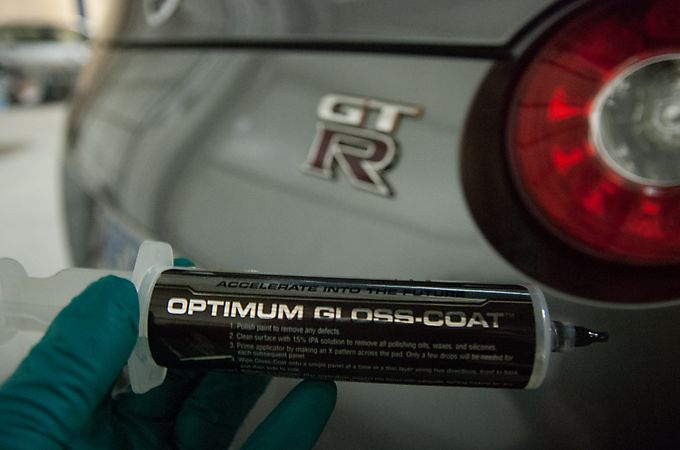
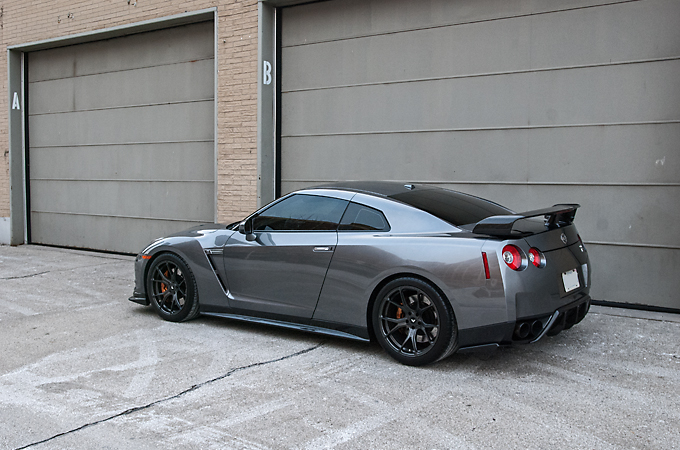
This GT-R came in for a promotion we were having in January. I spoke briefly to the client about a few areas of concern over the phone and then we both agreed that weather permitting it would come in for a 2 stage polish + Opti Gloss Coat. Luckily everything worked out and surprisingly the client didn't live to far away from the shop.
Arrival
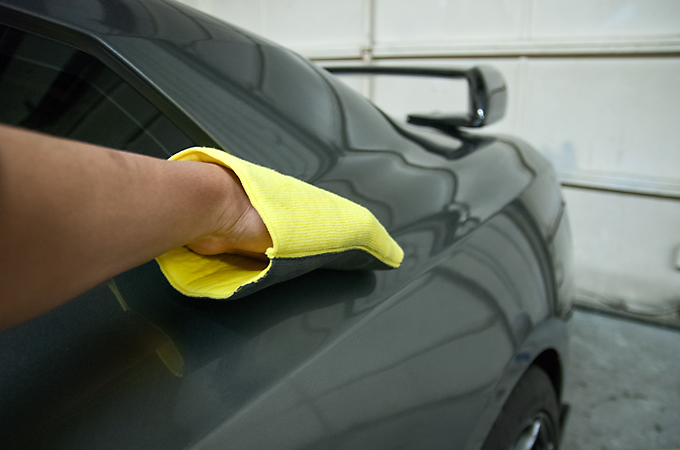
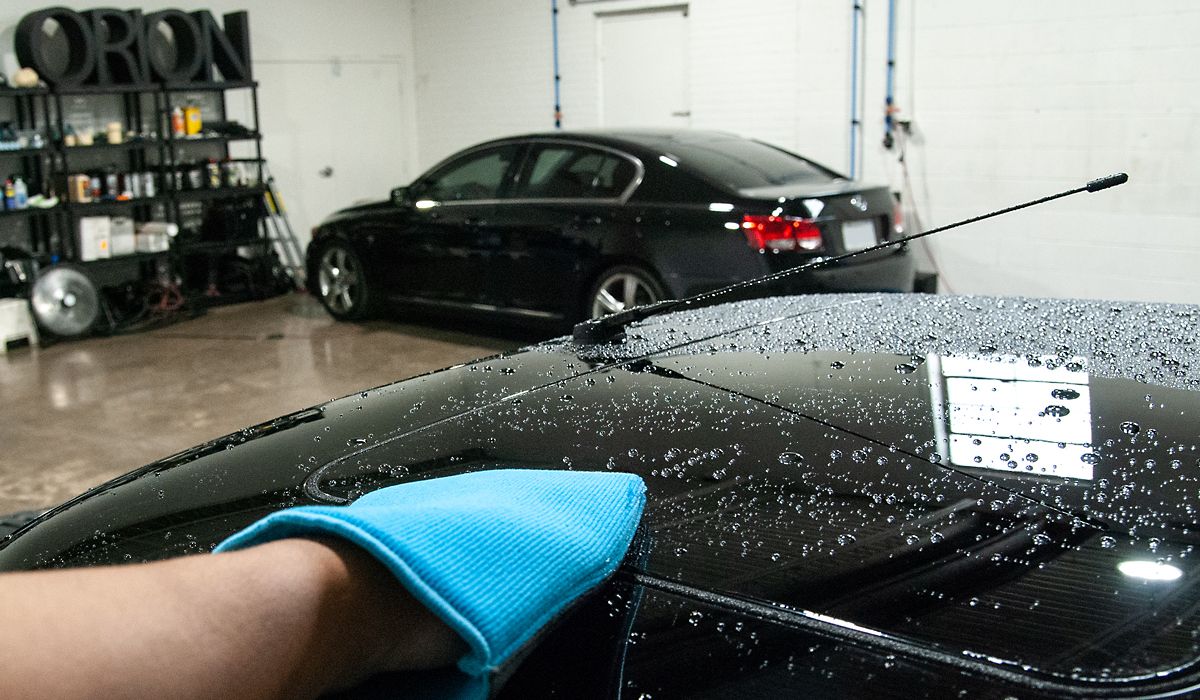
Claybarring the paint
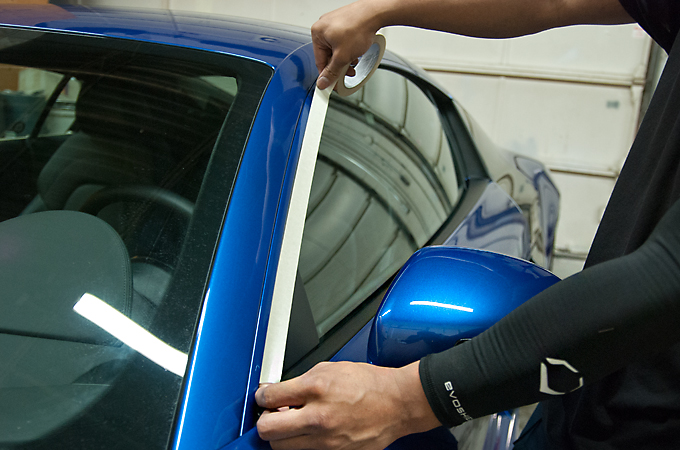
Masking off the rubber trim

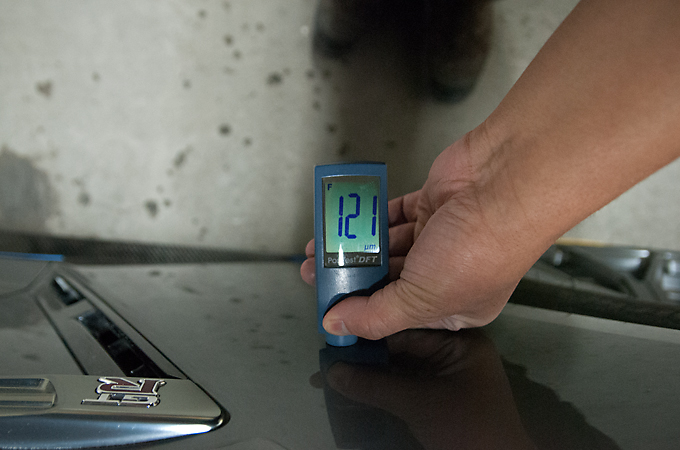
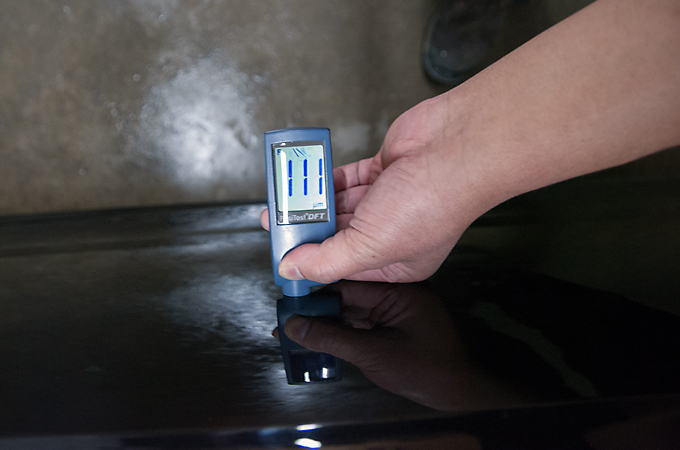
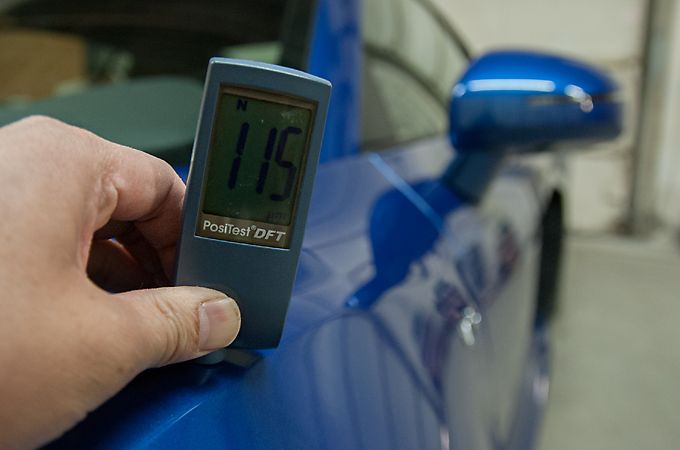
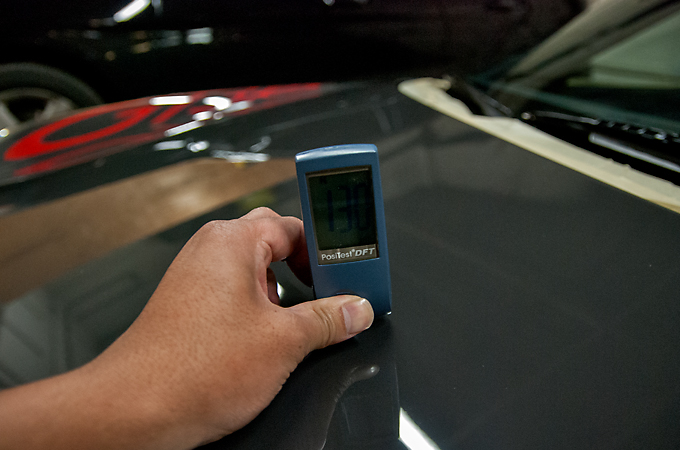
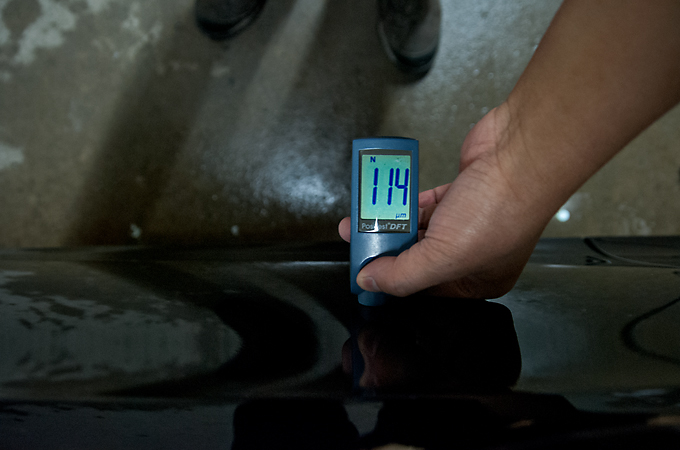
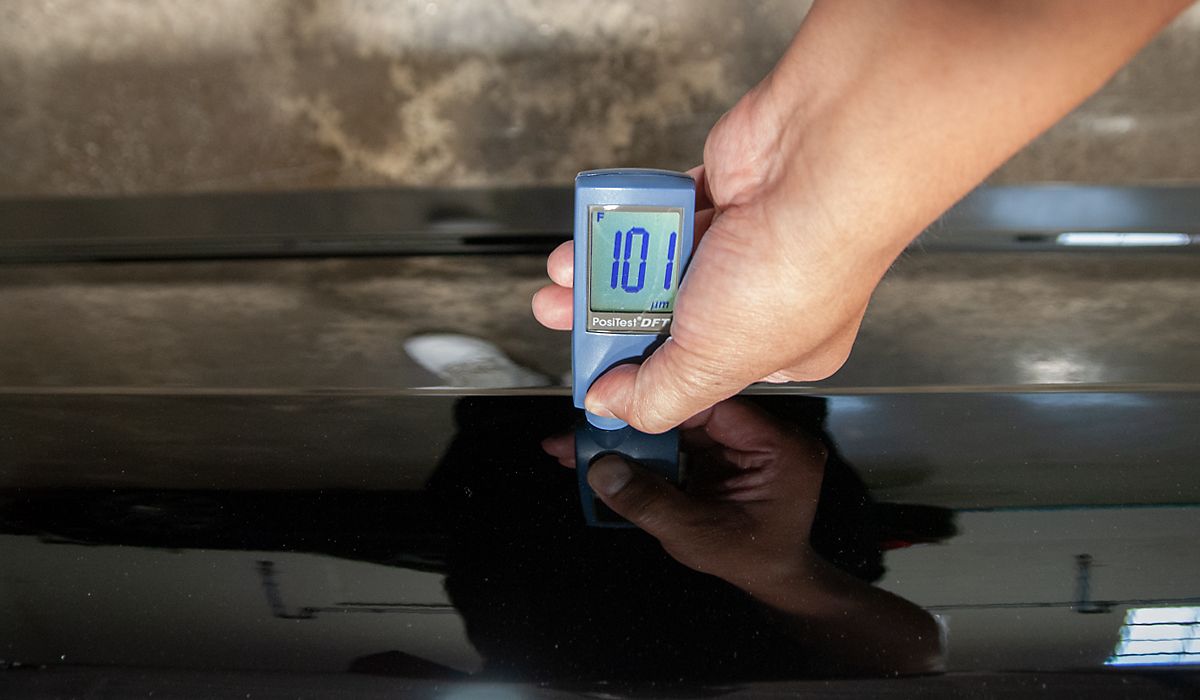
Measuring the paint
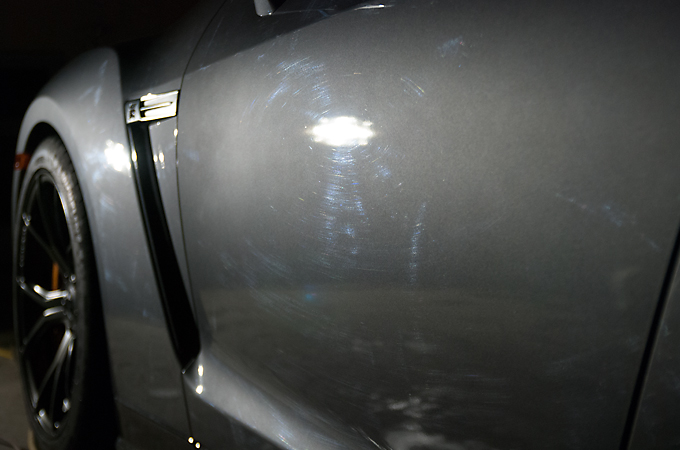
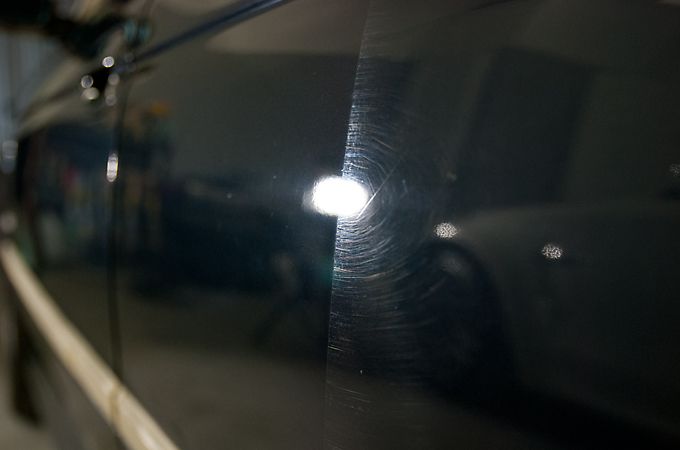
Onto the 1st stage of polishing
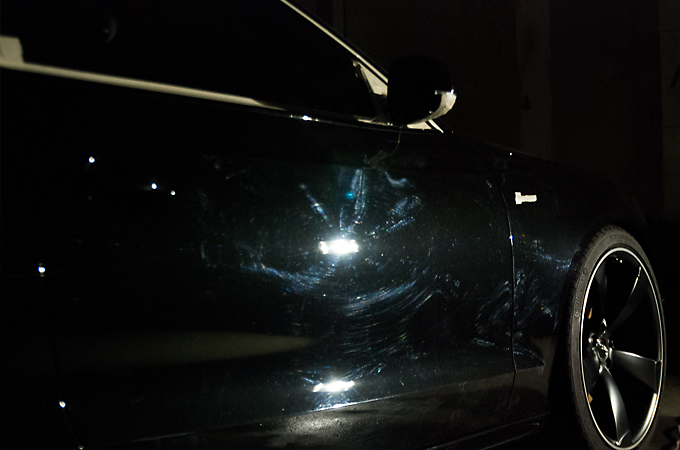
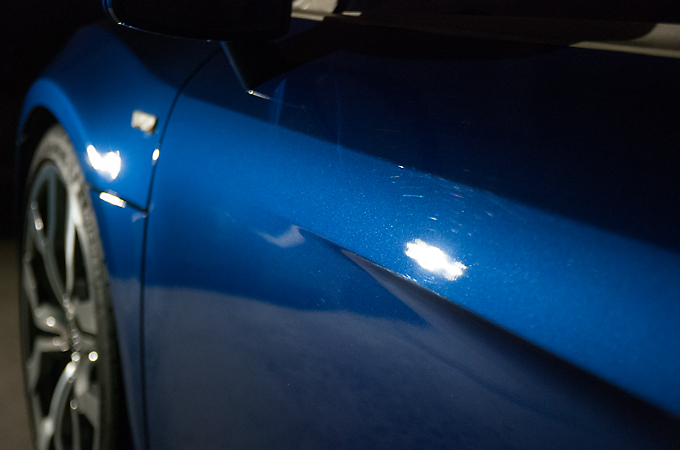
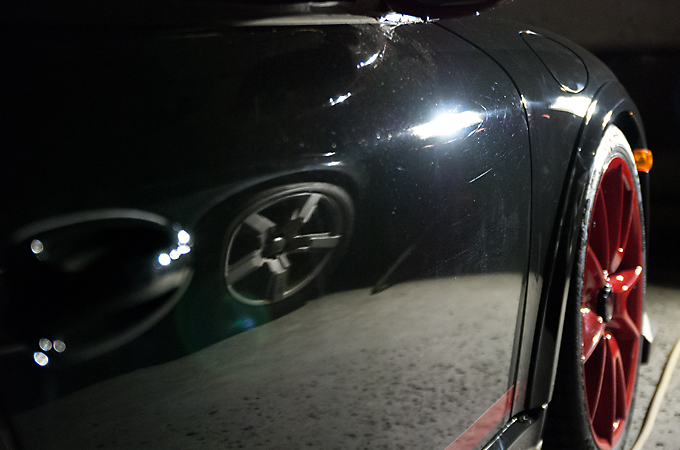
Before
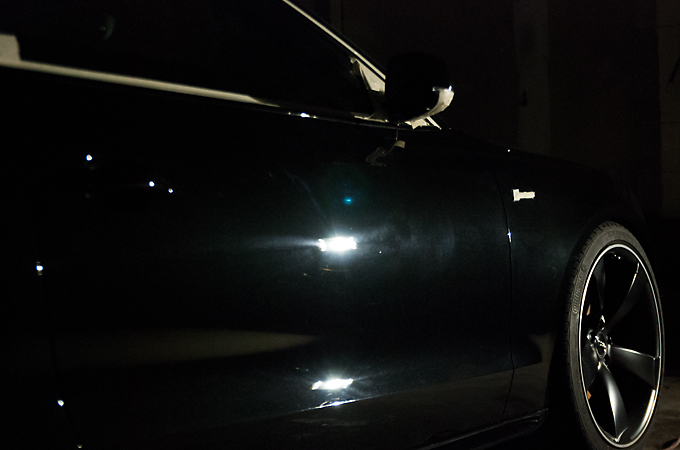
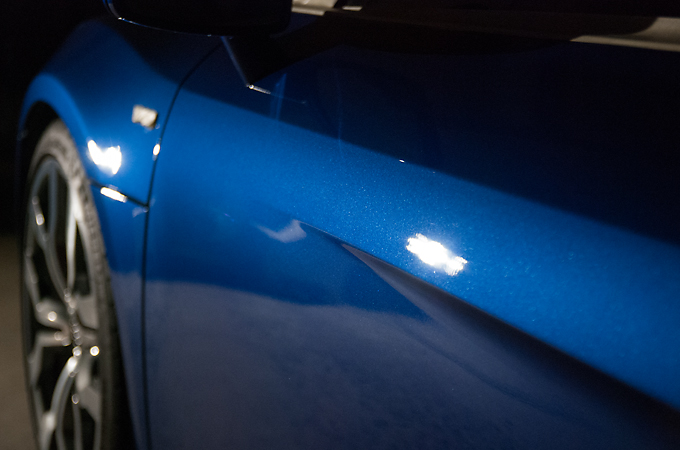
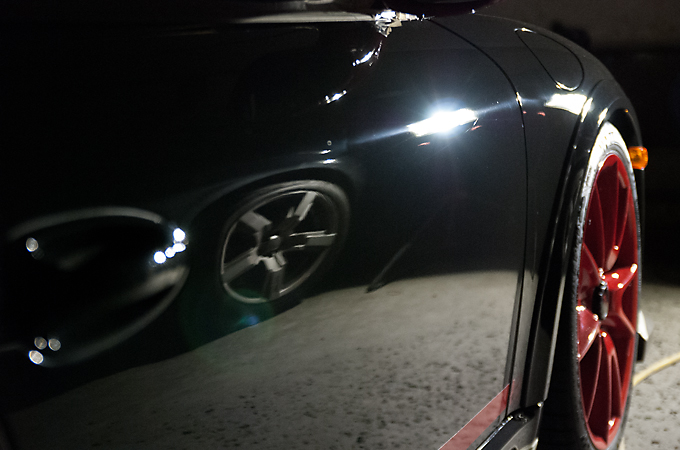
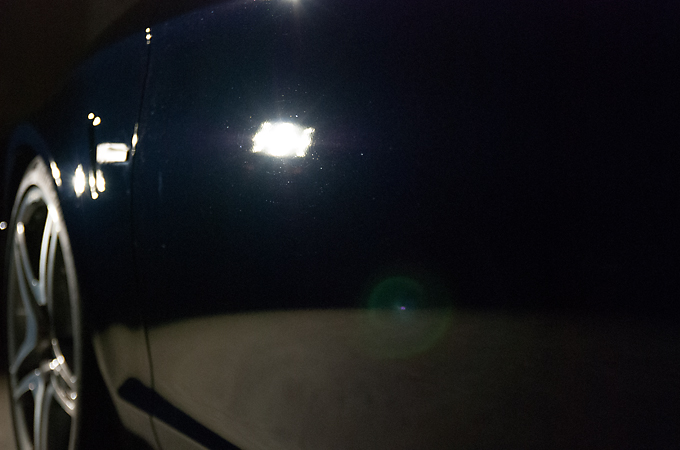
After
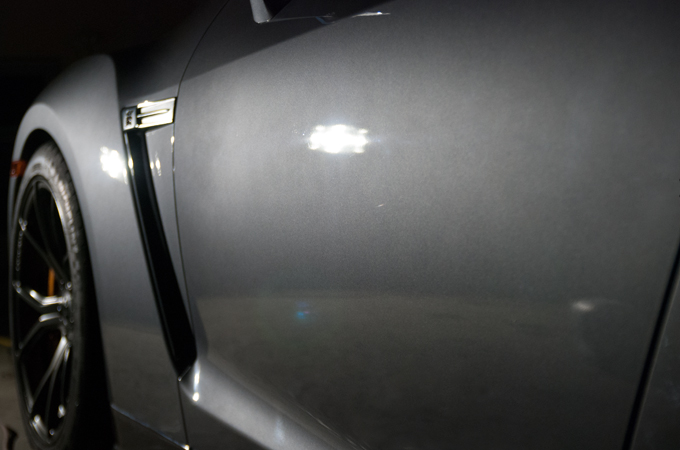
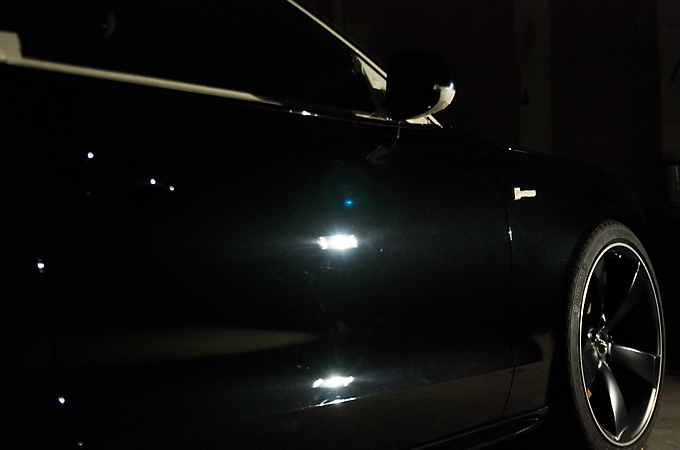
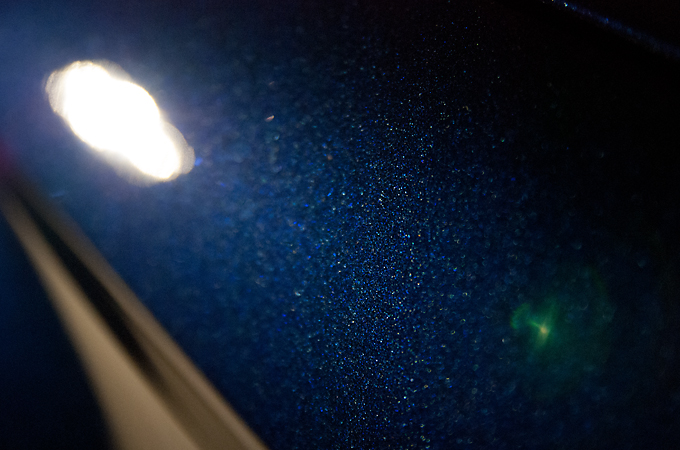
Metallic flake popping again

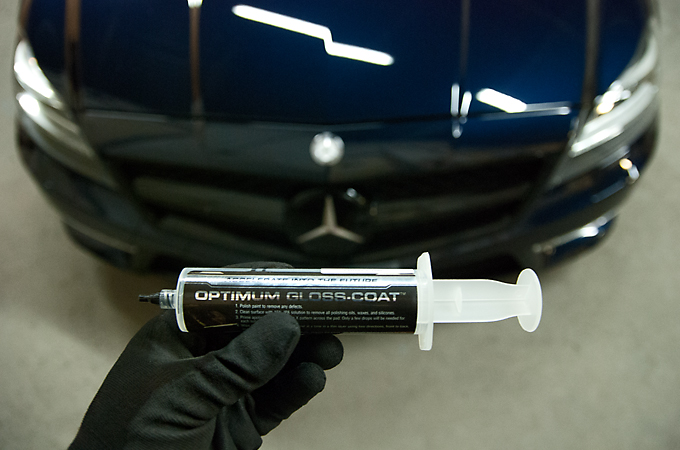
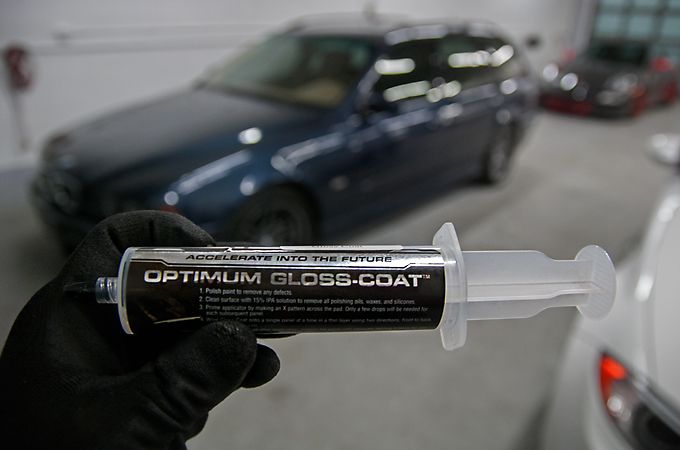
Opti Gloss Coat about to be applied
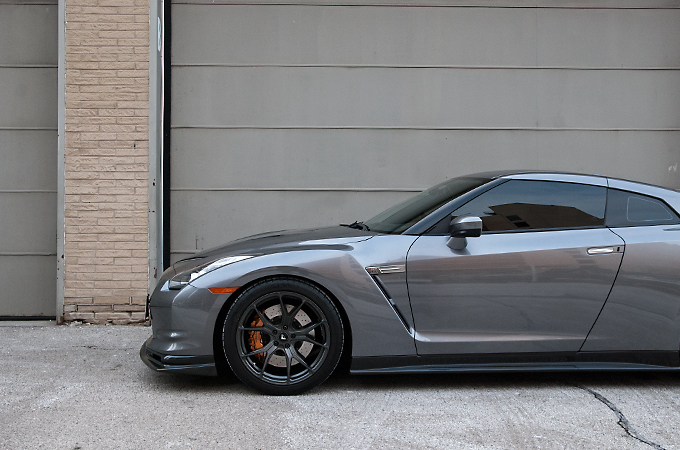
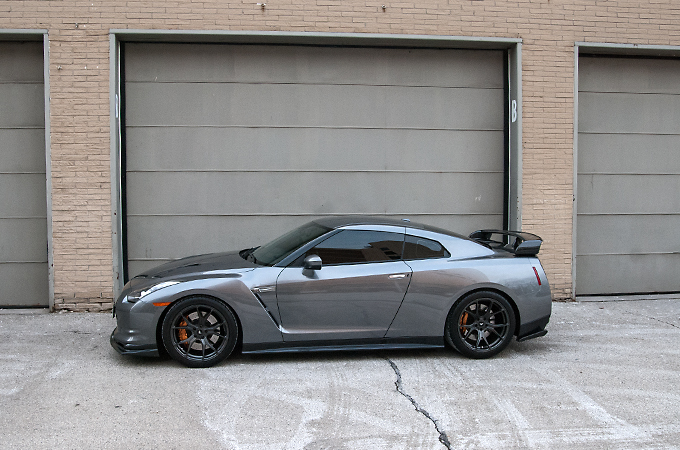
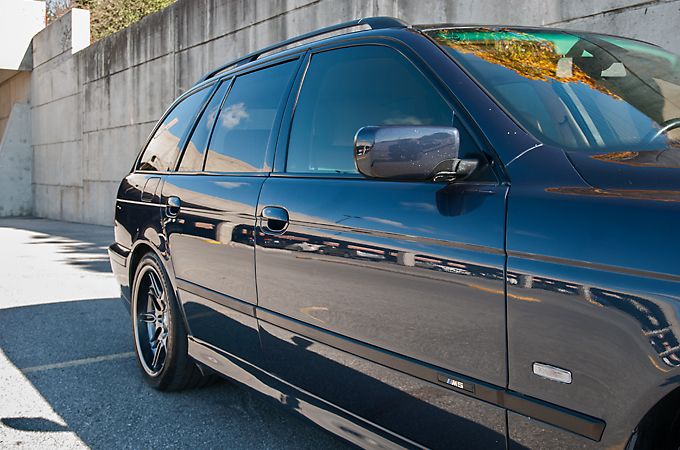
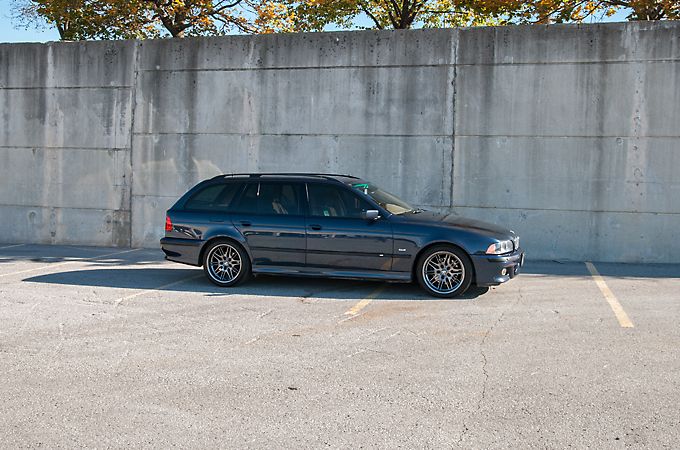
And the final results!
Arrival
Claybarring the paint
Masking off the rubber trim
Measuring the paint
Onto the 1st stage of polishing
Before
After
Metallic flake popping again
Opti Gloss Coat about to be applied
And the final results!
Members
Joined: Feb 2009
Posts: 98
Likes: 0
From: Toronto
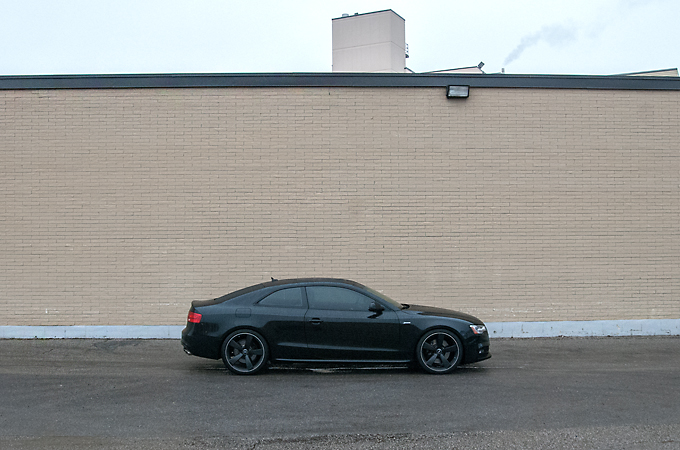
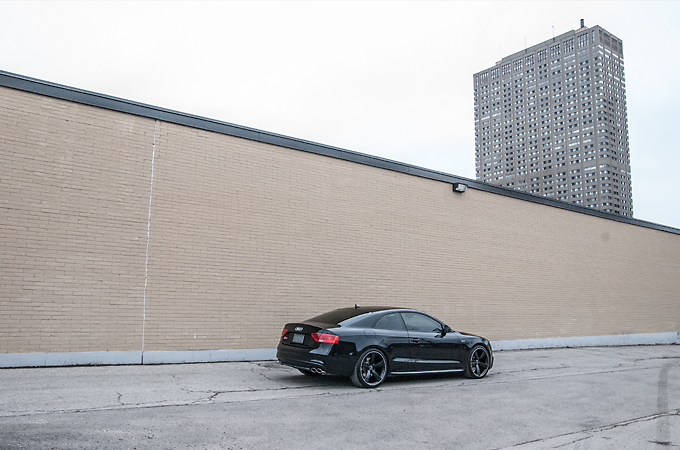
Had a chance to asses this S5 last year but due to scheduling on both our ends things didn't pan out. But this year the client wanted to get it done before our busy season hit so in it came for March and received our 2 stage polish with Opti Gloss Coat as protection.
Arrival
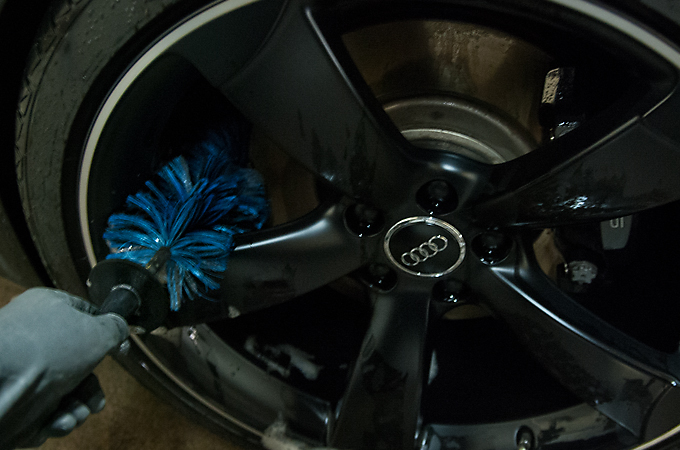
Cleaning the wheels while we had a chance to chat with the customer while he waited for his ride
Claybarring the paint

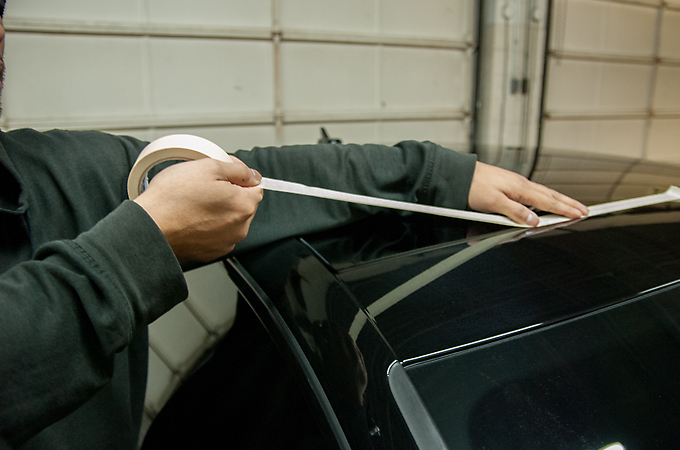
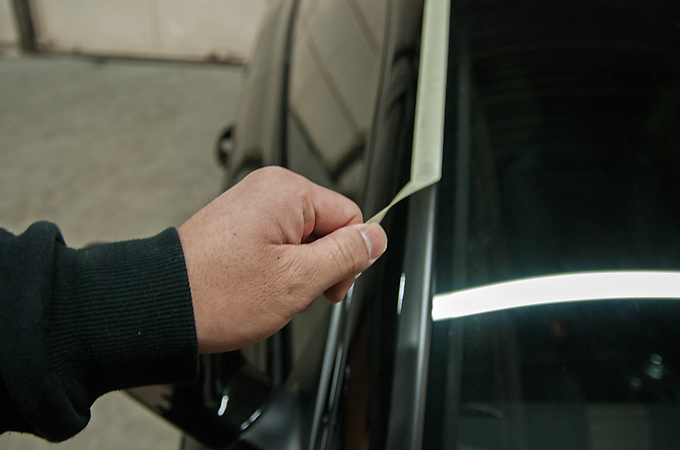
Masking off the rubber trim
Measuring the paint and found no panels that were repainted
The paint was in pretty rough shape so we had to hit it with a compound for the 1st stage
before
after (as you can see the compound removed the swirls but left a haze behind due to it's aggressiveness)
After the 1st stage we refined the paint with a lighter cutting polish on the 2nd stage to remove the haze as well as leave a deep gloss
before
after
After all the polishing was completed we began the finishing prep
Removing the masking tape
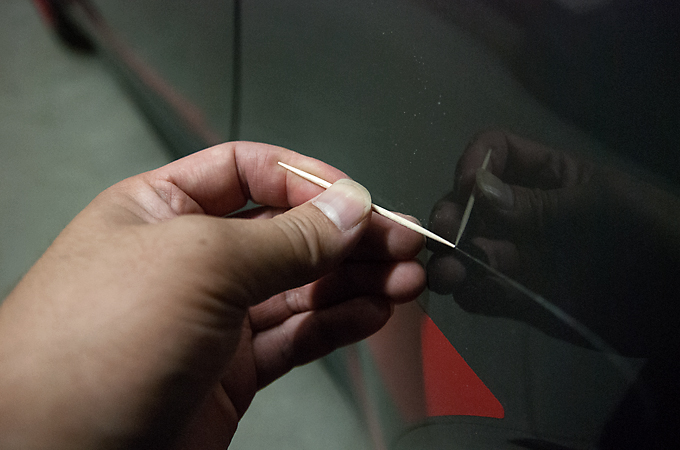
And cleaning polish that had gotten in the parking sensors with a tooth pick
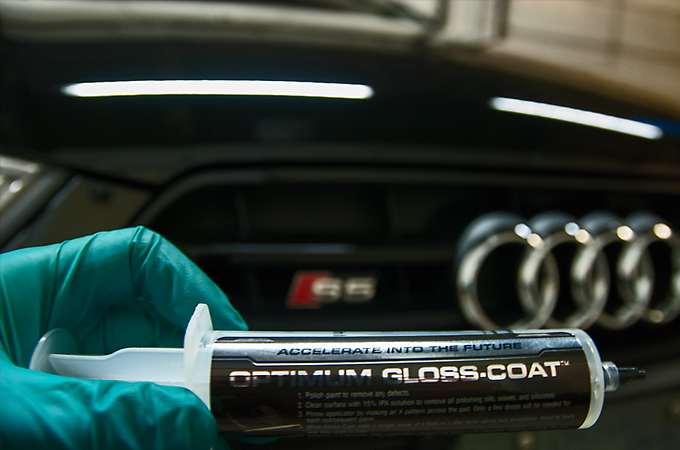
Then protected the new finish with Opti Gloss Coat which lasts for 2 years
And here are the final shots. Unfortunately no sun was out but hopefully you can still see the gloss achieved.

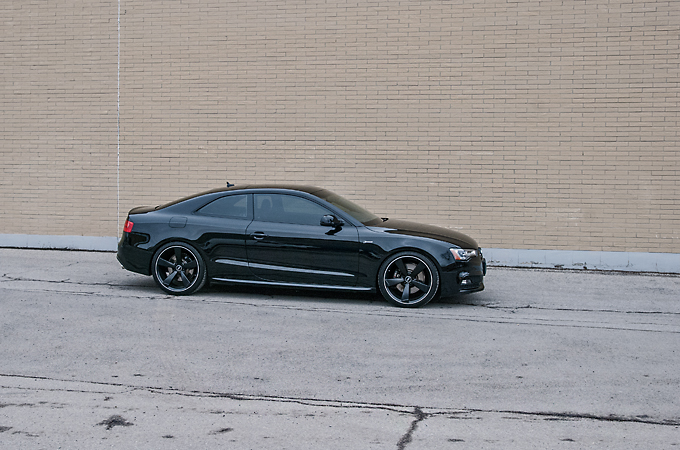
And the last pic
Hope you enjoyed the pics and looking forward to seeing some of you this driving season!
Arrival
Cleaning the wheels while we had a chance to chat with the customer while he waited for his ride
Claybarring the paint
Masking off the rubber trim
Measuring the paint and found no panels that were repainted
The paint was in pretty rough shape so we had to hit it with a compound for the 1st stage
before
after (as you can see the compound removed the swirls but left a haze behind due to it's aggressiveness)
After the 1st stage we refined the paint with a lighter cutting polish on the 2nd stage to remove the haze as well as leave a deep gloss
before
after
After all the polishing was completed we began the finishing prep
Removing the masking tape
And cleaning polish that had gotten in the parking sensors with a tooth pick
Then protected the new finish with Opti Gloss Coat which lasts for 2 years
And here are the final shots. Unfortunately no sun was out but hopefully you can still see the gloss achieved.
And the last pic
Hope you enjoyed the pics and looking forward to seeing some of you this driving season!
Members
Joined: Feb 2009
Posts: 98
Likes: 0
From: Toronto
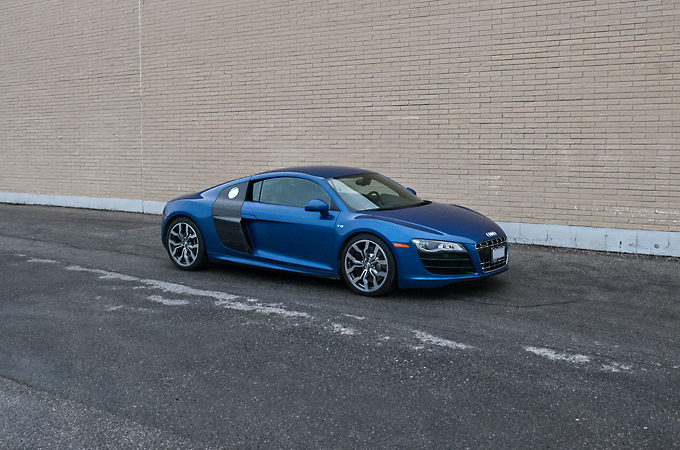
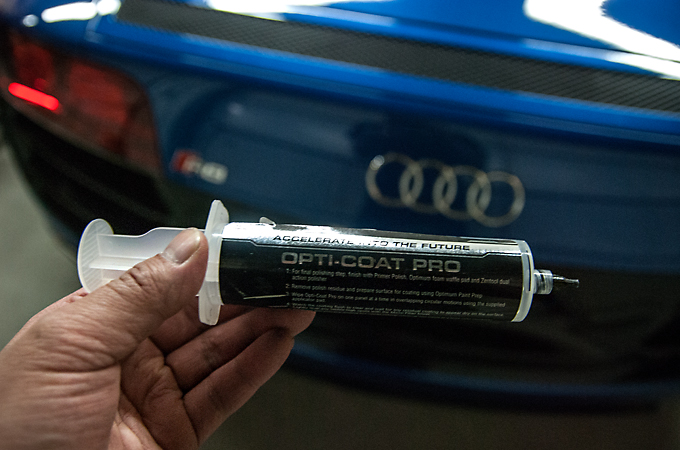
This beautiful Sepang Blue V10 R8 came in early spring but we have been so busy that I haven't had time to post it until now.
Not really much of a back story, got a call inquiring about Opti Coat Pro, client inquired with a few Audi Club members who vouched for our work, then in it came.
Arrival
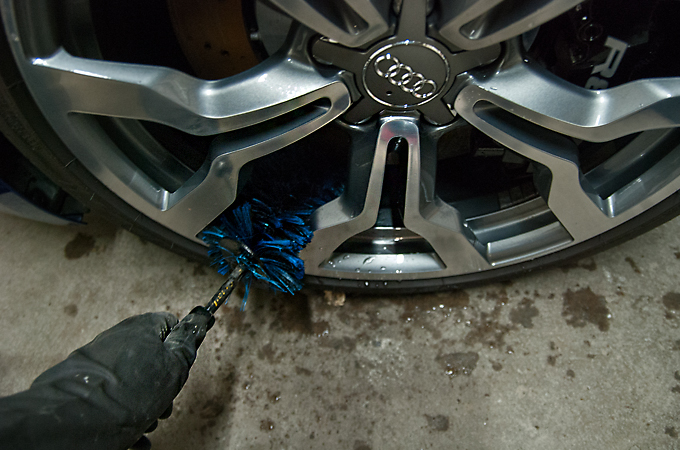
Cleaning the wheels
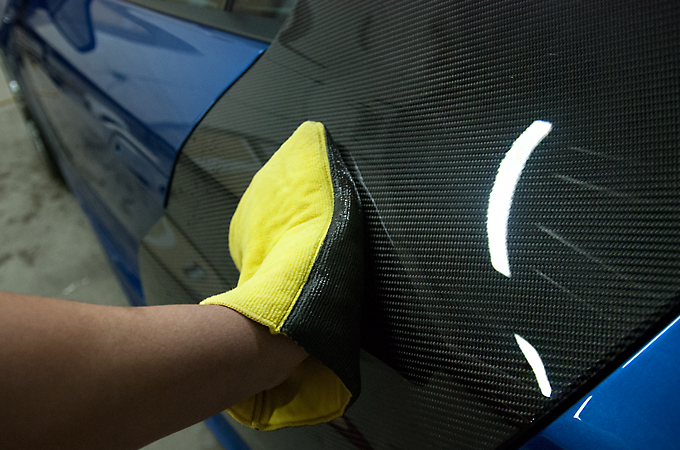
Claybarring the paint with the Nanoskin Mitt
Measuring the paint
Masking off the rubber trim
Before
After
After polishing and prep for Opti Coat Pro cleaned the windows

Opti Coat Pro about to be applied
And now the finished pics
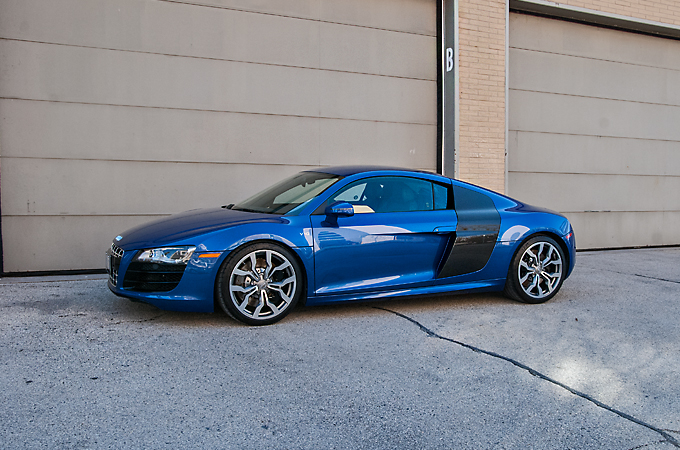
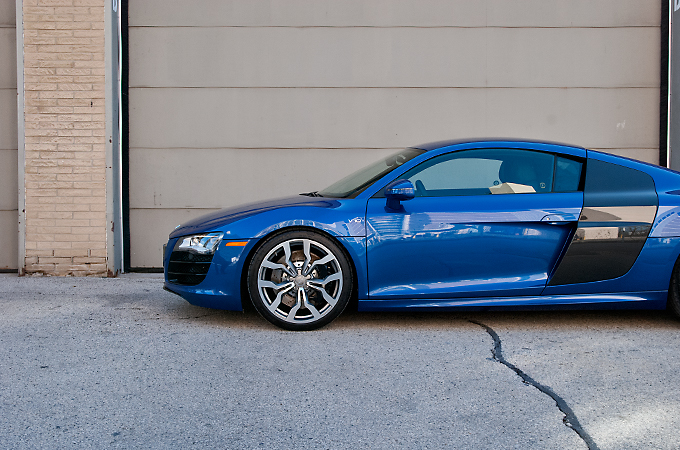
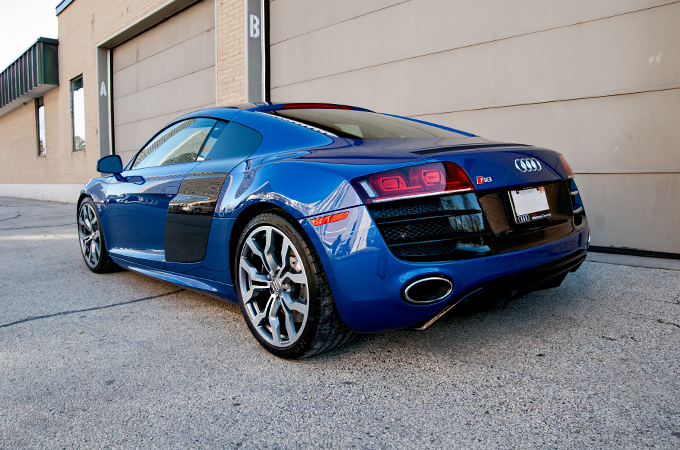
And a sun shot to show no more swirls

Hope you enjoyed the pics!
Not really much of a back story, got a call inquiring about Opti Coat Pro, client inquired with a few Audi Club members who vouched for our work, then in it came.
Arrival
Cleaning the wheels
Claybarring the paint with the Nanoskin Mitt
Measuring the paint
Masking off the rubber trim
Before
After
After polishing and prep for Opti Coat Pro cleaned the windows
Opti Coat Pro about to be applied
And now the finished pics
And a sun shot to show no more swirls
Hope you enjoyed the pics!
Members
Joined: Feb 2009
Posts: 98
Likes: 0
From: Toronto
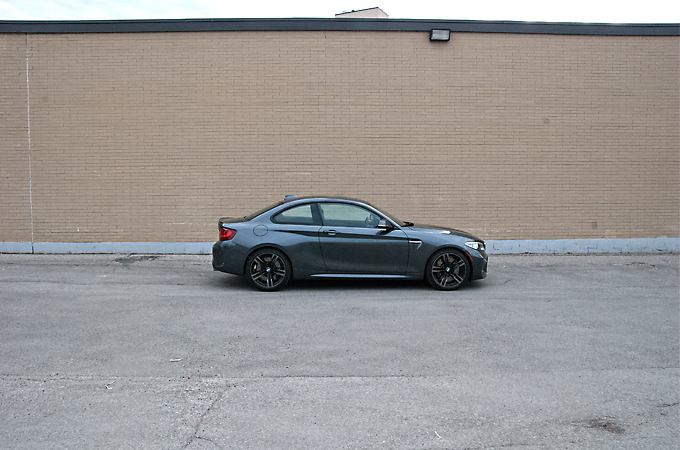
One of the first M2's delivered in the GTA we had done this back in the early spring.
Client informed us that he was expecting delivery and was interested in protecting it right away with Opti Coat Pro. We advised that the dealer not wash the car but remove the plastic to insure no damage underneath. Day of delivery in it came straight from the dealer. Paint wasn't bad at all just some very light swirls that we polished out with a 1 stage polish.
Arrival
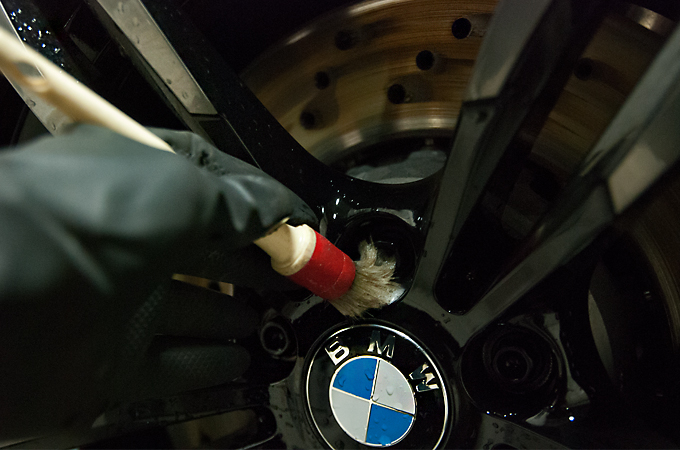
Cleaning the wheels
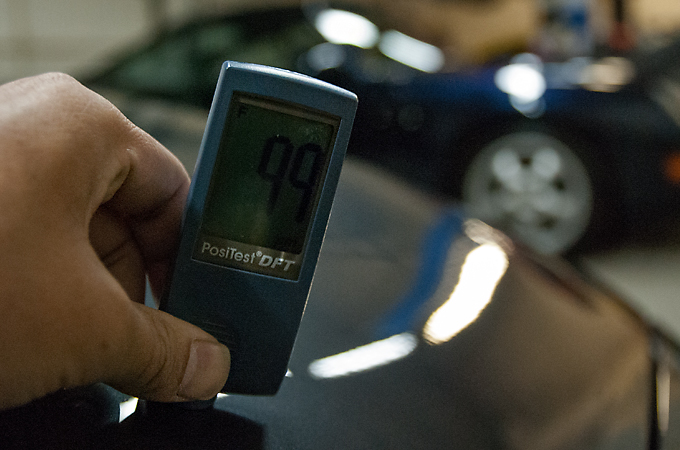
Measuring the paint
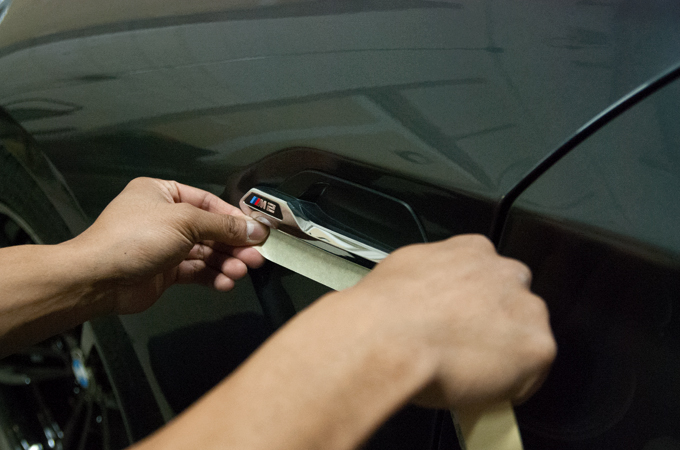
Masking off the rubber and plastic trim
Before
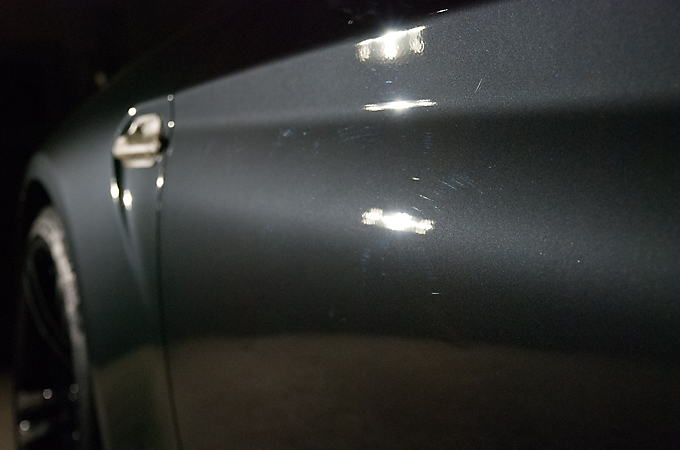
After
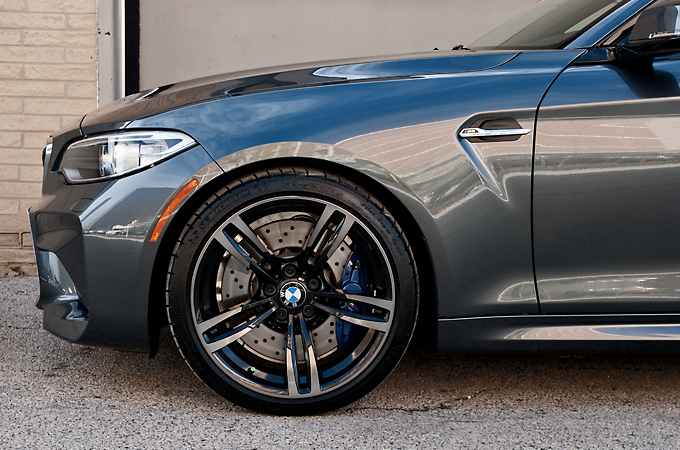
Mineral Grey Metallic flake looking beautiful

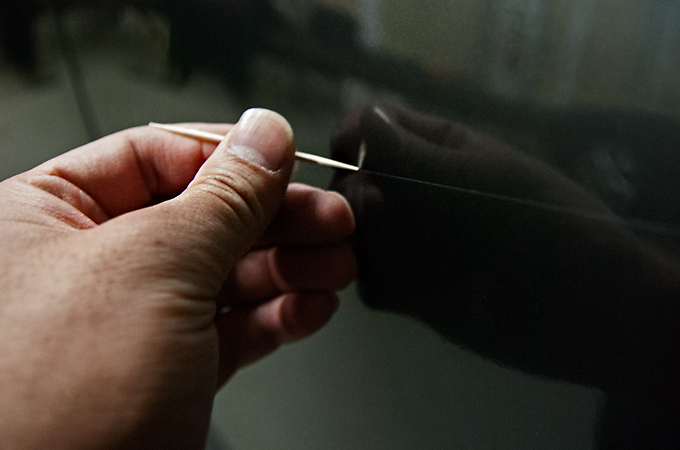
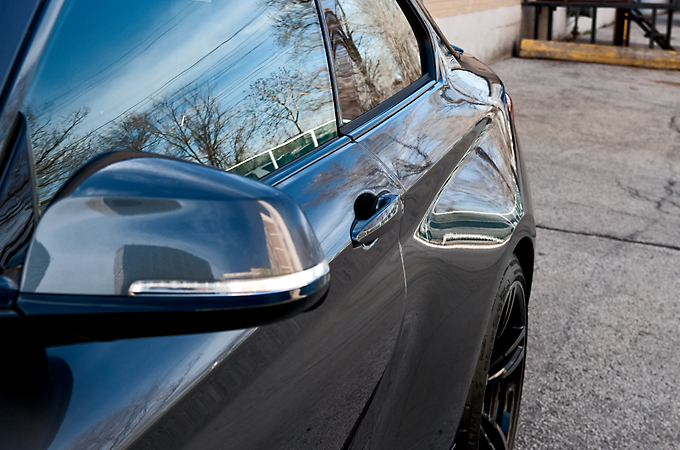
Removing residue from the stone guard edge
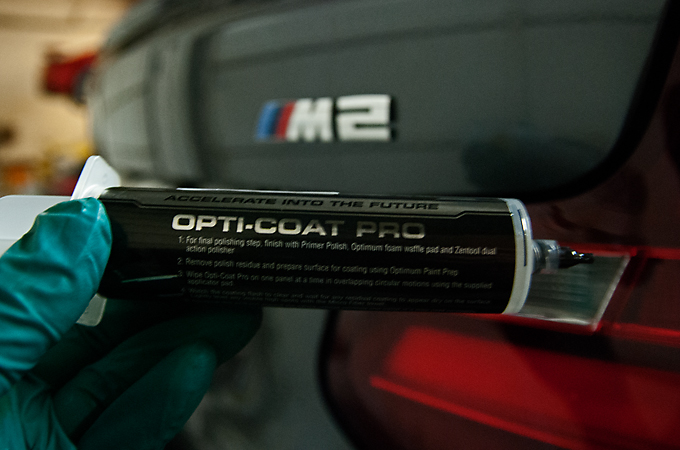
Opti Coat Pro about to go on and we applied 2 coats to the paint
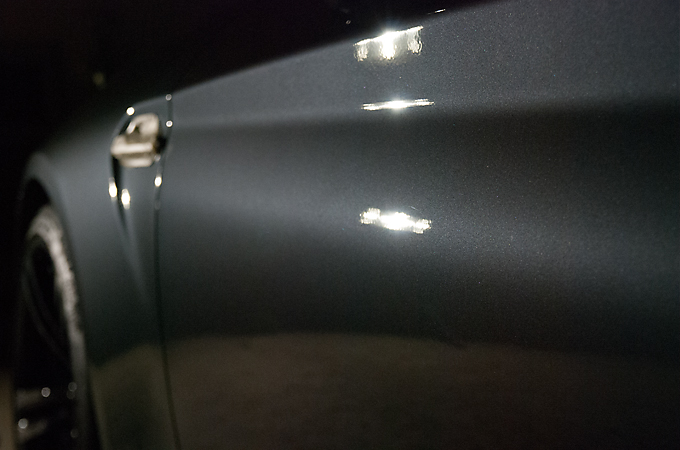
And the final results of our work
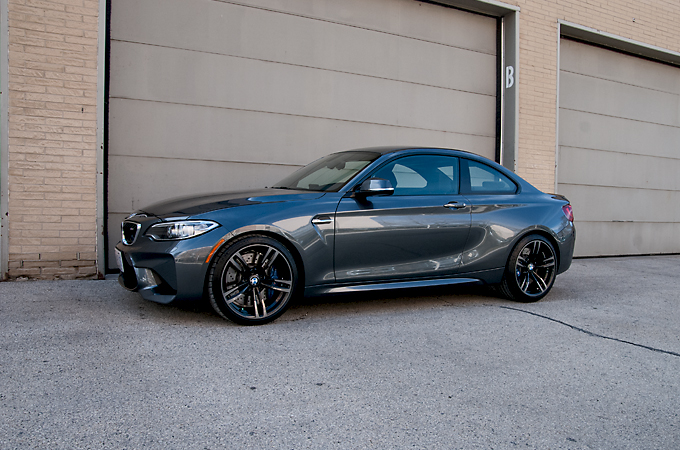
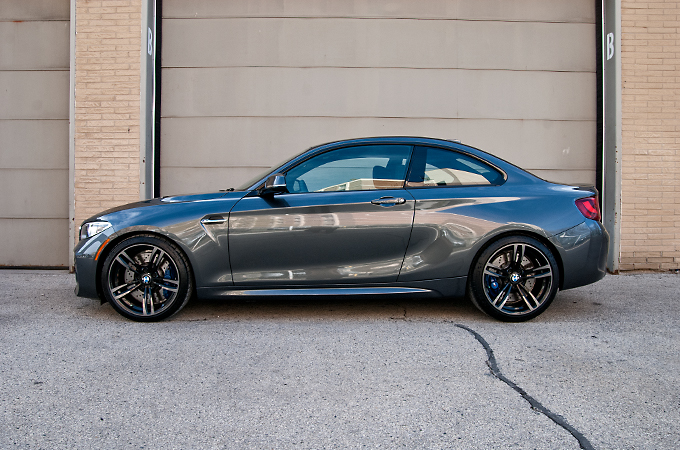
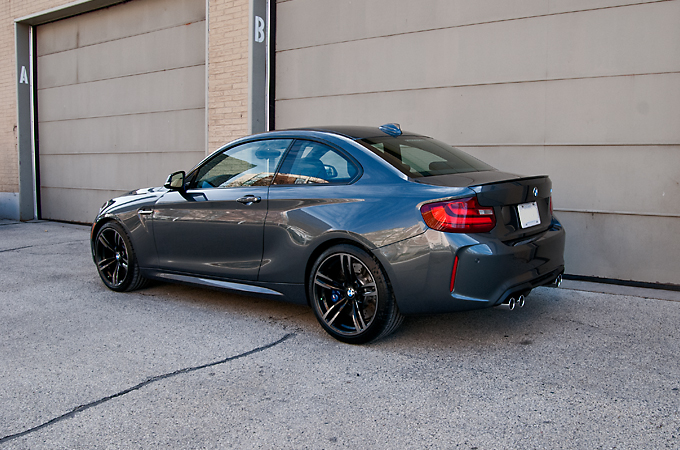
It was a huge pleasure to work on this M2 and thank you to the owner for choosing us to perform the work. Hope you guys enjoyed the pics!
Client informed us that he was expecting delivery and was interested in protecting it right away with Opti Coat Pro. We advised that the dealer not wash the car but remove the plastic to insure no damage underneath. Day of delivery in it came straight from the dealer. Paint wasn't bad at all just some very light swirls that we polished out with a 1 stage polish.
Arrival
Cleaning the wheels
Measuring the paint
Masking off the rubber and plastic trim
Before
After
Mineral Grey Metallic flake looking beautiful
Removing residue from the stone guard edge
Opti Coat Pro about to go on and we applied 2 coats to the paint
And the final results of our work
It was a huge pleasure to work on this M2 and thank you to the owner for choosing us to perform the work. Hope you guys enjoyed the pics!
Members
Joined: Feb 2009
Posts: 98
Likes: 0
From: Toronto
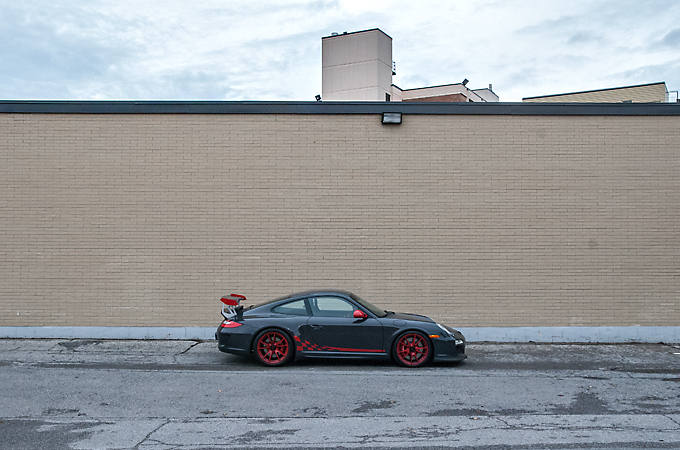
Long time client purchased this 997.2 GT3RS earlier this year and wanted to get it up to standard. I had gone with him to the purchase just to inspect it as well as measure the paint to make sure no panels had been repainted and everything turned out good. A few months later and a couple weeks ago in it came for a full interior, 2 stage polish, engine shampoo, and 2 coats of Opti Coat Pro.
Arrival
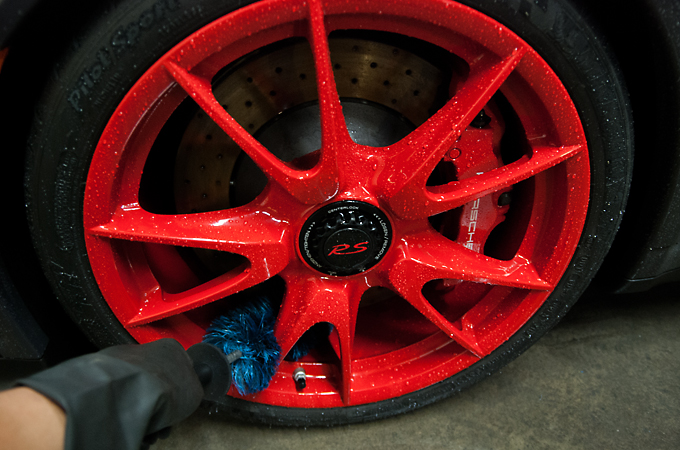
Cleaning the wheels
Claybarring the paint
Measuring the paint to look out for any low spots that we shouldn't get to aggressive on
Paint wasn't to rough but it still needed a 2 stage polish to get it to our standard
Before
After
50/50 shot on the carbon wing
Before
After
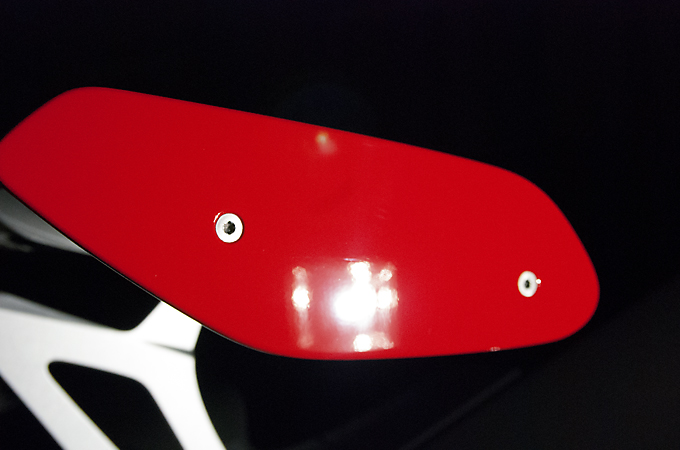
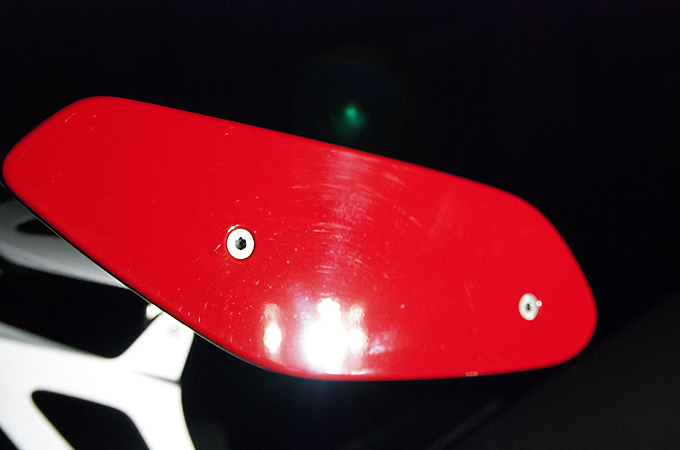
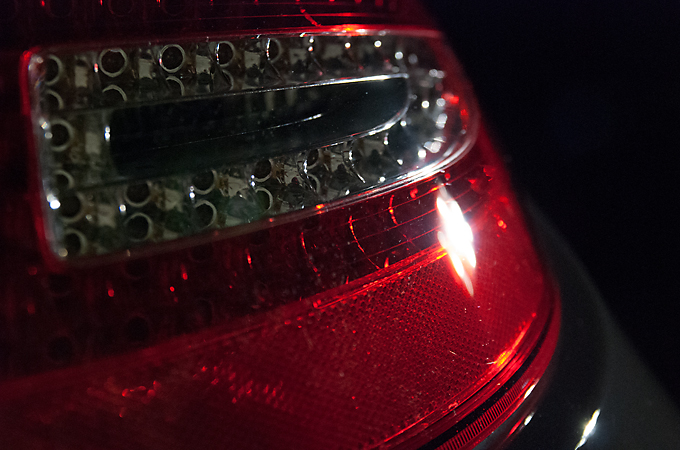
Taillights were polished as well
Before
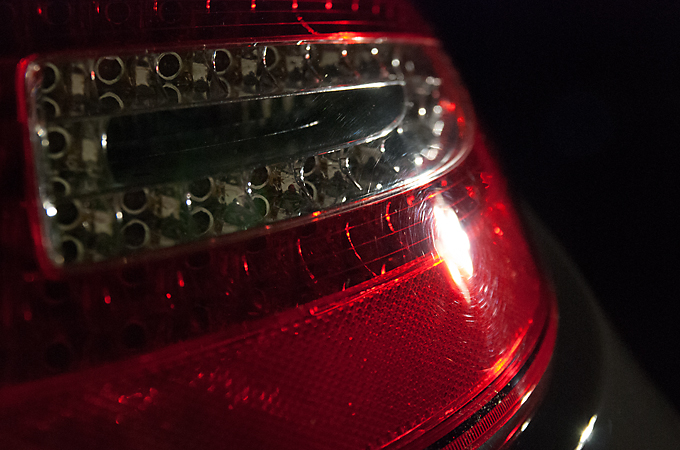
After
After the 2nd stage of polishing we unmasked the tape
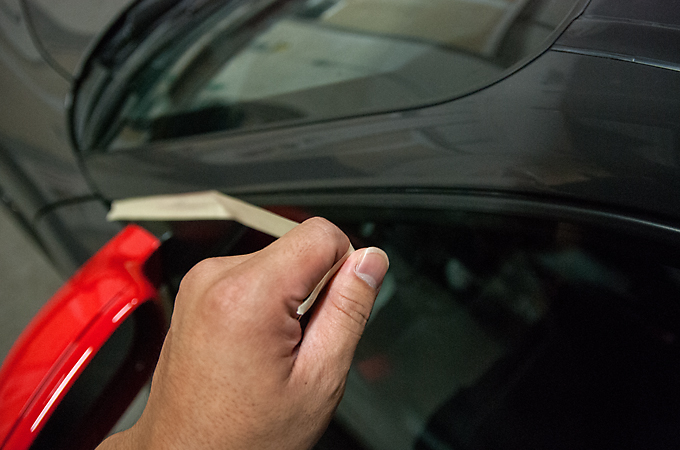
Cleaned the edges of the stone guard with a tooth pick
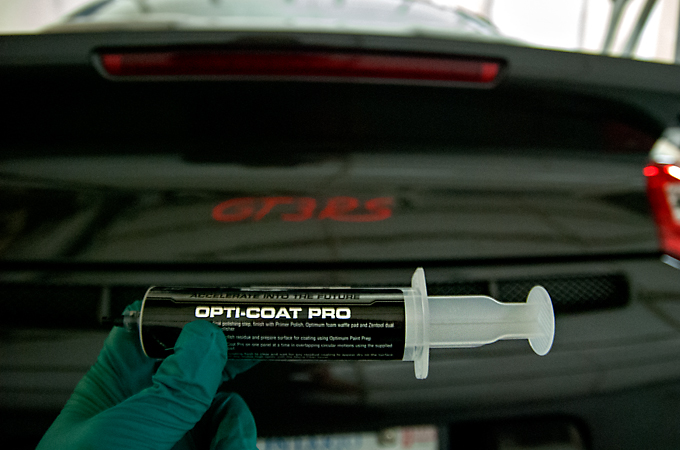
After all the finishing prep we finally applied Opti Coat Pro
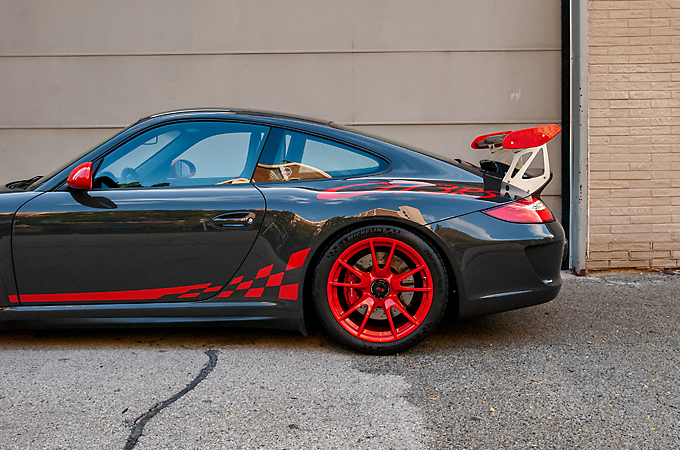
And finally the finished pics

Always a pleasure to detail client's cars who we have established a good relationship with. Looking forward to more additions to the collection wither it be the family hauler or the weekend car.
Hope you enjoyed the pics!
Arrival
Cleaning the wheels
Claybarring the paint
Measuring the paint to look out for any low spots that we shouldn't get to aggressive on
Paint wasn't to rough but it still needed a 2 stage polish to get it to our standard
Before
After
50/50 shot on the carbon wing
Before
After
Taillights were polished as well
Before
After
After the 2nd stage of polishing we unmasked the tape
Cleaned the edges of the stone guard with a tooth pick
After all the finishing prep we finally applied Opti Coat Pro
And finally the finished pics
Always a pleasure to detail client's cars who we have established a good relationship with. Looking forward to more additions to the collection wither it be the family hauler or the weekend car.
Hope you enjoyed the pics!
Members
Joined: Feb 2009
Posts: 98
Likes: 0
From: Toronto
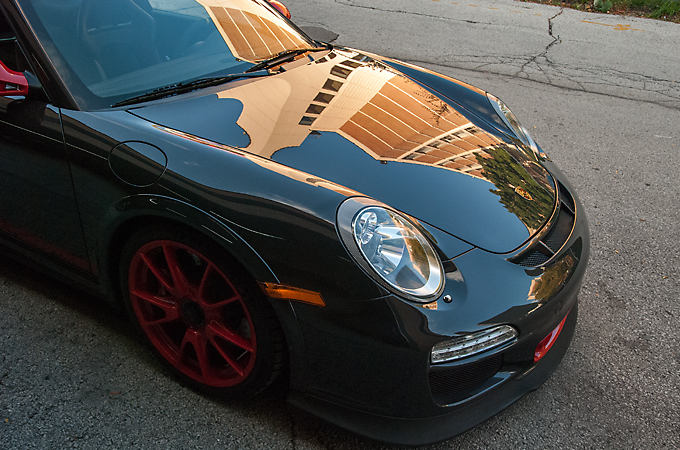
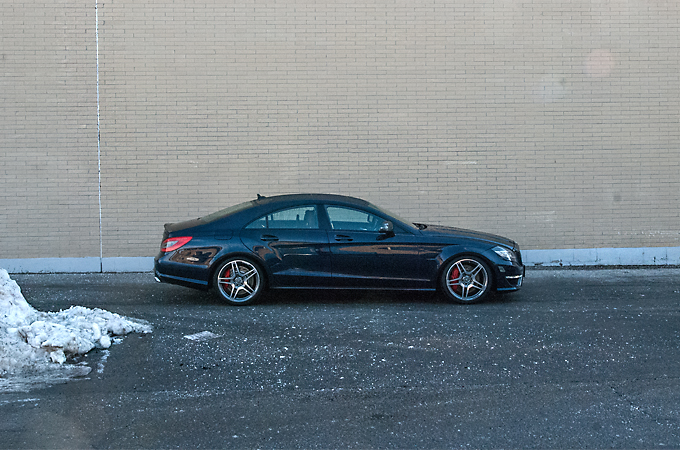
Long time client who previously brought us his w219 CLS 500, purchased this new w218 CLS 63 AMG and brought it in again for a 1 stage polish + Opti Gloss Coat.
Not much to mention about the car itself, the paint wasn't to bad and the 1 stage was enough to bring it up to a 8.5/9 out of 10.
On to the pics.
Arrival
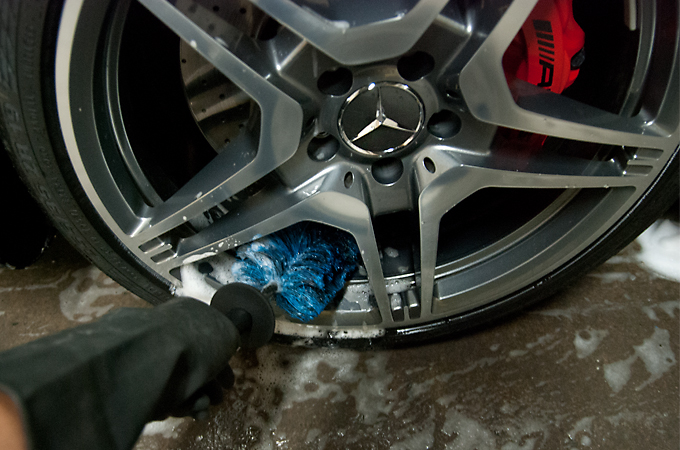
Cleaning the wheels
Claybarring the paint
Quick measurement of the paint
On to the polishing
Before

After
Metallic flake looking beautiful
Opti Gloss Coat about to be applied
And finally the finished pics
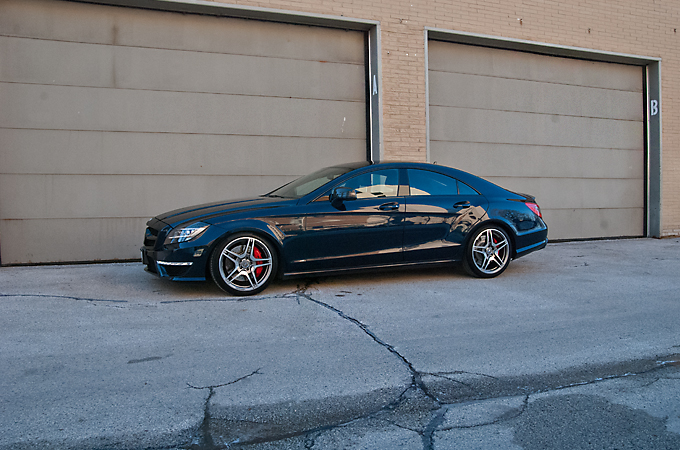
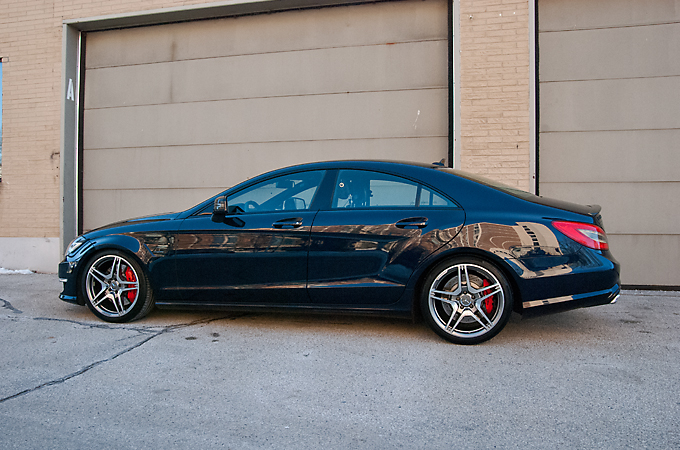
Always a pleasure to take care of this clients cars and I hope you guys enjoyed the pics!
Instagram - OrionDetailing.Co
Facebook - Orion Detailing Co.
Not much to mention about the car itself, the paint wasn't to bad and the 1 stage was enough to bring it up to a 8.5/9 out of 10.
On to the pics.
Arrival
Cleaning the wheels
Claybarring the paint
Quick measurement of the paint
On to the polishing
Before
After
Metallic flake looking beautiful
Opti Gloss Coat about to be applied
And finally the finished pics
Always a pleasure to take care of this clients cars and I hope you guys enjoyed the pics!
Instagram - OrionDetailing.Co
Facebook - Orion Detailing Co.
Members
Joined: Feb 2009
Posts: 98
Likes: 0
From: Toronto
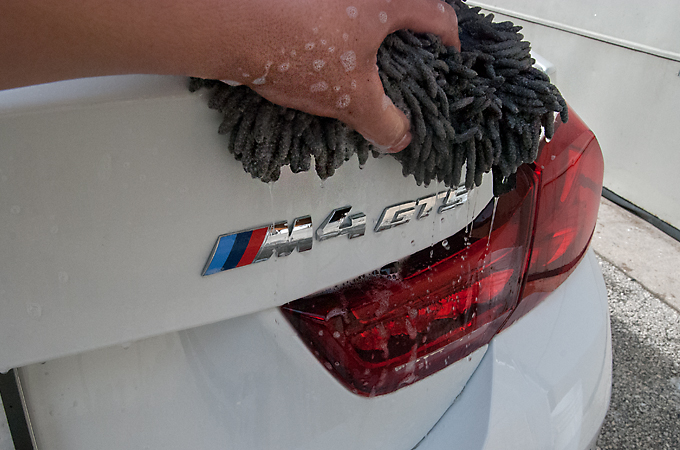
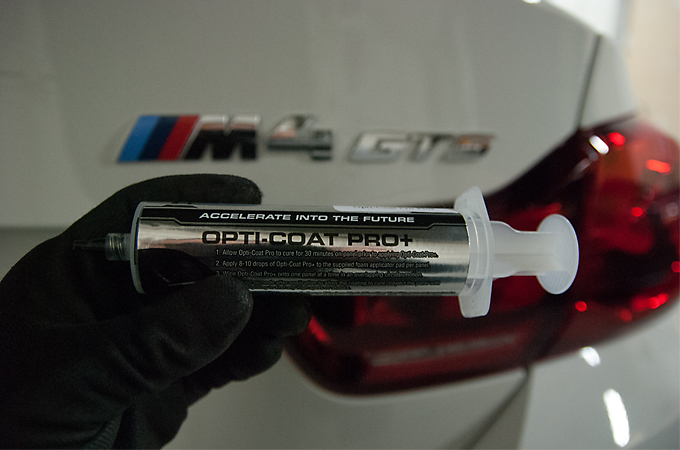
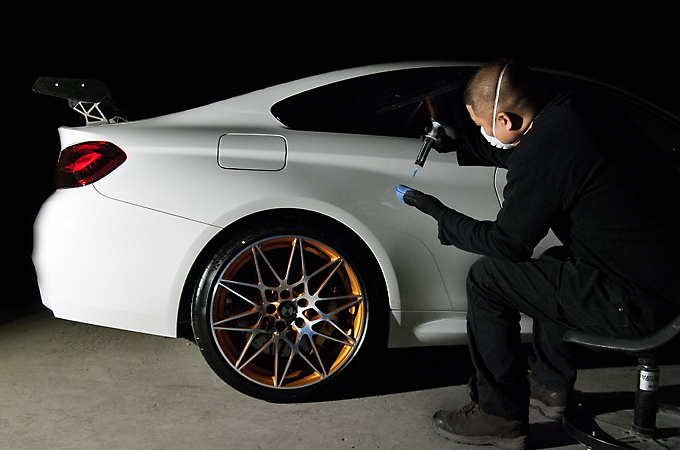
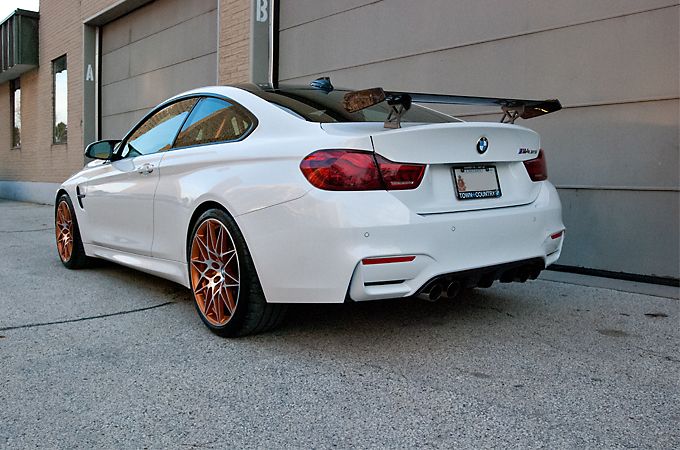
Good friend bought a brand new M4 GTS and we were expecting it since Feb. In it finally came last week for 3 layers of Opti Coat Pro+ but, the paint had a little bit of issues and required a 2 stage polish especially for the lower parts of the doors. Unfortunately due to the colour we couldn't get good before and afters of the results but none the less couldn't have it in the shop and not take pictures!
Anyways on to the write up.
Arrival
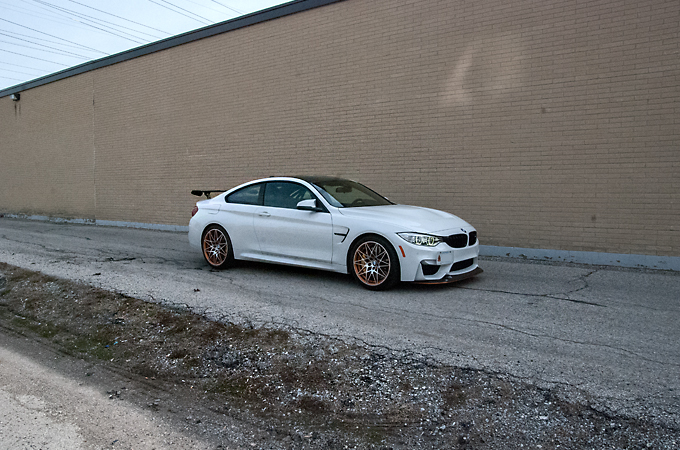
Cleaning the wheels and I love the angled wheel woolies for getting that lip behind the face
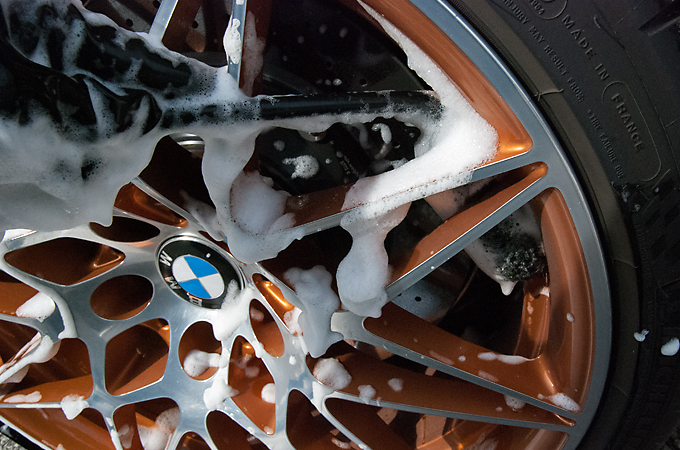
Two Bucket wash always
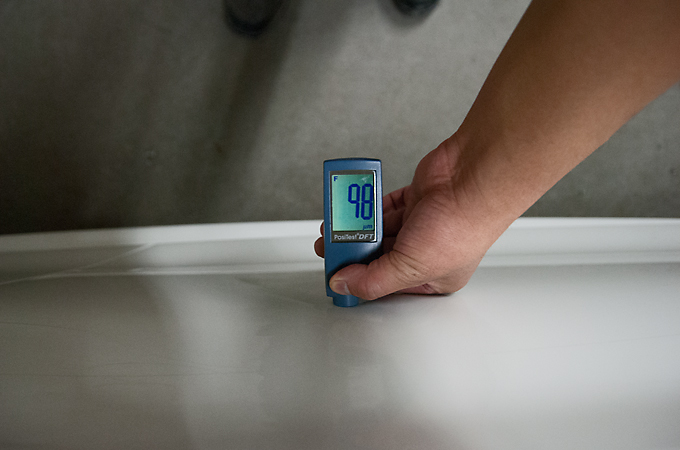
After claybarring and drying we took some quick measurements of the paint
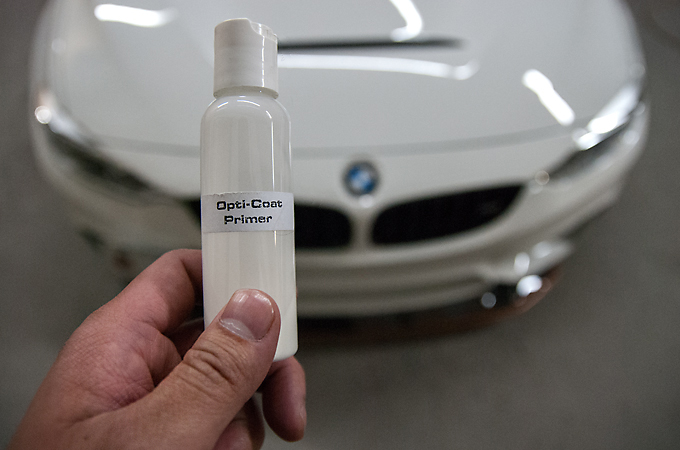
As stated earlier we couldn't get good before and afters of the defects so after the polishing Opti Coat Primer was applied via machine
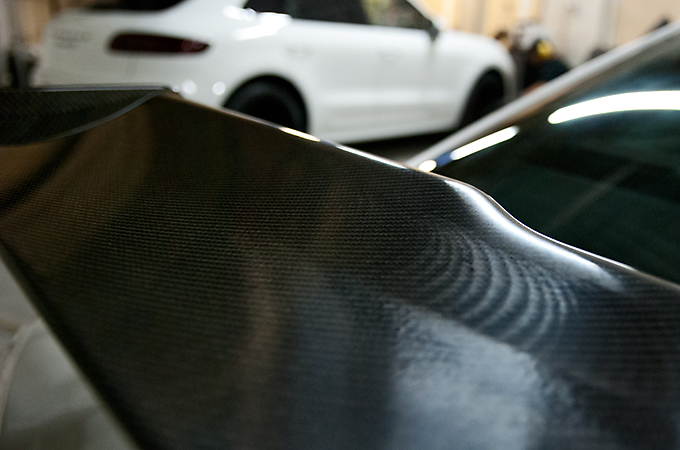
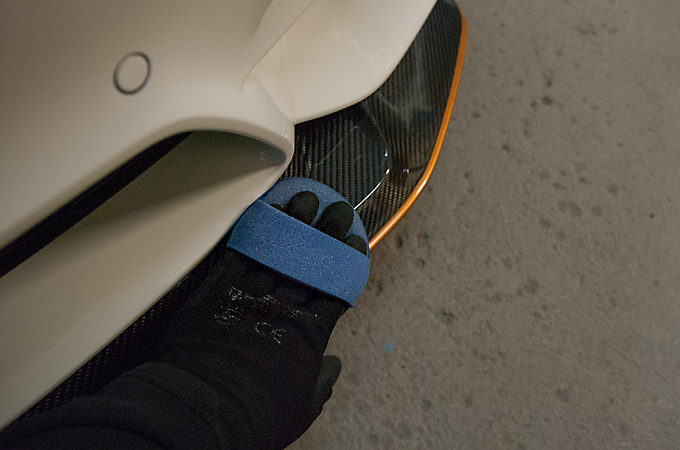
Applied to the carbon wing
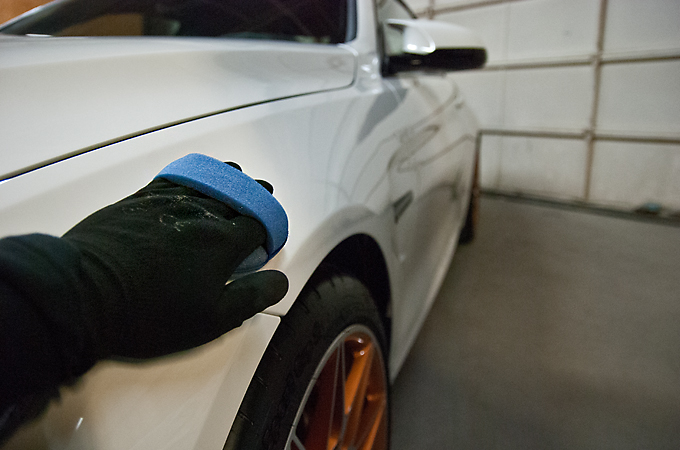
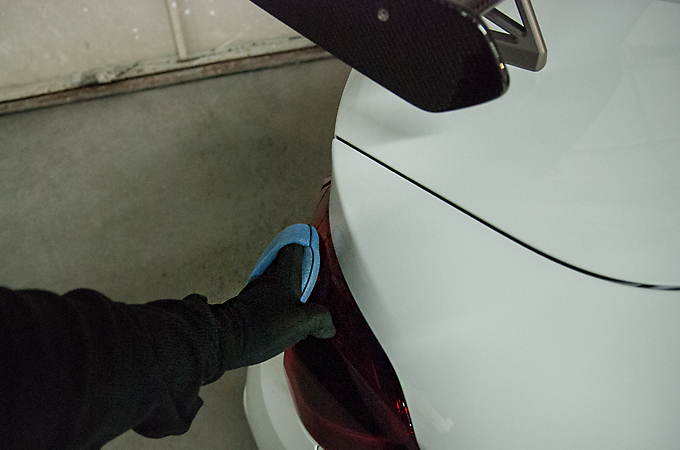
3 coats of Opti Coat Pro+ was applied
And it was applied to the paint
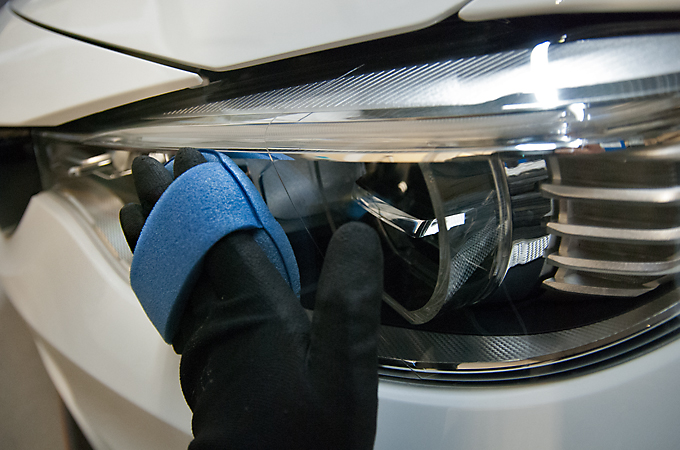
To the headlights
Tail lights
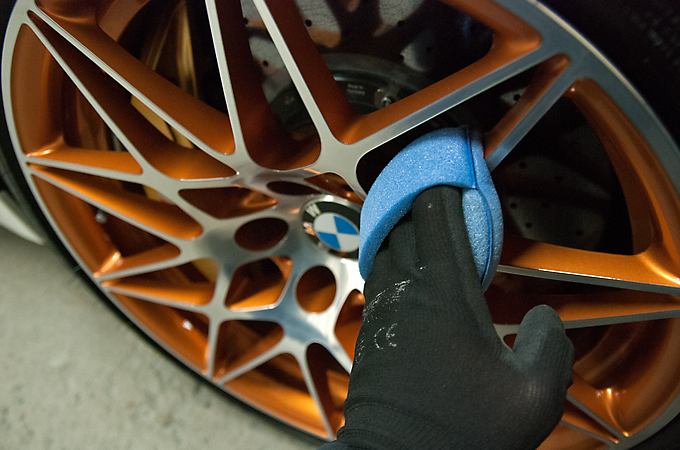
Face of the wheels
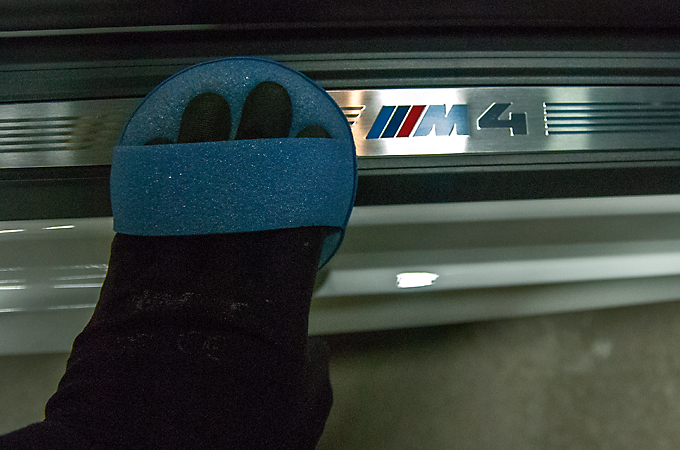
Door jambs
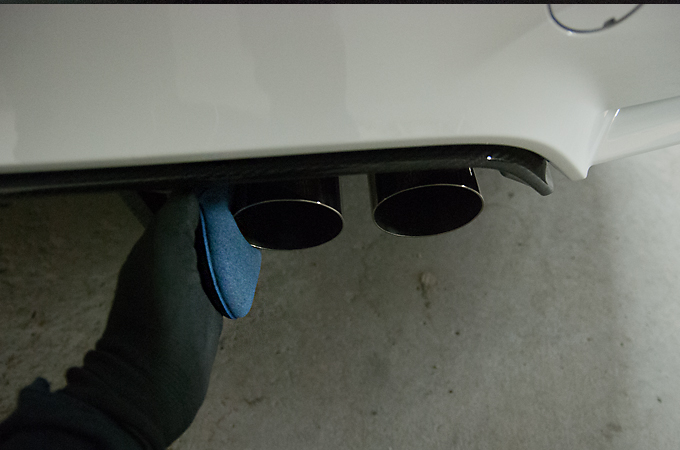
And finally the exhaust
Artsy fartsy shot of the application of Opti Coat Pro+
And the finished pics
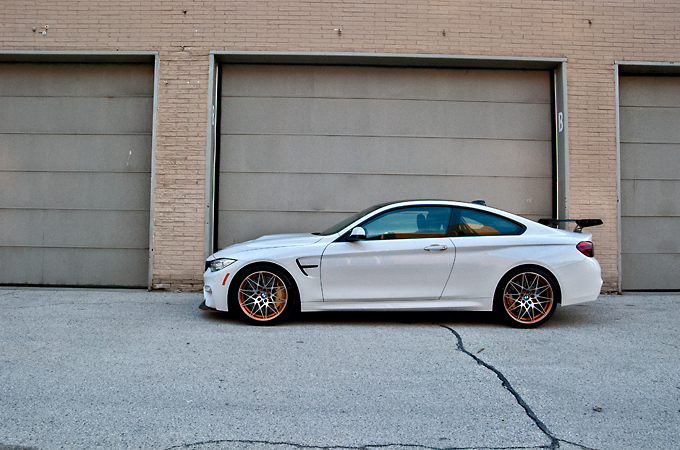
Glossy

Hope you enjoyed the pics as much as I enjoyed spending time with this car!
Wes
(647)999-8499
Instagram - Orion Detailing Co
Facebook - Orion Detailing Co
WeChat - Orion Detailing Co
Anyways on to the write up.
Arrival
Cleaning the wheels and I love the angled wheel woolies for getting that lip behind the face
Two Bucket wash always
After claybarring and drying we took some quick measurements of the paint
As stated earlier we couldn't get good before and afters of the defects so after the polishing Opti Coat Primer was applied via machine
Applied to the carbon wing
3 coats of Opti Coat Pro+ was applied
And it was applied to the paint
To the headlights
Tail lights
Face of the wheels
Door jambs
And finally the exhaust
Artsy fartsy shot of the application of Opti Coat Pro+
And the finished pics
Glossy
Hope you enjoyed the pics as much as I enjoyed spending time with this car!
Wes
(647)999-8499
Instagram - Orion Detailing Co
Facebook - Orion Detailing Co
WeChat - Orion Detailing Co
Members
Joined: Feb 2009
Posts: 98
Likes: 0
From: Toronto
This car makes me so happy!!!
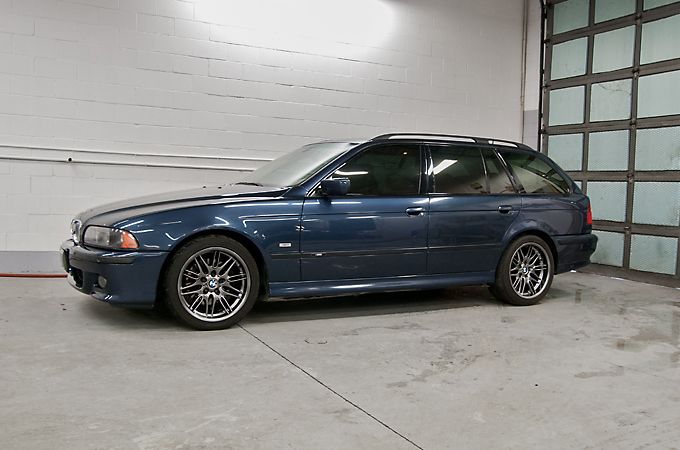
Returning client who brought in his e39 M5 now brought in this e39 M5 Touring project car. Basically a 540i Touring with an M5 engine, transmission, suspension, etc. Definitely on my bucket list of cars to have.
I hope you guys enjoy the pics!
Arrival
Claybarring the paint
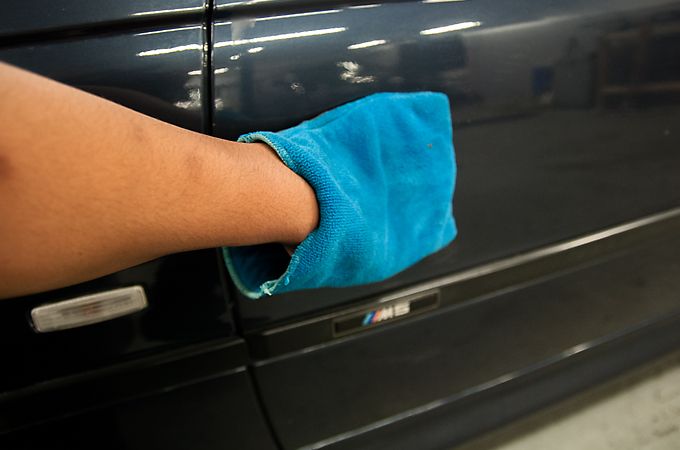
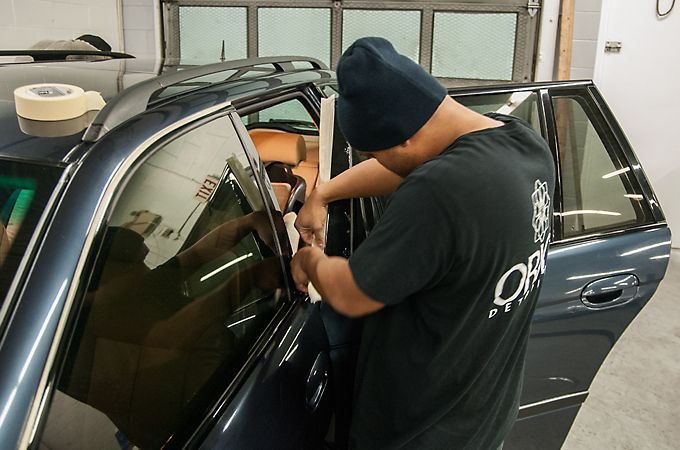
Masking off the rubber trim
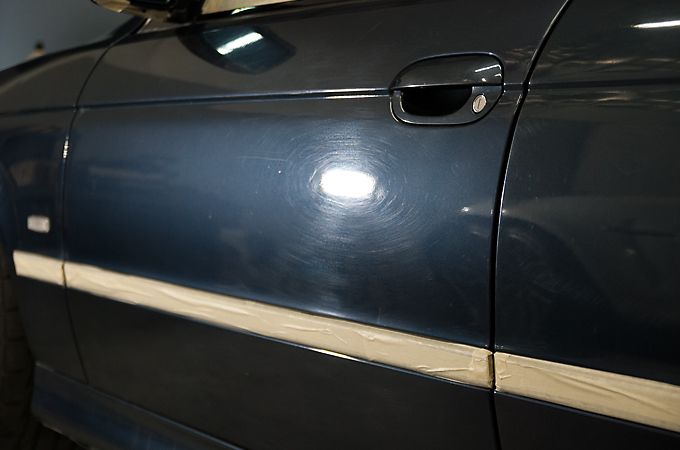
Before
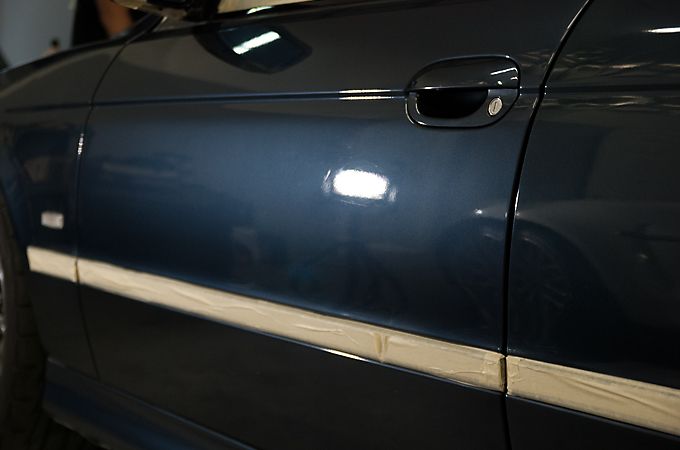
After
50/50
Opti Gloss Coat about to be applied
And the finished pictures
I really want to build my own Touring now!!!
Always a pleasure to work on stuff like this.
Wes
(647)999-8499
www.instagram.com/oriondetailing.co
Returning client who brought in his e39 M5 now brought in this e39 M5 Touring project car. Basically a 540i Touring with an M5 engine, transmission, suspension, etc. Definitely on my bucket list of cars to have.
I hope you guys enjoy the pics!
Arrival
Claybarring the paint
Masking off the rubber trim
Before
After
50/50
Opti Gloss Coat about to be applied
And the finished pictures
I really want to build my own Touring now!!!
Always a pleasure to work on stuff like this.
Wes
(647)999-8499
www.instagram.com/oriondetailing.co
Members
Joined: Feb 2009
Posts: 98
Likes: 0
From: Toronto
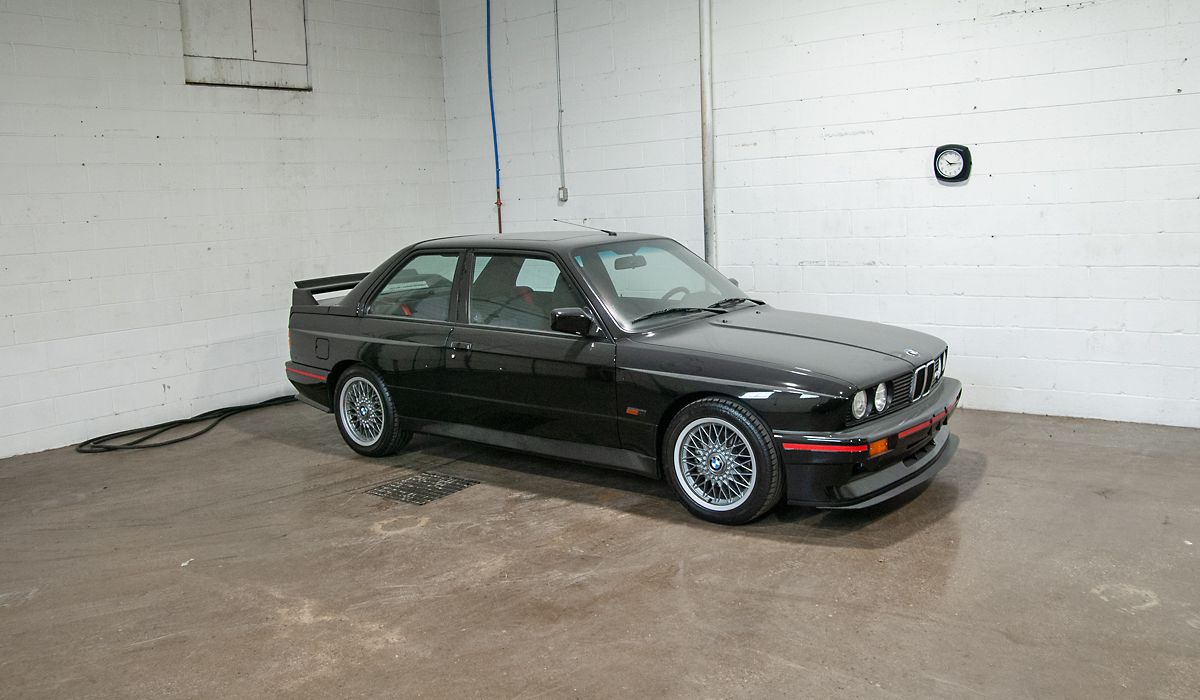
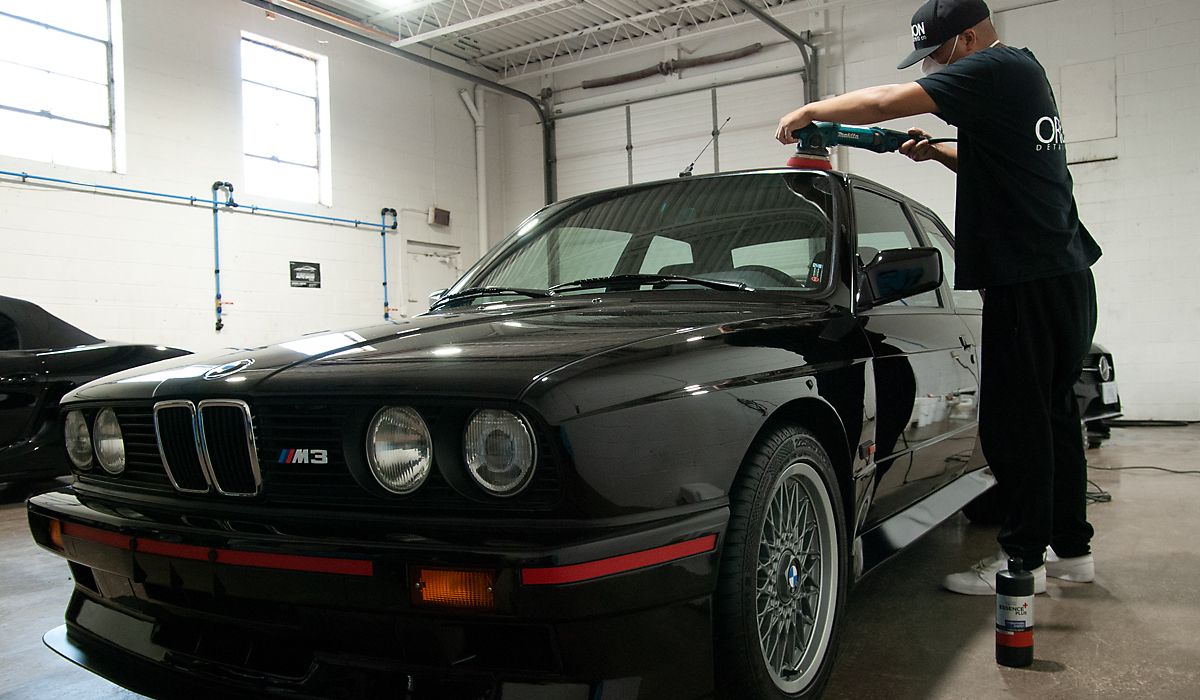
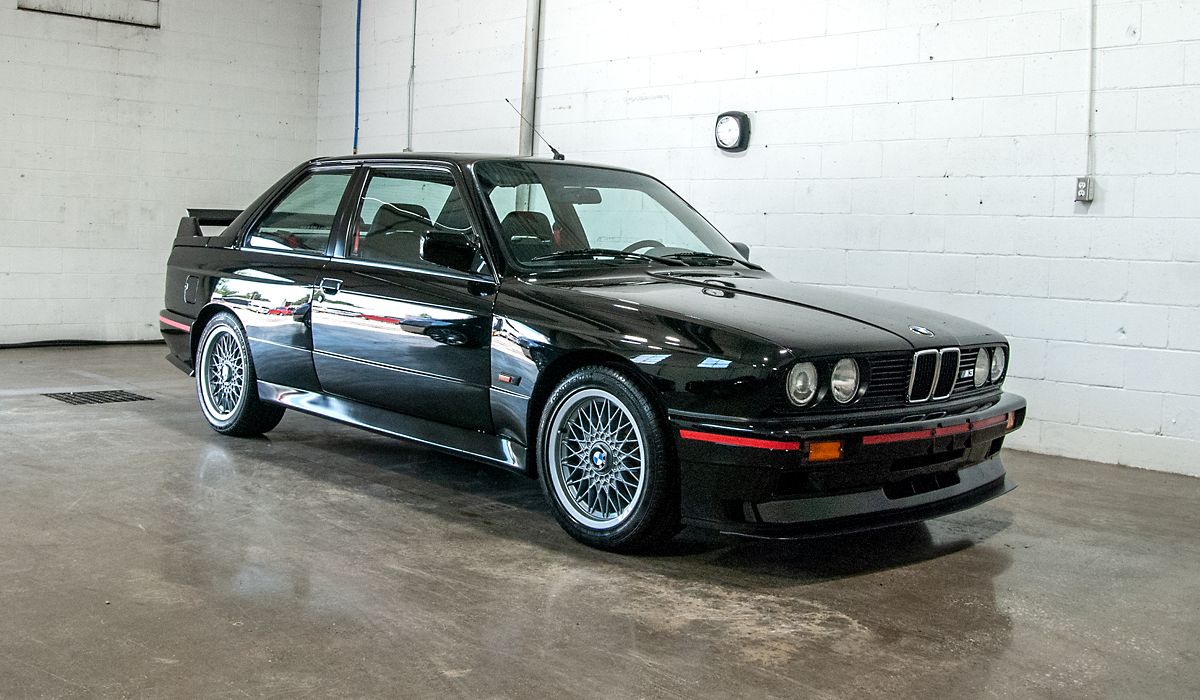
Long time client brought in his e30 M3 Evo Sport. It had been imported earlier this year but sat in storage for a few months before it made it's way over to us, hence it looking quite dusty in the first pic.
Once brought over client said "give it whatever it needs". After the initial wash we came to the realization that it had already been paint corrected and coated most likely by the previous owner. So we decided to just give it a Basic In & Out detail.
Hope you enjoy the pics on this rare classic!
Arrival
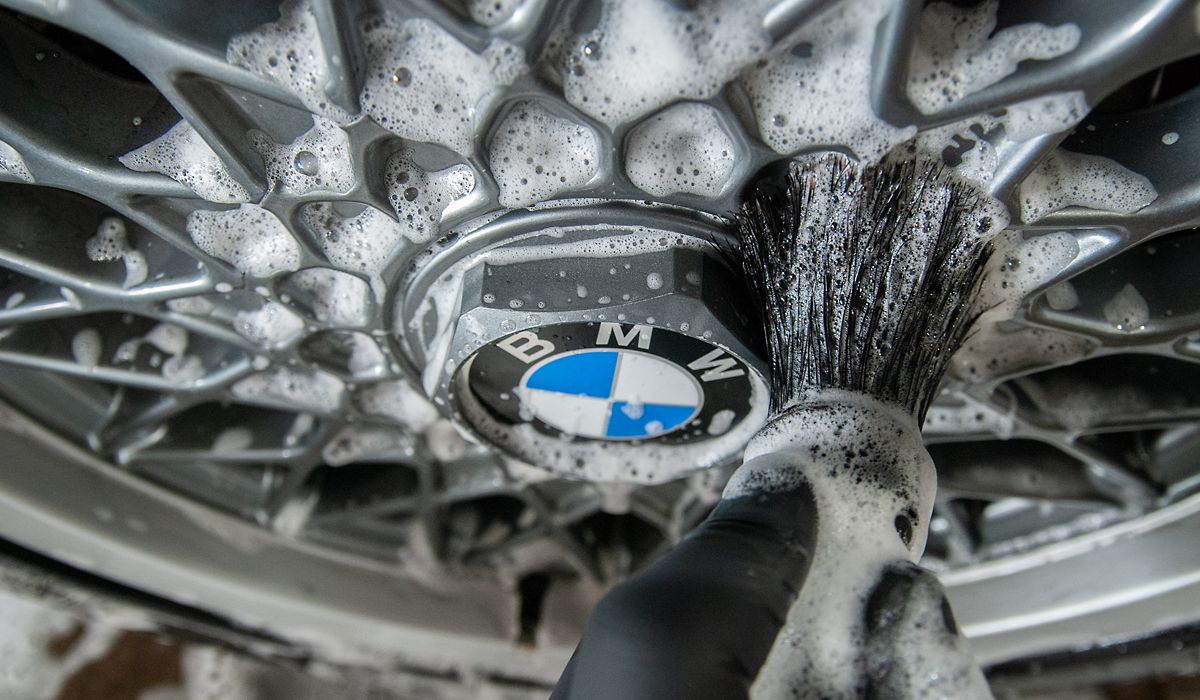
Cleaning the wheels
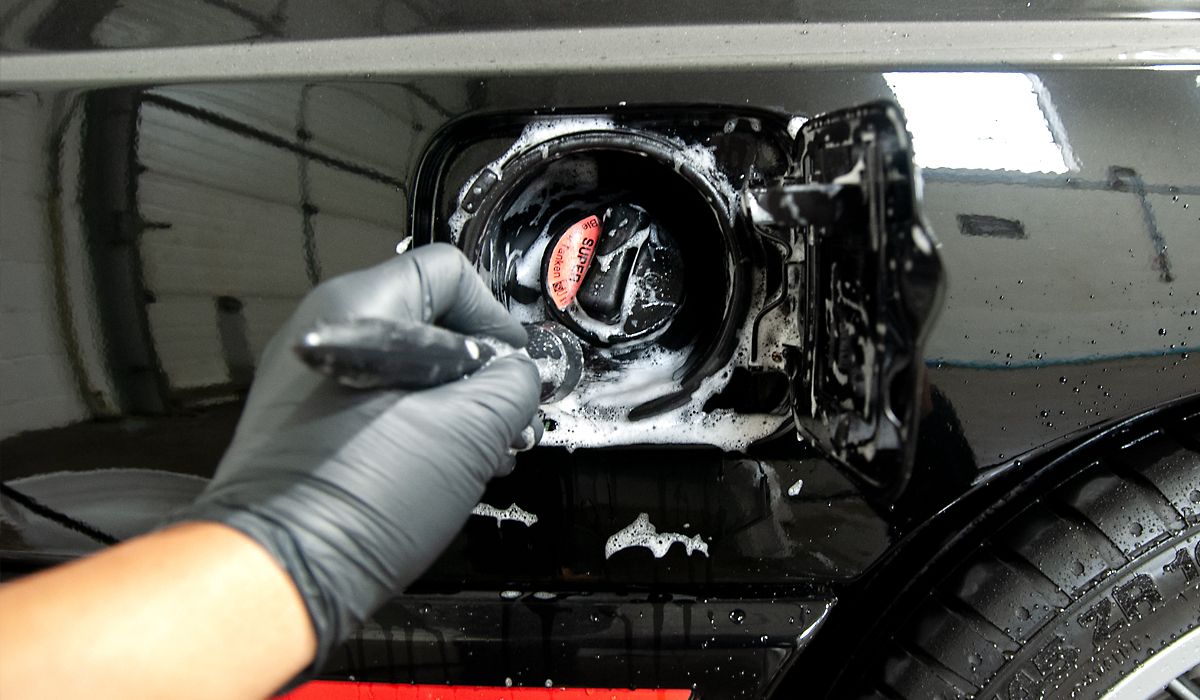
Cleaning inside the gas cap as well
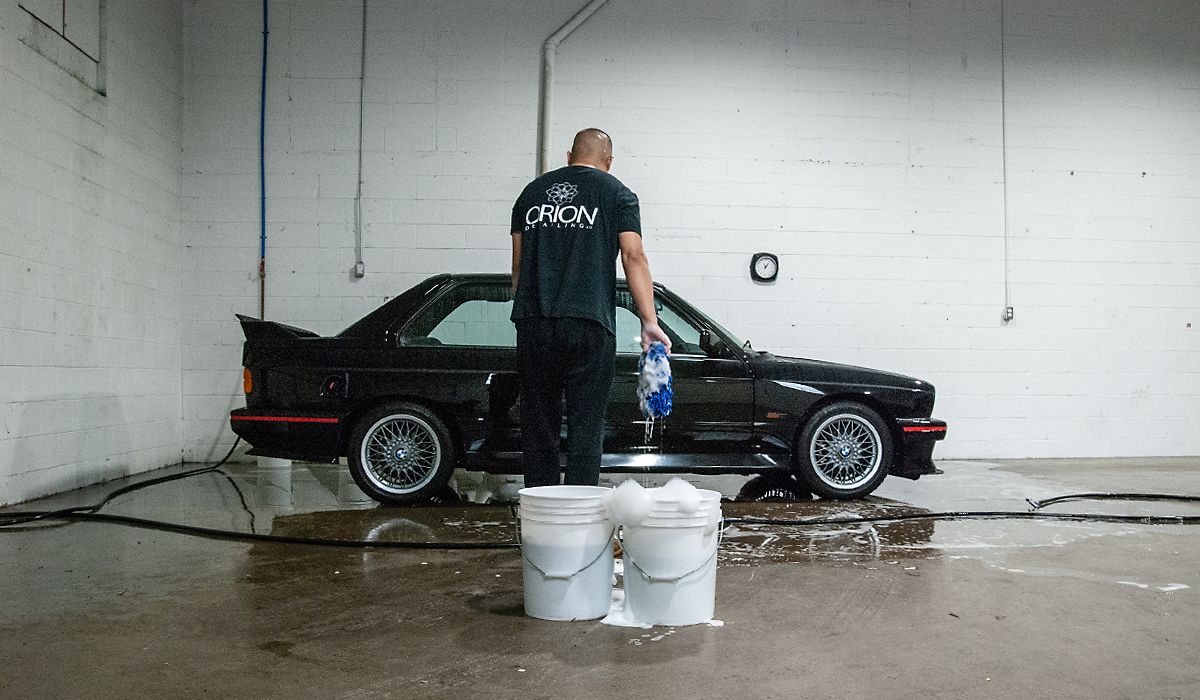
2 Bucket Method car wash only
Claybarring the paint, and as you can see the water beading is already very strong
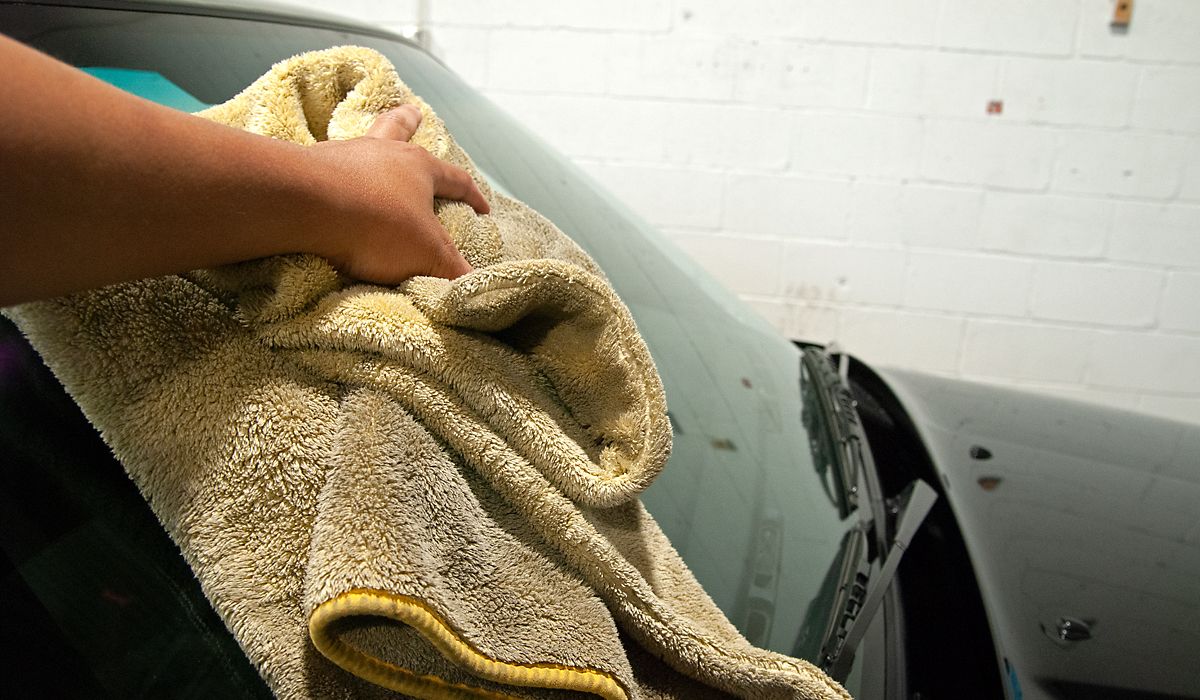
Drying off with a plush microfiber towel
Measuring the paint for the clients records
Machine waxing with a ceramic combatible wax
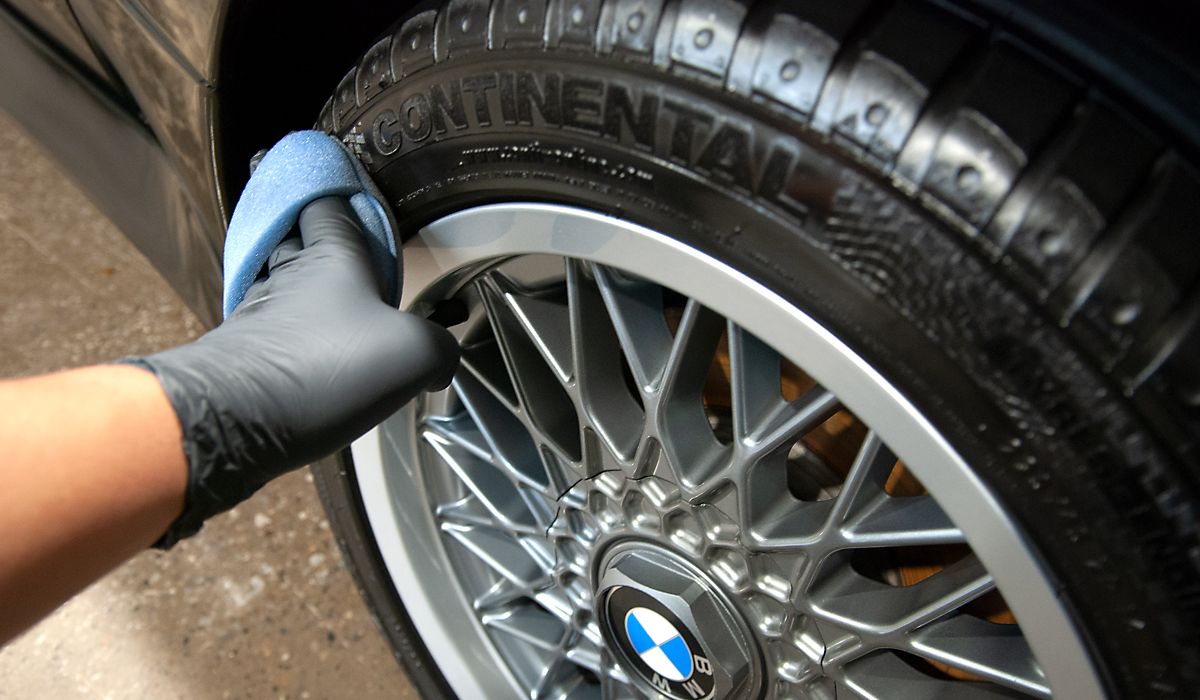
Tire dressing
Cleaning the windows
And the finished product
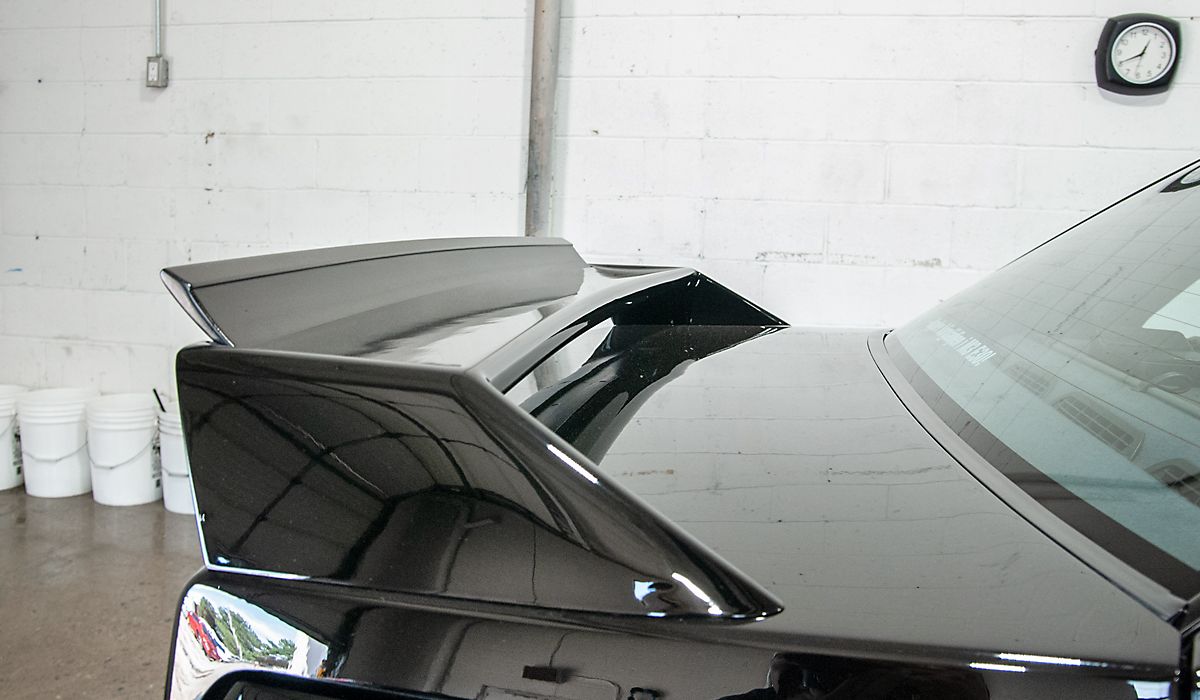
I LOVE the dtm spoiler
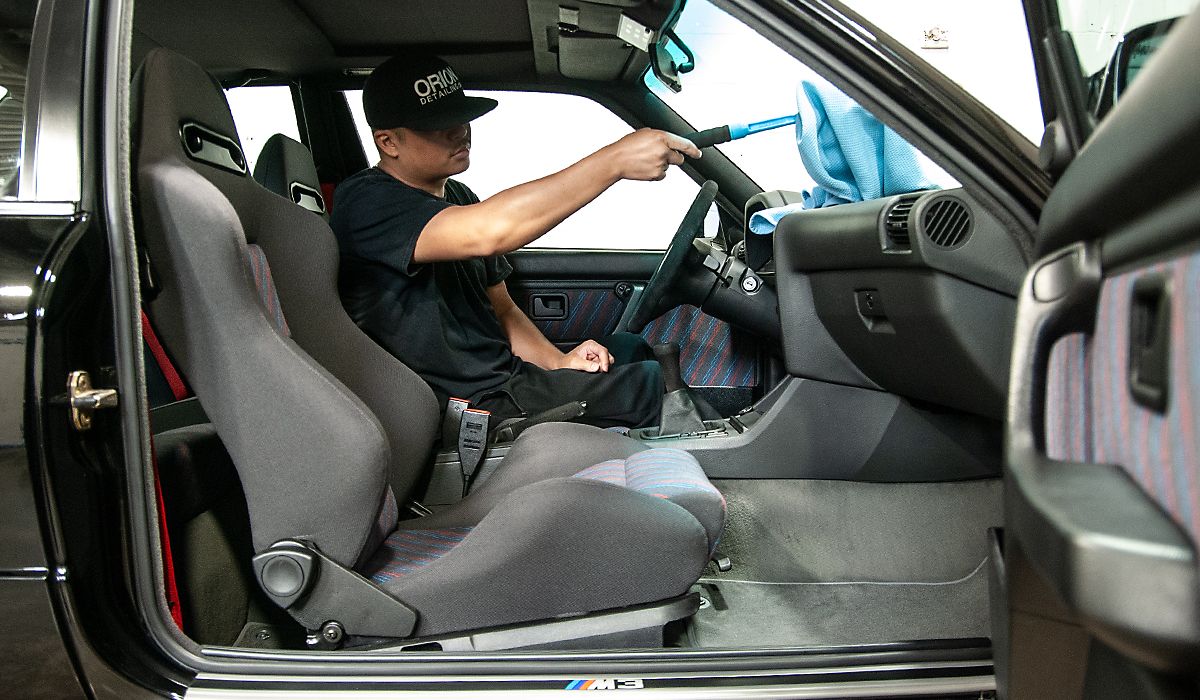
And some quick shots of the interior
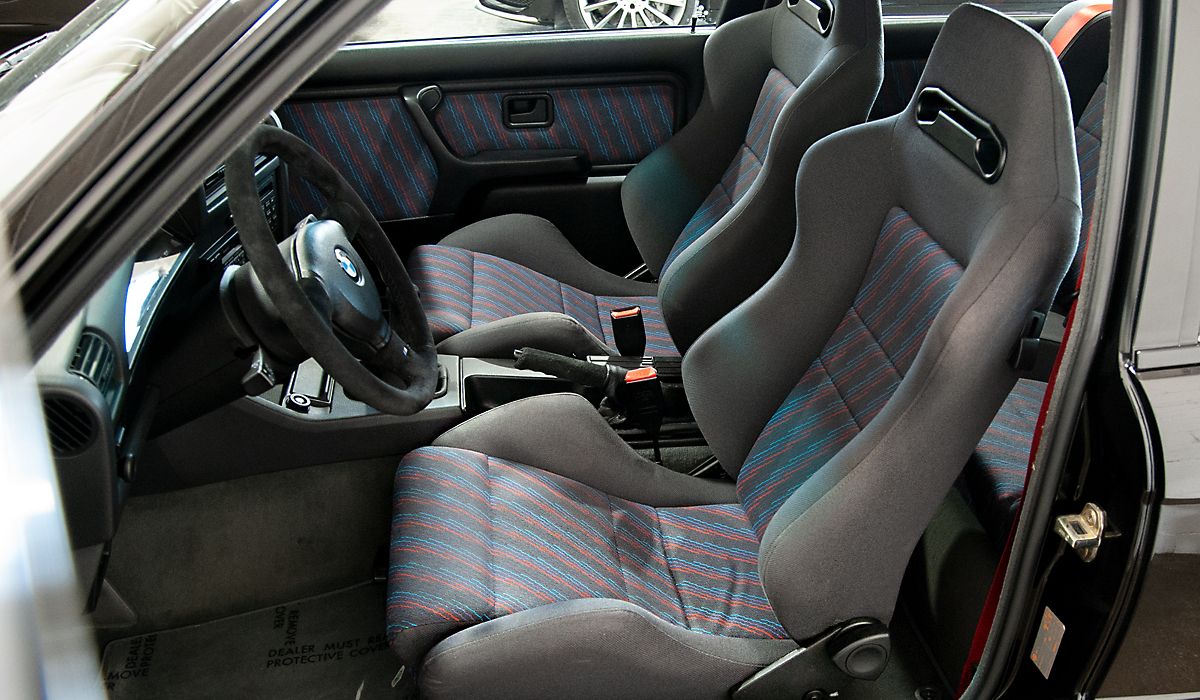
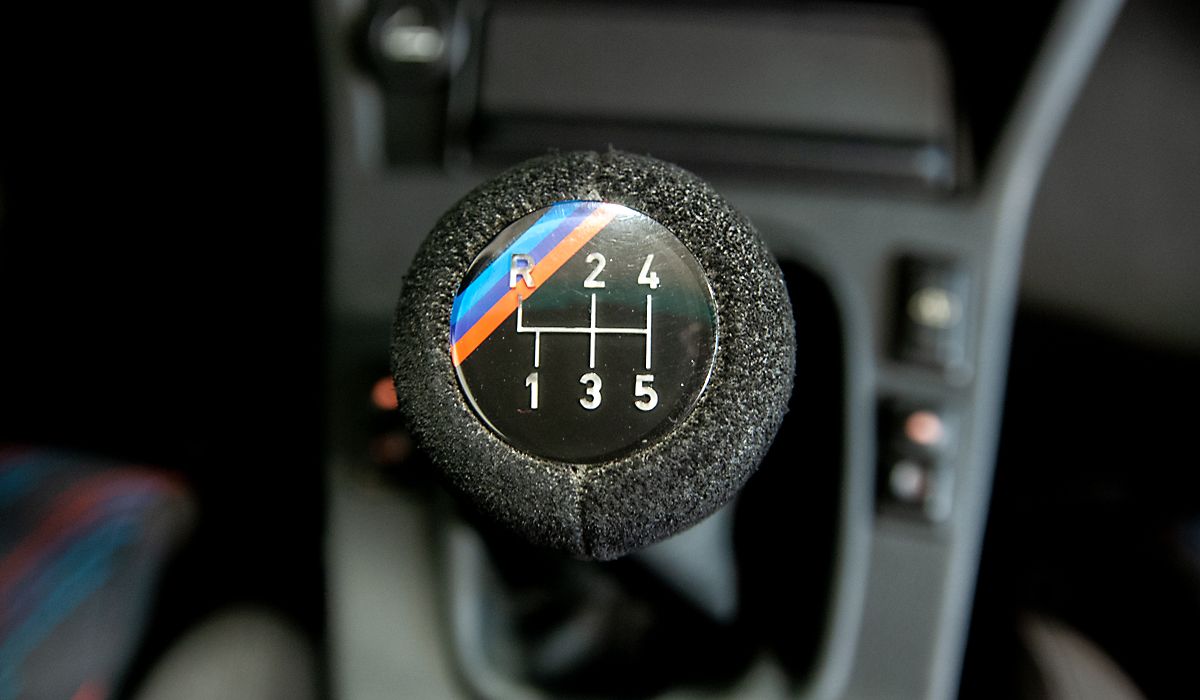
Dog leg shifter
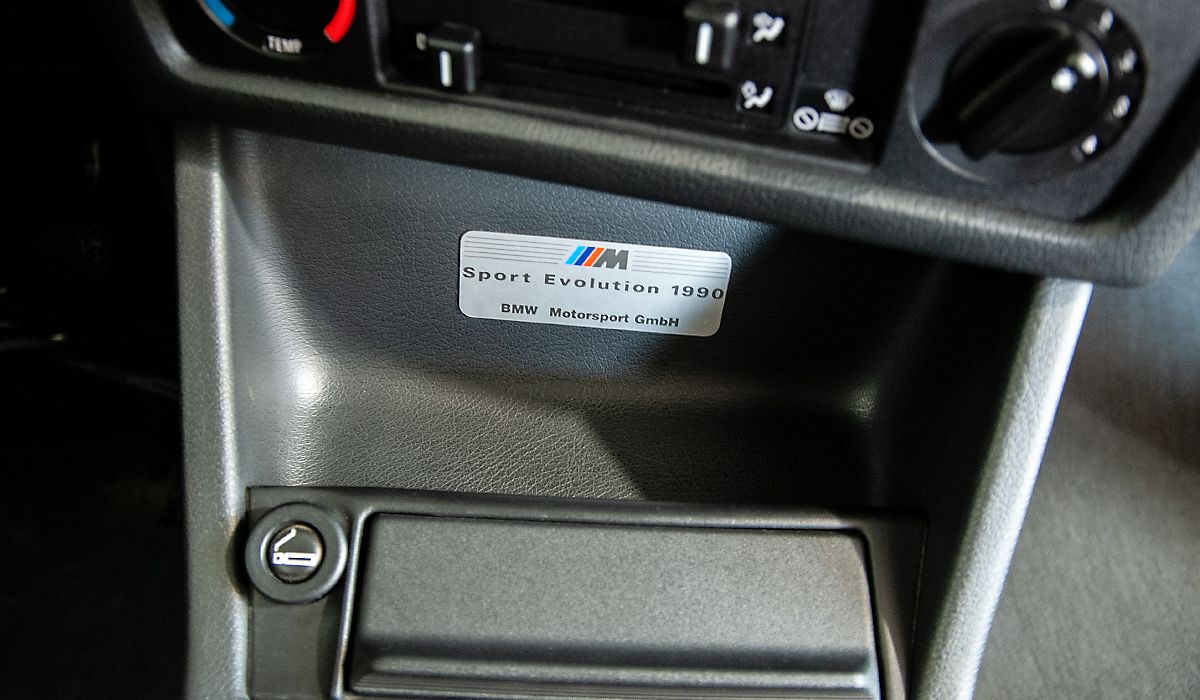
And just to make it official
Once brought over client said "give it whatever it needs". After the initial wash we came to the realization that it had already been paint corrected and coated most likely by the previous owner. So we decided to just give it a Basic In & Out detail.
Hope you enjoy the pics on this rare classic!
Arrival
Cleaning the wheels
Cleaning inside the gas cap as well
2 Bucket Method car wash only
Claybarring the paint, and as you can see the water beading is already very strong
Drying off with a plush microfiber towel
Measuring the paint for the clients records
Machine waxing with a ceramic combatible wax
Tire dressing
Cleaning the windows
And the finished product
I LOVE the dtm spoiler
And some quick shots of the interior
Dog leg shifter
And just to make it official

Thread
Thread Starter
Forum
Replies
Last Post
ynottony
E60, E61 Parts, Accessories and Mods
14
Mar 9, 2009 08:24 AM
octopaganini
E60, E61 Parts, Accessories and Mods
20
Apr 18, 2008 05:58 PM
So-Serene
Detailing Forum
2
Nov 11, 2006 07:20 AM