DIY - Fuel Filter/Sending Unit Swap
 02-25-2012, 09:34 PM
#1
Senior Members
Thread Starter
First, I want to say thanks to member ' zamestytel ' for his initial post here. http://forums.5serie..._1#entry1419188
It wasn't an official DIY but member ' pcy ' did a DIY in that thread which saved me a lot of time looking up the TIS for this.I decided to make an official DIY for this. Because his directions were straight forward and I am lazy, I'll just use his wording. TIP: To avoid spilling dirty fuel into the tank once you disconnect the fuel filter line on the bottom of the filter, put some sort of cloth underneath it. Trust me the fuel will be blackish.
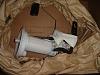
My vehicle has 125K miles on it right now and I cannot believe how much better it runs. Bought OEM part from http://www.bimmerspe...0765%20826/6679 for around $124 shipped.
1. Disconnect battery negative cable (I am not sure if this is necessary; but I wanted to make sure the pump won't run while I am working on the fuel lines).
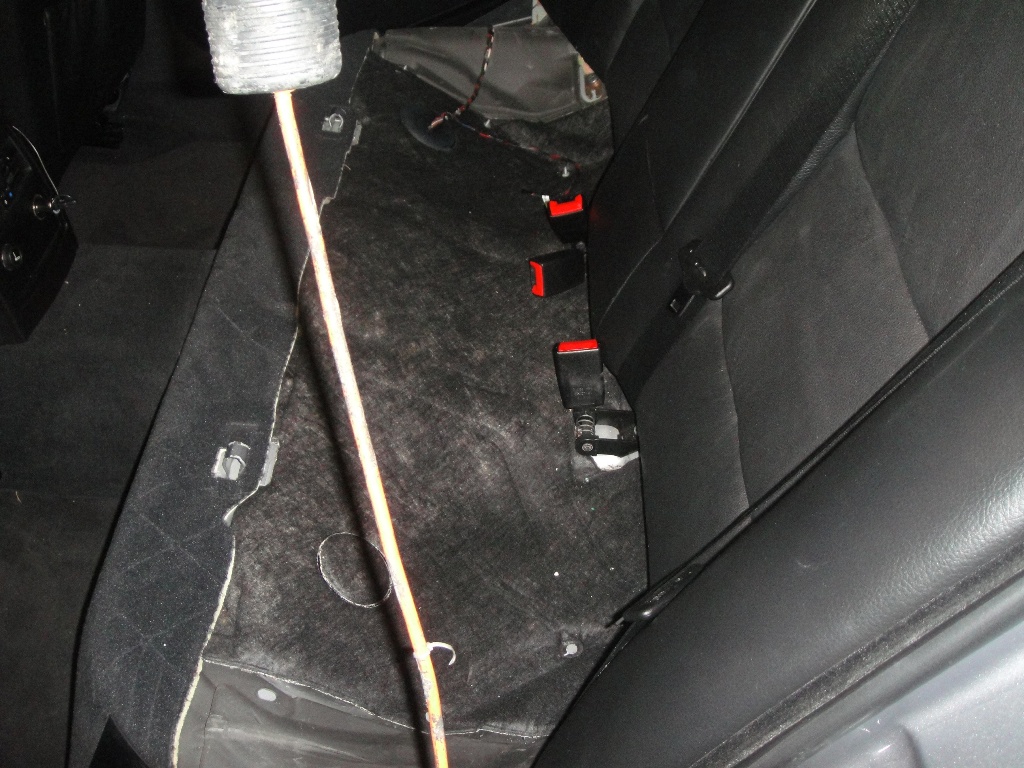
2. Lift up the rear seat and remove.
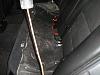
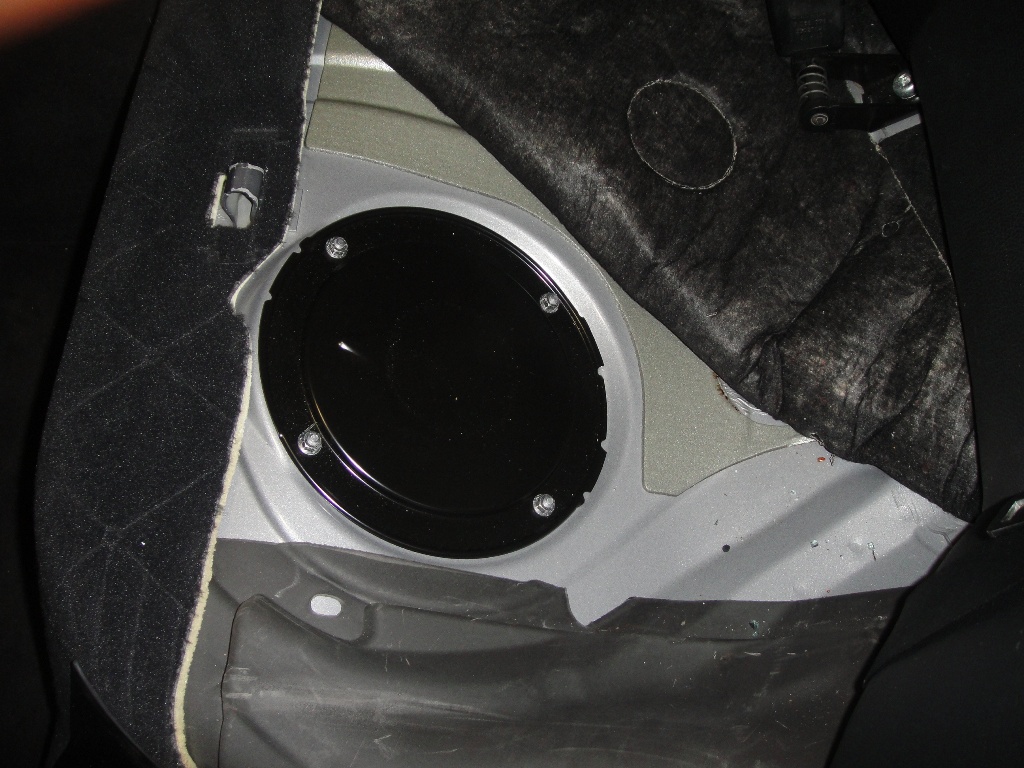
3. Go to the drivers side, pull back the mat, you will see access panel with 4 bolts (10mm). Remove those 4 bolts, remove that metal access panel.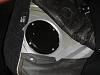
4. Put some rags on top of the fuel line and remove that fuel line (squeeze on the tabs and lift up). CAREFUL slowly lift up that connector, fuel is pressurized and comes out fast. I wrapped couple of pieces of cloths on the line while slowly lifting up. When the pressure is fully released, set the line aside.
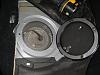
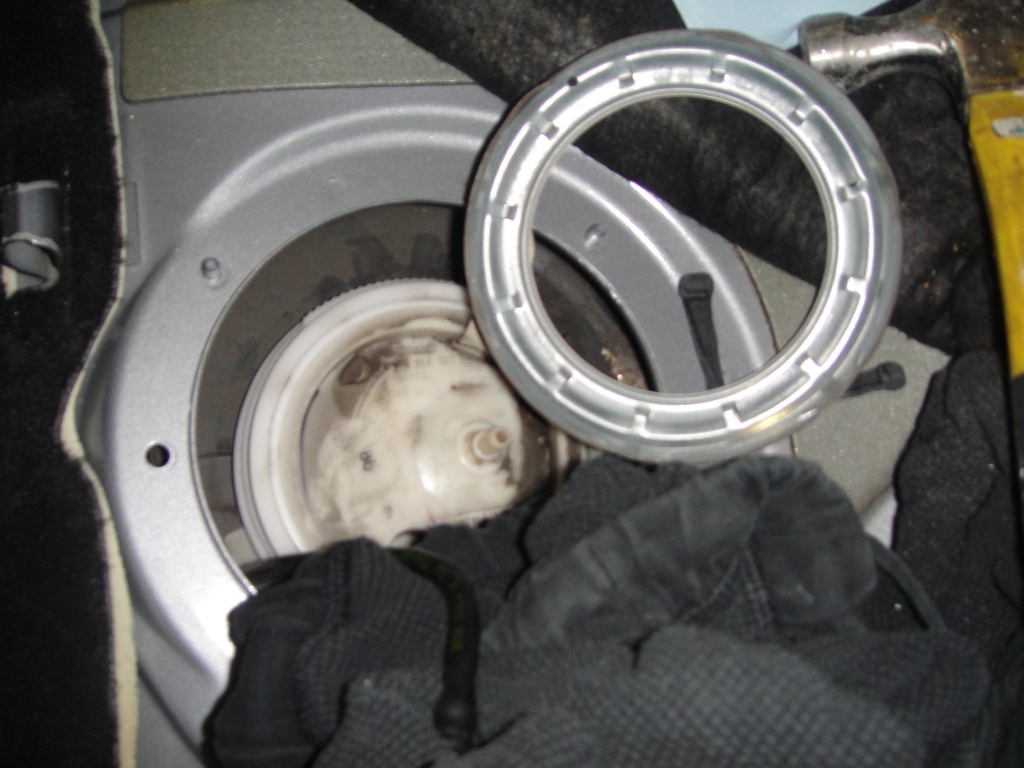
5. Take large flat screw driver any other appropriate tool and a hammer and undo the large collar nut. Remove the collar nut and set aside.

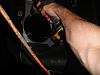
6. Left up the fuel filter assembly. You will see a large connector on the bottom, push the pin, and remove the connector.
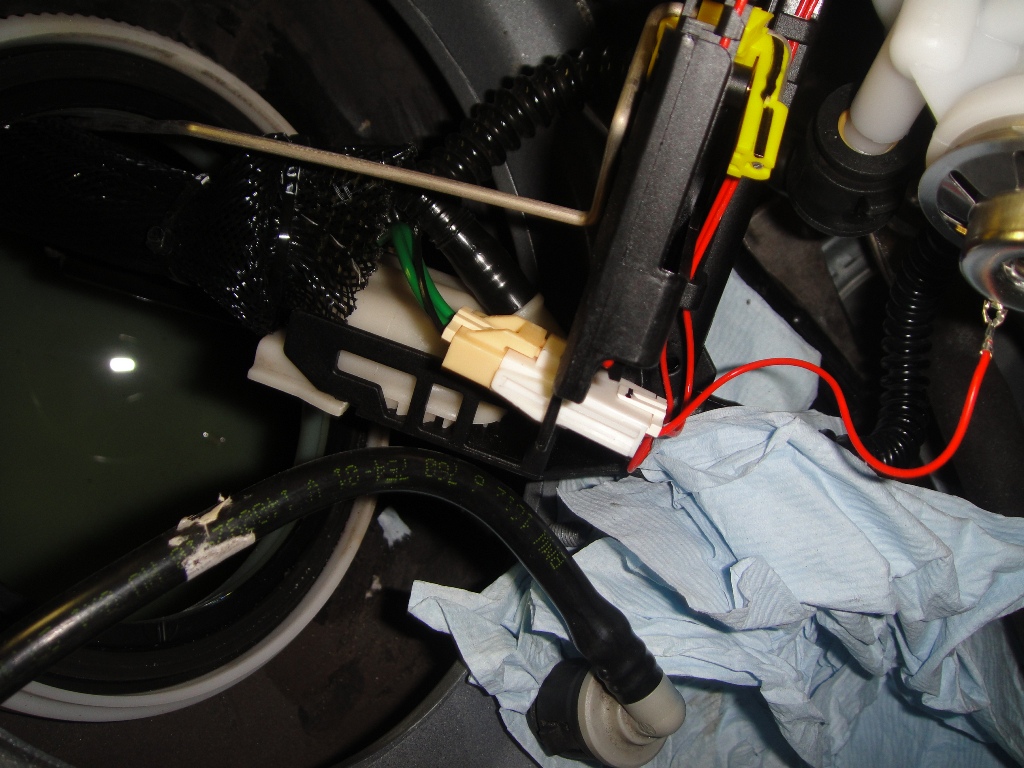
7. On the very bottom portion of the fuel filter, there is a flat surface. You will see an electrical connector, remove it.
8. You will see L shaped pin, push it down while pulling that entire connector away.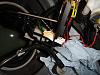
9. The last picture shows all the connectors removed (looking in to the fuel tank). All those cables/connectors are coming from the fuel pump on the passengers side and they are connected to the fuel pump.
10. When I disconnected the fuel filter, most of the dirty fuel in the filter dropped back in to the tank. So, I took a sponge and emptied the remaining fuel in the tank.
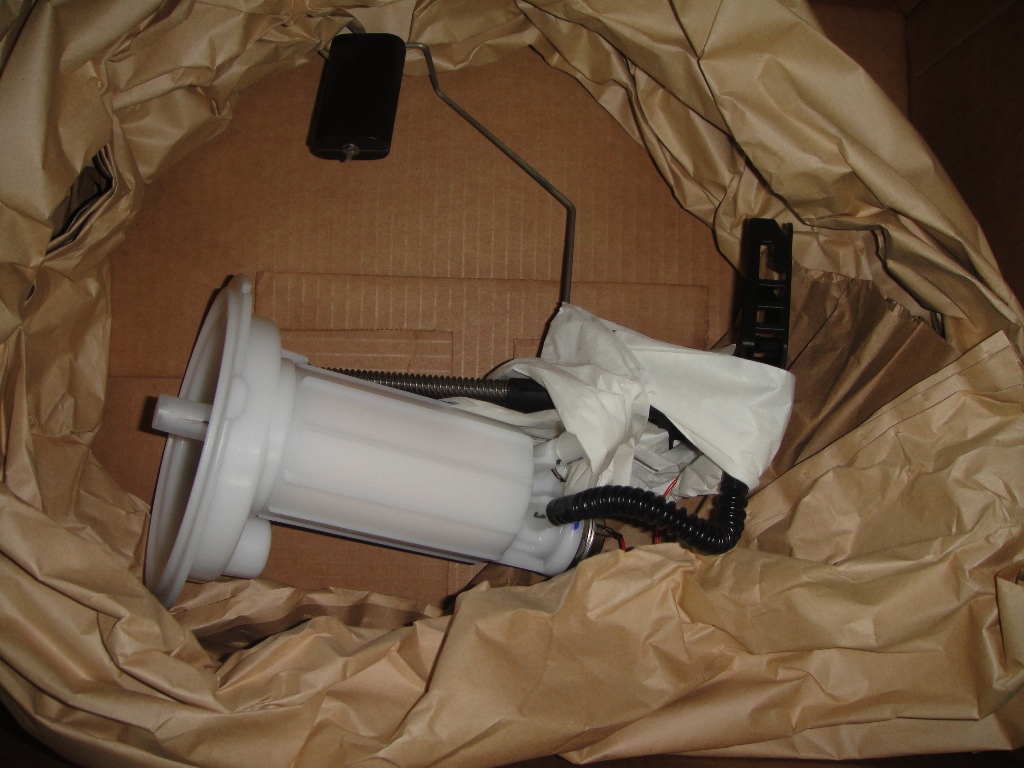
10. Position the new fuel filter in to the position; attach the electrical connector to the new fuel filter. Connect all the fuel lines to the filter. Take your time to make sure everything is connected properly. You can't make a mistake; all connectors go one-way only.
11. Remove old seal ring on collar and put the new seal that came with the fuel filter.
12. Lower the fuel filter in to position, you will have to push it down slightly since the spring pushes the filter up against the access panel.
13. Line up the fuel filter, collar ring nut and tighten.
14. Reconnect the fuel line. Wipe off the area, reconnect battery negative cable. Start the car (it will take some cranking to pressurize and prime the lines). When you are sure no leaks, put back the access panel, tighten 4 bolts. Place the rear seat in it's position.
When you buy the new fuel filter; look at it carefully and you will see all the connections and how they are released.
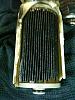
FUEL FILTER AFTER 125K MILES:
It wasn't an official DIY but member ' pcy ' did a DIY in that thread which saved me a lot of time looking up the TIS for this.I decided to make an official DIY for this. Because his directions were straight forward and I am lazy, I'll just use his wording. TIP: To avoid spilling dirty fuel into the tank once you disconnect the fuel filter line on the bottom of the filter, put some sort of cloth underneath it. Trust me the fuel will be blackish.
My vehicle has 125K miles on it right now and I cannot believe how much better it runs. Bought OEM part from http://www.bimmerspe...0765%20826/6679 for around $124 shipped.

2. Lift up the rear seat and remove.
3. Go to the drivers side, pull back the mat, you will see access panel with 4 bolts (10mm). Remove those 4 bolts, remove that metal access panel.


4. Put some rags on top of the fuel line and remove that fuel line (squeeze on the tabs and lift up). CAREFUL slowly lift up that connector, fuel is pressurized and comes out fast. I wrapped couple of pieces of cloths on the line while slowly lifting up. When the pressure is fully released, set the line aside.

5. Take large flat screw driver any other appropriate tool and a hammer and undo the large collar nut. Remove the collar nut and set aside.

6. Left up the fuel filter assembly. You will see a large connector on the bottom, push the pin, and remove the connector.
7. On the very bottom portion of the fuel filter, there is a flat surface. You will see an electrical connector, remove it.
8. You will see L shaped pin, push it down while pulling that entire connector away.
9. The last picture shows all the connectors removed (looking in to the fuel tank). All those cables/connectors are coming from the fuel pump on the passengers side and they are connected to the fuel pump.
10. When I disconnected the fuel filter, most of the dirty fuel in the filter dropped back in to the tank. So, I took a sponge and emptied the remaining fuel in the tank.
10. Position the new fuel filter in to the position; attach the electrical connector to the new fuel filter. Connect all the fuel lines to the filter. Take your time to make sure everything is connected properly. You can't make a mistake; all connectors go one-way only.
11. Remove old seal ring on collar and put the new seal that came with the fuel filter.
12. Lower the fuel filter in to position, you will have to push it down slightly since the spring pushes the filter up against the access panel.
13. Line up the fuel filter, collar ring nut and tighten.
14. Reconnect the fuel line. Wipe off the area, reconnect battery negative cable. Start the car (it will take some cranking to pressurize and prime the lines). When you are sure no leaks, put back the access panel, tighten 4 bolts. Place the rear seat in it's position.
When you buy the new fuel filter; look at it carefully and you will see all the connections and how they are released.
FUEL FILTER AFTER 125K MILES:

 02-26-2012, 03:47 AM
#3
Contributors
Join Date: Dec 2007
Location: The State of Southern NJ!
Posts: 5,972
Likes: 0
Received 0 Likes
on
0 Posts

That said, if the fuel pump is on a fused circuit - I suppose locating and pulling that fuse would be an alternative. At least it'd eliminate needing to reset things like radio presets, etc and potentially setting off other "alerts"
 ... If I decide to keep my '07 , based on the information in this useful post, I'll consider replacing the filter/sending unit @ 100K too

 02-28-2012, 02:43 PM
#6
Members
Join Date: Jan 2011
Location: North Jersey
Posts: 42
Likes: 0
Received 0 Likes
on
0 Posts
My Ride: 2004 525i
1997 318ti - Sold
1990 535i - Gone
 Been waiting for this DIY. I'm hoping this replacement will make the RPM fluctuations I'm getting to subside a little. My car is at 143k now.
02-28-2012, 07:02 PM
Been waiting for this DIY. I'm hoping this replacement will make the RPM fluctuations I'm getting to subside a little. My car is at 143k now.
02-28-2012, 07:02 PM
#7
Senior Members
Thread Starter
I did notice that it actually helped my RPM and my initial take off and overall driving. seriously, the car is fun to drive again i didn't realize how much better it could have responded. Probably like everyone else my BMW and I have a love/hate relationship but it appears this has put us and equal terms again.
03-01-2012, 05:50 PM
#9
Senior Members
Join Date: Sep 2010
Location: SoCal
Posts: 903
Likes: 0
Received 0 Likes
on
0 Posts
My Ride: 07 530i Mystic Blue
Does the package from the website you purchased from come with the actual filter as well or just the assembly?
I am very interested in doing this. Thanks,
I am very interested in doing this. Thanks,