
Wetsanding your chipped headlights

Thread Starter
Contributors
Joined: Jun 2006
Posts: 4,533
Likes: 0
From: HK (N.T), UK (Surrey)
My Ride: BMW E60 530i , Silver with leather Air Con iDrive 17" Breyton Rims with Dunlop Sp Sport tyres (M-Tech Bodykit and rims WANTED)
Alfa Romeo 147 TS1.6 , Black with Air Con 17" Multi Spoke alloys with Bridgestone RE040 tyres
Toyota MR-S 1.8 VVTI , Lagoon Blue with Red leather Air Con 15" standard alloys with Toyo tyres
Toyota Celica 1.8 VVTI, Lagoon Blue, Air Con, 16" Standard alloys with Kuhmo KU31, EBC Green Stuff
Hi folks,
As some of your requests, i decided to wetsand my dull looking headlights and to demonstrate how to reconditioning your chipped headlights and how to get rid of those crappy looking stone chips )
)
Tools required:
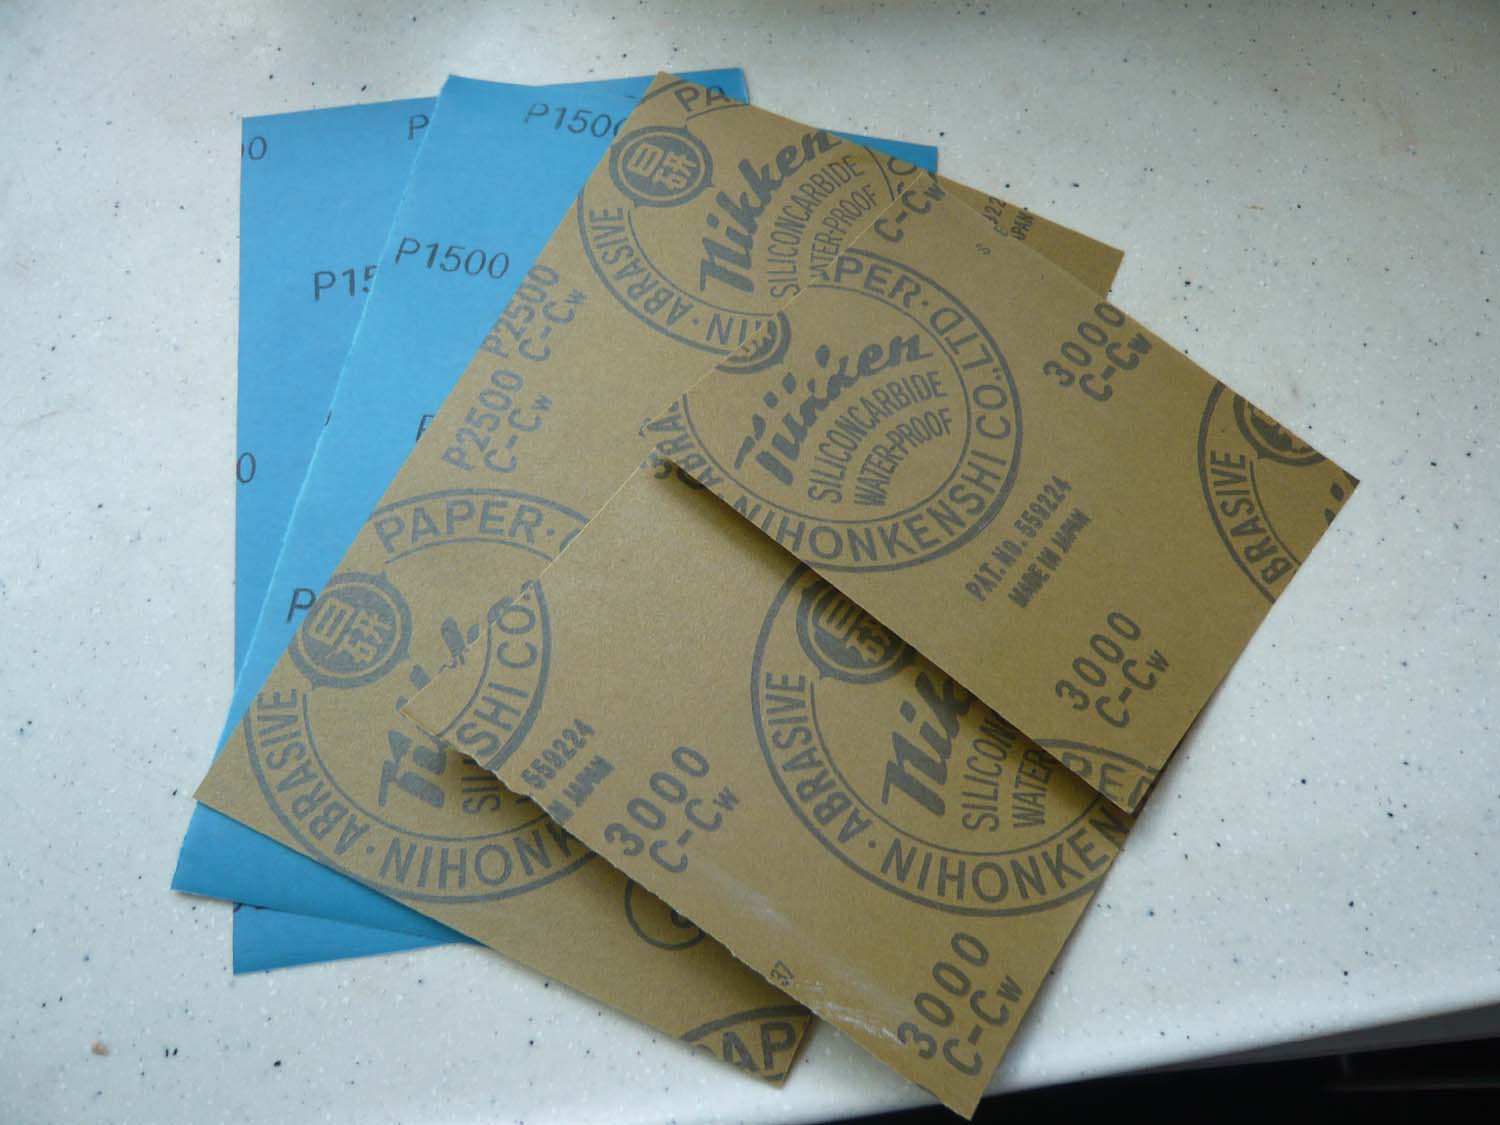
1)Sand Papers:
2 x 1500 grit
2 x 2500 grit
2 x 3000 grit
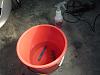
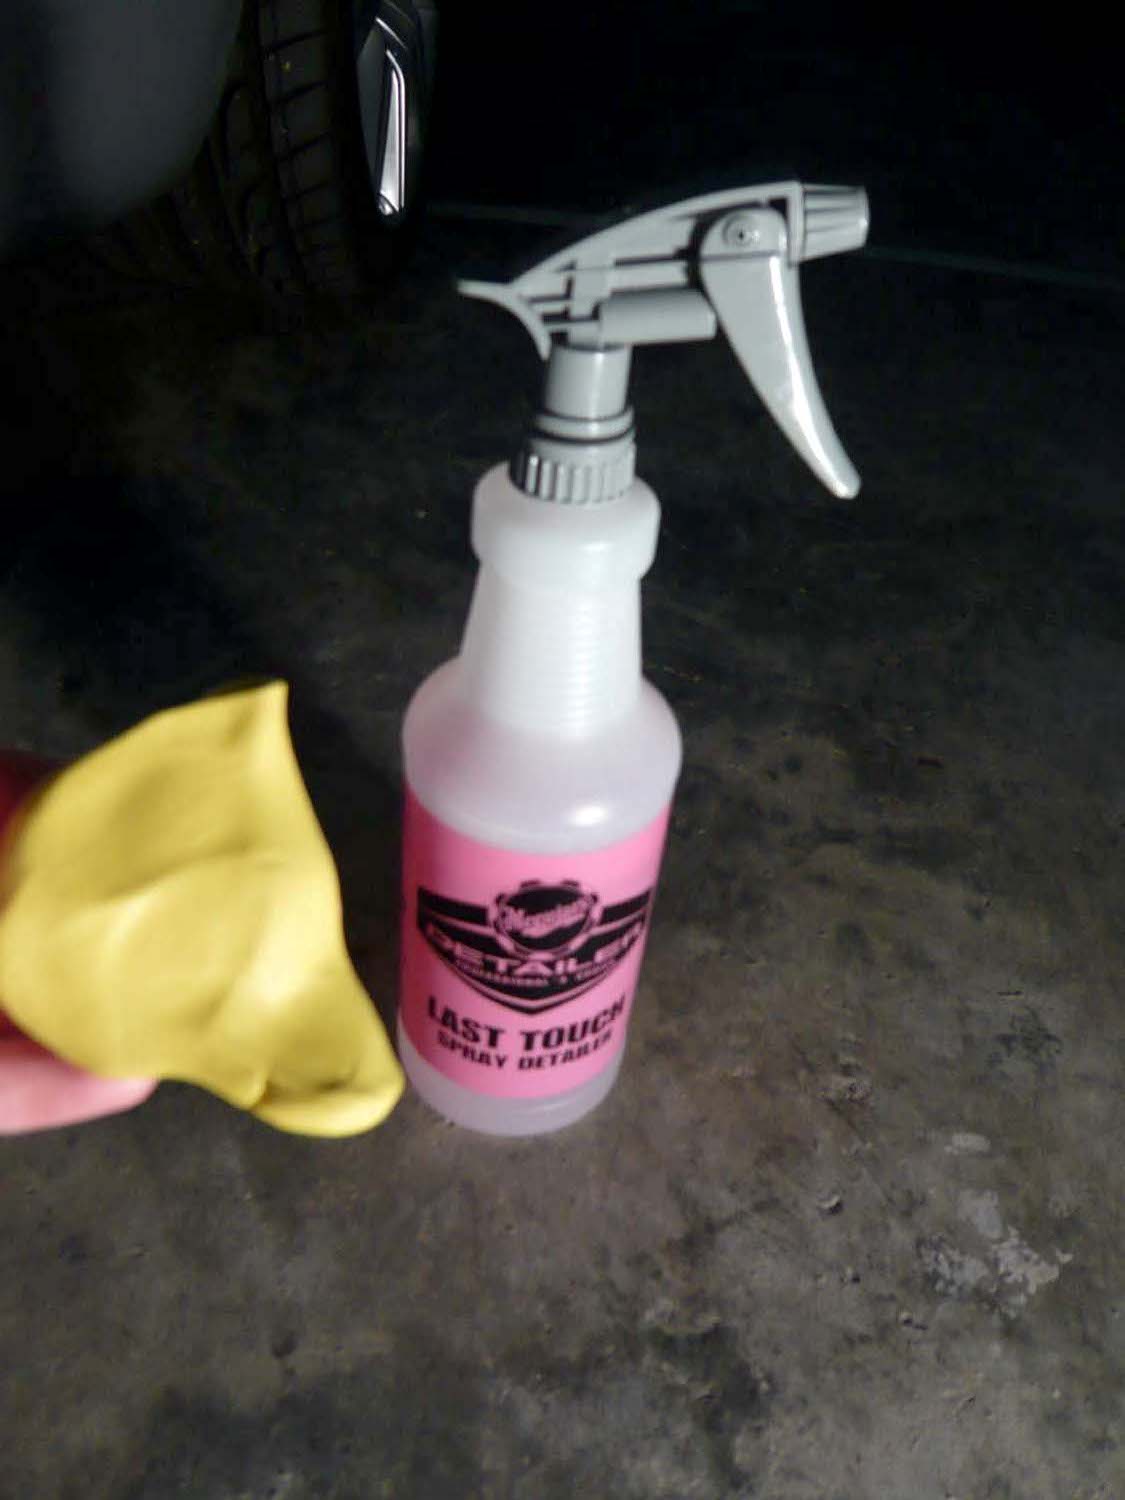
2)Bucket
3)Car wash shampoo
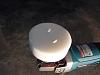
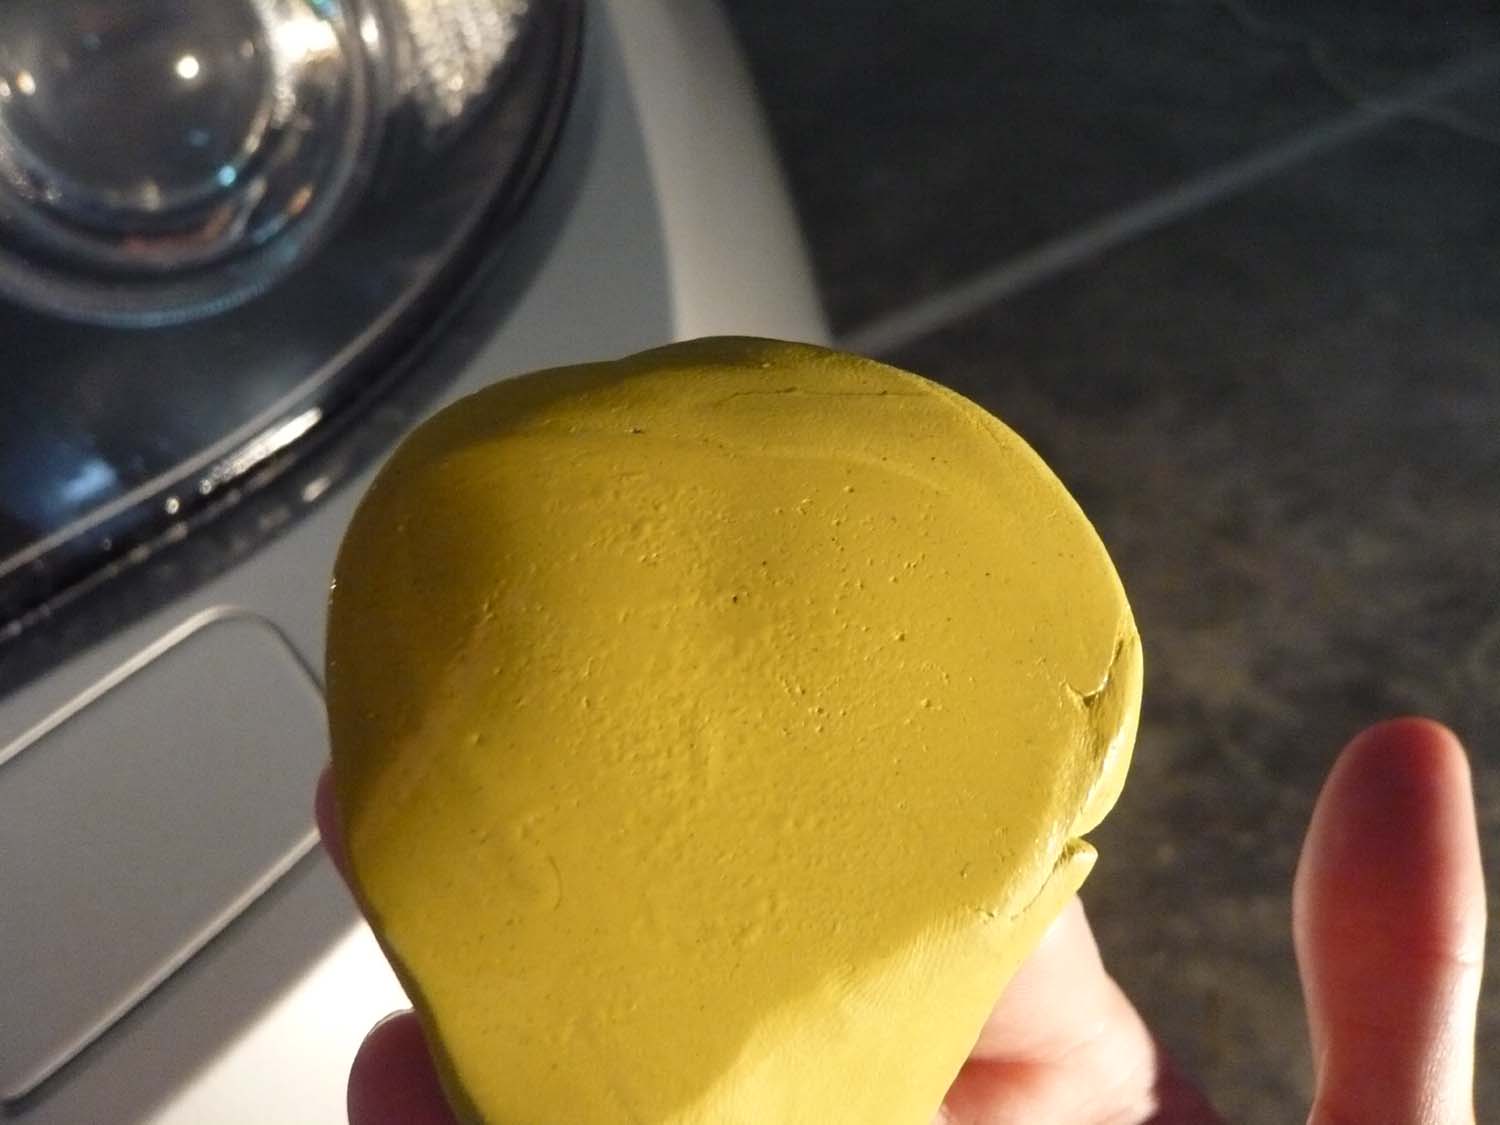
4)Detailing clay (Used clay will be fine)
5)Sanding backing pad
6)Microfibre Clothes
7)Menzerna
Power Gloss
3.02 RD
106 FF
8)Polisher (Rotary or DA)
9) 4" backing plate, polishing and finishing pads
10) Quick detailer (As lub)
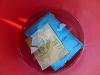
prepare 2 x 1500 grit, 2 x 2500 grit and 2 x 3000 grit sandpapers

Then soak in a bucket of water or Soap water (2hours +)
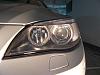
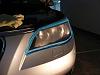
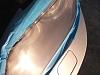
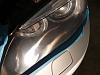
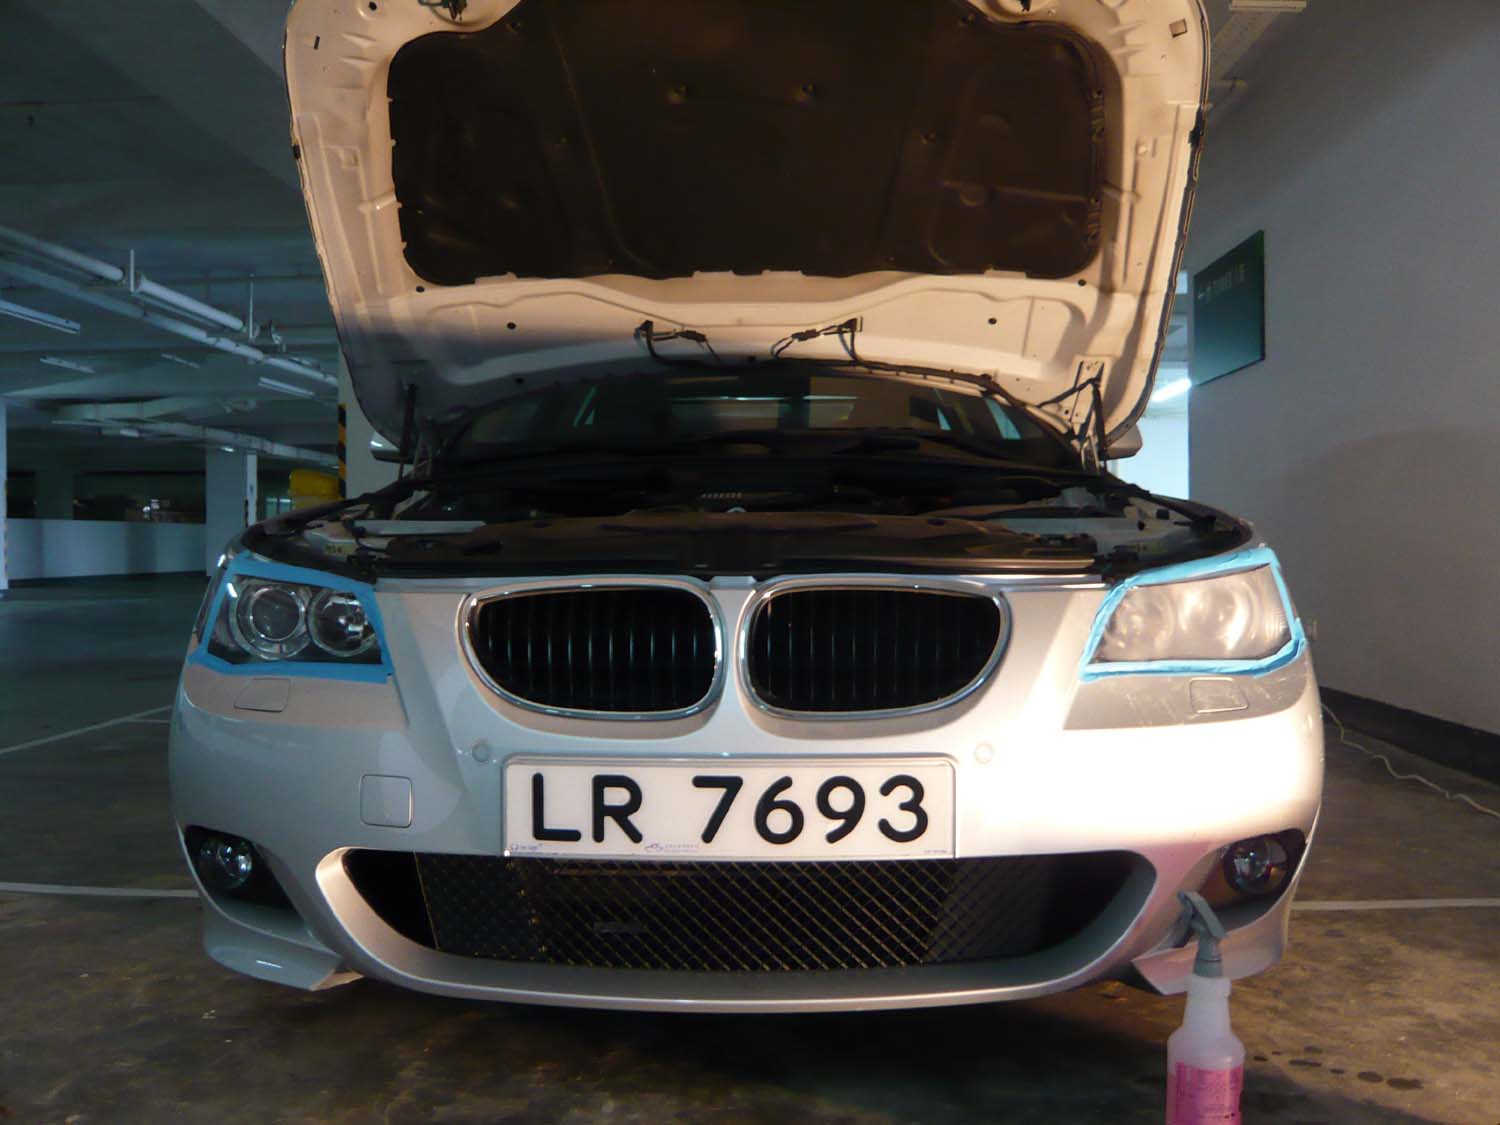
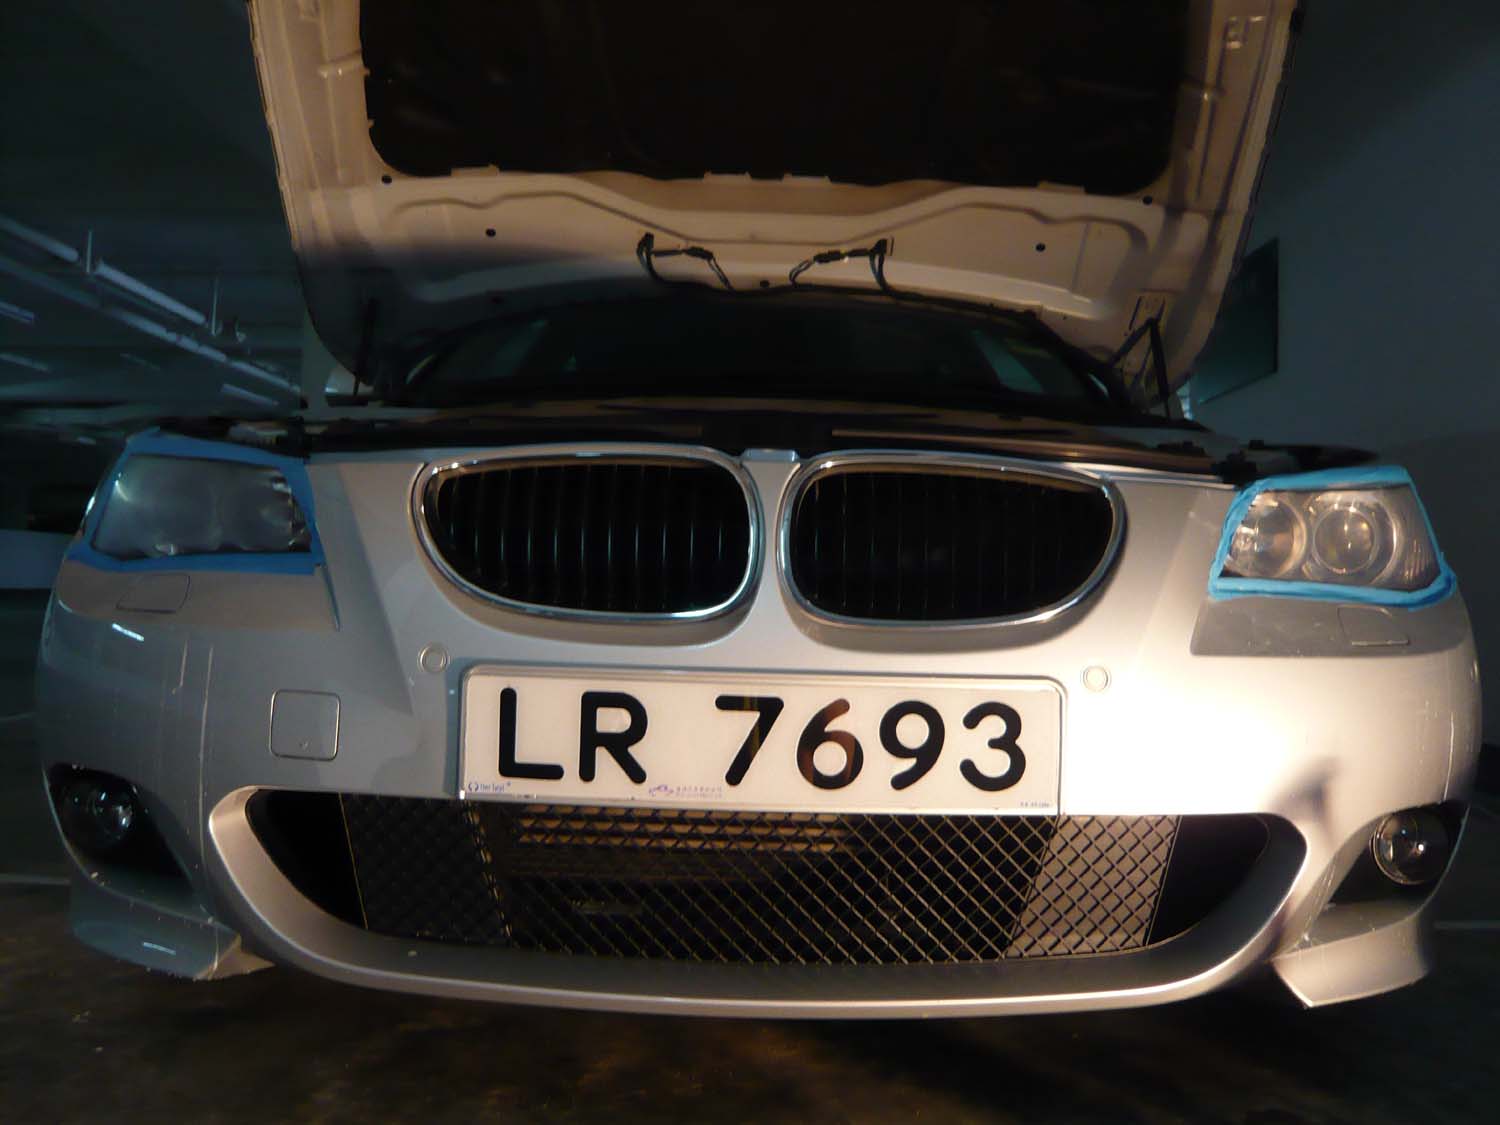
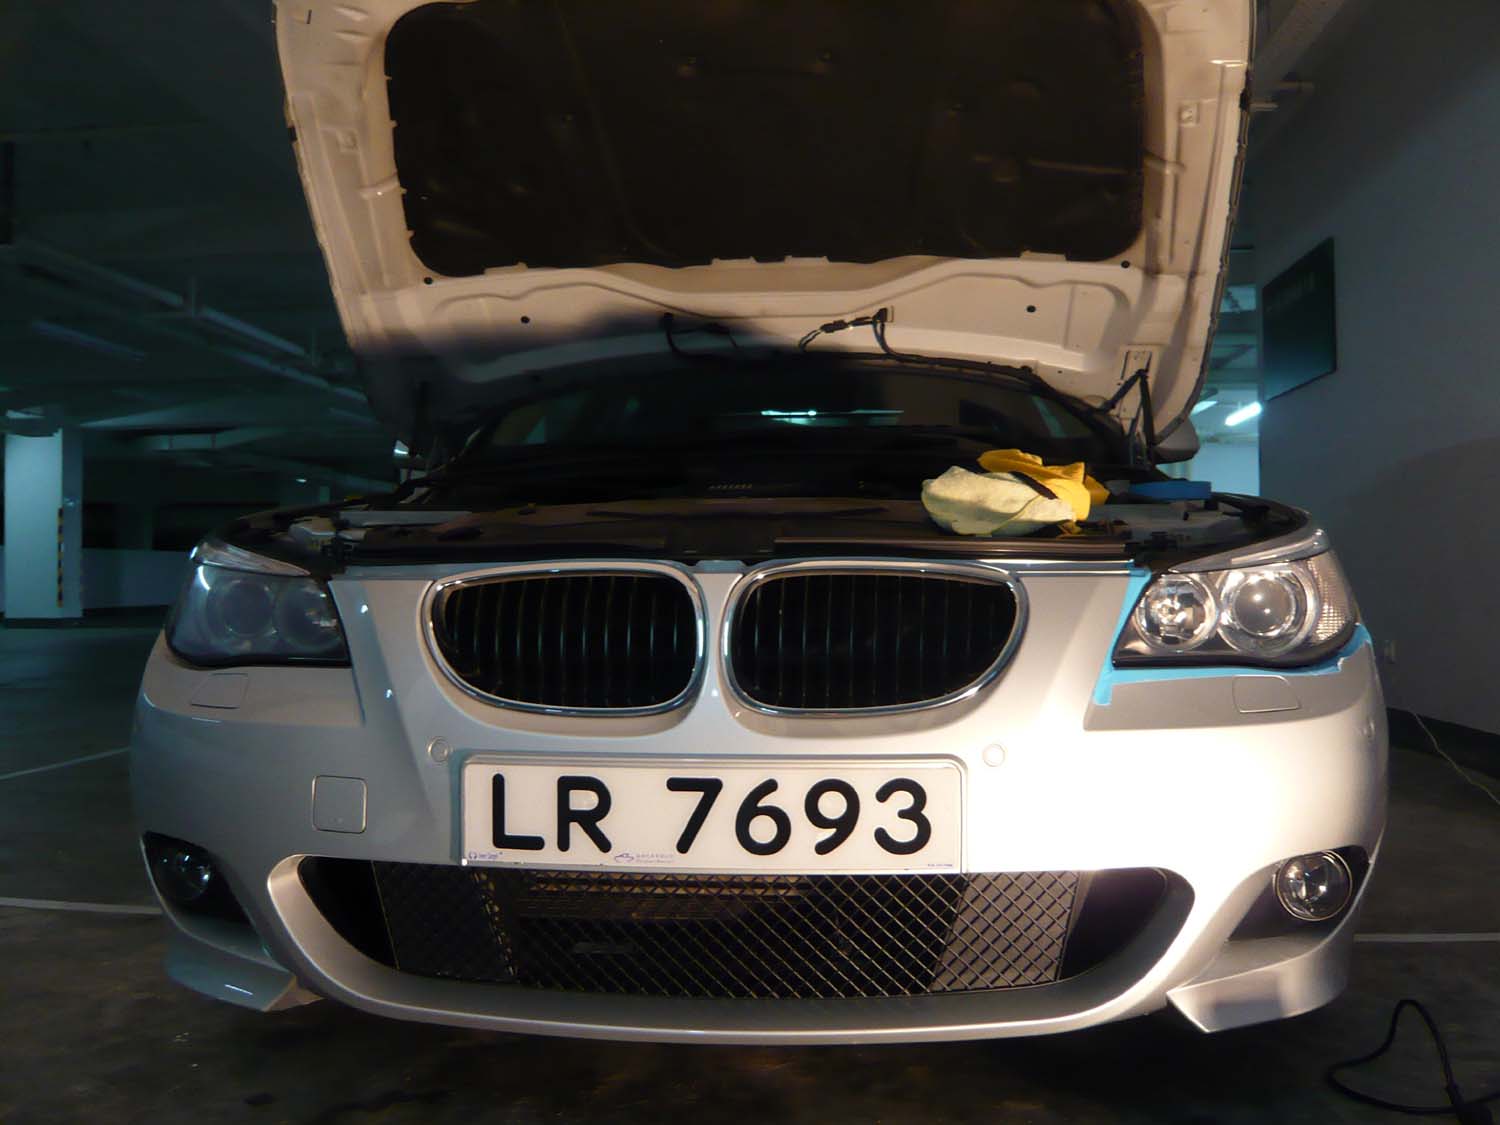
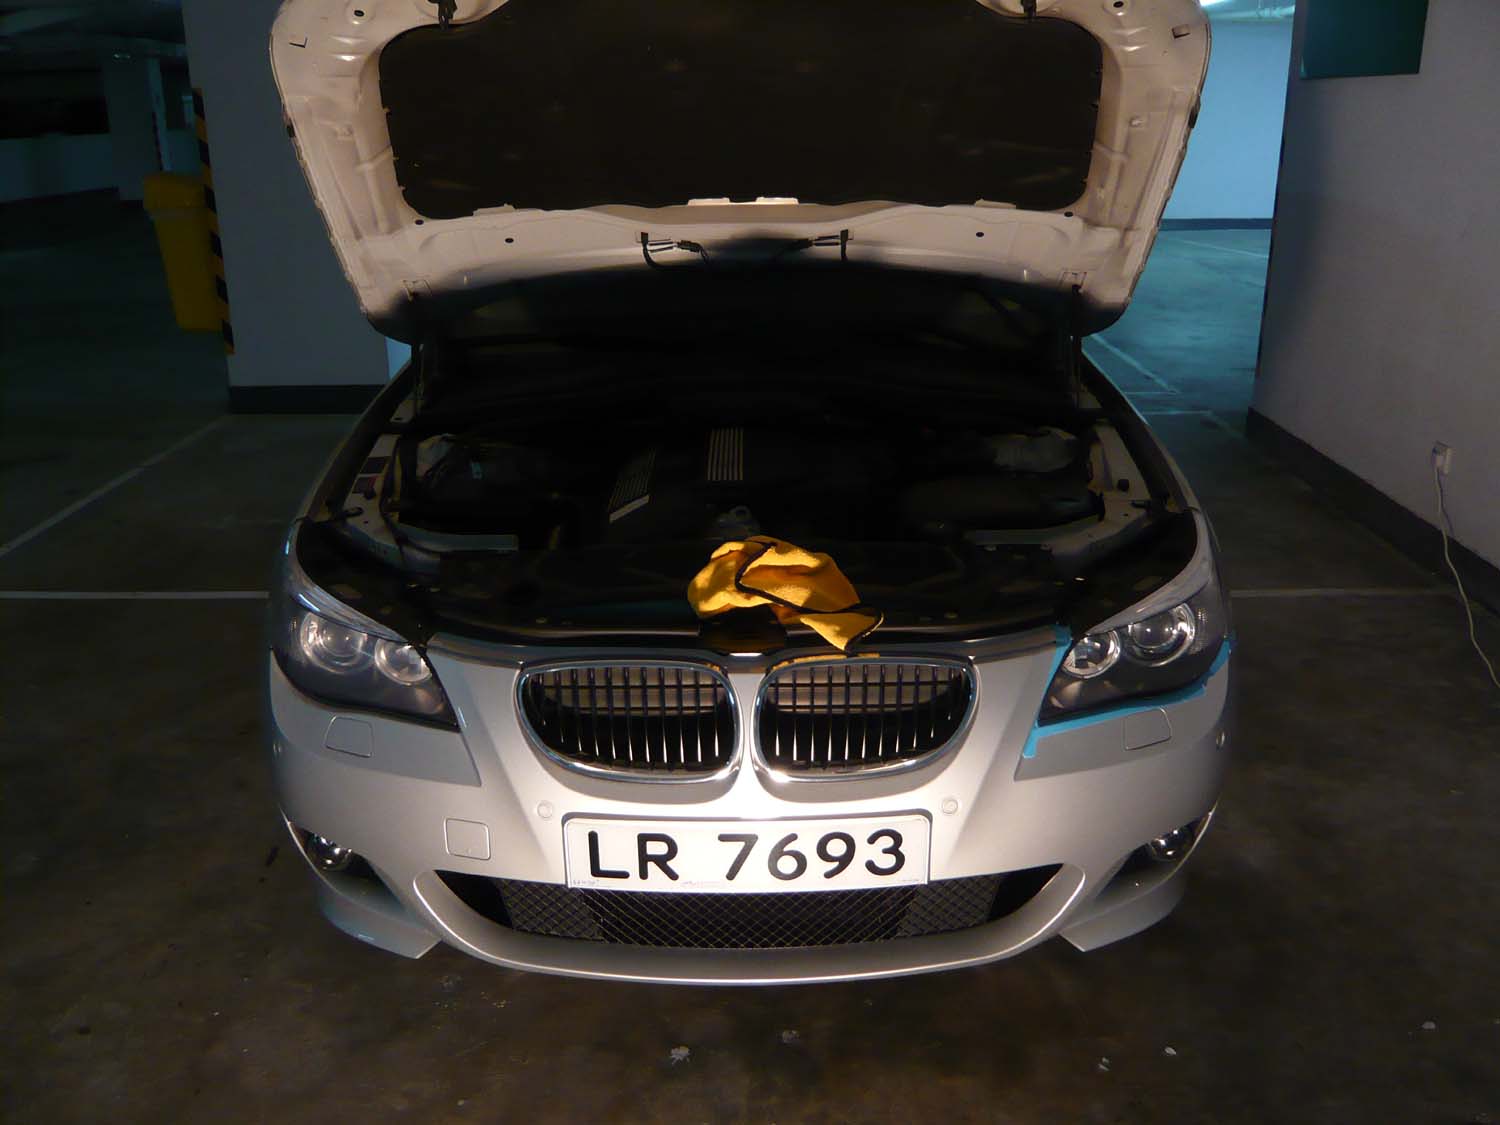
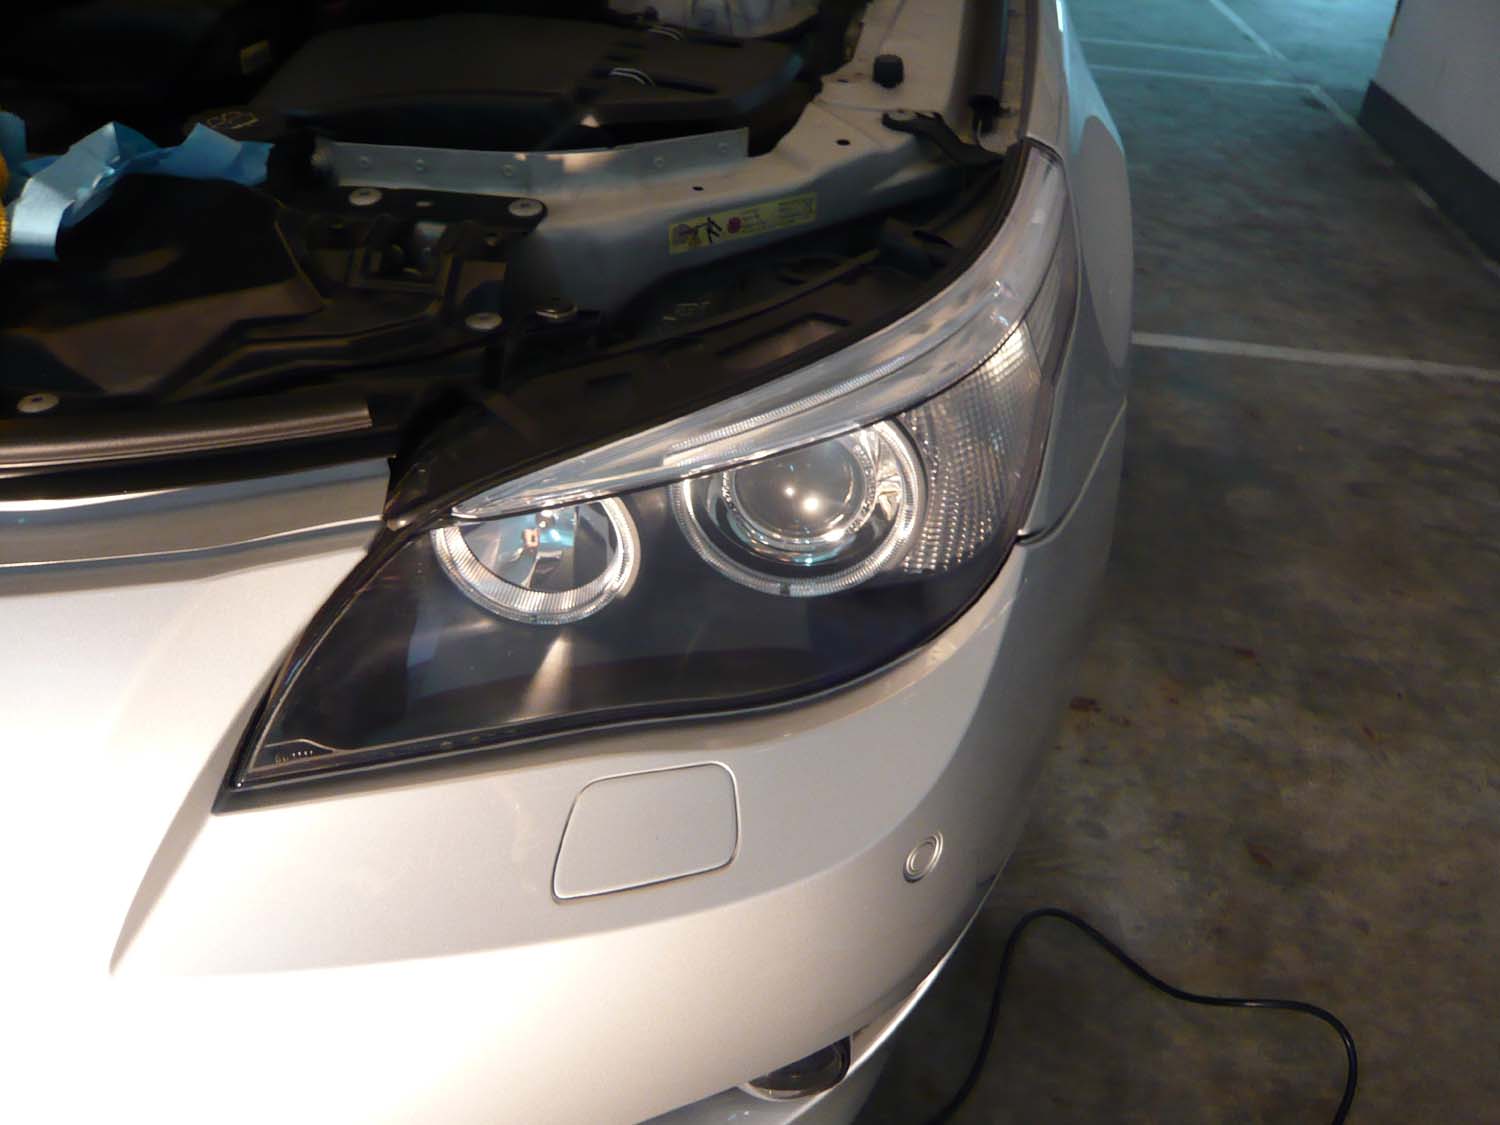
And few BEFORE pics, as you can see the headlights has picked up quite of few stone chips from the road


Headlights was washed and clayed with detailing clay
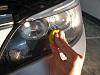

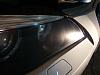
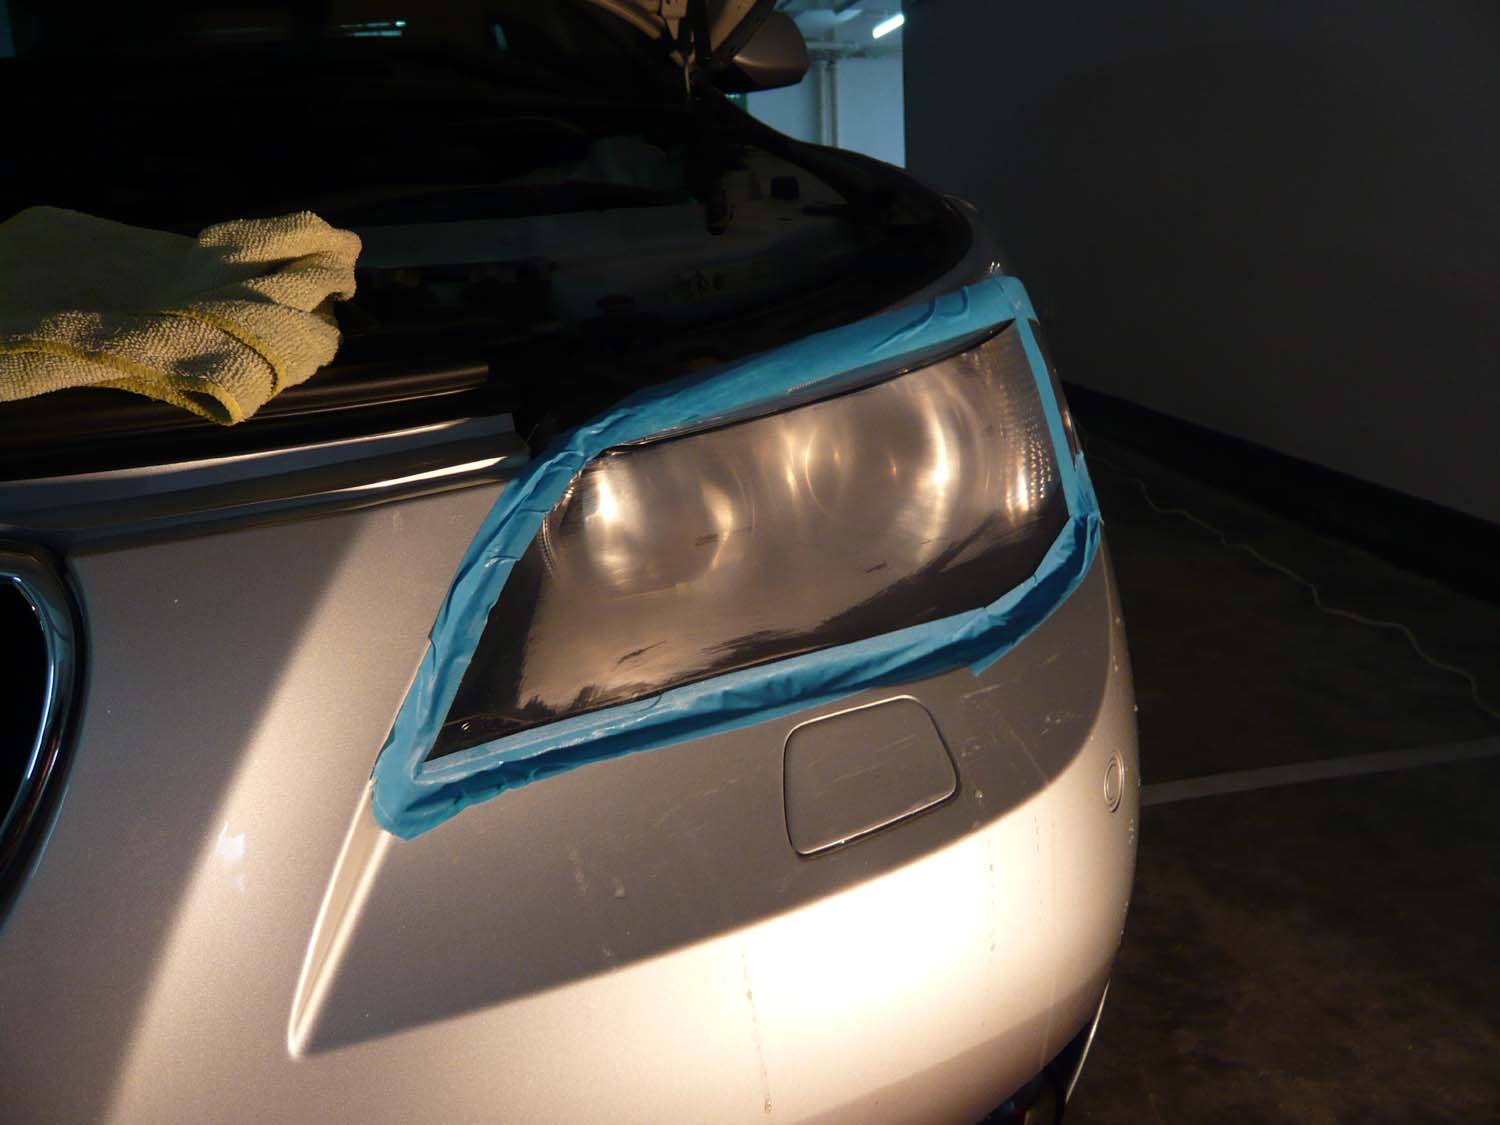
Then it was dried with MF cloth and ready to tape up all edges (To reduce the chance of sanding the painted area, which is you dont want to see )
)


sanding papers were soaked in the water for 6 hours, as to soften the sanding paper to reduce the chances of leaving deep scratching marks on your headlights and ensure even sanding.
A firm foam backing pad was used today (I lost my Meg sanding pad ) for the wetsanding
1500grit wet sanding
Tips:
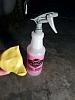
1)Spray plently of QD (Quick detailer) while you wetsanding to lubrcate the surface to reduce the chance of scratching
2)make sure you are applying with an even pressure, and work until the chips are level (some deep chips may not able to remove though)


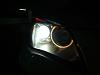
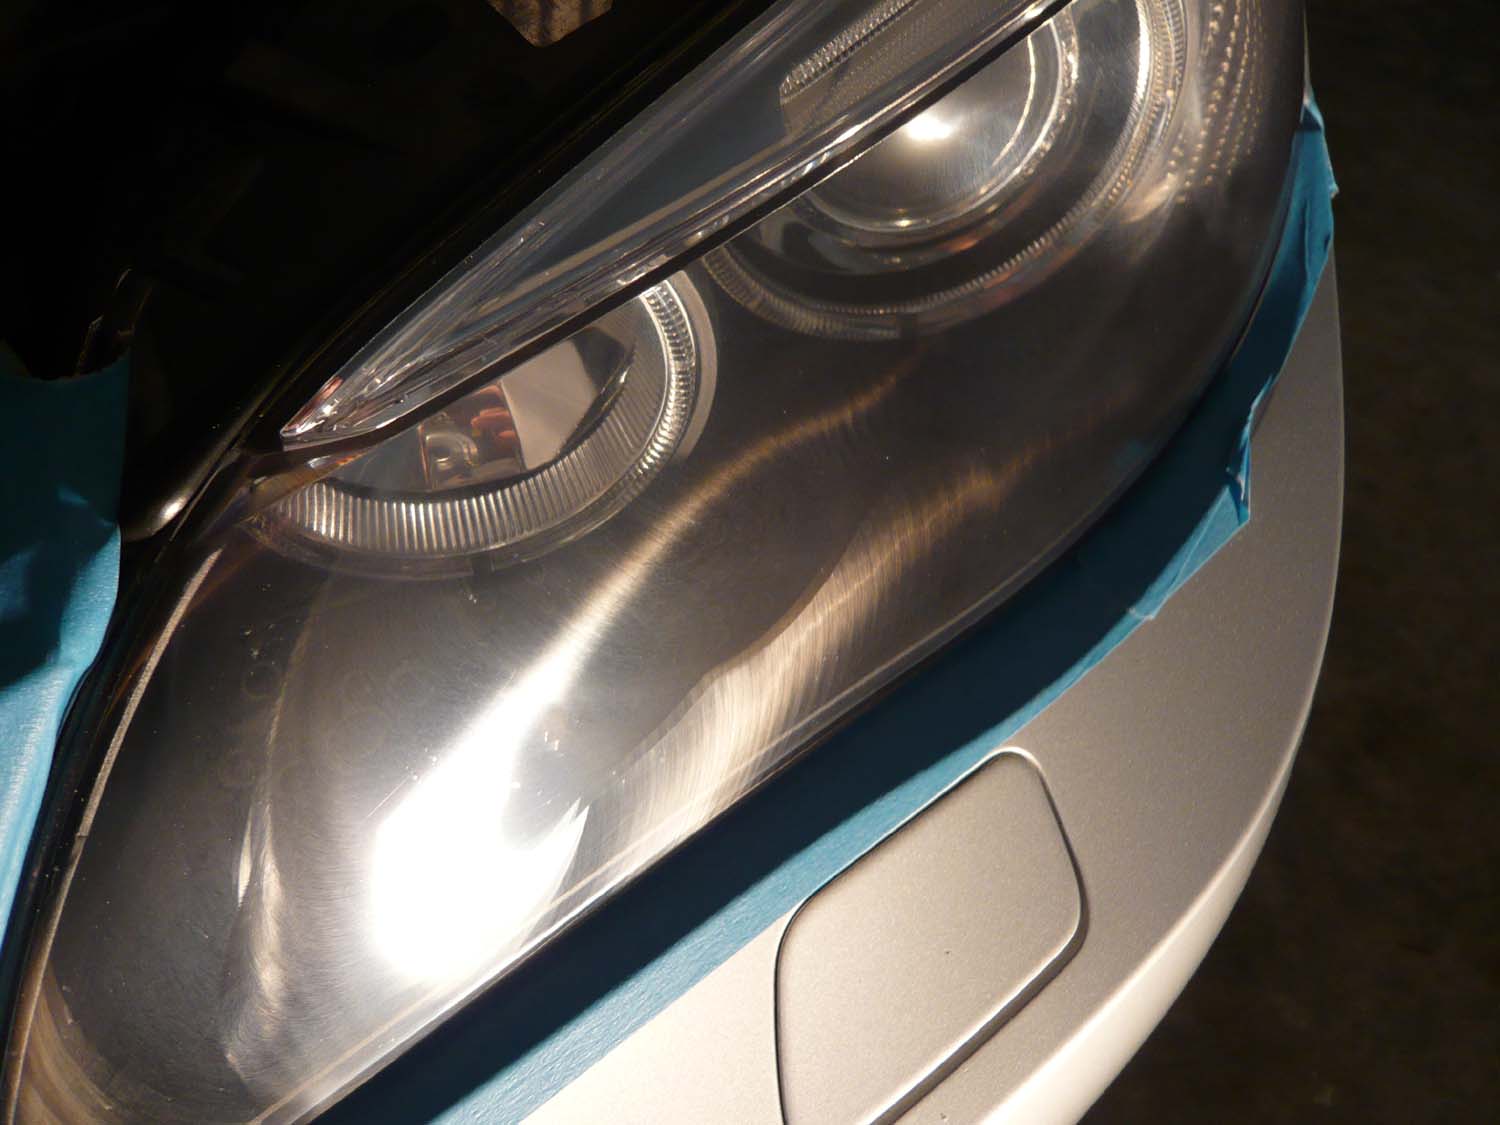
Here is the picture after 1500grit, the headlight looks cloudy and full of sanding marks
Right headlight: 2 x passes 1500grit, 2 x passess 2500grits, 2 x 3000 passess 3000grits (The headlight looks much clear after 3000grit)
Left headlight: 1 x 1500 grit
Both headlights were completed with 2 x passes 1500grit, 2 x passess 2500grits, 2 x passess 3000grits
After 2hrs washing claying and wetsanding, is time to polish Finally")
rotary was used this time as it has much greater correction ability than the DA, but DA will still can do a great job.

4" Sonus polishing pad with Menz power gloss to remove the sanding marks
Following are based on Makita polsiher
Speed 1 or 600rpm: to spread the polish evenly on the surface (1 pass) ----> Speed 2 or 900rpm: start to work the polsih (2-3 passes) -----> Speed 3 or 1500rpm (7-10 passes) to break down the polish until it looks clear (See pic below)
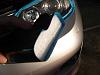
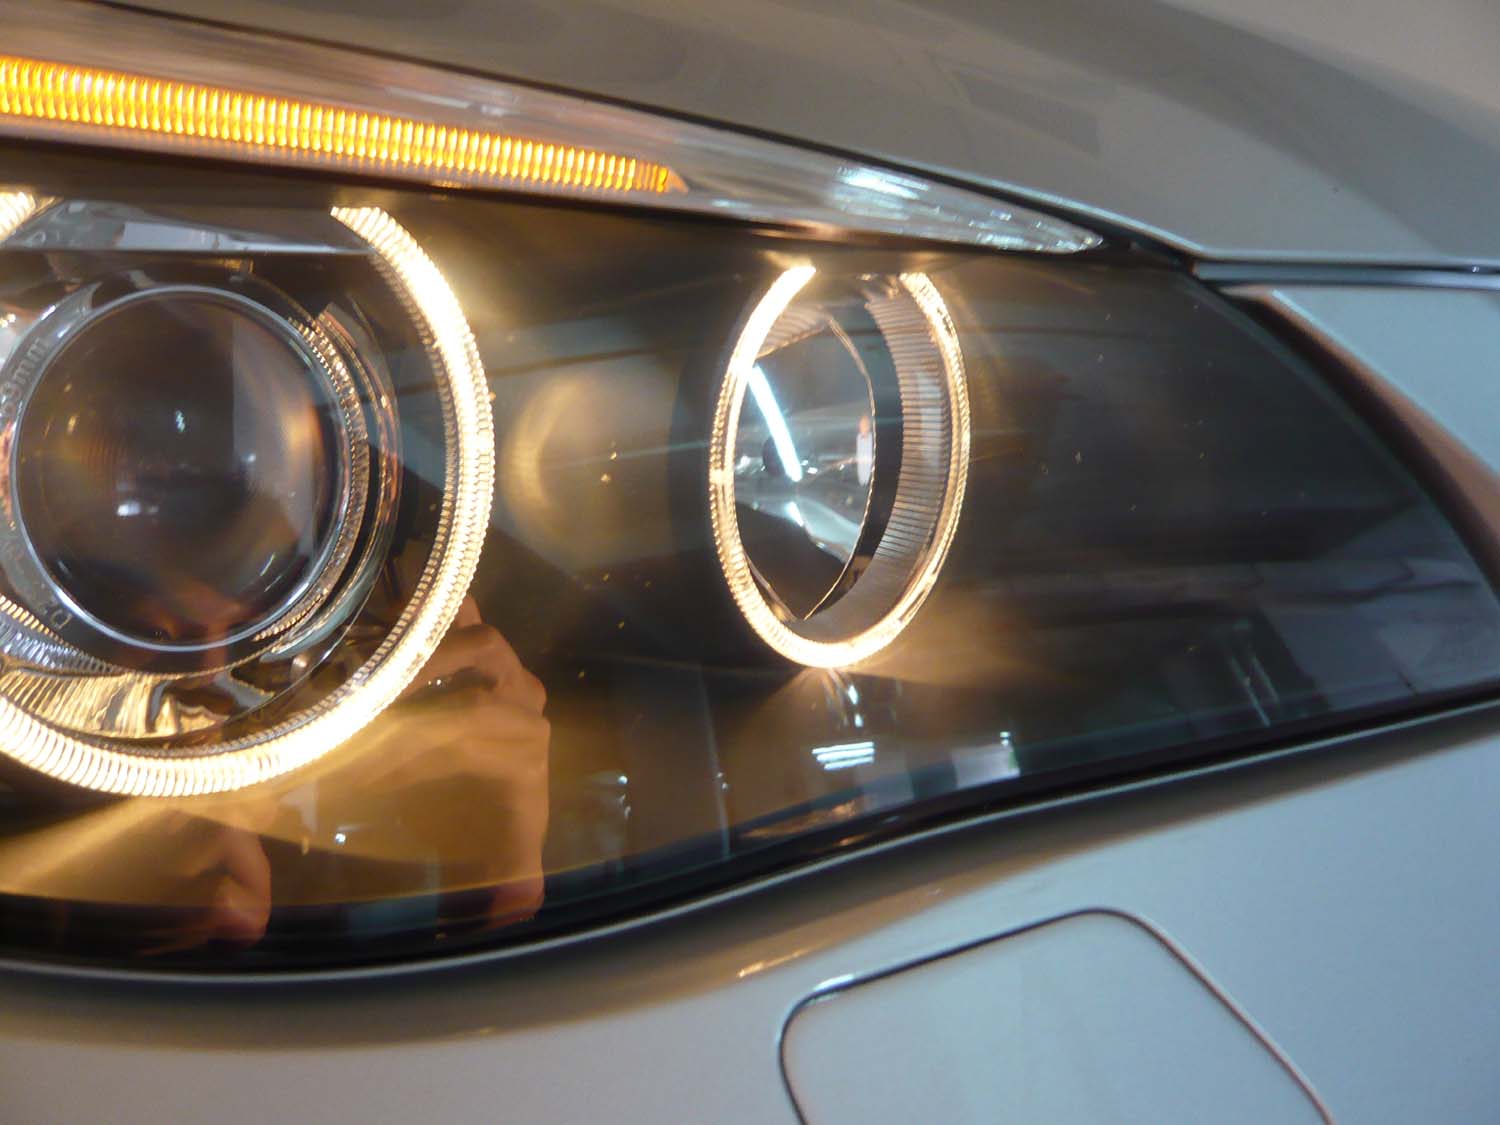
This is how it looks after power gloss 
After 2 passes of power gloss, both headlights was polished with 2 passes of Menz 3.02 and finshed with 2 passes of Menz 106 FF via 4" sonus finishing pad
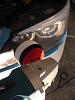
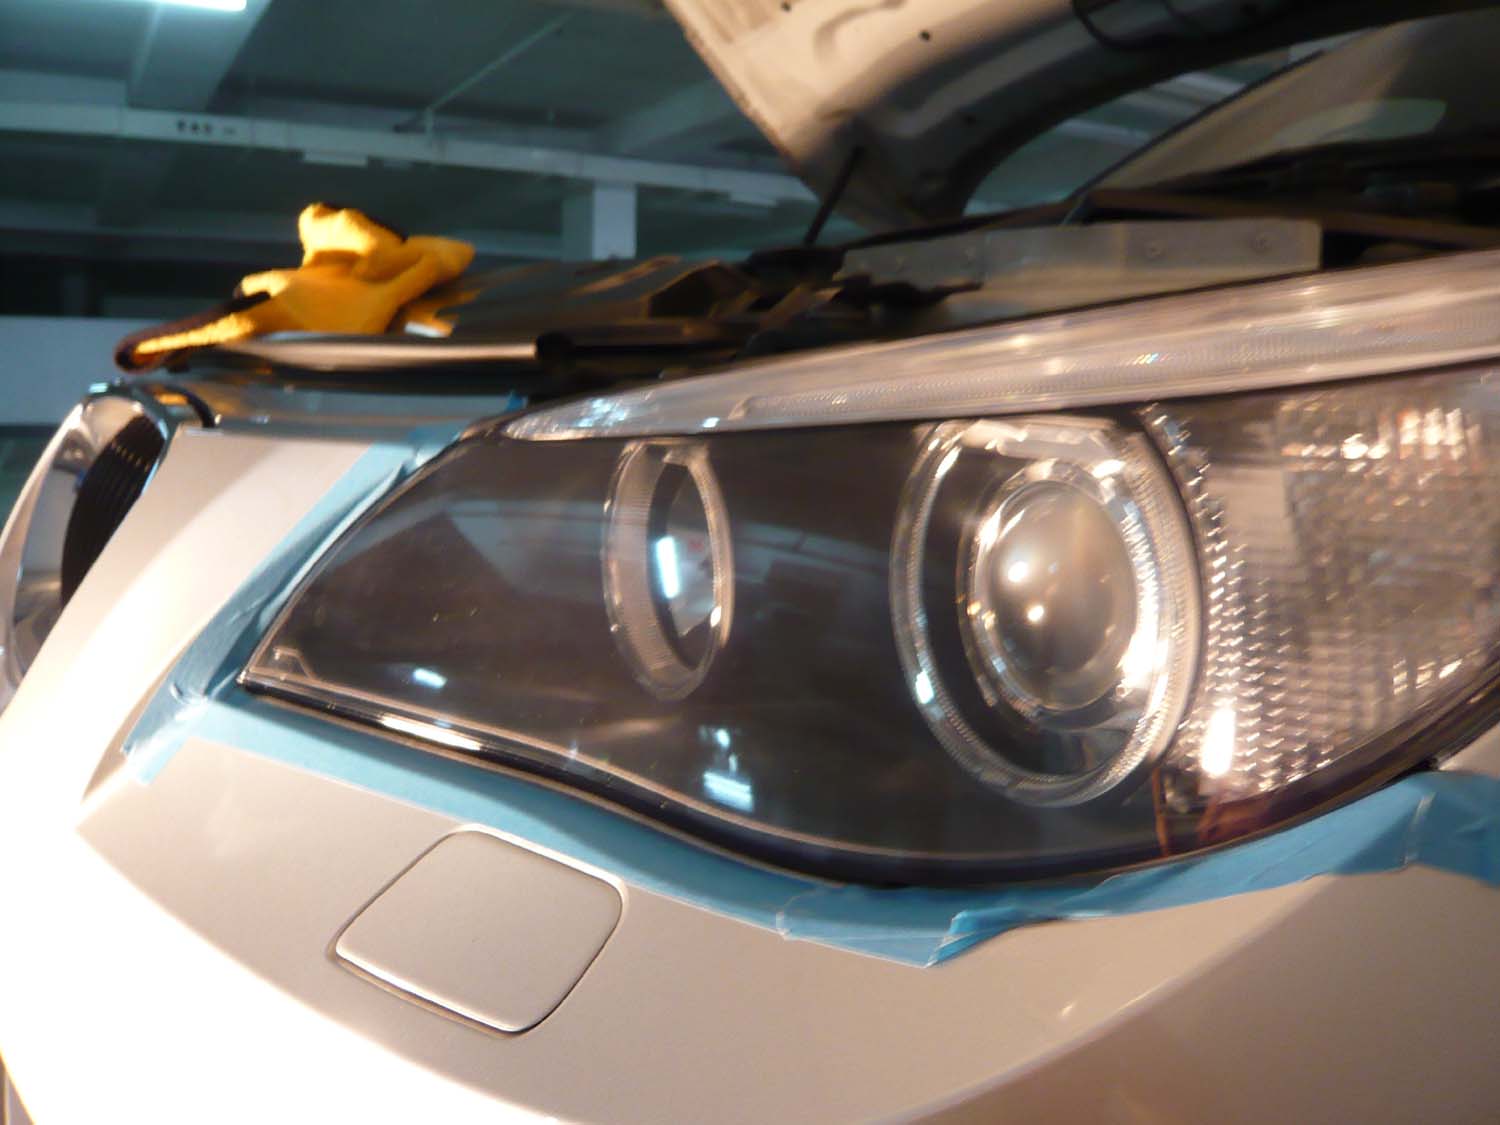
And it turned out like this, as you might able to see, few deep chips were still remaining but most light chips were removed and the headlights are now more clear to see


BEFORE:
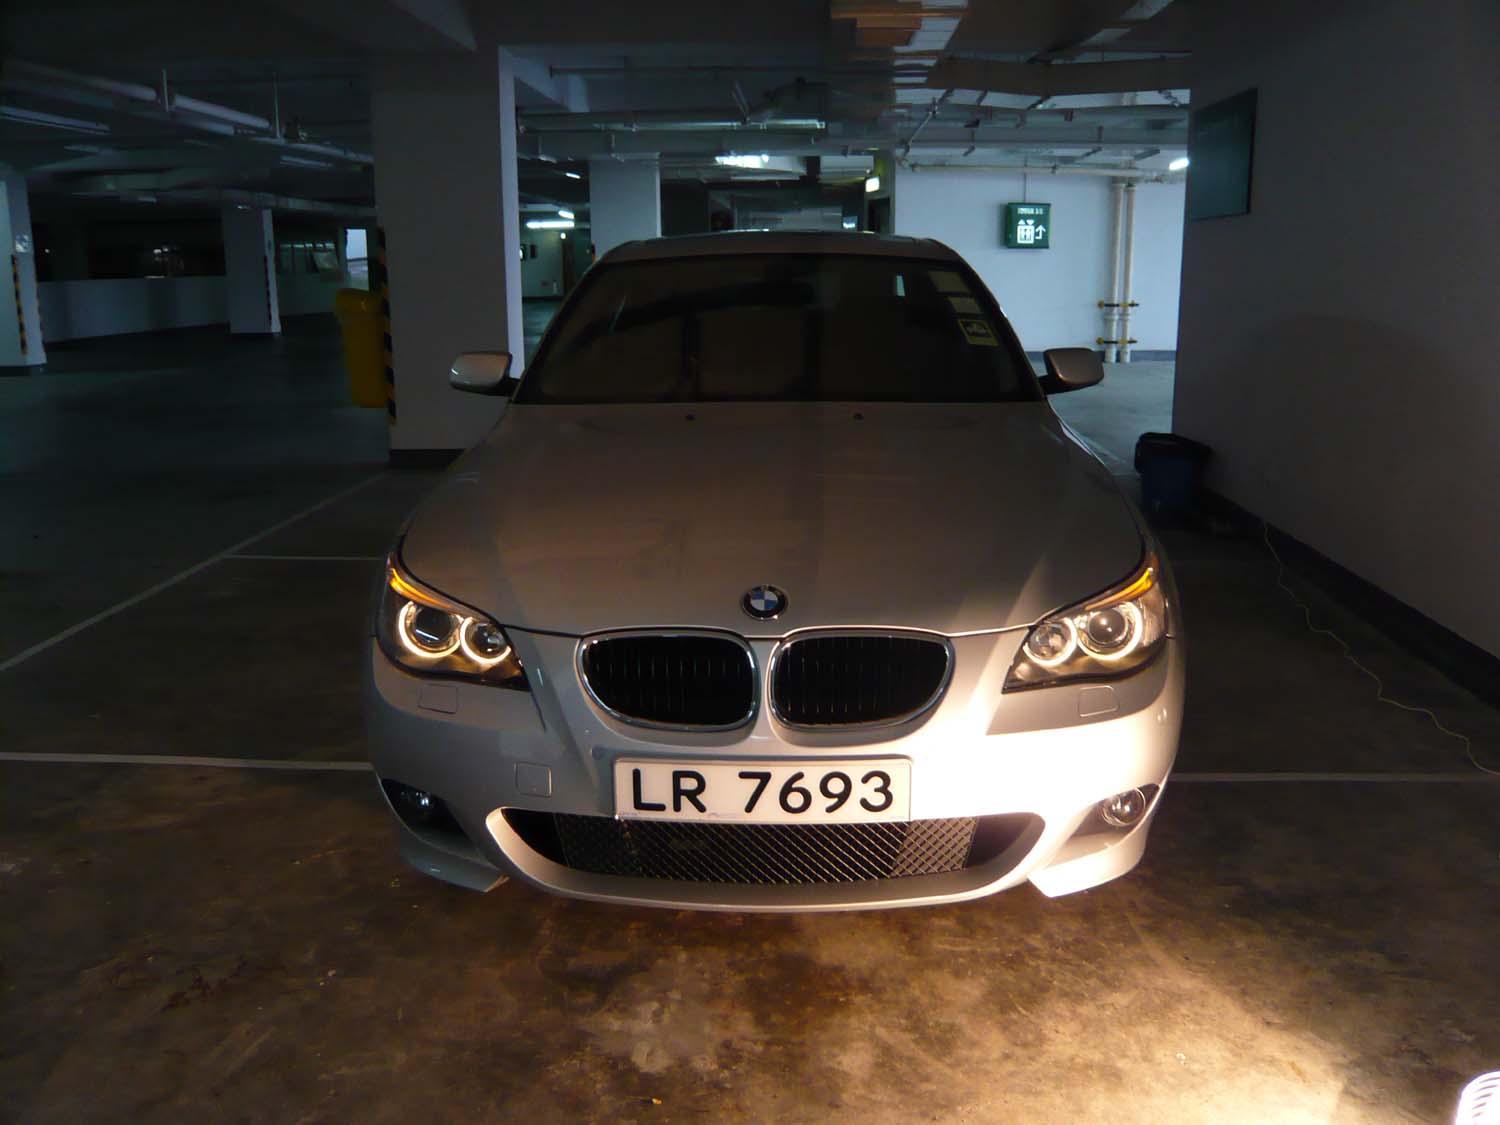
2 coats of Jetseal 109 were applied to protect the freshly polished headlights
As some of your requests, i decided to wetsand my dull looking headlights and to demonstrate how to reconditioning your chipped headlights and how to get rid of those crappy looking stone chips
)Tools required:
1)Sand Papers:
2 x 1500 grit
2 x 2500 grit
2 x 3000 grit
2)Bucket
3)Car wash shampoo
4)Detailing clay (Used clay will be fine)
5)Sanding backing pad
6)Microfibre Clothes
7)Menzerna
Power Gloss
3.02 RD
106 FF
8)Polisher (Rotary or DA)
9) 4" backing plate, polishing and finishing pads
10) Quick detailer (As lub)
prepare 2 x 1500 grit, 2 x 2500 grit and 2 x 3000 grit sandpapers
Then soak in a bucket of water or Soap water (2hours +)

And few BEFORE pics, as you can see the headlights has picked up quite of few stone chips from the road
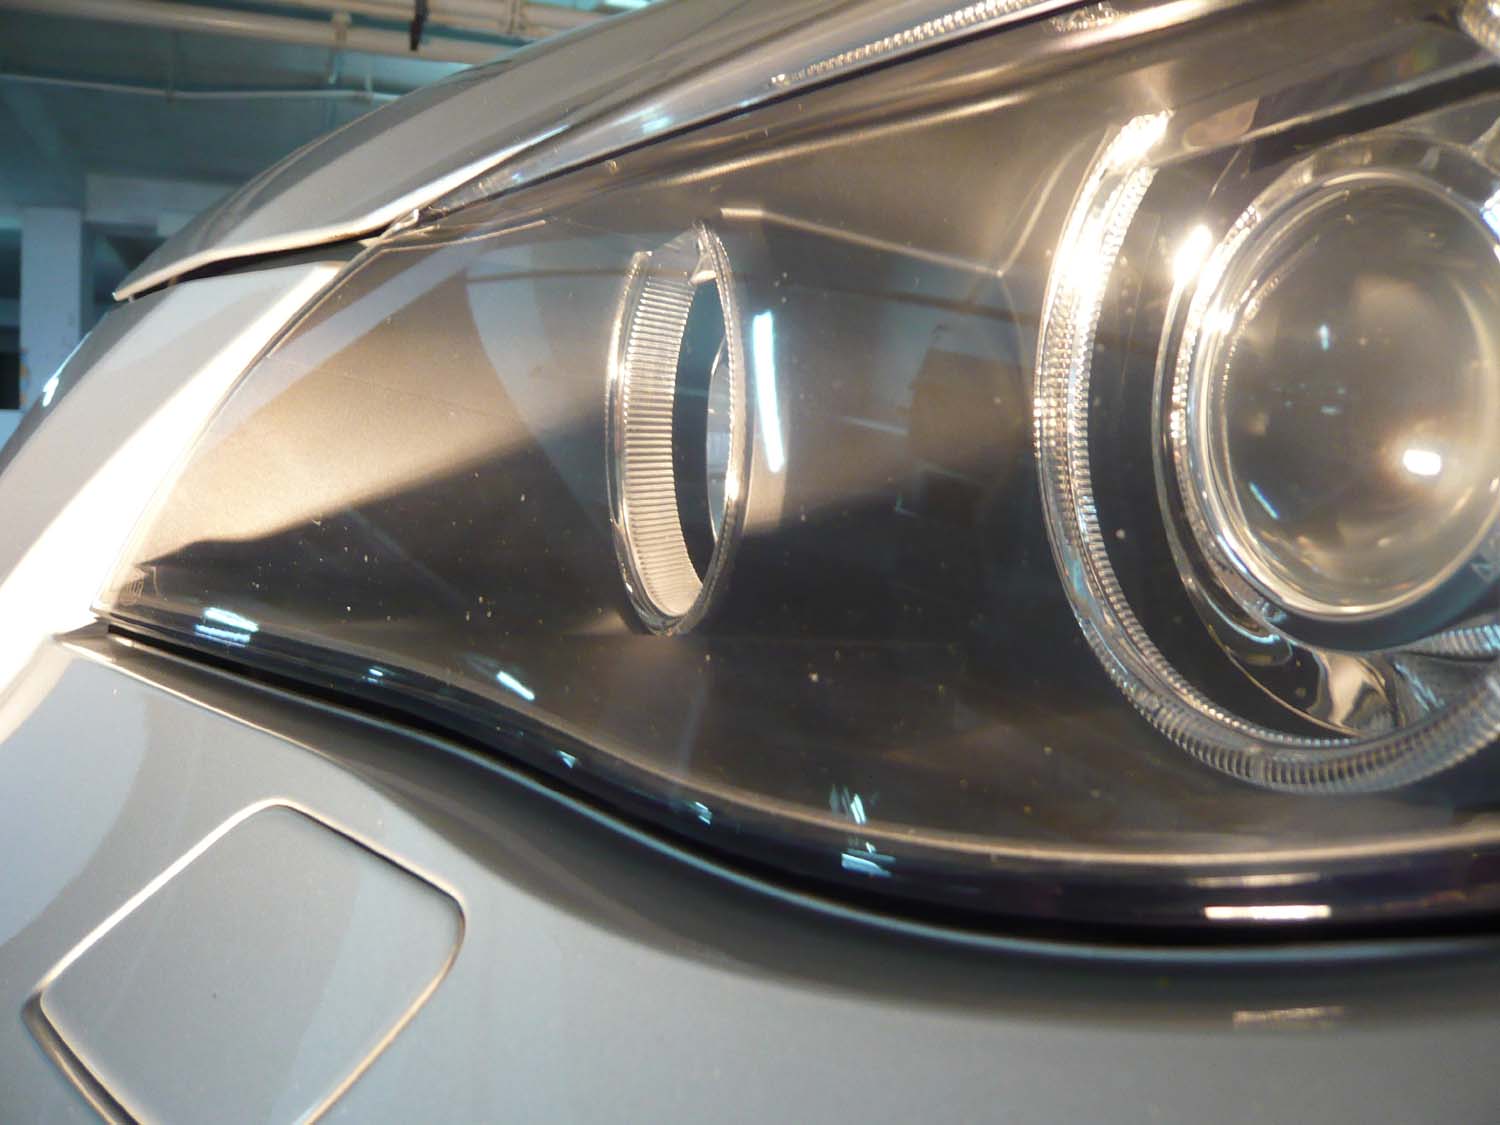

Headlights was washed and clayed with detailing clay

Then it was dried with MF cloth and ready to tape up all edges (To reduce the chance of sanding the painted area, which is you dont want to see
) 


sanding papers were soaked in the water for 6 hours, as to soften the sanding paper to reduce the chances of leaving deep scratching marks on your headlights and ensure even sanding.

A firm foam backing pad was used today (I lost my Meg sanding pad
) for the wetsanding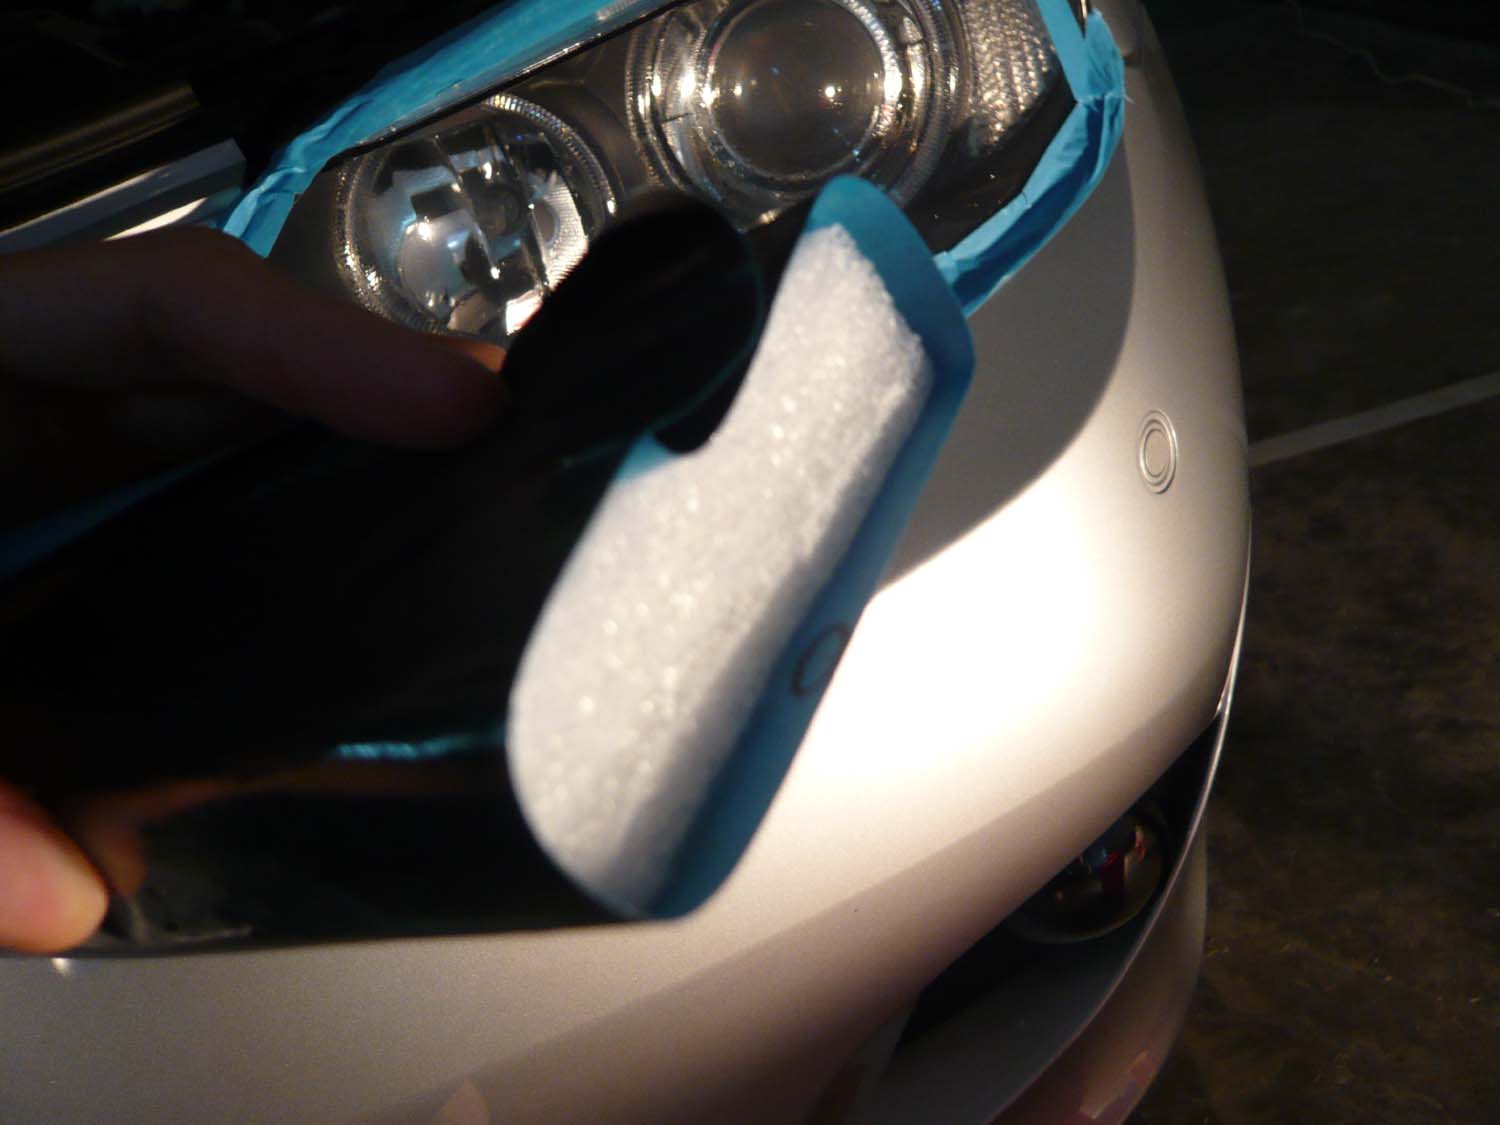
1500grit wet sanding
Tips:
1)Spray plently of QD (Quick detailer) while you wetsanding to lubrcate the surface to reduce the chance of scratching
2)make sure you are applying with an even pressure, and work until the chips are level (some deep chips may not able to remove though)
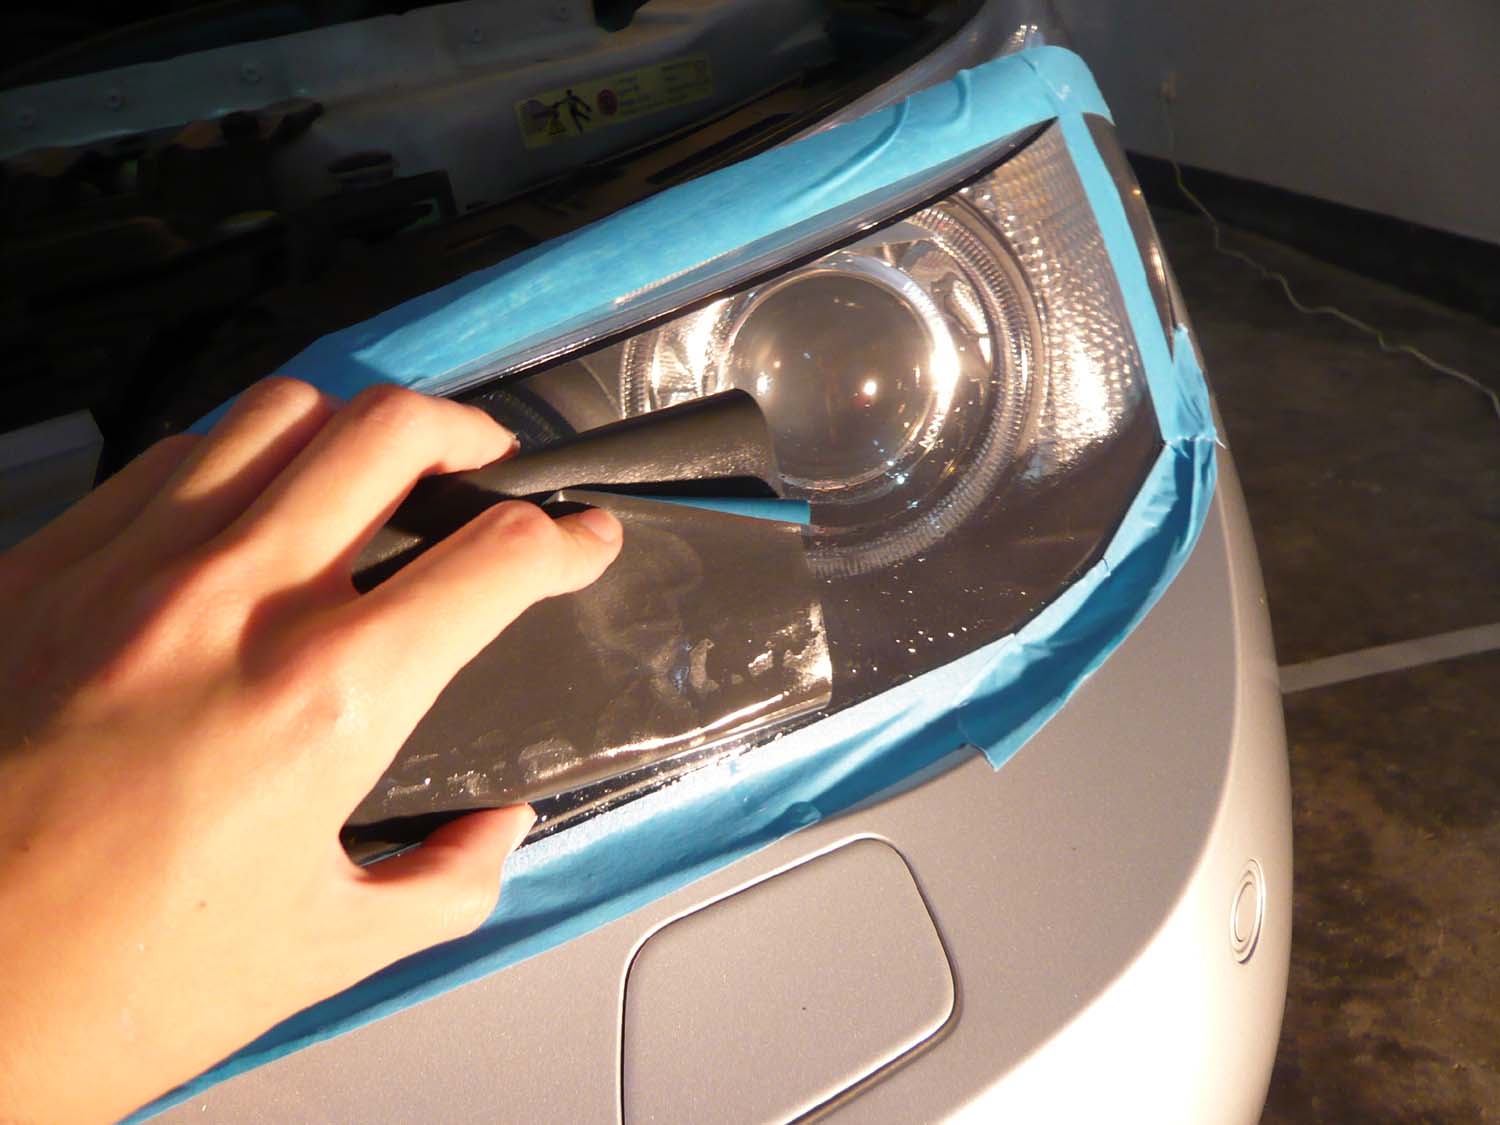
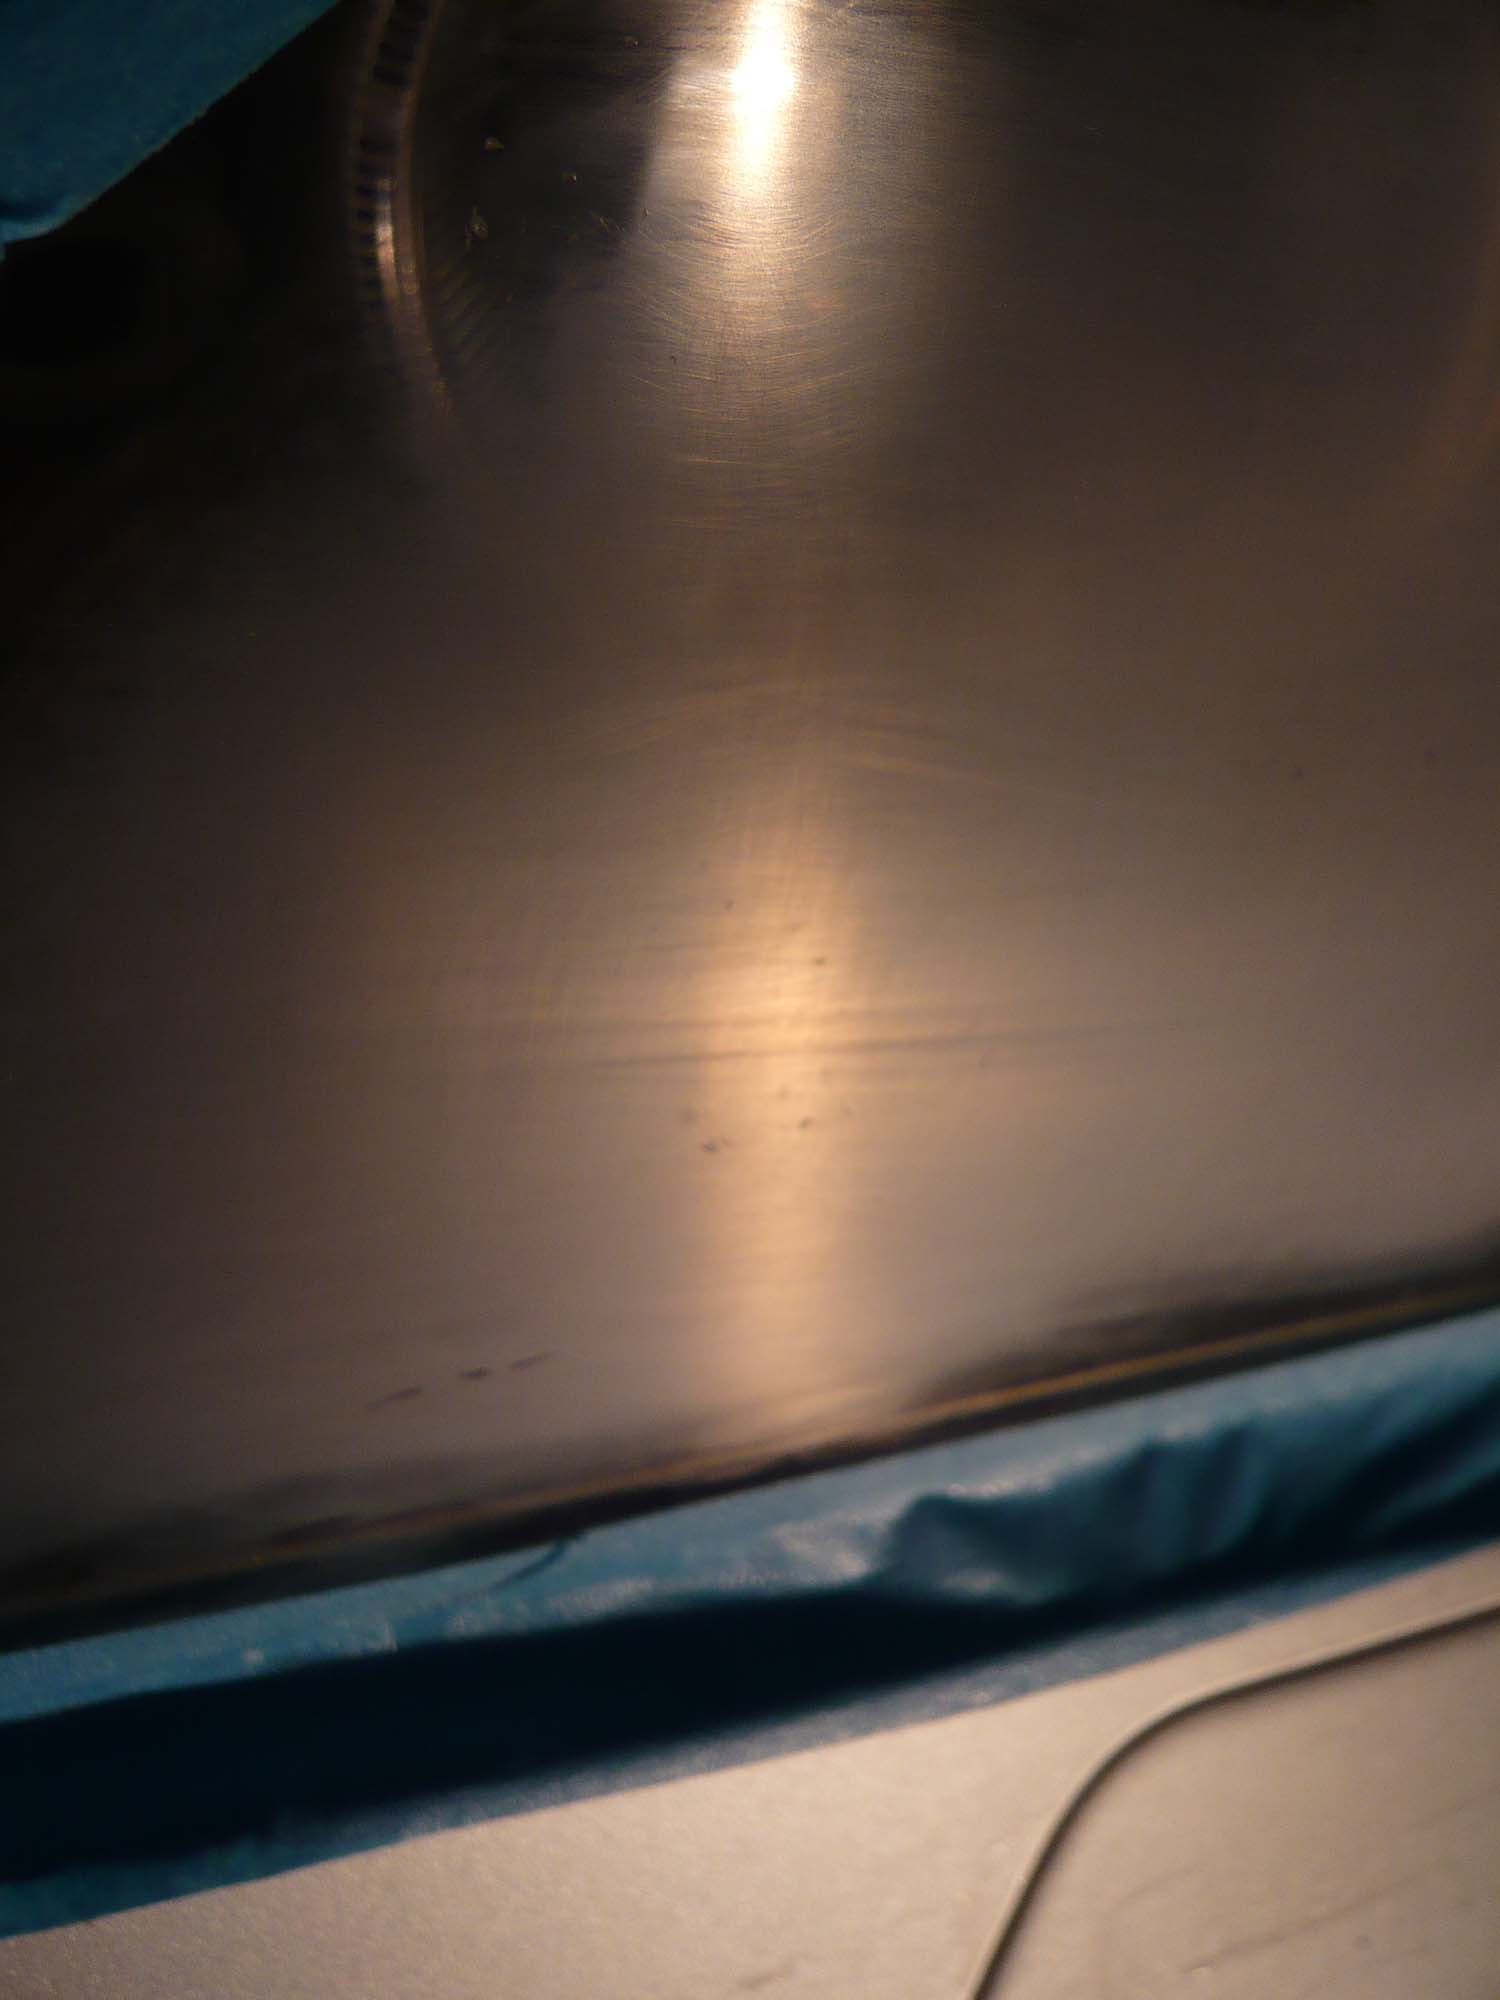
Here is the picture after 1500grit, the headlight looks cloudy and full of sanding marks
Right headlight: 2 x passes 1500grit, 2 x passess 2500grits, 2 x 3000 passess 3000grits (The headlight looks much clear after 3000grit)
Left headlight: 1 x 1500 grit
Both headlights were completed with 2 x passes 1500grit, 2 x passess 2500grits, 2 x passess 3000grits


After 2hrs washing claying and wetsanding, is time to polish Finally
rotary was used this time as it has much greater correction ability than the DA, but DA will still can do a great job.

4" Sonus polishing pad with Menz power gloss to remove the sanding marks
Following are based on Makita polsiher
Speed 1 or 600rpm: to spread the polish evenly on the surface (1 pass) ----> Speed 2 or 900rpm: start to work the polsih (2-3 passes) -----> Speed 3 or 1500rpm (7-10 passes) to break down the polish until it looks clear (See pic below)

This is how it looks after power gloss
After 2 passes of power gloss, both headlights was polished with 2 passes of Menz 3.02 and finshed with 2 passes of Menz 106 FF via 4" sonus finishing pad

And it turned out like this, as you might able to see, few deep chips were still remaining but most light chips were removed and the headlights are now more clear to see
BEFORE:
2 coats of Jetseal 109 were applied to protect the freshly polished headlights


Contributors
Joined: Nov 2006
Posts: 2,903
Likes: 0
From: Los Angeles, CA
My Ride: 2007 E60 530i
Color: Jet Black/Black Anthracite
STEP | Sport | Premium | NAV | Logic 7
EXTERIOR:
M-Tech Kit | M5 Mirrors, Trunk Finisher | Jet Black Kidney Surrounds | Madico Charcool Tint 54%, 35%
LIGHTING:
Euro-Headlights | Euro-LCI Tail Lights | AiB V3.0 | Solaris Invisi-bulbs | OEM LED Plate Lights
PERFORMANCE:
Porterfield R4-S Brake Pads | K&N Air Filter
WHEELS & SUSPENSION:
Work VS-XX 20x9, 20x10 | Toyo T1R 245/30/20, Michelin Pilot Sport A/S 295/25/20 | KW V2 Coilovers | Rogue Engineering 15mm Spacers
Awesome work! 


 Superb write-up! Thanks!
Contributors
Joined: Mar 2005
Posts: 2,573
Likes: 0
My Ride: 2006 530i Sport
Silver Gray - Black Leather - Anthracite Maple
Manual Transmission
Premium Audio
Cold Weather Package
Rear sunshade
Sirius Radio
Autobahnd Roadblock (3M) film kit
Ugh!
Now go get them ClearBra'd before they get messed up again!!!
Now go get them ClearBra'd before they get messed up again!!!
Senior Members
Joined: Sep 2006
Posts: 868
Likes: 0
From: Middelburg, the Netherlands
My Ride: 2004 645 Ci, Individual Stratusgrey Metallic with individual grey leather
Individual Stratos metallic, Shadow line, Black Individual leather, 19'' ellisoid, Panorama sunroof, PDC, Dynamic drive, Adaptive steering, Adaptive headlights, Voice control, Logic 7, Prof sat nav, BT phone, TV, Heated Sport seats, Ski sac, light pakket, CD-changer.
Mods (so far): iPod interface, K&N Airfilter.
No guts, .............no glory!
Contributors
Joined: Oct 2007
Posts: 11,084
Likes: 0
From: Thousand Oaks, California
My Ride: 2008 550i Jet Black on Black Leather, SAT with Paddles, Logic 7, Comfort Seats, NAV, Sport Package, PDC, Xenons, Sirius, Trinity 12W LED Angel Eyes, RPi GT Exhaust, M rear spoiler, ACS Roof Spoiler, Tinted Tail Lights, Bimmian Carbon Fiber Pillar Trim, Bimmian Shadow 550i emblem, RPi Scoop, E60 Forum Cling, Mtec bulbs in fog lights, Mtec 2W LED for License Plate Light Bulbs, K&N Filter, Bimmian LED Smoked Side Markers, Blackout roundels, Carbon Fiber Kidney Grills.
Retired Rides - 1989 325i convertible, 1995 M3, 2002 X5, 2005 545i, 2008 X5 (Lemon)
Nice DIY!!! and great results too! 
and great results too!
Contributors
Joined: Mar 2005
Posts: 2,573
Likes: 0
My Ride: 2006 530i Sport
Silver Gray - Black Leather - Anthracite Maple
Manual Transmission
Premium Audio
Cold Weather Package
Rear sunshade
Sirius Radio
Autobahnd Roadblock (3M) film kit
Seriously, go get some 3M film put on them. I bet it wouldn't be more than $100. When I had my front-end done, I had them do the headlights too. Not a mark.

Senior Members
Joined: Jun 2008
Posts: 1,124
Likes: 0
From: Bangladesh, USA
My Ride: 08 Porsche 911 c2s, 01 BMW 740il, 05 BMW 525i, 06 Acura TSX navi
Originally Posted by UUronL' post='619009' date='Jul 8 2008, 05:37 PM
Seriously, go get some 3M film put on them. I bet it wouldn't be more than $100. When I had my front-end done, I had them do the headlights too. Not a mark.
I can help set up a group buy for less than 60$ shipped.
RJ