ACS Tail Spoiler Install
 04-01-2008, 10:35 AM
#1
Senior Members
Thread Starter
Join Date: Aug 2007
Location: USA
Posts: 584
Likes: 0
Received 0 Likes
on
0 Posts
My Ride: 2005 545i E60 Orient Blau Metallic
Premium, NAV, Winter Package, Heads Up Display, Logic 7 Audio, AngeliBright Upgrade [White], M5 Body Kit, M Embroidered Seats
 ACS Tail Spoiler Installation
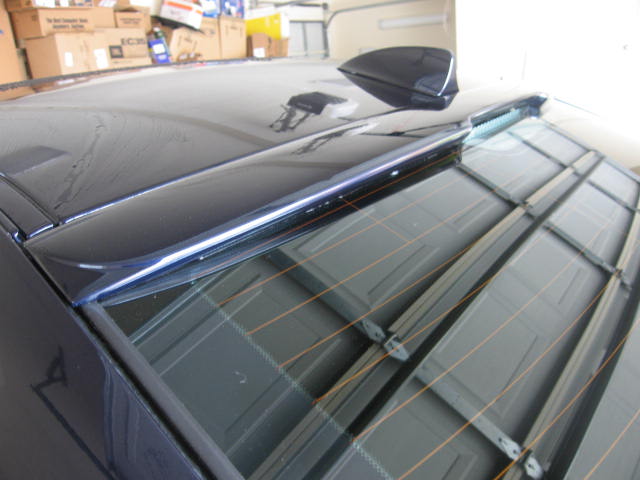
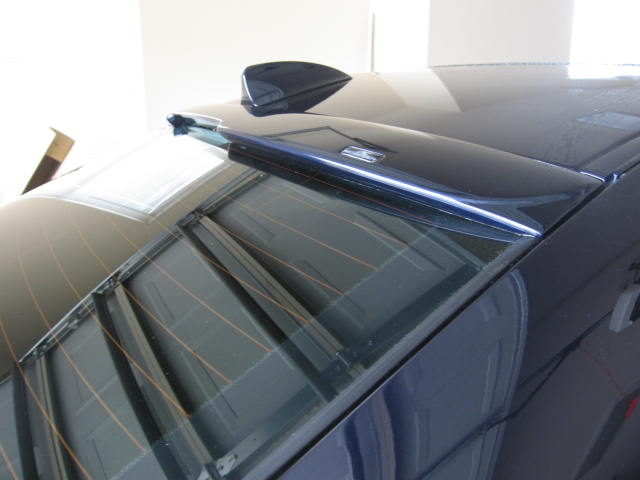
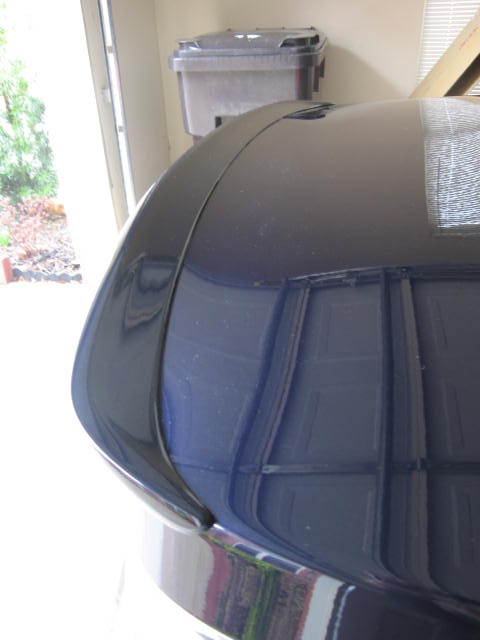
 Here's the second of my two part DIY for the ACS roof + rail spoiler install. The first DIY was posted under the ACS Rear Roof Wing Install Thread. I suggest you read that to familiarize yourself with the general process of installing any spoiler.
A couple of quick myths Id like to settle before detailing this install:
A) This does take more time and effort than the rear roof spoiler install;
 This is an easy DIY and doesn't need to go to a body shop
C) There is more downward force on the trunk spoiler than on the roof spoiler. Therefore, the bond on this spoiler must be 100% if you want your spoiler to stay on and not fly off into someone's windscreen. Use PLENTY of adhesive and silicone and allow for a 24hr cure before driving the car
D) This DIY will take time and patience...
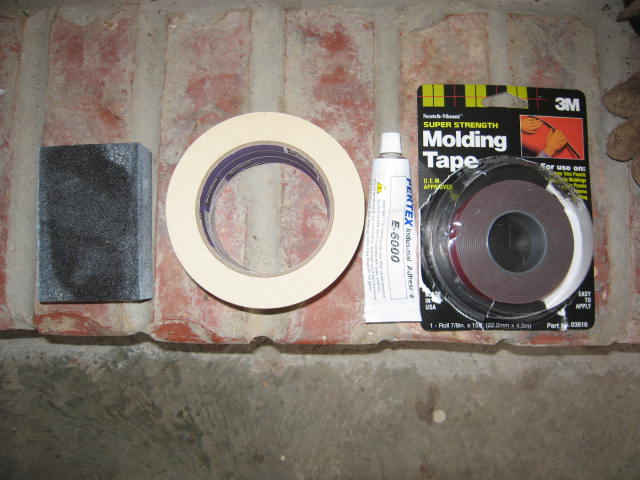
Required Equipment:
1. AC Schnizter Tail Spoiler
2. Industrial Strength Adhesive Polymer/Silicone
3. Two People [for alignment and proper placement of the spoiler]
4. 3M Medium/Fine Sandpaper Block
5. 3M Painters Masking Tape
6. 3M Super Strength Molding Tape
7. Weights [of any kind to hold the spoiler in place]
Time Requirements:
Expect to spend an hour in prep work. The actual install is only ten to fifteen minutes. You will need another fifteen to twenty minutes after install to secure the spoiler with tape, etc. Total = 90 minutes.
Difficulty:
This was harder to do than the roof spoiler so if you are doing both, I reccomend you do the roof first and then move on to this one!
Installation Steps:
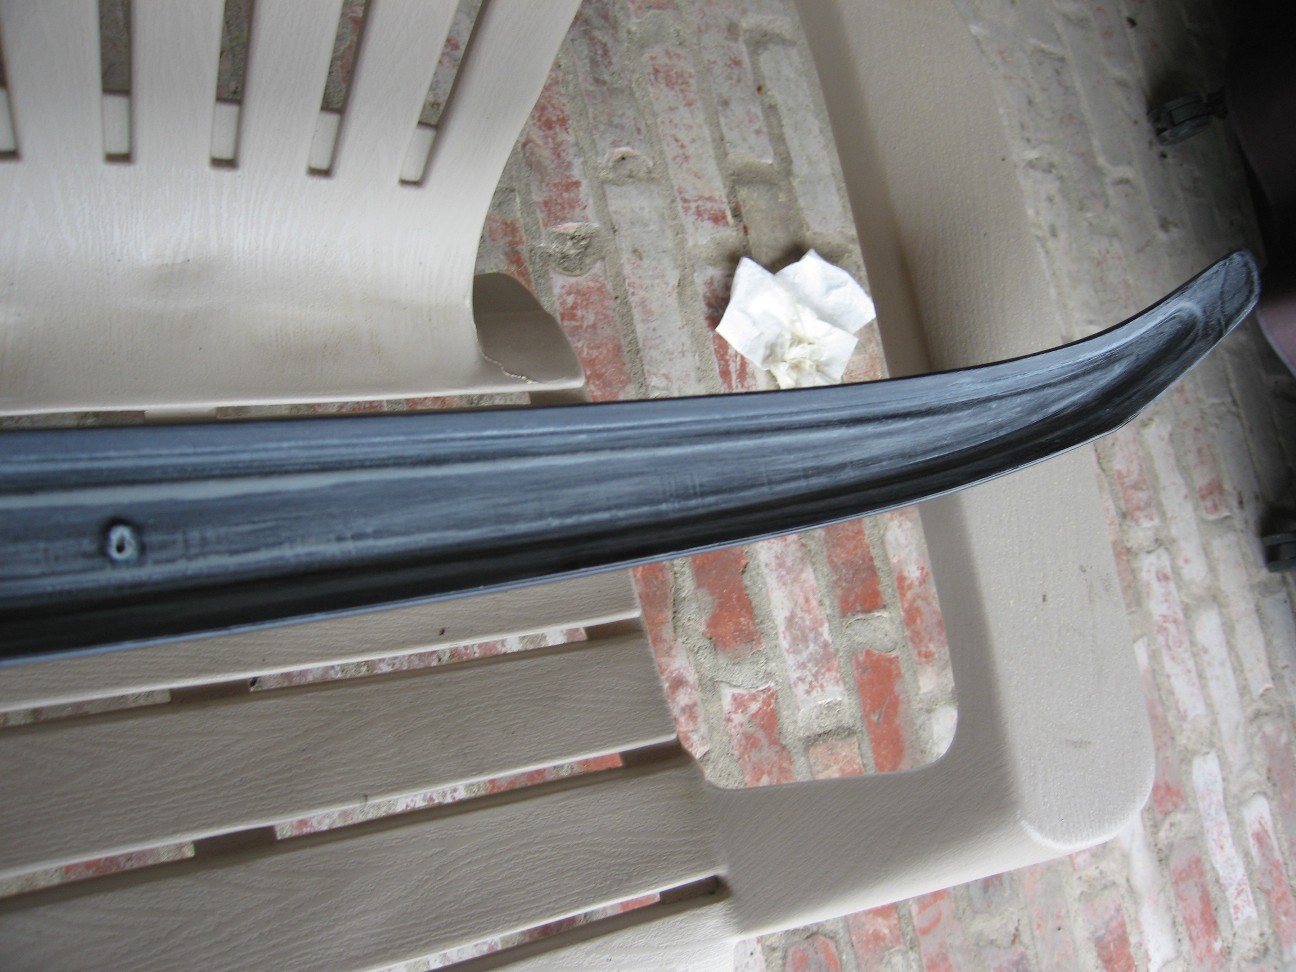
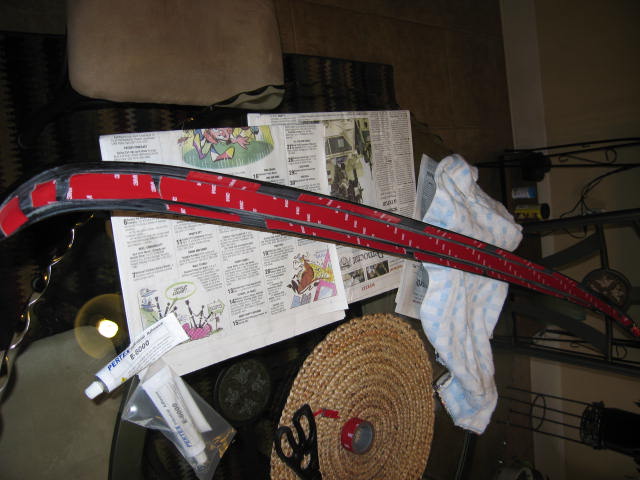
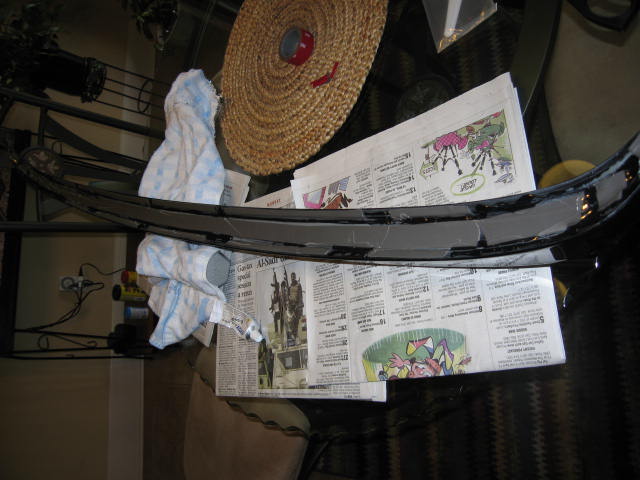
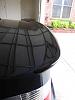
1. Unpack Your Spoiler and lay flat on a stable surface. Familiarize yourself with its shape, curves and bends....
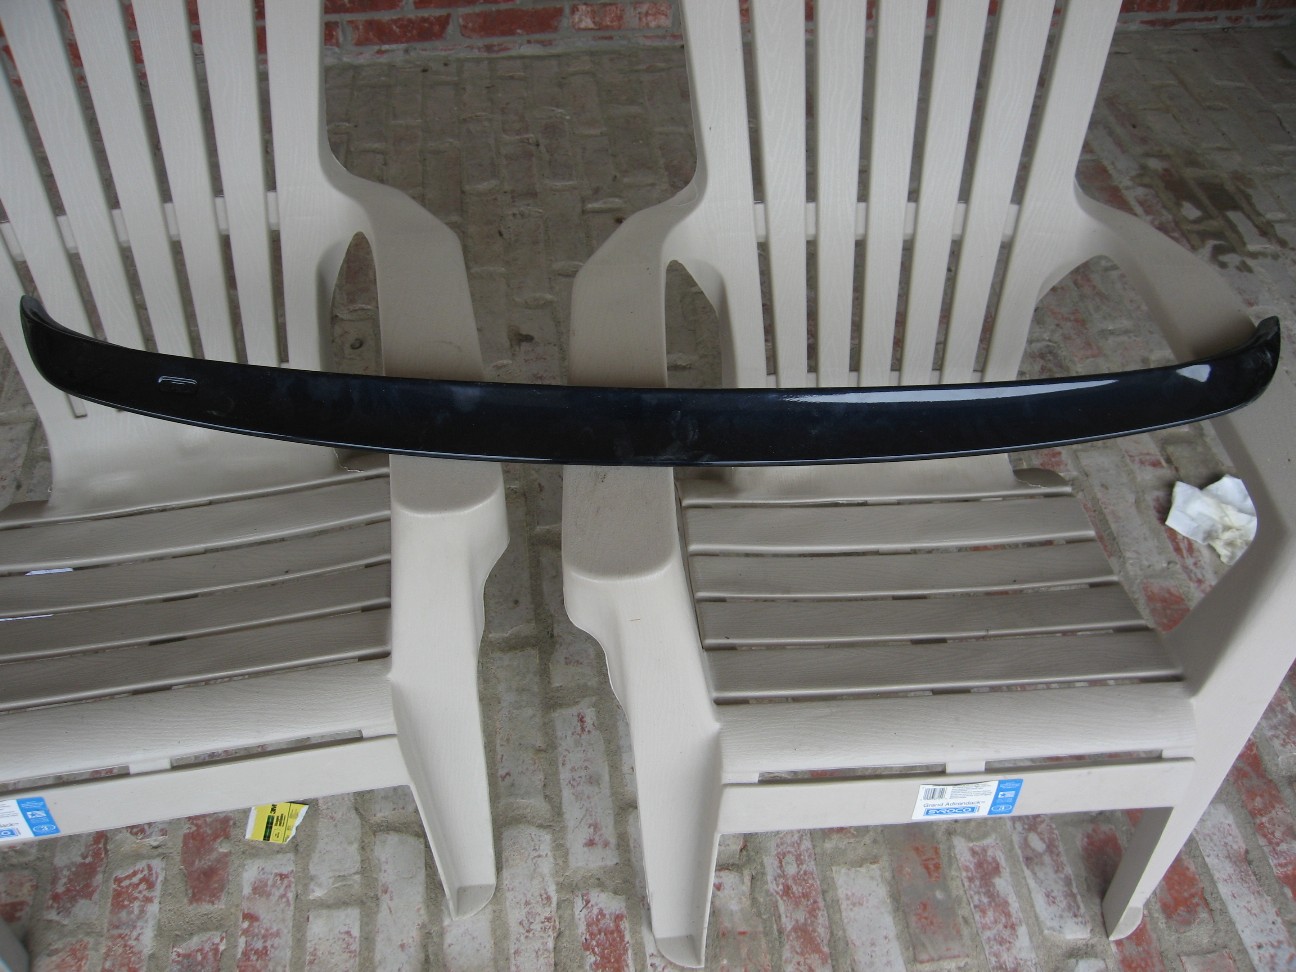
Spoiler between two chairs, evenly balanced and ready for work!
2. After familiarizing yourself with the contours of your spoiler, begin by manually placing your spoiler on the tail of your E60. With most replicas, there will not be a perfect fit as the FRP/ABS that is used tends to be a little 'bendy.' So, use this time to figure out where your unique part actually touches the surface well and where it tends to sit up. This will help when applying your adhesive later on as you will need to make sure these areas are secured with tape, etc.
3. Prepare your trunk surface by removing any wax or other surface glaze that will impair bond formation. Rather than use alcohol which can sometimes interfere with the bond later, I decided to go low-fi and got out my dish detergent and hot water and made a strong soapy solution. Soap will eat through any debris if you leave it there long enough. After fifteen minutes of contact time and scrubbing the soap in, rinse and thoroughly dry your car.
Soap suds sitting and absorbing chemicals, dirt and wax. Do not use car soap but a harsher clothes/dish detergent!
4. Make sure your trunk is totally dry and towel it off well...
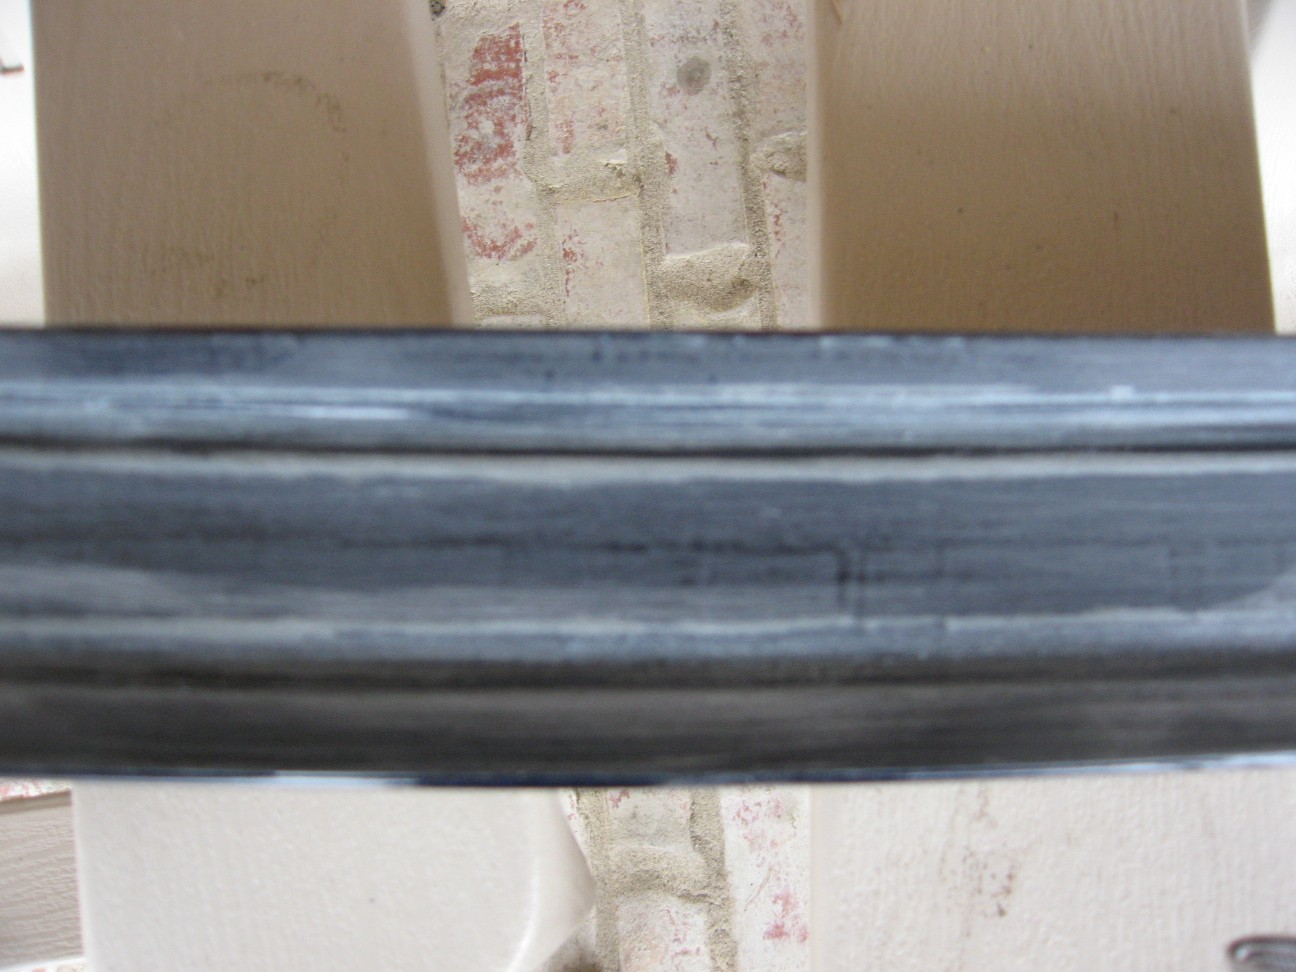
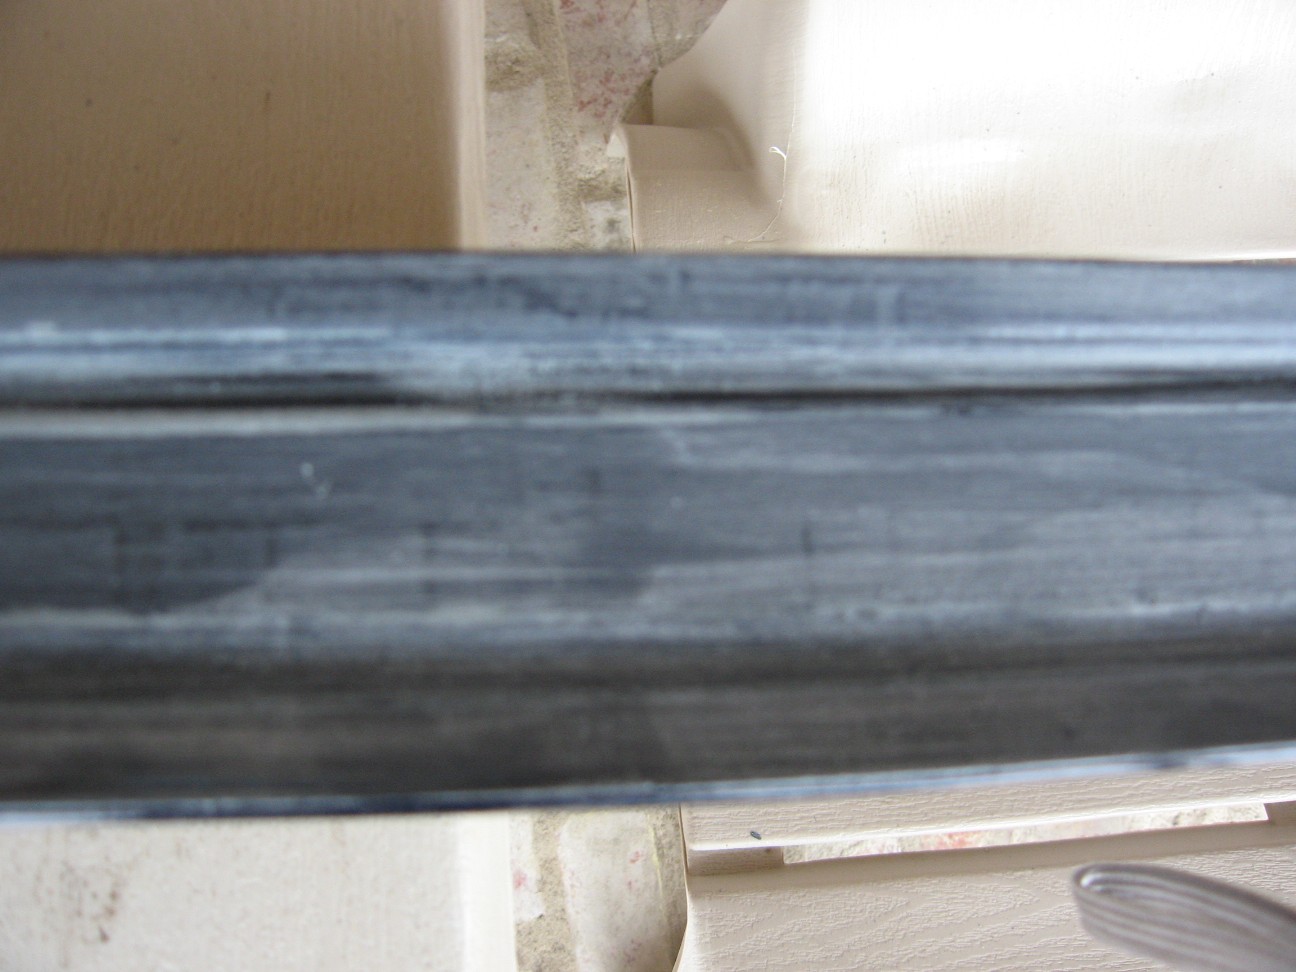
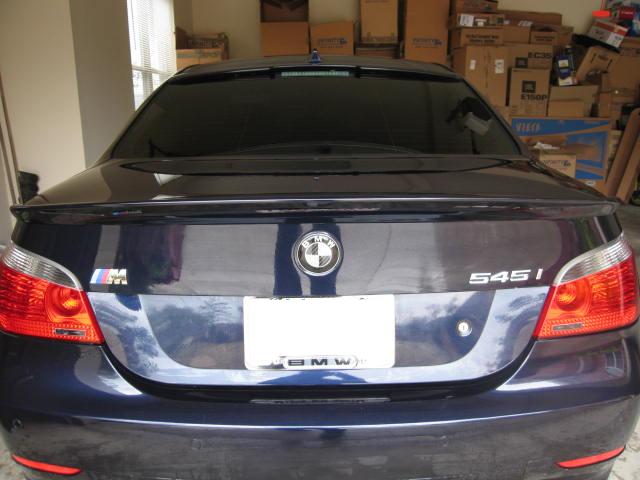
5. Sitting comfortably, take your sandpaper block and begin sanding off the clear color coat on the underside of the tail spoiler where you will apply your adhesive. The clear coat intereferes with a good bond forming and is not needed. The roughness you add to the surface helps in creating small crevices where the bond will better form between the spoiler and the trunk. Make sure you get all the contact surfaces and the grooves where the silicone will rest.
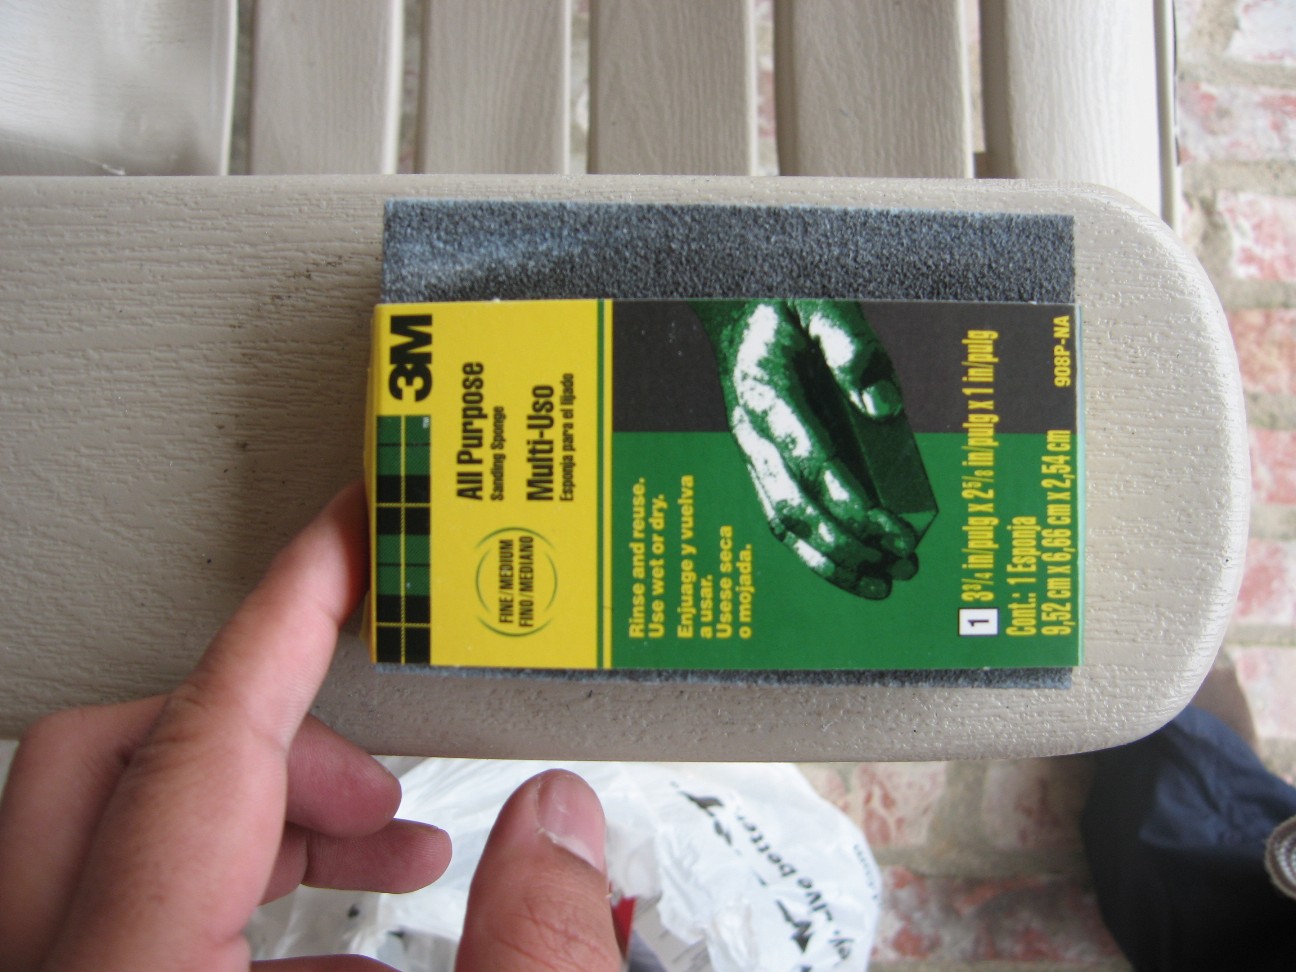 :
:Sandpaper I used -- this was a block so it was easier to get to work on the surface. I used the edges on the corners taking care not to go over the
edge and damage the painted side
Heres one end sanded nicely
Heres another end sanded nicely
Heres the center sanded nicely. Notice even the groove where the silicone will sit is sanded to ensure optimal bonding
6. Apply 3M Double Sided Molding Tape to the center beam of the spoiler. I used liberal amounts of the tape and a combination of tape + silicone really gets you the most bang for your buck. If you followed my advice in Step 2, you would have found areas where contact was not optimal between the two surfaces. In my case, this was along the top edges of the the spoiler and on the sides. I used extra tape in these areas to make sure it fit nicely. Make sure you apply a good deal of pressure after you apply the tape to ensure it bonds well to the undersurface of the spoiler.
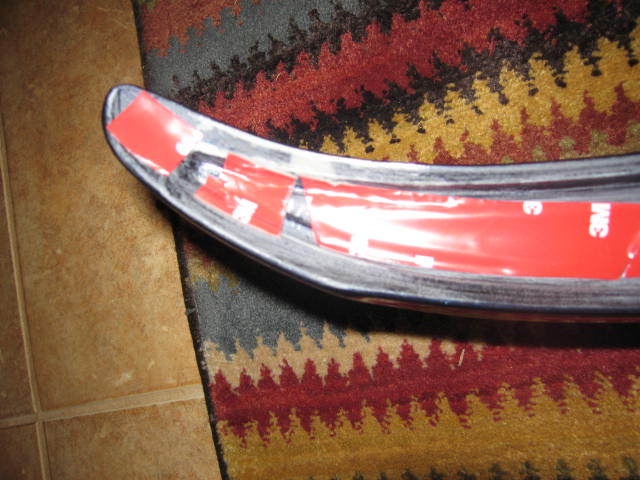
Heres one end, notice the tape has esp. been applied to areas that did not sit well on the trunk

Here's another view, this time of the center
Some more Views
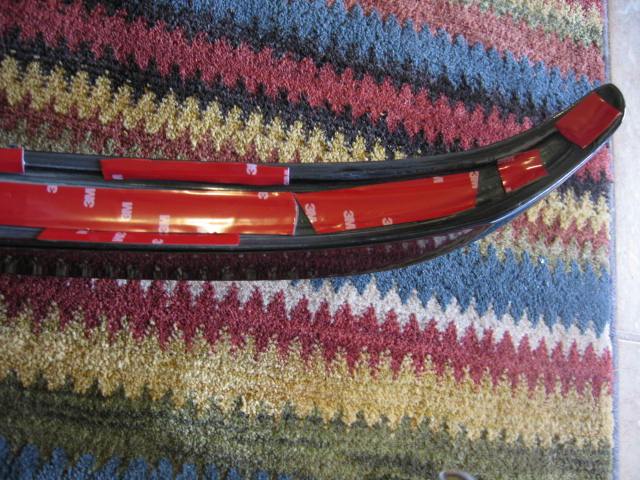
Heres the finished product
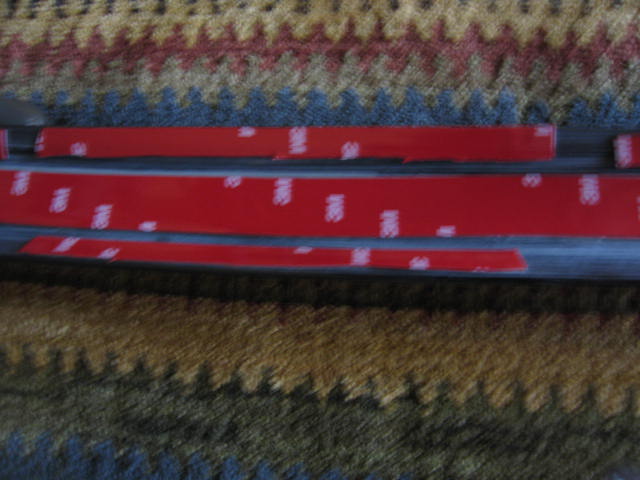
7. Once you have the tape applied, patiently remove the liner from the tape. This was the longest part for me!!!! I had to use a tweezer in some cases to pull the red lining back! Take your time and be patient with removing the backing.....
Here's the tape removed with the gray adhesive exposed
8. Now that your tape is exposed, get our your silcone. Use the whole tube and spare nothing. You should fill in all the plastic areas first and then zig zag over the tape also so that you have a layer of silicone on the tape as well. Be liberal along the top, bottom and side/wing edges as this is where you want the most adhesion! Leave a little silicone for later in case you have cracks or spaces you need to fill.
Here's the product ready to go -- adhesive and silicone glistening in place
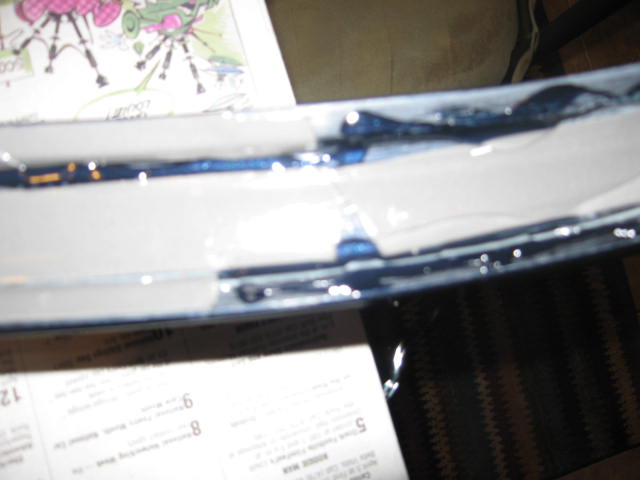
Be sure you have all the grooves totally filled with silicone....
9. Prior to placing the spoiler on the trunk, I went ahead and warmed the surface of the trunk in the area where the spoiler will be applied with a regular hair dryer. Higher temperatures will help the silicone melt and spread and also allow for better activation of the adhesive on the tape. Again, Make sure your trunk is TOTALLY dry ~ water and silicone do not mix...
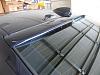
10. With the help of your assistant, place the spoiler parallel to the back of the trunk in the same plane as the edge of the trunk. Starting from one side [the wing], begin to attach your spoiler to the trunk of the car. Move from that one end to the middle and finally to the opposite end of the car. Take your time with this as it is KEY!!!!
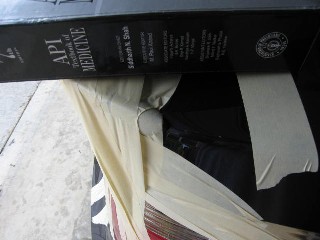
Heres the edge of the wing of the spoiler, masked into place. Pay attention to the way it sits perfectly level on the edge of the trunk - this is only possible and much easier if you start at one end with your assistant holding the spoiler level and work down towards the other.
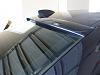
10. Using your masking tape, mask the spoiler heavily onto place. I found that opening the trunk helped with this as it allowed for me to get the right angle of pressure with the tape. Strapping tape is also a good idea here -- its a little stronger than ordinary masking tape.
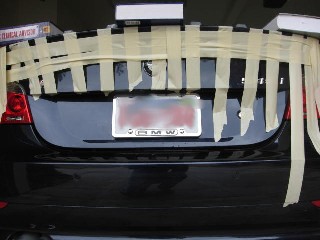
Er...yes...I did say heavily strap into place.....
11. Allow the silicone and tape to cure for 24 hrs. No moving the vehicle during this time! Trust me, this will be well worth it later....
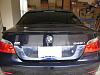
And that's it!
 Enjoy your pimped out new ride... Stay tuned for pixx of the final product!!!

 04-02-2008, 09:15 AM
#3
Senior Members
Thread Starter
Join Date: Aug 2007
Location: USA
Posts: 584
Likes: 0
Received 0 Likes
on
0 Posts
My Ride: 2005 545i E60 Orient Blau Metallic
Premium, NAV, Winter Package, Heads Up Display, Logic 7 Audio, AngeliBright Upgrade [White], M5 Body Kit, M Embroidered Seats
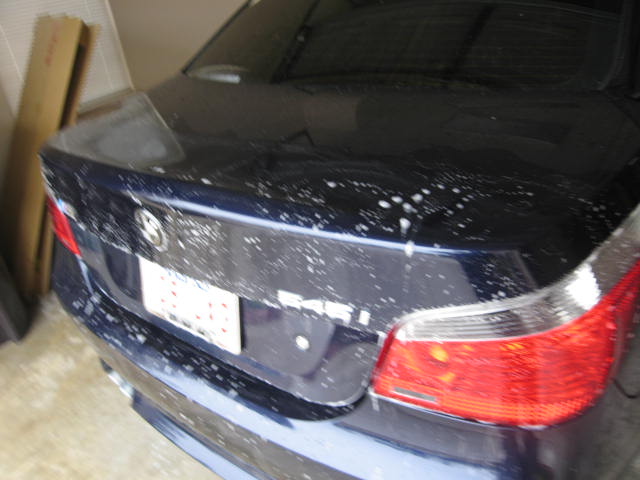
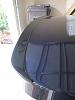
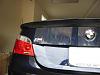
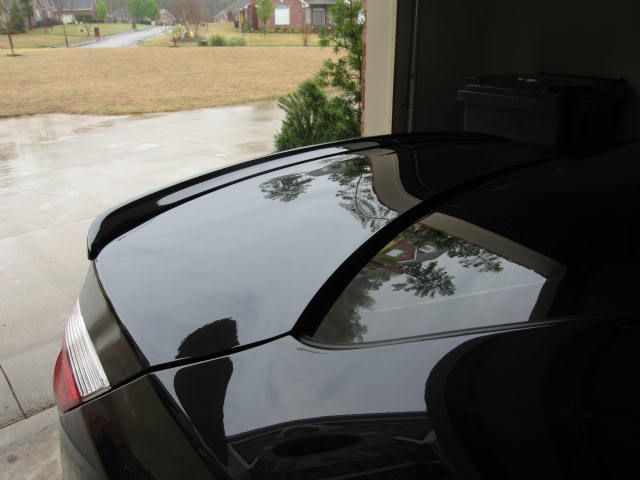
Guys: Here are the finished pix.. Your comments are welcome....

 04-02-2008, 09:29 AM
#4
Contributors
Join Date: Feb 2006
Location: NY
Posts: 14,646
Likes: 0
Received 0 Likes
on
0 Posts
My Ride: 2008 Silverstone II E60 M5 2012 E70 AW X5 50i Sport w/ LCI Aero Kit and Rocker Panels
Looks awesome! Great job! You should own a body shop. 
How about some full pix of the car from a distance now? I know...I'm a pain in the butt.
How about some full pix of the car from a distance now? I know...I'm a pain in the butt.
04-02-2008, 10:38 AM
#7
Contributors

Join Date: Apr 2007
Location: Vancouver, BC , Canada
Posts: 4,459
Likes: 0
Received 0 Likes
on
0 Posts
My Ride: 2011, X6 Hybrid . Alpine White , every option. 20" Conti' NON runflats,OEM trunk spoiler , LUX V3 AE's , HP Thunder Fogs , custom front bumper reflector delete........
S, great job !! looks great, where did you get the Roof Spoiler and how $$$. S, I just saw your other post and got the info ,
Thanks
Thanks
04-02-2008, 11:04 AM
#8
Contributors

Join Date: Oct 2007
Location: Central Coast of Cali
Posts: 114
Likes: 0
Received 0 Likes
on
0 Posts
My Ride: '08 535i Titanium Silver, Grey Dakota Comfort Seats-Premium Pkg, Nav, ipod, PDC, Steptronic
Proud BMW owner since 9-1-07
Does the tape leave a residue or marks on the paint? What do you use to take the tape residue off the paint?
Excellent write-up, many thanks. Bookmarked for when I get one.
Excellent write-up, many thanks. Bookmarked for when I get one.
04-02-2008, 11:14 AM
#9
Senior Members
Thread Starter
Join Date: Aug 2007
Location: USA
Posts: 584
Likes: 0
Received 0 Likes
on
0 Posts
My Ride: 2005 545i E60 Orient Blau Metallic
Premium, NAV, Winter Package, Heads Up Display, Logic 7 Audio, AngeliBright Upgrade [White], M5 Body Kit, M Embroidered Seats
Thanks all for the comments...
SLO -- No, the tape does not leave a residue when you remove it and there is no paint damage. You need to heat the area up using a hair dryer and it simply melts away. Any remaining 'stickiness' comes off with alcohol of any kind.
Southgate and C -- I will post more pix once the darn rain stops here in the South -- get you clips off the visage from the side and from a distance. Seriously though, this changes the ENTIRE profile of the car. I know some members were worried about the tail spoiler making it look too oomph but I think the roof and tail look really good together. One without the other is a job only half done...
Nick and WC -- thanks for the big ups. Feels good to give back to the forum for a change...
More mods coming [ACS Pedals next]!! DIY anyone???
04-02-2008, 04:07 PM
#10
Members

Join Date: Dec 2007
Location: ATLANTA
Posts: 139
Likes: 0
Received 0 Likes
on
0 Posts
My Ride: 2004 545i 6spd Man, 19' Breyton Wheels, Ipod Install, Parrot Bluetooth, AC roof and Trunk Spoiler
Nice write up, the spoiler looks great, i know you gonna turn a lot of heads with it. GOOD JOB