Group Buy OEM M5 / M6 mirrors
 05-01-2008, 04:38 AM
#181
Contributors
Join Date: Nov 2005
Location: Vienna, Austria
Posts: 1,264
Likes: 0
Received 0 Likes
on
0 Posts
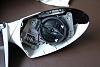
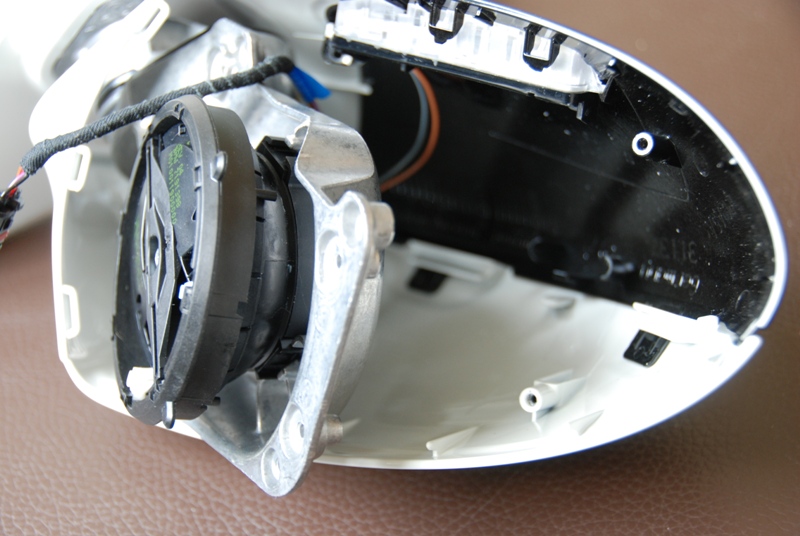
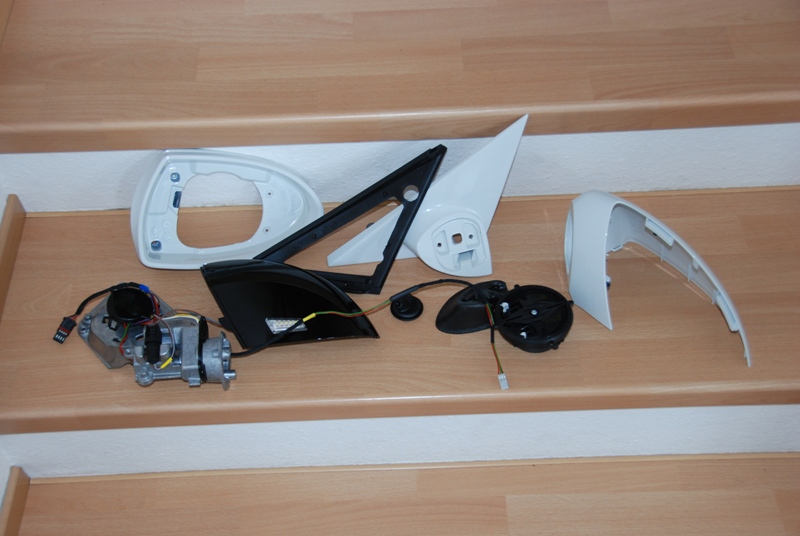
Some more pics after I have taken the mirror apart 
So after removing the frame of the shell:
removing the part that holds the motor
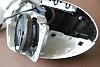
Removed the black bottom sheel
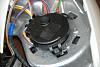
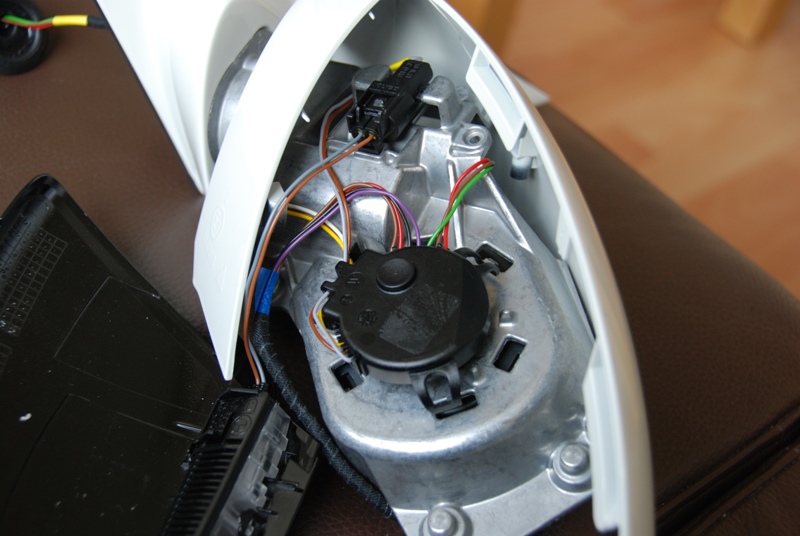
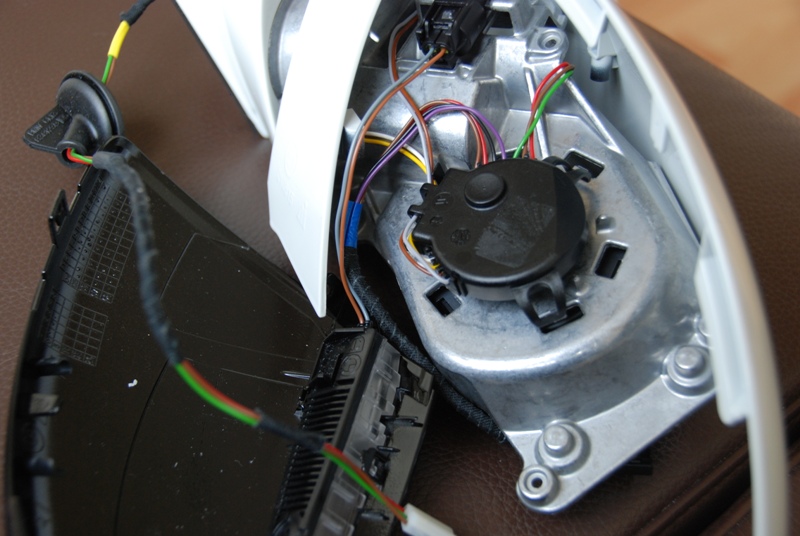
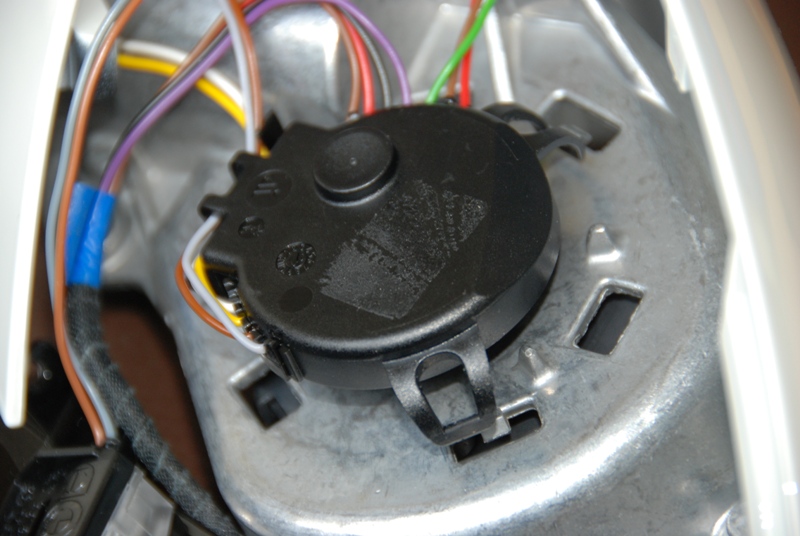
The heart of the mirror - looks like the ECU. Three wires coming in, 8 going out


The heart of the mirror
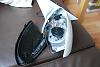
Obviously most of you dont need to take the mirror apart - i am doing it so that i roughly know now what I would need to do to change motors inside the mirror. The dismantling was easy - i only needed a torx 10, 8 screws in total and a few clips. Obviously plastic clips (i broke one but luckily with nothing to worry about)...
Anyways, bottom line - the mirror has been painted really well (inside and outside)..
greetings rumman
So after removing the frame of the shell:

removing the part that holds the motor
Removed the black bottom sheel

The heart of the mirror - looks like the ECU. Three wires coming in, 8 going out
The heart of the mirror
Obviously most of you dont need to take the mirror apart - i am doing it so that i roughly know now what I would need to do to change motors inside the mirror. The dismantling was easy - i only needed a torx 10, 8 screws in total and a few clips. Obviously plastic clips (i broke one
but luckily with nothing to worry about)...Anyways, bottom line - the mirror has been painted really well (inside and outside)..
greetings rumman
 05-01-2008, 04:40 AM
#182
Contributors
Join Date: Nov 2005
Location: Vienna, Austria
Posts: 1,264
Likes: 0
Received 0 Likes
on
0 Posts
Originally Posted by wees75' post='572198' date='May 1 2008, 01:20 PM
be careful about the price declaration. The shipment is insured and therefore you have to declare the correct amount to avoid any risks!!
cu rumman
 05-01-2008, 05:26 AM
#184
Contributors
Join Date: Sep 2007
Location: South Florida
Posts: 1,921
Likes: 0
Received 0 Likes
on
0 Posts
My Ride: 2008 535i w/ Sports & Permium Pkg. Silv/Blk
2008 VW R32 w/Nav.
1992 VW Corrado Silv/Blk-retired
2001 530i Sports/Premium-retired
Originally Posted by rsyed' post='572220' date='May 1 2008, 09:00 AM
...so finally took everything apart - this is what the mirror looks like when completely taken apart. For the last bit, I needed a torx 20..
cu rumman
Attachment 49426
cu rumman
Attachment 49426
 05-01-2008, 07:28 AM
#185
Members
Senior Members
Join Date: Sep 2006
Location: Omaha, NE - USA
Posts: 3,238
Likes: 0
Received 1 Like
on
1 Post
My Ride: MY07 525xi Silver Gray
Model Year: 2007
Which clip did you broke? I wanna try to avoid it when I do mine...
How did you pop off the mirror to get to the torx screws behind it at the beginning?
How did you pop off the mirror to get to the torx screws behind it at the beginning?
Originally Posted by rsyed' post='572216' date='May 1 2008, 07:38 AM
Obviously most of you dont need to take the mirror apart - i am doing it so that i roughly know now what I would need to do to change motors inside the mirror. The dismantling was easy - i only needed a torx 10, 8 screws in total and a few clips. Obviously plastic clips (i broke one but luckily with nothing to worry about)...
Anyways, bottom line - the mirror has been painted really well (inside and outside)..
greetings rumman
but luckily with nothing to worry about)...Anyways, bottom line - the mirror has been painted really well (inside and outside)..
greetings rumman
05-01-2008, 07:35 AM
#186
Contributors
Join Date: Nov 2005
Location: Vienna, Austria
Posts: 1,264
Likes: 0
Received 0 Likes
on
0 Posts
Originally Posted by BlaSTiWi' post='572270' date='May 1 2008, 05:28 PM
Which clip did you broke? I wanna try to avoid it when I do mine...
How did you pop off the mirror to get to the torx screws behind it at the beginning?
How did you pop off the mirror to get to the torx screws behind it at the beginning?
05-01-2008, 10:14 AM
#187
Members

Join Date: Feb 2008
Location: Brampton, Ontario, Canada
Posts: 173
Likes: 0
Received 0 Likes
on
0 Posts
My Ride: 2004 545i, SMG, Nav, Pro Logic, etc.
Originally Posted by rsyed' post='572152' date='May 1 2008, 02:56 AM
But guys - consider the following:
- for half of the mods you guys do in the US, the parts come from taiwan/hk: noone here complains about any problems with custom, or?
- let us assume 530dA declares the parcel as a gift - would you still have to pay taxes?
- even if you guys have to pay tax, let us assume the box is valued at 500 EUR, about 800 USD. Let us assume you guys need to pay 20% tax (that is extreme), then it is an 160 USD
What do you guys think?
I'm not sure about sending it as a gift, but I don't think that changes those costs.
At the end of the day if it costs an extra 25% for this item, I would have to reconsider this purchase, because it would cost me
$800 Item
$120 Shipping
$200 Importing
$80? Painting
That's the dilema and it's worse if you don't know how much it will end up being. In some countries (eg. carribean countries) duties alone are over %100 on cars.
05-02-2008, 09:16 AM
#188
Contributors
Join Date: Nov 2005
Location: Vienna, Austria
Posts: 1,264
Likes: 0
Received 0 Likes
on
0 Posts
Originally Posted by FastLane' post='572397' date='May 1 2008, 08:14 PM
At the end of the day if it costs an extra 25% for this item, I would have to reconsider this purchase, because it would cost me
$800 Item
$120 Shipping
$200 Importing
$80? Painting
$800 Item
$120 Shipping
$200 Importing
$80? Painting
i hear you but you will have to have mirrors painted if you got them from the dealer or if you got yourselves replicas from somewhere...
cu rumman
05-02-2008, 09:25 AM
#189
Contributors
Join Date: Nov 2005
Location: Vienna, Austria
Posts: 1,264
Likes: 0
Received 0 Likes
on
0 Posts
A quick update for the LCI owners:
I have taken the mirror apart (See pic above). I now know what to do. Exact DIY with pics will be available next week when my car arrives. Here is a brief to-do:
- open m5 mirror (10 screws in total - 8x torx 10, 2x torx 20): about 3 mins
- detach m5 ECU (3 clips) - 1 min
- cut 8 wires from m5 ECU with a wire cutter - 1 min
- open lci mirror: i assume, again about 3 mins
- detach lci ECU - 1 min
- cut upto (depending on configuration you can have between 2 to 8) 8 wires with a wire cutter - 1min
- put LCI ECU into m5 mirror (3 clips) - 2 mins
- connect upto 8 wires of your m5 mirror to your LCI ecu - 5 mins
- close m5 mirror (10 screws) - about 3 mins
You now have a LCI mirror - we are talking about 20 mins work per mirror per side.
Like I said, delivery of my car has been delayed till next week. Once i get the car, I will immediately do this mod. Will post exact DIY and pics..
Let me know if you guys have any questions.
cu rumman
05-02-2008, 01:19 PM
#190
Contributors

Join Date: Mar 2008
Location: Birmingham AL
Posts: 1,128
Likes: 0
Received 1 Like
on
1 Post
My Ride: 2010 VW Passat Wagon 2.0l Tsi
Grey/Grey Budapest 18"
Lost to HPFP issues:
08 535i sport pkg
Lost to Dreaded E61 Sun roof leaks:
07 E61 530Xi
Thumbs down on the wire cutting, looking for plug and play....