
545i BC Racing Coilover install/review/pictures
 06-29-2014, 06:04 PM
#1
New Members
Thread Starter
Join Date: Jun 2014
Location: Edwardsville, IL
Posts: 9
Likes: 0
Received 0 Likes
on
0 Posts
My Ride: 2004 545i
I just picked up my 545 a few months ago, and told myself that I would leave it alone....Riiiiiiiight.
So far I've just done piddly stuff. Changed the trans fluid/pan/filter, LED interior/exterior swap, etc. I bought some coilovers from Eric at Modbargains and got them last Wednesday and threw them on at work this weekend.
I was a little worried about how the install would go, with it being a BMW, but was AMAZINGLY surprised how easy it was. I've done tons of coilovers on US cars, and this was by far the easiest other than Corvettes.
-Racked the car and removed all 4 wheels.
-Opened the trunk and pulled the lining back to access and remove the 18mm nut, and (3) 13mm bolts.
-Raised the car back up.
-At this point, I pulled out the bottom mount bolt (18mm) with an impact, extension, swivel, and 18mm deep socket. (had to have all this to get past the exhaust on the drivers side)
-Pop the strut out of the bottom perch to release tension on the trailing arm you will need to remove to make room to slide it out.
-An 18mm bolt/nut on the inner side of the trailing arm, and a 21mm nut on the outer side will let you move it out of the way enough to pull the factory strut out.
-Slide the new coilover in, and put on the (3) 12mm nuts once you line up the top mount and poke it through the trunk.
-After the top is bolted, lift up the control arm and set the gold metal side of the bottom mount into the perch on the control arm. Tighten back down your long 18mm bolt.
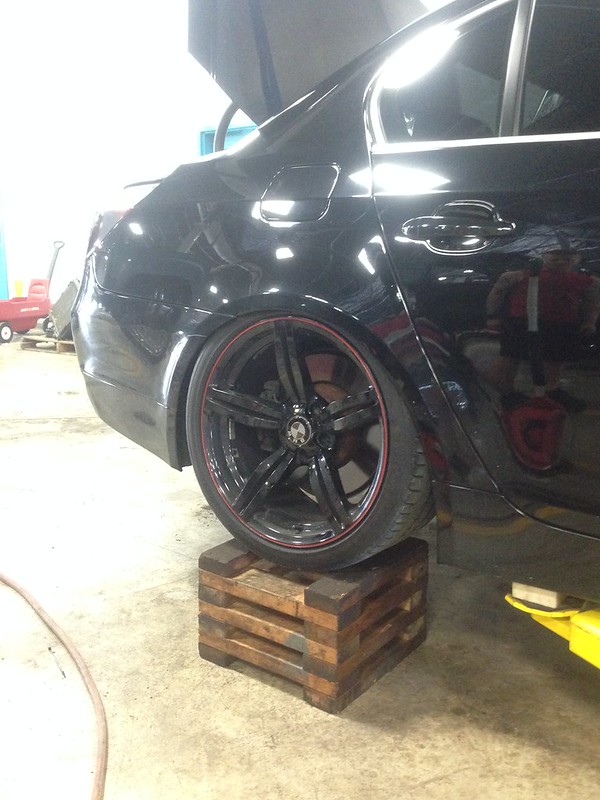
-Put your trailing arm back on, and set your spring perch to where you think you might want it. For this, I built (4) 2x4 boxes to set wheels on so that I can check ride height on coilover installs without racking/unracking the car.
REMEMBER its much easier to adjust the ride height down and go with the tension of the spring, than to have to adjust up and fight against it.
For the fronts, they're really easy as well. But a friend here will be a HUGE help.
-Unbolt your (3) 13mm nuts up top from the engine bay.
-Remove the 18mm pinch bolt/nut from the hub, and pull the front and rear brackets away.
-Undo the 16mm bolt just behind the rotor backing plate.
-Here is the part where you need your friend. Have them press down on the control arm while you also press down on the top of the strut and pull it out of the fender. Do this quickly.
-With your strut hanging out of the fender, use a chisel or wedge and drive it in the gap of the assembly that clamps down onto the factory strut. Once its spread apart enough you can just twist/slip the factory strut out, and the new coilover in.
-Once the new coilover is in, you can get it back inside the fender by yourself because it is MUCH shorter than the factory strut.
-Once its back inside, line up the top studs into the holes in the strut tower and put on your (3) 12mm nuts.
-Put your front and rear brackets on, along with your 18mm pinch bolt/nut. ***MAKE SURE that you lift up the control arm until it hits the stop on the new strut to ensure that it is bottomed out and sitting in as deep as it can.***
-After its set where it needs to be, tighten your pinch bolt down, and put your 16mm bolt back in.
-Put your wheel back on and check/adjust ride height as necessary.
Congratulations, you just did your coilover install!
I think I spent more time measuring and adjusting than I did on the actual install.
I ended up at 23.5" on all four corners to get the look that I want. (measured from the bottom lip of the rear wheel to the lip of the fender)
Here are some before/after pictures.
I also put in some black grilles the weekend before, and that paired with the coilovers make it look like an entirely different car. I still want to get rid of these black wheels, do M bumpers, and wrap the chrome window trim black. Also will be building a custom exhaust soon.
For more before afters, click here - https://www.flickr.com/photos/gconnoyer/
I took the car behind the shop and marked the front and rear wheels, along with each spot I took a picture from to make sure that after, I could get the exact same distance, position, and angle.


So far I've just done piddly stuff. Changed the trans fluid/pan/filter, LED interior/exterior swap, etc. I bought some coilovers from Eric at Modbargains and got them last Wednesday and threw them on at work this weekend.
I was a little worried about how the install would go, with it being a BMW, but was AMAZINGLY surprised how easy it was. I've done tons of coilovers on US cars, and this was by far the easiest other than Corvettes.
-Racked the car and removed all 4 wheels.
-Opened the trunk and pulled the lining back to access and remove the 18mm nut, and (3) 13mm bolts.
-Raised the car back up.
-At this point, I pulled out the bottom mount bolt (18mm) with an impact, extension, swivel, and 18mm deep socket. (had to have all this to get past the exhaust on the drivers side)
-Pop the strut out of the bottom perch to release tension on the trailing arm you will need to remove to make room to slide it out.
-An 18mm bolt/nut on the inner side of the trailing arm, and a 21mm nut on the outer side will let you move it out of the way enough to pull the factory strut out.
-Slide the new coilover in, and put on the (3) 12mm nuts once you line up the top mount and poke it through the trunk.
-After the top is bolted, lift up the control arm and set the gold metal side of the bottom mount into the perch on the control arm. Tighten back down your long 18mm bolt.
-Put your trailing arm back on, and set your spring perch to where you think you might want it. For this, I built (4) 2x4 boxes to set wheels on so that I can check ride height on coilover installs without racking/unracking the car.
REMEMBER its much easier to adjust the ride height down and go with the tension of the spring, than to have to adjust up and fight against it.
For the fronts, they're really easy as well. But a friend here will be a HUGE help.
-Unbolt your (3) 13mm nuts up top from the engine bay.
-Remove the 18mm pinch bolt/nut from the hub, and pull the front and rear brackets away.
-Undo the 16mm bolt just behind the rotor backing plate.
-Here is the part where you need your friend. Have them press down on the control arm while you also press down on the top of the strut and pull it out of the fender. Do this quickly.
-With your strut hanging out of the fender, use a chisel or wedge and drive it in the gap of the assembly that clamps down onto the factory strut. Once its spread apart enough you can just twist/slip the factory strut out, and the new coilover in.
-Once the new coilover is in, you can get it back inside the fender by yourself because it is MUCH shorter than the factory strut.
-Once its back inside, line up the top studs into the holes in the strut tower and put on your (3) 12mm nuts.
-Put your front and rear brackets on, along with your 18mm pinch bolt/nut. ***MAKE SURE that you lift up the control arm until it hits the stop on the new strut to ensure that it is bottomed out and sitting in as deep as it can.***
-After its set where it needs to be, tighten your pinch bolt down, and put your 16mm bolt back in.
-Put your wheel back on and check/adjust ride height as necessary.
Congratulations, you just did your coilover install!
I think I spent more time measuring and adjusting than I did on the actual install.
I ended up at 23.5" on all four corners to get the look that I want. (measured from the bottom lip of the rear wheel to the lip of the fender)
Here are some before/after pictures.
I also put in some black grilles the weekend before, and that paired with the coilovers make it look like an entirely different car. I still want to get rid of these black wheels, do M bumpers, and wrap the chrome window trim black. Also will be building a custom exhaust soon.
For more before afters, click here - https://www.flickr.com/photos/gconnoyer/
I took the car behind the shop and marked the front and rear wheels, along with each spot I took a picture from to make sure that after, I could get the exact same distance, position, and angle.
Last edited by gconnoyer; 06-29-2014 at 06:15 PM.
 06-30-2014, 10:21 AM
#3
New Members
Thread Starter
Join Date: Jun 2014
Location: Edwardsville, IL
Posts: 9
Likes: 0
Received 0 Likes
on
0 Posts
My Ride: 2004 545i
For being as low as it is, and having them pretty close to full stiff, it rides pretty nice. I'm sure if i raised it up half an inch or so, and turned them to full soft it would feel just as nice as factory.

Thread
Thread Starter
Forum
Replies
Last Post