
restoring your gear stick cover
 07-08-2009 | 07:20 AM
#1
Thread Starter
Senior Members
Joined: Dec 2008
Posts: 300
Likes: 0
From: Australia
My Ride: 2004 525i Executive
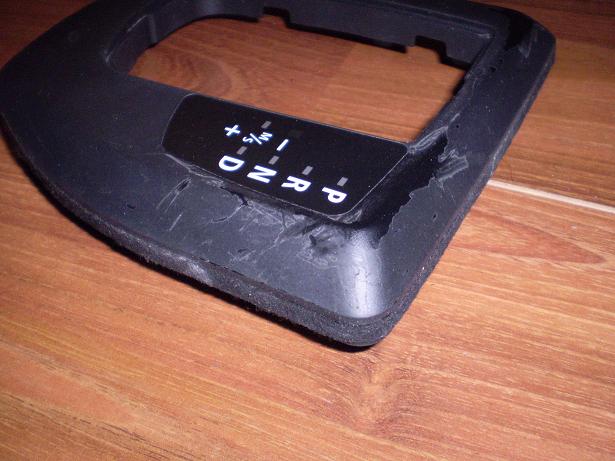
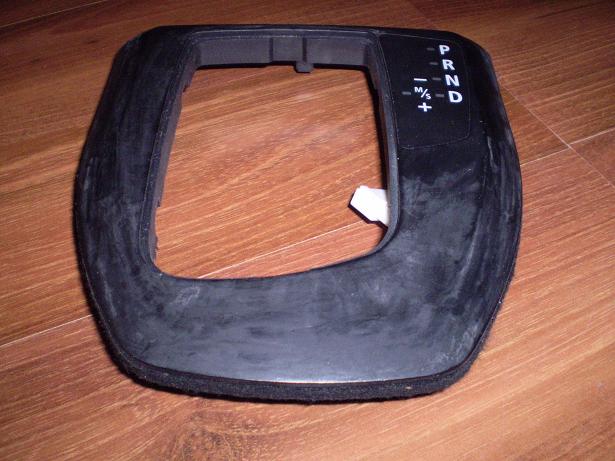
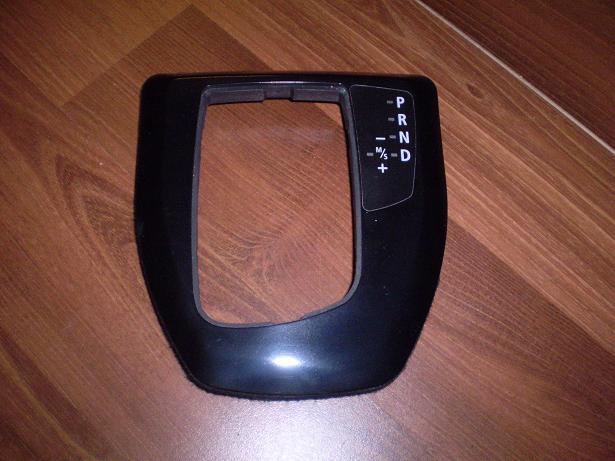
Does your gear stick cover look like this?
I havent seen this on the forum or maybe i have missed it through search,
doesnt hurt to post it again!
This is my first DIY so please dont crucify me if anything goes wrong.
I will do my best to describe the steps
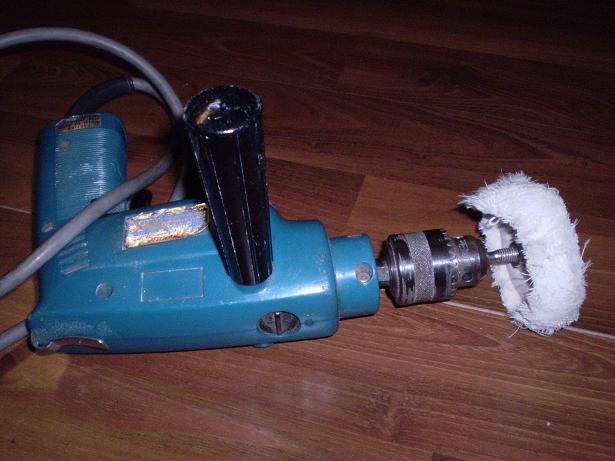
What you need is:
Buffer
Cleaning Chemical
Old CD or plastic pick
Perspex/Plastic polish solution
Cloth
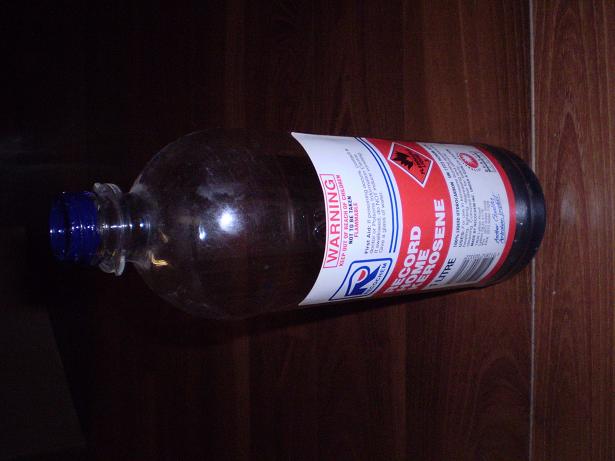
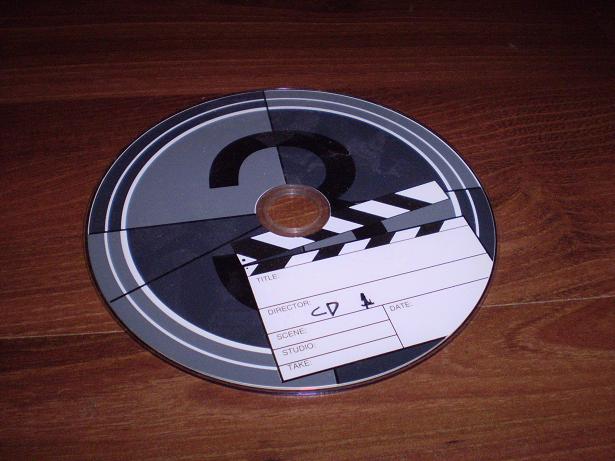
First you basically scratch the matt looking rubber surface off using the CD while the surface is covered with the cleaning chemical.
It will look like poo as it the picture below
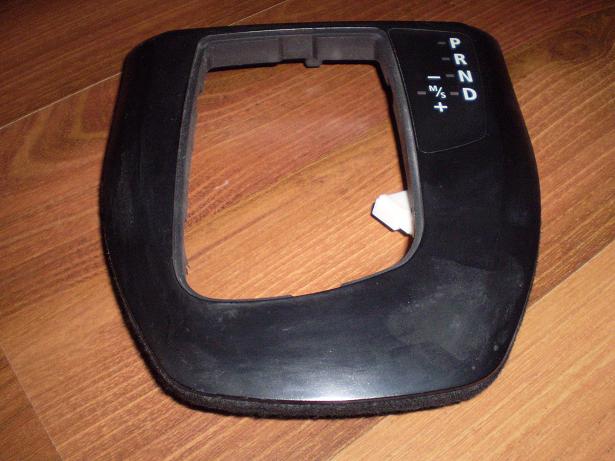
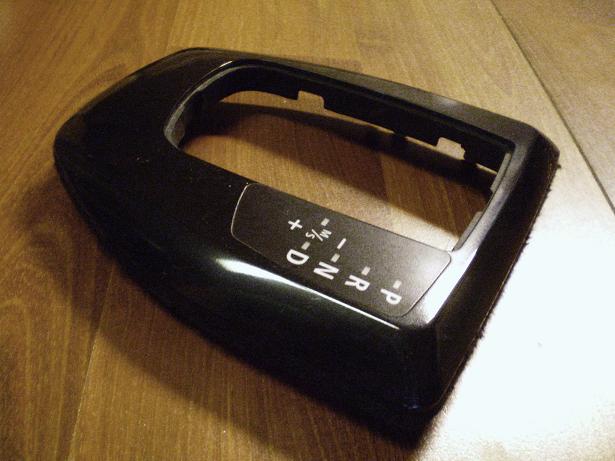
Then the next step is to buffer it lightly around, then repeat the first step until you reach something like what i have below
Again with more elbow grease rubbing off the coating with the cloth damped with the chemical and lightly buffering, you will eventually reach the picture below
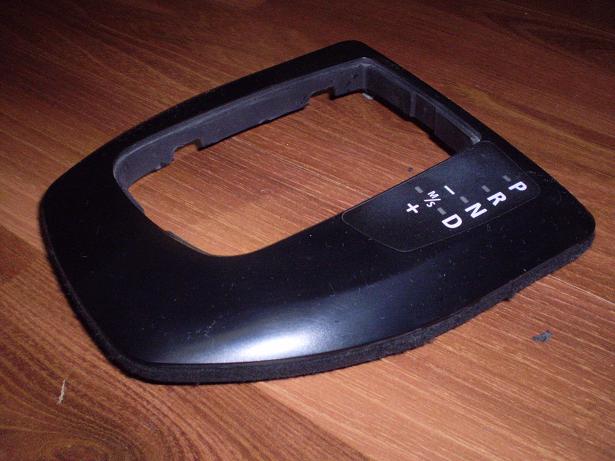
Make sure everything is buffered evenly so the surface is even and not have bumpy spots
For superior shine, use the polising solution, in my case i used toothpaste
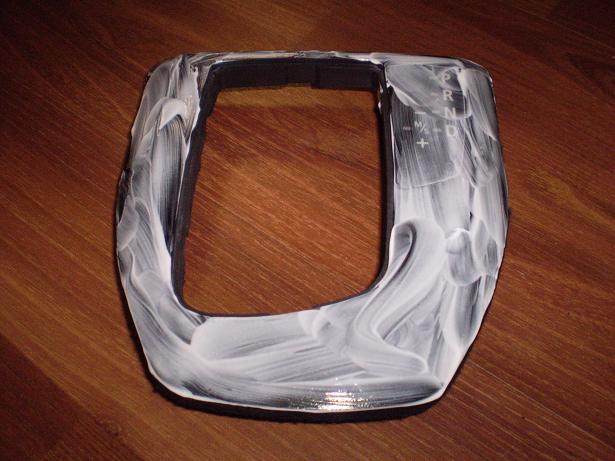
Finally, wipe everything with a clean dry cloth and voila!
it doesnt have the matt looking finish as original, but shiny is still better than scratchy!
Thanks guys for reading, i am interested in seeing all your results or better solutions, so please reply back to this thread!

 07-08-2009 | 07:53 AM
#4
Contributors
Joined: May 2009
Posts: 10,496
Likes: 2
From: SoCal
My Ride: 2008 550I LOADED, all options except HUD and NV
Great job and good idea, mine isn't scratched yet but if it ever is i will definitely try this. Thanks. BTW, your first DIY went fine, you did great - good pics, good description.
07-08-2009 | 08:30 AM
#5
Contributors
Joined: May 2005
Posts: 1,986
Likes: 0
From: Chicago, IL
Great recovery!
I was going to suggest that with all the effort just to take that part out, why not just install a new one. But I checked on RealOEM and the replacement part costs $227.
By the way ... how do you remove that part?
I was going to suggest that with all the effort just to take that part out, why not just install a new one. But I checked on RealOEM and the replacement part costs $227.
By the way ... how do you remove that part?
07-08-2009 | 09:21 AM
#6
Thread Starter
Senior Members
Joined: Dec 2008
Posts: 300
Likes: 0
From: Australia
My Ride: 2004 525i Executive
Originally Posted by tachyon' post='936148' date='Jul 8 2009, 11:30 AM
Great recovery!
I was going to suggest that with all the effort just to take that part out, why not just install a new one. But I checked on RealOEM and the replacement part costs $227.
By the way ... how do you remove that part?
I was going to suggest that with all the effort just to take that part out, why not just install a new one. But I checked on RealOEM and the replacement part costs $227.
By the way ... how do you remove that part?
07-08-2009 | 09:21 AM
#7
Contributors
Joined: Dec 2007
Posts: 8,998
Likes: 1
From: St. Louis Burbs, USA
My Ride: 2007 530i. Purchased 6/28/07. Titanium Silver Metallic, Black Dakota Leather, Dark Poplar Trim, Steptronic, Premium Package, Cold Weather Package, Bluetooth, Adaptive Control Xenons. 10/30/07 Added OEM 124s with 245/40/18 & 275/35/18 Michelin Pilot Sport A/S tires. Installed red Cal Covers� from BavAuto. 11/21/07 Added OEM all-weather floor mats (for winter, carpet in summer) and coat rack. 6/26/08 installed M5-style rear spoiler. 6/30/08 put on red reflectors. 8/22/08 Euro turn signal stickers applied. 3/20/09 Installed Shadowline Trim. 3/27/09 Added Matte Black Kidney Grilles from Trinity. 4/03/09 Installed Bimmian Shadow Matte Black 530i Badges. 4/04/09 Installed LED license plate lights from Trinity. 5/01/09 Installed Brabus Interior LED Kit and White Angel Eyes. 5/02/09 Put in Brabus 6K Fogs. 5/14/09 Removed charcoal filter. 5/15/09 Installed light smoke LED side marker lamps from Trinity. 5/21/09 Sprint Booster. 6/12/09 Painted exhaust tips flat black. 6/13/09 Pulled red Cal Covers and painted calipers low gloss black. 6/27/09 RPI Ram Air Scoop from Trinity. 8/15/09 Installed Brabus's silver invisibulbs front and rear. 9/24/09 Installed R-Dash license plate LEDs from Brabaus (John).
That's a really good idea. Mine isn't scratched, but if it were, I'd definitely do this. Good DIY!
Plus, your interior will smell minty fresh!
Plus, your interior will smell minty fresh!
07-08-2009 | 01:44 PM
#8
Contributors
Joined: Oct 2007
Posts: 3,561
Likes: 0
From: Milky Way, Earth, N. America, CA, San Jose, 95136, Latitude N 37� 16.837, Longitude W 121� 50.461
My Ride: 2004 530i | Sapphire Black | Sport | Premium | NAV | Logic 7 | DPE R07 Variant S Gloss Black with Polished Lip 20x8.5 front 20x10 rear | Falken FK452 tires 245/30/20 front 275/30/20 rear | H&R Coilovers | Smoked Tail Lights | M5 trunk spoiler | AC Schnitzer style roof spoiler | HID 8000K headlights & foglights | 35% tint all around | Sprint Booster | Speed Innovation ECU tuning | M5 trunk finisher | M-Tech body kit | Remus Quad Exhaust | AC Schnitzer style pedals | Euro Stickers | RPi Ram Air Induction | Smoked LED Side Lenses | AC Schnitzer style e-brake handle | AC Schnitzer style shifter | AC Schnitzer style iDrive knob | AC Schnitzer style carbon fiber diffuser | carbon fiber hood/trunk/steering emblems | carbon fiber grilles | carbon fiber door pillars | MTEC v2 Angel Eyes | Hamann style carbon fiber splitter
nicely done! great DIY!

