
A pillar removal pics & FYI

Thread Starter
Contributors
Joined: Jul 2005
Posts: 445
Likes: 0
From: Salem, NH USA
I've been having some rattle problems in my A pillar, so I decided to go rattle hunting & post some pics. As it turns out, the rattle is coming from the windshield tapping against the frame of the car a bit - if I push out on the windshield, the noise stops. I think the only way to fix something like that would be to re-seat the windshield, so I may just live with it. 
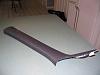
Anyway... if anyone needs to remove their A pillar, I have one piece of advice: when you remove the screw (behind the "Airbag" plate) and lift the trim piece out, lift UP (as in towards the roof) so you don't snap off the clip like I did (you'll see it in the pics). If you do it's no big deal - just go get a new one from the dealer for $0.76.
Here's what it looks like when removed:
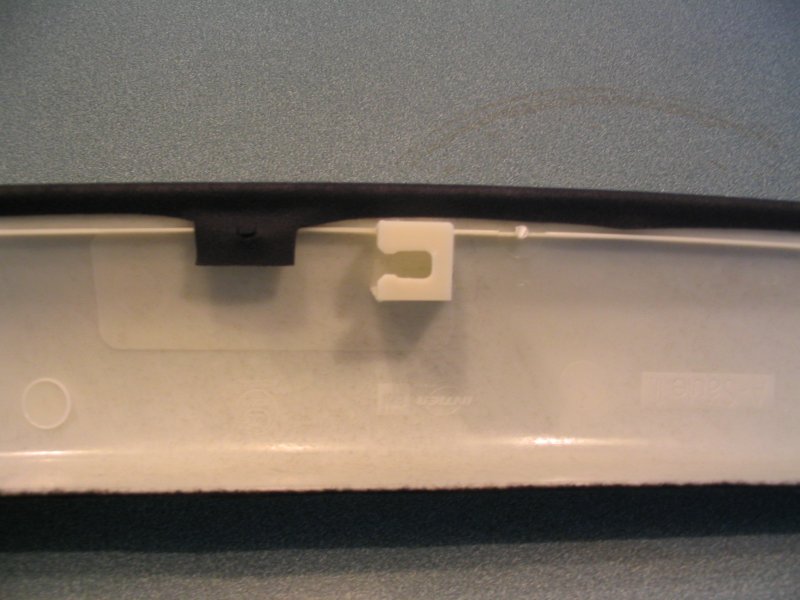
And from the other side (note the bracket that the clip slides in to:
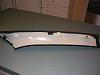
Closer view of the bracket:
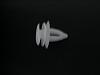
Here's a top view of the clip that I snapped:
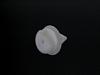
And a side view:
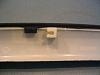
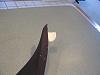
There's a tab sticking out at the bottom of the trim piece - this slides into the dash, and it can be a bit of a pain to get seated properly. Not difficult, just slightly annoying:
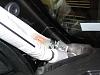
Here's a couple shots of what it looks like underneath. There isn't anything there other than the air bag:

Anyway... if anyone needs to remove their A pillar, I have one piece of advice: when you remove the screw (behind the "Airbag" plate) and lift the trim piece out, lift UP (as in towards the roof) so you don't snap off the clip like I did (you'll see it in the pics). If you do it's no big deal - just go get a new one from the dealer for $0.76.
Here's what it looks like when removed:

And from the other side (note the bracket that the clip slides in to:

Closer view of the bracket:
Here's a top view of the clip that I snapped:
And a side view:
There's a tab sticking out at the bottom of the trim piece - this slides into the dash, and it can be a bit of a pain to get seated properly. Not difficult, just slightly annoying:
Here's a couple shots of what it looks like underneath. There isn't anything there other than the air bag:

Contributors
Joined: Oct 2007
Posts: 11,084
Likes: 0
From: Thousand Oaks, California
My Ride: 2008 550i Jet Black on Black Leather, SAT with Paddles, Logic 7, Comfort Seats, NAV, Sport Package, PDC, Xenons, Sirius, Trinity 12W LED Angel Eyes, RPi GT Exhaust, M rear spoiler, ACS Roof Spoiler, Tinted Tail Lights, Bimmian Carbon Fiber Pillar Trim, Bimmian Shadow 550i emblem, RPi Scoop, E60 Forum Cling, Mtec bulbs in fog lights, Mtec 2W LED for License Plate Light Bulbs, K&N Filter, Bimmian LED Smoked Side Markers, Blackout roundels, Carbon Fiber Kidney Grills.
Retired Rides - 1989 325i convertible, 1995 M3, 2002 X5, 2005 545i, 2008 X5 (Lemon)
Nice DIY.....now when are you going to paint that garage???? 

Contributors
Joined: Oct 2007
Posts: 11,084
Likes: 0
From: Thousand Oaks, California
My Ride: 2008 550i Jet Black on Black Leather, SAT with Paddles, Logic 7, Comfort Seats, NAV, Sport Package, PDC, Xenons, Sirius, Trinity 12W LED Angel Eyes, RPi GT Exhaust, M rear spoiler, ACS Roof Spoiler, Tinted Tail Lights, Bimmian Carbon Fiber Pillar Trim, Bimmian Shadow 550i emblem, RPi Scoop, E60 Forum Cling, Mtec bulbs in fog lights, Mtec 2W LED for License Plate Light Bulbs, K&N Filter, Bimmian LED Smoked Side Markers, Blackout roundels, Carbon Fiber Kidney Grills.
Retired Rides - 1989 325i convertible, 1995 M3, 2002 X5, 2005 545i, 2008 X5 (Lemon)
Originally Posted by bdkinnh' post='557473' date='Apr 7 2008, 11:33 AM
Never - I'm renting. 
")
Senior Members
Joined: Feb 2008
Posts: 801
Likes: 0
From: Pikes Peak- Colorado
My Ride: BMW 535xi
Model Year: 2008
Originally Posted by bdkinnh' post='556992' date='Apr 6 2008, 01:22 PM
I've been having some rattle problems in my A pillar, so I decided to go rattle hunting & post some pics. As it turns out, the rattle is coming from the windshield tapping against the frame of the car a bit - if I push out on the windshield, the noise stops. I think the only way to fix something like that would be to re-seat the windshield, so I may just live with it.
Anyway... if anyone needs to remove their A pillar, I have one piece of advice: when you remove the screw (behind the "Airbag" plate) and lift the trim piece out, lift UP (as in towards the roof) so you don't snap off the clip like I did (you'll see it in the pics). If you do it's no big deal - just go get a new one from the dealer for $0.76.
Here's what it looks like when removed:
Attachment 47652
And from the other side (note the bracket that the clip slides in to:
Attachment 47653
Closer view of the bracket:
Attachment 47654
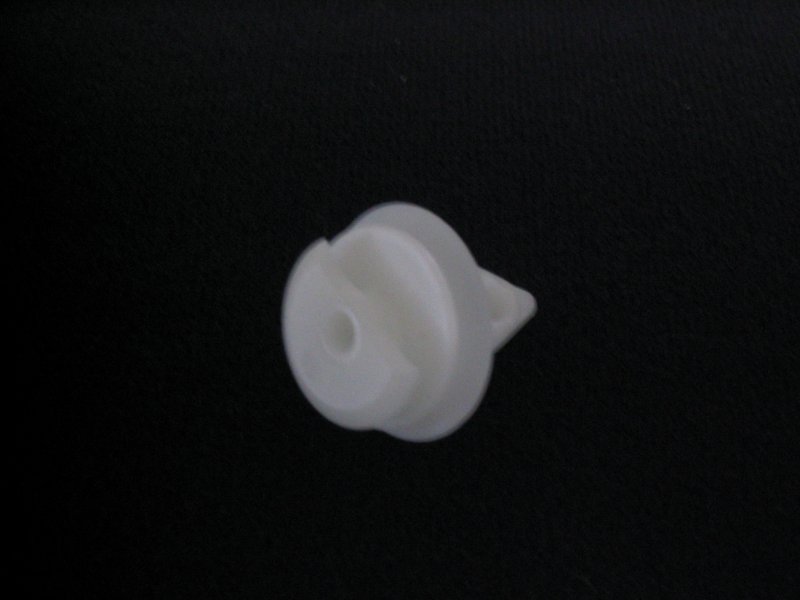
Here's a top view of the clip that I snapped:
Attachment 47655
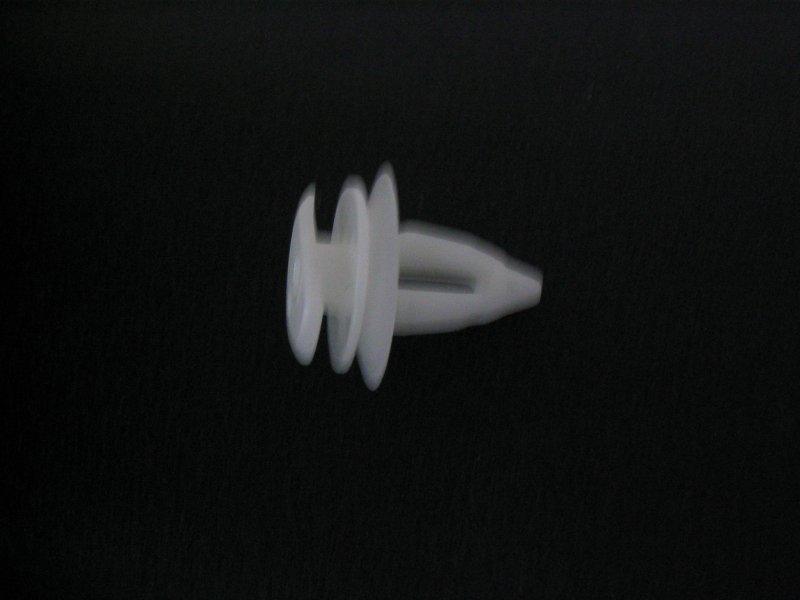
And a side view:
Attachment 47656
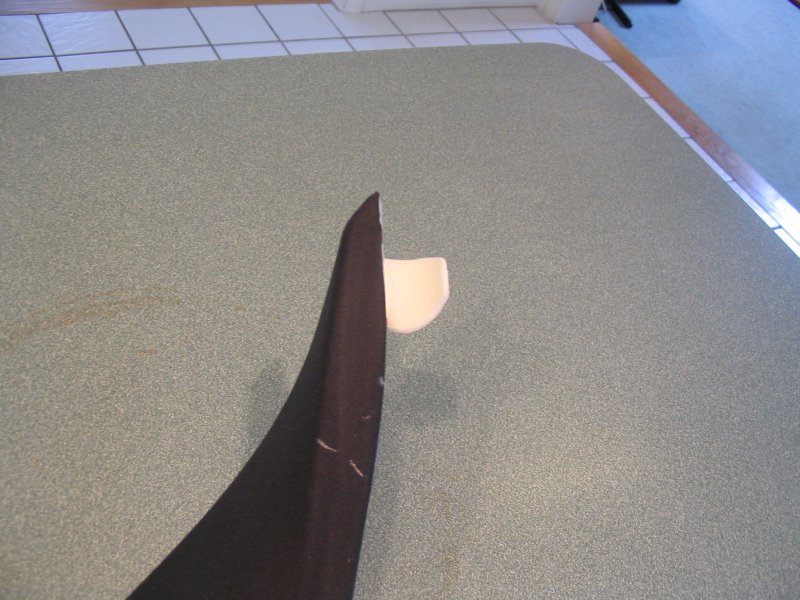
There's a tab sticking out at the bottom of the trim piece - this slides into the dash, and it can be a bit of a pain to get seated properly. Not difficult, just slightly annoying:
Attachment 47657
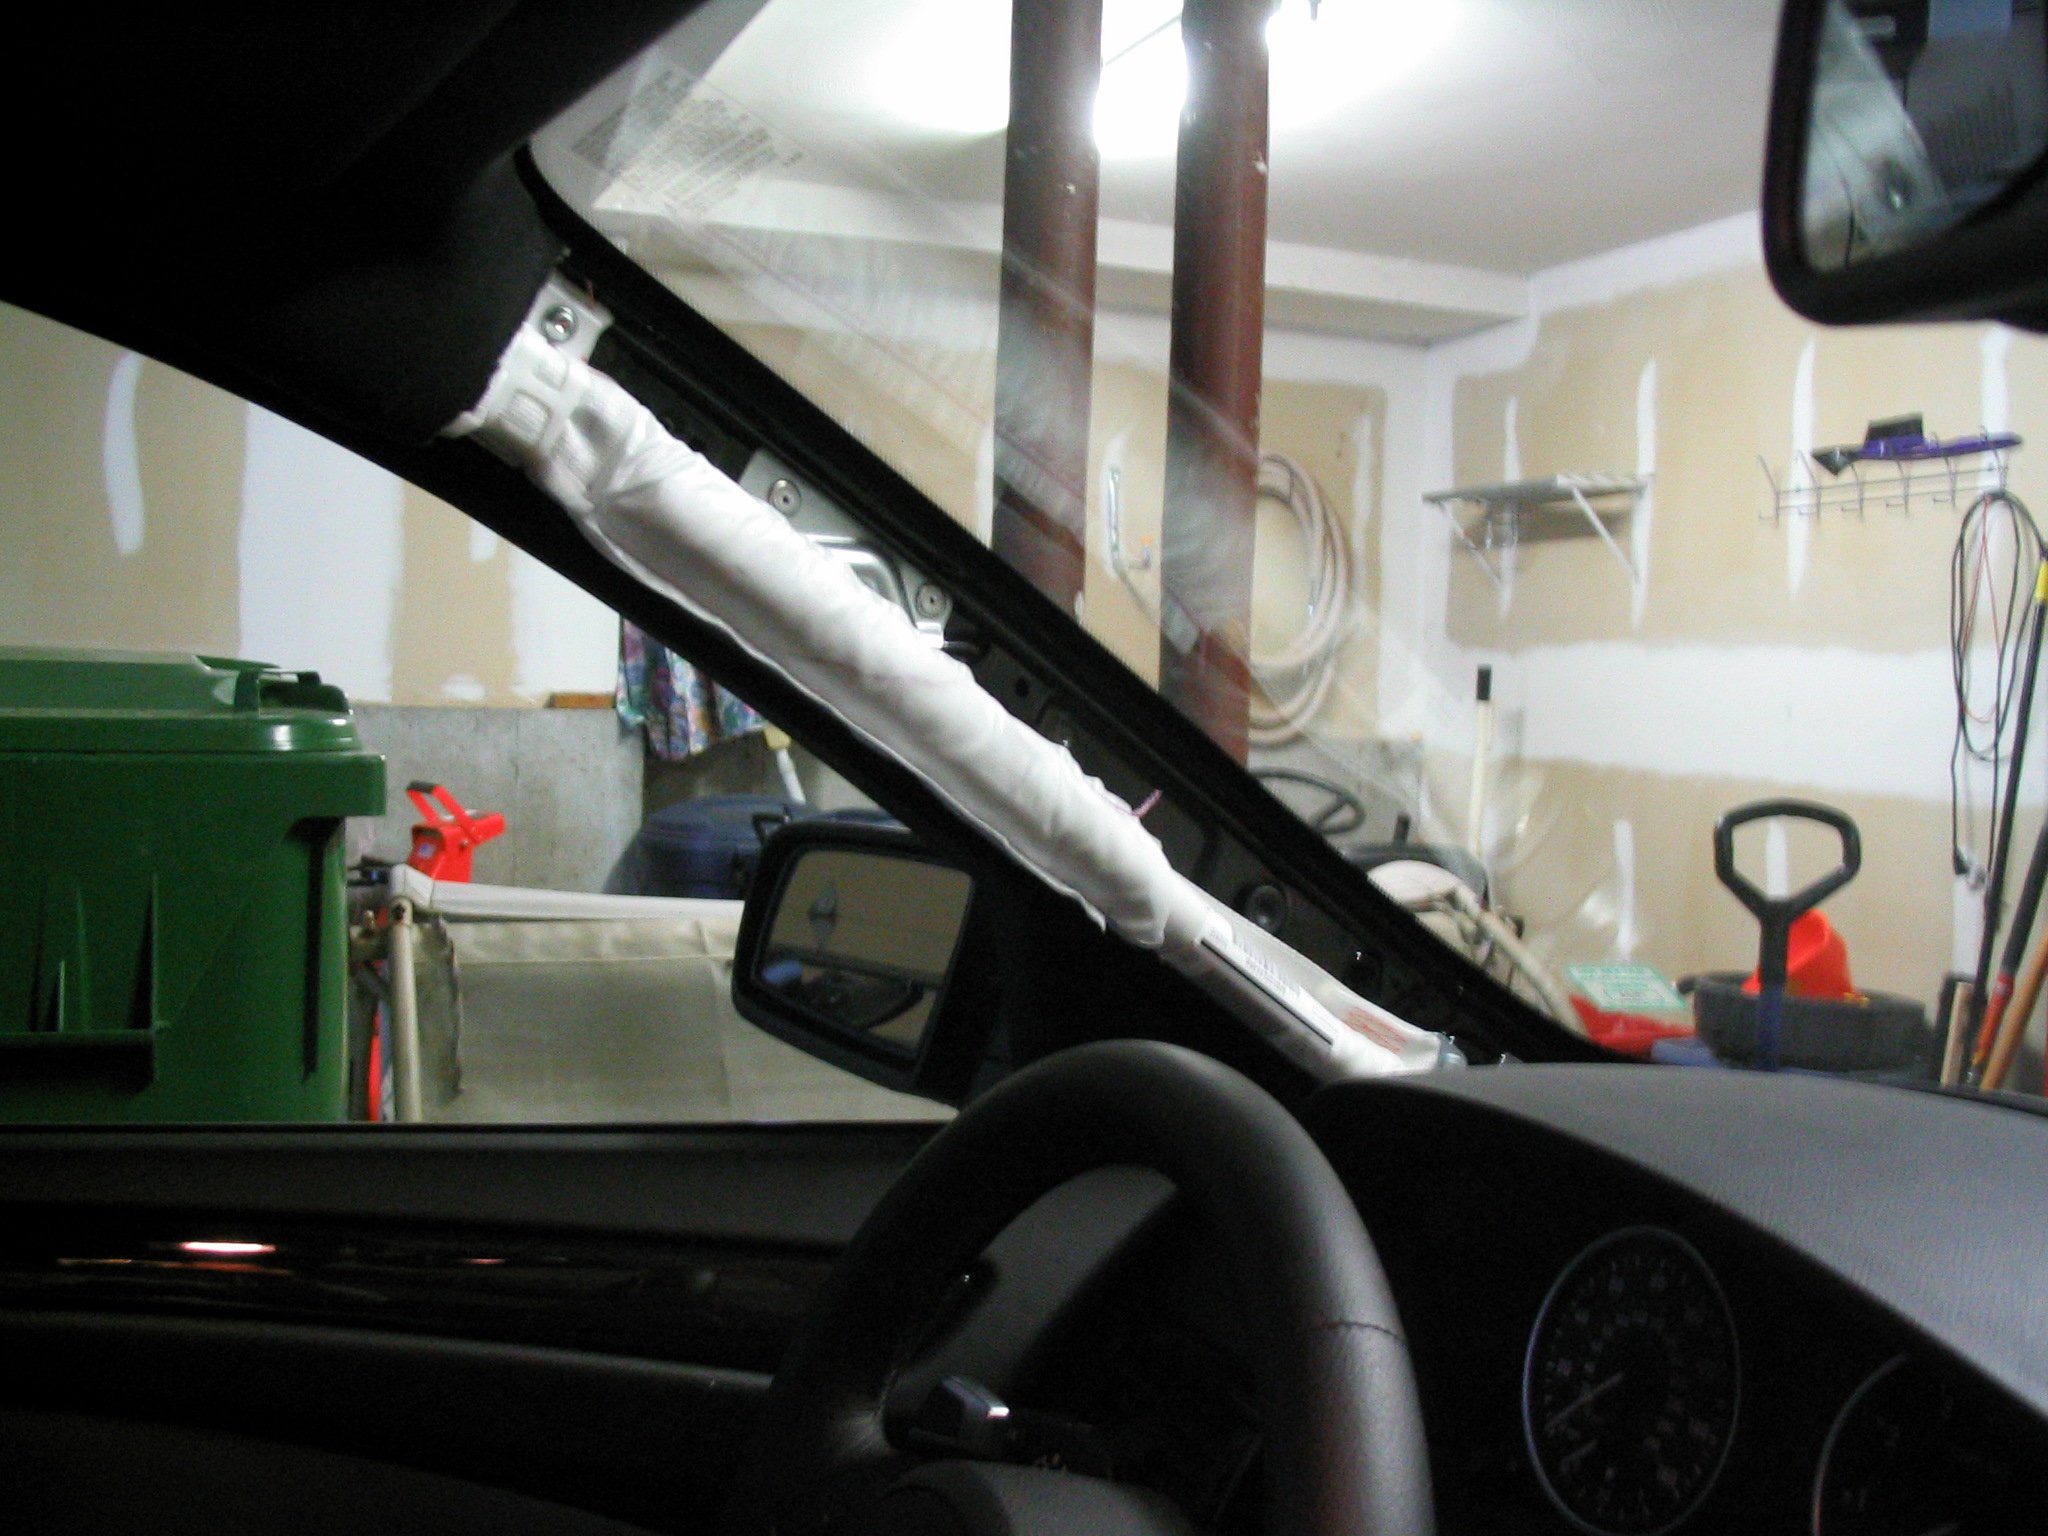
Here's a couple shots of what it looks like underneath. There isn't anything there other than the air bag:
Attachment 47658
Attachment 47659
Anyway... if anyone needs to remove their A pillar, I have one piece of advice: when you remove the screw (behind the "Airbag" plate) and lift the trim piece out, lift UP (as in towards the roof) so you don't snap off the clip like I did (you'll see it in the pics). If you do it's no big deal - just go get a new one from the dealer for $0.76.
Here's what it looks like when removed:
Attachment 47652
And from the other side (note the bracket that the clip slides in to:
Attachment 47653
Closer view of the bracket:
Attachment 47654
Here's a top view of the clip that I snapped:
Attachment 47655
And a side view:
Attachment 47656
There's a tab sticking out at the bottom of the trim piece - this slides into the dash, and it can be a bit of a pain to get seated properly. Not difficult, just slightly annoying:
Attachment 47657
Here's a couple shots of what it looks like underneath. There isn't anything there other than the air bag:
Attachment 47658
Attachment 47659

Members
Joined: Jun 2008
Posts: 81
Likes: 0
From: DFW, Texas
My Ride: 2005 545i Blk/Blk Sport Package
Originally Posted by juris335' post='584005' date='May 19 2008, 07:17 PM
Thank you for that great set of photos. How could I screw that up??? Appreciate your help.
Thanks for the insight about the clip that might break!
I have been wanting to paint my pillars black and wasn't sure how to go about getting these off without too much grief. I got the ones off my E39 with no problem but, this beast is a much tighter ship.
Thanks again!

Super Moderator
Joined: Mar 2004
Posts: 17,310
Likes: 2
From: Pittsburgh, PA USA
My Ride: G30 M550i
Model Year: 2018
Thanks for the pics! In order for this DIY to be complete, here's a link to an older thread that has the TIS instructions posted in it:
http://forums.e60.net/index.php?showtopic=39361
http://forums.e60.net/index.php?showtopic=39361

Super Moderator
Joined: Mar 2004
Posts: 17,310
Likes: 2
From: Pittsburgh, PA USA
My Ride: G30 M550i
Model Year: 2018
Originally Posted by spacedemon' post='1089404' date='Jan 12 2010, 09:05 PM
Guys,
Im getting ready to remove the A trim due to the fact that the fabric is wrinkled towards the dash....
Do I need to disconnect the battery since we are working near an airbag?
Thanks!
Im getting ready to remove the A trim due to the fact that the fabric is wrinkled towards the dash....
Do I need to disconnect the battery since we are working near an airbag?
Thanks!
You need to be sure the ignition is switched off before working near any airbags.