N52 E60 Valve cover gasked DIY with pictures
 07-11-2011, 03:14 PM
#1
New Members
Thread Starter

Join Date: Jul 2011
Location: Houston
Posts: 2
Likes: 0
Received 0 Likes
on
0 Posts
My Ride: E60 Blue
Model Year: 2006
So I have been doing a lot of research on how I'm supposed to change the valve cover gasket. I did plenty of research online and I finally gave in and purchased a Bentley manual. While that helped, it did nothing to prepare me for the task that I took on. First off, I did change this part on my Z3 a few years back and I thought as good as my indy mechanic was, I didn?t feel like spending $400 for him to replace $40 worth of parts. I understand now why the outrageous labor charge, so be warned that this task is truly a PITA.
I will be pulling info from various posts to get this as complete as I can. Besides my library, I also borrowed some pictures from poster Beaker and from Dracon of e90post.com. I hope you gents don?t mind that I?m sharing your IP for the greater good.
Please note that you are on your own when you attempt this and if you screw up, then it's your own fault.
Parts List
11 12 7 581 215 Valve Cover Gasket
11 12 0 409 288 Valve Cover Screw Set
11 37 7 516 302 Gasket for Valvetronic Motor
Tools List
Torque Wrench 0-100nm reading
HEX bolts socket Size 8
TORX bolt size 15 and 45
TORX socket set (Mainly we will be using E8 and E10)
Precision screwdriver (In case any of the valve screw breaks)
Work light/Flash light
Socket wrench set
Needle noise pliers
Lots of towels
Some things to take note of:
This did not happen to me but, when you start to rebuild, double and triple check that no cables are caught in between the cover and motor. I mean run your fingers the best you can all the way around to ensure nothing is trapped.
Also, a thing that scared the bejeezus out of me was that after all that was said and done, I started the motor and it started smoking after 30 seconds being on. The smell was something between oil and electrical. I primary thought was that it was oil from the cover that spilled over to the exhaust manifold but I didn?t want to take chances. I tried to research this online and couldn?t find anything. I called a few mechanic friends and they said that if your check engine light isn?t on, chances are it is oil. Just let it run for a few minutes and if it gets worse, then you should worry. To my relief, it did stop.
Now to the good stuff. Get ready because you will have to spend about 3-5 hours on it if it?s your first time.
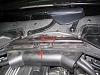
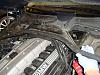
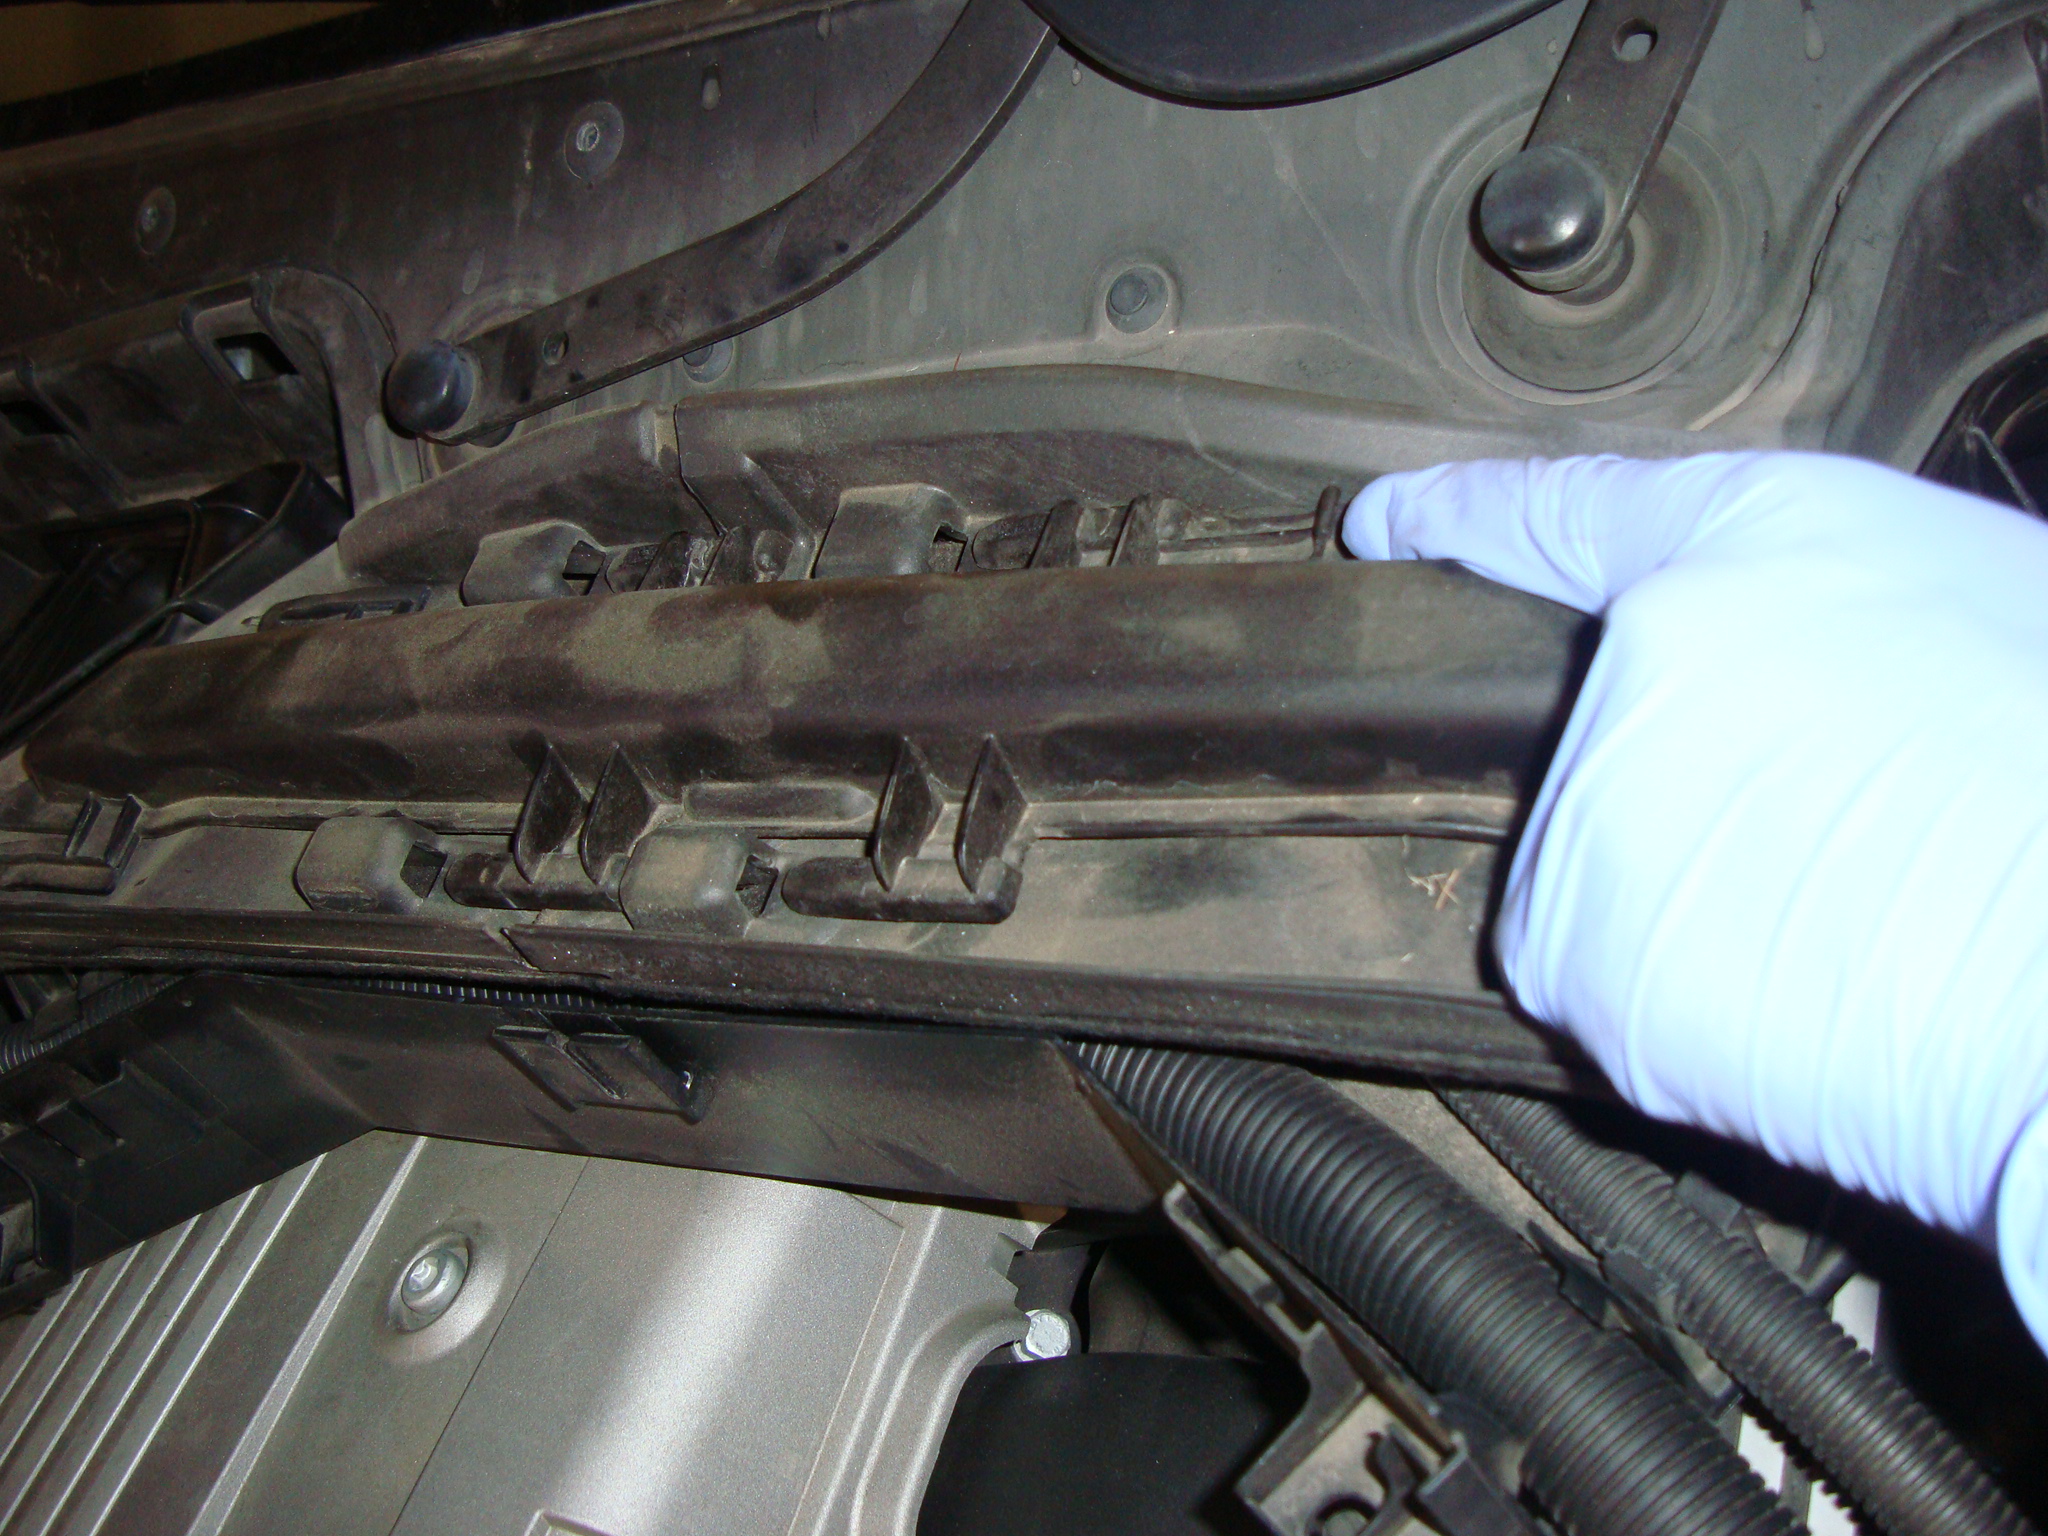
Remove the wire harness duct from the strut. To remove, pull at one end at a time straight up.
Remove the microfilter on both sides of the car. Use the HEX bolt size 8 to unscrew the quick release fasteners
Pry cover spring clip off cover
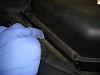
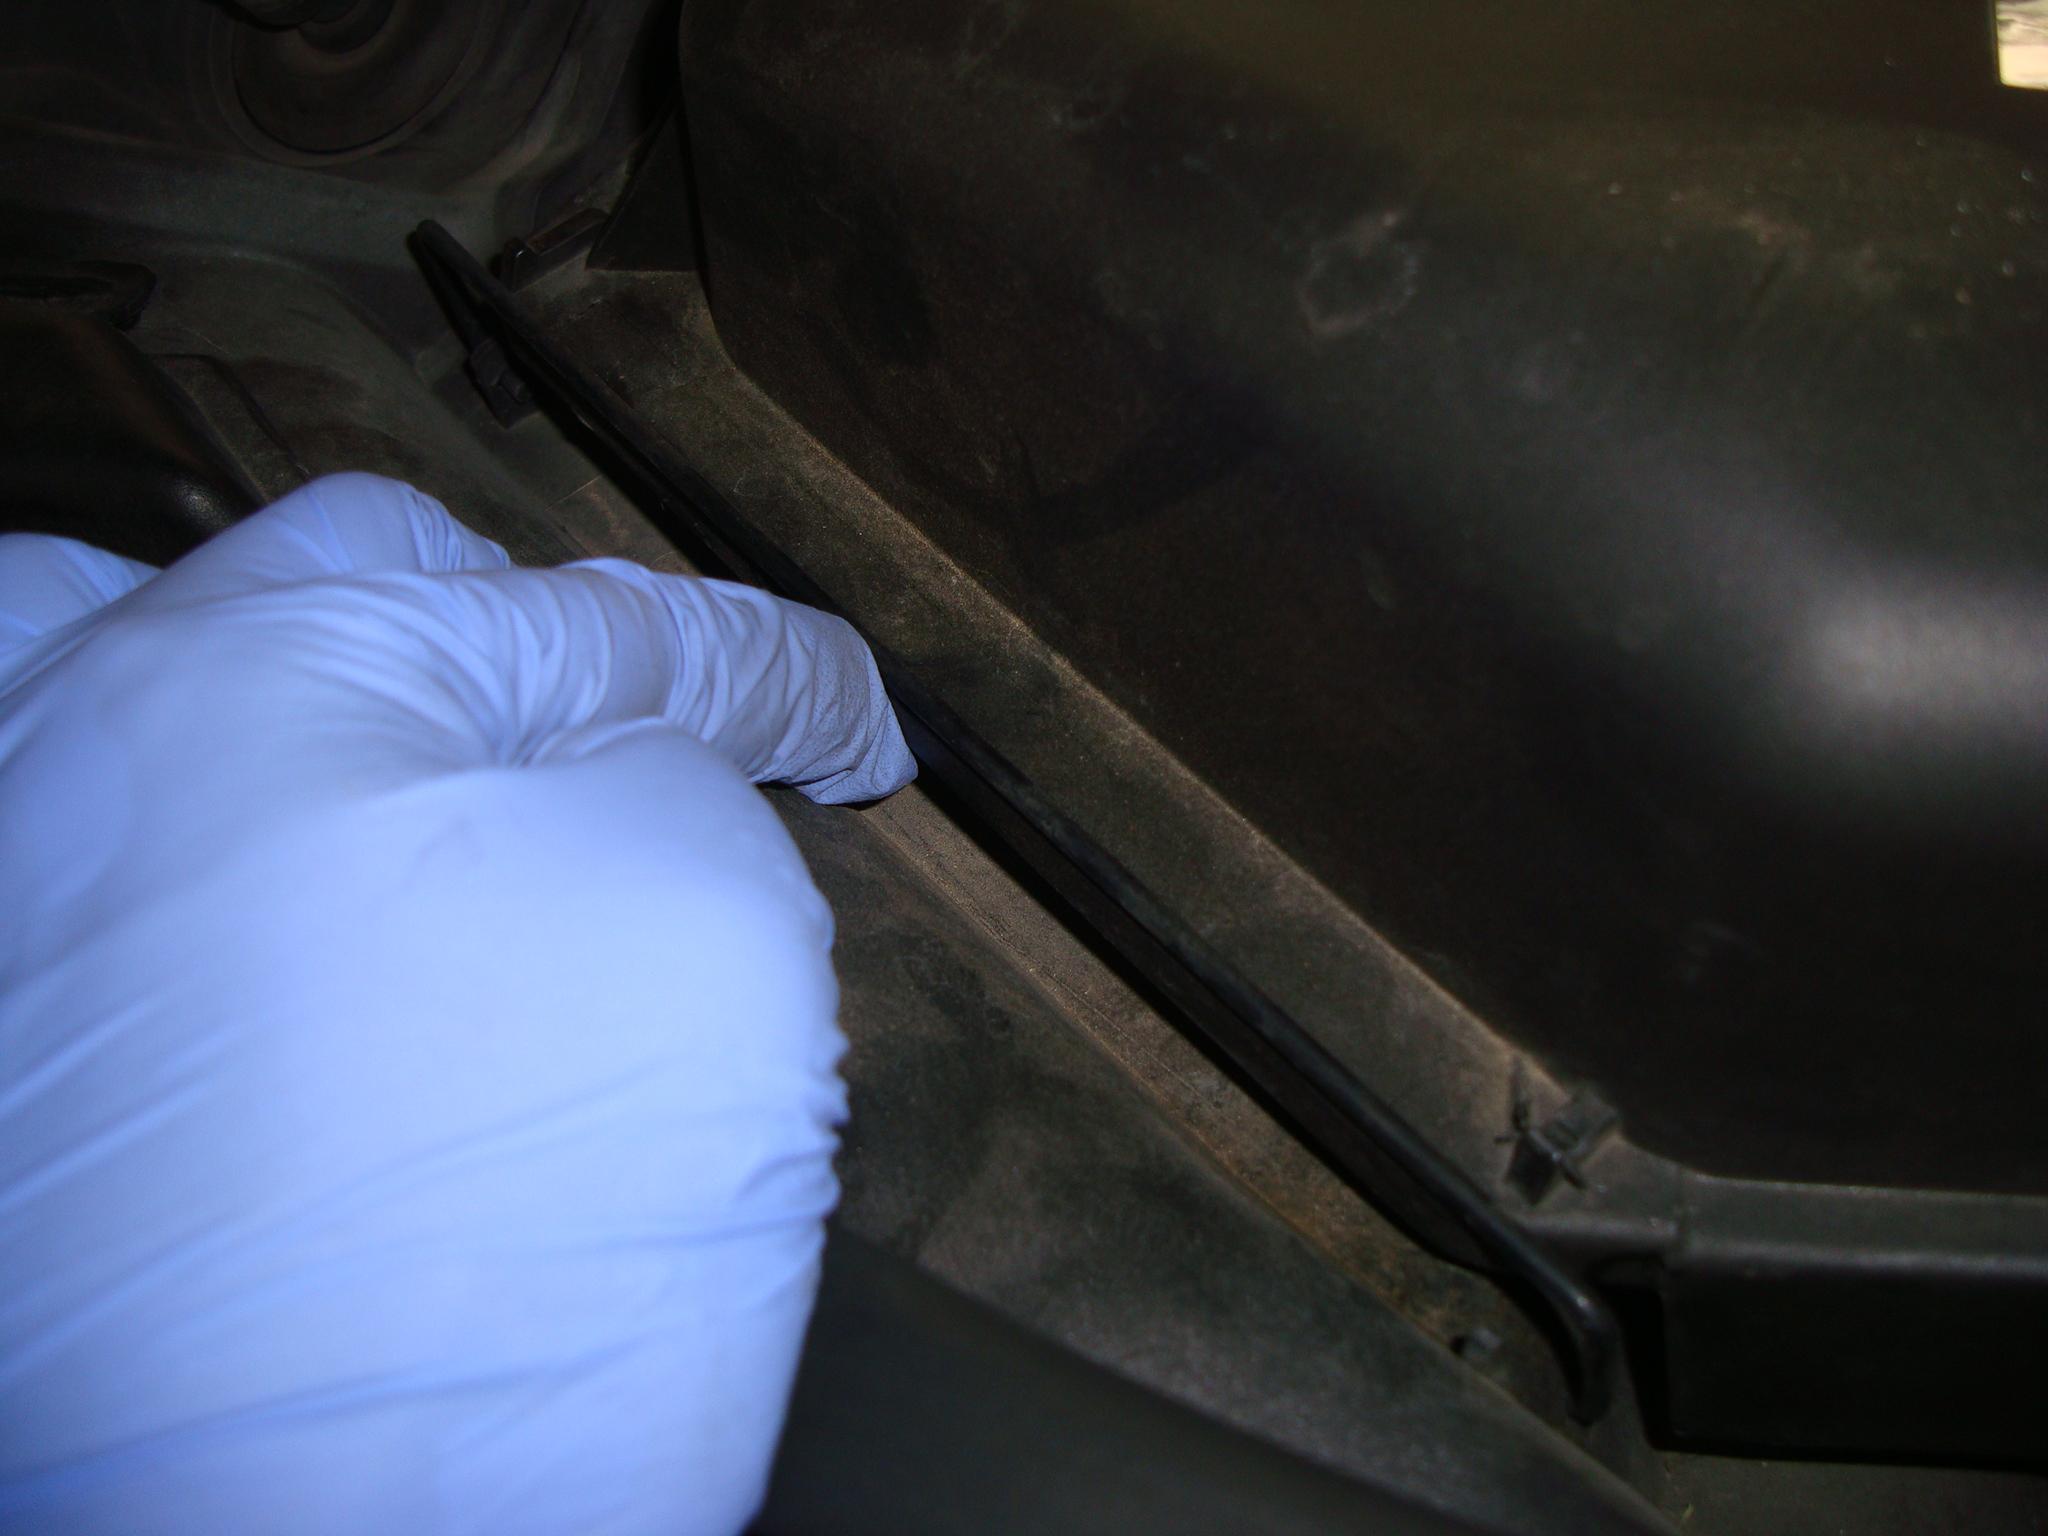
Remove the weather strip. Peel it off starting at one end to the other.
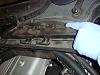
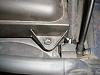
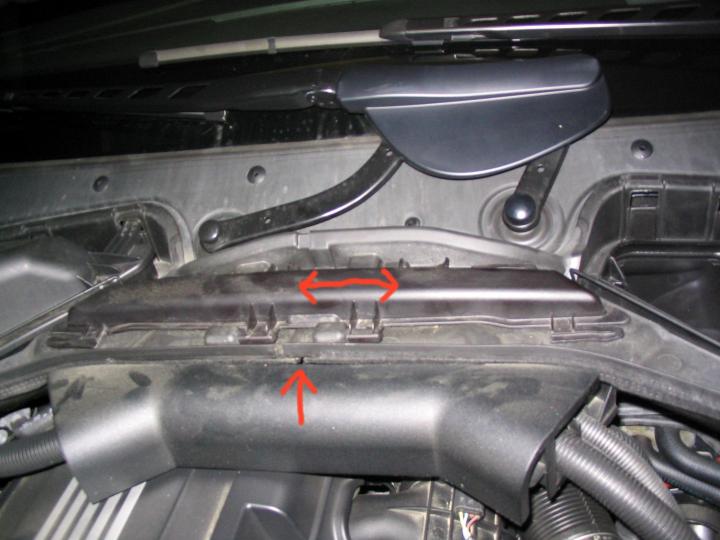
Next Remove the center trim. Press down where my finger is and slide it to the right.
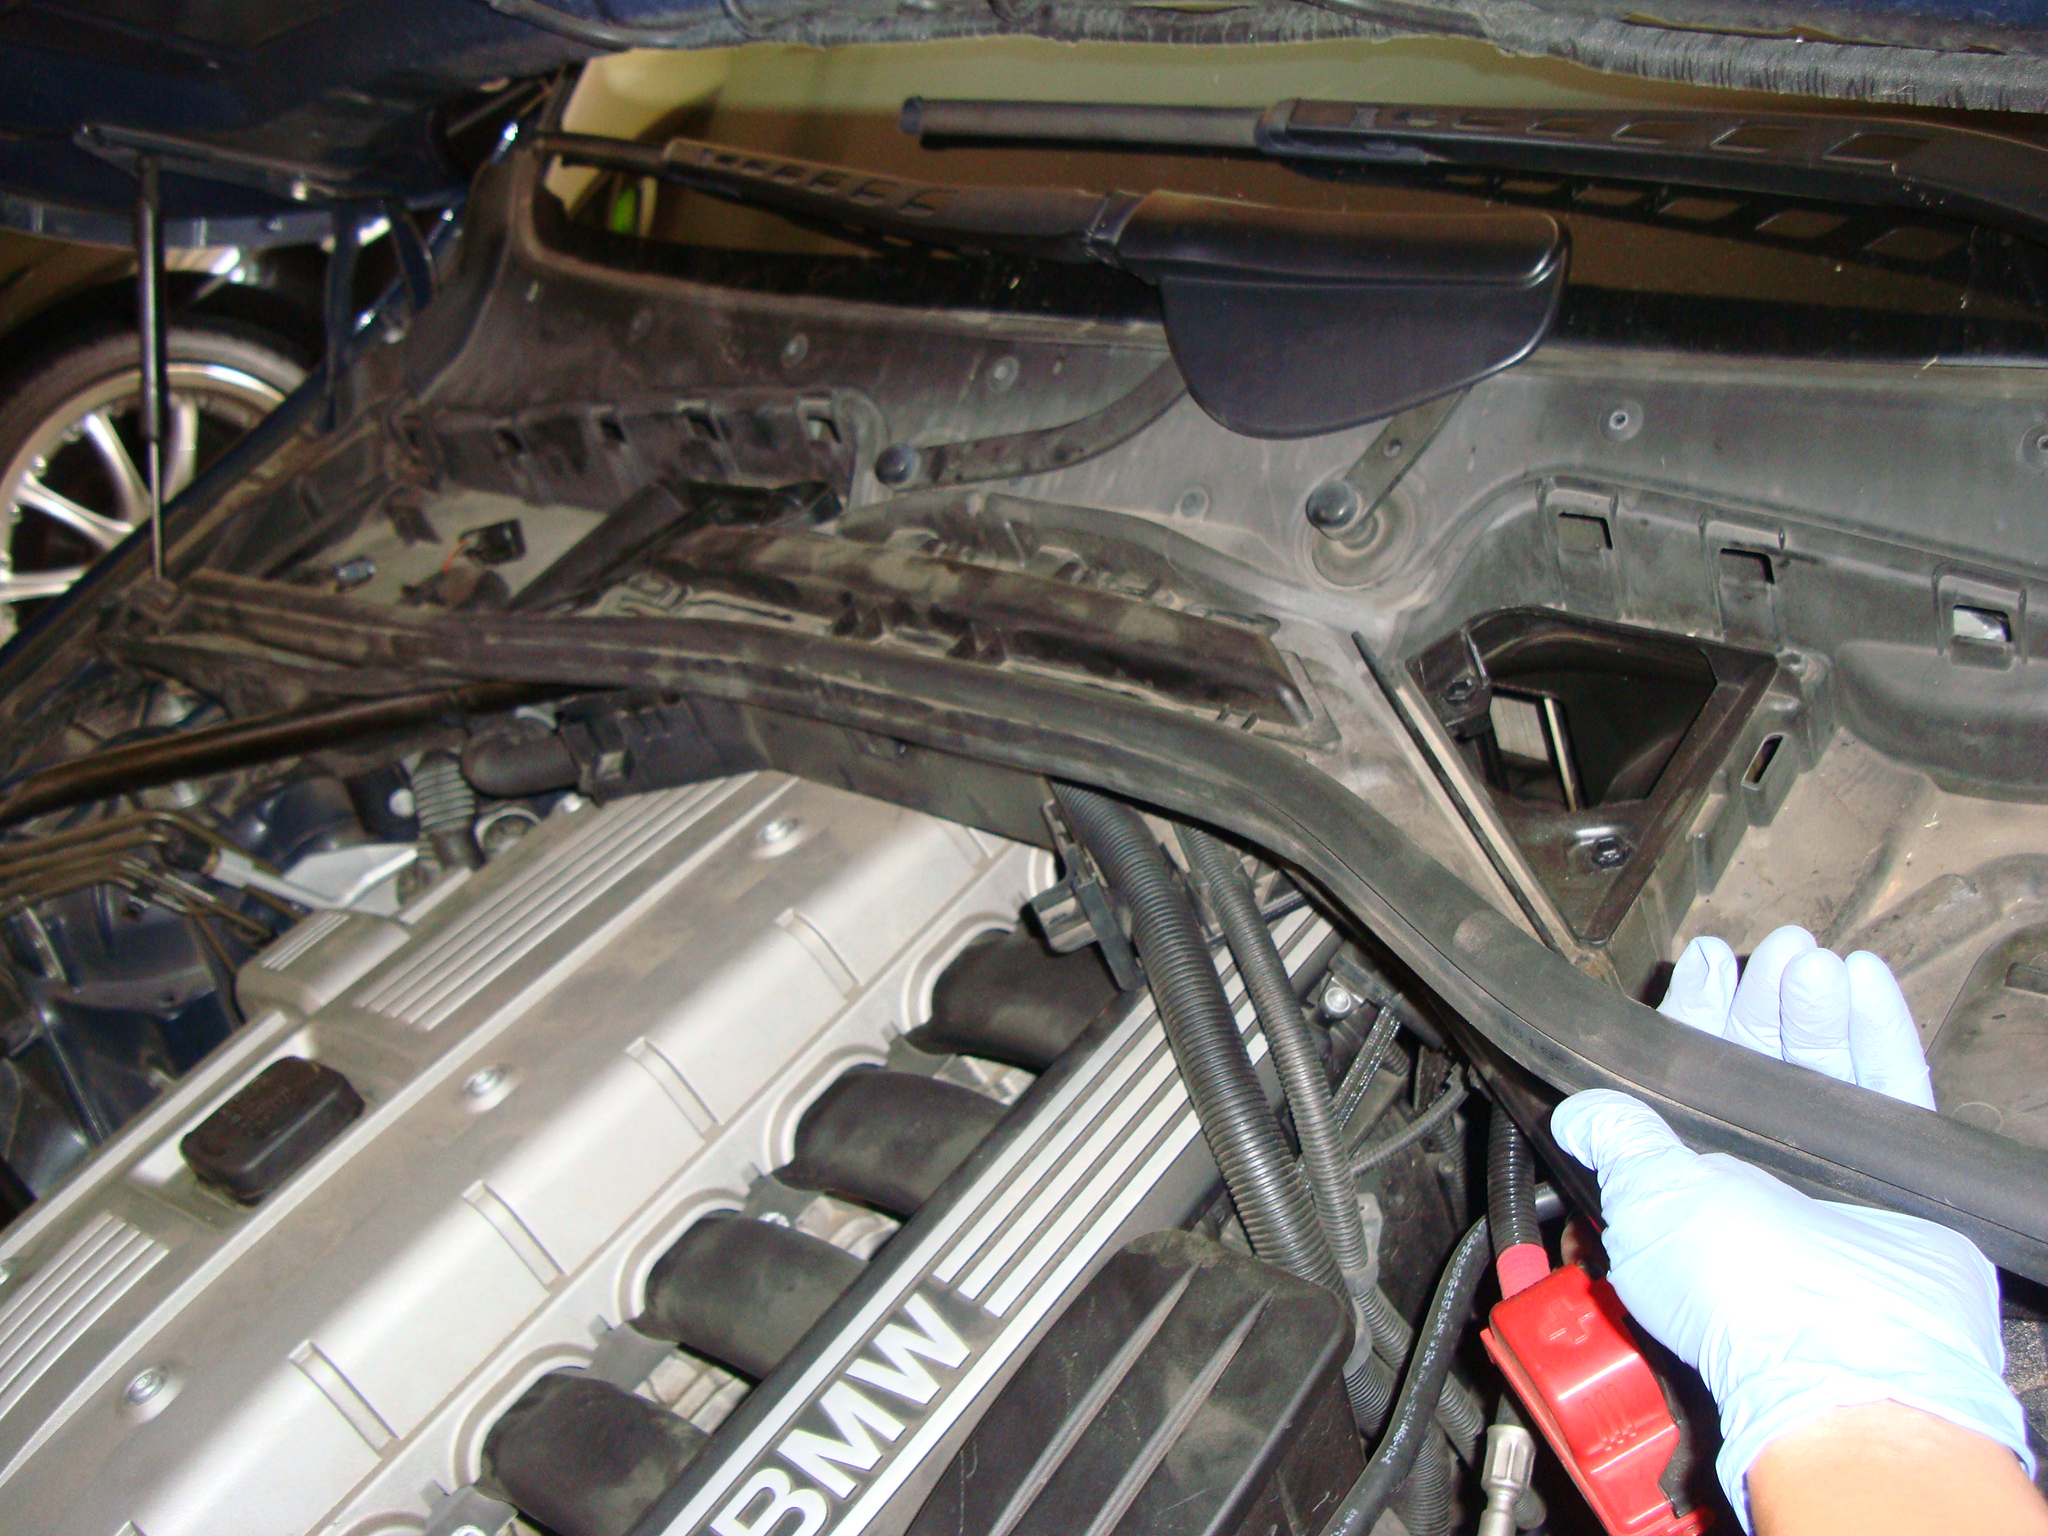
Remove the rubber gutters
You will see on both sides 3 HEX size 8 quick release on each side of the car and 1 under the center trim. Unlock all of them.
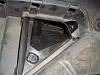
One final screw is a TORX 15 screw. Remove it on both sides and remove the entire microfilter lower housing.
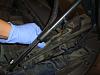
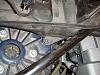
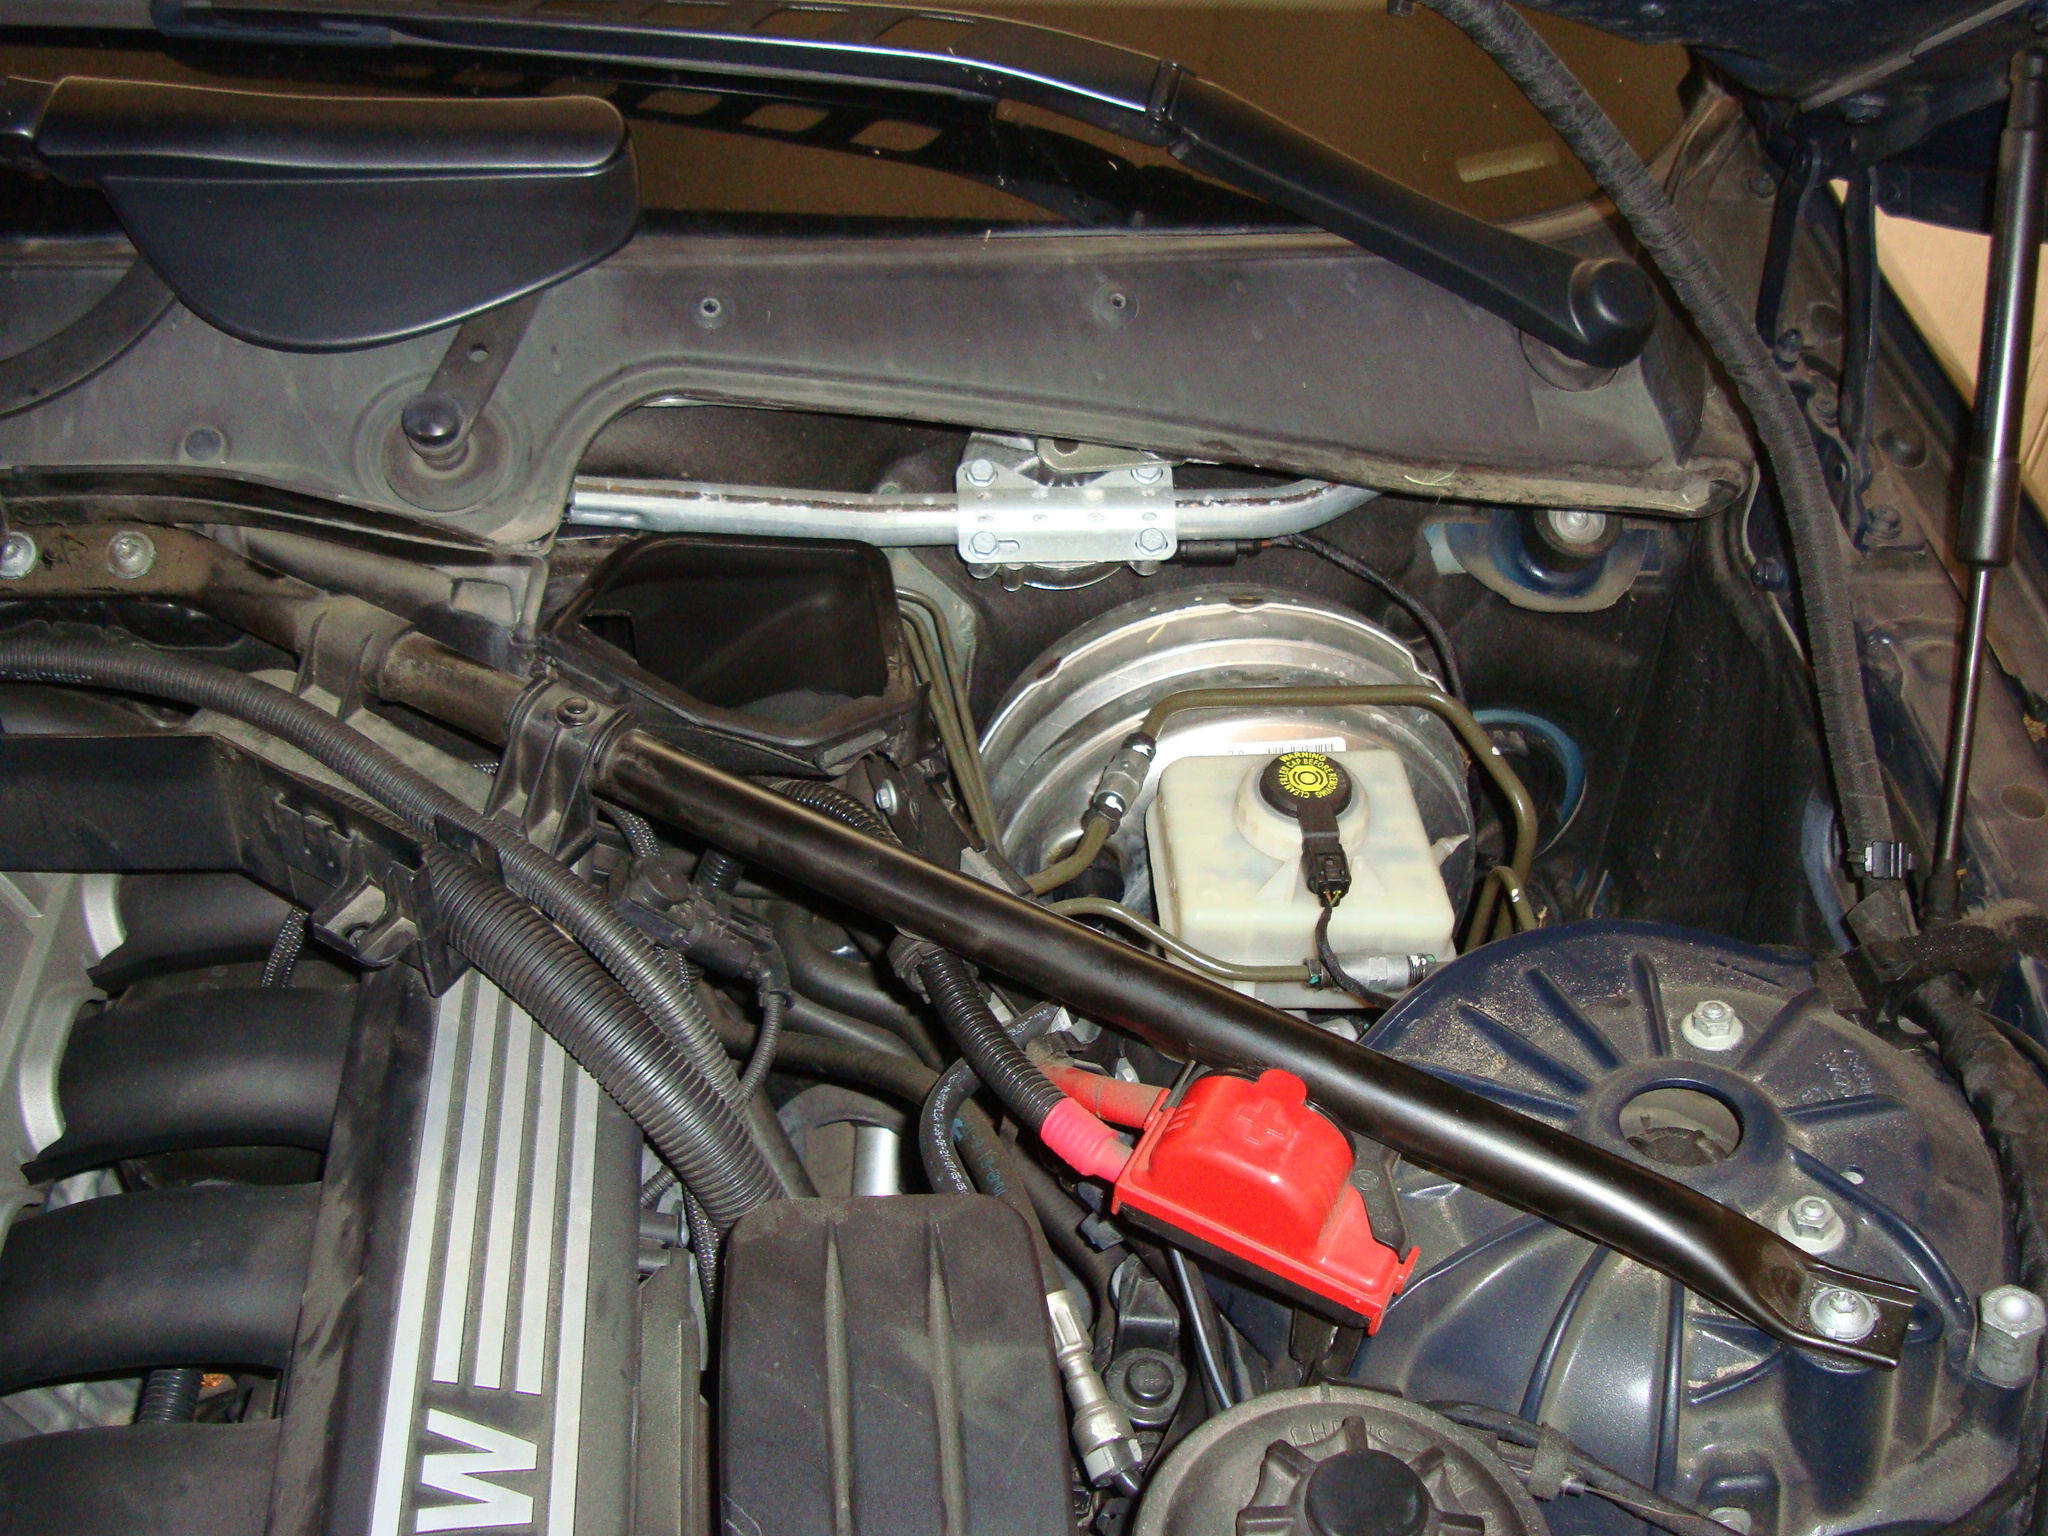
After you get the MF housing off, unbolt the the 4 Torx screw for the struct bar (T45)
Pull the wires out of the struct bar housing and remove the strut bar.
There is one more thing that you need to do in which I do not have a picture of. If you follow the wires to the passanger side, you will notice that they are latched onto a piece of plastic. There are 3 basic bolts that hold it in place. Remove that piece of plastic so that you can get better access to the valve bolts. I tried to work around it but it's easier to remove it.
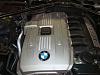
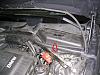
Next use the T45 to remove the Ignition coil covering. This will only take you a 90 degree turn to unlock them.

Gently pull off the coil cover bracket.

From this point on I have limited pictures so I will be as descriptive as I can.
Detach ignition coil connectors. Unclip ignition coil harness from cylinder head cover and lift aside
Next remove the ignition coils by gently twisting and pulling it up and out. Set aside

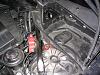
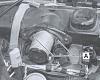
Detach the crankcase breather hose (number 9). This hose connects towards the end of the bay. To detach, use your fingers and squeeze the clips together and then pull outwards.
Remove the valvetronic motor. There will be 3 E8 bolts. For easy reinstall, do not spin the coil inside. Note: The torque for reinstall is 10NM (7 ft-lb)
Disconnect the connector strip of the fuel injector (The black electricical strip). There are clips that hold it together between the injector.
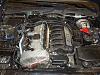
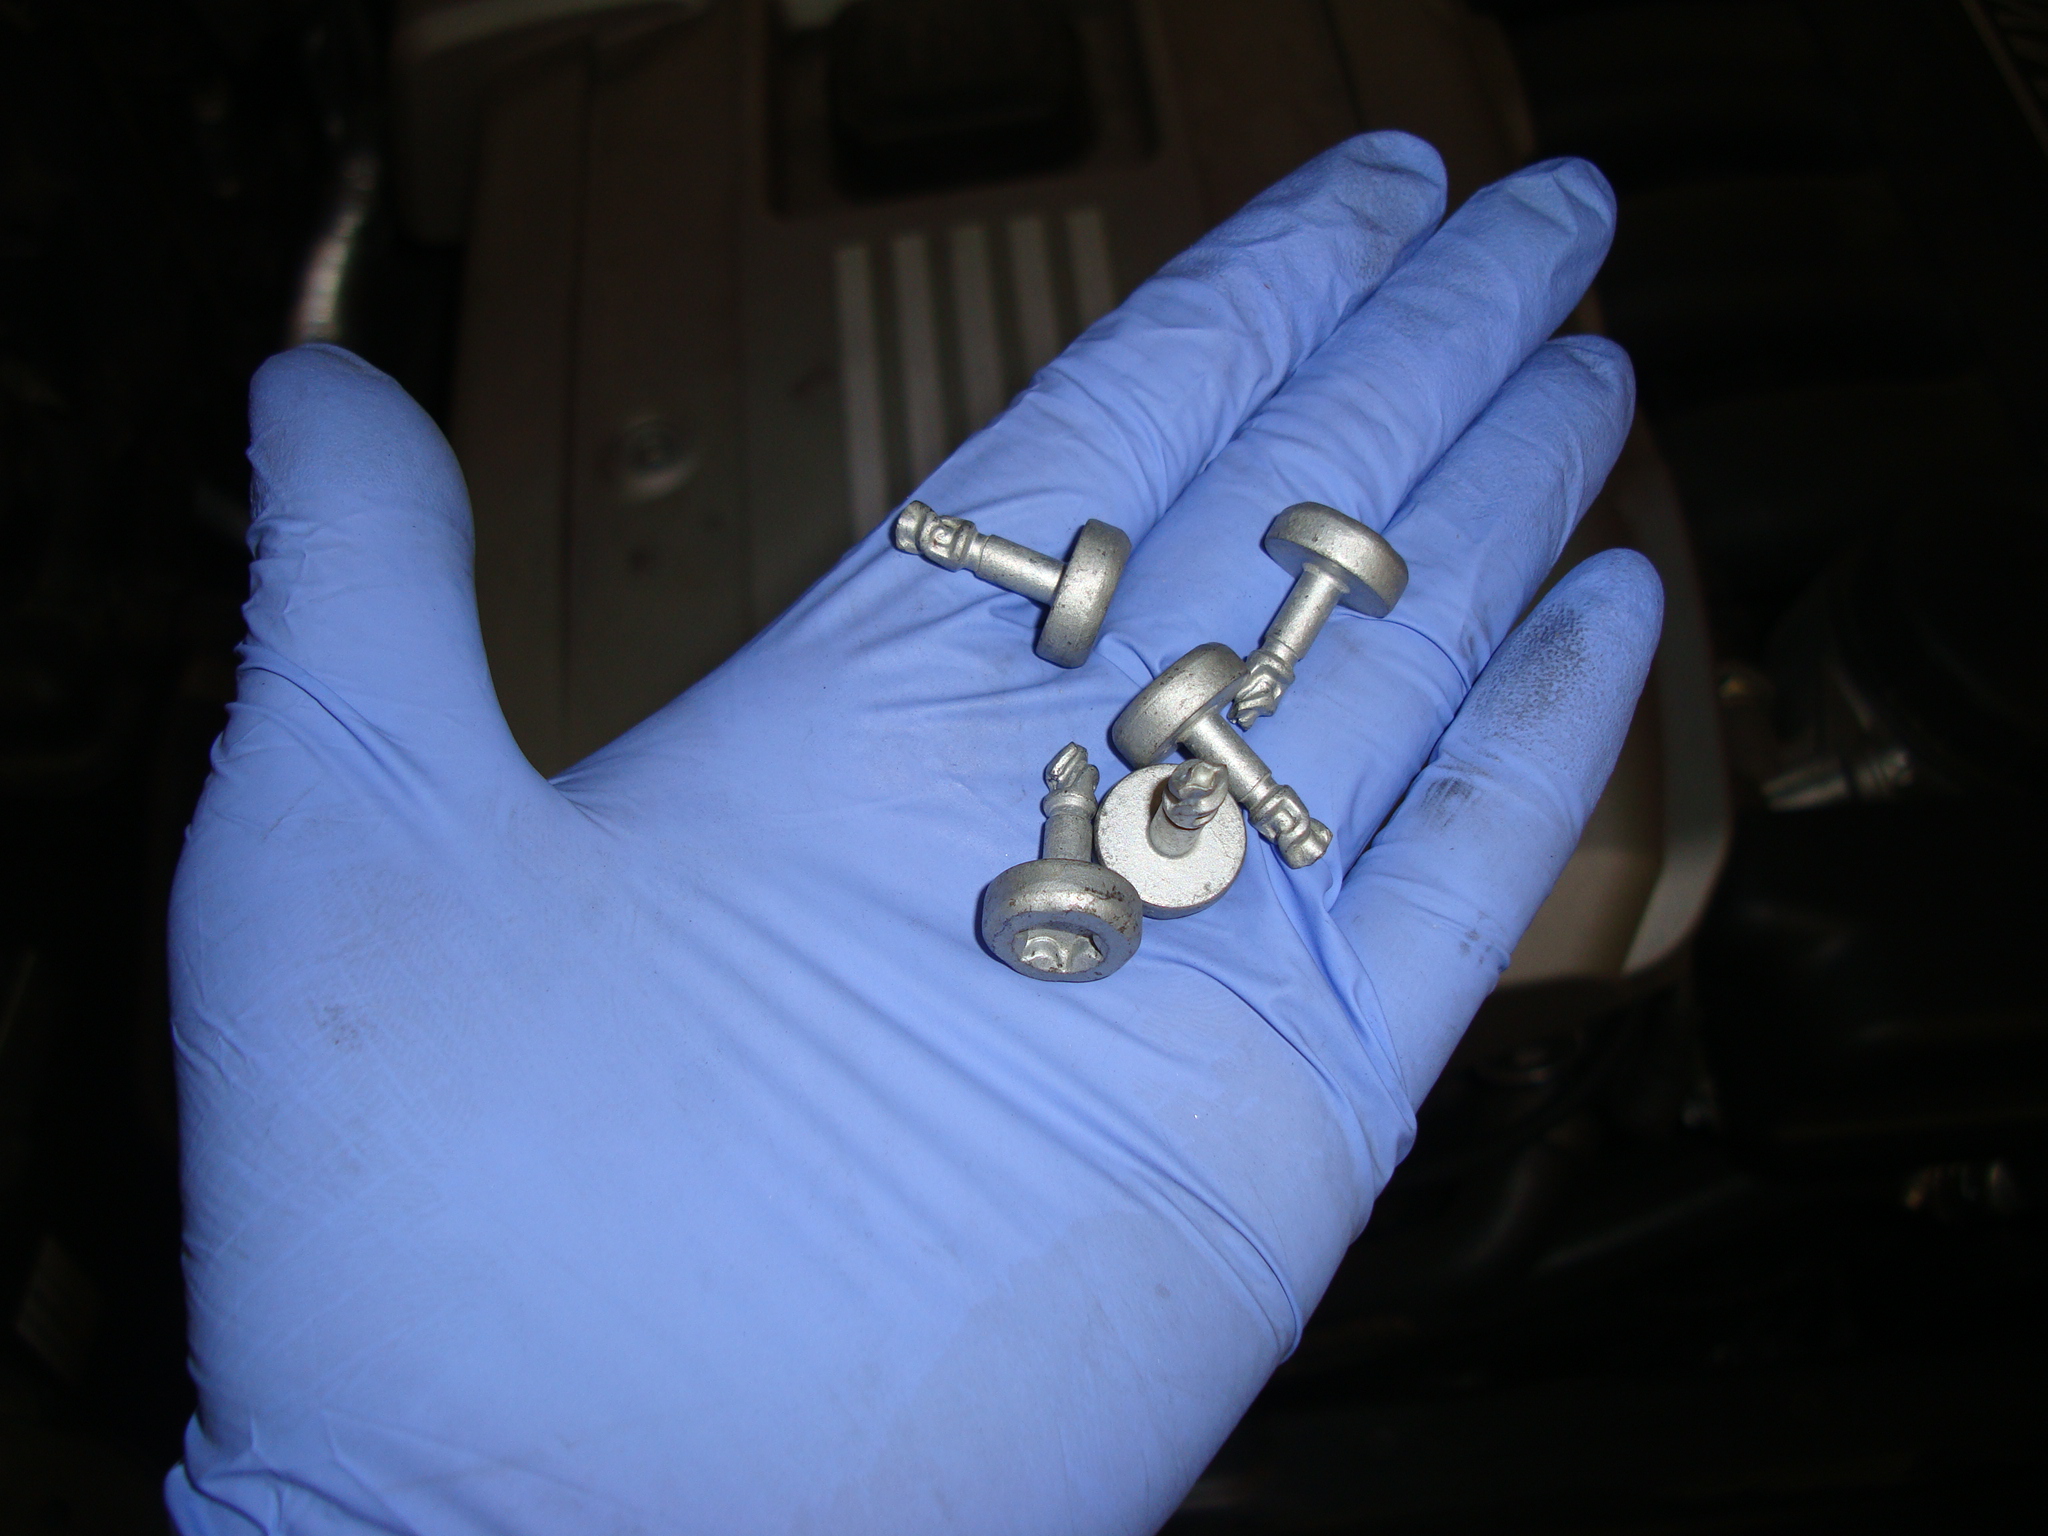
Now you can remove the valve screws. There will be 19 around and 3 in the center of the cover. The 3 in the back is the hardest to get to.
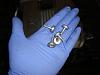
If they break, dont worry, finishing removing all 22 bolts and go back for the broken ones. The bolts are all the same length so remember if any of them came up short. They do not seize so you can use your fingers to genely turn them out after the cover is off.
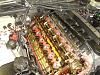
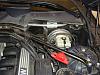
This is how it looks like if you were successful in removing your cover.
Use some towels to wipe around the rim of the cover and engine block. Remote any crusted gasket cooked on but be careful not to flick it into the engine.
Place the new gasket over the base and make sure you dont strech or force it in place. Place a small amount of silicone sealant at the metal to metal seams (timing cover to engine block) and half moon gasket area.
I will repeat this again. Double and triple check that no cables are caught in between the cover and motor. I mean run your fingers the best you can all the way around to ensure nothing is trapped and there is proper closure.
Torque the bolts to 7Nm (63in-lb) once you get to 7Nm, add another 90 degree turn to it. Start with the 3 center bolts. The remainder you will torque in a crisscross pattern around the outside.
Dont forget to ground all cables that came off the body and ignition harness.
Replace gasket for valvetronic motor. Tighten the two screws to 10Nm.
Rebuild to where all the components are connected. Start the car and let run for about 3-5 minutes. Let cool and check for leaks around the gasket. Ensure that check engine light is not on.
I hope this helps someone out there.
I will be pulling info from various posts to get this as complete as I can. Besides my library, I also borrowed some pictures from poster Beaker and from Dracon of e90post.com. I hope you gents don?t mind that I?m sharing your IP for the greater good.
Please note that you are on your own when you attempt this and if you screw up, then it's your own fault.
Parts List
11 12 7 581 215 Valve Cover Gasket
11 12 0 409 288 Valve Cover Screw Set
11 37 7 516 302 Gasket for Valvetronic Motor
Tools List
Torque Wrench 0-100nm reading
HEX bolts socket Size 8
TORX bolt size 15 and 45
TORX socket set (Mainly we will be using E8 and E10)
Precision screwdriver (In case any of the valve screw breaks)
Work light/Flash light
Socket wrench set
Needle noise pliers
Lots of towels
Some things to take note of:
This did not happen to me but, when you start to rebuild, double and triple check that no cables are caught in between the cover and motor. I mean run your fingers the best you can all the way around to ensure nothing is trapped.
Also, a thing that scared the bejeezus out of me was that after all that was said and done, I started the motor and it started smoking after 30 seconds being on. The smell was something between oil and electrical. I primary thought was that it was oil from the cover that spilled over to the exhaust manifold but I didn?t want to take chances. I tried to research this online and couldn?t find anything. I called a few mechanic friends and they said that if your check engine light isn?t on, chances are it is oil. Just let it run for a few minutes and if it gets worse, then you should worry. To my relief, it did stop.
Now to the good stuff. Get ready because you will have to spend about 3-5 hours on it if it?s your first time.
Remove the wire harness duct from the strut. To remove, pull at one end at a time straight up.

Remove the microfilter on both sides of the car. Use the HEX bolt size 8 to unscrew the quick release fasteners
Pry cover spring clip off cover

Remove the weather strip. Peel it off starting at one end to the other.
Next Remove the center trim. Press down where my finger is and slide it to the right.

Remove the rubber gutters
You will see on both sides 3 HEX size 8 quick release on each side of the car and 1 under the center trim. Unlock all of them.

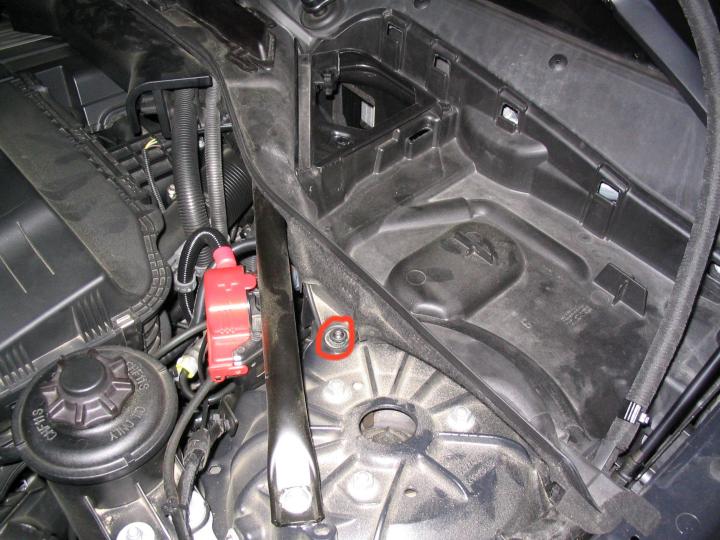
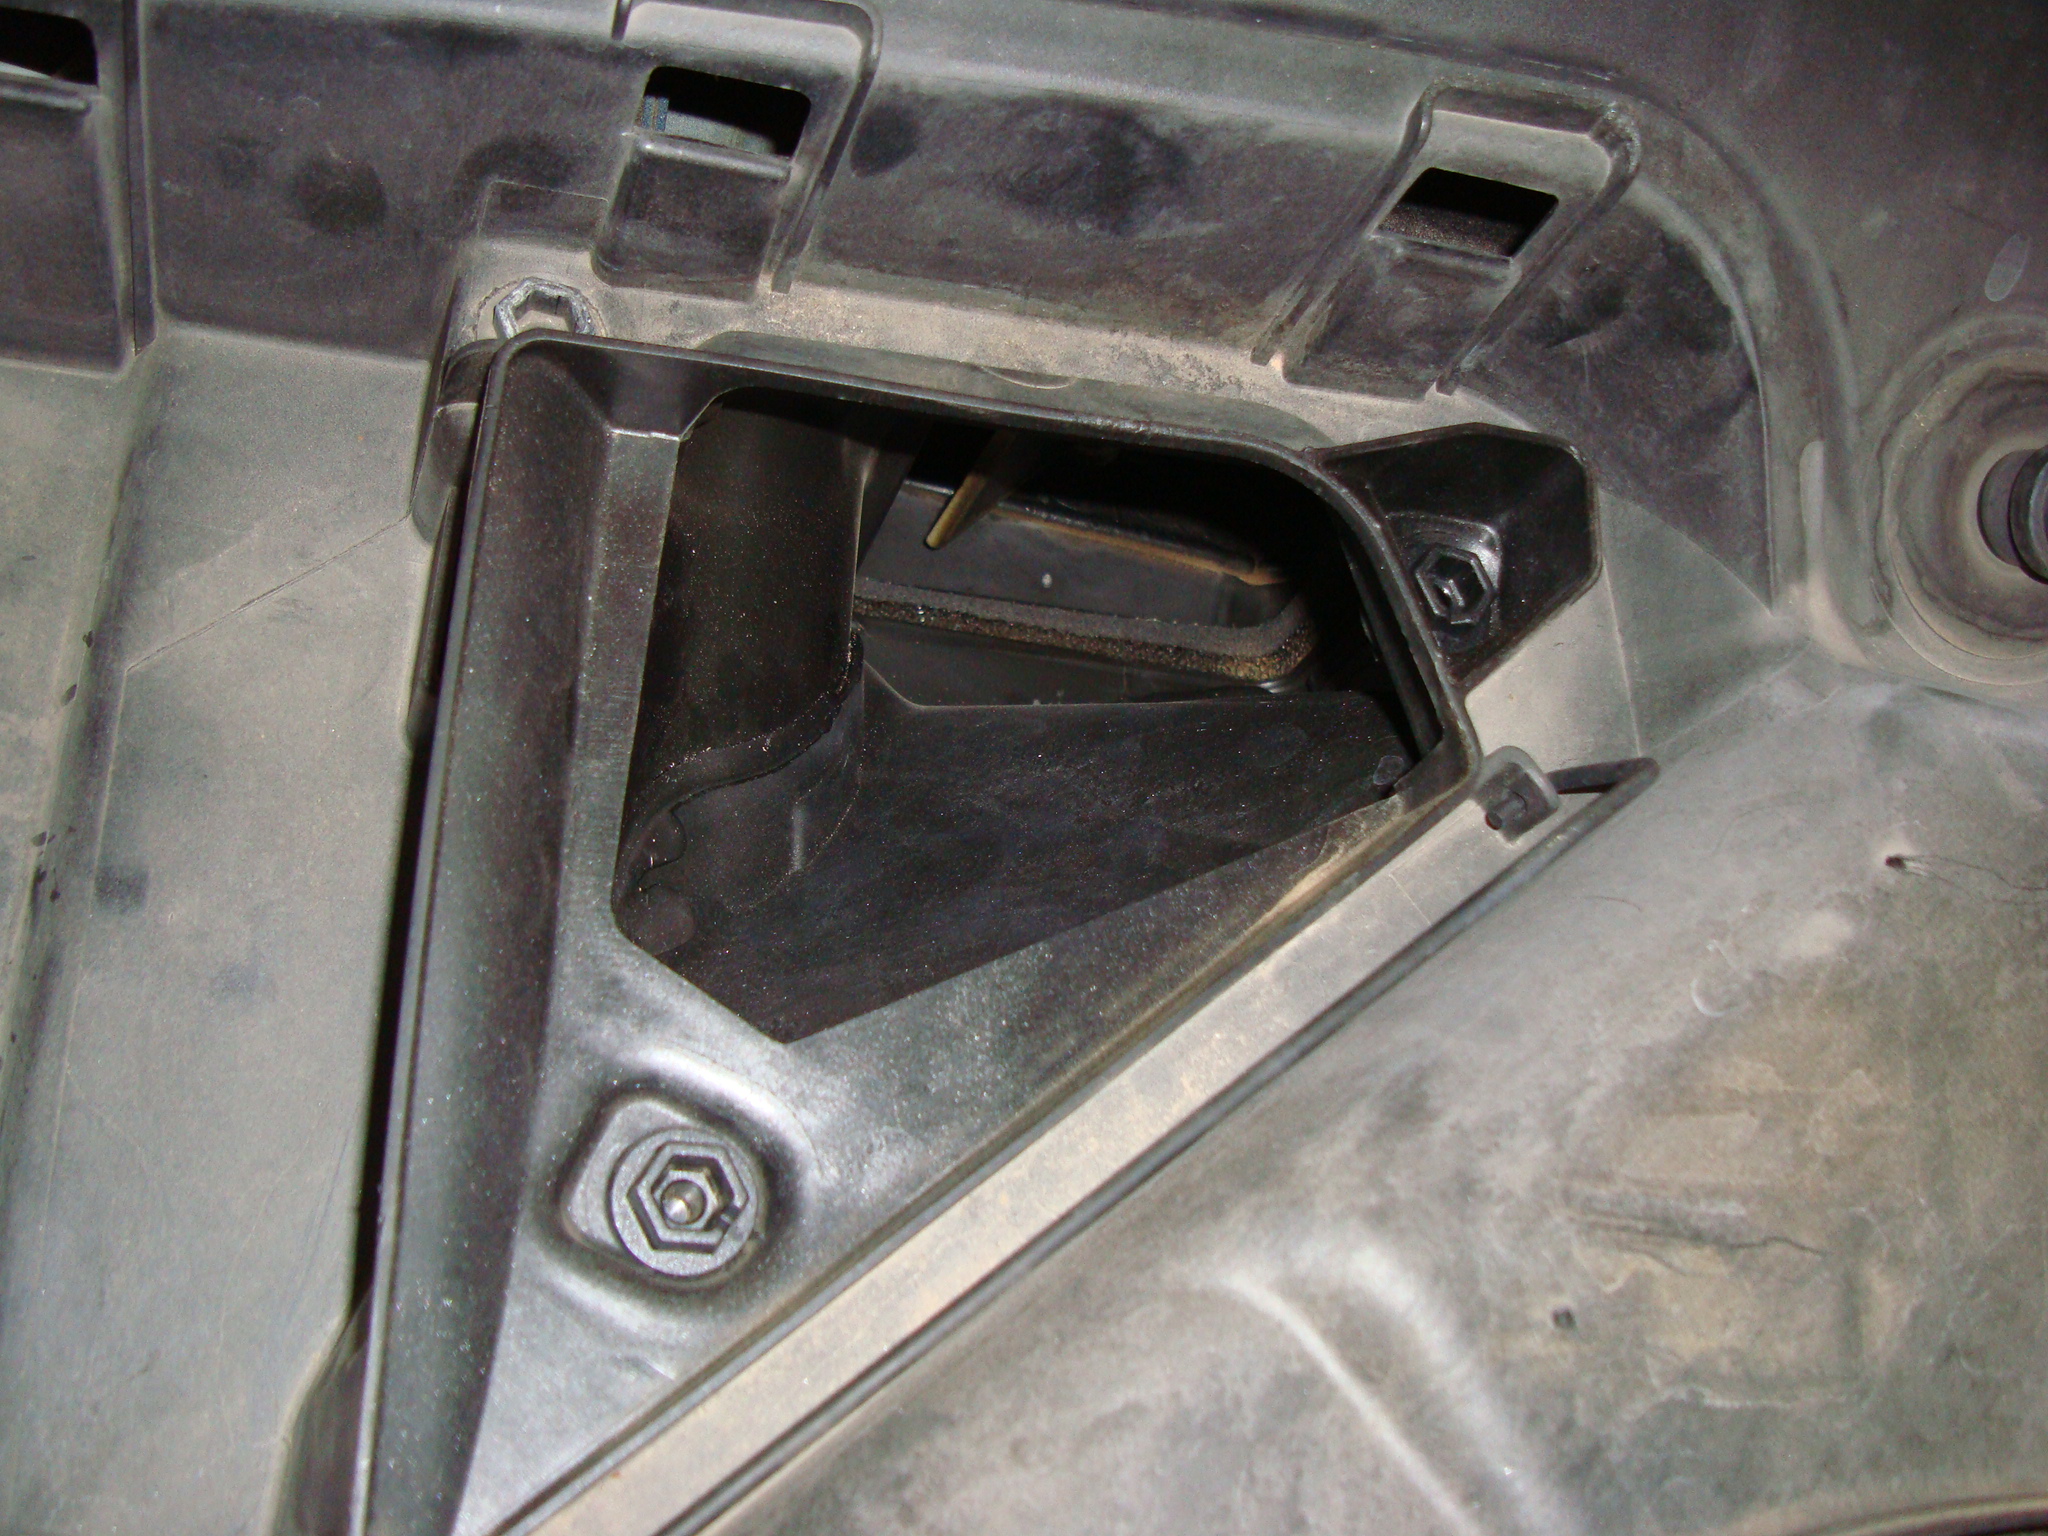
One final screw is a TORX 15 screw. Remove it on both sides and remove the entire microfilter lower housing.
After you get the MF housing off, unbolt the the 4 Torx screw for the struct bar (T45)
Pull the wires out of the struct bar housing and remove the strut bar.
There is one more thing that you need to do in which I do not have a picture of. If you follow the wires to the passanger side, you will notice that they are latched onto a piece of plastic. There are 3 basic bolts that hold it in place. Remove that piece of plastic so that you can get better access to the valve bolts. I tried to work around it but it's easier to remove it.

Next use the T45 to remove the Ignition coil covering. This will only take you a 90 degree turn to unlock them.

Gently pull off the coil cover bracket.

From this point on I have limited pictures so I will be as descriptive as I can.
Detach ignition coil connectors. Unclip ignition coil harness from cylinder head cover and lift aside
Next remove the ignition coils by gently twisting and pulling it up and out. Set aside
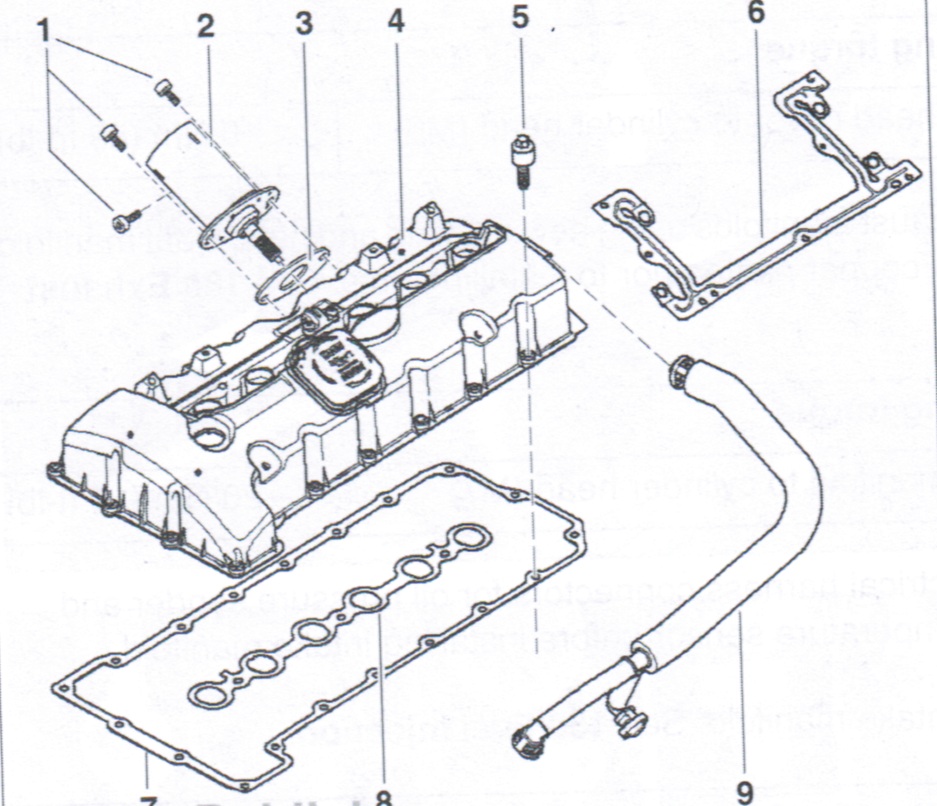
Detach the crankcase breather hose (number 9). This hose connects towards the end of the bay. To detach, use your fingers and squeeze the clips together and then pull outwards.
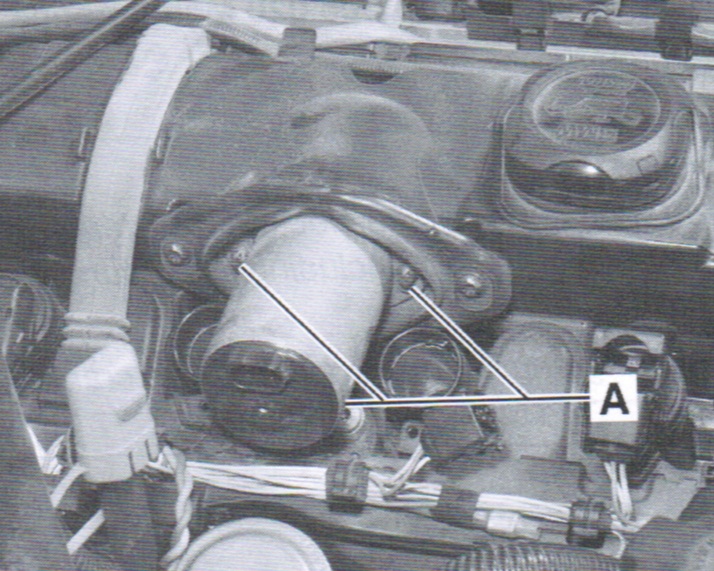
Remove the valvetronic motor. There will be 3 E8 bolts. For easy reinstall, do not spin the coil inside. Note: The torque for reinstall is 10NM (7 ft-lb)
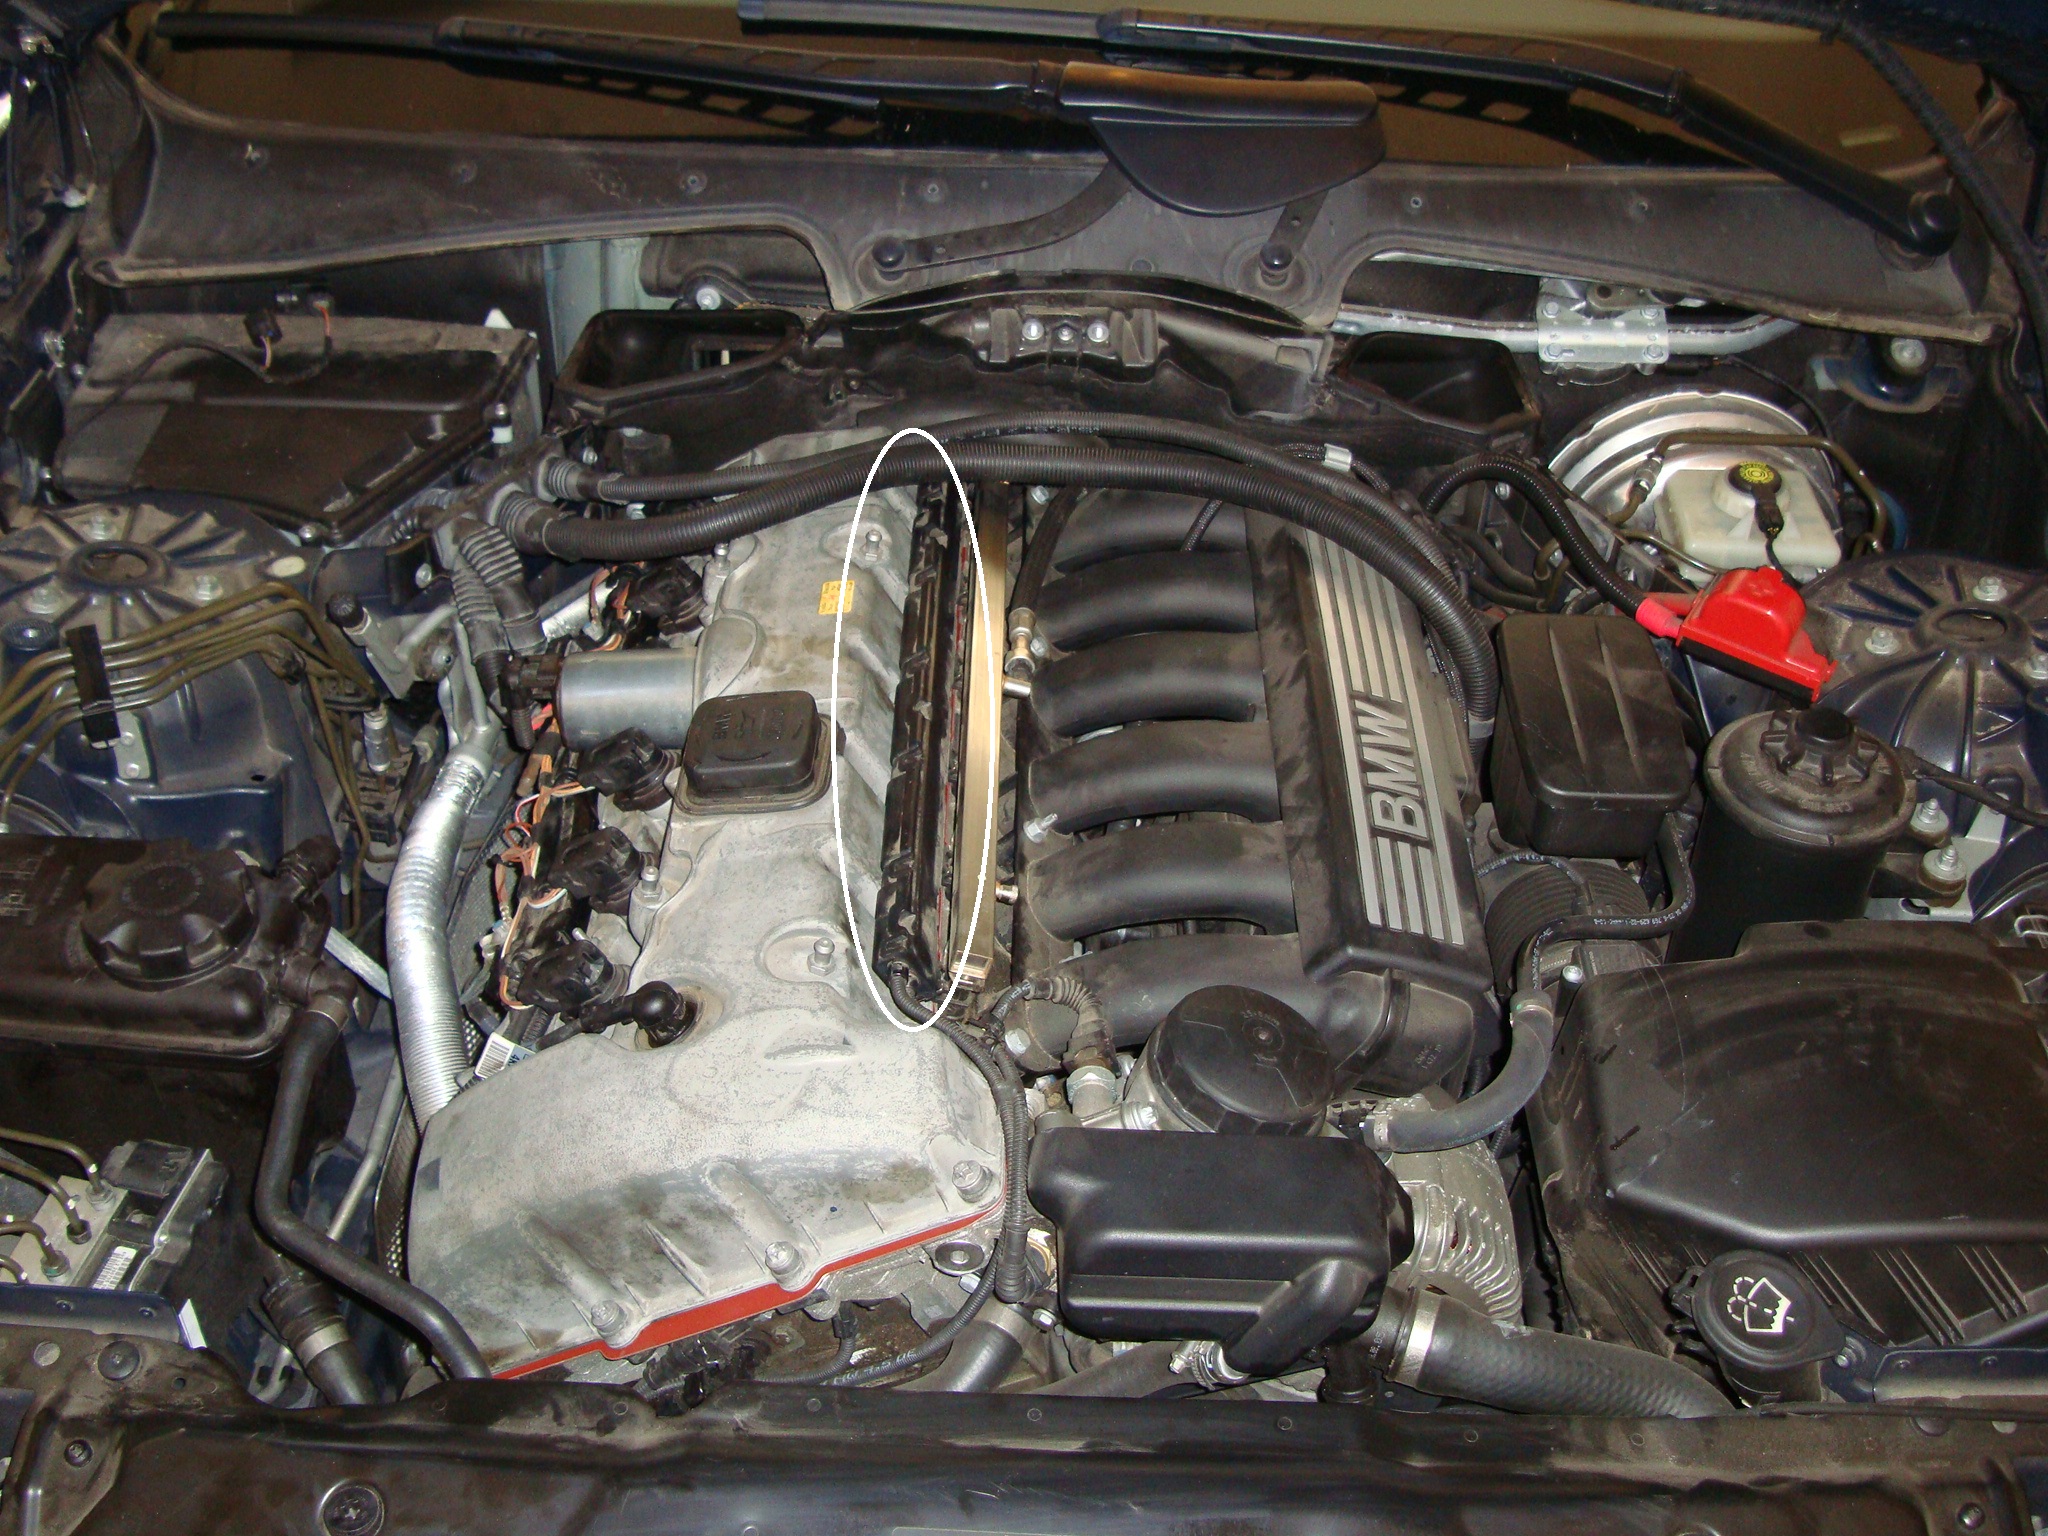
Disconnect the connector strip of the fuel injector (The black electricical strip). There are clips that hold it together between the injector.
Now you can remove the valve screws. There will be 19 around and 3 in the center of the cover. The 3 in the back is the hardest to get to.
If they break, dont worry, finishing removing all 22 bolts and go back for the broken ones. The bolts are all the same length so remember if any of them came up short. They do not seize so you can use your fingers to genely turn them out after the cover is off.
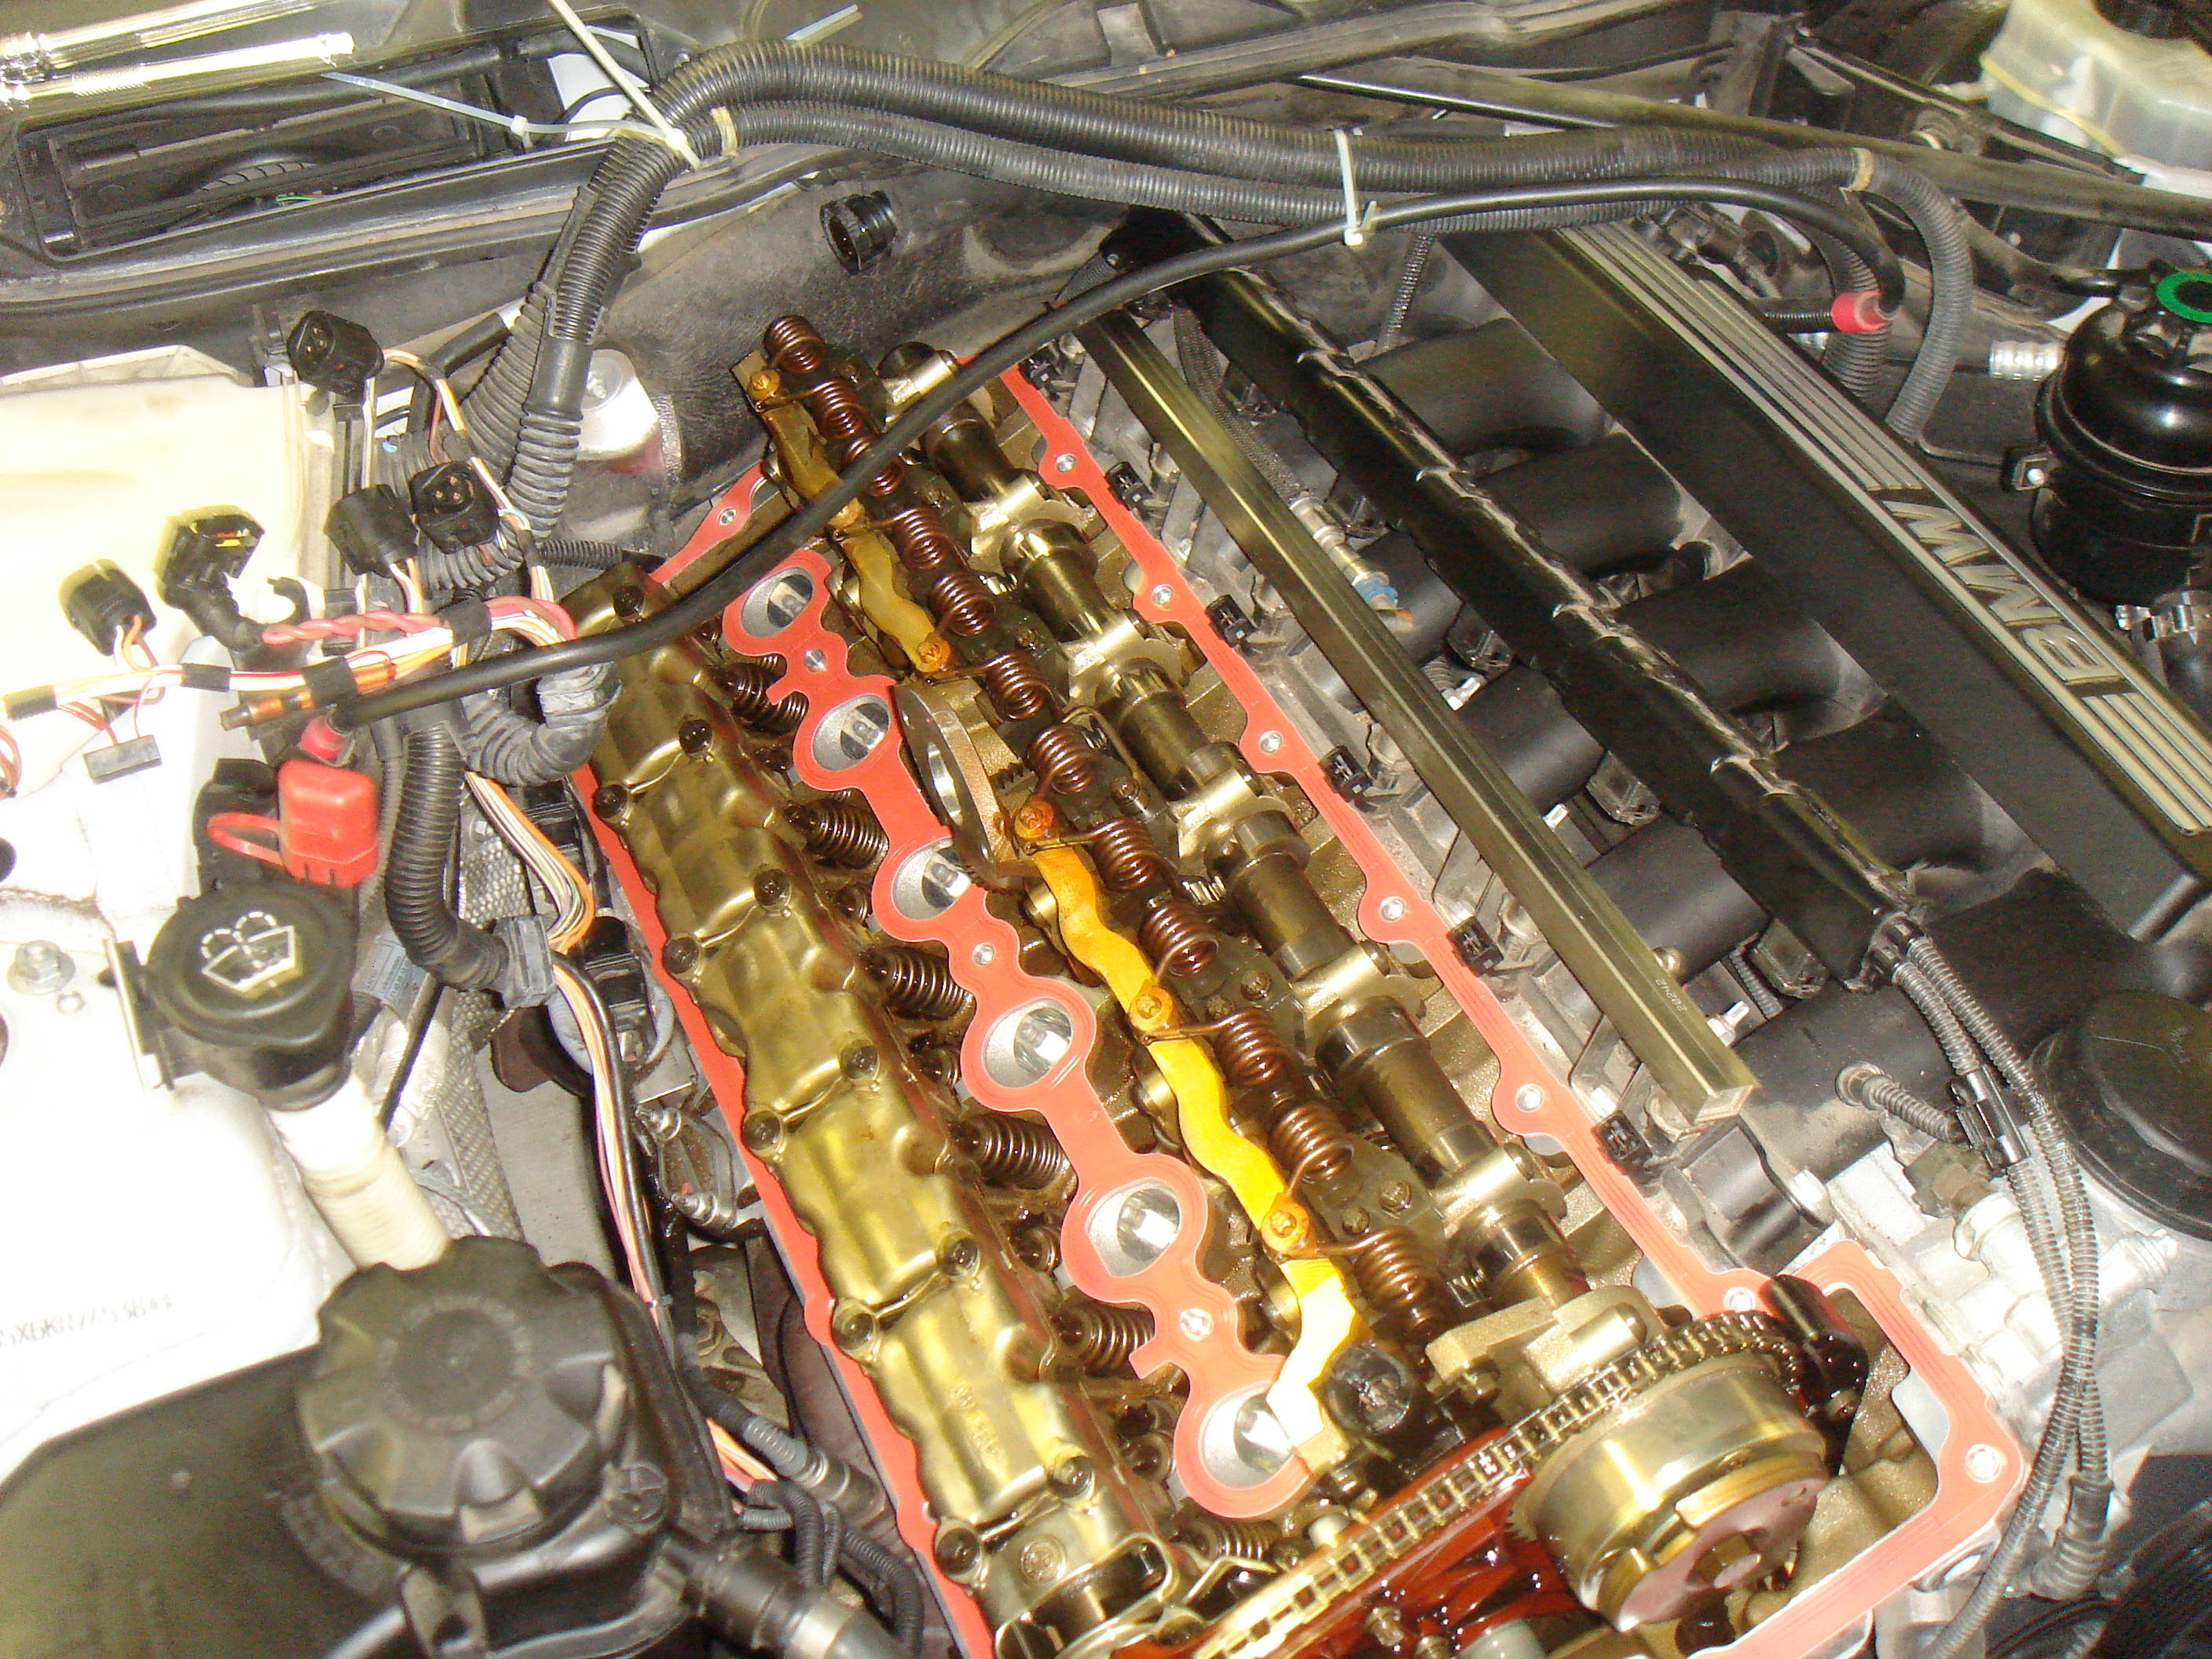
This is how it looks like if you were successful in removing your cover.
Use some towels to wipe around the rim of the cover and engine block. Remote any crusted gasket cooked on but be careful not to flick it into the engine.
Place the new gasket over the base and make sure you dont strech or force it in place. Place a small amount of silicone sealant at the metal to metal seams (timing cover to engine block) and half moon gasket area.
I will repeat this again. Double and triple check that no cables are caught in between the cover and motor. I mean run your fingers the best you can all the way around to ensure nothing is trapped and there is proper closure.
Torque the bolts to 7Nm (63in-lb) once you get to 7Nm, add another 90 degree turn to it. Start with the 3 center bolts. The remainder you will torque in a crisscross pattern around the outside.
Dont forget to ground all cables that came off the body and ignition harness.
Replace gasket for valvetronic motor. Tighten the two screws to 10Nm.
Rebuild to where all the components are connected. Start the car and let run for about 3-5 minutes. Let cool and check for leaks around the gasket. Ensure that check engine light is not on.
I hope this helps someone out there.
 07-11-2011, 03:53 PM
#3
New Members
Thread Starter
Join Date: Jul 2011
Location: Houston
Posts: 2
Likes: 0
Received 0 Likes
on
0 Posts
My Ride: E60 Blue
Model Year: 2006
The car is a 2006 530i. My indy mechanic told me that the gasket is leaking oil and that it was common when the cars get to about 55k miles.
07-06-2012, 06:44 PM
#4
New Members

Join Date: Nov 2011
Location: Whittier
Posts: 1
Likes: 0
Received 0 Likes
on
0 Posts
Great write up! I'm going to do this tonight and needed torque specs. I also need to replace the oil filter housing gaskets and a the transmission gasket in the transmission that sheilds the electrical connection. So I'll be doing a trans fluid change. My 06 E30 has 79k miles and it needs a little tidying up.
07-08-2012, 03:24 PM
#5
Senior Members
Wow. I did this on same engine from a 3 series. It was an 09 with 107K on it. But I had to change a few other parts along with it (major parts) and it took me a total of 10 hours to do. I did all of the above in addition to more. I was working a little slow but I knew what I was doing so it equalled out. WHAT A PITA. Anyone with an M54 engine should feel blessed right now. So much easier to work on besides it being a better engine.
07-09-2012, 08:34 PM
#6
Members
Senior Members
Join Date: Mar 2012
Location: SOCAL
Posts: 710
Likes: 0
Received 0 Likes
on
0 Posts
My Ride: 2006 BMW 530I
Model Year: 530i
I had mine replaced about a year ago by a BMW Dealer at 53,000 miles. A local independent shop did not want the job because he was afraid the valvetronic can mess up the timing and do more damage to the car if he could not put it back correctly. Regarding to that, did you "simply" unscrew the three bolts, pulled it out and reinstalled it by simply sliding it back in? Please confirm.
Thanks for the write up!
Thanks for the write up!
07-10-2012, 01:25 PM
#7
Senior Members
I had mine replaced about a year ago by a BMW Dealer at 53,000 miles. A local independent shop did not want the job because he was afraid the valvetronic can mess up the timing and do more damage to the car if he could not put it back correctly. Regarding to that, did you "simply" unscrew the three bolts, pulled it out and reinstalled it by simply sliding it back in? Please confirm.
Thanks for the write up!
Thanks for the write up!

 03-26-2013, 07:09 PM
#10
Senior Members