E60 Sunroof Seal Replacement DIY
 04-27-2013, 07:12 PM
#1
Contributors
Thread Starter

Join Date: Mar 2010
Location: Los Angeles, CA
Posts: 3,098
Likes: 0
Received 4 Likes
on
4 Posts
My Ride: BMW
Model Year: 2006
I noticed some water stains on my headliner and also, there is some very significant audible difference between when the sunroof shade is closed or open. I figured that it's time to replace the sunroof seal.
What you need:
New seal: Part No. 54107245551
Goo Gone for cleaning off the adhesive. http://www.autozone.com/autozone/acc...er=539309_0_0_
A couple of rags for wiping and cleaning
Scissors or cutters to trim the seal
Black silicone adhesive sealant. You can get this from Autozone. It comes in a tube. http://www.autozone.com/autozone/acc...er=526731_0_0_
Initial Warning. Work by standing in the back seat area. If you work in the front seats, you may be tempted to put your foot down on the passenger seat and possibly mess up your OC3 or passenger occupancy matt. If you do you can get the dreaded Passenger restraint malfunction errors on the iDrive.
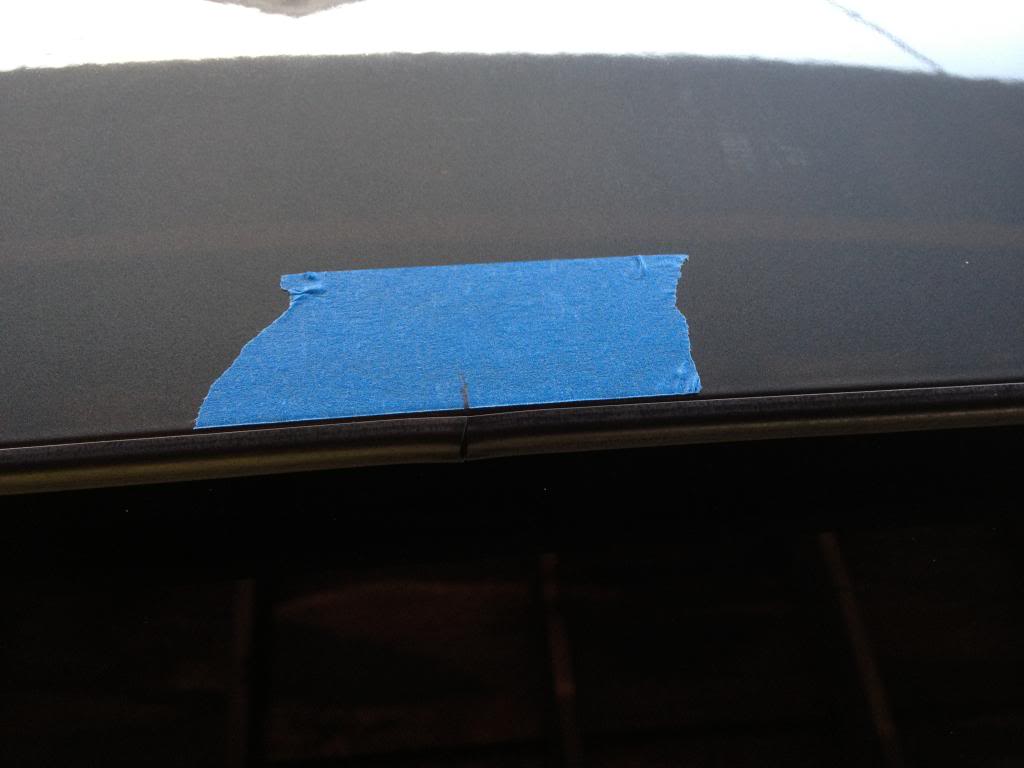
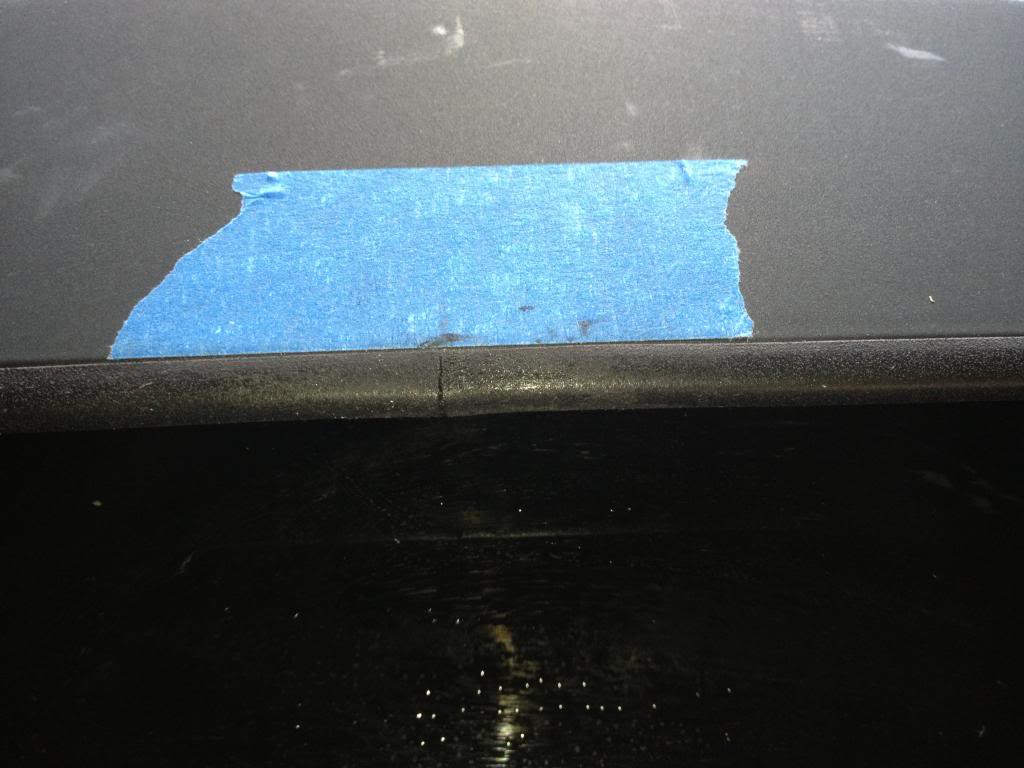
First off, using a masking tape, I marked the center of the sunroof towards the rear window. This gave a center and beginning point of installing the new seal.
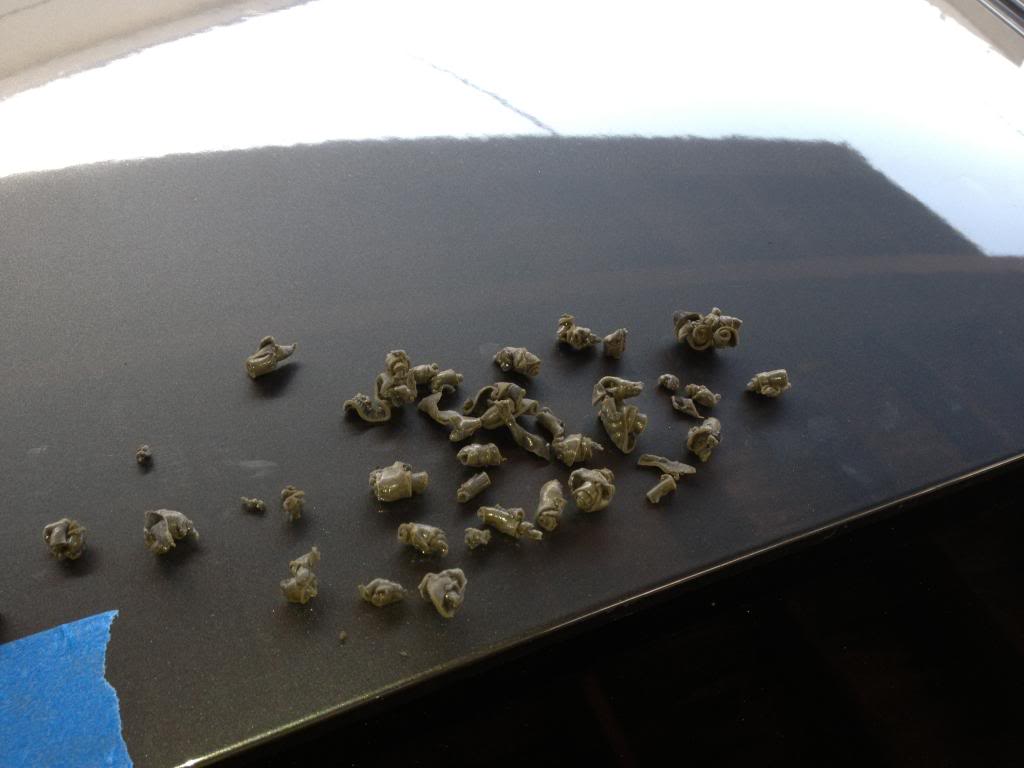
Then I began to start peeling off the old sunroof seal. Taking off the old adhesive is lengthy. It's best to just sort of roll it off...
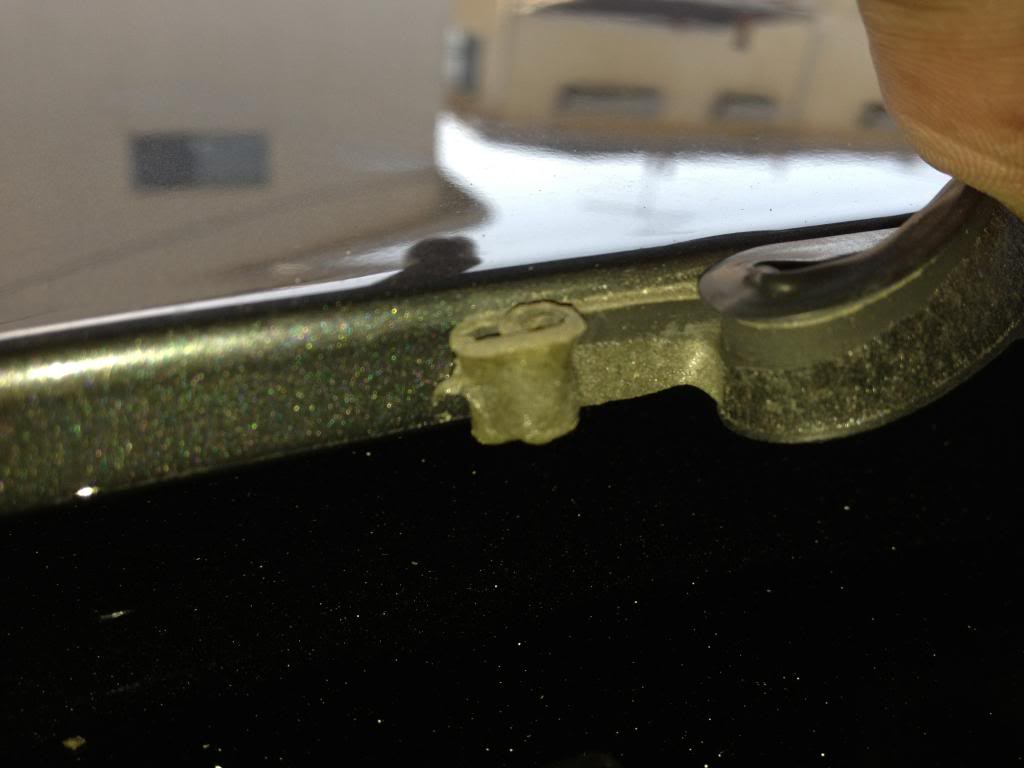
Some of the old adhesive rolls I took off:
Once you got all the adhesive off, use some Goo Gone to clean out all the extra adhesive. Then use a wet cloth to wipe up all the Goo Gone until the surface is nice clean.
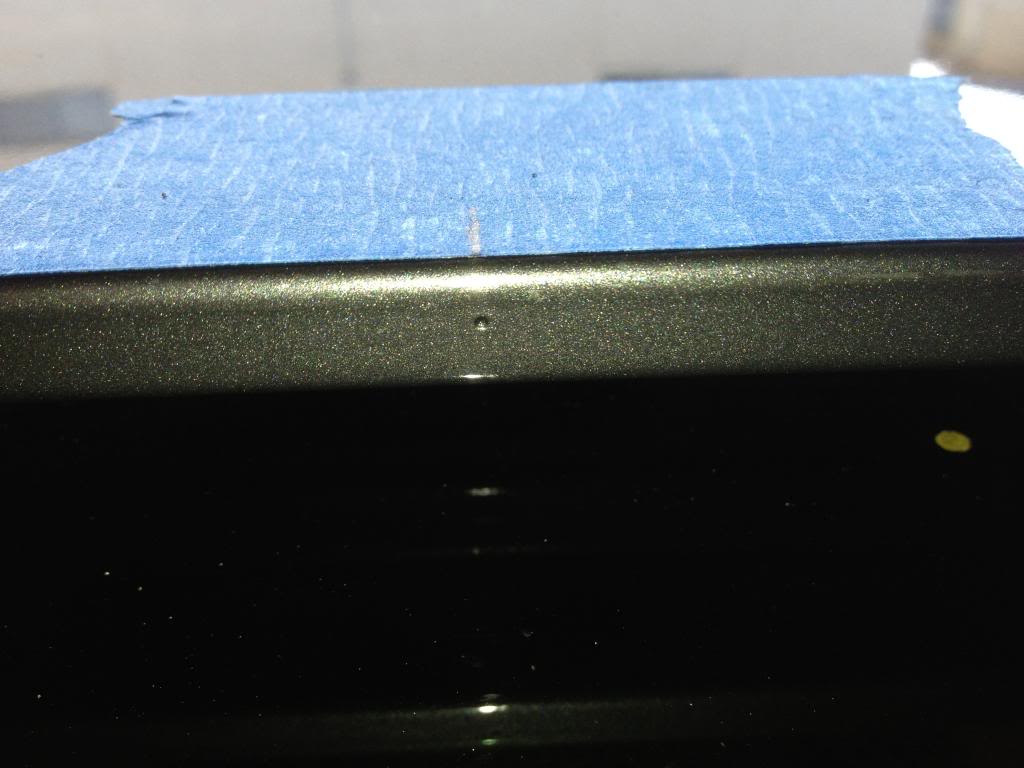
Once all the adhesive is cleaned up, I noticed that there is a small dimple to mark the center. It seems I didn't need to use the masking tape to mark the center after all.:
Now it's time to install the new seal. Notice the big difference in size\width between the old and new seal. I think the new seal is redesigned to be thicker.:
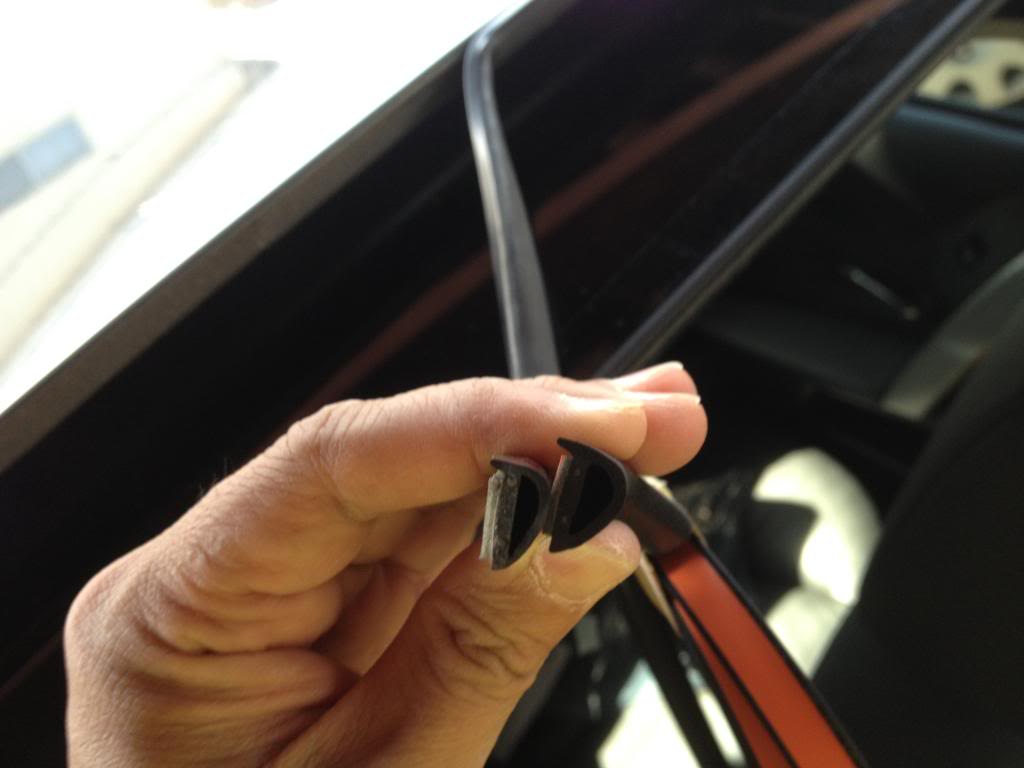
As you can see, there is a lip that extends out. That goes on the top side of the sunroof.
From there, peeling and mounting the new seal is self explanatory. Start mounting and feeding the new seal and work your way around the sunroof. No need to worry about stretching the seal to make sure you have enough, because you have plenty. When you finally reach the end, cut about 1.5mm extra and make the ends meet.
A little extra I did was to fill in the gap with some black silicone adhesive.
Once you're all done, it's time to initialize the sunroof. Otherwise, the sunroof anti-trap may not let you close the sunroof.
I took the car for a test drive and what a difference it made in road noise as far as the sunroof is concerned. I can't tell an audible difference whether or not the sunroof shade is closed or not. I still have to do a freeway test though.
What you need:
New seal: Part No. 54107245551
Goo Gone for cleaning off the adhesive. http://www.autozone.com/autozone/acc...er=539309_0_0_
A couple of rags for wiping and cleaning
Scissors or cutters to trim the seal
Black silicone adhesive sealant. You can get this from Autozone. It comes in a tube. http://www.autozone.com/autozone/acc...er=526731_0_0_
Initial Warning. Work by standing in the back seat area. If you work in the front seats, you may be tempted to put your foot down on the passenger seat and possibly mess up your OC3 or passenger occupancy matt. If you do you can get the dreaded Passenger restraint malfunction errors on the iDrive.
First off, using a masking tape, I marked the center of the sunroof towards the rear window. This gave a center and beginning point of installing the new seal.

Then I began to start peeling off the old sunroof seal. Taking off the old adhesive is lengthy. It's best to just sort of roll it off...

Some of the old adhesive rolls I took off:

Once you got all the adhesive off, use some Goo Gone to clean out all the extra adhesive. Then use a wet cloth to wipe up all the Goo Gone until the surface is nice clean.
Once all the adhesive is cleaned up, I noticed that there is a small dimple to mark the center. It seems I didn't need to use the masking tape to mark the center after all.:

Now it's time to install the new seal. Notice the big difference in size\width between the old and new seal. I think the new seal is redesigned to be thicker.:

As you can see, there is a lip that extends out. That goes on the top side of the sunroof.
From there, peeling and mounting the new seal is self explanatory. Start mounting and feeding the new seal and work your way around the sunroof. No need to worry about stretching the seal to make sure you have enough, because you have plenty. When you finally reach the end, cut about 1.5mm extra and make the ends meet.

A little extra I did was to fill in the gap with some black silicone adhesive.
Once you're all done, it's time to initialize the sunroof. Otherwise, the sunroof anti-trap may not let you close the sunroof.
I took the car for a test drive and what a difference it made in road noise as far as the sunroof is concerned. I can't tell an audible difference whether or not the sunroof shade is closed or not. I still have to do a freeway test though.
Last edited by balbs; 04-27-2013 at 08:00 PM.


Thread
Thread Starter
Forum
Replies
Last Post
rackhacker9275
New Member Introductions
5
05-19-2015 02:42 PM
thesalboy
Other BMW Models
2
04-08-2015 09:13 AM
mikekilpatrick
F10, F11 Parts, Accessories and Mods
0
03-06-2015 05:40 AM