
DIY E9x LED License Plate Lights/ Harness
 12-21-2011, 09:57 AM
#1
Senior Members
Thread Starter
Join Date: Mar 2011
Location: KY
Posts: 596
Likes: 0
Received 0 Likes
on
0 Posts
My Ride: 02/2006 525i Titanium Silver Metallic
Manual 6-Speed
DIY E9x LED License Plate Lights/ Harness
NO iDRIVE ERRORS
Making these harness are pretty easy - Take your time and have fun, do a good job!
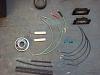
Parts Needed:
From GetBMWparts.com:
2x LED Fixtures for E9x Cars 36267193293 $16.21 ea
4x Bushing Contact (with 1 foot black wire attached) 61130005197 $1.73 ea
4x Circular Contact (with green wire attached) 31130007452 $2.18 ea
2x Universal Socket (Blue - Fits into the plug on the lights) 61136925634 $1.73 ea
From Radio Shack:
1 pk (2ea) 10W 50 Ohm 10% Resistors $2.19
60/40 60% Rosin Core Solder
Heat Shrink tubing
DIY:
1. Lay out all parts needed
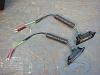
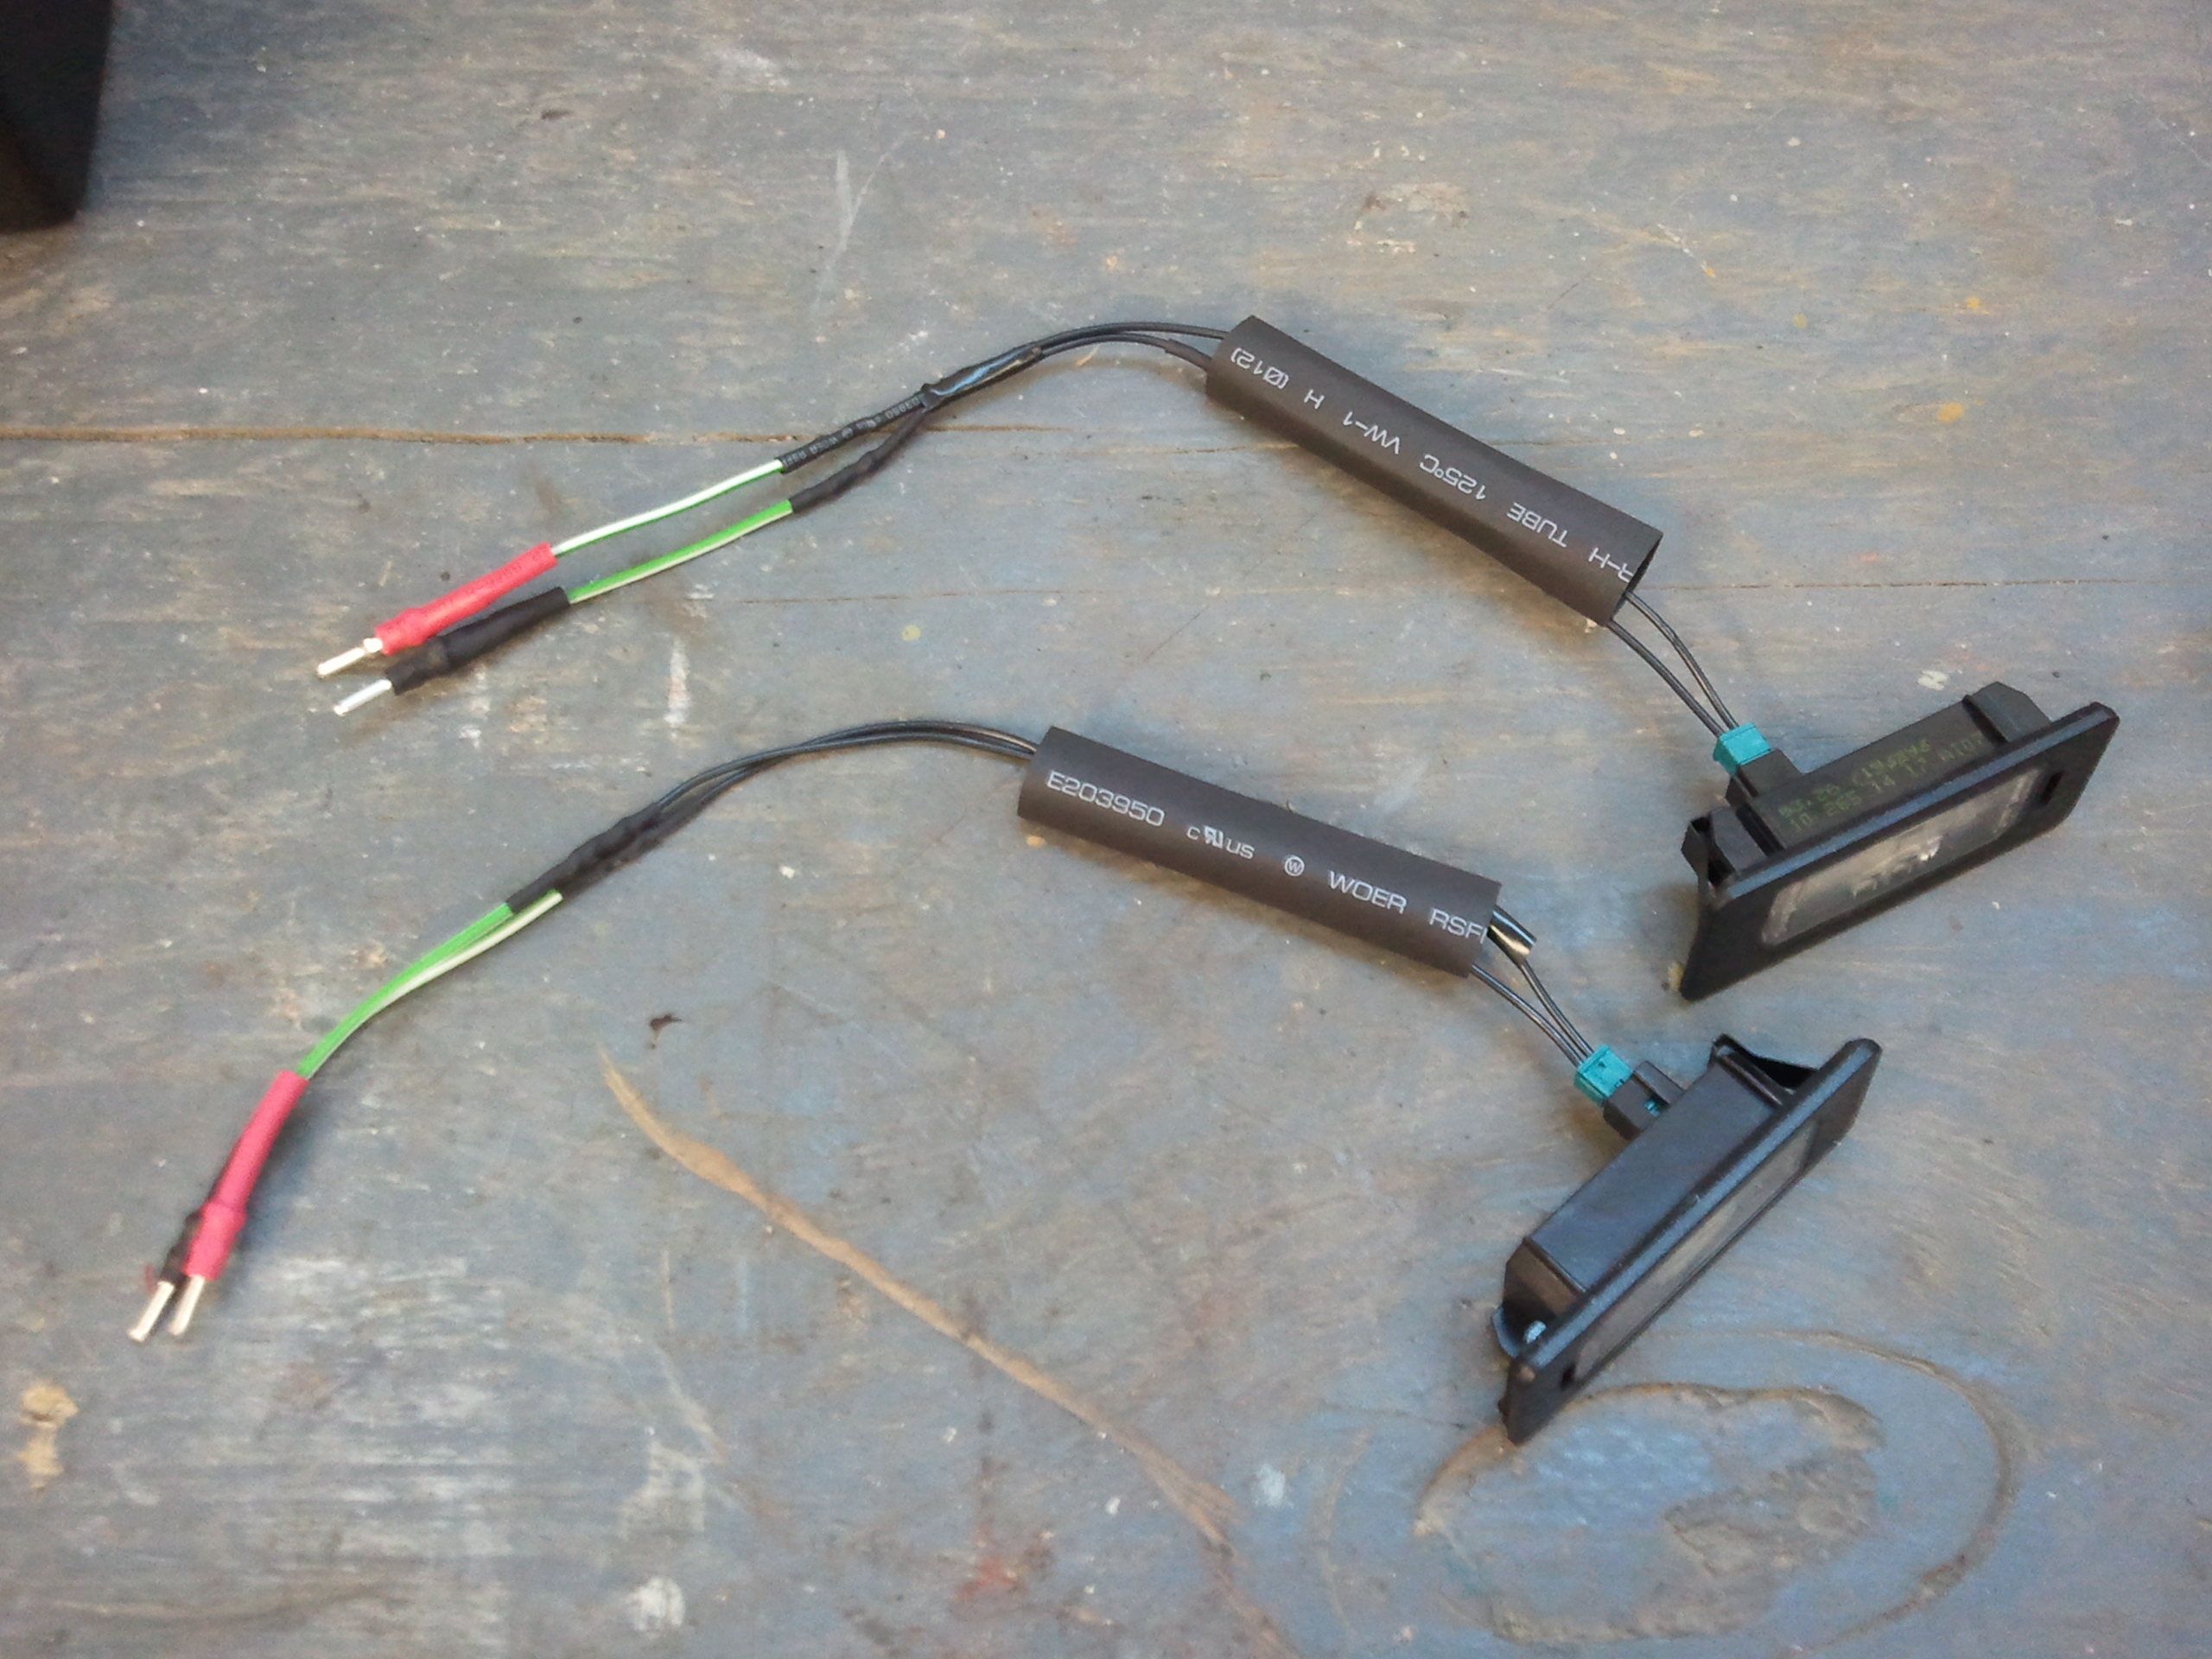
2. Trim the Bushing contacts down to about 8" and strip the ends, then twist the wire firmly.
3. Take 2 ea of the Bushing contacts and insert them into the Universal sockets (making sure they click in good), then clip down the tab on the sockets to lock the bushing contact in.
4. Next, come down about 2" on one of the wires, and strip an area to connect one side of the resistor to.
5. Come down about 4=6" on the other wire, and strip an area to connect the other end of the resistor to.
6. Crimp your resistor connections, then solder them to ensure a durable connection.
7. Take 2 of the Circular contacts and cut them down to about 4". And strip/ twist the wires.
8. Cut 2 small sections of heat shrink and slide them down your black wires (after you connect your ends, you will shrink these over your solder joint)
9. Connect the ends of the circular contacts with the ends of the 2 wires from your harness and twist them and solder them.
10. Slide your heat shrinks over your solder joints and use a heat gun to securely shrink tubing over the solder joints.
11. Now, you want to put some heat shrink tubing over the ends of the circular contacts to protect them from touching anything in your trunk lid and shorting out. (see picture)
12. Apply electrical tape over any exposed areas such as the resistor connections.
---
Installation
1. Pop trunk and remove panel - 2 screws and a bunch of tabs.
2. Remove your old license plate light fixtures and plug in your new harnesses and lights.
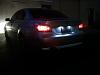
3. Before putting everything back together, turn on your lights and test to make sure the new LED fixtures light up.
!!! If they do not light up, simply turn off your lights, and switch around the circular contacts in the plugs. !!!
4. Once you have the lights working, raise the trunk lid and feed the harnesses through to the back side with both hands on both sides ensuring your harness does not get hung up on anything.
5. If you want you can zip tie your harness to the trunk lid to keep it from moving around while driving.
6. You can now reinstall the trunk lid lining and snap your lights in.
BOOM! That's it!!
**Note: When I finished up, I slid some large heat shrink tubing over the resistors just to keep them from touching anything as they do get warm.
Have fun guys!
NO iDRIVE ERRORS
Making these harness are pretty easy - Take your time and have fun, do a good job!
Parts Needed:
From GetBMWparts.com:
2x LED Fixtures for E9x Cars 36267193293 $16.21 ea
4x Bushing Contact (with 1 foot black wire attached) 61130005197 $1.73 ea
4x Circular Contact (with green wire attached) 31130007452 $2.18 ea
2x Universal Socket (Blue - Fits into the plug on the lights) 61136925634 $1.73 ea
From Radio Shack:
1 pk (2ea) 10W 50 Ohm 10% Resistors $2.19
60/40 60% Rosin Core Solder
Heat Shrink tubing

DIY:
1. Lay out all parts needed
2. Trim the Bushing contacts down to about 8" and strip the ends, then twist the wire firmly.
3. Take 2 ea of the Bushing contacts and insert them into the Universal sockets (making sure they click in good), then clip down the tab on the sockets to lock the bushing contact in.
4. Next, come down about 2" on one of the wires, and strip an area to connect one side of the resistor to.
5. Come down about 4=6" on the other wire, and strip an area to connect the other end of the resistor to.
6. Crimp your resistor connections, then solder them to ensure a durable connection.
7. Take 2 of the Circular contacts and cut them down to about 4". And strip/ twist the wires.
8. Cut 2 small sections of heat shrink and slide them down your black wires (after you connect your ends, you will shrink these over your solder joint)
9. Connect the ends of the circular contacts with the ends of the 2 wires from your harness and twist them and solder them.
10. Slide your heat shrinks over your solder joints and use a heat gun to securely shrink tubing over the solder joints.
11. Now, you want to put some heat shrink tubing over the ends of the circular contacts to protect them from touching anything in your trunk lid and shorting out. (see picture)
12. Apply electrical tape over any exposed areas such as the resistor connections.
---
Installation
1. Pop trunk and remove panel - 2 screws and a bunch of tabs.
2. Remove your old license plate light fixtures and plug in your new harnesses and lights.
3. Before putting everything back together, turn on your lights and test to make sure the new LED fixtures light up.
!!! If they do not light up, simply turn off your lights, and switch around the circular contacts in the plugs. !!!
4. Once you have the lights working, raise the trunk lid and feed the harnesses through to the back side with both hands on both sides ensuring your harness does not get hung up on anything.
5. If you want you can zip tie your harness to the trunk lid to keep it from moving around while driving.
6. You can now reinstall the trunk lid lining and snap your lights in.
BOOM! That's it!!
**Note: When I finished up, I slid some large heat shrink tubing over the resistors just to keep them from touching anything as they do get warm.

Have fun guys!

 12-21-2011, 10:44 PM
#3
Contributors
Join Date: Dec 2010
Location: BW
Posts: 385
Likes: 0
Received 2 Likes
on
2 Posts
My Ride: Many BMW's
I love the OEM LED ones , less bright than those million LED aftermarket ones but last forever ,, i bought a set in 2008 , and since then , i move them from one car to the other ..
" 4x Circular Contact (with green wire attached) 31130007452 $2.18 ea " , I think the part number is wrong
" 4x Circular Contact (with green wire attached) 31130007452 $2.18 ea " , I think the part number is wrong
12-22-2011, 03:10 AM
#4
Senior Members
Thread Starter
Join Date: Mar 2011
Location: KY
Posts: 596
Likes: 0
Received 0 Likes
on
0 Posts
My Ride: 02/2006 525i Titanium Silver Metallic
Manual 6-Speed


Thread
Thread Starter
Forum
Replies
Last Post
umnitza
Vendor Classifieds
1
11-03-2015 02:58 PM