
The 2 Day ULTIMATE Detail!

Thread Starter
Contributors
Joined: Feb 2006
Posts: 14,646
Likes: 0
From: NY
My Ride: 2008 Silverstone II E60 M5 2012 E70 AW X5 50i Sport w/ LCI Aero Kit and Rocker Panels
So I finally got around to doing my semi-annual detail. It took me 2 days, but it was well worth it. However, this time, I changed it up a bit. As some of you know, I was and have been, a Zaino addict for some time. Based on feedback from some other members, I tried some new products.
I was extremely anal about this particular detail and probably did more than I needed to do, but I wanted it to be perfect. A Jet Black car is the hardest color to clean and I knew it would take time if I wanted it looking better than new.
I am so happy with the end result. The car has never been glossier/wetter looking and JetSEAL 109 is by far the best sealant I've used to date. It gives off the BEST gloss and shine I've ever seen. It's also impenetrable (I'm an Ex-Rejex user too). The Polishes are outstanding! I think they do a much better job than Z5 Pro, Z2 and Z-PC Fusion.
The Products used were:
1) Dawn
2) 2 Sets of Microfiber Mitts
3) 2 Buckets
4) Zaino Z7 Car Wash
5) Foam Cannon (http://www.autogeek.net/auhagafogun.html)
6) Griots Random Orbital
7) Lake Country CCS Pads (Orange, Blue and Red)
8) Menzerna Intensive Polish
9) Menzerna Final Polish
10) JetSEAL 109 by The Chemical Guys
11) Microfiber Towels
12) Microfiber Bonnets
13) Lambswool pad for Orbital
14) Ultima Elastrofoam Paint Cleaning System w/ Sponge
15) Mother's Clay Bar
16) DP Xtreme Foam Formula Auto Shampoo
17) Zaino Z-8 Grand Finale Spray
18) Blue Painters Tape
19) Yellow, Hand Applicator Pad for hard to reach areas.
The Process is as follows:
Preparation
Step 1) Rinse Car
Step 2) Cover entire car with new Foam Cannon and DP Xtreme Foam Formula Auto Shampoo. I highly recommend a Foam Cannon if you've never tried one before.
Step 3) Fill a bucket with Dawn Soap. Use 2 MicroFiber Mitts and wash car completely down with Dawn soap to remove all old wax, polish or old sealants.
Step 4) Rinse Car
Step 5) "Sponged" car with Ultima's new, Ultima Elastrofoam Paint Cleaning System. This is their version, instead of a clay bar.
Step 6) "Clayed" car with the same Ultima Cleaning Lubriant Gel, but this time I used a Mothers Clay Bar instead. (Yes, I clayed the car twice. Once with the sponge and once with the clay bar).
Step 7) Fill a different bucket with Zaino Z-7 Car Wash. Use 2 new and separate Microfiber Mitts (you don't want to use the Dawn ones). Wash car completely down to remove Sponge/Clay lubricant residue.
Step 8) Rinse Car
Step 9) Dry Car with Microfiber Towels
Step 10) Get out Leaf Blower and blow every single drop of water out from every crack or seam in the car. Dry again with Microfiber towels.
Step 11) Blue Painters Tape. Cover every edge where plastic molding appears. Edge all lights (fronts, rears and sides), and all emblems.
Polish
Step 1) Polish entire car, one section at a time, with Griot's Random Orbital w/ Orange Light Cutting Pad. Used Menzerna Intensive Polish.
Step 2) Repeat Step 1 for any area's that still showed slight swirl marks.
Step 3) Buff with Microfiber Towels and Microfiber Bonnets using Orbital and Lambswool pad.
Step 3) Polish entire car, one section at a time, with Griot's Random Orbital w/ Blue Finishing Pad. Used Menzerna Final Polish.
Step 4) Buff with Microfiber Towels and Microfiber Bonnets using Orbital and Lambswool pad.
Step 5) Spray entire car, one section at a time, with Zaino Z-8 Grand Finale Spray to remove any residue or missed area's when buffing.
Seal
Step 1) Seal entire car, one section at a time, with Griot's Random Orbital w/ Red Finishing Pad. Used Chemical Guys, JetSEAL 109.
Step 2) Buff with Microfiber Towels.
Step 3) Apply a second coat of Chemical Guys JetSEAL 109 to ensure every area is covered.
Step 4) Buff with Microfiber Towels.
Step 5) Spray entire car, one section at a time, with Zaino Z-8 Grand Finale Spray.
Step 6) Buff dry with Microfiber Towels.
DONE!
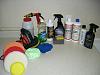
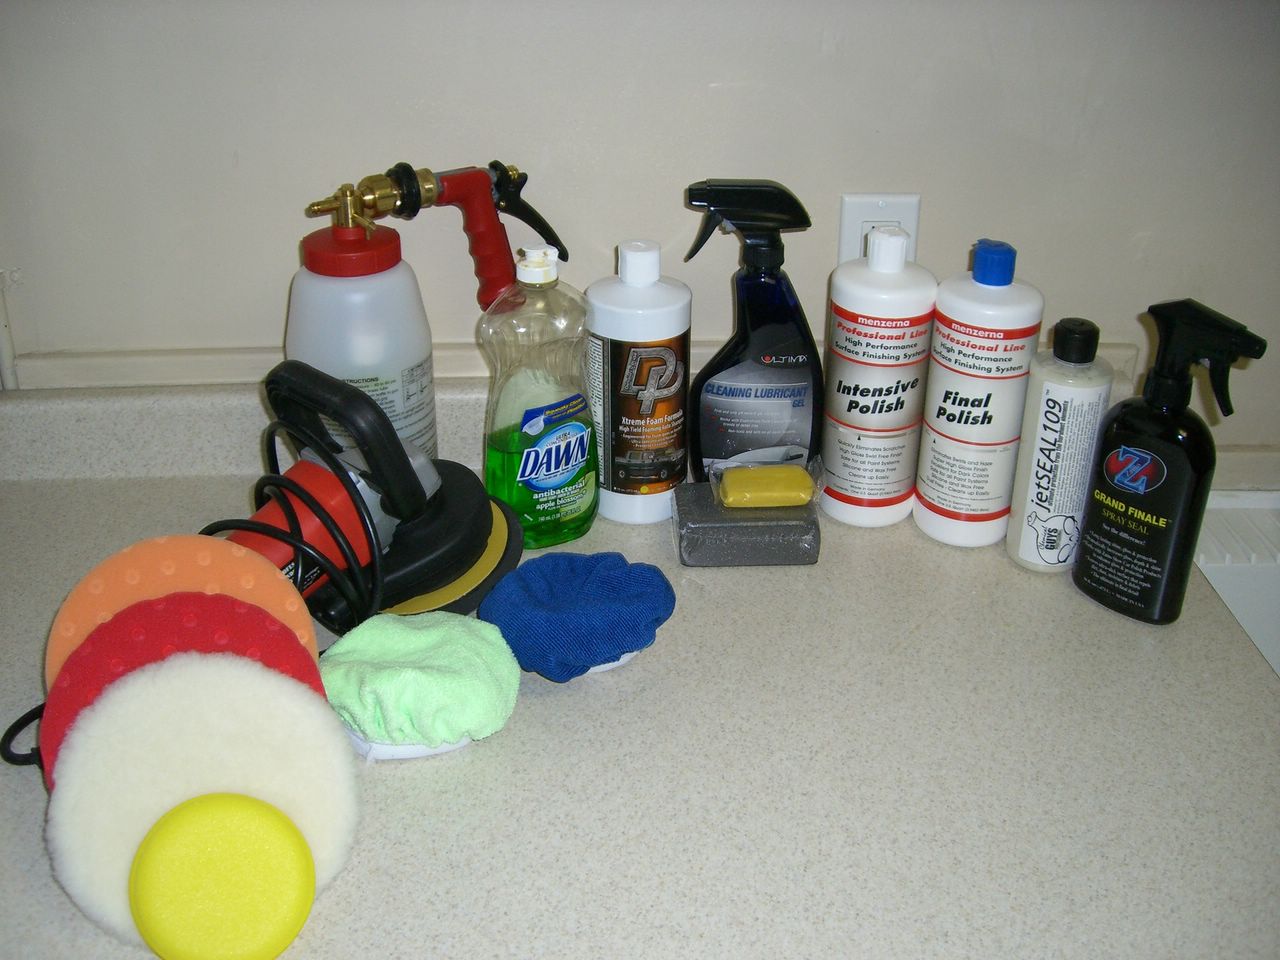
Here is a picture of the products I used.
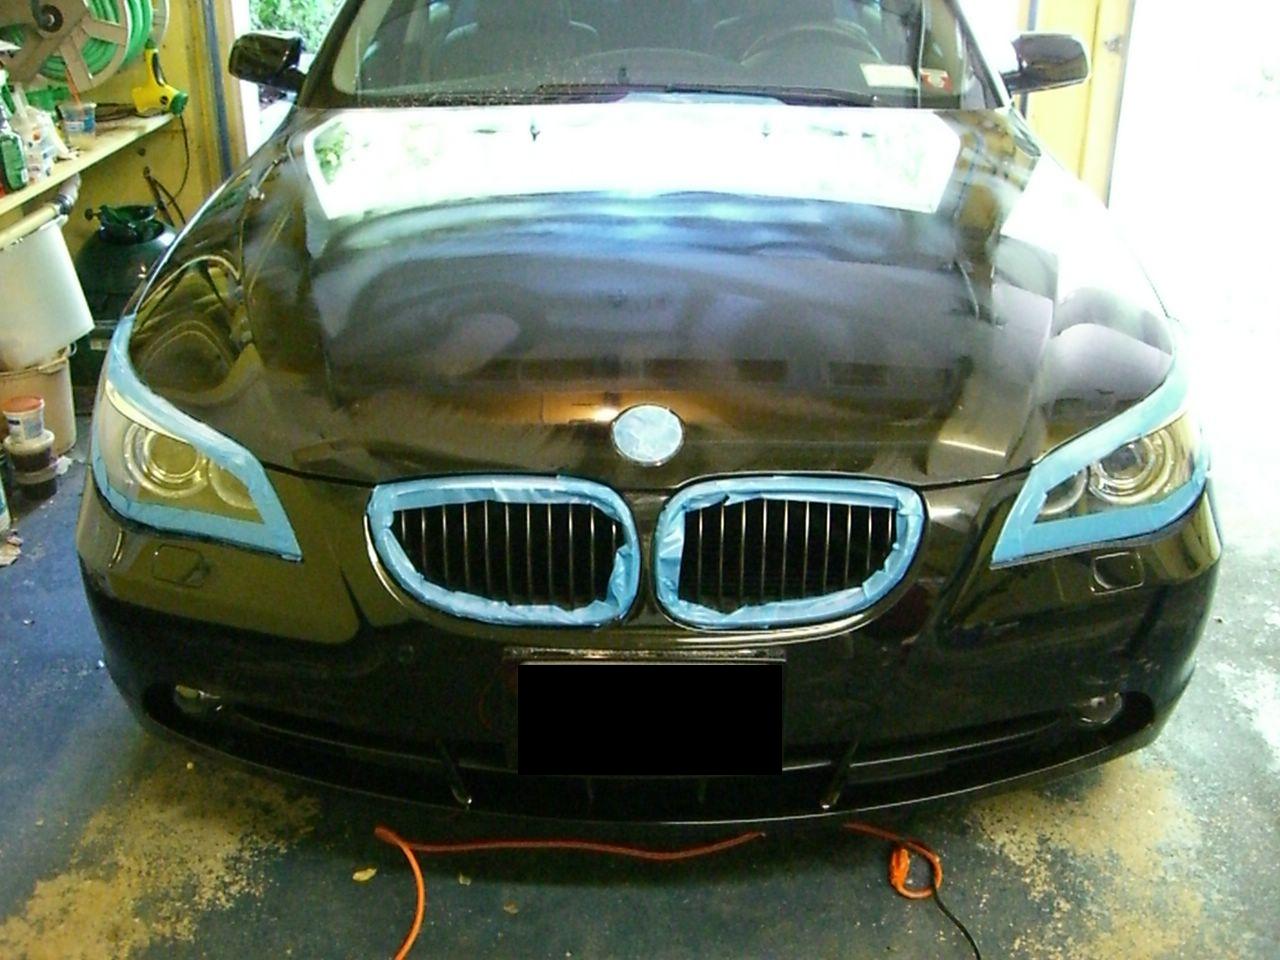
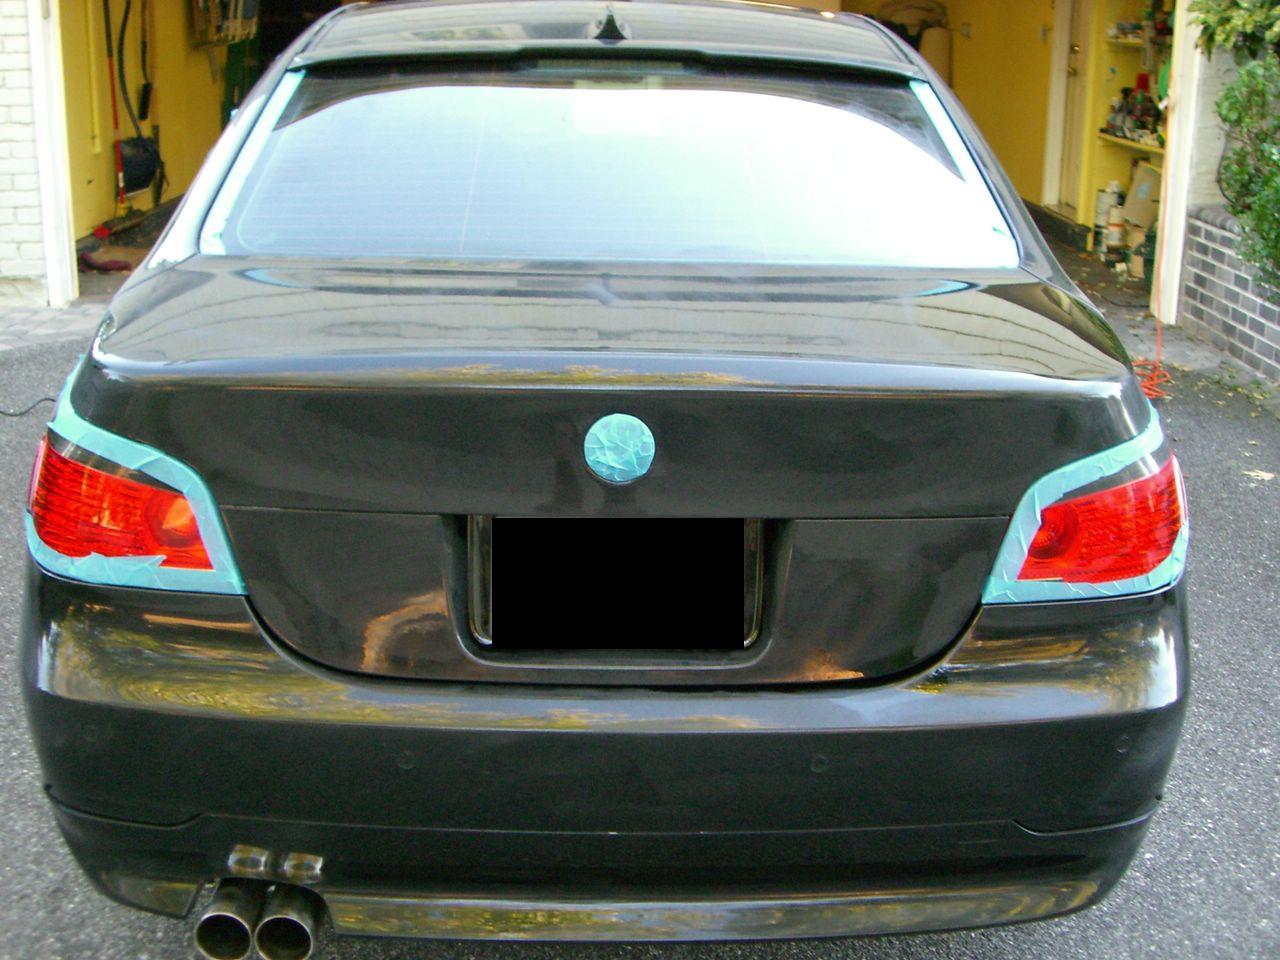
A few pictures along the way...
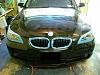

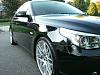
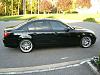
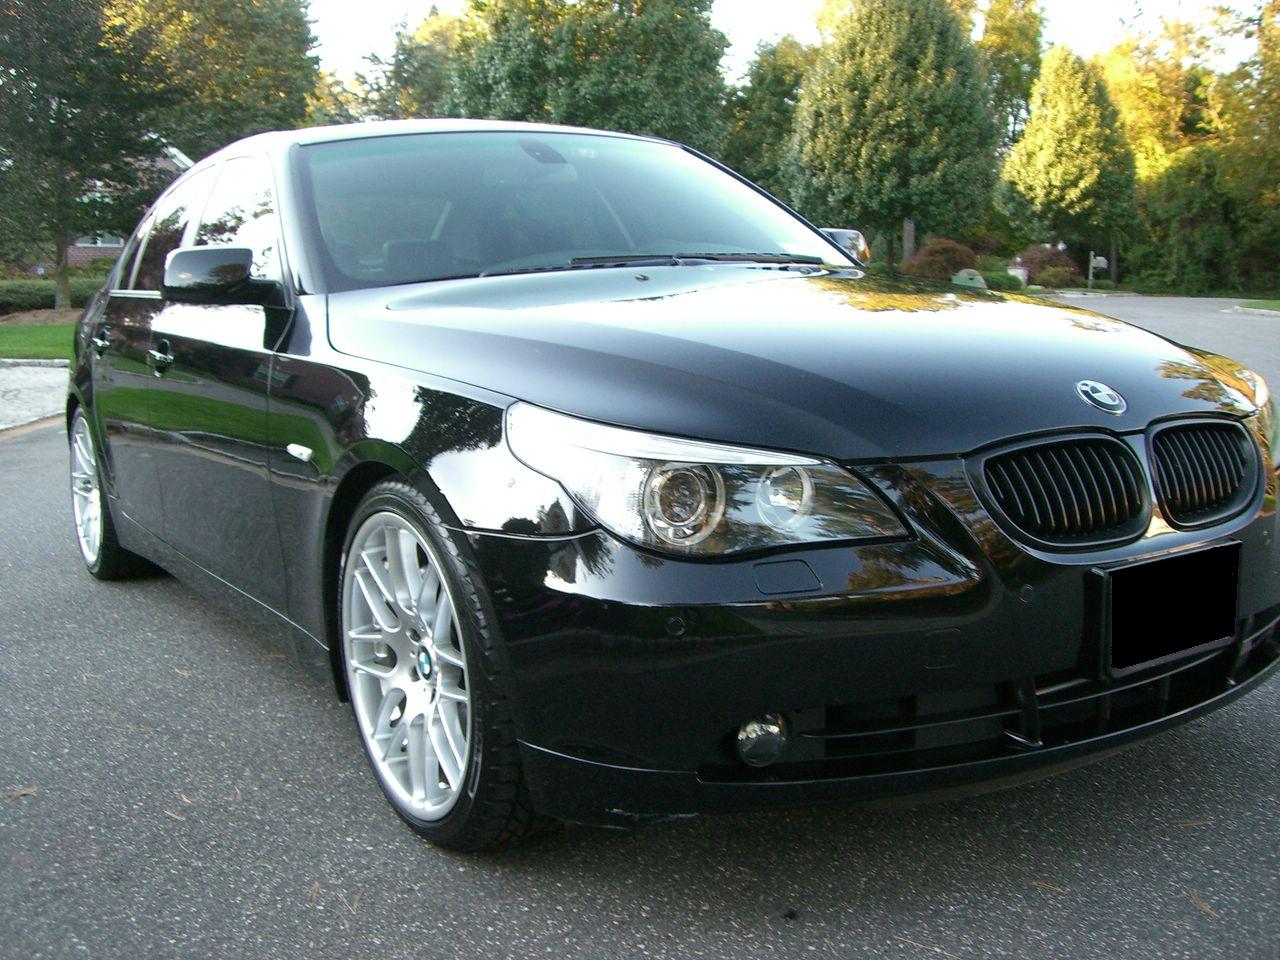
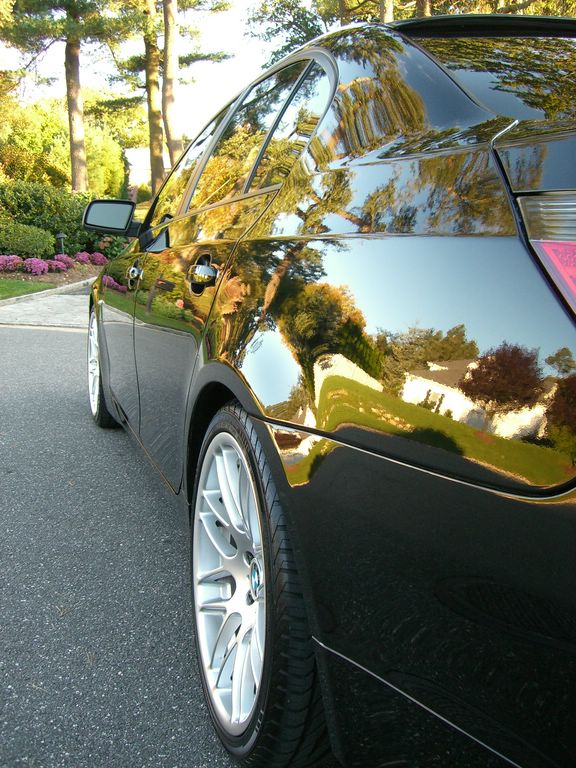
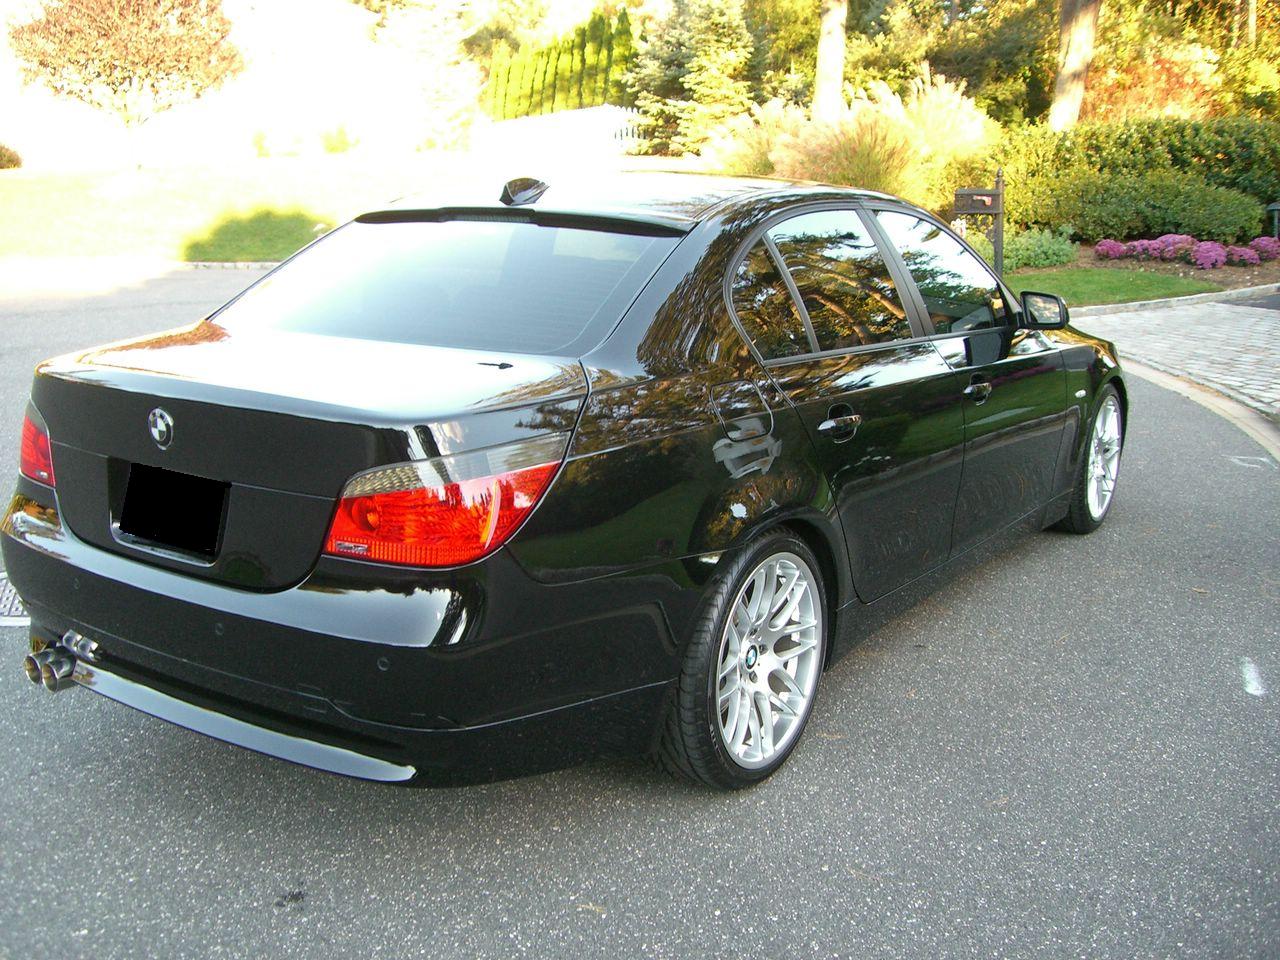
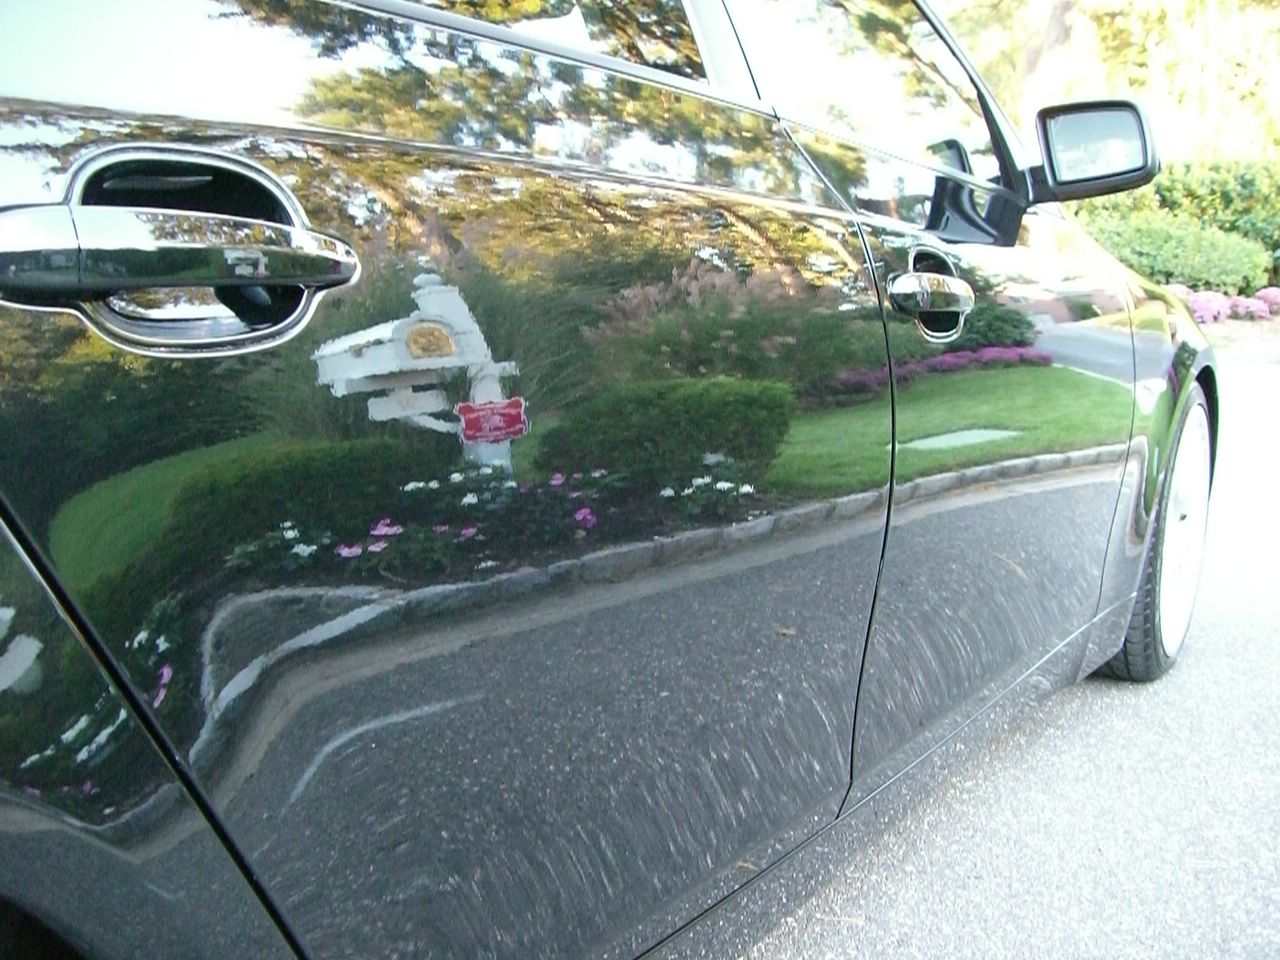
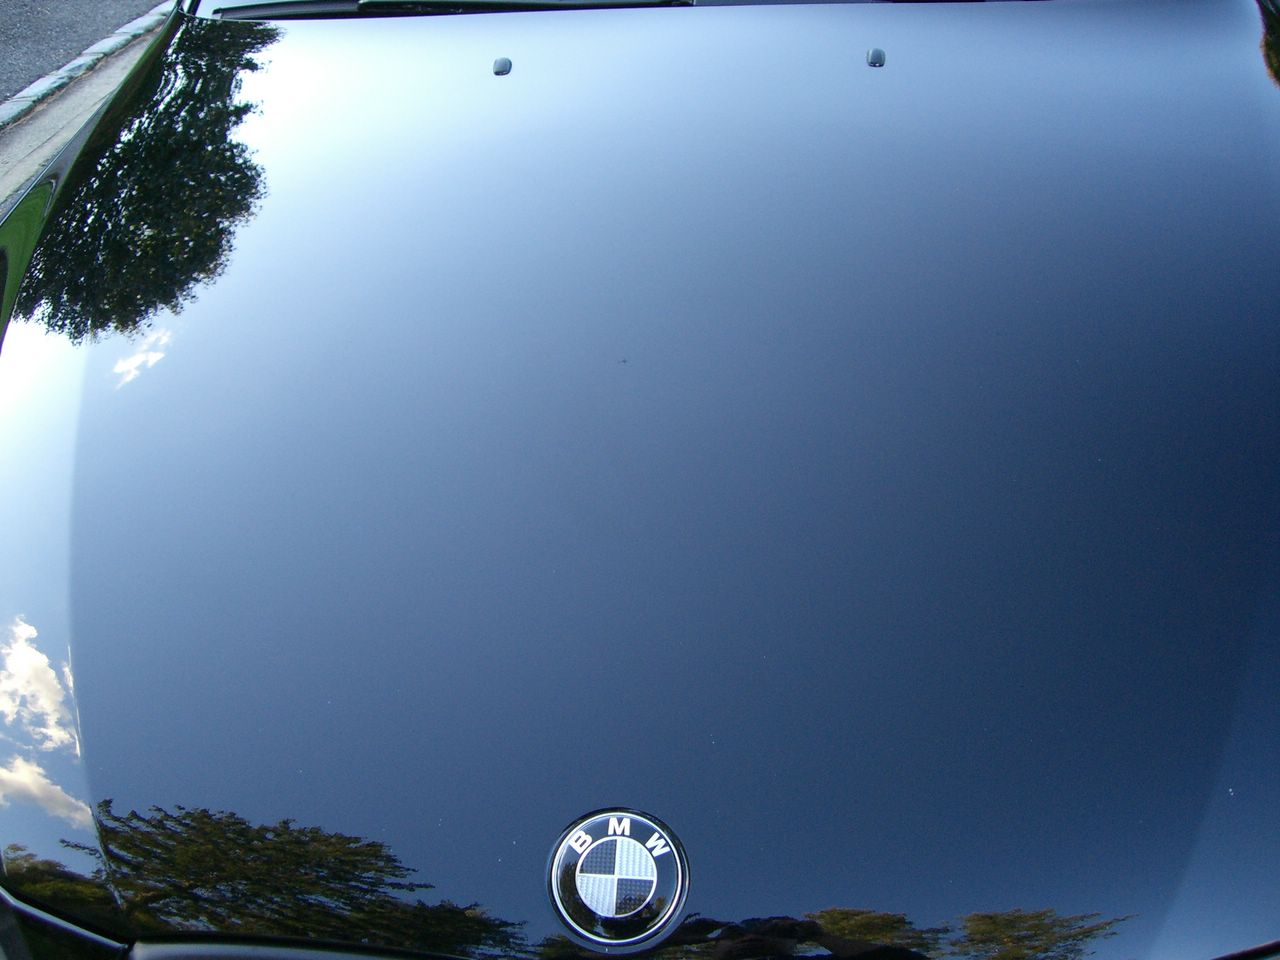
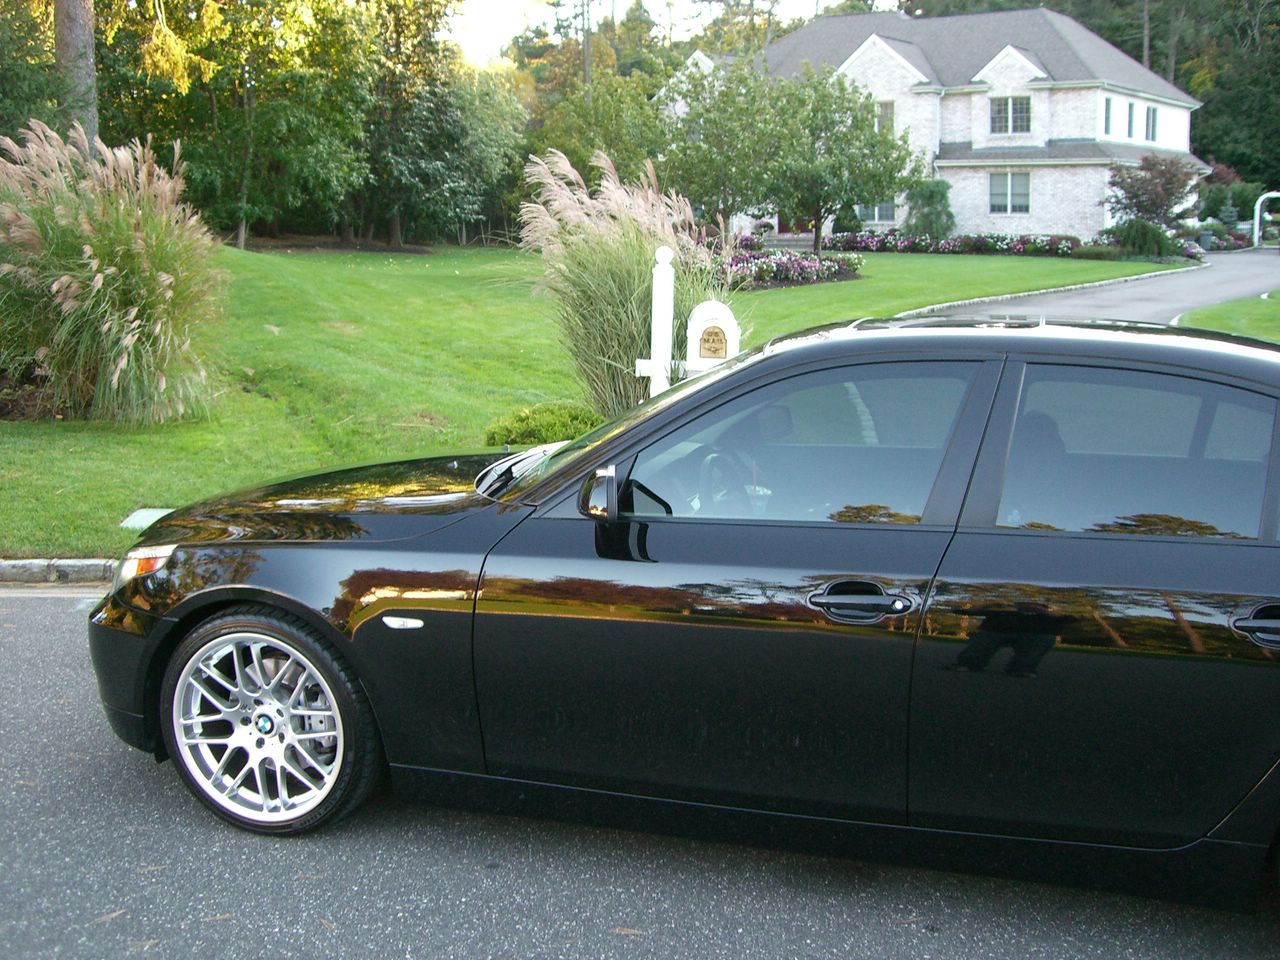
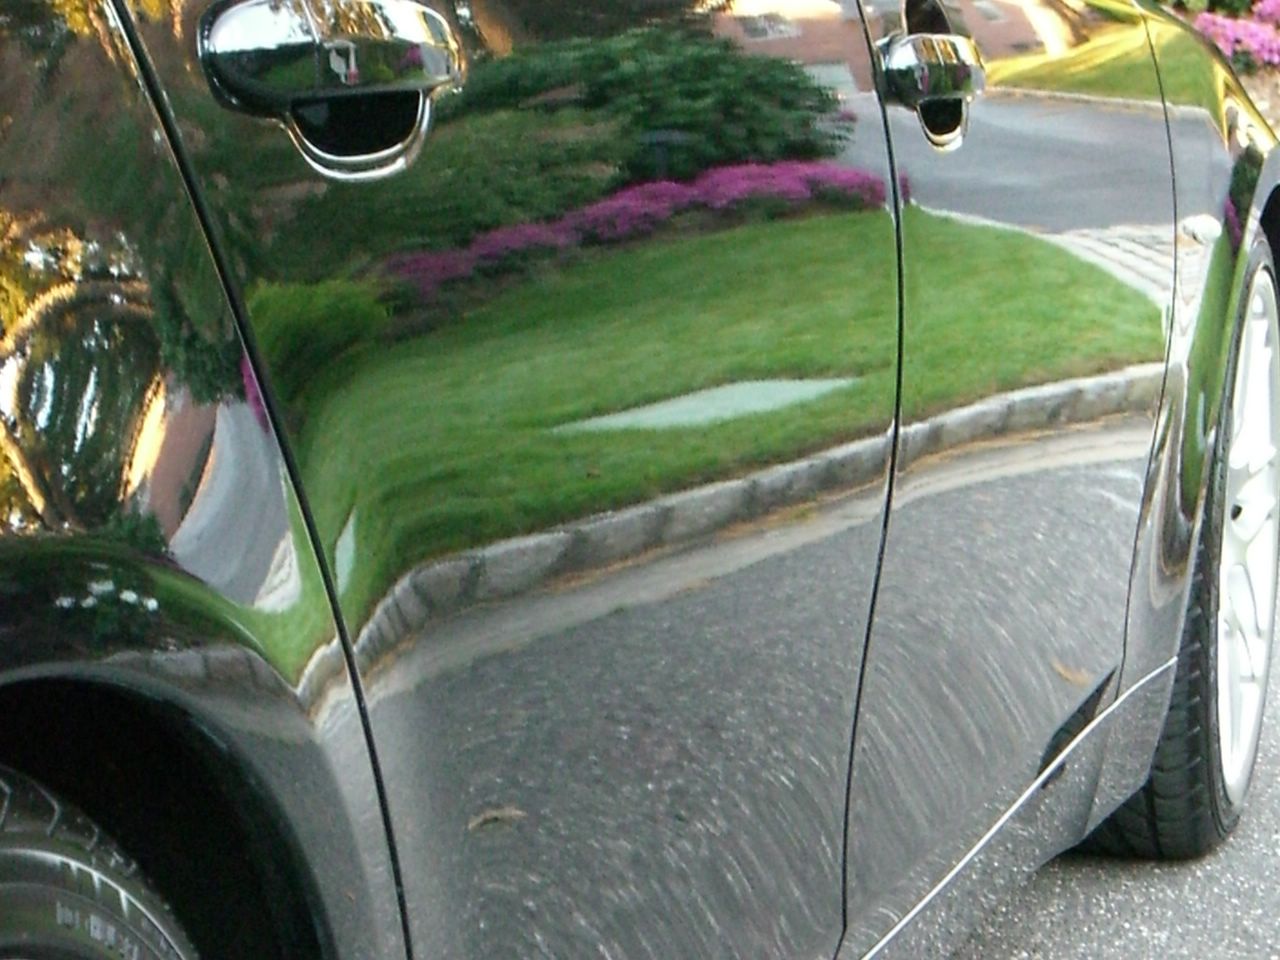
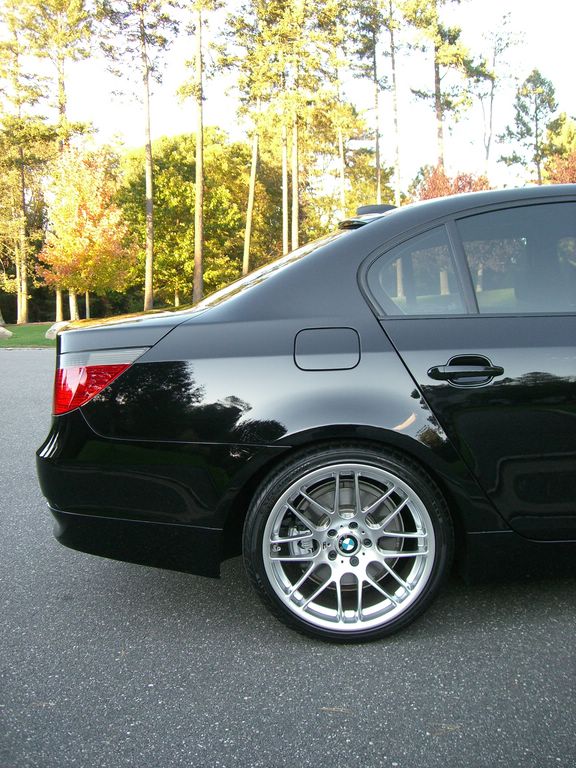
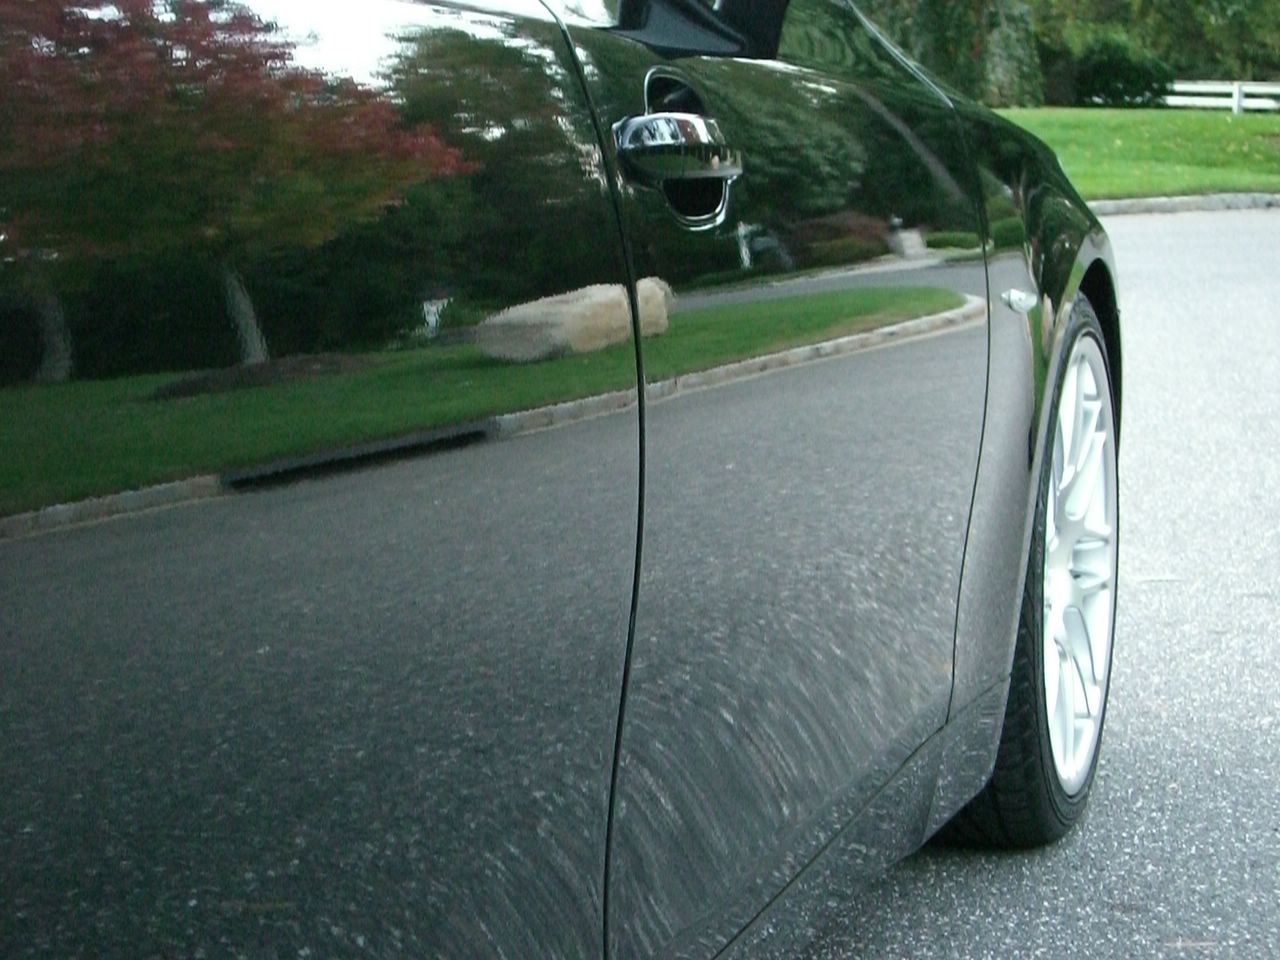
End Result:


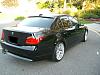

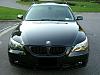
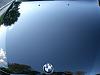

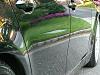

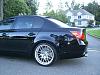
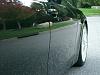
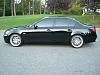
I was extremely anal about this particular detail and probably did more than I needed to do, but I wanted it to be perfect. A Jet Black car is the hardest color to clean and I knew it would take time if I wanted it looking better than new.
I am so happy with the end result. The car has never been glossier/wetter looking and JetSEAL 109 is by far the best sealant I've used to date. It gives off the BEST gloss and shine I've ever seen. It's also impenetrable (I'm an Ex-Rejex user too). The Polishes are outstanding! I think they do a much better job than Z5 Pro, Z2 and Z-PC Fusion.
The Products used were:
1) Dawn
2) 2 Sets of Microfiber Mitts
3) 2 Buckets
4) Zaino Z7 Car Wash
5) Foam Cannon (http://www.autogeek.net/auhagafogun.html)
6) Griots Random Orbital
7) Lake Country CCS Pads (Orange, Blue and Red)
8) Menzerna Intensive Polish
9) Menzerna Final Polish
10) JetSEAL 109 by The Chemical Guys
11) Microfiber Towels
12) Microfiber Bonnets
13) Lambswool pad for Orbital
14) Ultima Elastrofoam Paint Cleaning System w/ Sponge
15) Mother's Clay Bar
16) DP Xtreme Foam Formula Auto Shampoo
17) Zaino Z-8 Grand Finale Spray
18) Blue Painters Tape
19) Yellow, Hand Applicator Pad for hard to reach areas.
The Process is as follows:
Preparation
Step 1) Rinse Car
Step 2) Cover entire car with new Foam Cannon and DP Xtreme Foam Formula Auto Shampoo. I highly recommend a Foam Cannon if you've never tried one before.
Step 3) Fill a bucket with Dawn Soap. Use 2 MicroFiber Mitts and wash car completely down with Dawn soap to remove all old wax, polish or old sealants.
Step 4) Rinse Car
Step 5) "Sponged" car with Ultima's new, Ultima Elastrofoam Paint Cleaning System. This is their version, instead of a clay bar.
Step 6) "Clayed" car with the same Ultima Cleaning Lubriant Gel, but this time I used a Mothers Clay Bar instead. (Yes, I clayed the car twice. Once with the sponge and once with the clay bar).
Step 7) Fill a different bucket with Zaino Z-7 Car Wash. Use 2 new and separate Microfiber Mitts (you don't want to use the Dawn ones). Wash car completely down to remove Sponge/Clay lubricant residue.
Step 8) Rinse Car
Step 9) Dry Car with Microfiber Towels
Step 10) Get out Leaf Blower and blow every single drop of water out from every crack or seam in the car. Dry again with Microfiber towels.
Step 11) Blue Painters Tape. Cover every edge where plastic molding appears. Edge all lights (fronts, rears and sides), and all emblems.
Polish
Step 1) Polish entire car, one section at a time, with Griot's Random Orbital w/ Orange Light Cutting Pad. Used Menzerna Intensive Polish.
Step 2) Repeat Step 1 for any area's that still showed slight swirl marks.
Step 3) Buff with Microfiber Towels and Microfiber Bonnets using Orbital and Lambswool pad.
Step 3) Polish entire car, one section at a time, with Griot's Random Orbital w/ Blue Finishing Pad. Used Menzerna Final Polish.
Step 4) Buff with Microfiber Towels and Microfiber Bonnets using Orbital and Lambswool pad.
Step 5) Spray entire car, one section at a time, with Zaino Z-8 Grand Finale Spray to remove any residue or missed area's when buffing.
Seal
Step 1) Seal entire car, one section at a time, with Griot's Random Orbital w/ Red Finishing Pad. Used Chemical Guys, JetSEAL 109.
Step 2) Buff with Microfiber Towels.
Step 3) Apply a second coat of Chemical Guys JetSEAL 109 to ensure every area is covered.
Step 4) Buff with Microfiber Towels.
Step 5) Spray entire car, one section at a time, with Zaino Z-8 Grand Finale Spray.
Step 6) Buff dry with Microfiber Towels.
DONE!
Here is a picture of the products I used.
A few pictures along the way...
End Result:


Contributors
Joined: Apr 2007
Posts: 4,459
Likes: 0
From: Vancouver, BC , Canada
My Ride: 2011, X6 Hybrid . Alpine White , every option. 20" Conti' NON runflats,OEM trunk spoiler , LUX V3 AE's , HP Thunder Fogs , custom front bumper reflector delete........
Originally Posted by C's Bimmer' post='487185' date='Oct 28 2007, 05:36 PM
So I finally got around to doing my semi-annual detail. It took me 2 days, but it was well worth it. However, this time, I changed it up a bit. As some of you know, I was and have been, a Zaino addict for some time. Based on feedback from some other members, I tried some new products.
I was extremely anal about this particular detail and probably did more than I needed to do, but I wanted it to be perfect. A Jet Black car is the hardest color to clean and I knew it would take time if I wanted it looking better than new.
I am so happy with the end result. The car has never been glossier/wetter looking and JetSEAL 109 is by far the best sealant I've used to date. It gives off the BEST gloss and shine I've ever seen. It's also impenetrable (I'm an Ex-Rejex user too). The Polishes are outstanding! I think they do a much better job than Z5 Pro, Z2 and Z-PC Fusion.
The Products used were:
1) Dawn
2) 2 Sets of Microfiber Mitts
3) 2 Buckets
4) Zaino Z7 Car Wash
5) Foam Cannon (http://www.autogeek.net/auhagafogun.html)
6) Griots Random Orbital
7) Lake Country CCS Pads (Orange, Blue and Red)
8) Menzerna Intensive Polish
9) Menzerna Final Polish
10) JetSEAL 109 by The Chemical Guys
11) Microfiber Towels
12) Microfiber Bonnets
13) Lambswool pad for Orbital
14) Ultima Elastrofoam Paint Cleaning System w/ Sponge
15) Mother's Clay Bar
16) DP Xtreme Foam Formula Auto Shampoo
17) Zaino Z-8 Grand Finale Spray
18) Blue Painters Tape
19) Yellow, Hand Applicator Pad for hard to reach areas.
The Process is as follows:
Preparation
Step 1) Rinse Car
Step 2) Cover entire car with new Foam Cannon and DP Xtreme Foam Formula Auto Shampoo. I highly recommend a Foam Cannon if you've never tried one before.
Step 3) Fill a bucket with Dawn Soap. Use 2 MicroFiber Mitts and wash car completely down with Dawn soap to remove all old wax, polish or old sealants.
Step 4) Rinse Car
Step 5) "Sponged" car with Ultima's new, Ultima Elastrofoam Paint Cleaning System. This is their version, instead of a clay bar.
Step 6) "Clayed" car with the same Ultima Cleaning Lubriant Gel, but this time I used a Mothers Clay Bar instead. (Yes, I clayed the car twice. Once with the sponge and once with the clay bar).
Step 7) Fill a different bucket with Zaino Z-7 Car Wash. Use 2 new and separate Microfiber Mitts (you don't want to use the Dawn ones). Wash car completely down to remove Sponge/Clay lubricant residue.
Step 8) Rinse Car
Step 9) Dry Car with Microfiber Towels
Step 10) Get out Leaf Blower and blow every single drop of water out from every crack or seam in the car. Dry again with Microfiber towels.
Step 11) Blue Painters Tape. Cover every edge where plastic molding appears. Edge all lights (fronts, rears and sides), and all emblems.
Polish
Step 1) Polish entire car, one section at a time, with Griot's Random Orbital w/ Orange Light Cutting Pad. Used Menzerna Intensive Polish.
Step 2) Repeat Step 1 for any area's that still showed slight swirl marks.
Step 3) Buff with Microfiber Towels and Microfiber Bonnets using Orbital and Lambswool pad.
Step 3) Polish entire car, one section at a time, with Griot's Random Orbital w/ Blue Finishing Pad. Used Menzerna Final Polish.
Step 4) Buff with Microfiber Towels and Microfiber Bonnets using Orbital and Lambswool pad.
Step 5) Spray entire car, one section at a time, with Zaino Z-8 Grand Finale Spray to remove any residue or missed area's when buffing.
Seal
Step 1) Seal entire car, one section at a time, with Griot's Random Orbital w/ Red Finishing Pad. Used Chemical Guys, JetSEAL 109.
Step 2) Buff with Microfiber Towels.
Step 3) Apply a second coat of Chemical Guys JetSEAL 109 to ensure every area is covered.
Step 4) Buff with Microfiber Towels.
Step 5) Spray entire car, one section at a time, with Zaino Z-8 Grand Finale Spray.
Step 6) Buff dry with Microfiber Towels.
DONE!
Here is a picture of the products I used.
Attachment 39510
A few pictures along the way...
Attachment 39512
Attachment 39511
End Result:
Attachment 39521
Attachment 39522
Attachment 39513
Attachment 39514
Attachment 39515
Attachment 39516
Attachment 39517
Attachment 39518
Attachment 39519
Attachment 39520
Attachment 39523
Attachment 39525
Attachment 39526
Attachment 39527
Attachment 39524

Cheers


Contributors
Joined: Mar 2007
Posts: 1,769
Likes: 0
From: Newnan, Georgia
My Ride: 2004 545i
Production date: 02/04
Color: Black Sapphire Metallic
Trim: Anthracite
Options: Sport package with STEPTRONIC, Premium Sound, Rear Sunshade, Xenon
Nice....we should do a 'detail meet' 
Thread Starter
Contributors
Joined: Feb 2006
Posts: 14,646
Likes: 0
From: NY
My Ride: 2008 Silverstone II E60 M5 2012 E70 AW X5 50i Sport w/ LCI Aero Kit and Rocker Panels
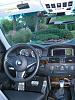
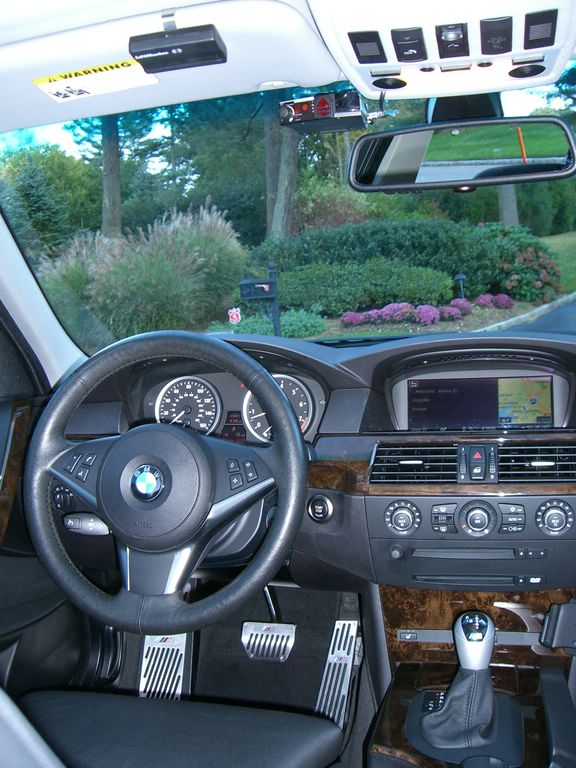
I just realized I have an interior shot. WTF??? That wasn't supposed to be in there. Hahahaha! Although, I did do the leather (clean and condition), as well.
Thread Starter
Contributors
Joined: Feb 2006
Posts: 14,646
Likes: 0
From: NY
My Ride: 2008 Silverstone II E60 M5 2012 E70 AW X5 50i Sport w/ LCI Aero Kit and Rocker Panels
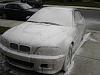
This is what the Foam Cannon does to your car, prior to using Mitts to clean. I didn't take a shot of my car "Foamed", but this is what my car looked like. I hope FMINUS doesn't mind me using this picture, but you can clearly see why this step helps with the cleaning/washing process. It removes and loosens all dirt particles, so you don't rub them around and around with your Mitts and cause more swirls.


Members
Joined: Jun 2007
Posts: 68
Likes: 0
From: Sydney, Australia
My Ride: LCI E60 Individual (Onyx Blue, Piano Black trim, Marino Leather) M Sport Package, 19" M172 wheels, Sunroof, Professional Navigation, HUD, TV function, Voice Recognition, PDC, Active Steering, Comfort Access, Logic 7, iPod/USB Adapter, Xeon Headlights, Adaptive Headlights, High Beam Assist. Build completed August 2007.
Worth every minute of the 2 days you have spent. Looks like new.
Thread Starter
Contributors
Joined: Feb 2006
Posts: 14,646
Likes: 0
From: NY
My Ride: 2008 Silverstone II E60 M5 2012 E70 AW X5 50i Sport w/ LCI Aero Kit and Rocker Panels
Originally Posted by Murray' post='487222' date='Oct 28 2007, 08:28 PM
Worth every minute of the 2 days you have spent. Looks like new.
Senior Members
Joined: Mar 2007
Posts: 2,850
Likes: 0
From: Huntington Beach, CA & Scottsdale, AZ
Damn C, looks like a mirror finish. My luck it would rain for the next week, after doing all that work.
I have been thinking about getting a Griot's Random Orbital kit, my car has some swirl marks in the clear coat.
My luck it would rain for the next week, after doing all that work.I have been thinking about getting a Griot's Random Orbital kit, my car has some swirl marks in the clear coat.