Colorado Wagon
 01-01-2017, 01:39 PM
#1
New Members
Thread Starter

Join Date: Dec 2015
Location: Denver
Posts: 57
Likes: 0
Received 2 Likes
on
2 Posts
My Ride: 535xi touring
Model Year: 2008
Thought I might duplicate my build thread here since it is an E61.
Hello,
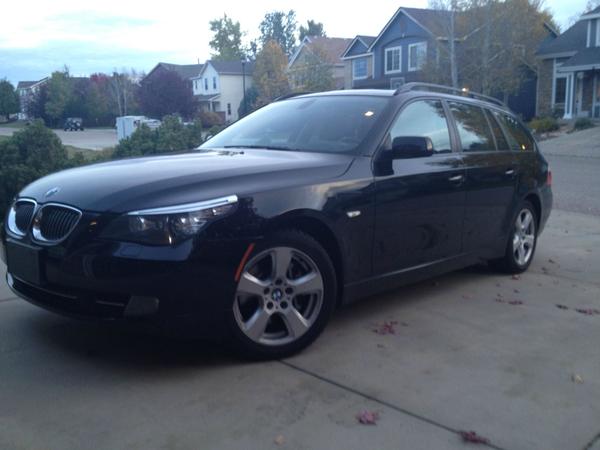
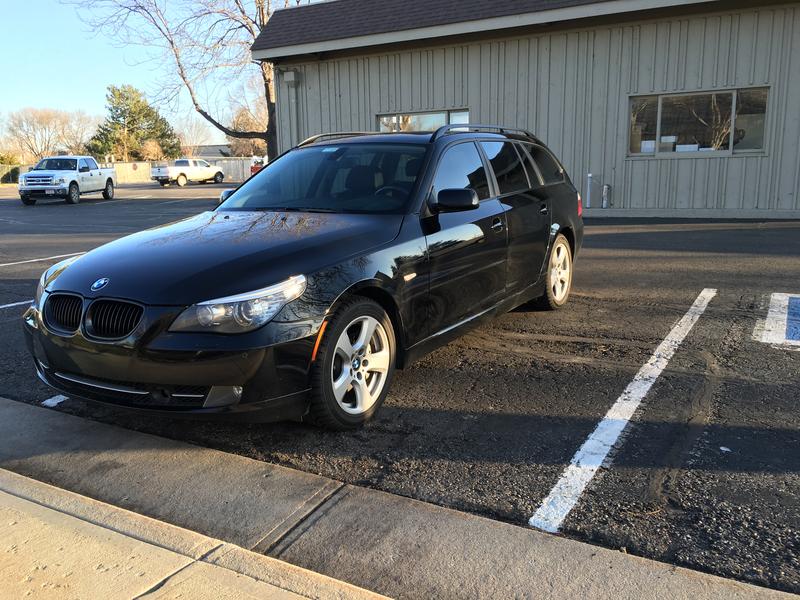
I thought I'd start a thread for my newly acquired '08 535 xi wagon.
Options:
Premium, Sport and Cold Weather packages.
78k miles
Heads up display
Night vision (not currently working?)
Parking distance control
and my favorite non-option, a manual transmission
Pics:
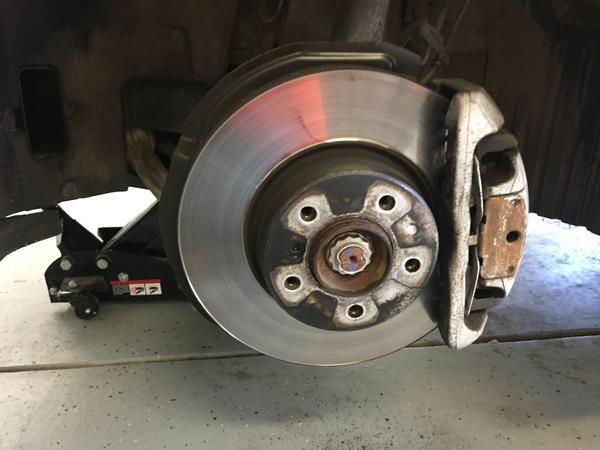
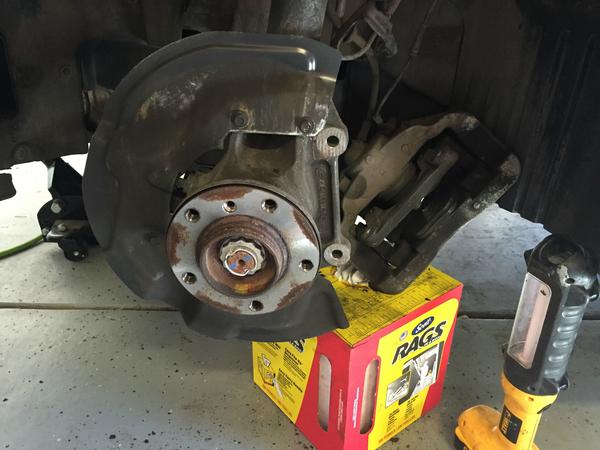
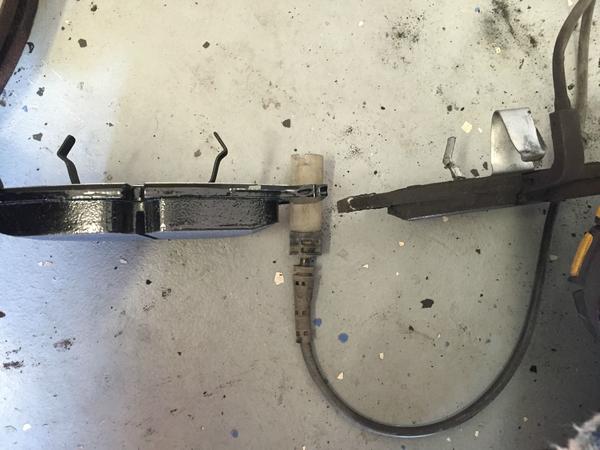
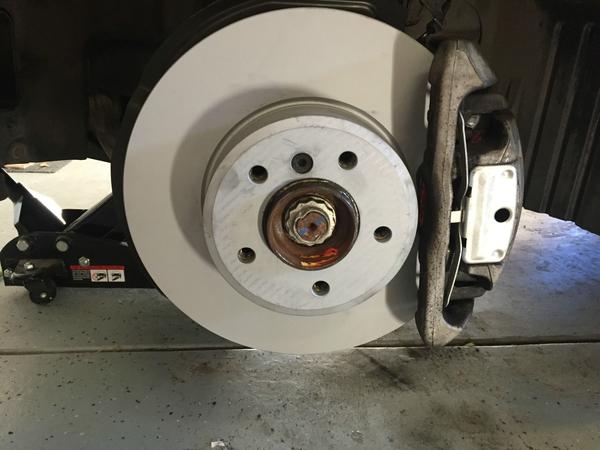
Replaced the brakes! Frozen rotors (blanks) and Hawk pads.
I had a heck of a time trying to get the wheels unstuck from the hub. Tried kicking them, PB Blaster, dropping the jack down quickly with the lug nuts loose, and rocking the car with the lug nuts loose. I even tried a torch on one hub. I ended up having to lower the car down off the jack, with the lugs nuts on loose, and driving the car back and forth a couple times on an angled 2x6. Quite the task. I cleaned the rust off the hub and put some (anti-rust) lubricant on.
I replaced the rotors, pads, spring clips (because the old were rusty), and wear sensors. I also re-lubed the sliding pins. Also put new lug nuts on (cosmetic).
Photos:
Hello,
I thought I'd start a thread for my newly acquired '08 535 xi wagon.
Options:
Premium, Sport and Cold Weather packages.
78k miles
Heads up display
Night vision (not currently working?)
Parking distance control
and my favorite non-option, a manual transmission
Pics:
Replaced the brakes! Frozen rotors (blanks) and Hawk pads.
I had a heck of a time trying to get the wheels unstuck from the hub. Tried kicking them, PB Blaster, dropping the jack down quickly with the lug nuts loose, and rocking the car with the lug nuts loose. I even tried a torch on one hub. I ended up having to lower the car down off the jack, with the lugs nuts on loose, and driving the car back and forth a couple times on an angled 2x6. Quite the task. I cleaned the rust off the hub and put some (anti-rust) lubricant on.
I replaced the rotors, pads, spring clips (because the old were rusty), and wear sensors. I also re-lubed the sliding pins. Also put new lug nuts on (cosmetic).
Photos:
 01-01-2017, 01:40 PM
#2
New Members
Thread Starter
Join Date: Dec 2015
Location: Denver
Posts: 57
Likes: 0
Received 2 Likes
on
2 Posts
My Ride: 535xi touring
Model Year: 2008
I've been busy with a few projects:
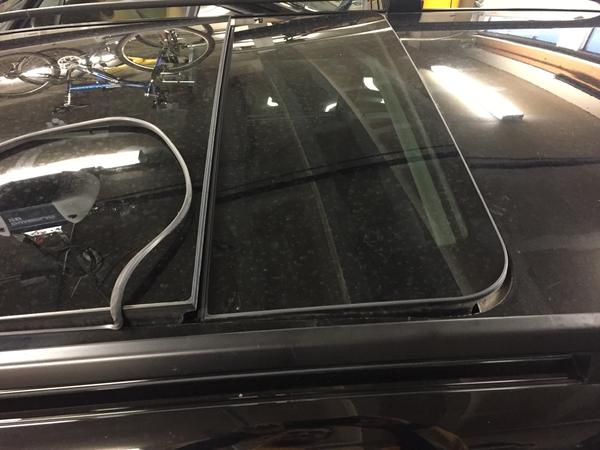
First one after the brakes was the panoramic sunroof seal. I was getting some wind noise.
I read a couple posts where people removed the glass to do this. I didn't really want to remove the glass and after finding a post where one guy said he did it with the glass installed, I decided to try it.
I thought it went okay. I started removing the old seal around the rear. It is easy enough with the glass popped up until you get to the side of the rear glass, then it is difficult to remove the old adhesive. I ended up using a pick tool wrapped with electrical tape (sticky side out) and kind of rolling it on the old adhesive. It worked okay, just make sure not to scratch your paint!
When I got around to the front I used the button to open the front glass and removed the seal from up there. That is not difficult, just hard on the thumbs rubbing the adhesive off.
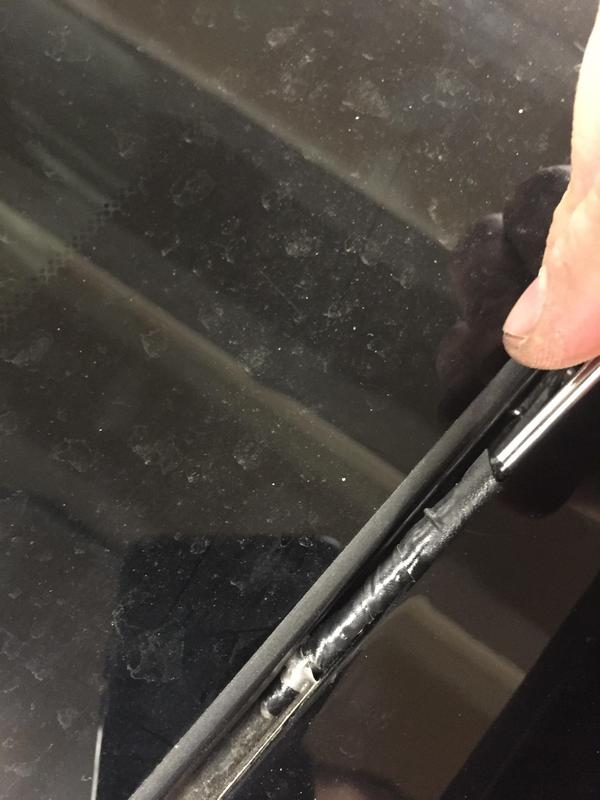
To put the new seal in, I closed all of the glass and laid the new seal in there with the backing tape still on. I cut it to length and then started to peal the orange backing tape off while holding the seal in position. This worked pretty decent until I got next to the side of the rear glass and the tape broke, forcing me to pull the seal out a bit to grab the tape and jam it back down into the gap. Same thing happened on the other side of the rear glass and it didn't seat quite as well as I would have liked (i.e. perfectly flat like the old seal).
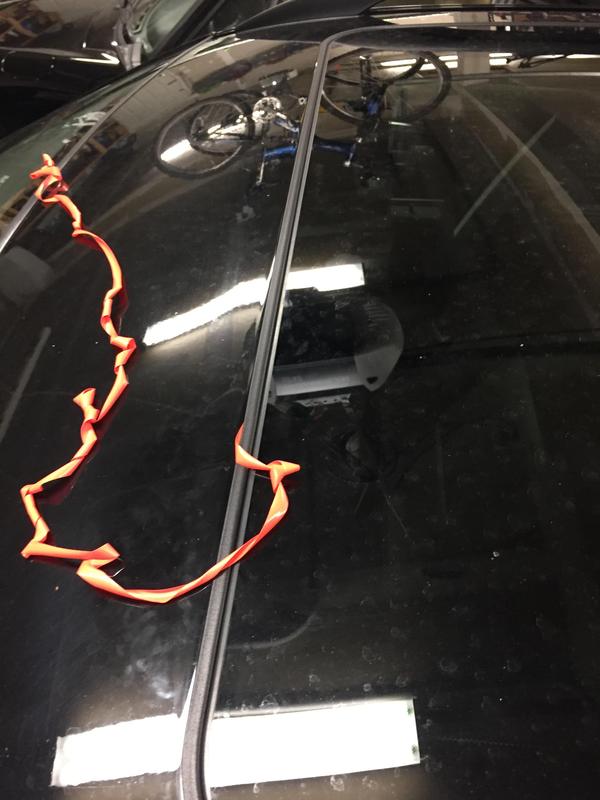
So I am not sure I would recommend that method, but it might be less intrusive for folks who don't want to remove the glass.
Old vs. new: (Part number 54 10 7 199 533)

After putting in the new seal you need to reset the sunroof. To do that you have the hold the sunroof button up for like 30 seconds. The roof moves to every position and finally completely closes at the end (or something like that, there is a DIY video I found that showed it).
It fixed the wind noise!
First one after the brakes was the panoramic sunroof seal. I was getting some wind noise.
I read a couple posts where people removed the glass to do this. I didn't really want to remove the glass and after finding a post where one guy said he did it with the glass installed, I decided to try it.
I thought it went okay. I started removing the old seal around the rear. It is easy enough with the glass popped up until you get to the side of the rear glass, then it is difficult to remove the old adhesive. I ended up using a pick tool wrapped with electrical tape (sticky side out) and kind of rolling it on the old adhesive. It worked okay, just make sure not to scratch your paint!
When I got around to the front I used the button to open the front glass and removed the seal from up there. That is not difficult, just hard on the thumbs rubbing the adhesive off.
To put the new seal in, I closed all of the glass and laid the new seal in there with the backing tape still on. I cut it to length and then started to peal the orange backing tape off while holding the seal in position. This worked pretty decent until I got next to the side of the rear glass and the tape broke, forcing me to pull the seal out a bit to grab the tape and jam it back down into the gap. Same thing happened on the other side of the rear glass and it didn't seat quite as well as I would have liked (i.e. perfectly flat like the old seal).
So I am not sure I would recommend that method, but it might be less intrusive for folks who don't want to remove the glass.
Old vs. new: (Part number 54 10 7 199 533)
After putting in the new seal you need to reset the sunroof. To do that you have the hold the sunroof button up for like 30 seconds. The roof moves to every position and finally completely closes at the end (or something like that, there is a DIY video I found that showed it).
It fixed the wind noise!
01-01-2017, 01:45 PM
#3
New Members
Thread Starter
Join Date: Dec 2015
Location: Denver
Posts: 57
Likes: 0
Received 2 Likes
on
2 Posts
My Ride: 535xi touring
Model Year: 2008
The next project I moved on to was to try to correct some surging/hesitation. The car has ~79k miles and none of the maintenance records showed any sort of carbon cleaning. So I planned that using:
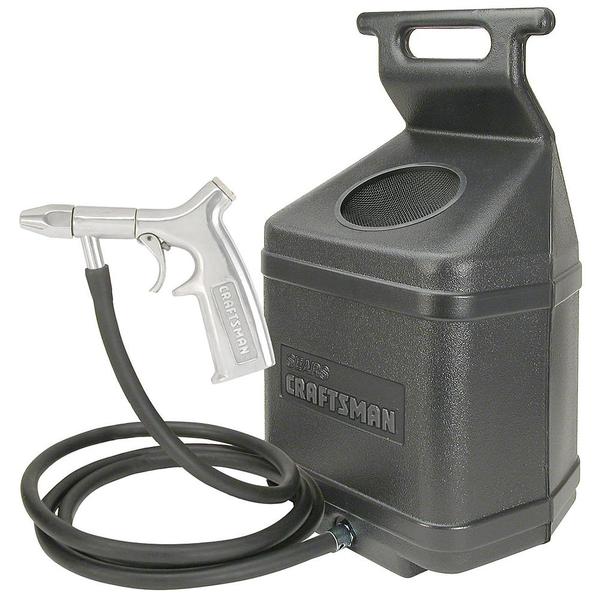
A sears sand blaster that I already had ($60):
The bimmerhelp kit ($68.50):

and walnut shells from Harbor Freight.
The bimmerhelp kit didn't fit into the sears gun, and after looking for some sort of threaded adaptor with no luck, I ended up taking the pipe off the threaded adaptor and sticking it inside the sears gun with a piece of hose inside the gun to seal it. Then I taped the outside with some foil tape. Very rigged but it ended up working perfectly.
I followed the Bavarian Auto video:
I could not get the electrical adaptor off of the the bottom of the intake manifold no matter how hard I pulled or pressed with screwdrivers. I ended up pulling the intake partially off and unscrewing the three screws on the electrical box.
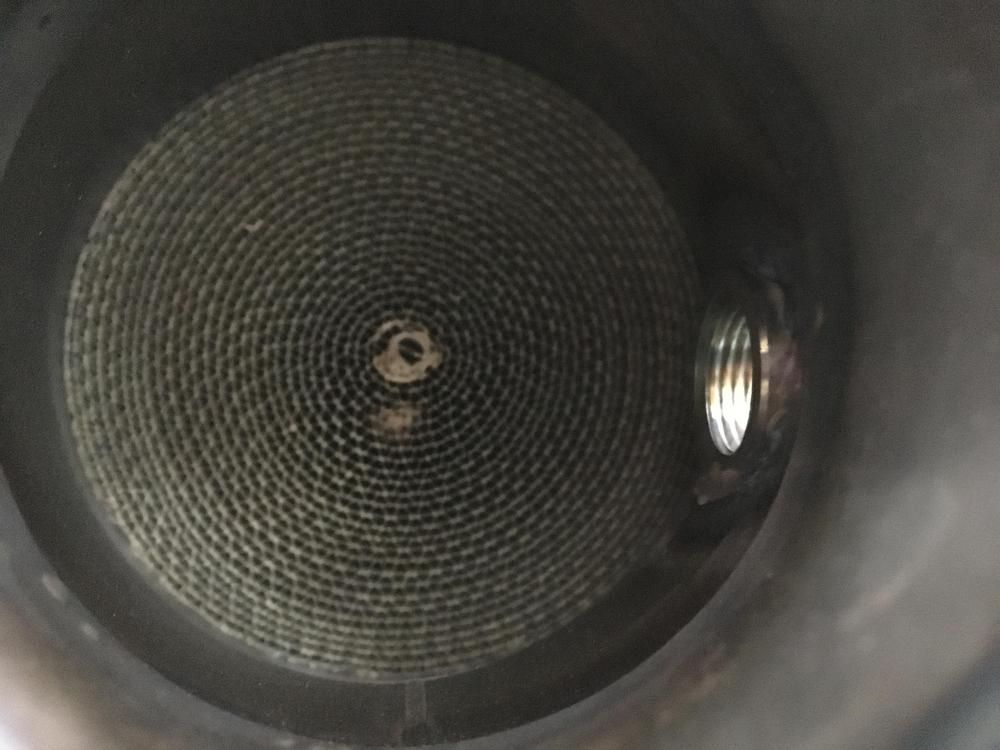
Here is what my ports looked like:
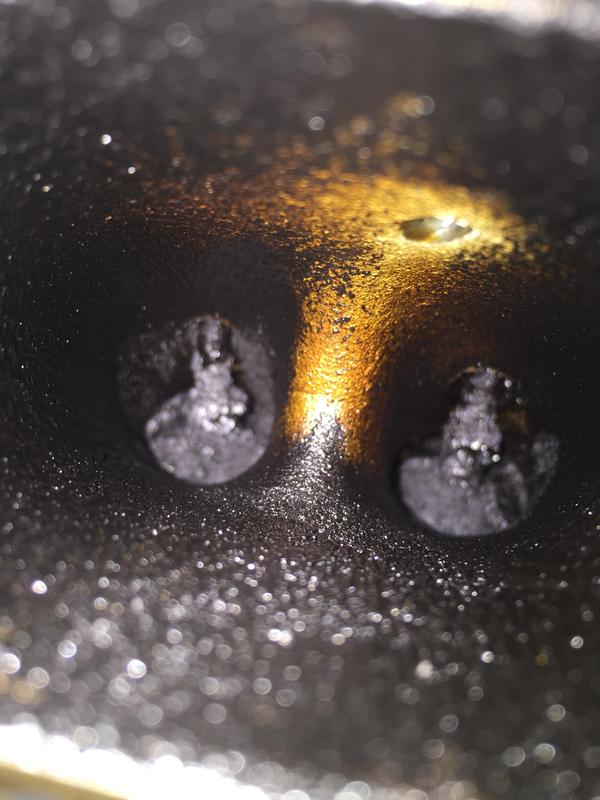
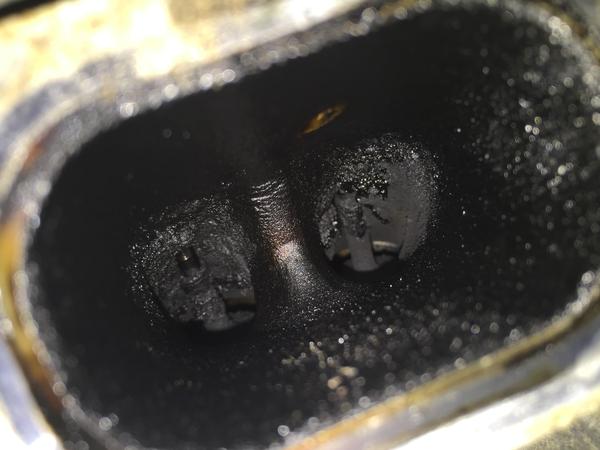
Now, here is where I screwed up. I emptied my vacuum prior to doing this and I even changed the filter because it felt a little weak. I kind of ignored it because I thought I was just imagining it. Now, I have a decent sized compressor and when I was blasting I had shells coming out from around the blaster wand. I set up a sheet and didn't think much about it. Until I pulled the tape off of the second intake port and saw shells inside.
The shells had gotten to every other port through the PCV air port!
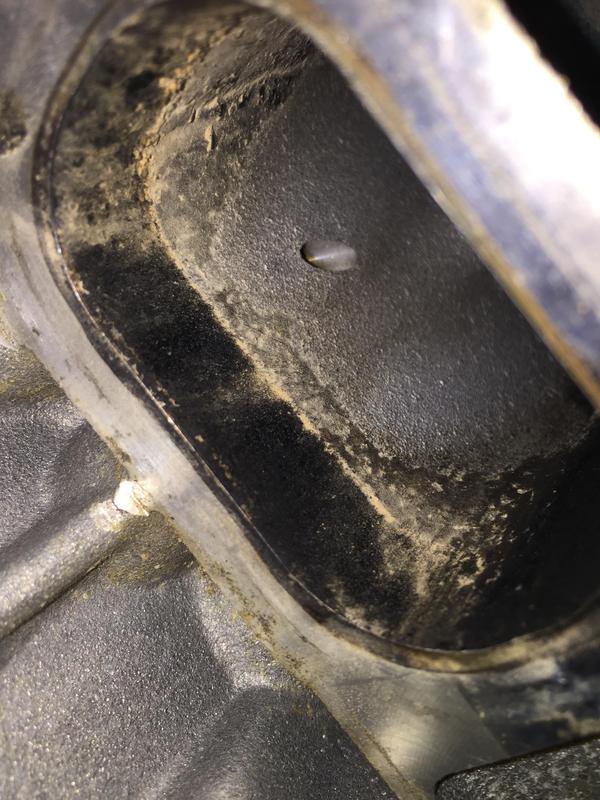
Bad news! So I had shells inside the PCV system as well as falling into the other cylinders! Why? Because my vaccum hose had some crap in it and was not drawing enough air out of the intake while blasting. So be careful!
I fixed the vacuum hosed and finished the blasting:

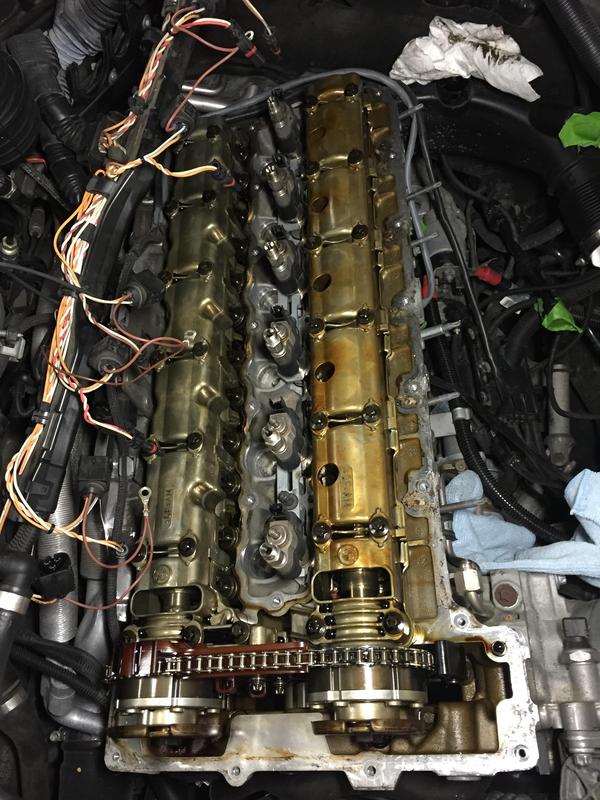
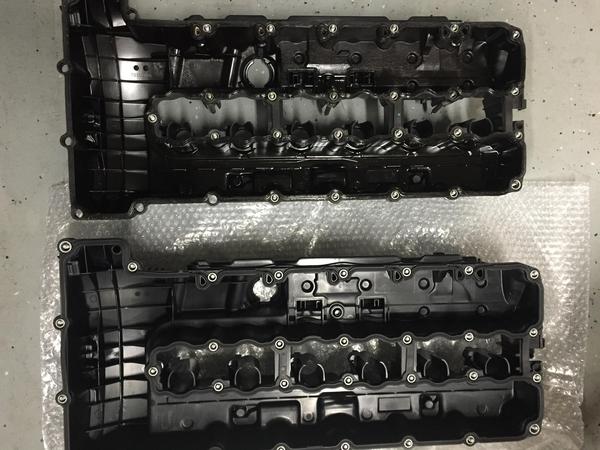
So, wondering whether or not I had clogged up the PCV system and reading about how it is important for it to be functioning properly I felt like I should pull the valve cover off. So, that is what I did:
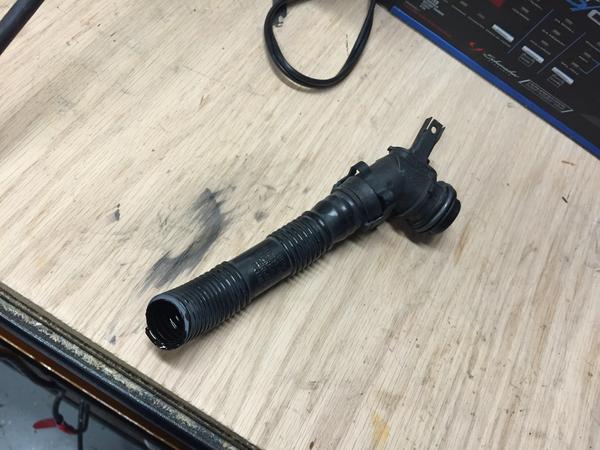
Also broke this hose while removing it($26 at getbmwparts):
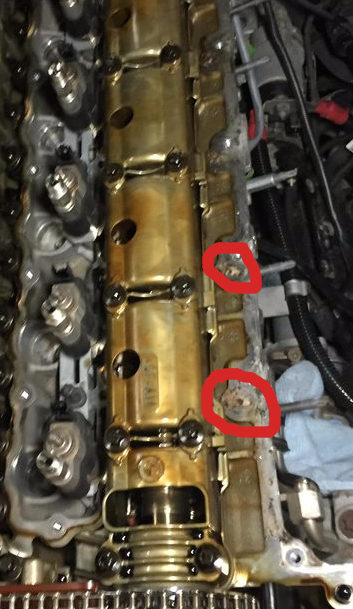
I ended up only seeing shells near the ports on the head.
Now after reading some threads about needing a new valve cover seal and bolts and worrying a bit about a clogged pcv system I decided why mess with it and decided just to replace the valve cover ($355 from getbmwparts):
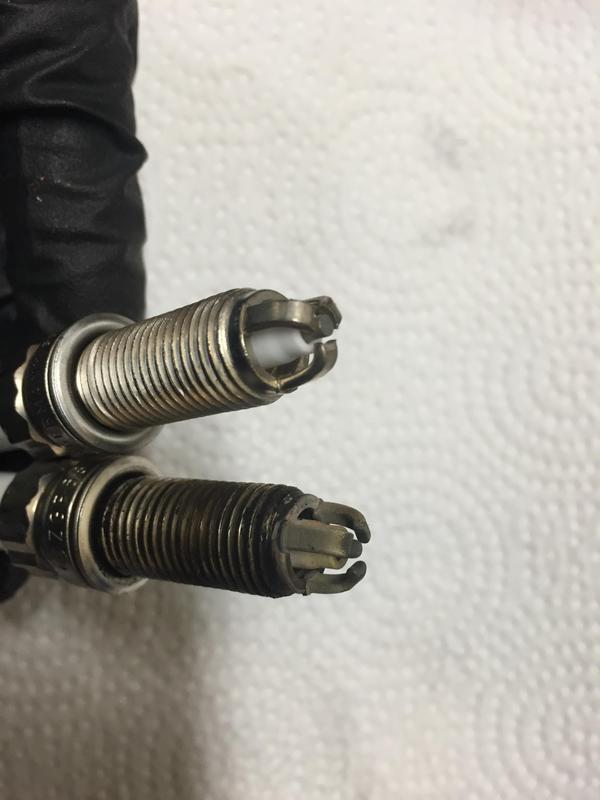
While I was in there, I also replaced the spark plugs ($13 tool from ECS, $82 for 6 Bosch from Pelican Parts) and the coil packs ($208 for 6 at Pelican Parts):
Put it back together (except I had a heck of a time getting the electrical box connected back to the intake). Replaced the intake seals ($17 at ECS), throttle body gasket ($6 at ECS), and air filter ($21 at ECS).
Results: Hesitation/surging is gone. Not sure if it was the carbon cleaning or a combination of that with the plugs and coil packs, but whatever it was, I like it. Car is driving well now. Time for MHD tune.
.
.
.
So I've had the MHD tune for a while now. Like the additional power.
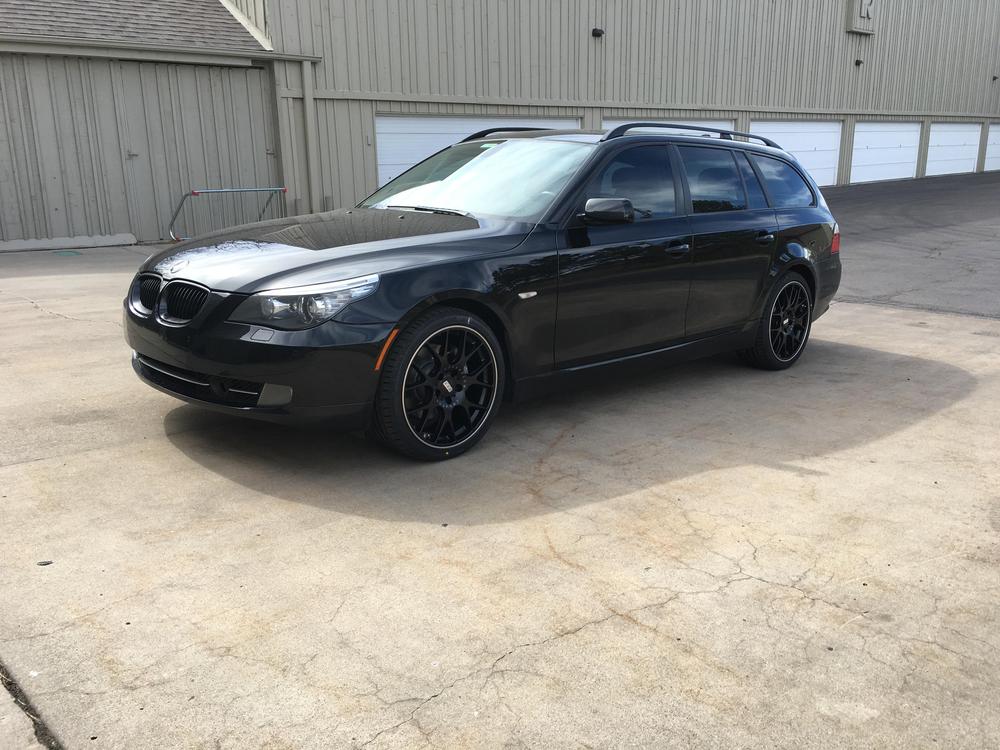
Also picked up a grill on Amazon. It was Matte black but I hit it with a light poly spray to give it just a bit of shine.
Also had the windows tinted. Llumar CTX 30%.
.
.
.
New rims:
A sears sand blaster that I already had ($60):
The bimmerhelp kit ($68.50):
and walnut shells from Harbor Freight.
The bimmerhelp kit didn't fit into the sears gun, and after looking for some sort of threaded adaptor with no luck, I ended up taking the pipe off the threaded adaptor and sticking it inside the sears gun with a piece of hose inside the gun to seal it. Then I taped the outside with some foil tape. Very rigged but it ended up working perfectly.
I followed the Bavarian Auto video:
I could not get the electrical adaptor off of the the bottom of the intake manifold no matter how hard I pulled or pressed with screwdrivers. I ended up pulling the intake partially off and unscrewing the three screws on the electrical box.
Here is what my ports looked like:
Now, here is where I screwed up. I emptied my vacuum prior to doing this and I even changed the filter because it felt a little weak. I kind of ignored it because I thought I was just imagining it. Now, I have a decent sized compressor and when I was blasting I had shells coming out from around the blaster wand. I set up a sheet and didn't think much about it. Until I pulled the tape off of the second intake port and saw shells inside.
The shells had gotten to every other port through the PCV air port!
Bad news! So I had shells inside the PCV system as well as falling into the other cylinders! Why? Because my vaccum hose had some crap in it and was not drawing enough air out of the intake while blasting. So be careful!
I fixed the vacuum hosed and finished the blasting:
So, wondering whether or not I had clogged up the PCV system and reading about how it is important for it to be functioning properly I felt like I should pull the valve cover off. So, that is what I did:
Also broke this hose while removing it($26 at getbmwparts):
I ended up only seeing shells near the ports on the head.
Now after reading some threads about needing a new valve cover seal and bolts and worrying a bit about a clogged pcv system I decided why mess with it and decided just to replace the valve cover ($355 from getbmwparts):
While I was in there, I also replaced the spark plugs ($13 tool from ECS, $82 for 6 Bosch from Pelican Parts) and the coil packs ($208 for 6 at Pelican Parts):
Put it back together (except I had a heck of a time getting the electrical box connected back to the intake). Replaced the intake seals ($17 at ECS), throttle body gasket ($6 at ECS), and air filter ($21 at ECS).
Results: Hesitation/surging is gone. Not sure if it was the carbon cleaning or a combination of that with the plugs and coil packs, but whatever it was, I like it. Car is driving well now. Time for MHD tune.
.
.
.
So I've had the MHD tune for a while now. Like the additional power.
Also picked up a grill on Amazon. It was Matte black but I hit it with a light poly spray to give it just a bit of shine.
Also had the windows tinted. Llumar CTX 30%.
.
.
.
New rims:
01-01-2017, 01:52 PM
#4
New Members
Thread Starter
Join Date: Dec 2015
Location: Denver
Posts: 57
Likes: 0
Received 2 Likes
on
2 Posts
My Ride: 535xi touring
Model Year: 2008
I picked up some 3.5mm hose from Verocious Motorsports.
Old vs new
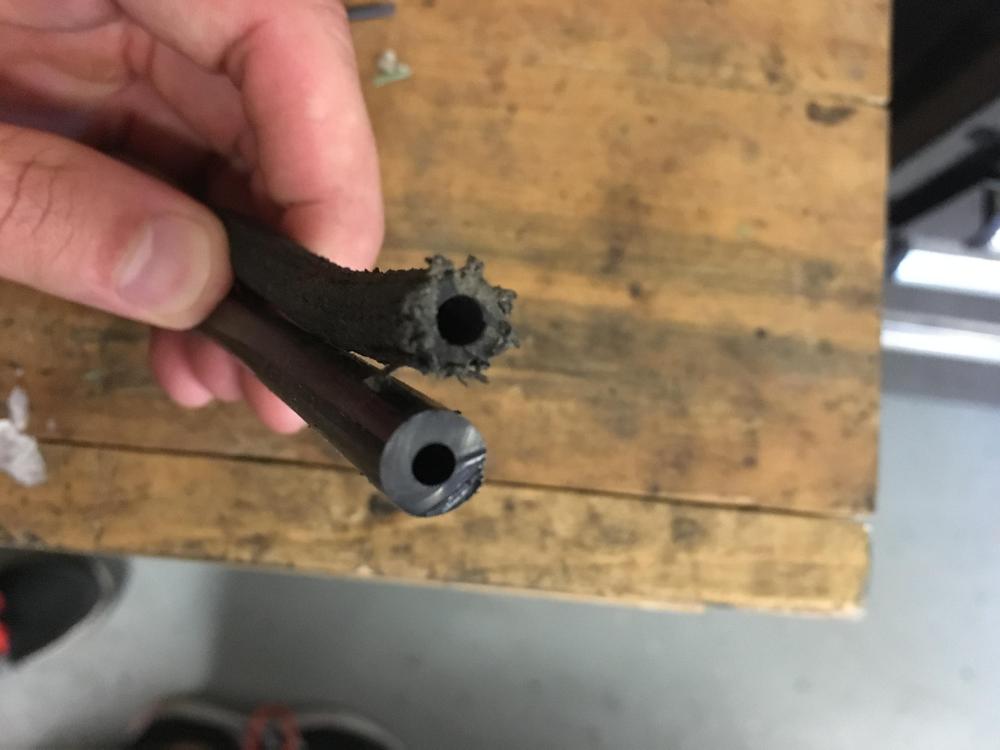
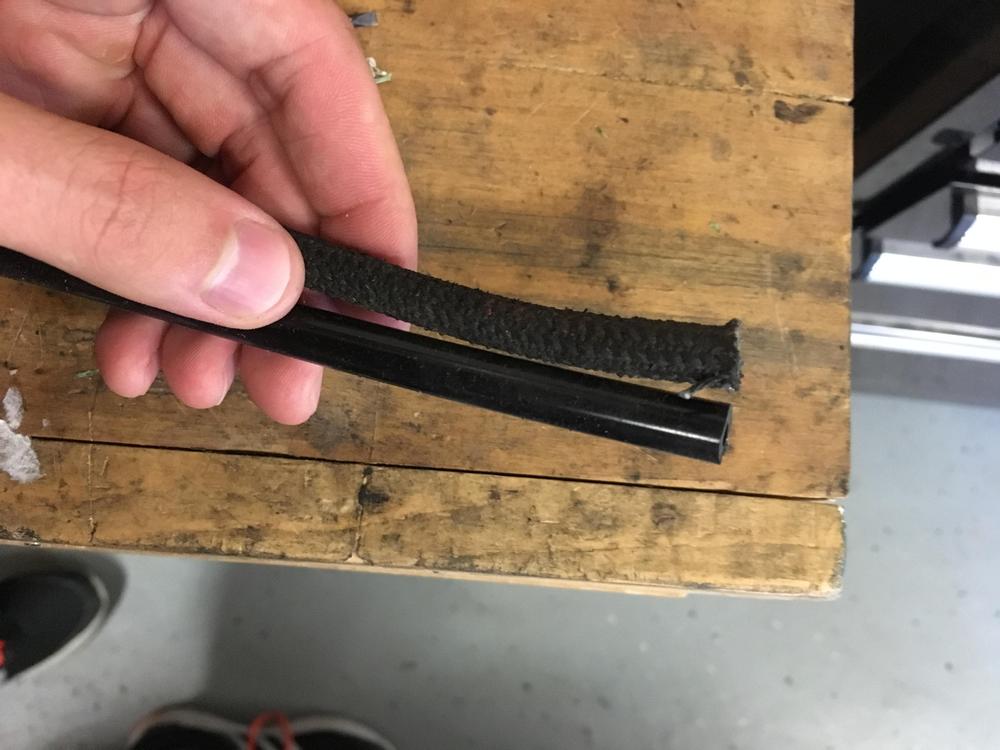
The lines are mostly on the passenger side of the engine and the two wastegate lines are the hardest to replace; not sure how someone who has larger arms would have managed installing them from above.
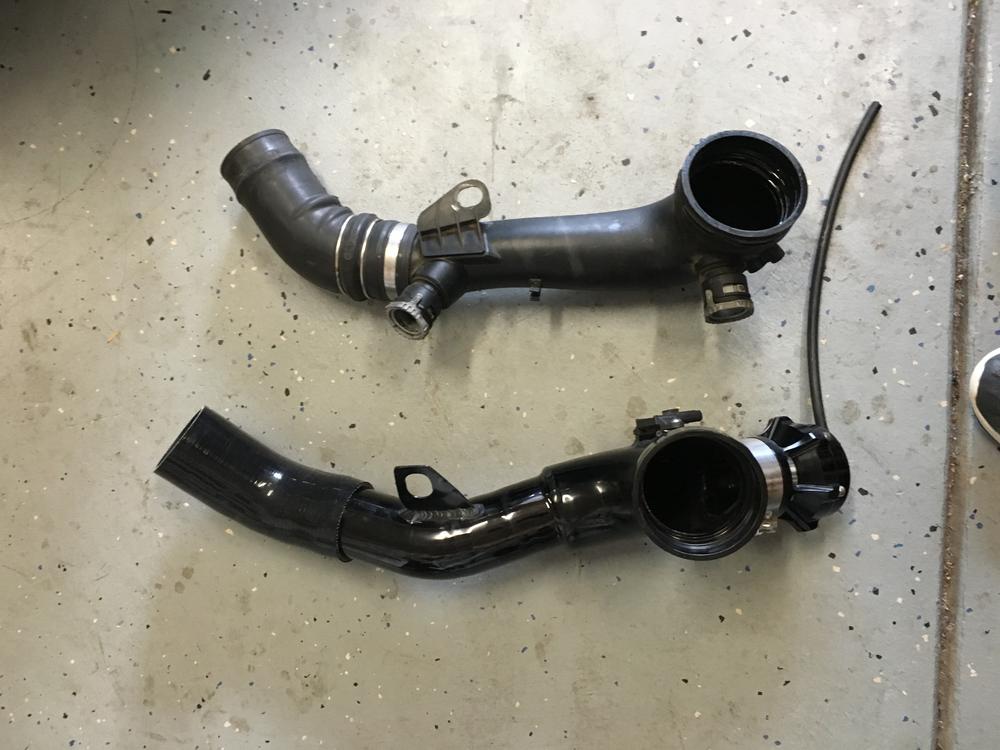
I also decided I wanted to ditch the charge pipe for a proper one from Evolution Racing
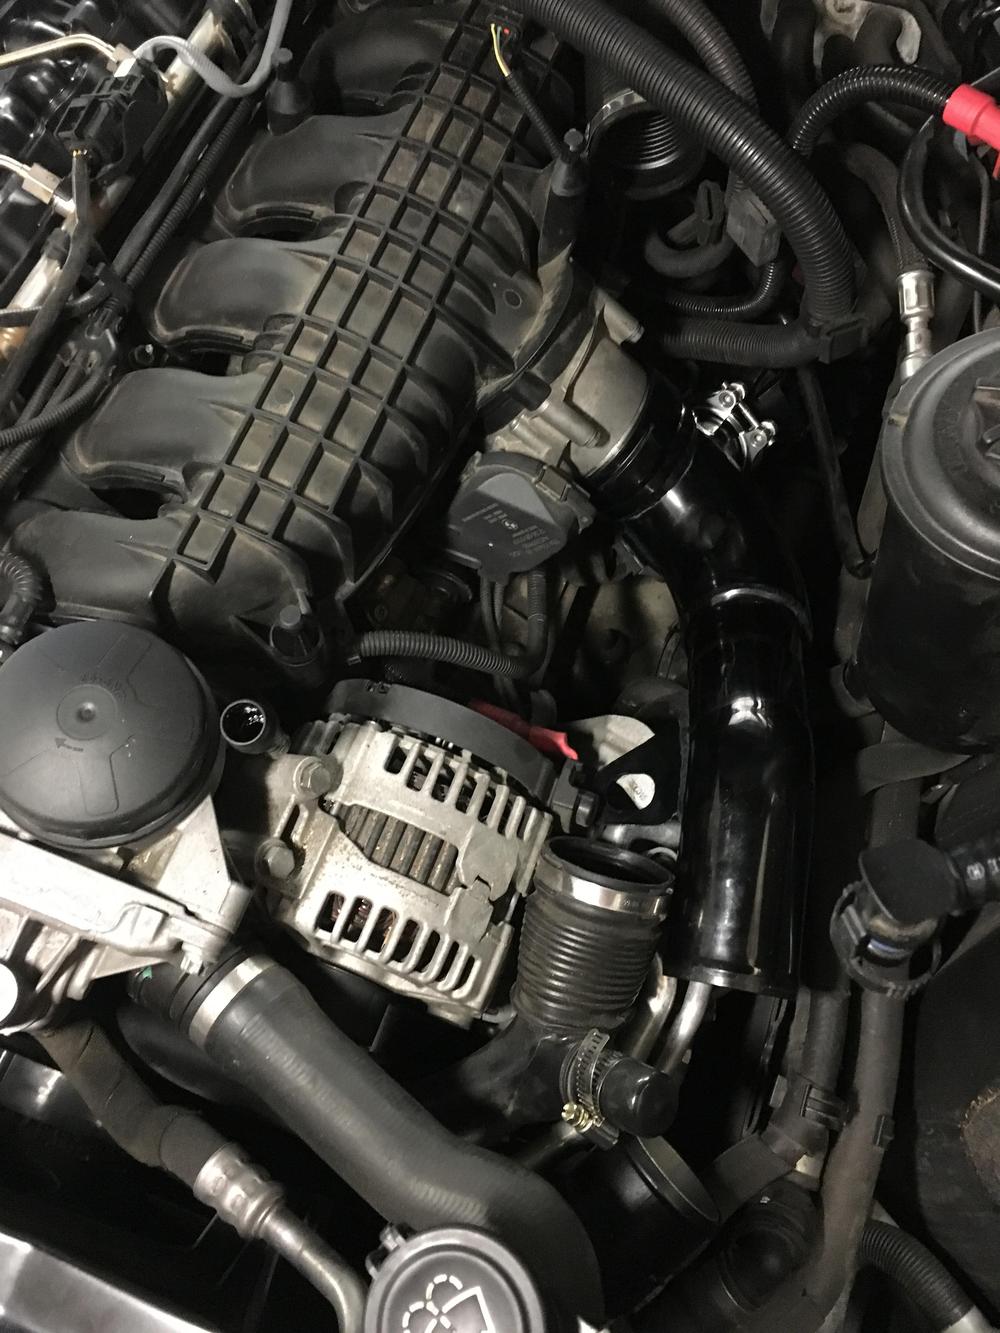
However, what they sent wasn't quite complete:
They advised me that "Our charge pipe requires you to use the factory elbow that is on the factory charge pipe. You need to remove it and install it on the new charge pipe. The silicone coupler is included for customer who are installing the charge pipe on aftermarket intercooler systems. If you want to replace the elbow, the elbow section is replaced in our intercooler system."
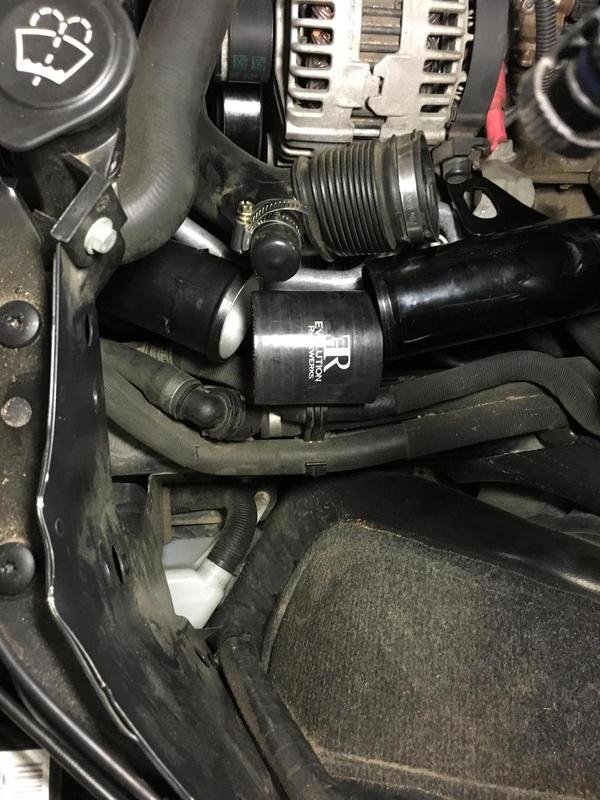
Which is fine if you want to take apart your factory charge pipe and use an old rubber connector on a new charge pipe, which I didn't. Quick trip to Amazon fixed that with a 45 Degree High Temperature Silicone Elbow Coupler Hose
Here it is attached to the new charge pipe as compared to the old:
And installed
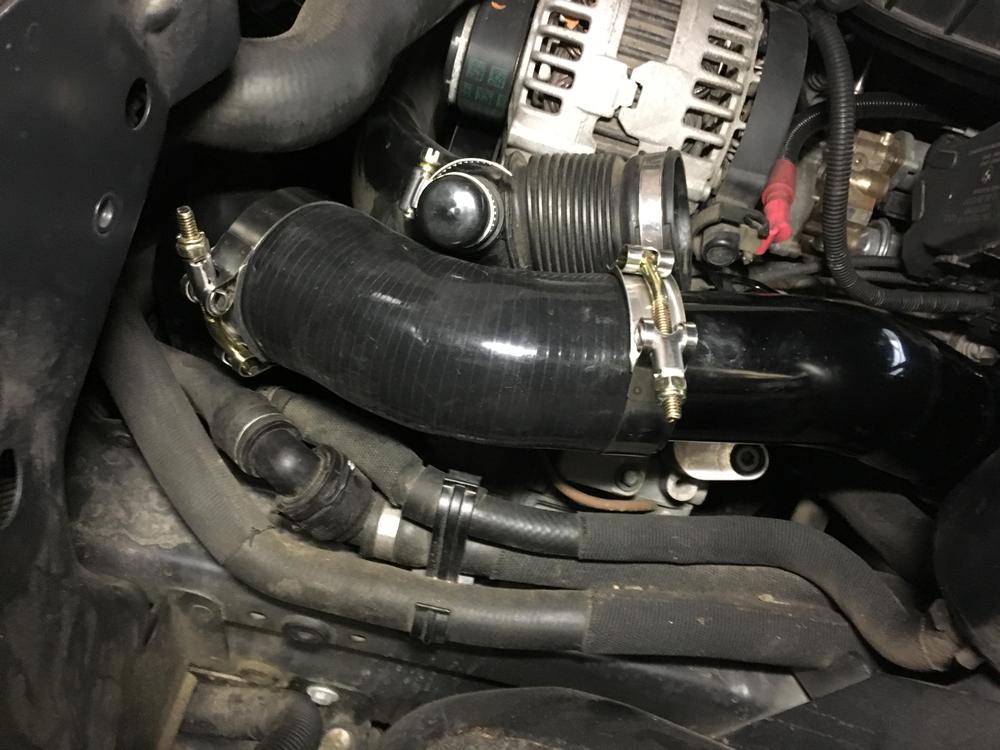
I didn't want to crank down the T-bolt clamps too tight and the first time I drove it around the block the connection from the 45 degree hose to the charge pipe popped off but 5 minutes later it was working as intended. The BOV (Tial) is pretty subdued which I think fits the character of the car.
30FF fault has not returned.
.
.
.
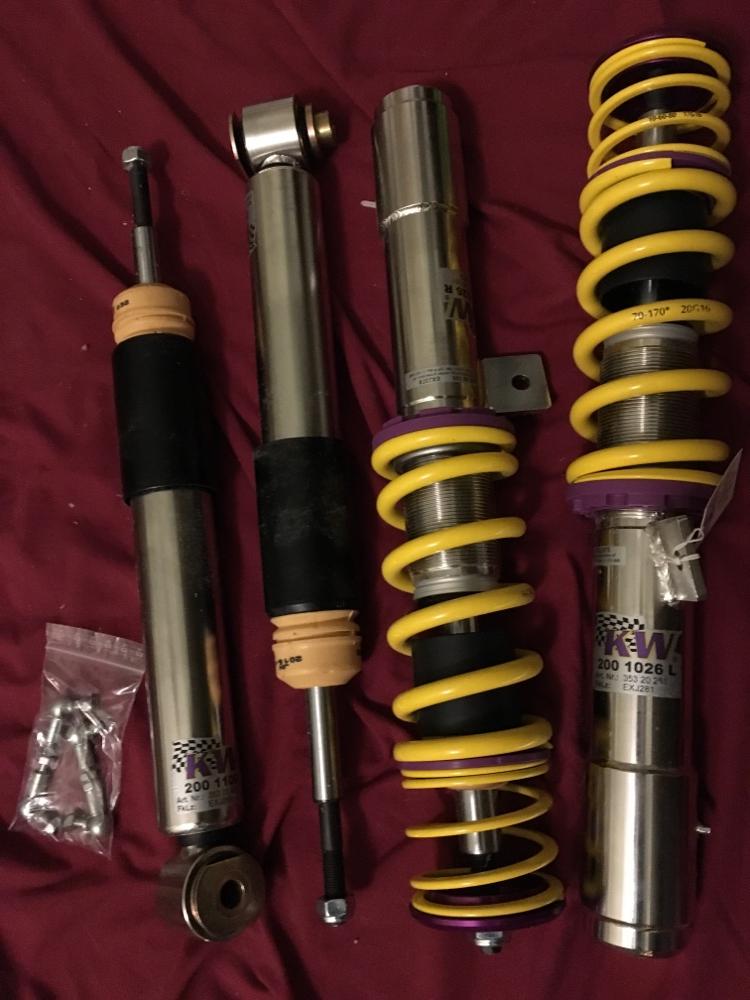
Got the KW V3 installed. Took a bit of time as I replaced the front lower rear control arms (because I mangled the top of them while removing them).
If I have to do this again I am going to buy this schwaben tool from ECS:

I also used this tool to separate the part that pinches the front struts:

You also need a strut socket to match the size of the top bolt. I think the KW V3 one was larger than the BMW one. My tool didn't fit inside the strut mount. Used a bench grinder on the tool to make it smaller so it fit. Still tight but made it work.

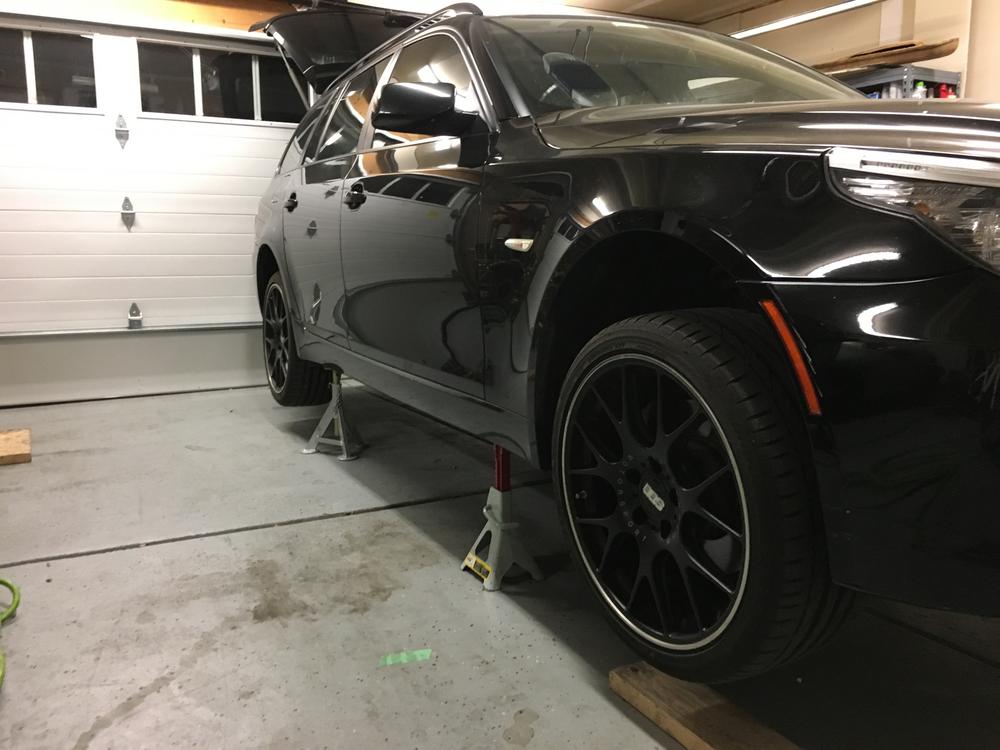
Car up on jack stands:
Released air from the rear springs per the Bentley manual:
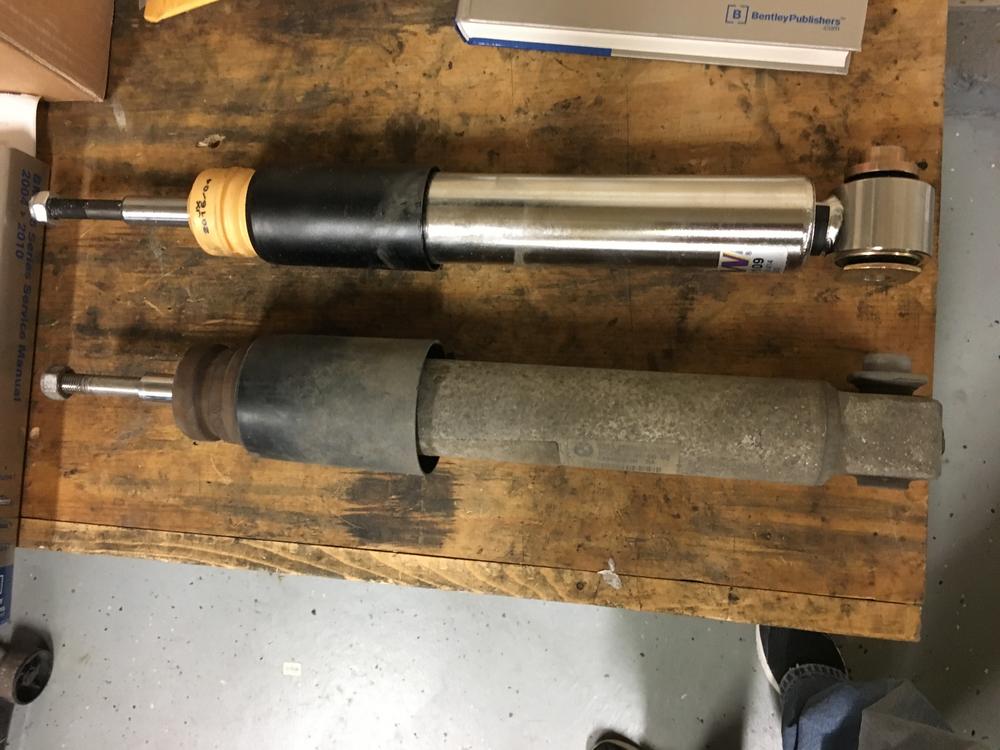
New vs. old rear shocks:
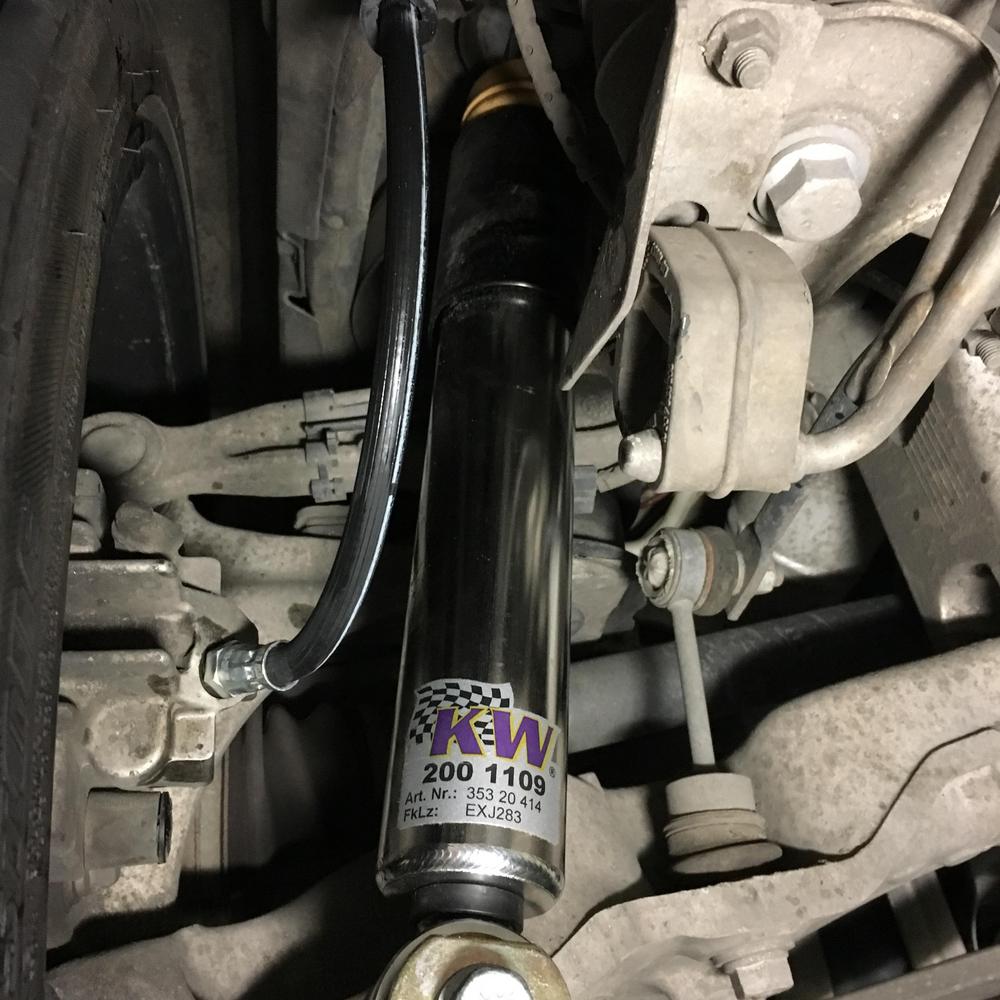
Rear shocks installed, I also replaced all of the brake lines at the same time, I needed to bleed the brakes per the car anyway so I thought I would be proactive and replace them.
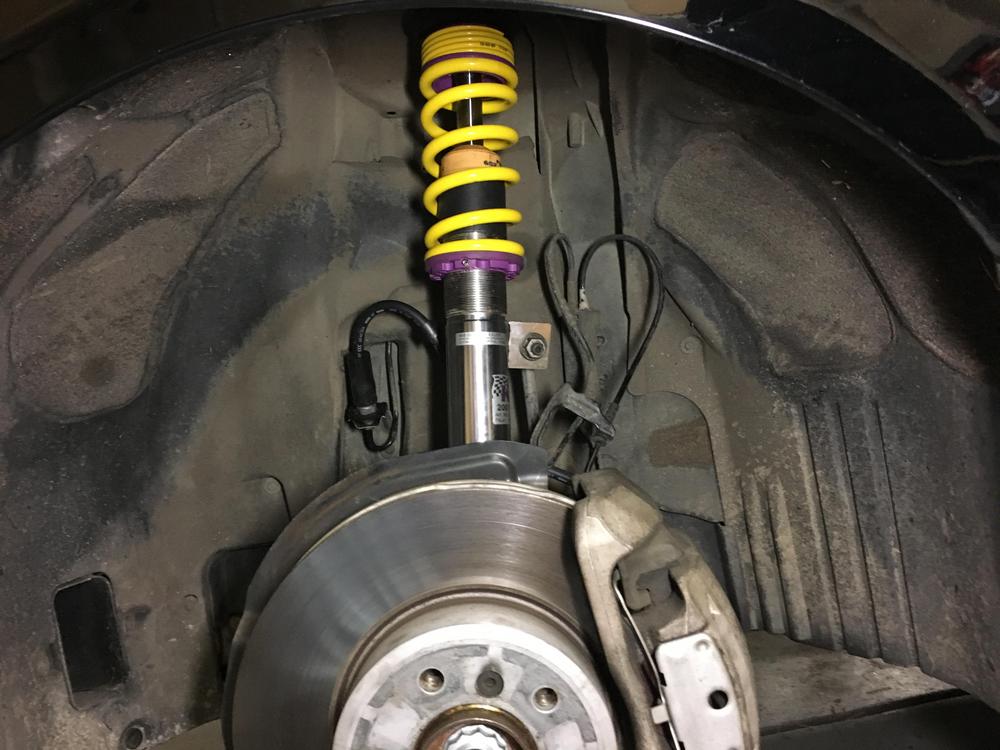
Fronts installed:
New lower rear control arms and new tie rod ends, definitely needed to replace the pinch bolts as they were quite rusty. Also the driver's side tie rod end was quite a pain to get off.
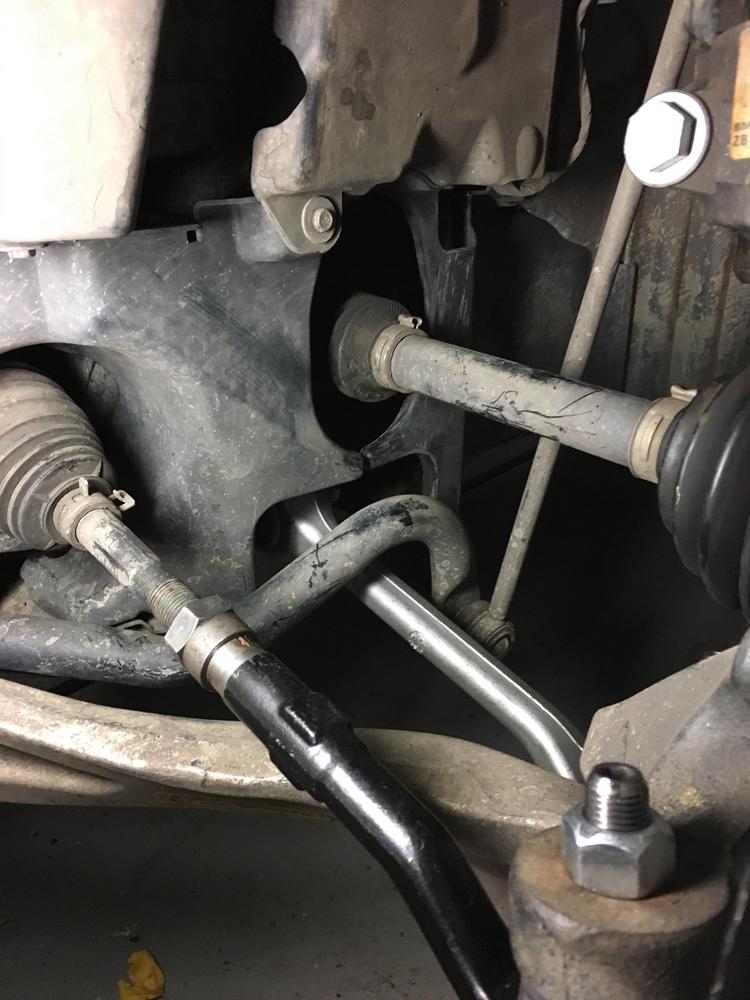
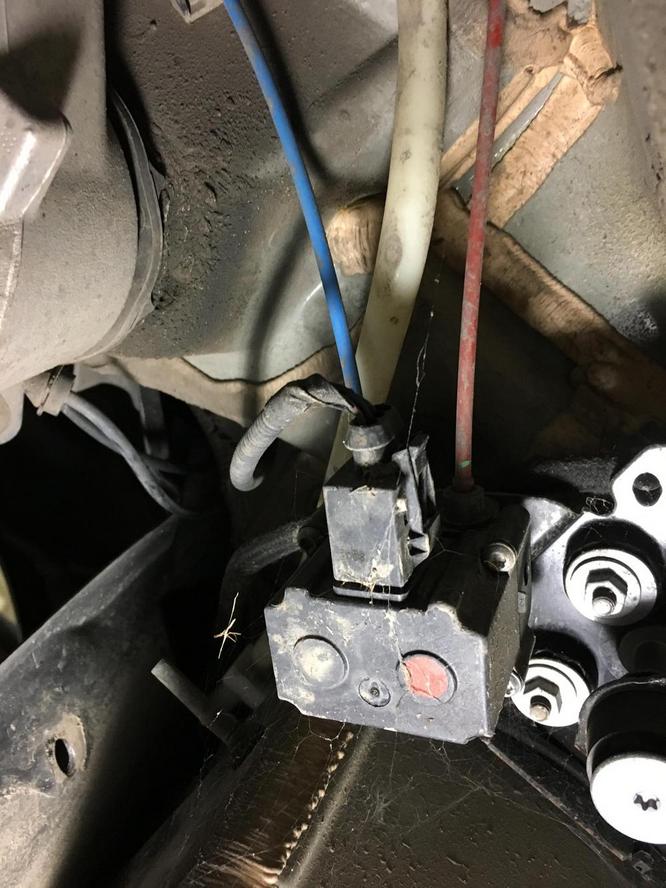
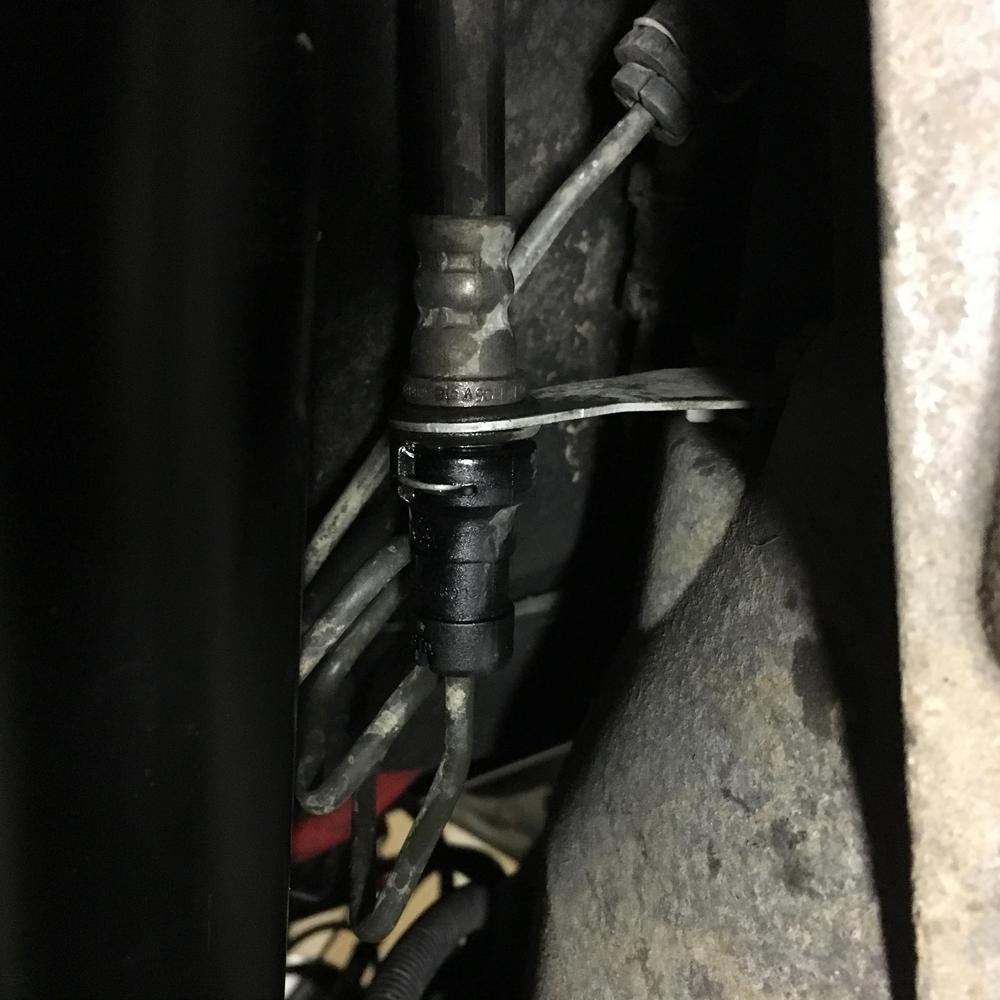
Also used this opportunity to remove the clutch delay valve (removed in this photo):
I drilled small holes in the carpet and plastic in the back of the wagon so that I can get an Allen wrench through the floor to adjust the rear shocks. You can't even see them so I left a couple pieces of tape so I could more easily find them. The rest of the adjustments you can get to more easily.
Initial impressions are that the old shocks (84k miles) were definitely worn out. I can feel the road variations more. Not nearly as much body roll. Still feels like a big car though but coming from a 911 it's probably hard to compare. Unfortunately it is also winter here so I did not try it on the BBS/summer tires.
I will post more impressions once I get the car aligned on Wednesday. The fronts are still a 1/2 inch higher than the rear. Will have them level it too.
.
.
.
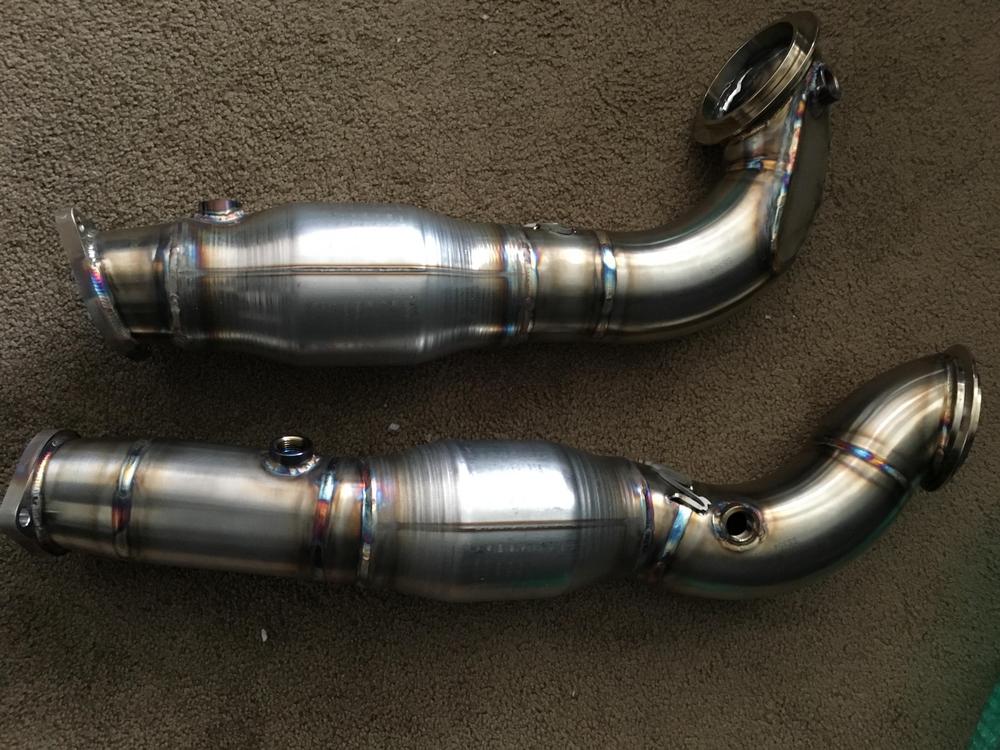
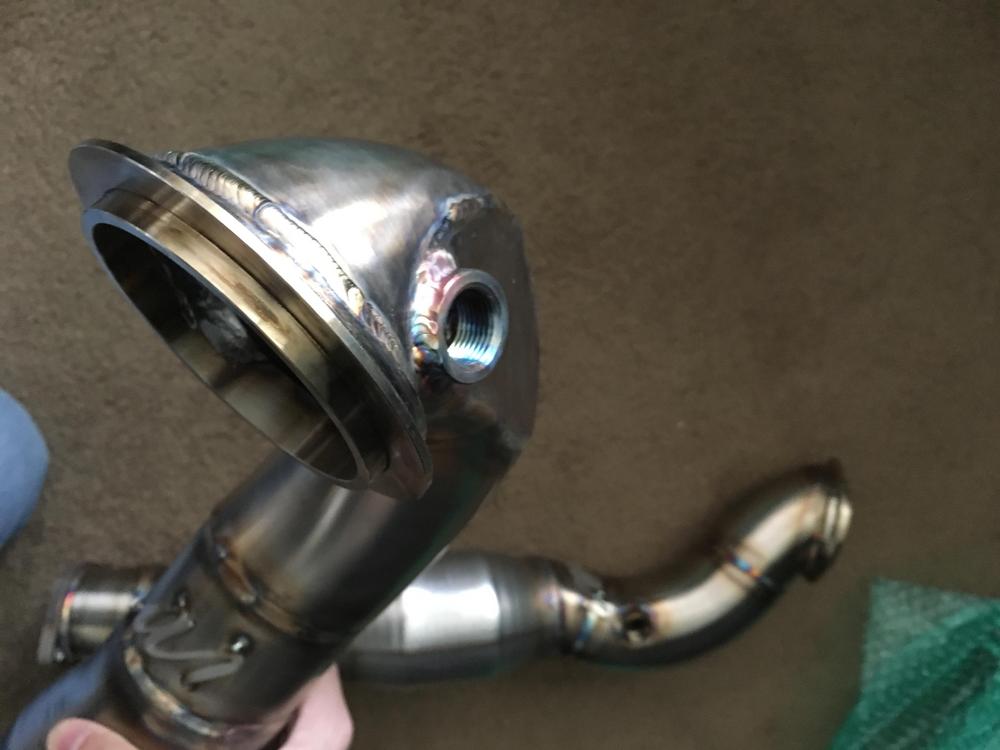
Might be a while before I install these: AR design downpipes with cats
.
.
.
Car was at the mechanic recently to see if he could help me track down a vibration during acceleration.
Here is what they did (in order after consultations several times with me under the car):
-Installed the new index 12 injectors
-Re-balanced my winter rims/tires (they told me a couple of them are bent so I will be looking to replace them next year).
-Checked the Guibo (looked okay)
-Checked the transmission and engine mounts (looked okay)
-Rebuilt the rear driveshaft
-Replaced the front lower control arm bushings (inner)
-Replaced the front driver's side axle
$2200 later
I still have some vibration during hard acceleration. It is not quite as severe. Mechanic thinks it might be flywheel related. At least now all of the front suspension bushings are new and the front axles are new.
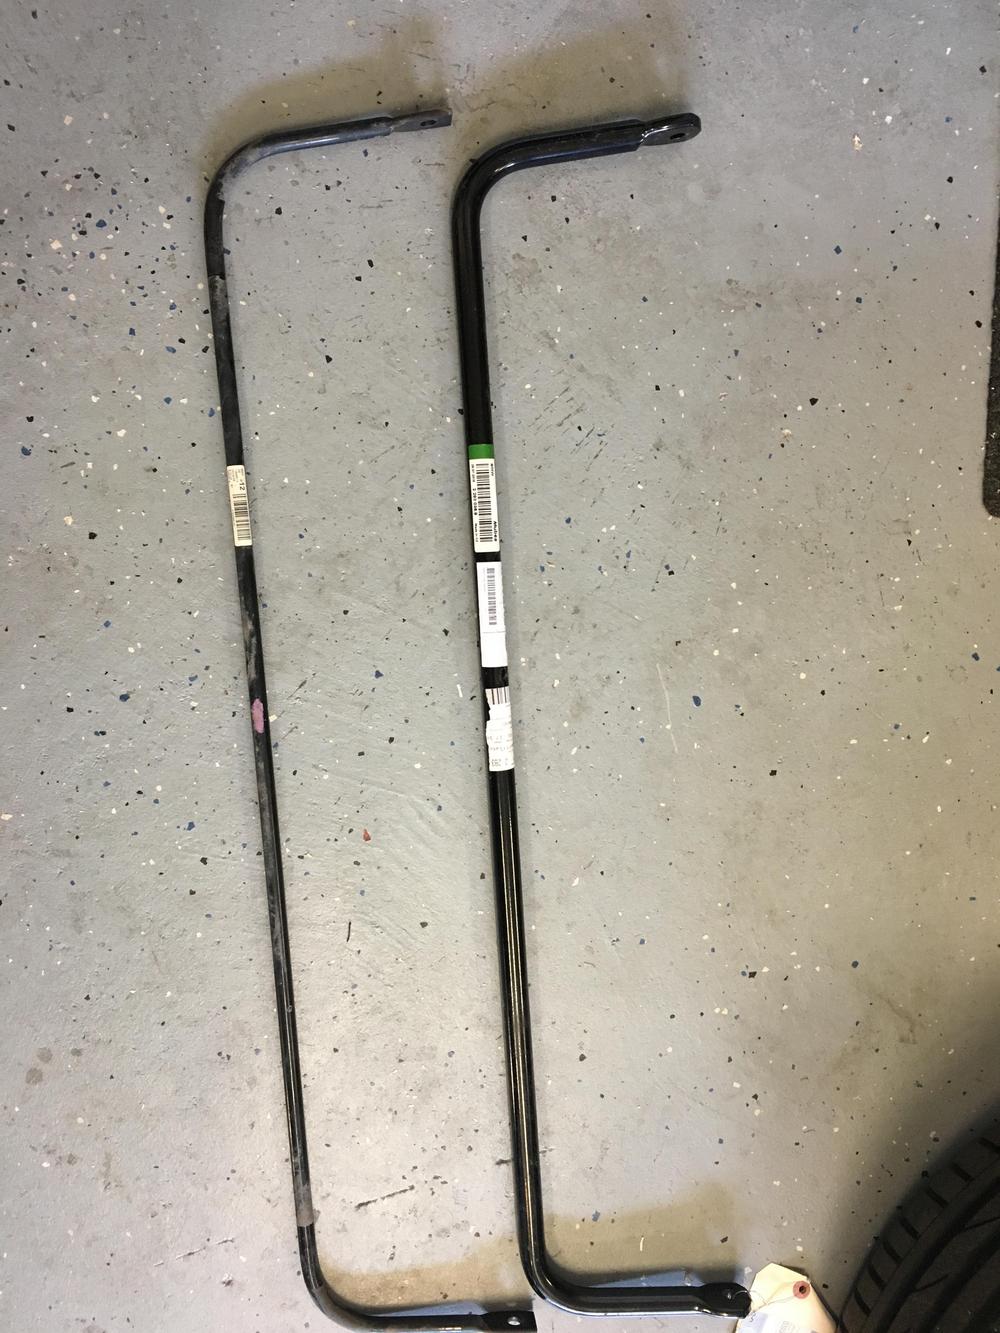
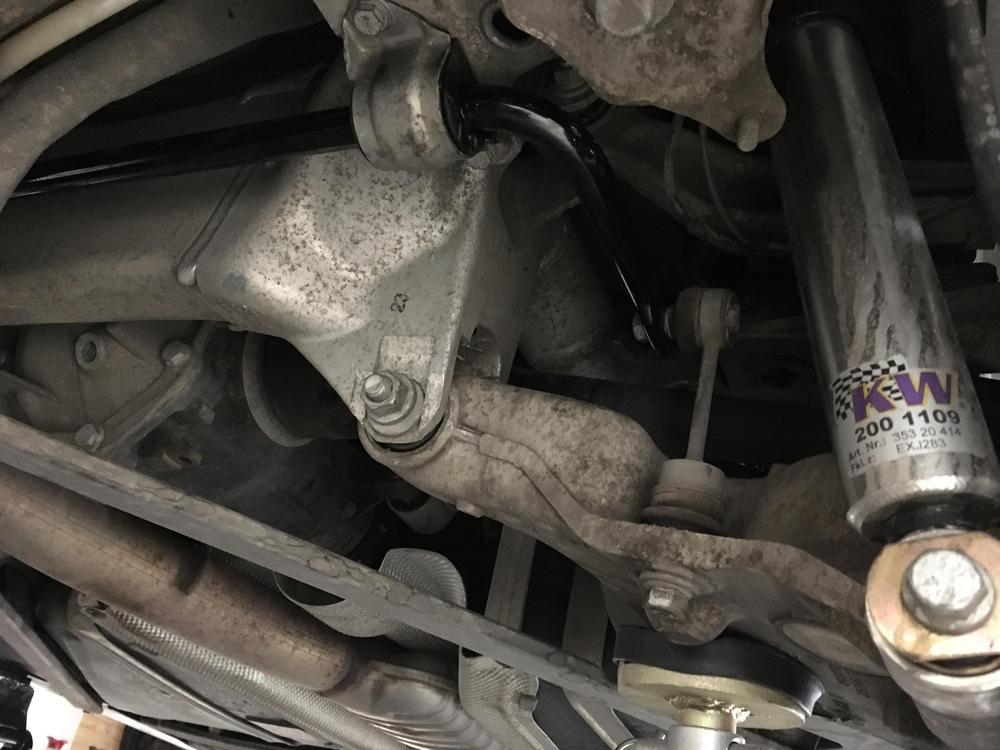
I also followed another thread here and put in the E61 M5 rear sway bar:
E61 LCI M5 Wagon Rear Bar
33552283036
The E61 LCI M5 Wagon Rear Swaybar Bushings: 33551096701
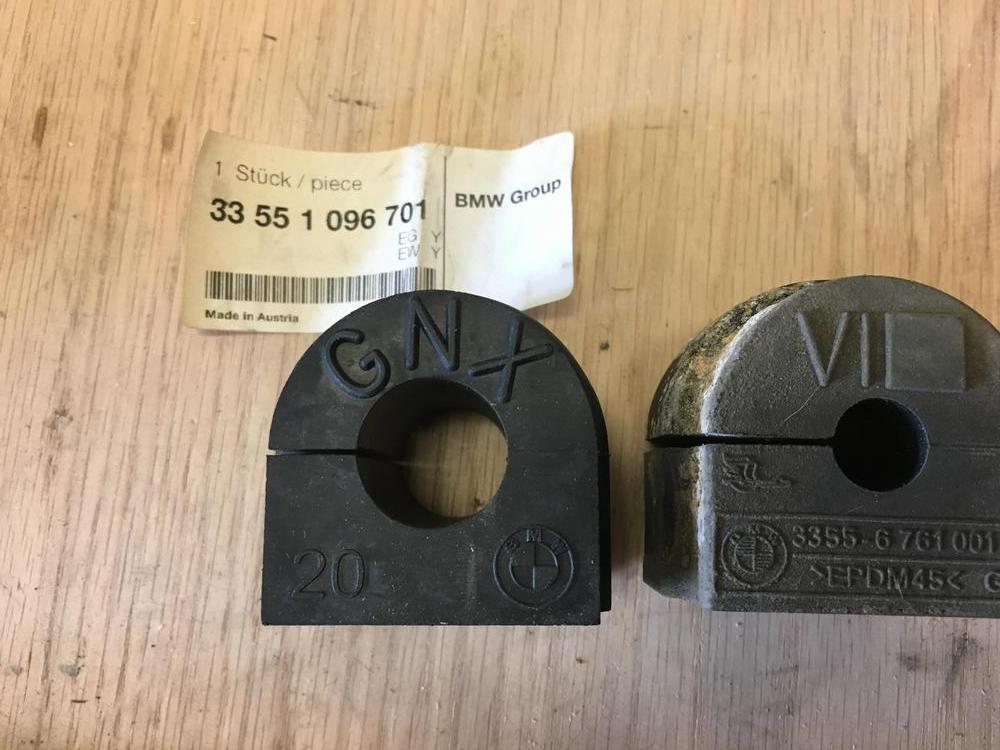
Old vs new
The lines are mostly on the passenger side of the engine and the two wastegate lines are the hardest to replace; not sure how someone who has larger arms would have managed installing them from above.
I also decided I wanted to ditch the charge pipe for a proper one from Evolution Racing
However, what they sent wasn't quite complete:
They advised me that "Our charge pipe requires you to use the factory elbow that is on the factory charge pipe. You need to remove it and install it on the new charge pipe. The silicone coupler is included for customer who are installing the charge pipe on aftermarket intercooler systems. If you want to replace the elbow, the elbow section is replaced in our intercooler system."
Which is fine if you want to take apart your factory charge pipe and use an old rubber connector on a new charge pipe, which I didn't. Quick trip to Amazon fixed that with a 45 Degree High Temperature Silicone Elbow Coupler Hose
Here it is attached to the new charge pipe as compared to the old:
And installed
I didn't want to crank down the T-bolt clamps too tight and the first time I drove it around the block the connection from the 45 degree hose to the charge pipe popped off but 5 minutes later it was working as intended. The BOV (Tial) is pretty subdued which I think fits the character of the car.
30FF fault has not returned.
.
.
.
Got the KW V3 installed. Took a bit of time as I replaced the front lower rear control arms (because I mangled the top of them while removing them).
If I have to do this again I am going to buy this schwaben tool from ECS:
I also used this tool to separate the part that pinches the front struts:
You also need a strut socket to match the size of the top bolt. I think the KW V3 one was larger than the BMW one. My tool didn't fit inside the strut mount. Used a bench grinder on the tool to make it smaller so it fit. Still tight but made it work.
Car up on jack stands:
Released air from the rear springs per the Bentley manual:
New vs. old rear shocks:
Rear shocks installed, I also replaced all of the brake lines at the same time, I needed to bleed the brakes per the car anyway so I thought I would be proactive and replace them.
Fronts installed:
New lower rear control arms and new tie rod ends, definitely needed to replace the pinch bolts as they were quite rusty. Also the driver's side tie rod end was quite a pain to get off.
Also used this opportunity to remove the clutch delay valve (removed in this photo):
I drilled small holes in the carpet and plastic in the back of the wagon so that I can get an Allen wrench through the floor to adjust the rear shocks. You can't even see them so I left a couple pieces of tape so I could more easily find them. The rest of the adjustments you can get to more easily.
Initial impressions are that the old shocks (84k miles) were definitely worn out. I can feel the road variations more. Not nearly as much body roll. Still feels like a big car though but coming from a 911 it's probably hard to compare. Unfortunately it is also winter here so I did not try it on the BBS/summer tires.
I will post more impressions once I get the car aligned on Wednesday. The fronts are still a 1/2 inch higher than the rear. Will have them level it too.
.
.
.
Might be a while before I install these: AR design downpipes with cats
.
.
.
Car was at the mechanic recently to see if he could help me track down a vibration during acceleration.
Here is what they did (in order after consultations several times with me under the car):
-Installed the new index 12 injectors
-Re-balanced my winter rims/tires (they told me a couple of them are bent so I will be looking to replace them next year).
-Checked the Guibo (looked okay)
-Checked the transmission and engine mounts (looked okay)
-Rebuilt the rear driveshaft
-Replaced the front lower control arm bushings (inner)
-Replaced the front driver's side axle
$2200 later
I still have some vibration during hard acceleration. It is not quite as severe. Mechanic thinks it might be flywheel related. At least now all of the front suspension bushings are new and the front axles are new.
I also followed another thread here and put in the E61 M5 rear sway bar:
E61 LCI M5 Wagon Rear Bar
33552283036
The E61 LCI M5 Wagon Rear Swaybar Bushings: 33551096701
01-02-2017, 08:57 AM
#5
New Members

very nice build thread and jealous you have a manual. Are you going to upgrade the brakes at all? i have the e60 m5 brakes and love them.
01-02-2017, 03:22 PM
#6
New Members
Thread Starter
Join Date: Dec 2015
Location: Denver
Posts: 57
Likes: 0
Received 2 Likes
on
2 Posts
My Ride: 535xi touring
Model Year: 2008
I like the idea of M5 brakes. Perhaps down the line. I just replaced the front rotors and pads though. I would need 19" rims for my winter set too?
01-02-2017, 04:24 PM
#7
New Members
01-03-2017, 08:12 AM
#8
Members

Join Date: Jul 2010
Location: Ashburn VA
Posts: 58
Likes: 0
Received 0 Likes
on
0 Posts
My Ride: '08 e61 535ix LCI
Model Year: 2007
Engine: N54
I am thinking of going to the E60 550 Brakes. It improves Rotor size from 324 to 348. While still being able to use 18" Wheels. Has anyone here done that Mod?
On my 2000 E39 528iT I swapped to 2000 E39 540 Brakes and there was a significant difference (improvement). J
On my 2000 E39 528iT I swapped to 2000 E39 540 Brakes and there was a significant difference (improvement). J